Sourdough Glossary: 60+ Sourdough Terms and Definitions Explained

Sourdough baking comes with its own language. If you’ve ever followed a sourdough recipe and wondered what terms like autolyse, bulk fermentation, oven spring, or banneton actually mean, you’re not alone!
This sourdough glossary explains the most common sourdough terms and definitions used by home bakers and professional bakers alike.
Here’s everything I’ve learned since starting sourdough baking over 5 years ago, developing 70+ sourdough recipes, creating 15 delicious sourdough discard recipes, writing 25 sourdough technical guides, and a sourdough cookbook!
A
Acetic Acid
Acetic acid is one of the primary acids produced by lactic acid bacteria during sourdough fermentation.
Unlike lactic acid, which gives a mild, tangy flavor, acetic acid contributes a sharper, vinegar-like sourness.
Acetic acid production increases when fermentation slows down, so cooler temperatures, lower hydration dough, and longer fermentation times help add sourness to your bread.
This naturally occurring acid not only influences flavor but also improves dough strength and shelf life, as it has preservative qualities that help the bread stay fresh longer.
I use this knowledge deliberately in my bakes! When I want a milder loaf, I do all the fermentation at room temperature, increase the starter volume, and bake the same day – kinda like my Same Day Sourdough. When I want a more punchy, sour flavor, I reduce the starter and cold retard for 48-72 hours.
See also: Lactic Acid | Cold Ferment/Retard | Tang
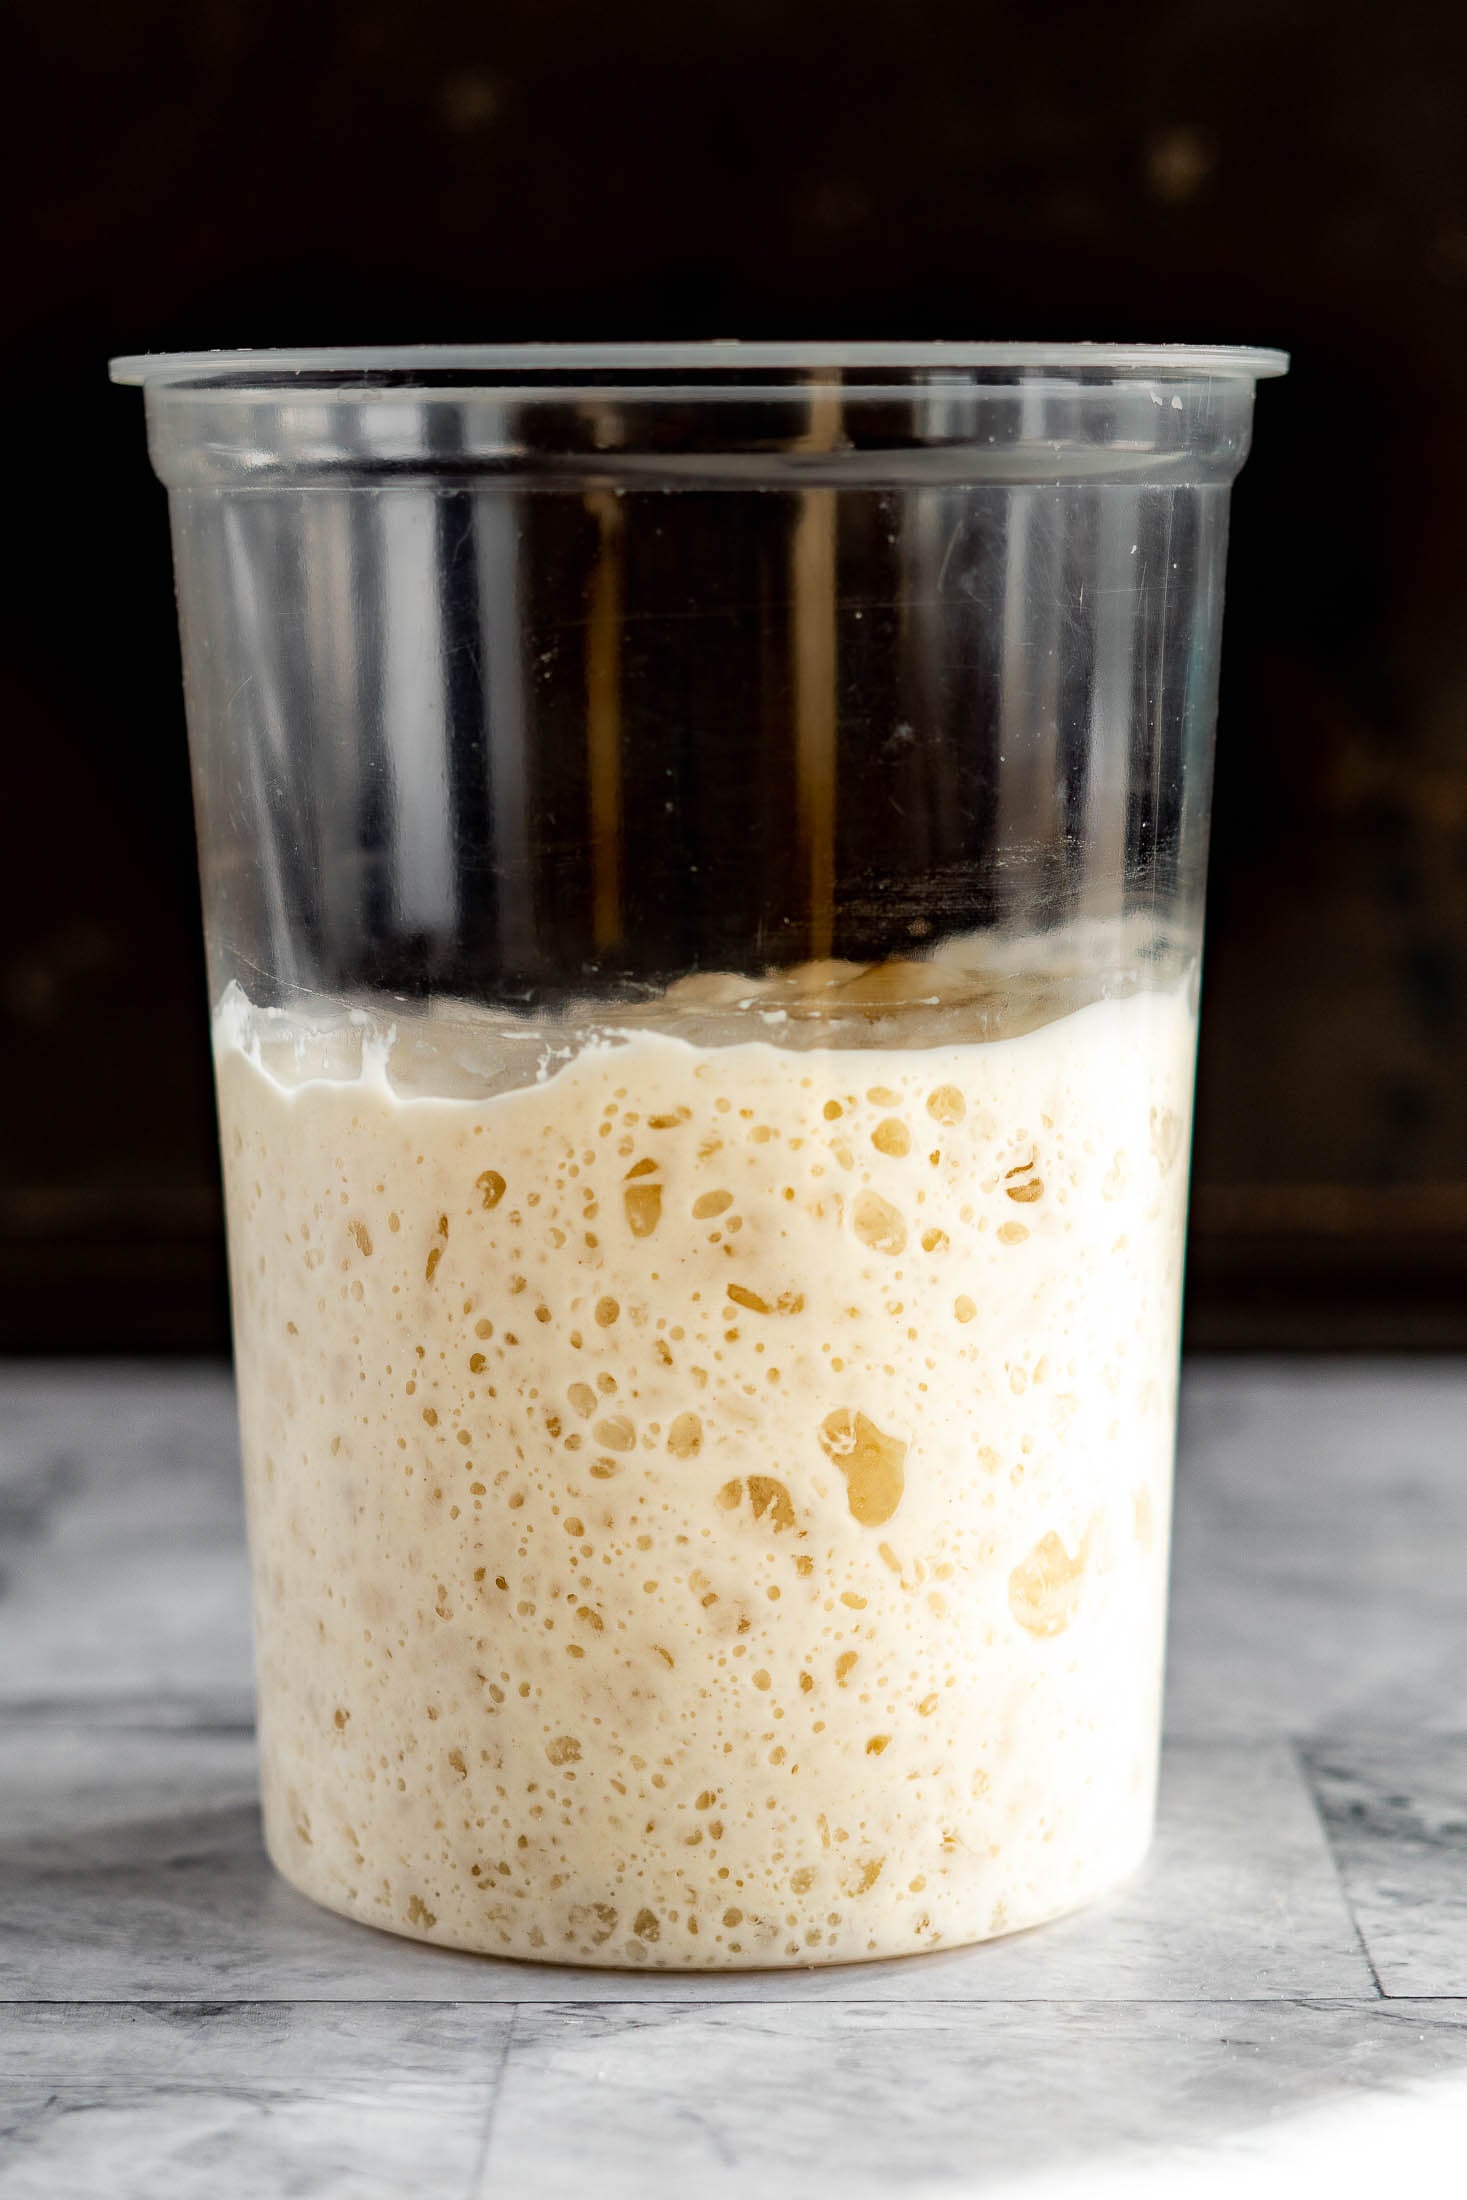
Active Starter
An active starter is sourdough starter that has recently been fed and is ready to leaven bread.
You’ll find the same checklist everywhere: look for bubbles, a domed top, doubled volume. That’s all accurate. But after five years of daily baking, here’s how I actually think about it.
Peak activity isn’t a single moment, it’s a window. Your starter is usable from the time it doubles until it starts to deflate, which can be anywhere from 30 minutes to several hours depending on your kitchen temperature and feeding ratio. Beginner bakers often stress about using starter at the exact peak. In reality, anywhere in that active window works fine for most loaves.
A few things that can fool you: a starter can look bubbly on top but still be underripe if the bubbles are small and tight rather than large and webby. And a starter in a very warm kitchen can peak and begin deflating before it looks fully doubled because warmth accelerates fermentation faster than visual cues can keep up with.
I use the simplest trick to tell me if my starter is peaking: pick up the jar. If it feels dramatically lighter than you’d expect for the volume the starter is taking up, the yeast has been busy producing CO₂ and it’s ready. If it feels dense and heavy, give it more time.
If you need a reliable starter to begin with, here’s my quick sourdough starter recipe. It’s designed to be forgiving for exactly this reason.

Aliquot Method
The aliquot method is a way to track your dough’s progress during bulk fermentation.
The aliquot method involves taking a small portion (aliquot) of the dough and placing it into a small, transparent jar or container right after the stretch and folds or coil folds. The container is nestled inside the main dough for the remainder of the bulk ferment.
Because the small sample rises at the same rate as the larger dough, it allows you to visually track the rise without disturbing the main dough.
Using the aliquot method is a great way to help you learn to read your dough, prevent overworking it, and easily determine rise percentage accurately especially if using a non-straight sided proofing container.
I personally don’t use the aliquot method and instead rely on visual cues (and a lot of trial and error during my years of sourdough baking! haha!)
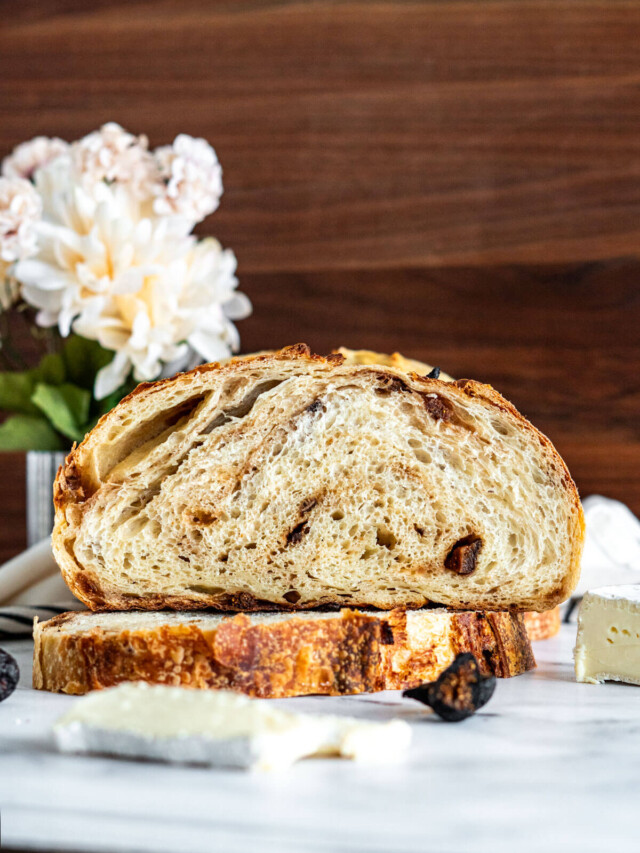
Alveoli
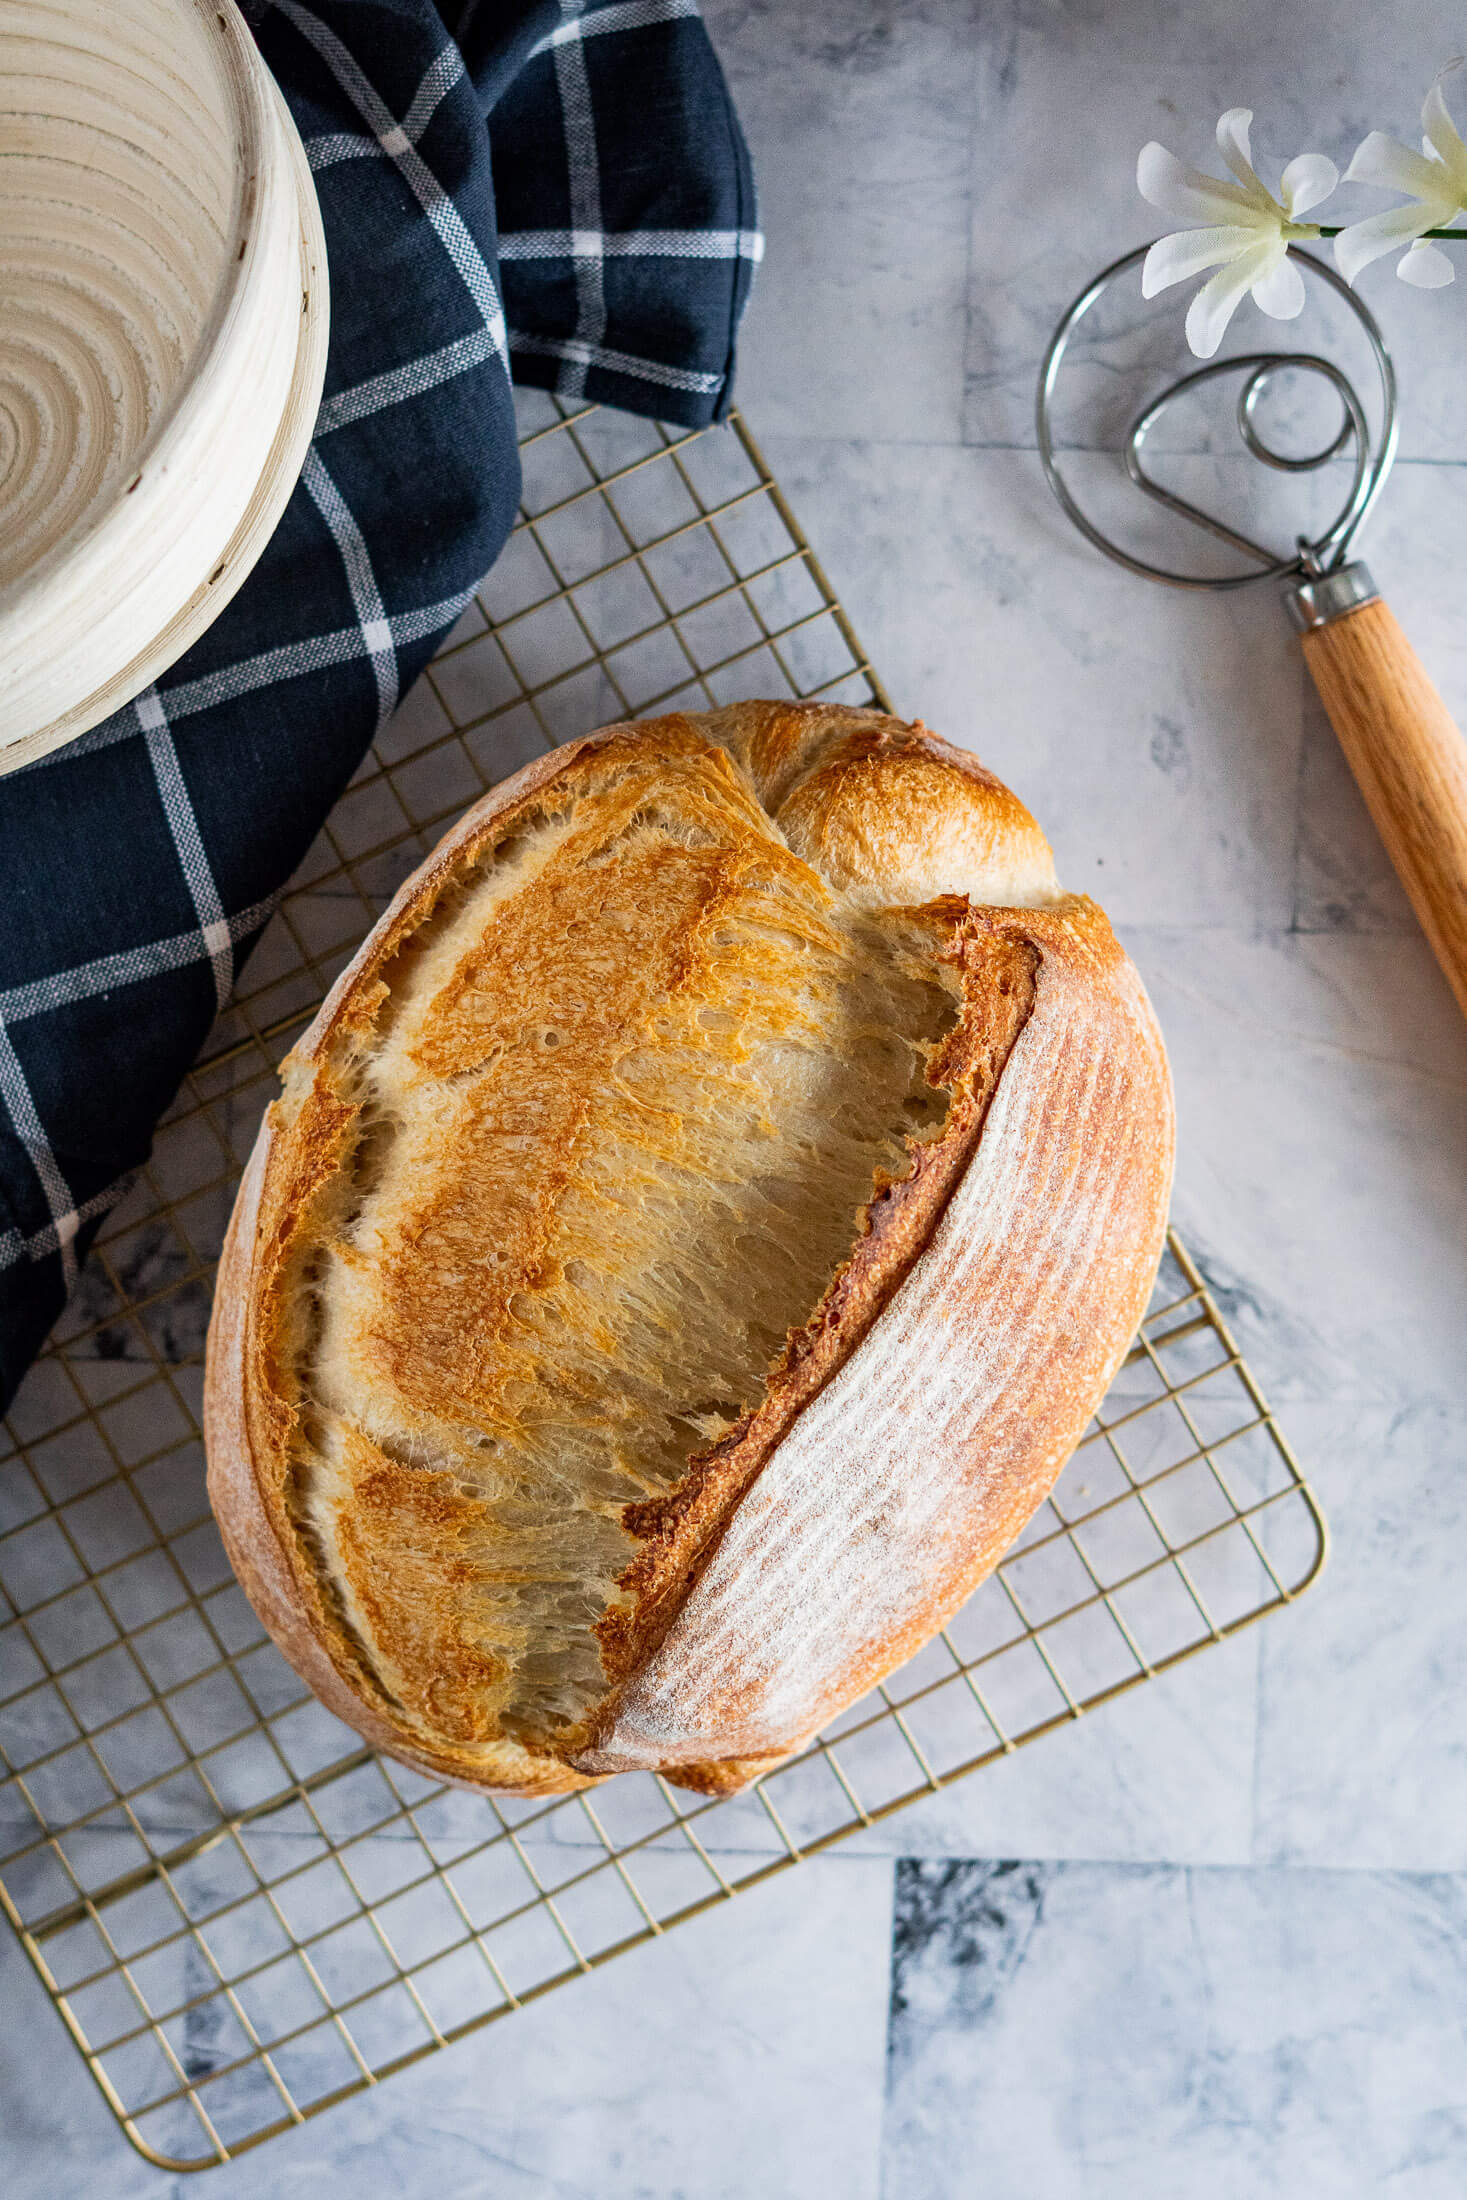
Alveoli are the air pockets inside a baked loaf of sourdough.
When bakers talk about the holes in their crumb, they generally mean alveoli.
Large, irregular alveoli are the hallmark of a high-hydration, well-fermented loaf. Smaller, more uniform alveoli are typical of lower-hydration doughs like sandwich bread. The size and distribution of alveoli depend on hydration, fermentation time, shaping, and how much you degas the dough before its final proof.
Chasing a perfectly open, hole-y crumb is a genuine sourdough rabbit hole and honestly, a tight crumb on a well-flavored loaf is nothing to be ashamed of.
Flavor first, alveoli second!
Autolyse
Autolyse is a technique where flour and water are mixed and allowed to rest before incorporating sourdough starter and salt.
The flour hydrates, the gluten begins forming on its own, and the dough becomes noticeably smoother and more extensible by the time you’re ready to add everything else. But autolyse is not equally useful for every recipe, and I’ve made enough batches to have strong opinions on when it matters.
When autolyse genuinely changes the outcome: Whole wheat flour, rye flour, and other high-bran flours benefit enormously from autolyse. A 45-60 minute autolyse gives the flour time to fully hydrate before you start developing gluten, which means the gluten you build is stronger and more intact.
My whole wheat sourdough bread is measurably better, taller oven spring, more open crumb, with a proper autolyse than without.
One thing to know: Autolyse does NOT include your starter. The moment you add starter, fermentation begins and the clock starts ticking on your bulk ferment. Autolyse is specifically the flour-and-water-only rest. If you add starter during the rest, that’s fermentolyse, a related but different technique.
Want to go deeper? I have a full guide on autolyse including timings and troubleshooting.

B
Baker’s Percentages
Baker’s percentages are a method of measuring bread ingredients relative to the weight of flour. This can also be called baker’s math.
Using percentages makes it easy to adjust recipe quantities to scale up or down.
In baker’s math, flour is always considered 100%, and all other ingredients are expressed as a percentage of the flour’s weight.
For example:
| Flour | 100% |
| Water | 80% |
| Salt | 2% |
If your recipe calls for 500g of flour, to determine the water content you’d simply multiply 500 x 80% = 400g. Salt would be 500 x 2% 10g.
The waters get a little muddy when adding sourdough starter to the mix because technically it’s 50% water and 50% flour if fed at a 100% hydration rate. I actually choose to omit sourdough starter from my water and flour calculations and instead designate it as its own line item.
Learn more: All about Baker’s Percentages + free calculator
Baker’s Timeline
The baker’s timeline in sourdough is a planned schedule that guides each step of the sourdough process.
Because sourdough relies on natural fermentation rather than commercial yeast, the process takes longer and is more dependent on timing.
A typical baker’s schedule may include:
- Mixing
- Bulk fermentation
- Pre shaping
- Final shaping
- Proofing
- Baking
Temperature, starter strength, starter quantity, and dough hydration can influence the dough and the baker's timeline can help to manage these variables, especially with new to you recipes.
I often add baker’s timelines to my sourdough recipes, but not all have them.
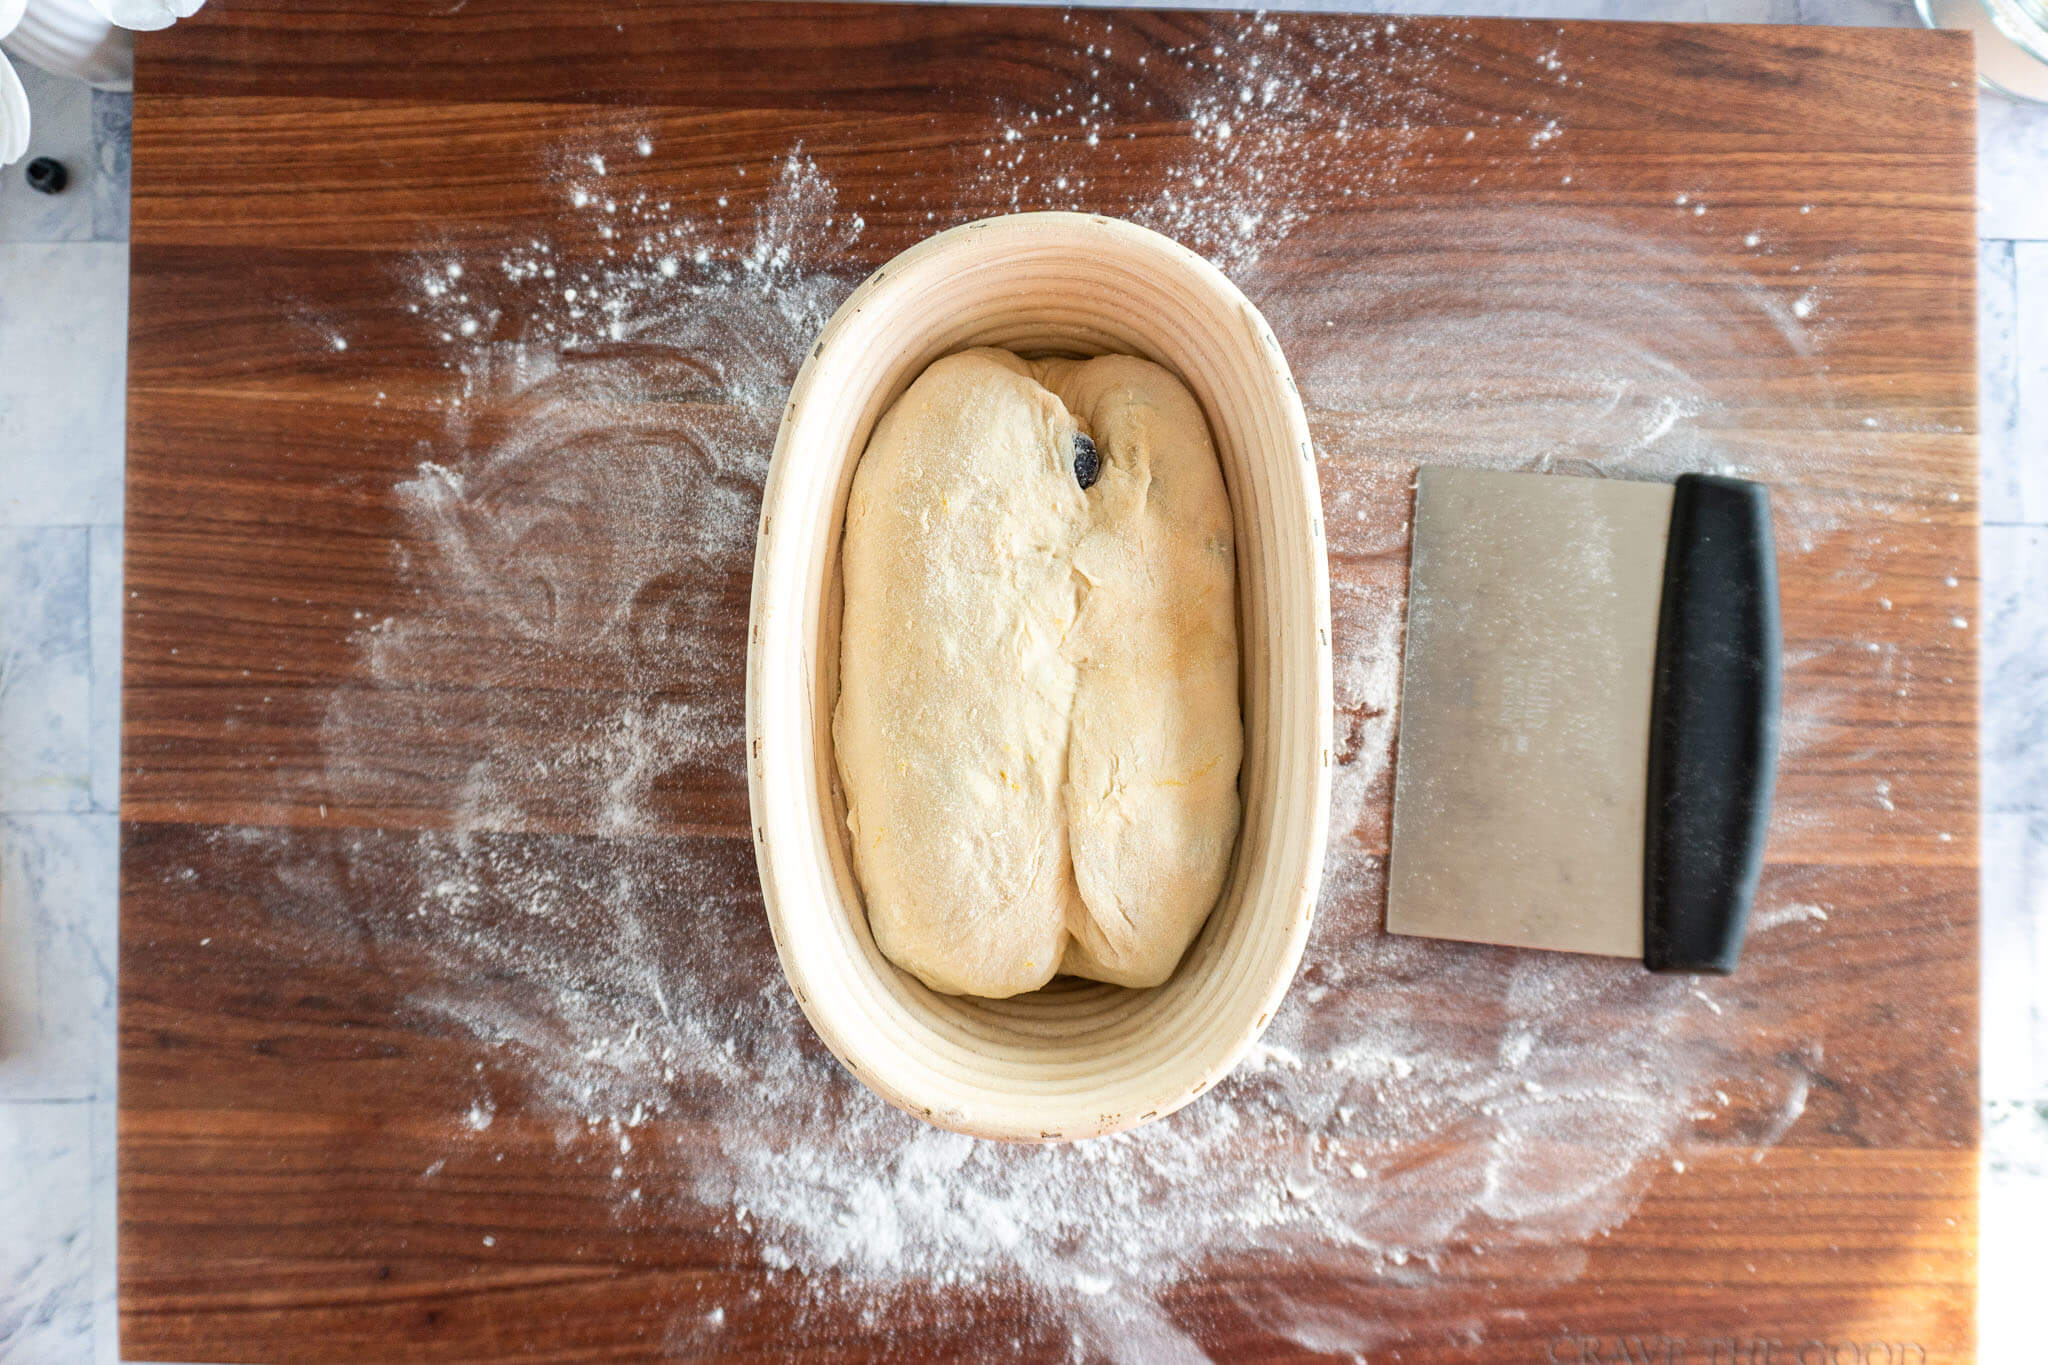
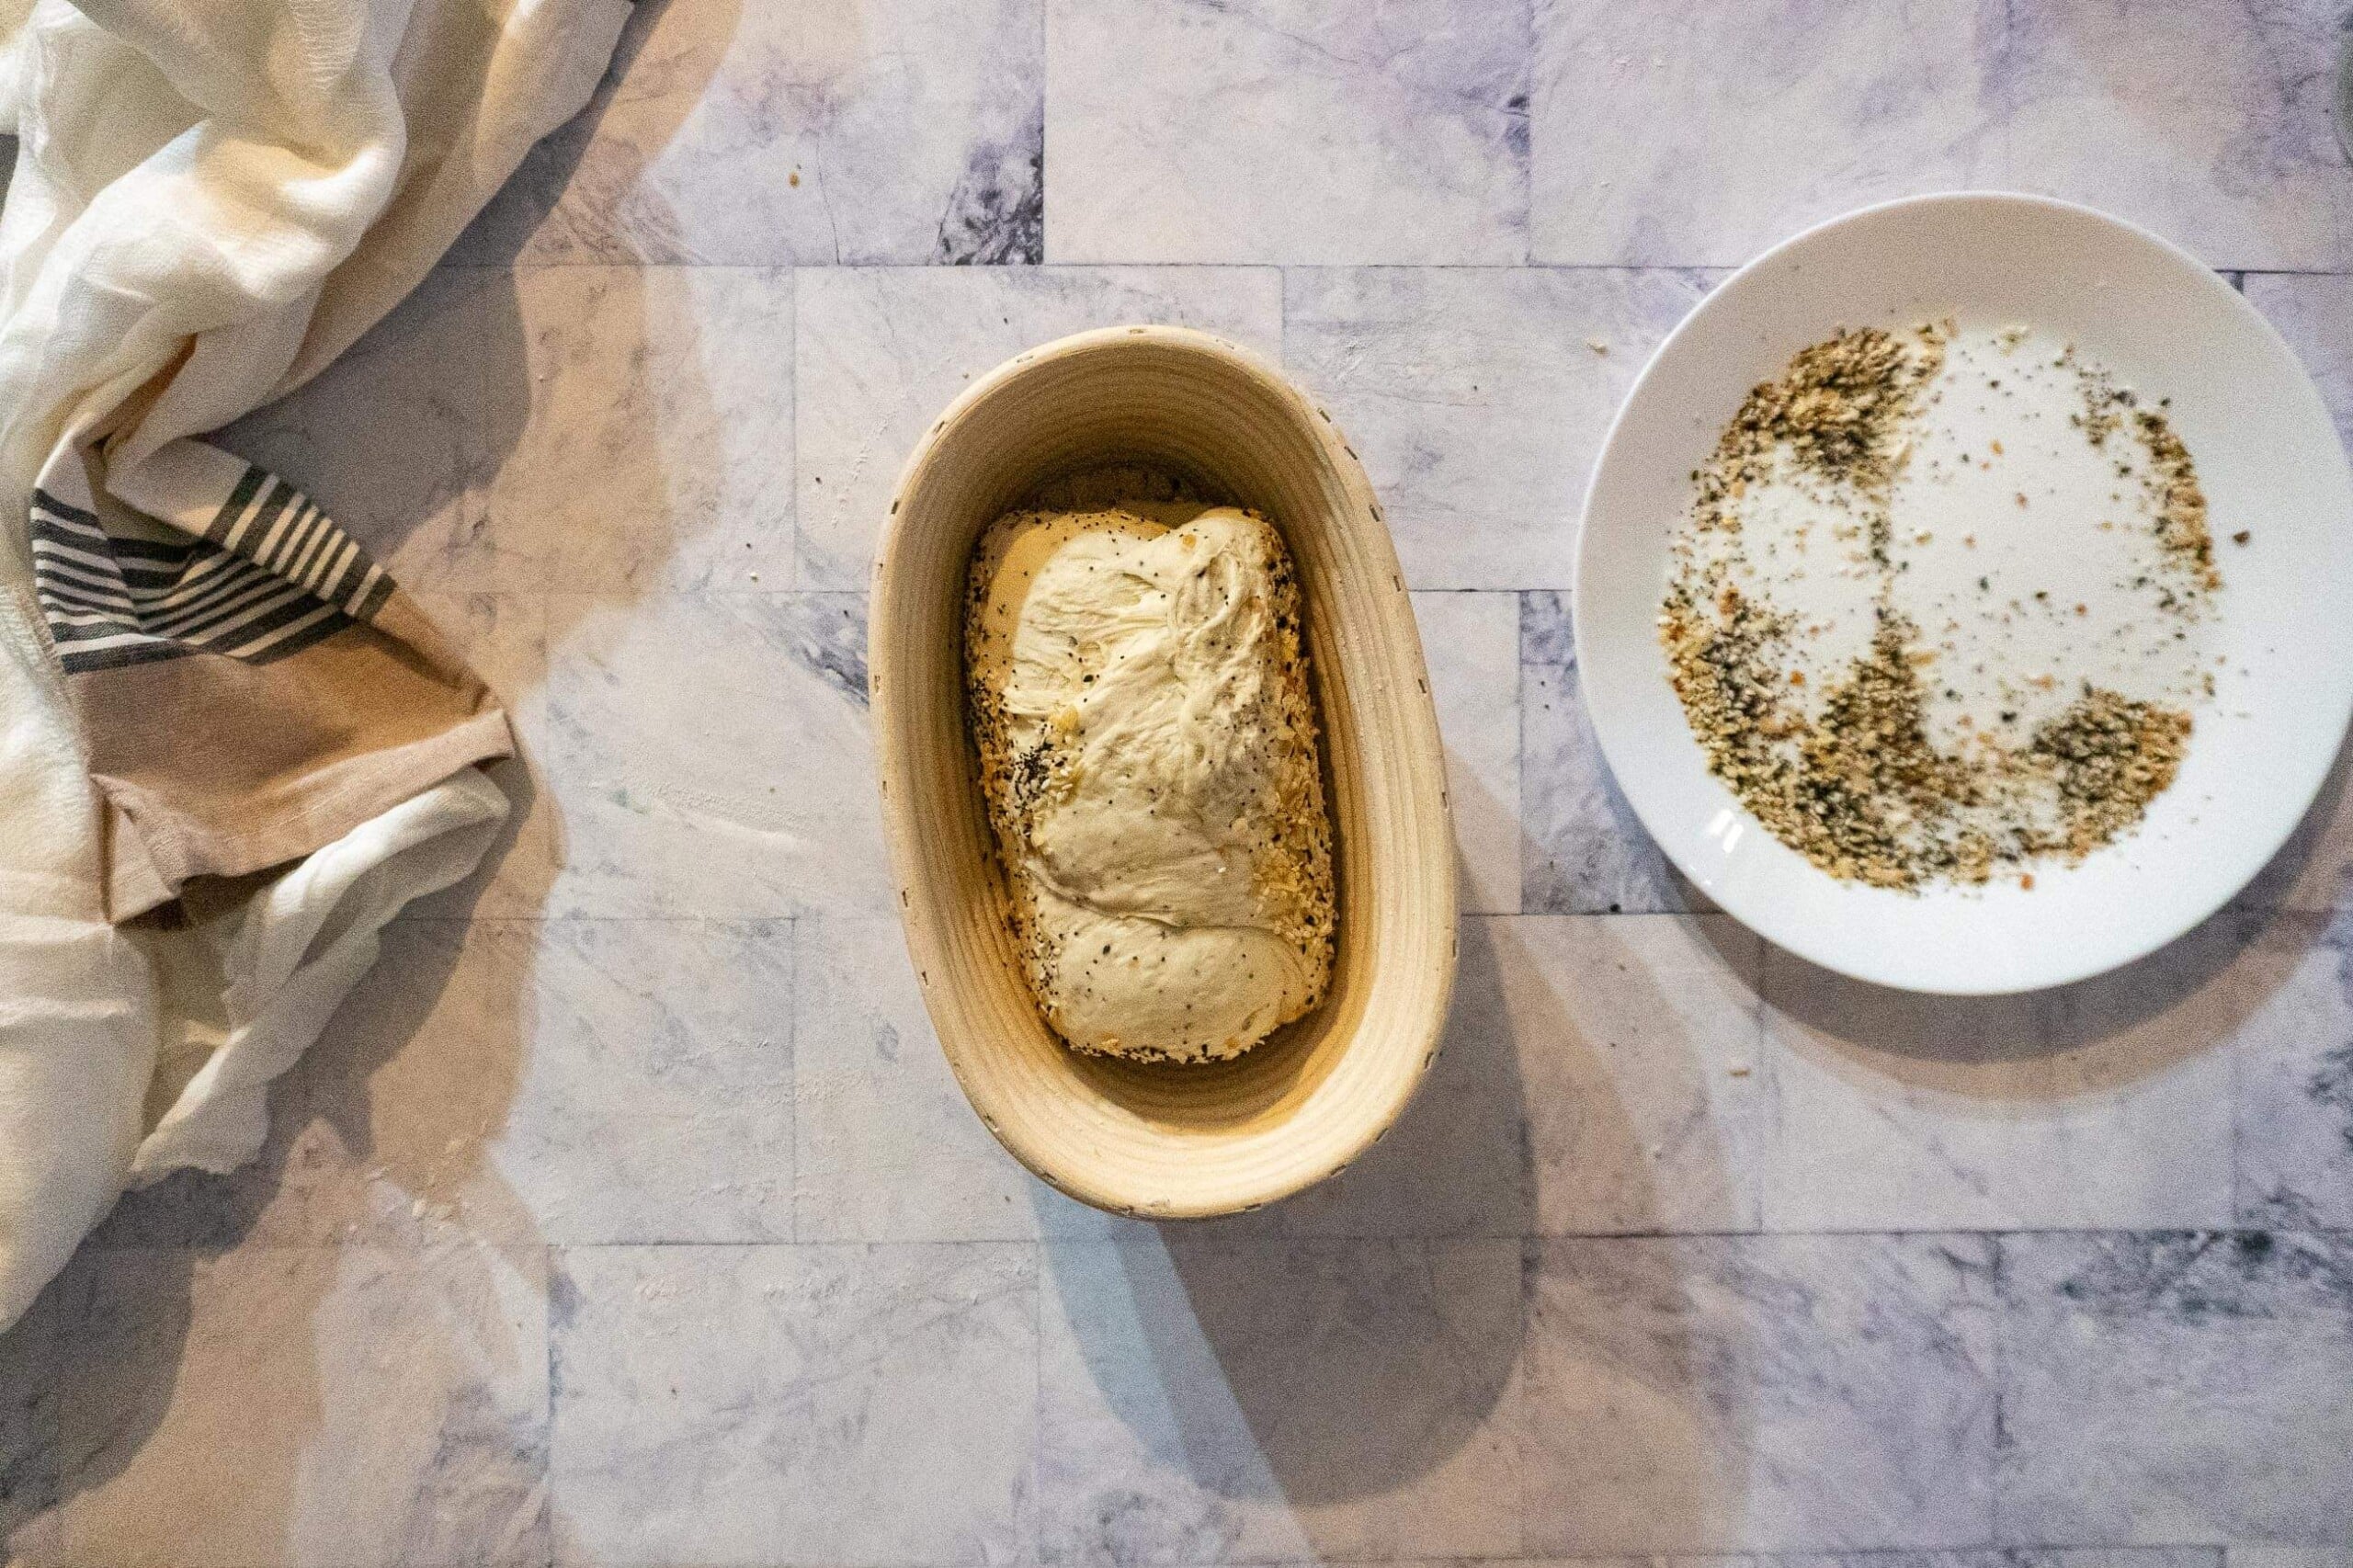
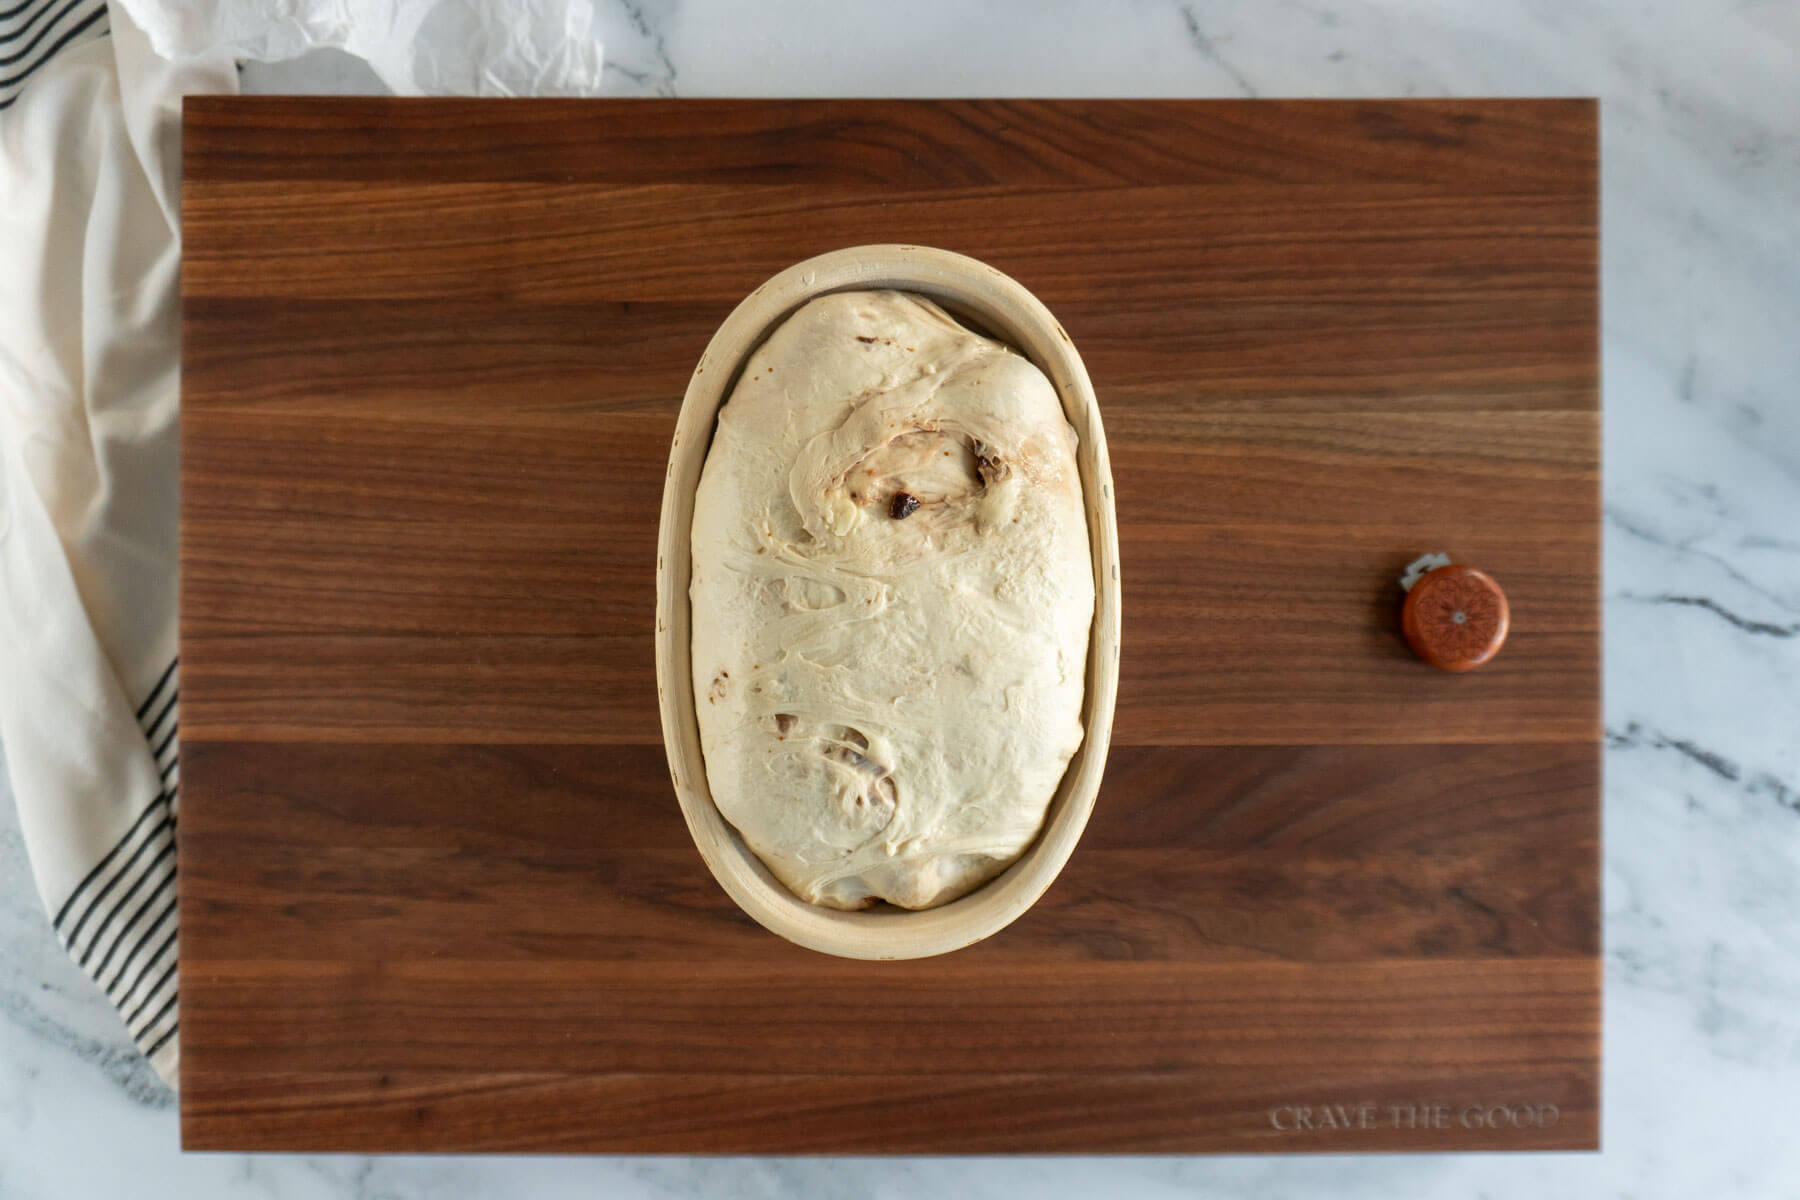
Banneton
A banneton is a proofing basket used to support dough during its final rise.
Bannetons are usually made from materials like rattan or cane, some are lined with linen. The coiled rattan, when properly floured, leaves a beautiful spiral pattern on the crust of baked bread.
What a banneton actually does is control how your dough rises. Without support, a well-hydrated sourdough dough will spread outward during the final proof, rising wide instead of tall. The banneton forces the dough upward, preserving the surface tension you built during shaping and giving you a taller, better-structured loaf. The rattan also wicks away surface moisture, creating a slightly dry skin on the dough that scores more cleanly and blisters more dramatically during baking.
I baked sourdough for over a year without having a single banneton, and you know what, the bread was still delicious, so if you don’t have a banneton at home, don’t let that discourage you because I have a great list of banneton alternatives!
When you’re ready to invest, here’s everything on using, caring for, and maintaining bannetons!

Batard
A batard is an oval shaped loaf of sourdough bread.
Unlike a boule, which is round, a batard has an elongated shape.
I prefer the batard shape in most circumstances, because I find the loaves to rise taller and have a more consistent shape. The long, oval loaf is easier to slice, fit into a toaster, and turn into a sandwich! I also prefer to shape batards.
Don’t take that to mean that round loaves are bad – because they are not!
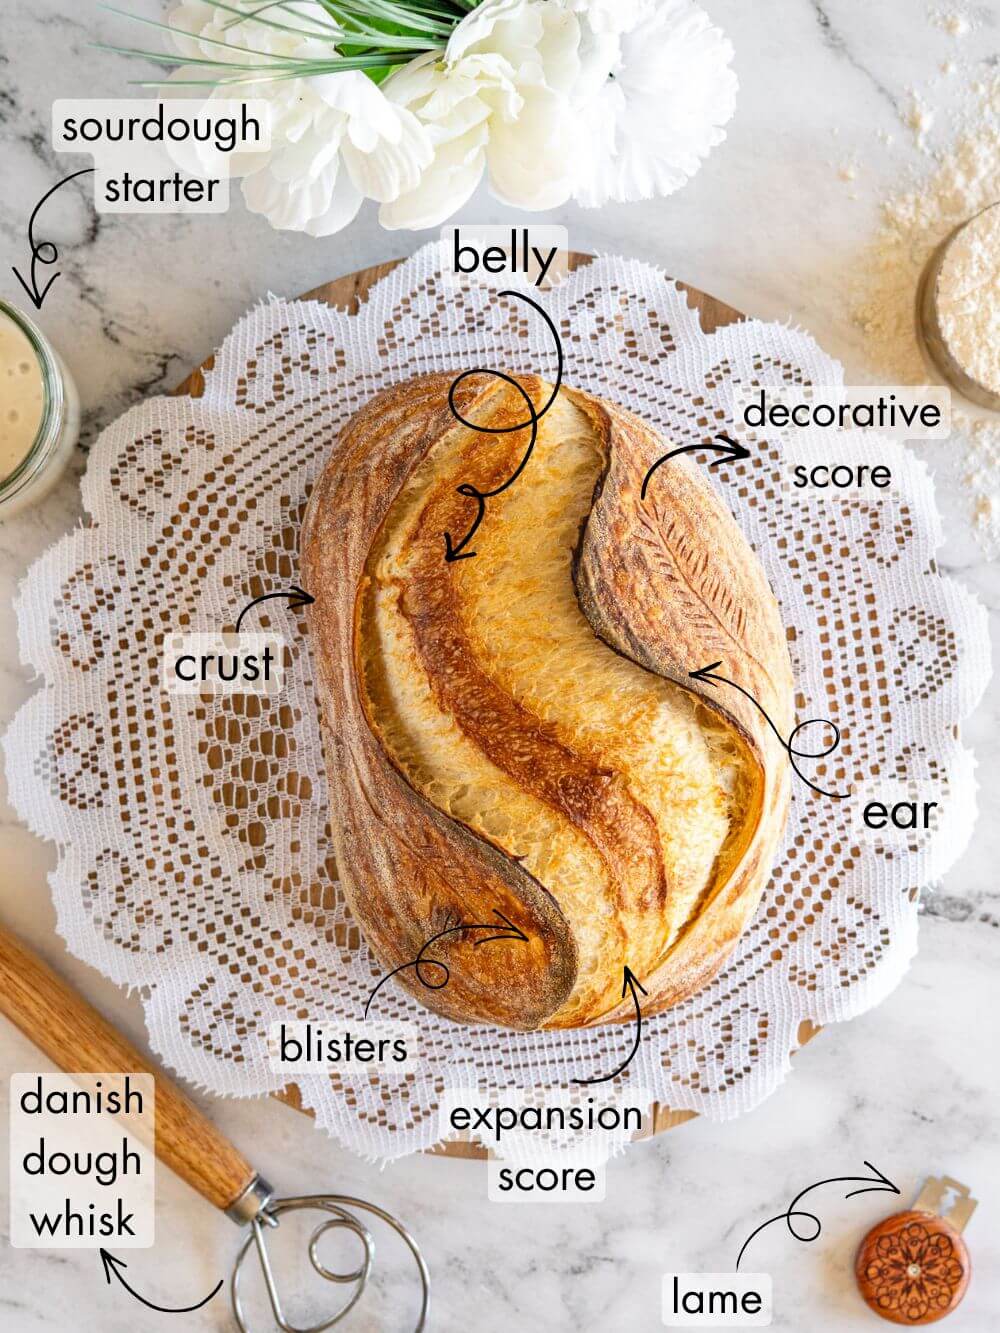
Belly
The belly of a sourdough loaf is the outward expansion that forms during baking.
A well-developed belly indicates strong dough structure and proper fermentation, as it allows the loaf to achieve good height and shape. The belly is typically most visible in sourdoughs with a strong oven spring and proper scoring techniques.
Big, bulging bellies are sought after in sourdough baking because loaves with a big belly are irresistibly delicious looking!
Bench Rest
The bench rest is a short resting period between pre-shaping and final shaping.
During this time, the gluten strands in the dough relax, making it easier to handle and shape without tearing, helping achieve better structure and texture in the final loaf.
Bench rests usually last 20-30 minutes.
I find that during the bench rest, the crust of my dough dries slightly which helps prevent it from sticking to the banneton and increases blistering of the crust during baking.
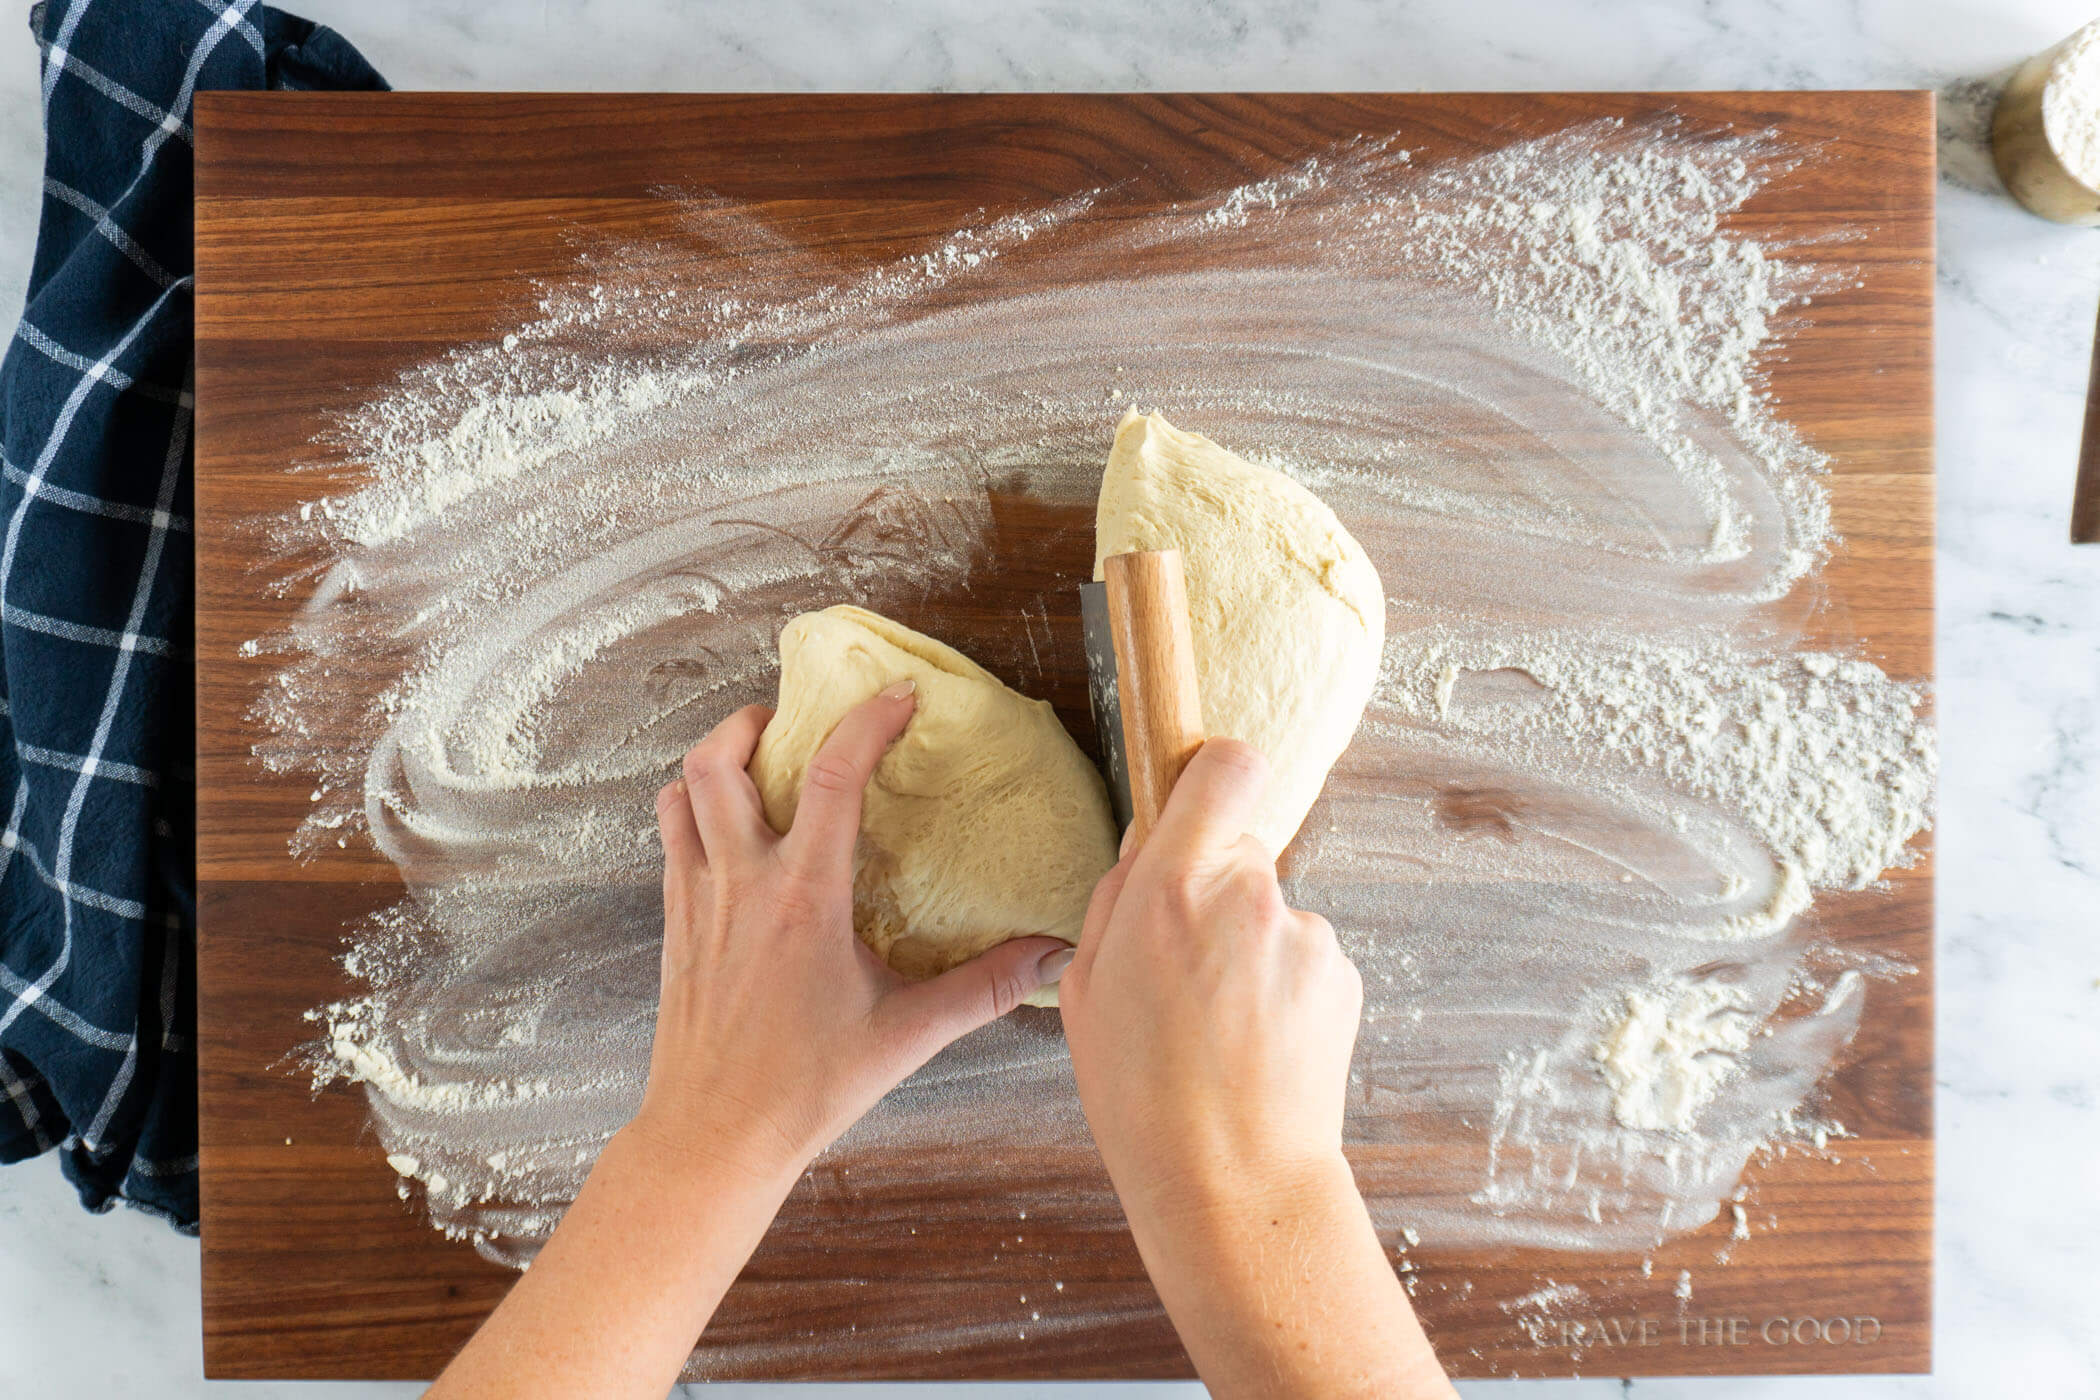
Bench Scraper
A bench scraper is a flat tool used to divide, lift, move, and shape dough.
They are especially helpful for handling sticky, high-hydration doughs, making it easier to cleanly cut portions or perform folding techniques.
Bakers also use it to scrape flour or dough residue from the work surface, keeping the bench tidy during the sourdough process.
Note: I use a bench scraper every time I make sourdough – especially to pick up and flip the dough after the bench rest! I prefer metal scrapers with wooden handles, but that’s just a personal preference.
Blisters
Blisters are small bubbles that form on the crust during baking.
They are often a result of cold fermentation. Blisters add a rustic, artisanal look and contribute that unmistakable sourdough crunch to the crust.
They develop when moisture trapped in the dough expands in the hot oven, creating tiny pockets under the crust. Blisters are a desirable trait, indicating good fermentation and handling.
In my experience, a cold ferment and spritzing the dough with water immediately before baking can improve the blisters.
Boule
A boule is a round, dome shaped loaf of bread.
The word comes from the French word for "ball." This classic shape is achieved by carefully shaping the dough into a tight round before its final proof.
Note: I love to use boules with marbled loaves, I find the pattern doesn’t get lost in the shaping. I also prefer boule shaped loaves when I’m serving with spinach dip or other dips that require the bread cut into cubes.
Brotform
A brotform is a type of proofing basket similar to a banneton.
Brotform is the German equivalent to the French banneton. Brotforms are used to support sourdough during its final proof.
In my experience, brotform is usually used to denote a proofing basket made of wood pulp versus one made with rattan. In my kitchen I use cane bannetons.
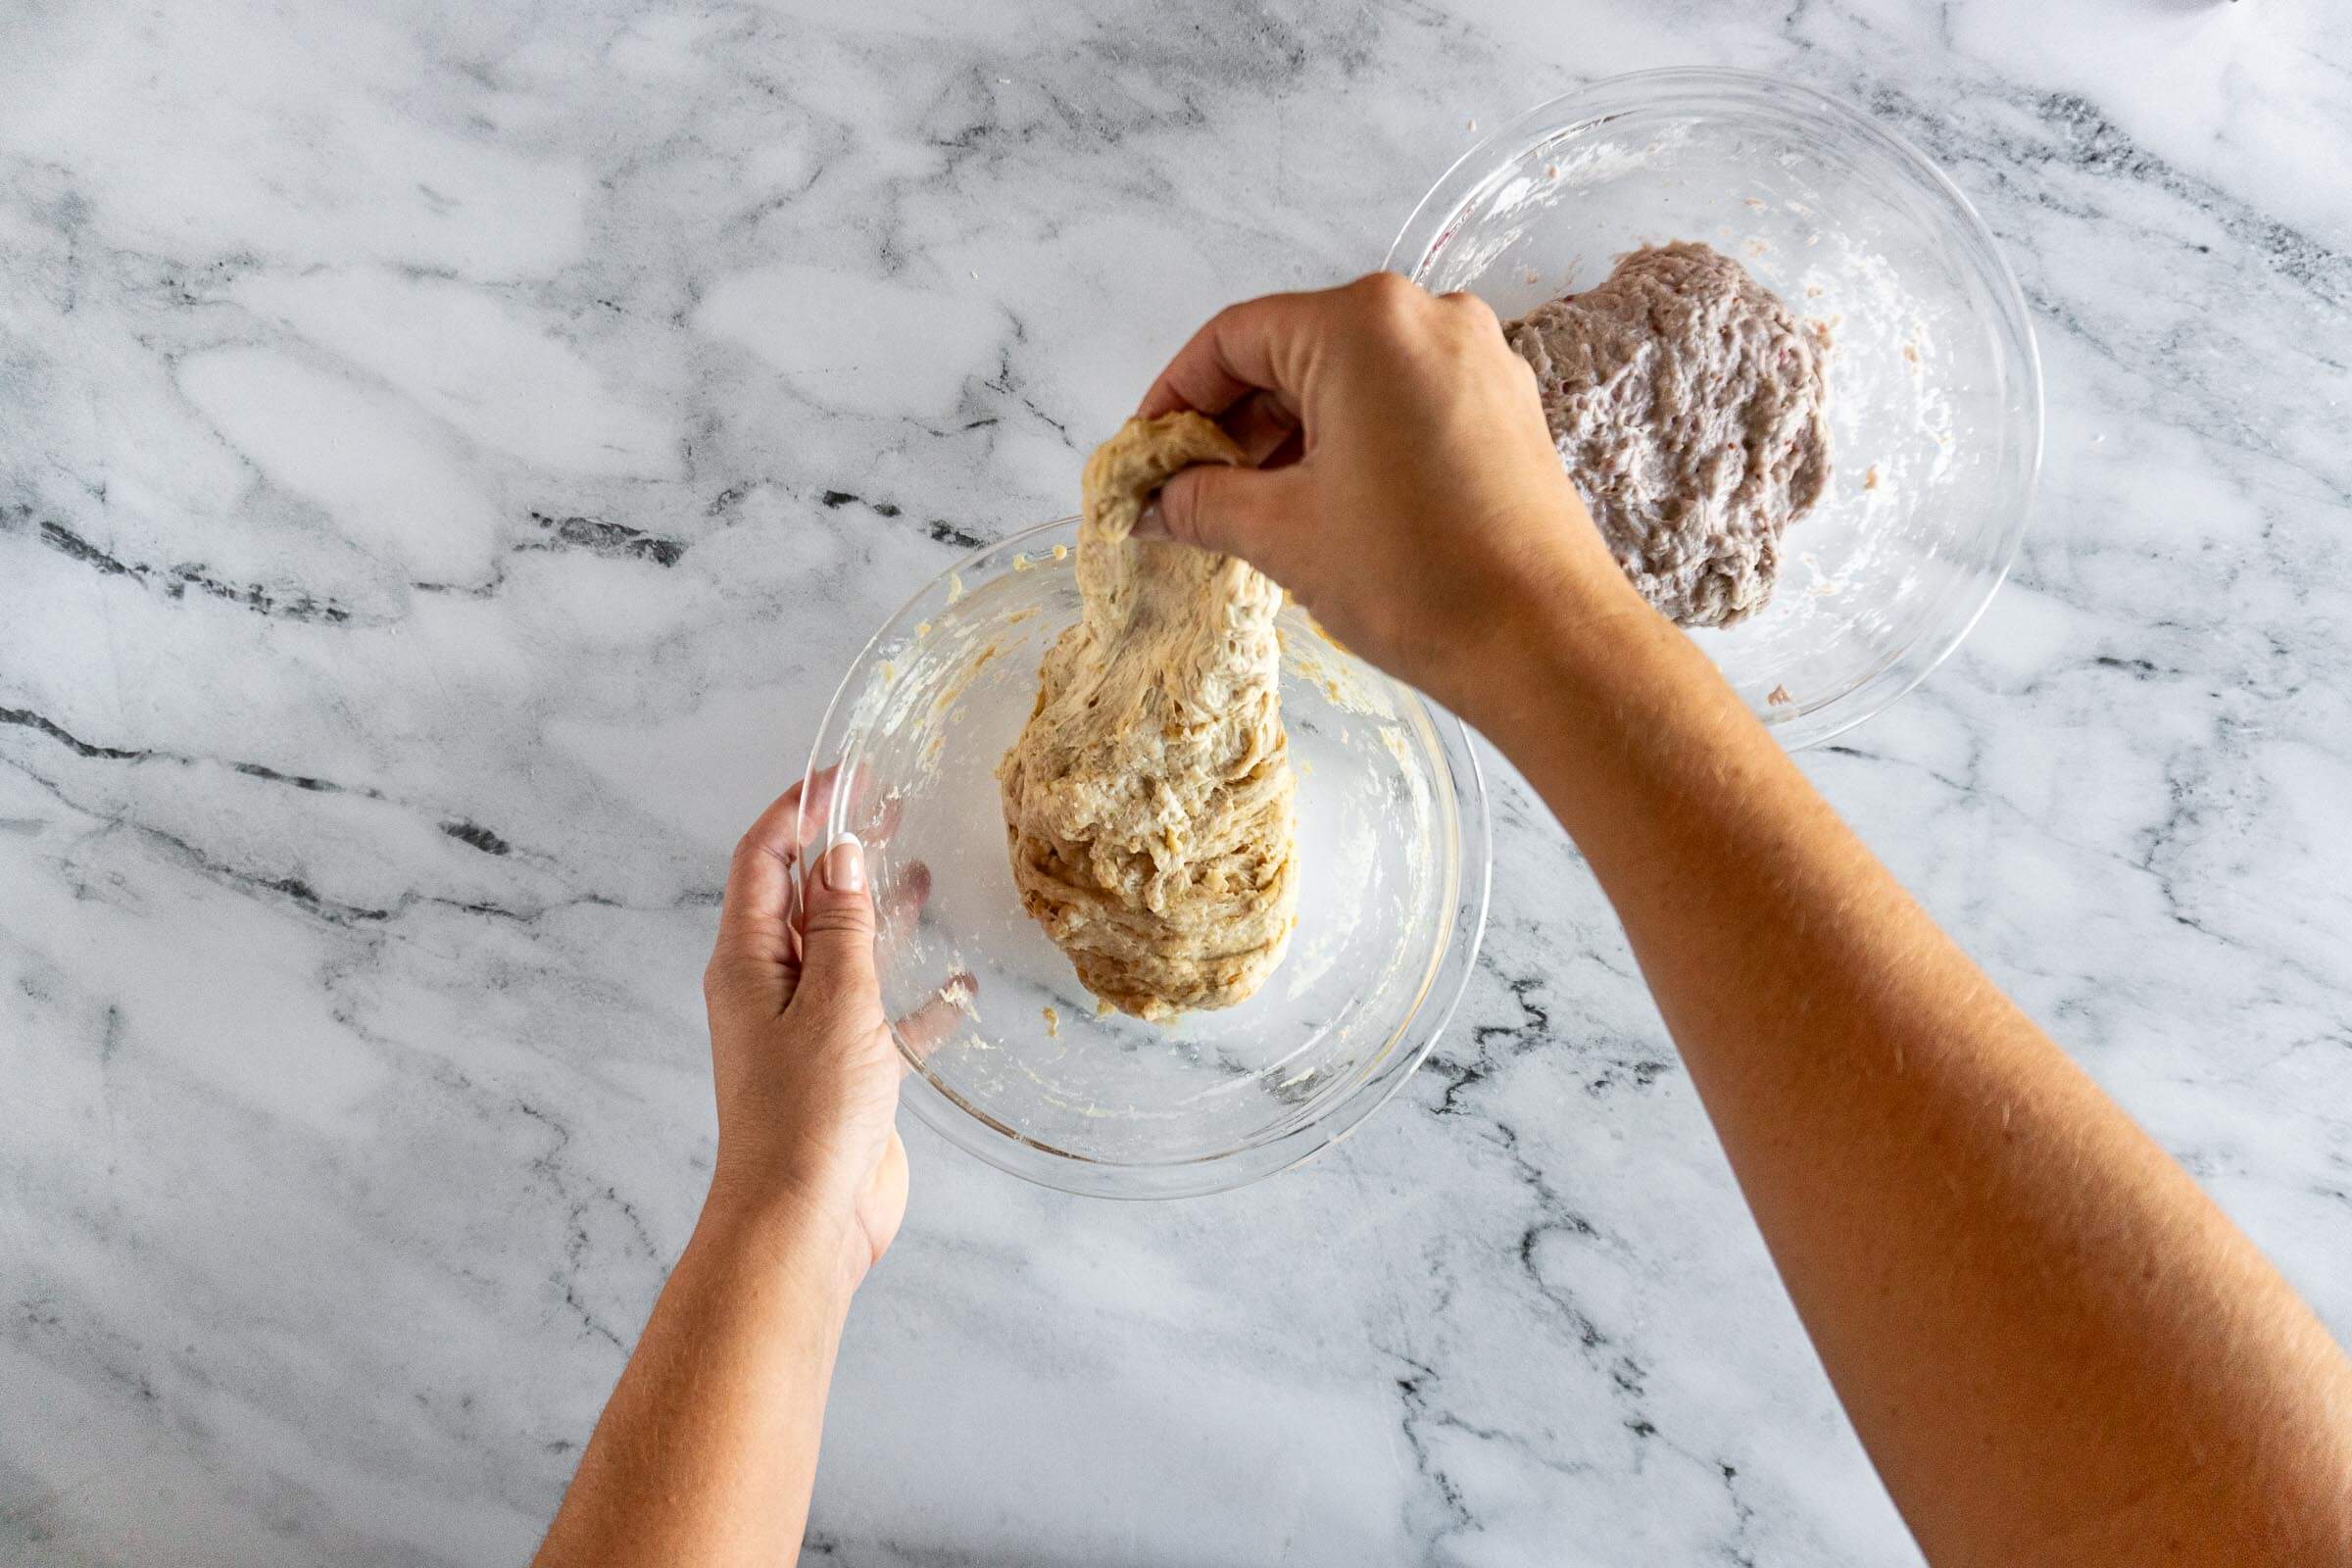
Bulk Fermentation
Bulk fermentation is the first rise of the sourdough dough after the flour, water, starter, and salt, are combined. It is sometimes called first rise or primary fermentation, depending on the baker's preferred term.
Bulk fermentation starts once all ingredients are combined and ends when the dough is divided, shaped for the final proof. Any time the dough spends in autolyse is not included in this stage.
During bulk fermentation, fermentation and time work together to develop gluten strength without requiring intensive kneading or mechanical mixing but rather through gentle stretch and folds or coil folds.
Temperature is the biggest variable during the bulk ferment. In a 70°F kitchen, bulk ferment might take 4-5 hours. In a 78°F kitchen, it could be done in 3. In a cold winter kitchen at 65°F, you might be looking at 8+ hours. The clock tells you very little; the dough tells you everything.
The term bulk fermentation comes from commercial baking, where large batches of dough ferment together in bulk. Home bakers making a single loaf just borrow the terminology!
My biggest learning curve when it came to bulk fermentation was ending it too early! Under-fermented loaves aren’t as easy to work with during the shaping stage and often have dense, gummy crumb.
Hungry for more information about the bulk ferment? I have an article designed to help you nail the bulk ferment!
C
Coil Folds
Coil folds are a gentle folding technique used during sourdough's bulk fermentation to build gluten strength without deflating the dough.
To perform a coil fold, you lift the dough from the center and allow each side to fold under itself, creating layers.
High-hydration doughs in particular benefit from coil folding, as it helps develop structure and elasticity while preserving air bubbles for a light, open crumb in the final loaf. Lower hydration doughs tend to be better served with the stretch and fold process.
I often use a hybrid of coil folding and stretch and folding during the sourdough process.
Cold Ferment/ Retard
Cold fermentation (or cold retard) is the process of refrigerating the dough for an extended period, usually overnight or longer, during the final proof.
The cold temperature slows down yeast activity but does not halt lactic acid or acetic acid production, allowing for more complex flavors to develop as the dough ferments. Cold fermentation also enhances the dough’s structure making it easier to score and transfer to the oven, and often enhances blistering in the crust.
I absolutely LOVE to cold retard my dough and the step is added to more of my recipes than not.
Learn how to cold retard your sourdough with my easy guide!

Cooling
Cooling is the final stage after baking and is crucial for proper crumb development.
Freshly baked sourdough bread continues to cook internally once removed from the oven. Cooling is crucial because it lets the interior finish setting and moisture redistribute evenly, preventing a gummy or overly moist crumb. Cutting into a hot loaf can release steam prematurely, disrupting the crumb structure, making the bread seem undercooked, and harder to slice.
Cooling is painfully simple but can be painfully difficult! I set my sourdough on a wire rack and walk away for at least 2 hours before slicing.
Couche
A couche is a heavy linen cloth used to support shaped dough during the final proof.
Couches are often used for baguettes or extra long batards because there are no dedicated bannetons for these types of loaves.
The fabric's texture gently supports the dough while wicking away excess surface moisture. This helps the dough develop a slightly dry skin, which contributes to a crisp crust during baking. Bakers fold the couche to create ridges that separate and support each loaf, helping the dough hold its shape as it rests before baking.
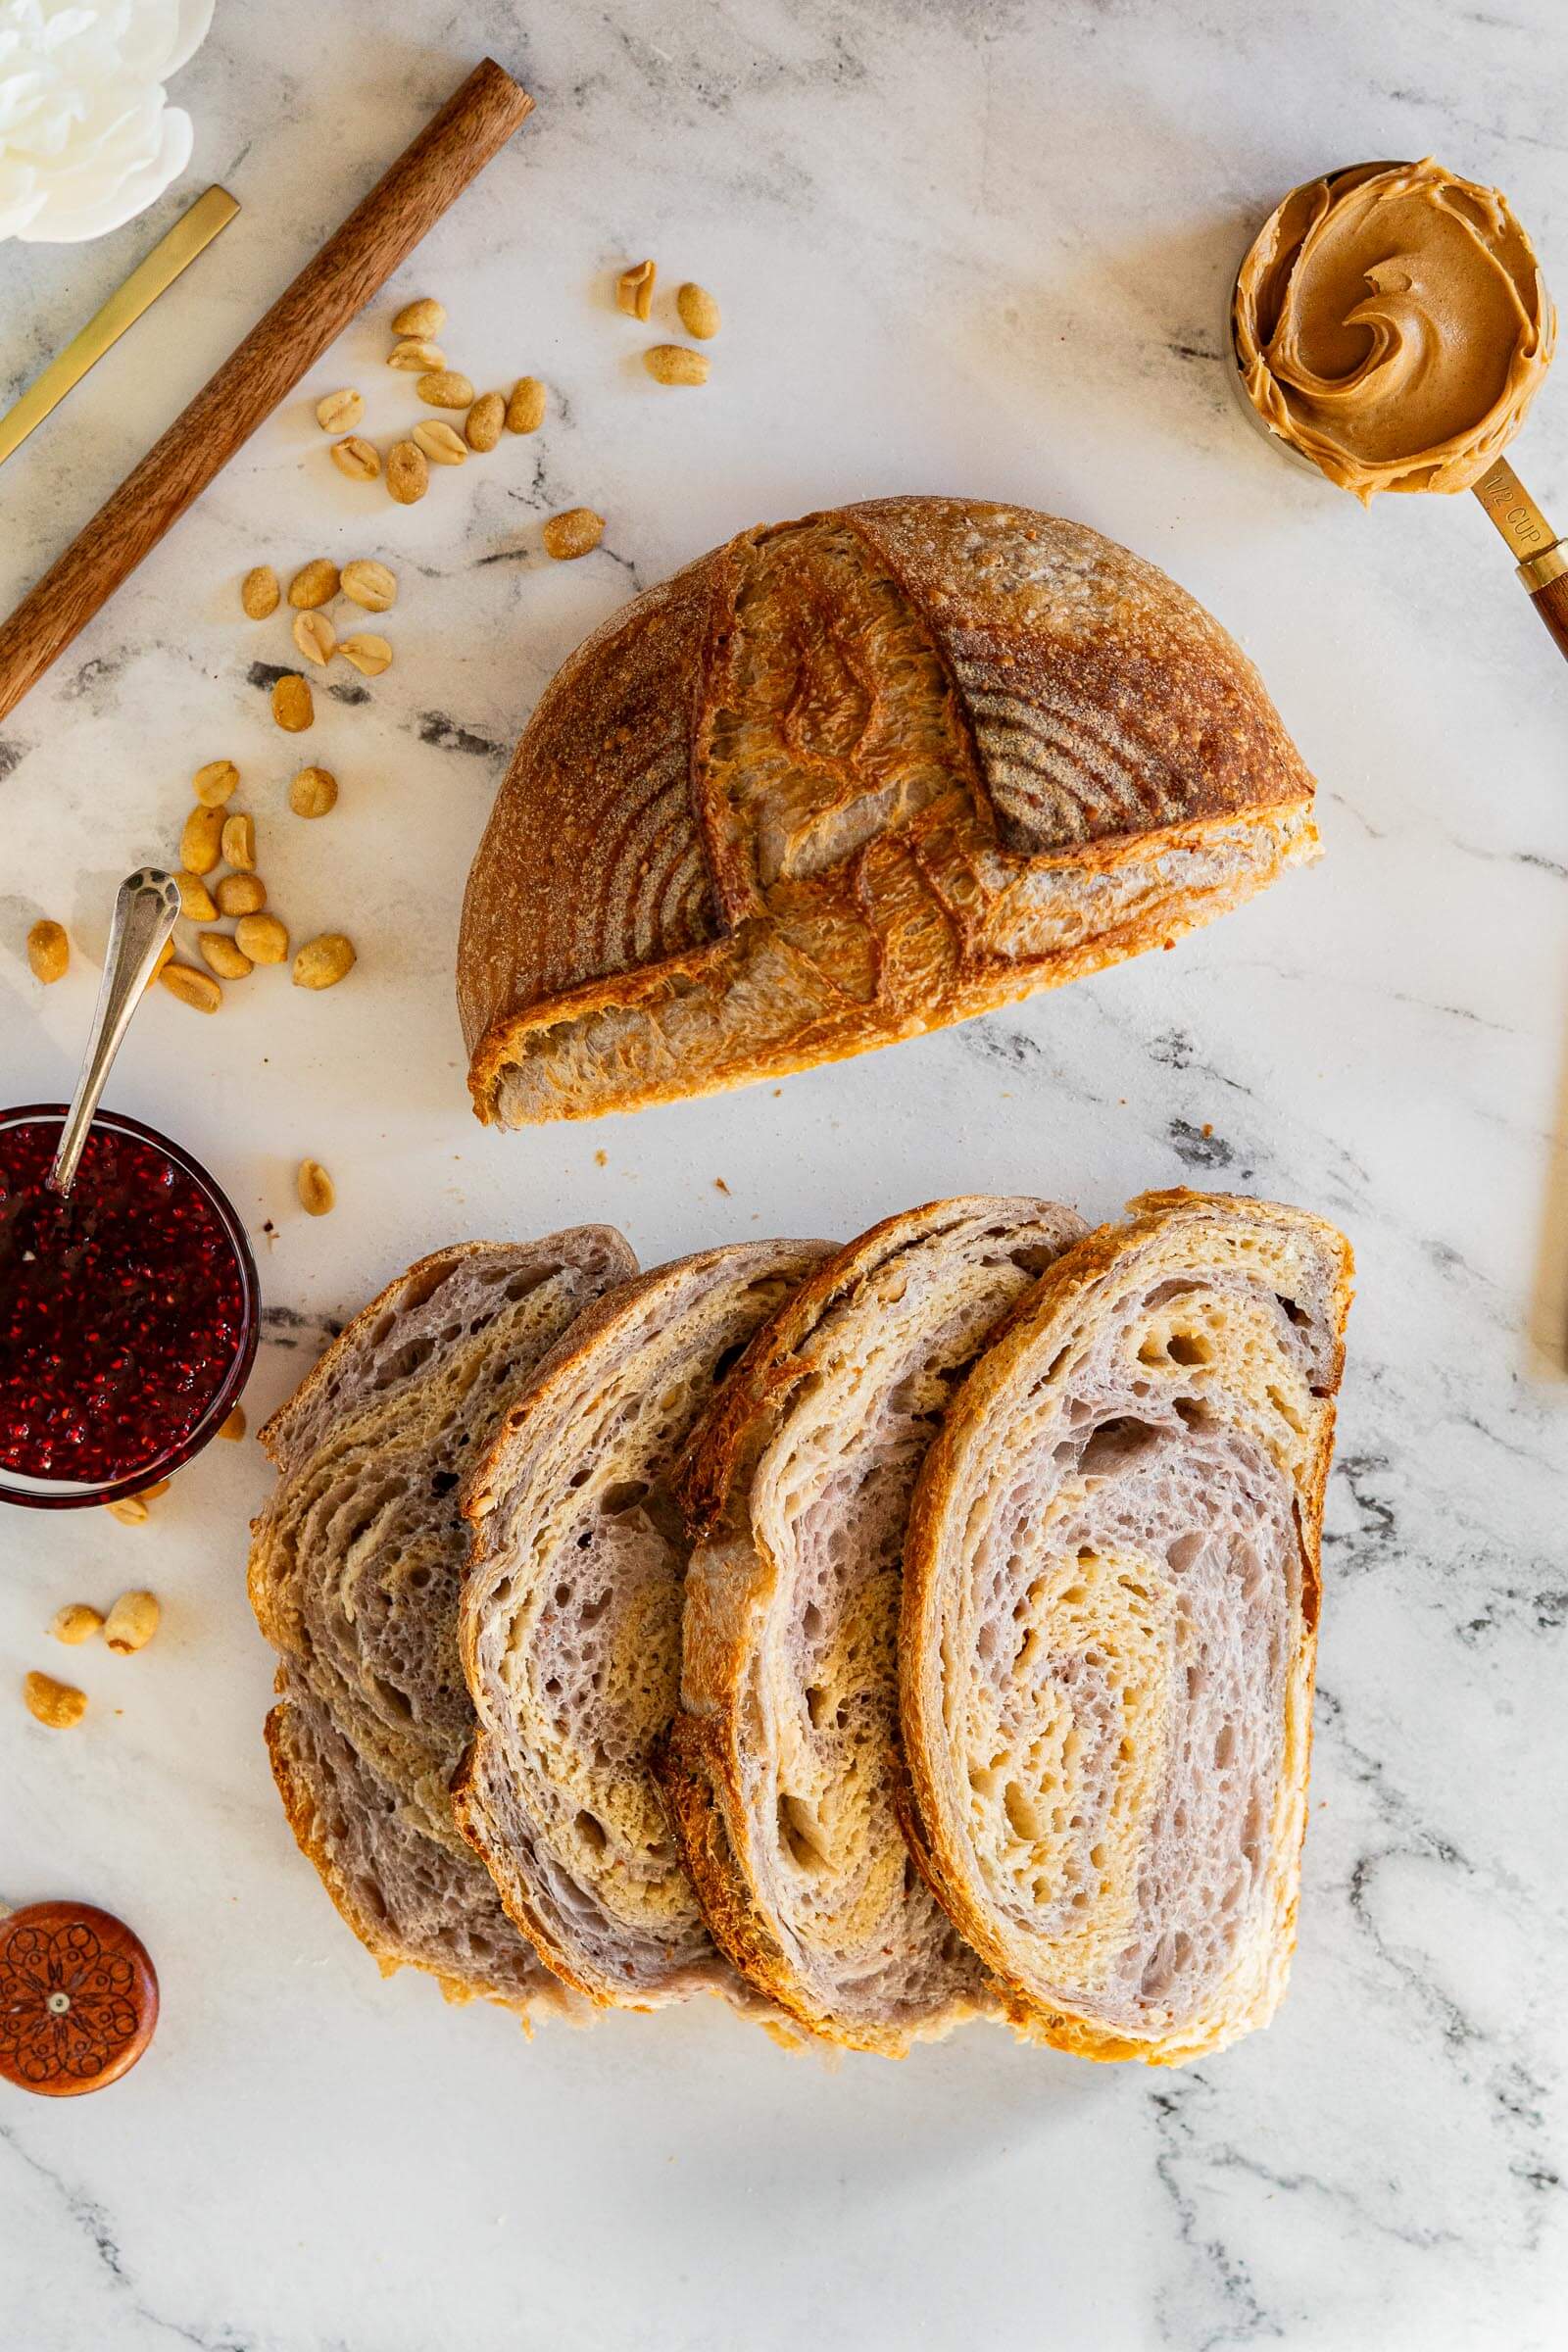
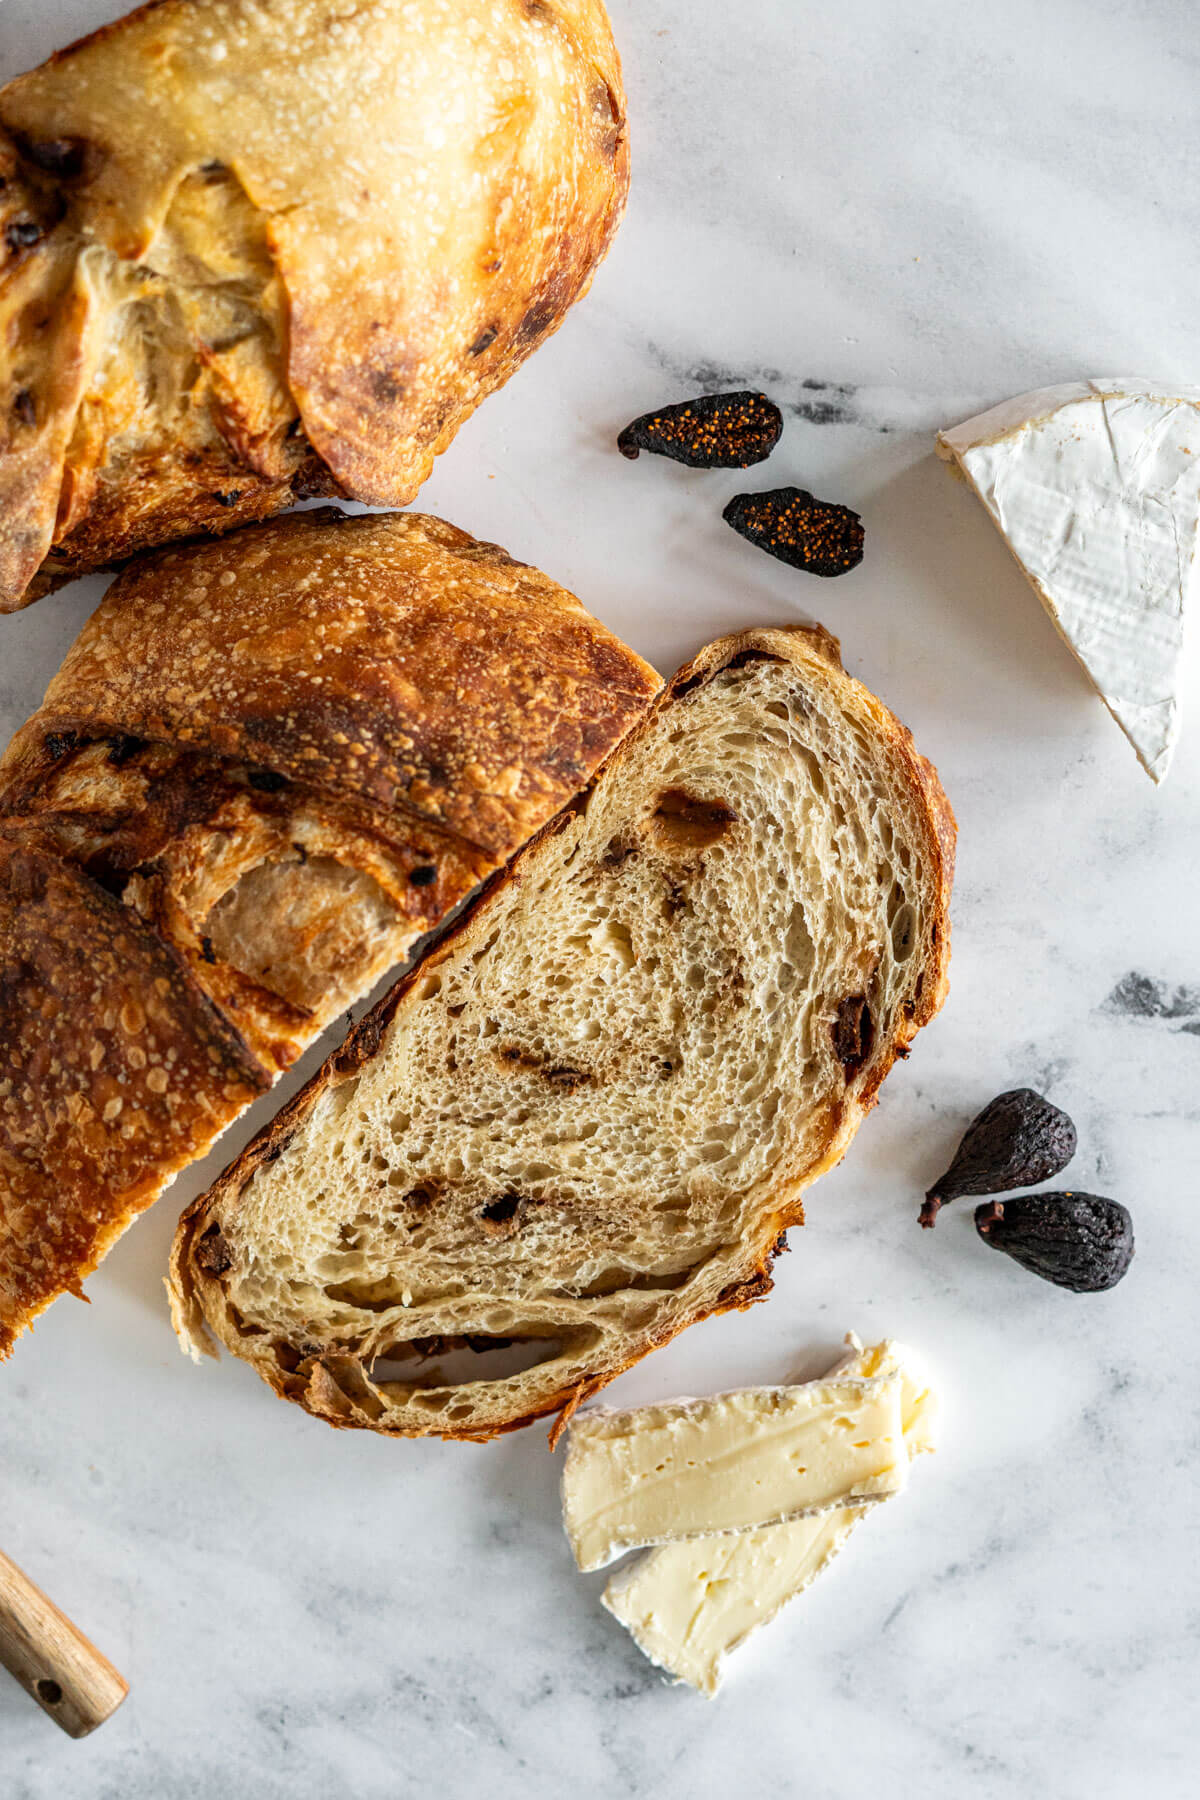
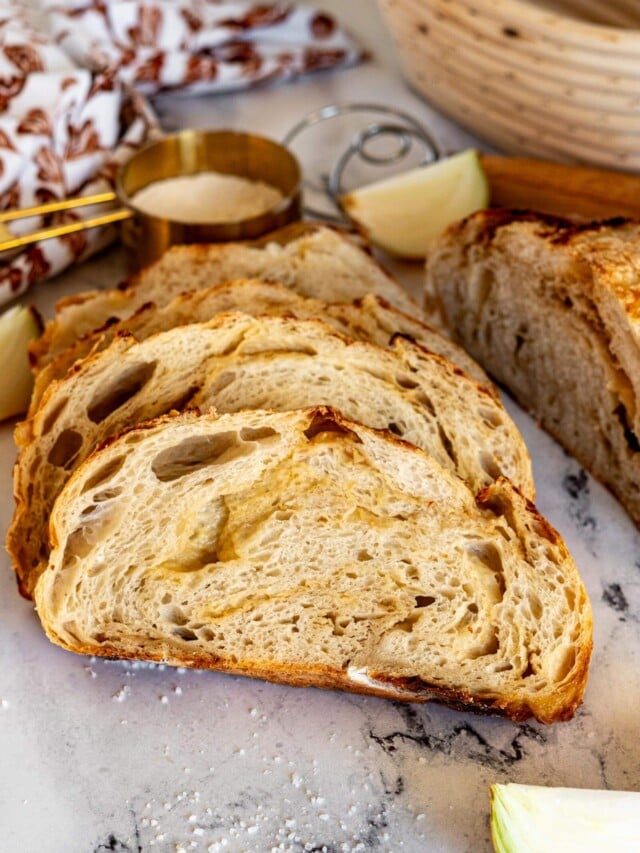
Crumb
The crumb refers to the interior texture of the baked bread, the texture, structure, size, and distribution of the air pockets (called alveoli) inside.
Crumb can vary along a spectrum. One end has tight, even, fine crumb with uniform, consistent alveoli. The opposite end of the spectrum is generally considered a wild crumb, with large, irregular holes and moist, almost custardy texture. Loaves with a tight crumb are excellent for sandwiches, you don’t risk losing toppings through the holes, while loaves with a wild crumb are my favorite for toast or dipping.
What creates crumb structure:
- Hydration: Higher water content = more open potential crumb. Lower hydration = tighter crumb. This is the biggest variable.
- Fermentation: Under-fermented dough produces a dense, gummy crumb. Over-fermented dough produces an irregular, weakly structured crumb. Properly fermented dough gives you consistent holes throughout.
- Shaping: How much you degas during shaping directly affects crumb openness. A more aggressive pre-shape = tighter crumb. A gentler handling = more open.
- Inclusions: Add-ins like cheese, seeds, or dried fruit will disrupt the gluten network and create a less uniform crumb.
The online sourdough community has developed an almost unhealthy obsession with open crumb as the singular marker of baking success. But I think that a tight crumb on a well-flavored, properly fermented loaf is not a failure. It might be exactly what the recipe calls for. My sourdough bagels have a very tight crumb by design. My rustic sourdough goes the other direction. Both are correct.

Crumb Shot
A crumb shot is a photo of the interior of a sliced sourdough loaf, taken to show the crumb structure; the size, distribution, and openness of the alveoli.
Crumb shots are a staple of sourdough communities online, where bakers share their results and troubleshoot together. A good crumb shot is taken immediately after slicing, in good light, with the cut face of the bread facing the camera.
Resist the urge to slice a fresh baked loaf immediately just to check the crumb. Let it cool fully first, your crumb shot will be better for it and your bread won’t be gummy!
Crust
The crust is the outer layer of the loaf that forms during baking.
A well-developed crust is typically deep golden-brown with a rich, caramelized flavor, and beautiful blistering.
Good crusts are achieved through proper fermentation, high baking temperatures, and steam in the oven. The crust also protects the loaf’s moisture and contributes to its shelf life.
The crust will forever be my favorite part of the entire loaf!
D
Danish Dough Whisk
A Danish dough whisk is a specialized mixing tool designed to combine bread dough ingredients quickly and effectively.
Its unique looped design allows it to easily cut through thick, sticky doughs, helping to incorporate flour and water evenly. The dough whisk is perfect for initial mixing, as it prevents clumping and is easier to clean than traditional whisks.
Pro Tip: If your dough whisk is hard to clean because the loops are pressing against each other, you can gently bend them outward to create a bit of space between the wires.
Degas
Degassing means gently releasing some of the built-up gas produced during fermentation.
This is usually done right before shaping by lightly pressing or folding the dough. Degassing helps to redistribute the gas pockets, control the crumb texture, and allows for a more even rise in the final loaf.
This is very similar to punching down your dough in yeasted recipes, but is definitely done more gently!
Desired Dough Temperature (DDT)
Desired dough temperature, or DDT, is the target internal temperature of your dough immediately after mixing.
Temperature is one of the biggest variables in how fast your bulk fermentation moves, and DDT helps you account for that before you even start mixing. You calculate it by adjusting your water temperature to compensate for the temperature of your flour, your kitchen, and your hands.
A dough that’s even 5°F warmer than intended can be ready to shape hours earlier than expected.
If you’re wanting to play with DDT, aim for a dough temperature between 75-78°F. Maurizio at The Perfect Loaf has a simple water temperature calculator to help nail your DDT,
I’ll be honest, I don’t formally calculate DDT ever. But understanding the concept has made me a much better troubleshooter when my bulk fermentation is moving faster or slower than a recipe says it should.
Discard
Discard refers to the portion of starter that is removed before feeding it with fresh flour and water.
When you maintain a starter, you feed it by adding fresh flour and water, but if you never removed any starter, the volume would double with every feeding and you’d have a bathtub full of starter within a week! Discarding keeps the culture at a manageable size and maintains the right ratio of microorganisms to fresh food.
What discard actually is:
Discard is mature starter. It’s had time to ferment, but it’s past its peak of yeast activity. This matters for how you use it. The wild yeast in discard is still present but sluggish; it won’t reliably leaven a loaf on its own. However, the acids and flavor compounds in discard are fully developed and very active. This is why discard makes things taste better, it adds tang, depth, and a subtle complexity.
Discard works beautifully when you’re after the flavor, not the leavening power. The baking soda or baking powder does the leavening work; the discard does the flavor work. These are some of my favourite sourdough discard recipes:
- sourdough discard cornbread
- sourdough scones
- sourdough peanut butter cookies
- sourdough brownies
- bread machine sourdough
- sourdough discard pasta
I’ve learned that the age of my discard matters a lot in discard recipes. Aged discard (unfed for 5+ days) is more acidic and pungent than fresh discard. You can sometimes hide the overwhelming sour flavor but more often than not, fresh discard performs better, especially in sweet or delicately flavored recipes.
Need more information on sourdough discard? I have a guide on storing sourdough discard as well as an entire article dedicated on what to do with your discard, and even more delicious sourdough discard recipes.

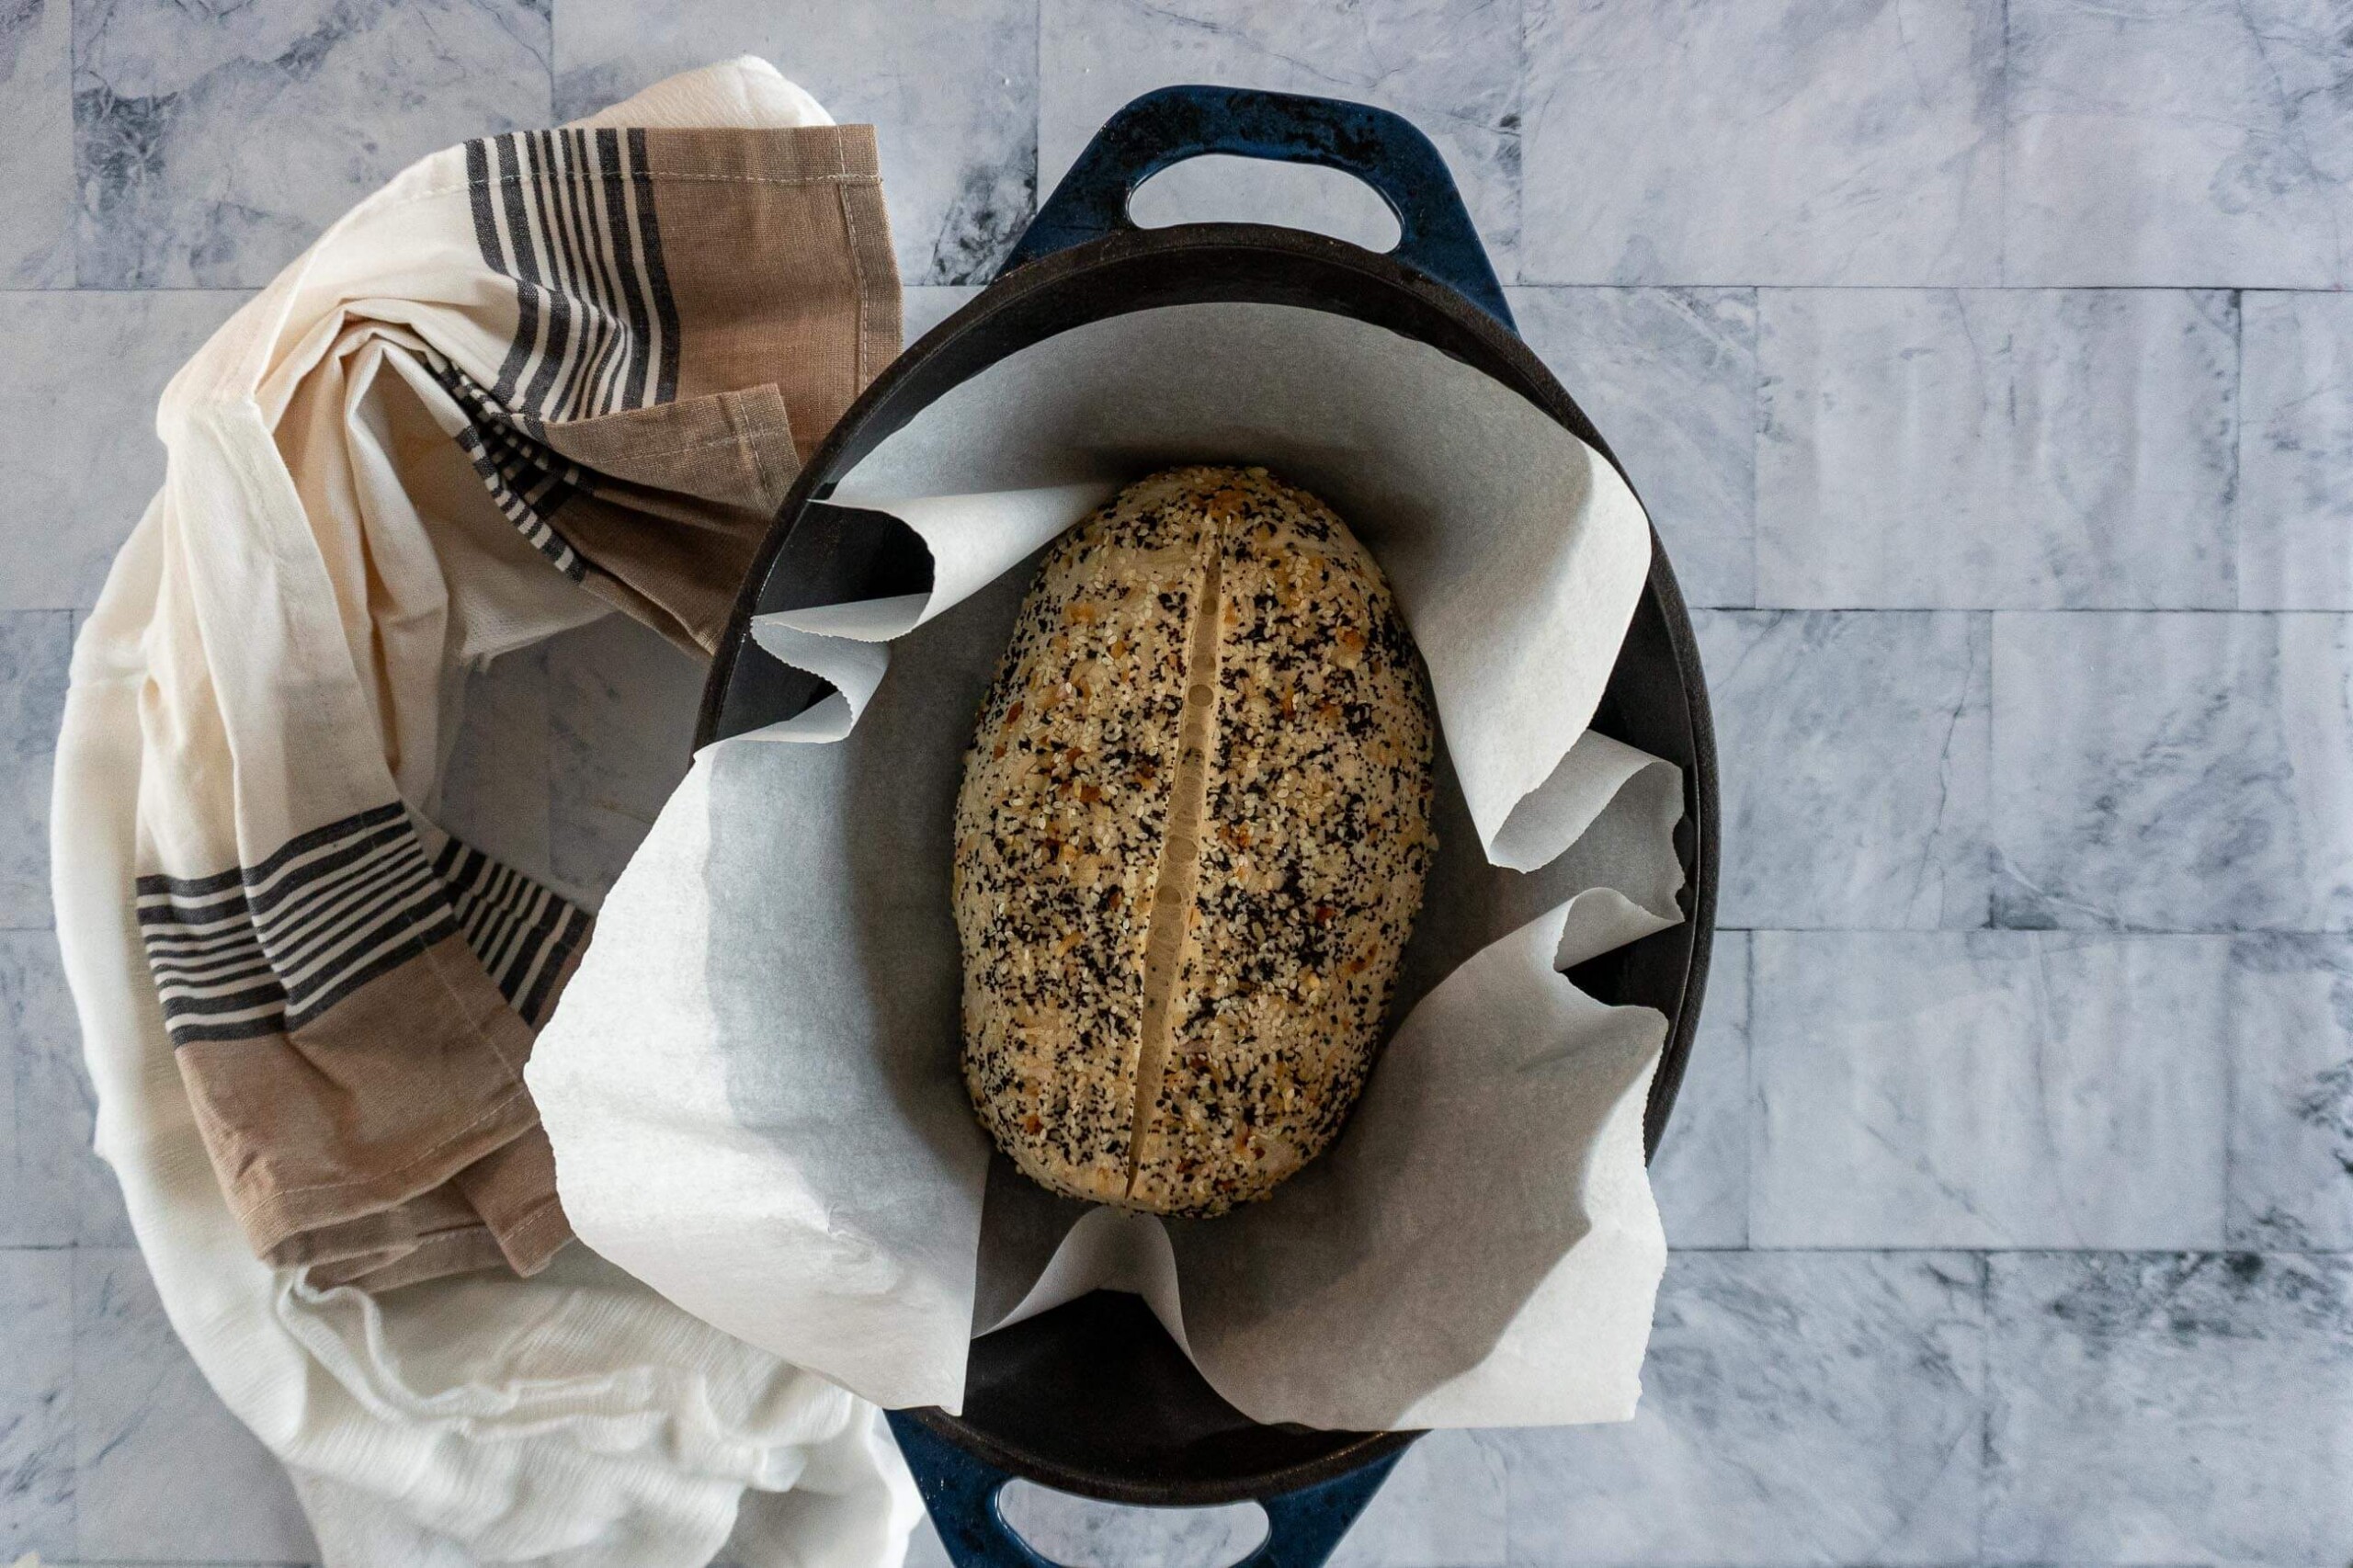
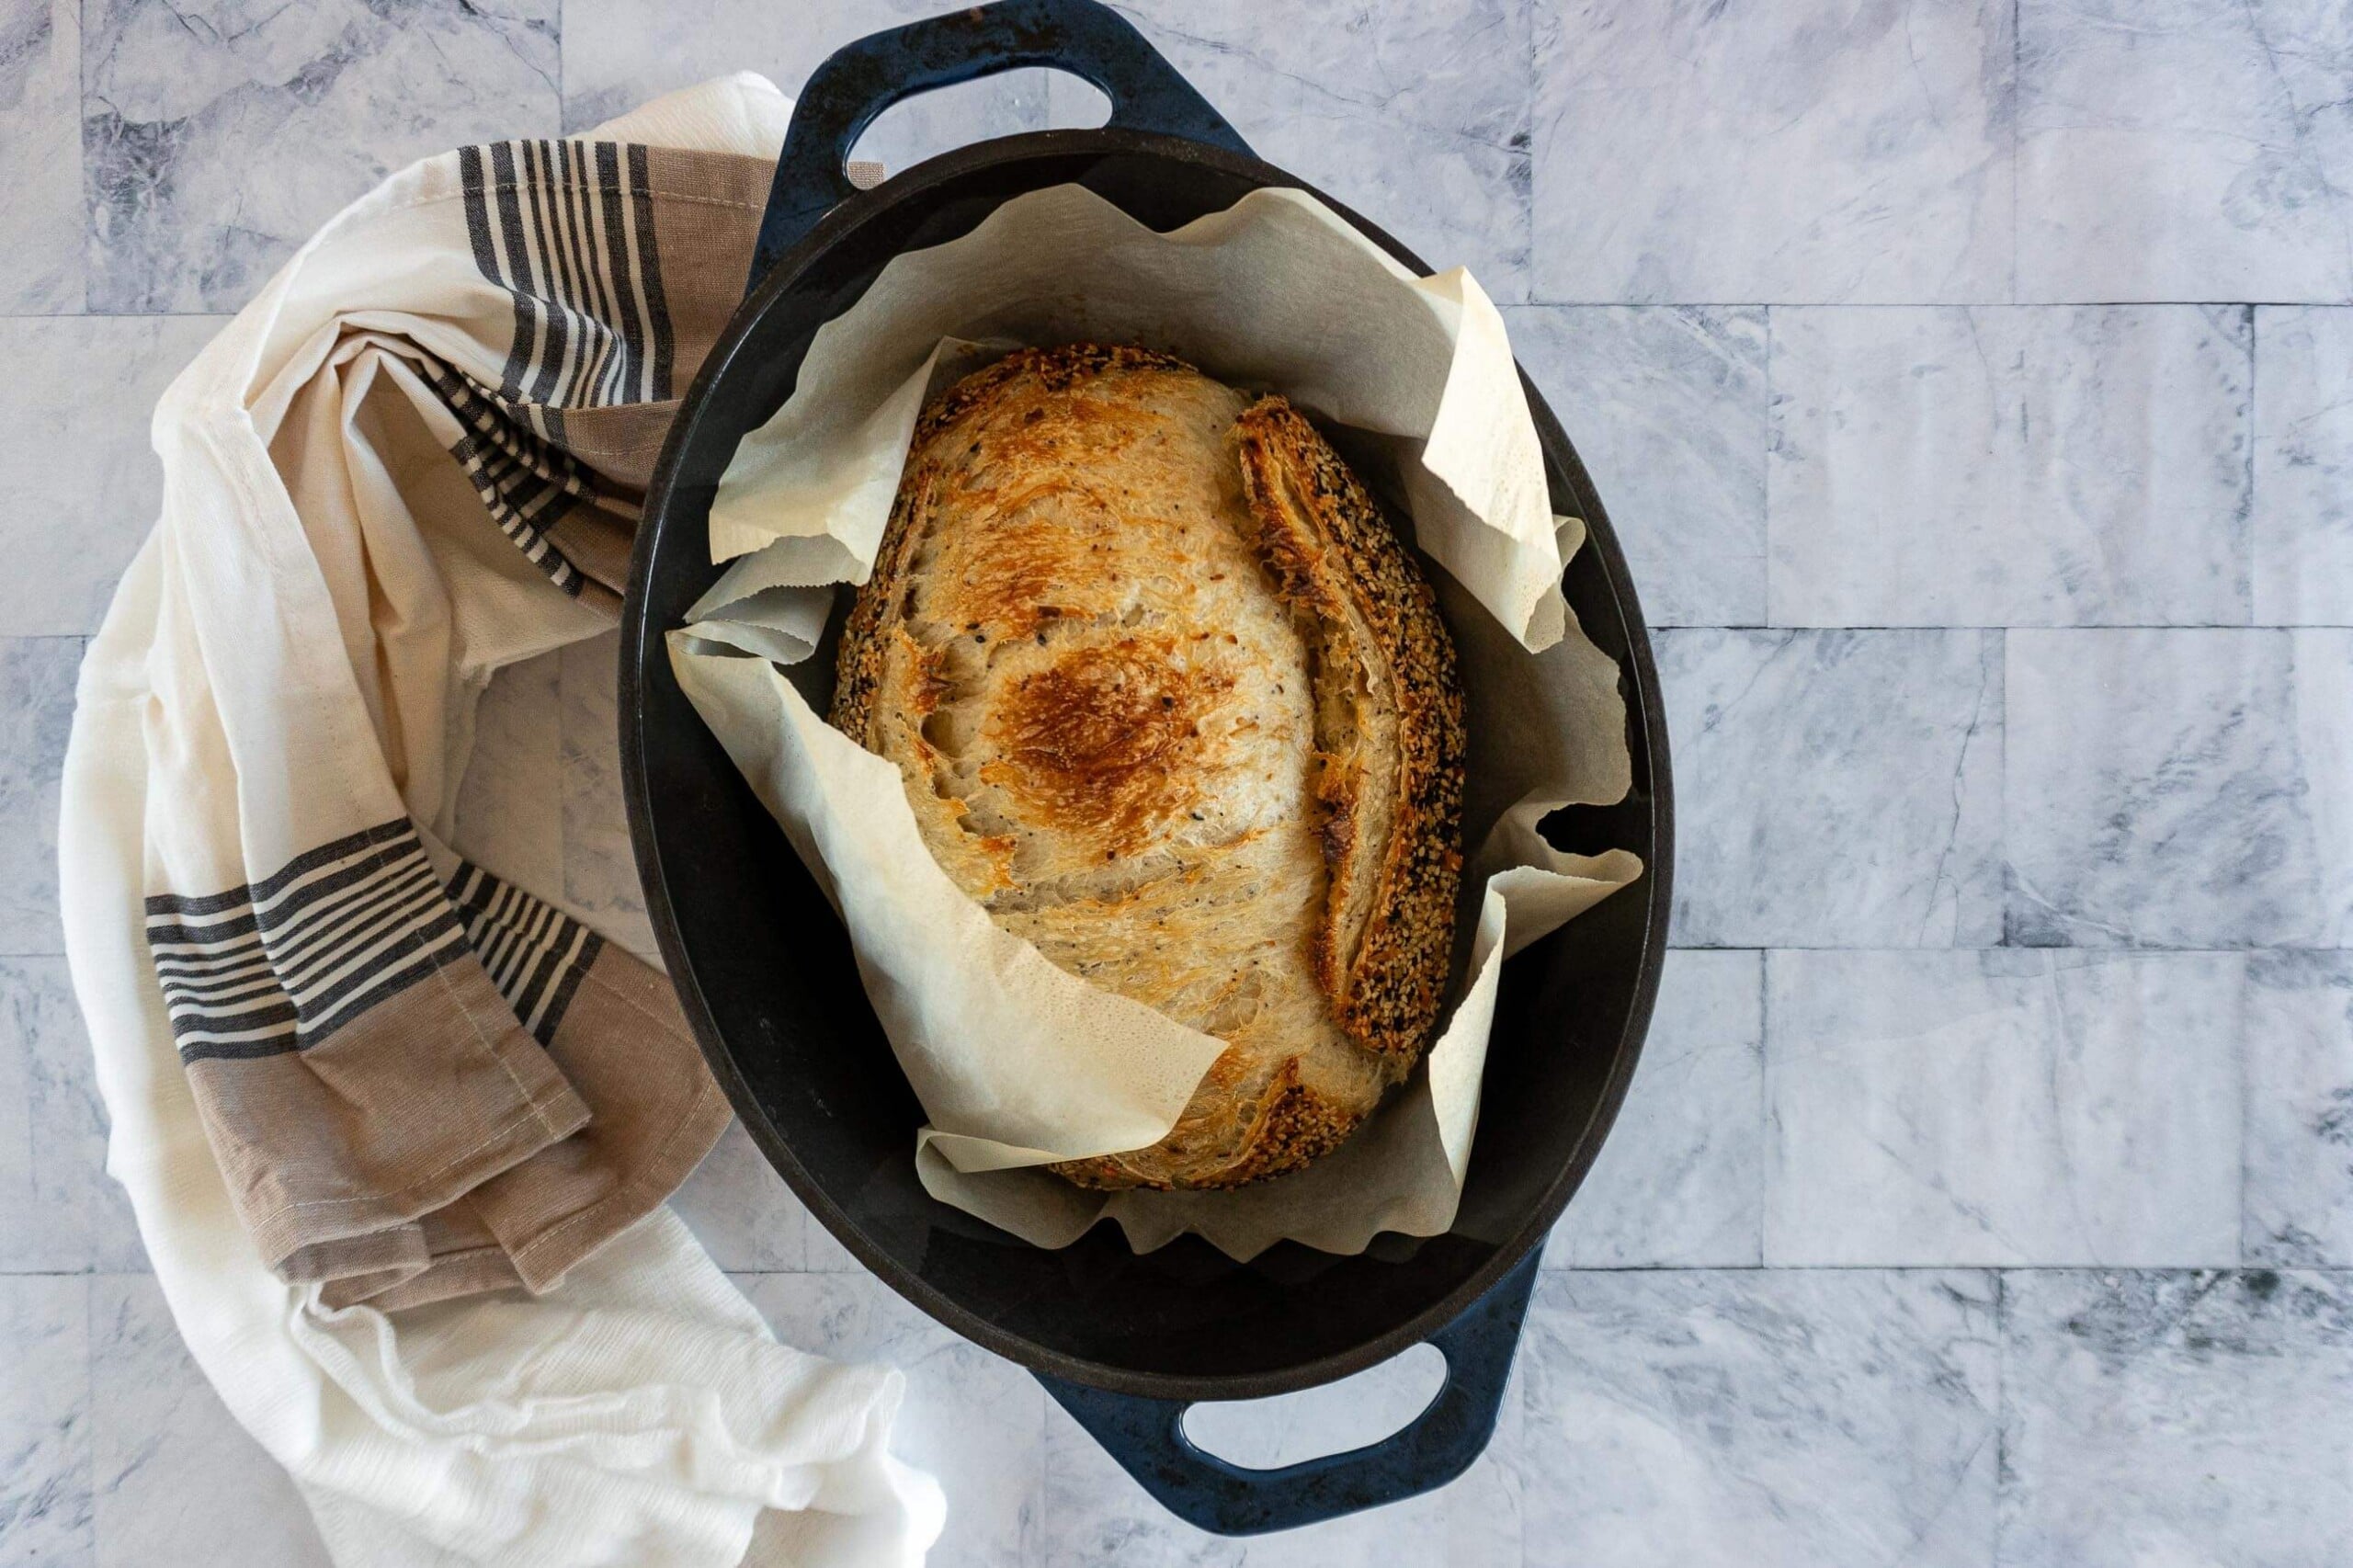
Dutch Oven
A dutch oven is a heavy, lidded pot, often made of cast iron, used to bake sourdough bread.
Dutch ovens are prized by home bakers because they simulate the high-heat, steam-filled environment of a professional bread oven.
The enclosed space traps steam released from the dough, keeping the crust moist and allowing for maximum oven spring during the initial baking phase. The trapped steam helps create a crispy, caramelized crust and a well-risen loaf with an open crumb.
I always place my cast iron dutch ovens in the oven while it preheats. I find I get a better result when the dutch oven is preheated than when it goes into the oven cold.
E
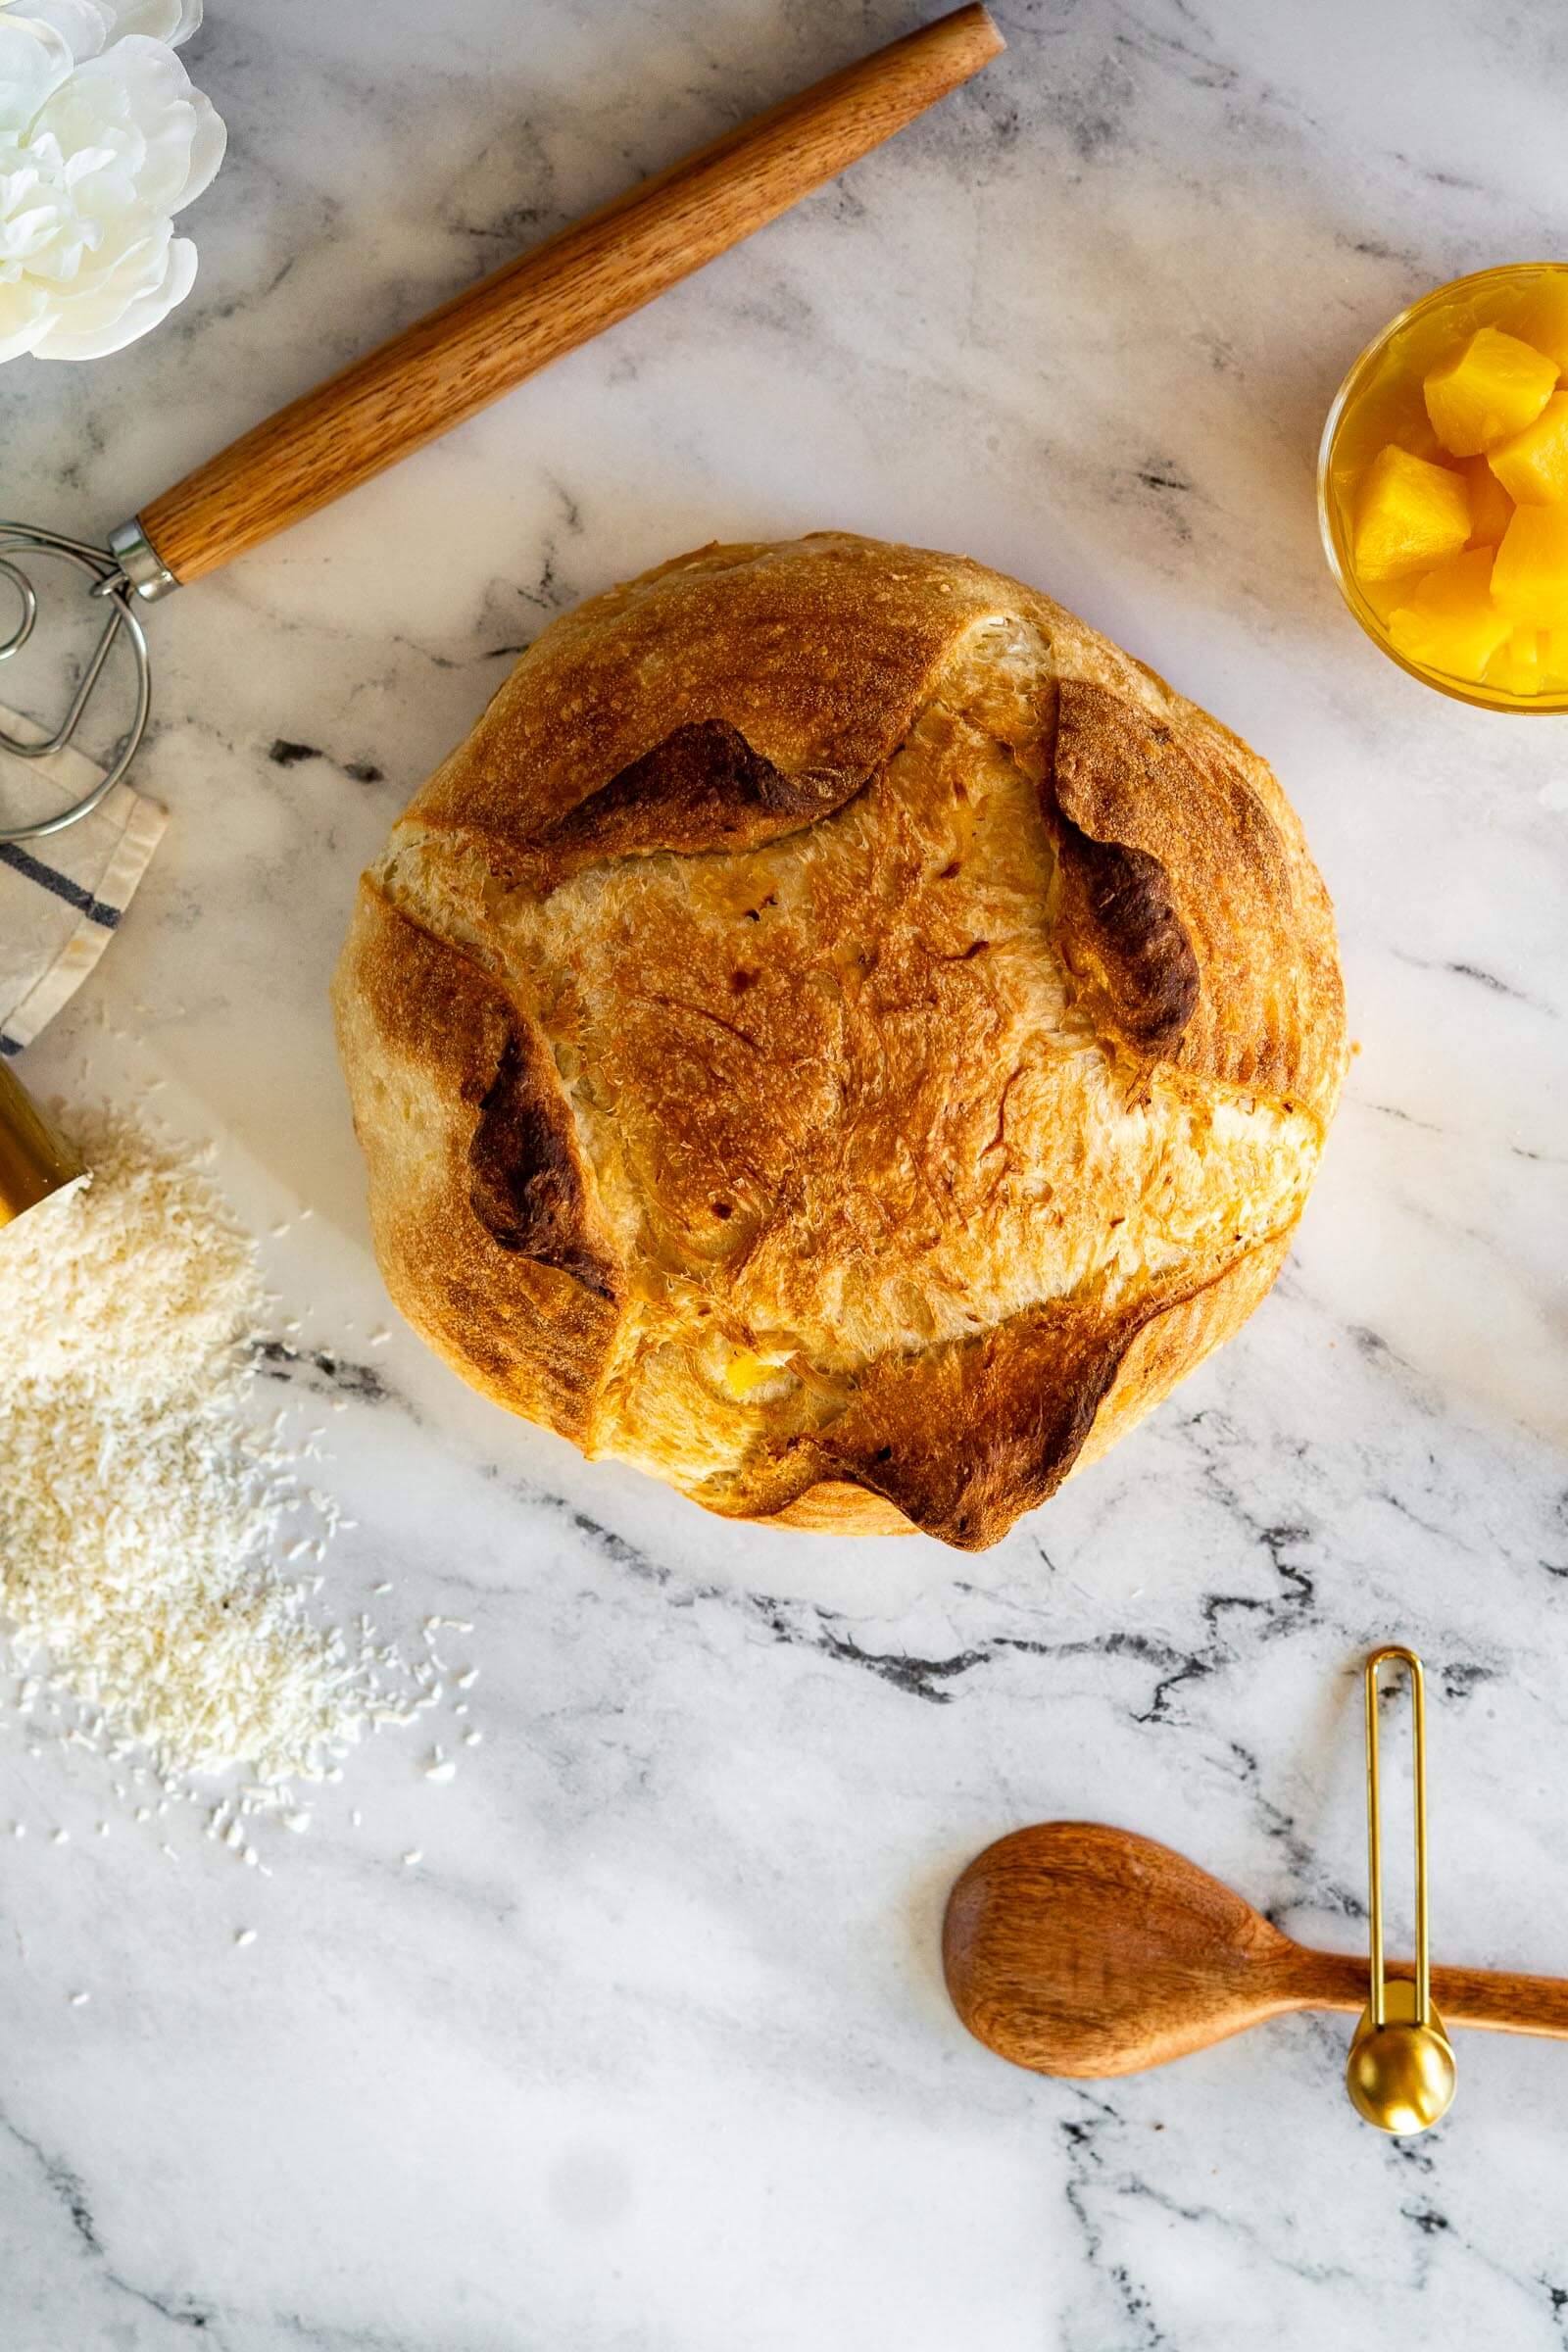
Ear
A sourdough ear is the raised flap that forms along the scored line during baking.
It is created when the dough expands in the oven and the score opens dramatically.
Ears, like bellies, are sought after for their visual appeal and as a sign of good fermentation and proper scoring technique.
Though there are times you might not want an ear, like on softer, less crusty breads or sandwich loaves, where a smooth, uniform crust is preferred for easier slicing and a more tender texture.
Sourdough ears form best when the dough is scored deeply at a 30-45 degree angle, allowing the crust to open up and develop a pronounced, crispy ridge.
Elastic/Extensible
Elasticity and extensibility describe the dough’s ability to stretch and hold its shape without tearing.
Elasticity allows the dough to bounce back, helping it maintain structure during fermentation and shaping. Extensibility allows the dough to stretch easily, accommodating gas expansion for an open, airy crumb.
A balance of both is essential for proper fermentation and oven spring, creating a loaf that's well-risen, with a soft interior and a structured crust. Balanced dough is easier to handle and results in a more desirable texture in the finished bread.
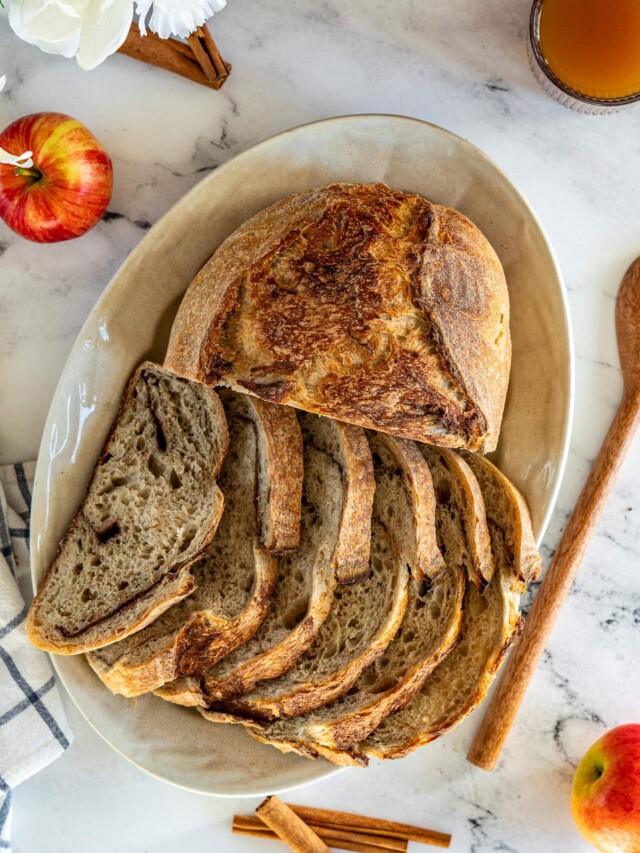
Enriched Dough
Enriched doughs contain added fatty ingredients like butter, milk, eggs, or sugar.
These recipes create softer, richer dough with a tender, pillowy crumb. Enriched doughs are often used for sweeter, softer breads like brioche or sweet rolls rather than rustic sourdough loaves.
Understanding enrichment is important, as it affects fermentation time, dough handling, and the final bread's structure and shelf life.
You can find enriched doughs in my sourdough cinnamon rolls, sourdough hot dog buns, and my double chocolate sourdough babka.

F
Feeding
Feeding refers to the process of adding fresh flour and water to your sourdough starter.
This process provides your starter with the nutrients needed for the wild yeast and bacteria to thrive.
Feeding usually involves discarding a portion of the starter and then mixing in equal parts flour and water. Proper feeding is essential for maintaining a healthy, active starter that can effectively leaven bread naturally and produce good flavor.
Read More: 10 tips for feeding your sourdough!
Fermentolyse
Fermentolyse is a variation of autolyse, where the flour, water, and sourdough starter are mixed together and rested before adding salt.
Unlike traditional autolyse, which includes only flour and water, fermentolyse allows fermentation to begin earlier by including the starter. This technique promotes gluten development while kickstarting fermentation, leading to a dough that's easier to handle and with a well-developed flavor.
I discuss fermentolyse more in depth in this guide to autolyse! Fermentolyse is particularly useful when looking to shorten the overall bulk fermentation time, and I use it more often than not when developing sourdough recipes.
Float Test
The float test is a quick and easy way to check whether sourdough starter is ready to bake with.
To perform the test, simply drop a small amount of sourdough starter in a glass of water, if it floats, it's all good! If it doesn't float, might be time to feed your starter.
The idea behind the float test is once the yeast has activated and started to create bubbles in the starter, the starter will float due to added buoyancy from the trapped air.
There's a lot of talk about the float test on the internet. Some swear that it's a great way to test the viability of your starter for use in bread making, others say it doesn't matter.
Personally, I think it makes sense, but I don’t use the float test. I prefer to rely on visual cues given by my starter; and to pick up the container. If my starter container seems lighter than it should based on the starter’s volume, I know I’m good to go.
Formula
A formula is the precise recipe written using baker’s percentages.
Unlike casual recipes, a formula includes specific ratios for flour, water, starter, and salt, allowing bakers to replicate and adjust the dough consistently.
This structured approach is essential for sourdough baking, where small changes in hydration, fermentation time, or ingredient proportions can significantly affect the final loaf’s texture, flavor, and structure.
Formula is just another way to refer to a recipe that’s been expressed in Baker’s Math.
Read More: Baker’s Math 101

G
Gluten
Gluten is a network of proteins (glutenin and gliadin) that form when flour is mixed with water.
Gluten gives dough its structure, elasticity, and strength, allowing it to trap gas produced during fermentation.
Well-developed gluten strands are crucial for sourdough, as they support a good rise, create an open crumb, and help achieve a chewy texture.
Techniques like stretching and folding during bulk fermentation help strengthen gluten in sourdough dough, even with minimal kneading.
You can feel gluten developing as you progress through the stretch and folds, the dough will become more and more elastic and less likely to tear.
H
Hooch
Hooch is the liquid that sometimes forms on the top of sourdough starter when it hasn’t been fed recently.
It's usually gray or brown and is produced as a fermentation byproduct.
Hooch is a sign that the starter is hungry and needs to be fed. While it can be stirred back in for a slightly more sour flavor, some bakers prefer to pour it off to keep the starter's taste balanced.
Is your sourdough looking sad and hoochy? I’ll teach you how to revive your sourdough starter!
Hydration
Hydration is the ratio of water to flour in bread dough, expressed as a percentage.
A dough’s hydration directly affects its texture and crumb. For example:
- Low hydration (60-70%) results in a firmer dough that's easier to handle, producing a tighter crumb with smaller, more even holes. This is ideal for sandwich loaves and less open-crumb breads.
- High hydration (75% and above) creates a wetter, stickier dough that's more challenging to work with but leads to an open crumb with large, irregular holes and a moist, chewy texture. High-hydration doughs are prized for rustic, artisan-style sourdough loaves.
As a beginner, I found lower hydration doughs much easier to work with and more forgiving, but as my sourdough journey continues, I prefer working with higher hydration doughs.
Learn more: sourdough hydration explained.
I
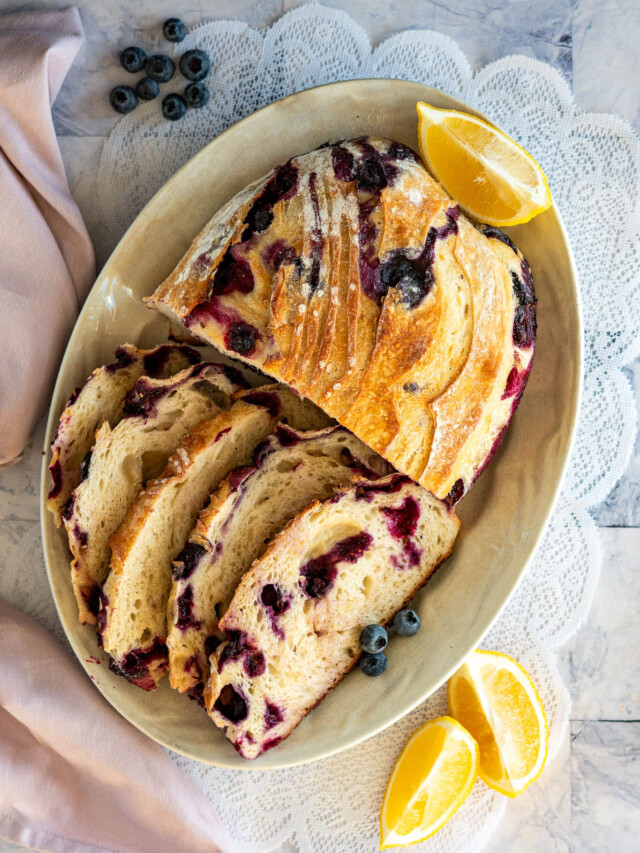
Inclusions
Inclusions are any ingredients added to sourdough beyond the basic formula of flour, water, starter, and salt.
Think cheese, jalapeños, dried fruit, nuts, herbs, chocolate chips, or olives.
Inclusions are typically added during lamination or during the stretch-and-fold stage so they distribute evenly without tearing the gluten structure.
The key thing to watch with inclusions is moisture, wet ingredients like olives or sun-dried tomatoes in oil should be patted dry before adding, or they’ll introduce unexpected hydration and throw off your bulk fermentation timing.
I am mildly obsessed with inclusions. They’re one of the easiest ways to turn a basic sourdough into something amazing.

K
Kahm Yeast
Kahm yeast is a harmless but unpleasant yeast that sometimes forms on ferments.
If you notice a white film forming on the surface of your starter that looks wrinkled or ramen noodle like, it’s probably kahm yeast- which is generally harmless but tastes terrible.
The presence of kahm yeast will probably affect the outcome of your ferment. While it may be tempting to try and salvage, it's generally not worth the risk. Starting over may seem like a pain, but it's better than ending up with a batch that has poor flavor or outcomes.
Though some people say you can scrape it off and continue, I prefer to scrap ferments when kahm yeast gets involved. If you decide to start over, you can always revive unfed starter or discard from the back of the fridge or from your dehydrated starter.
How to tell if your sourdough starter has gone bad!
Kneading
Kneading is the process of working the dough to develop gluten structure.
Sourdough baking requires less intensive kneading due to techniques like autolyse and long bulk fermentation, which naturally strengthen the gluten. Proper gluten development through gentle kneading or folding allows the dough to trap gas, resulting in a well-risen loaf with a desirable crumb structure.
Instead of actual kneading, all of my sourdough recipes rely exclusively on stretch and folds or coil folds during the bulk fermentation.
L
Lactic Acid
Lactic Acid is another natural acid produced during sourdough fermentation.
It is produced by lactic acid bacteria (LAB) in the starter and helps give sourdough its mild tanginess and contributes to a balanced, complex flavor profile. Lactic acid helps strengthen the dough structure and improves its keeping quality by creating an acidic environment that slows spoilage and inhibits mold growth.
Its presence, along with acetic acid, defines the sourdough's characteristic flavor.
Lactic acid also plays a big role in my other fermentation recipes, like my dill pickle hot sauce, half sour pickles, and lacto-fermented salsa!
Lame
A lame (pronounced “lahm”) is a sharp knife or blade used to score or cut the dough before baking.
A lame is generally a handle with a thin, sharp razor blade.
Using a lame to score loaves allows bakers to control where the bread expands during baking to improve the shape of the loaf and enhance oven spring.
While other sharp instruments, like knives and scissors, can be used, a lame is preferred for its ability to make clean, precise cuts.
My favorite lame is the “UFO” style for precise control, but I do keep a long handled lame for larger loaves.

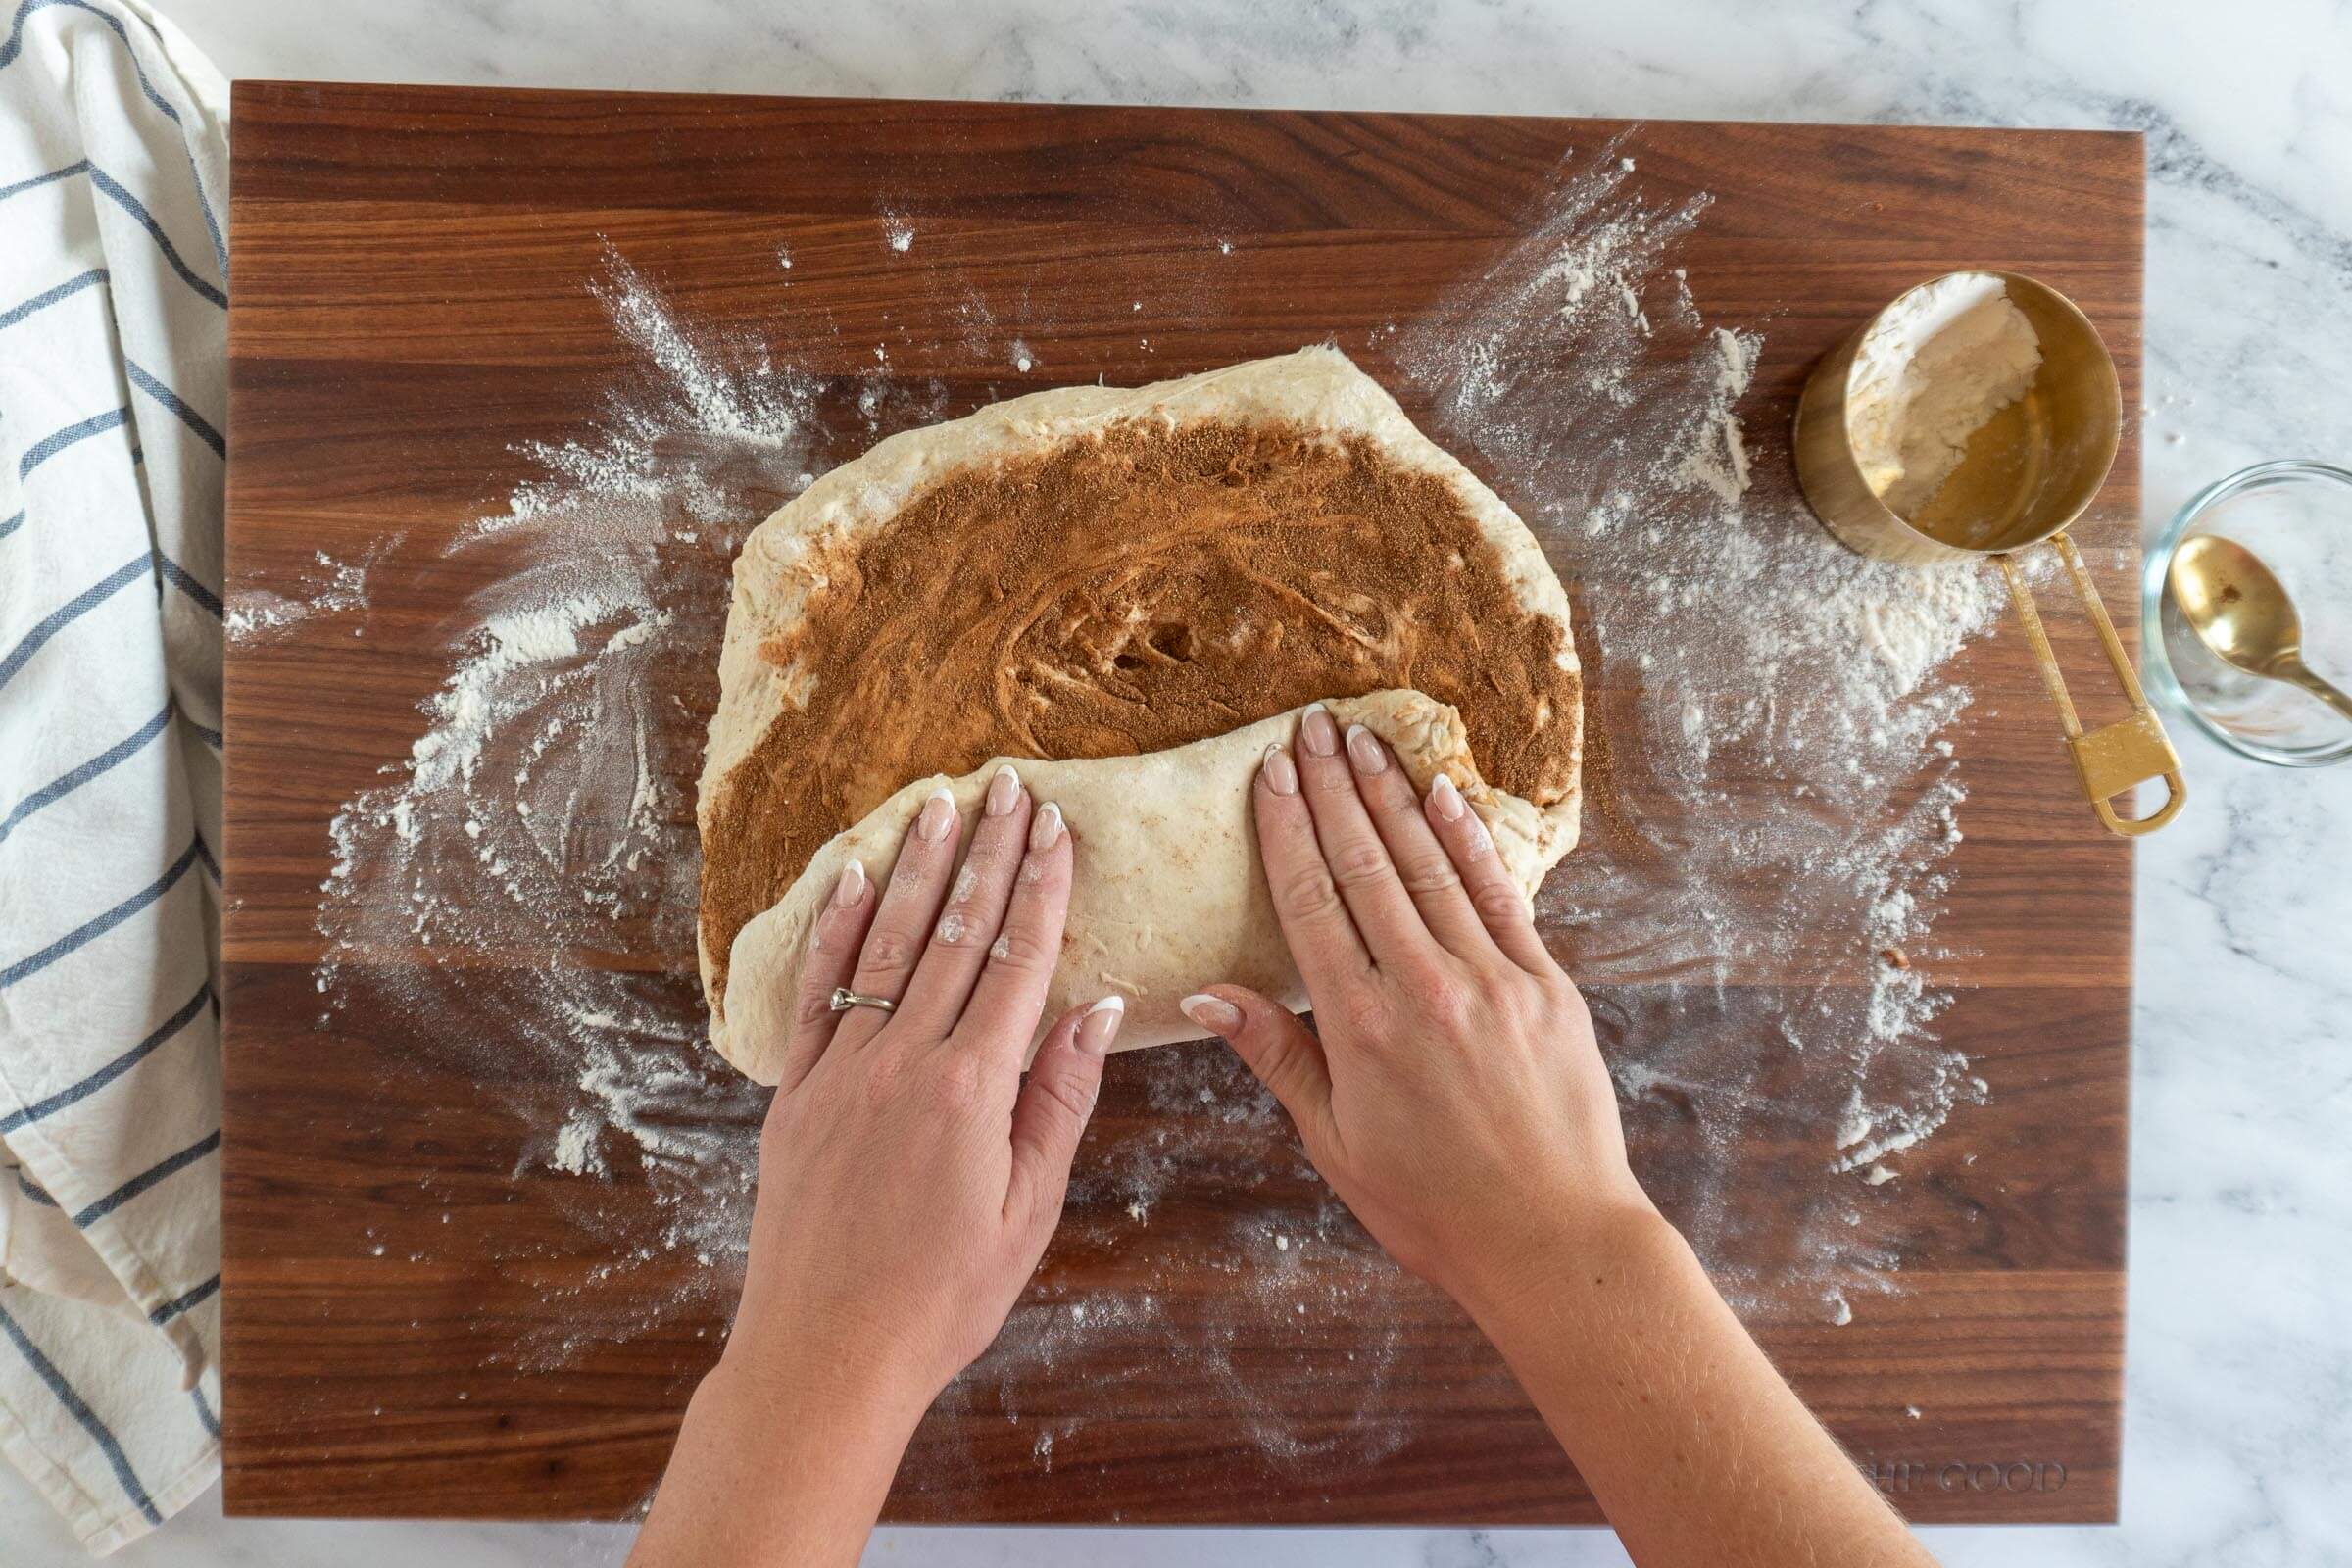
Lamination
Lamination is a sourdough technique used to incorporate inclusions into the dough.
During lamination, you stretch the dough into a thin sheet then spread or scatter the inclusions along the surface, and then fold the dough over to encase them.
This technique ensures that the inclusions are evenly distributed throughout the dough, creating layers that enhance the texture and flavor of the final loaf.
There are 2 main ways to add inclusions to sourdough, during lamination or during stretch and folds. I find it depends what inclusions I’m using on how I choose to add them. Chunky things are better added during stretch and folds, while ribbons of seasonings work great during lamination.
Levain
Levain is a preferment made from sourdough starter, flour, and water.
This helps to create a more active culture used for leavening the dough. This pre-fermented mixture is allowed to ferment for several hours before being incorporated into the main dough.
I don’t use the levain method when baking sourdough, but rather prefer to feed the sourdough mother and use a portion of that in my dough.
M
Mother
The mother is the main sourdough starter culture that is maintained over time.
It is the foundational culture from which all sourdough products are made, contributing to the distinctive tangy flavor and texture characteristic of sourdough loaves.
This starter contains a stable colony of wild yeast and bacteria and serves as the source for creating levain.
You can bake directly from the mother sourdough starter without using a levain or preferment. This is generally what I do!
O
Open Bake
Open baking refers to baking bread without the enclosed environment of a dutch oven.
Instead, bread is baked directly on a baking stone or baking steel in an open oven.
This allows for greater air circulation and can produce a different, often darker, crust texture and color. Open baking can yield loaves with a more pronounced ear and a crispier crust.
I lean into open baking when I have a loaf that won’t fit into one of my dutch ovens or when I’m baking multiple loaves in a day, as I can fit 2 loaves on my baking steel!
Learn more about open baking your sourdough!
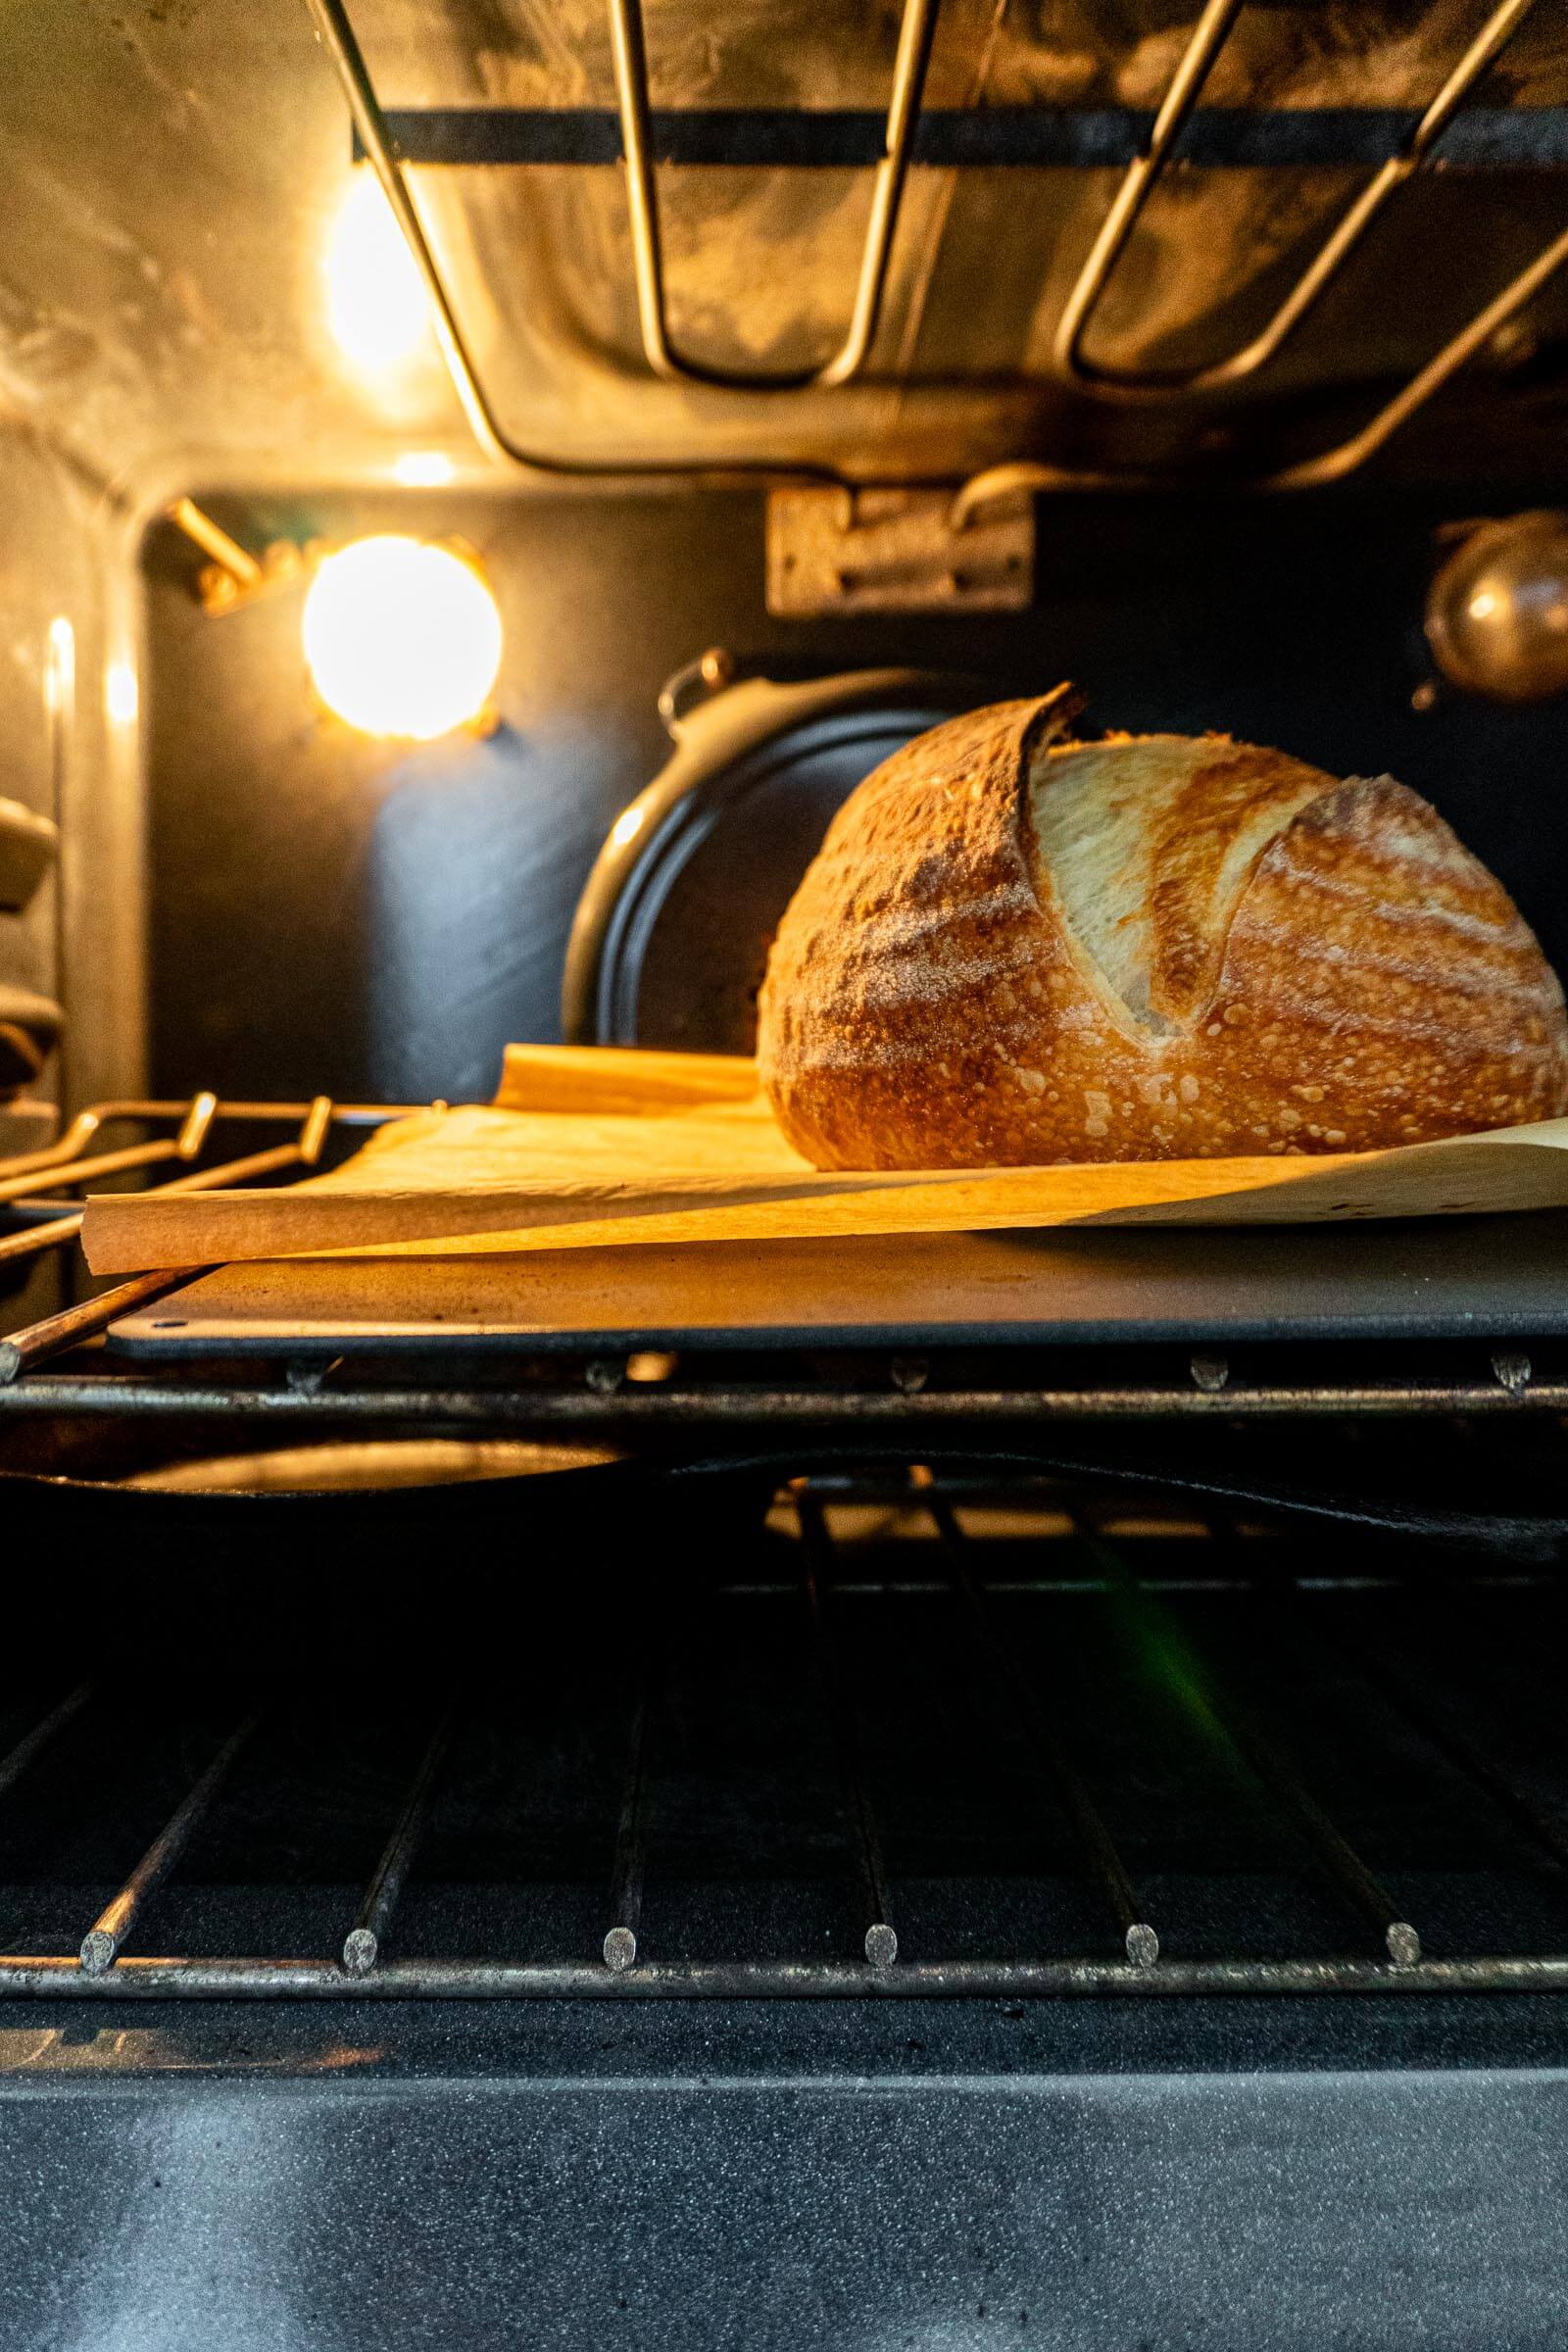
Oven Spring
Oven spring is the rapid rise of bread dough that occurs during the first few minutes of baking.
Heat causes the CO₂ trapped in the gluten network to expand. The moisture in the dough turns to steam and creates additional lift. The yeast go into a final burst of fermentation activity, meanwhile, the steam from the Dutch oven (or open oven steam setup) keeps the crust soft and extensible long enough for all this expansion to occur.
Once the surface temperature rises enough to begin the crust, expansion stops.
What produces maximum oven spring:
- Properly fermented dough: not over-proofed (where the gluten structure has weakened from excess acid) and not under-proofed (where there isn’t enough gas development)
- A well-developed gluten network strong enough to contain the expanding gas
- Steam during the first phase of baking (the lid on your Dutch oven, a pan of water in the oven, or a covered baker)
- A fully preheated oven and vessel

P
Peel
A peel is a flat tool used to transfer bread into and out of the oven.
Peels are usually made of wood or metal and help bakers to easily slide dough onto a baking stone or directly onto the oven rack.
I have 2 aluminum peels, one large 14″ pizza peel with a long wooden handle, and one smaller 8″ wide peel with a shorter handle. I use them both quite often in my sourdough baking!
Poke Test
The poke test helps to determine if your dough is properly proofed.
To perform the poke test, gently press a finger into the surface of the dough:
- if the indentation springs back slowly and leaves a slight impression, the dough is properly proofed and ready to bake.
- if it bounces back quickly, it may need more time to rise.
- if the indentation remains and does not spring back, the dough may be over-proofed
As a new sourdough baker, I used the poke test often, but as my experience improved, I no longer need the poke test as my ability to read the dough has improved.
Preferment
A preferment is any portion of dough or starter that is fermented before being added to the main dough. Levain, poolish, and biga are all examples of preferments.
The purpose of a preferment is to develop flavor and fermentation activity ahead of the main mix, giving the final dough a head start. In sourdough baking, the levain is the most common preferment.
I skip the preferment step in most of my recipes and bake directly from my mother starter instead. It’s one less step, and for home bakers making one or two loaves at a time, I find the results are just as good.
Pre-Shape
Pre-shape refers to the first shaping of the dough after bulk fermentation.
During pre-shaping, the dough is gently turned out onto a lightly floured surface and formed into a loose boule or batard, depending on the final desired loaf shape.
Pre-shaping helps to create surface tension, which is crucial for achieving a good rise and oven spring.
After pre-shaping, the dough is typically allowed to rest for a short bench rest before the final shaping.
My sourdough results really improved once I realized how important the pre-shape is to the baking process.
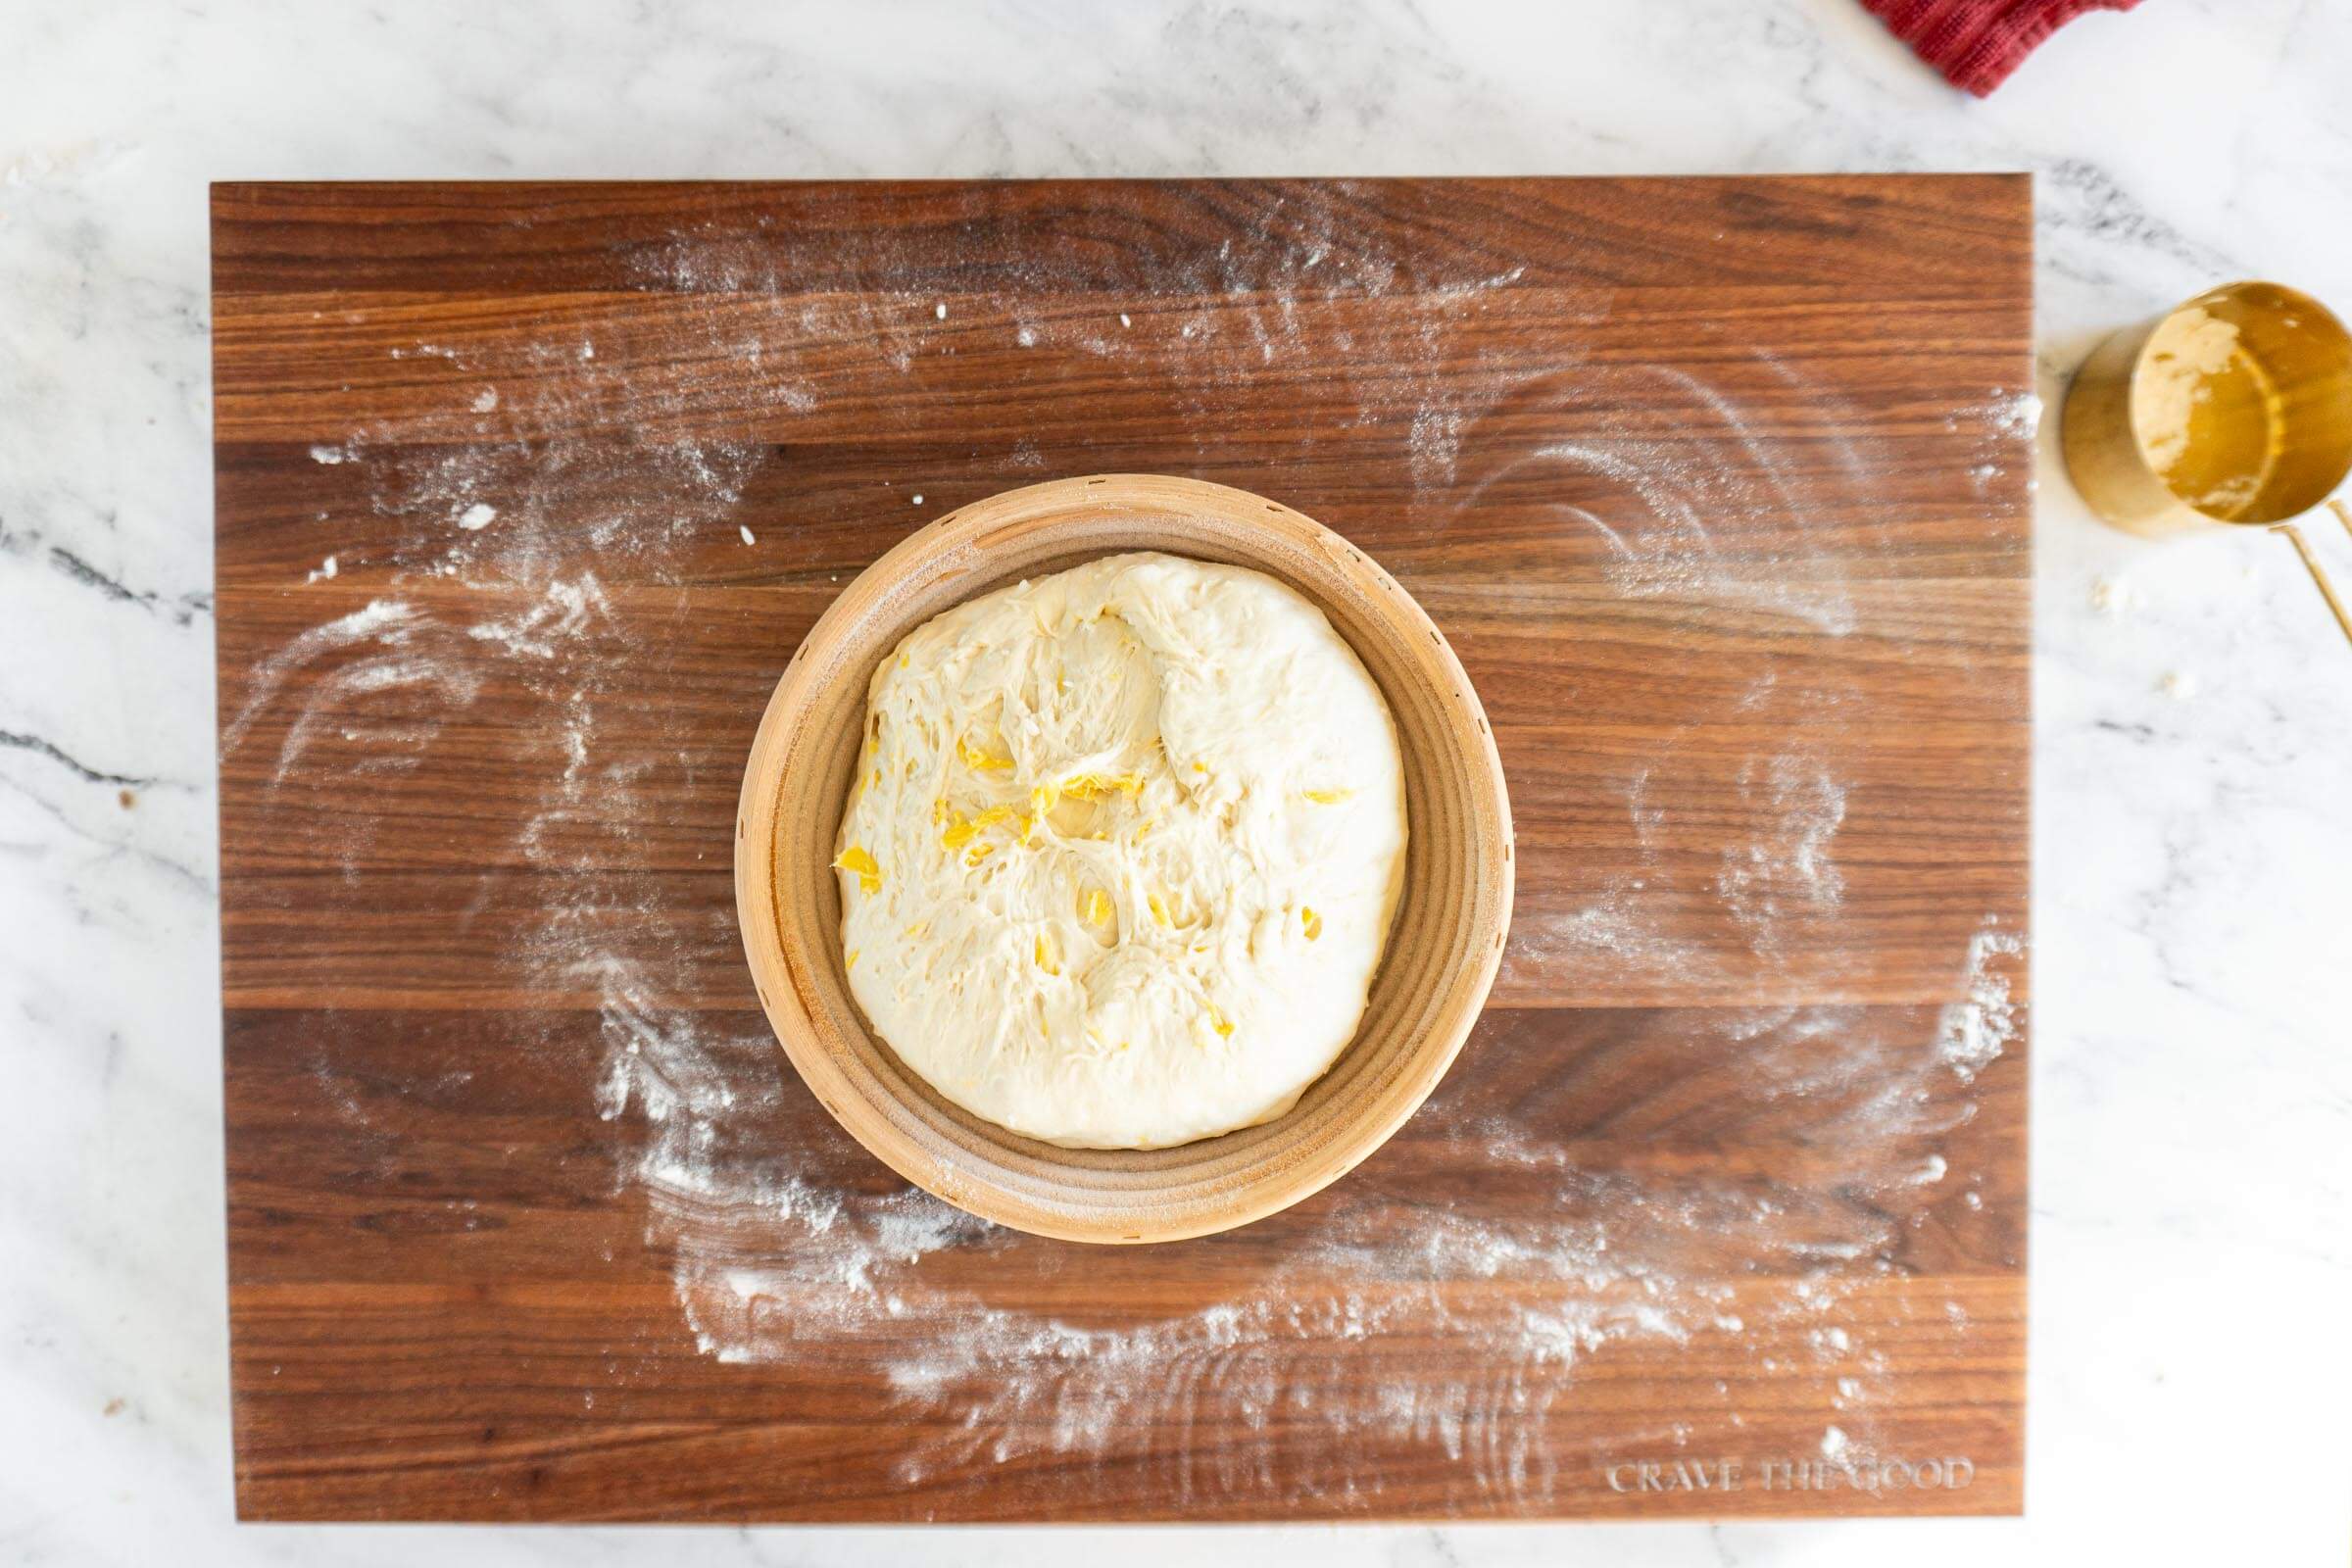
Proof
Proofing is the final rise of the dough before baking.
Proper proofing gives sourdough its airy texture and is usually done in a banneton or proofing basket to encourage the loaf to maintain it’s shape.
This stage allows the yeast to continue fermenting, producing carbon dioxide that causes the dough to expand and develop its structure. Proofing can vary in time and temperature, influencing the flavor and texture of the final loaf.
Over-proofing can lead to a collapsed loaf, while under-proofing may result in a dense texture.
Most of my recipes call for a hybrid of room temperature proofing and a cold proof in the fridge. I find this gives the best results!

R
Ripe
Ripe refers to sourdough starter or levain that has fully fermented and is ready to use.
A ripe starter or levain is typically bubbly, active, and has a slightly tangy aroma. It has reached its peak of fermentation, meaning it has enough yeast and bacteria to properly leaven the dough.
Using a ripe starter ensures that the dough will rise effectively and develop the desired texture and flavor during baking.
I generally choose to call it active starter versus ripe starter.
S
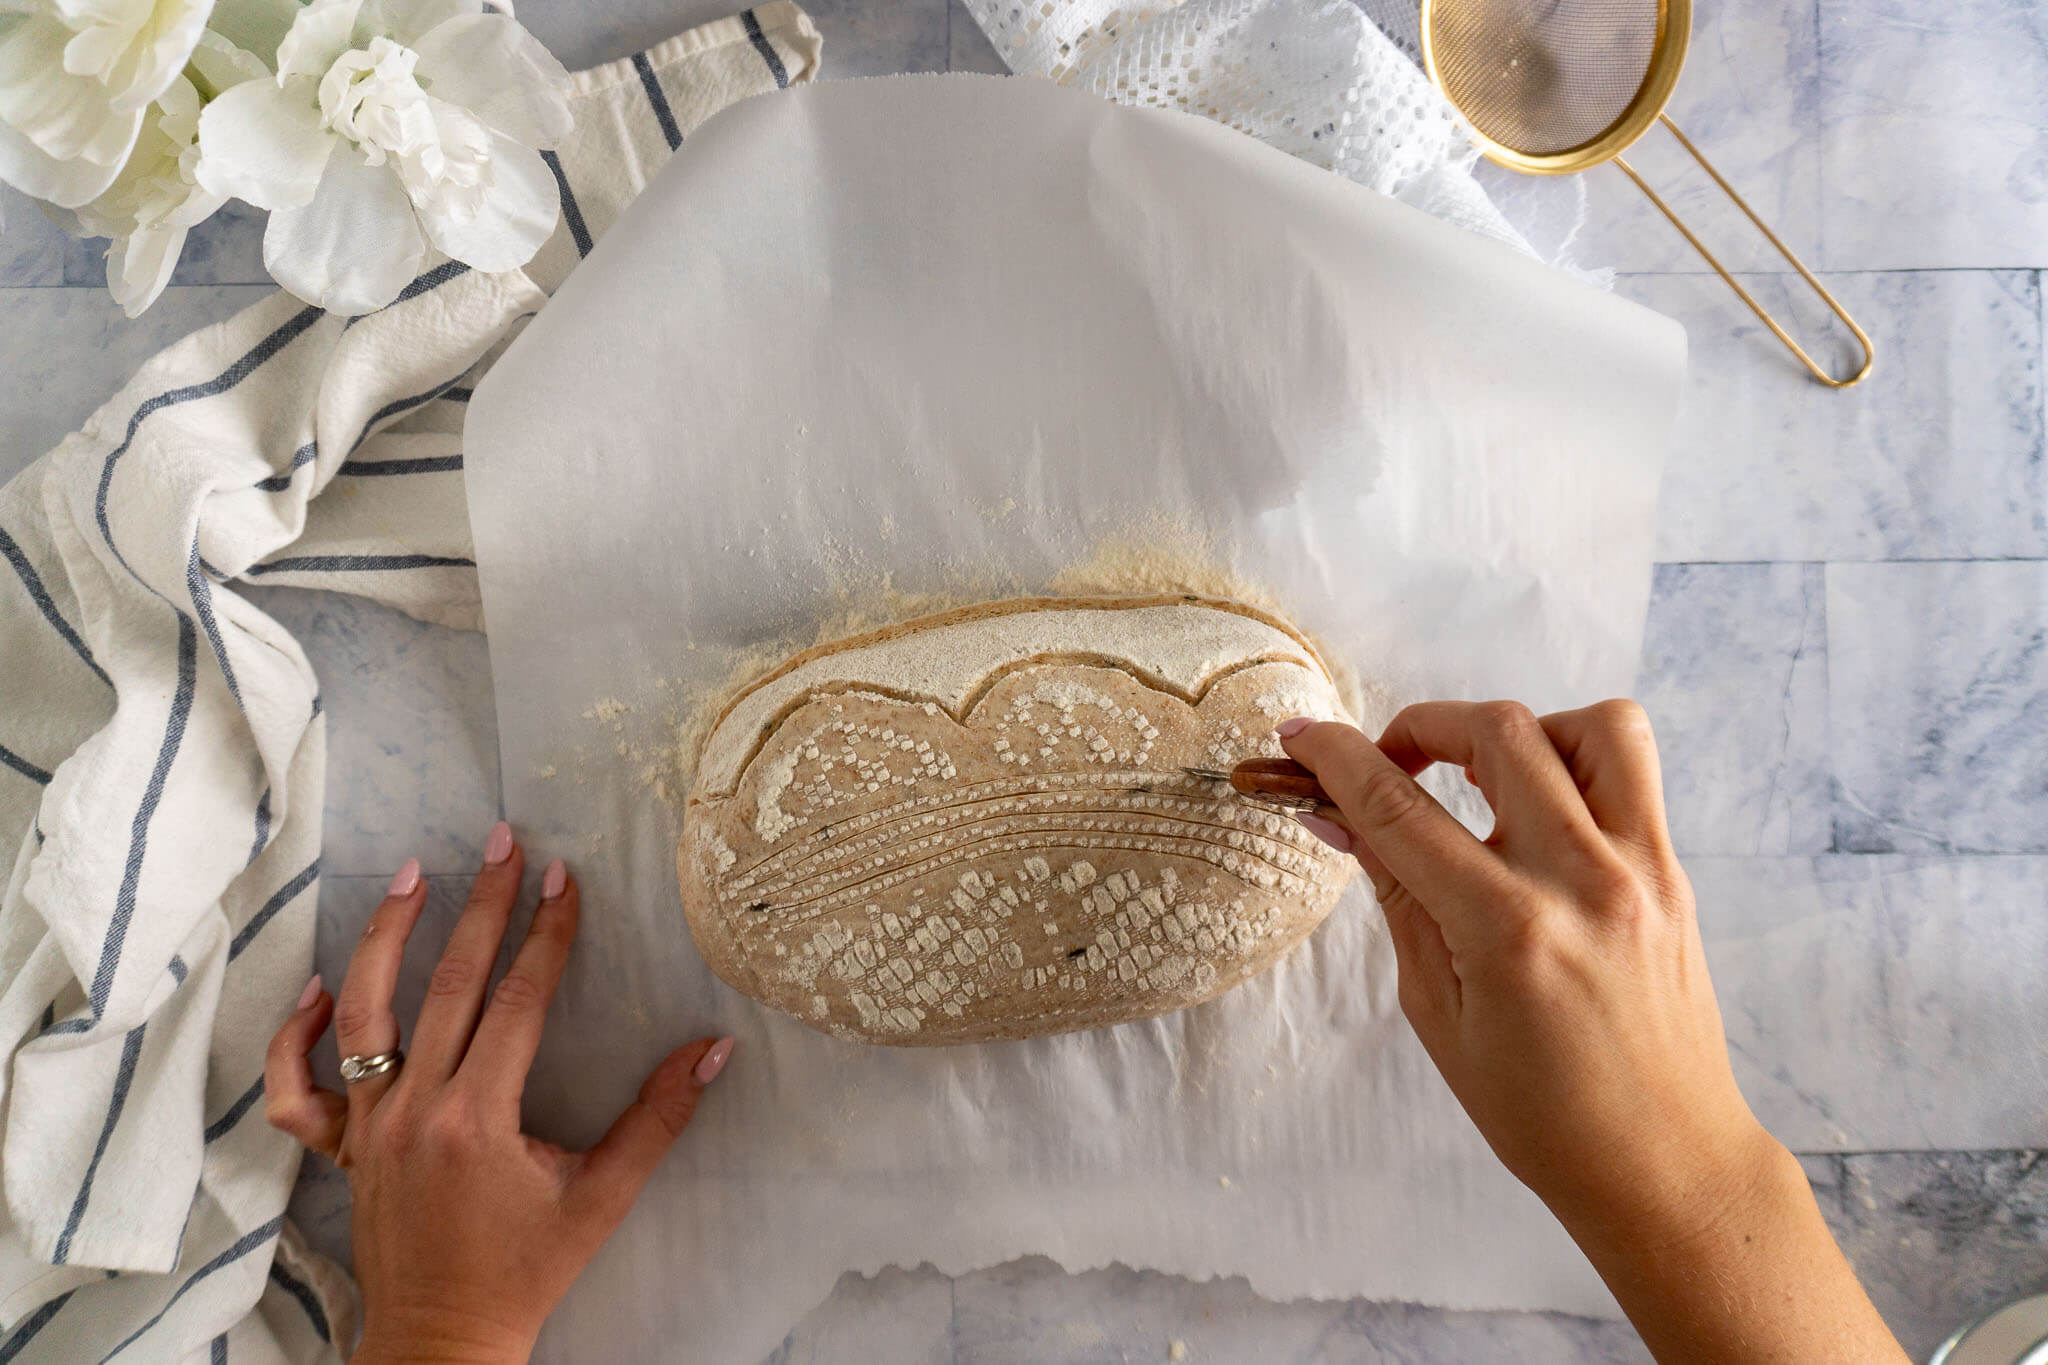
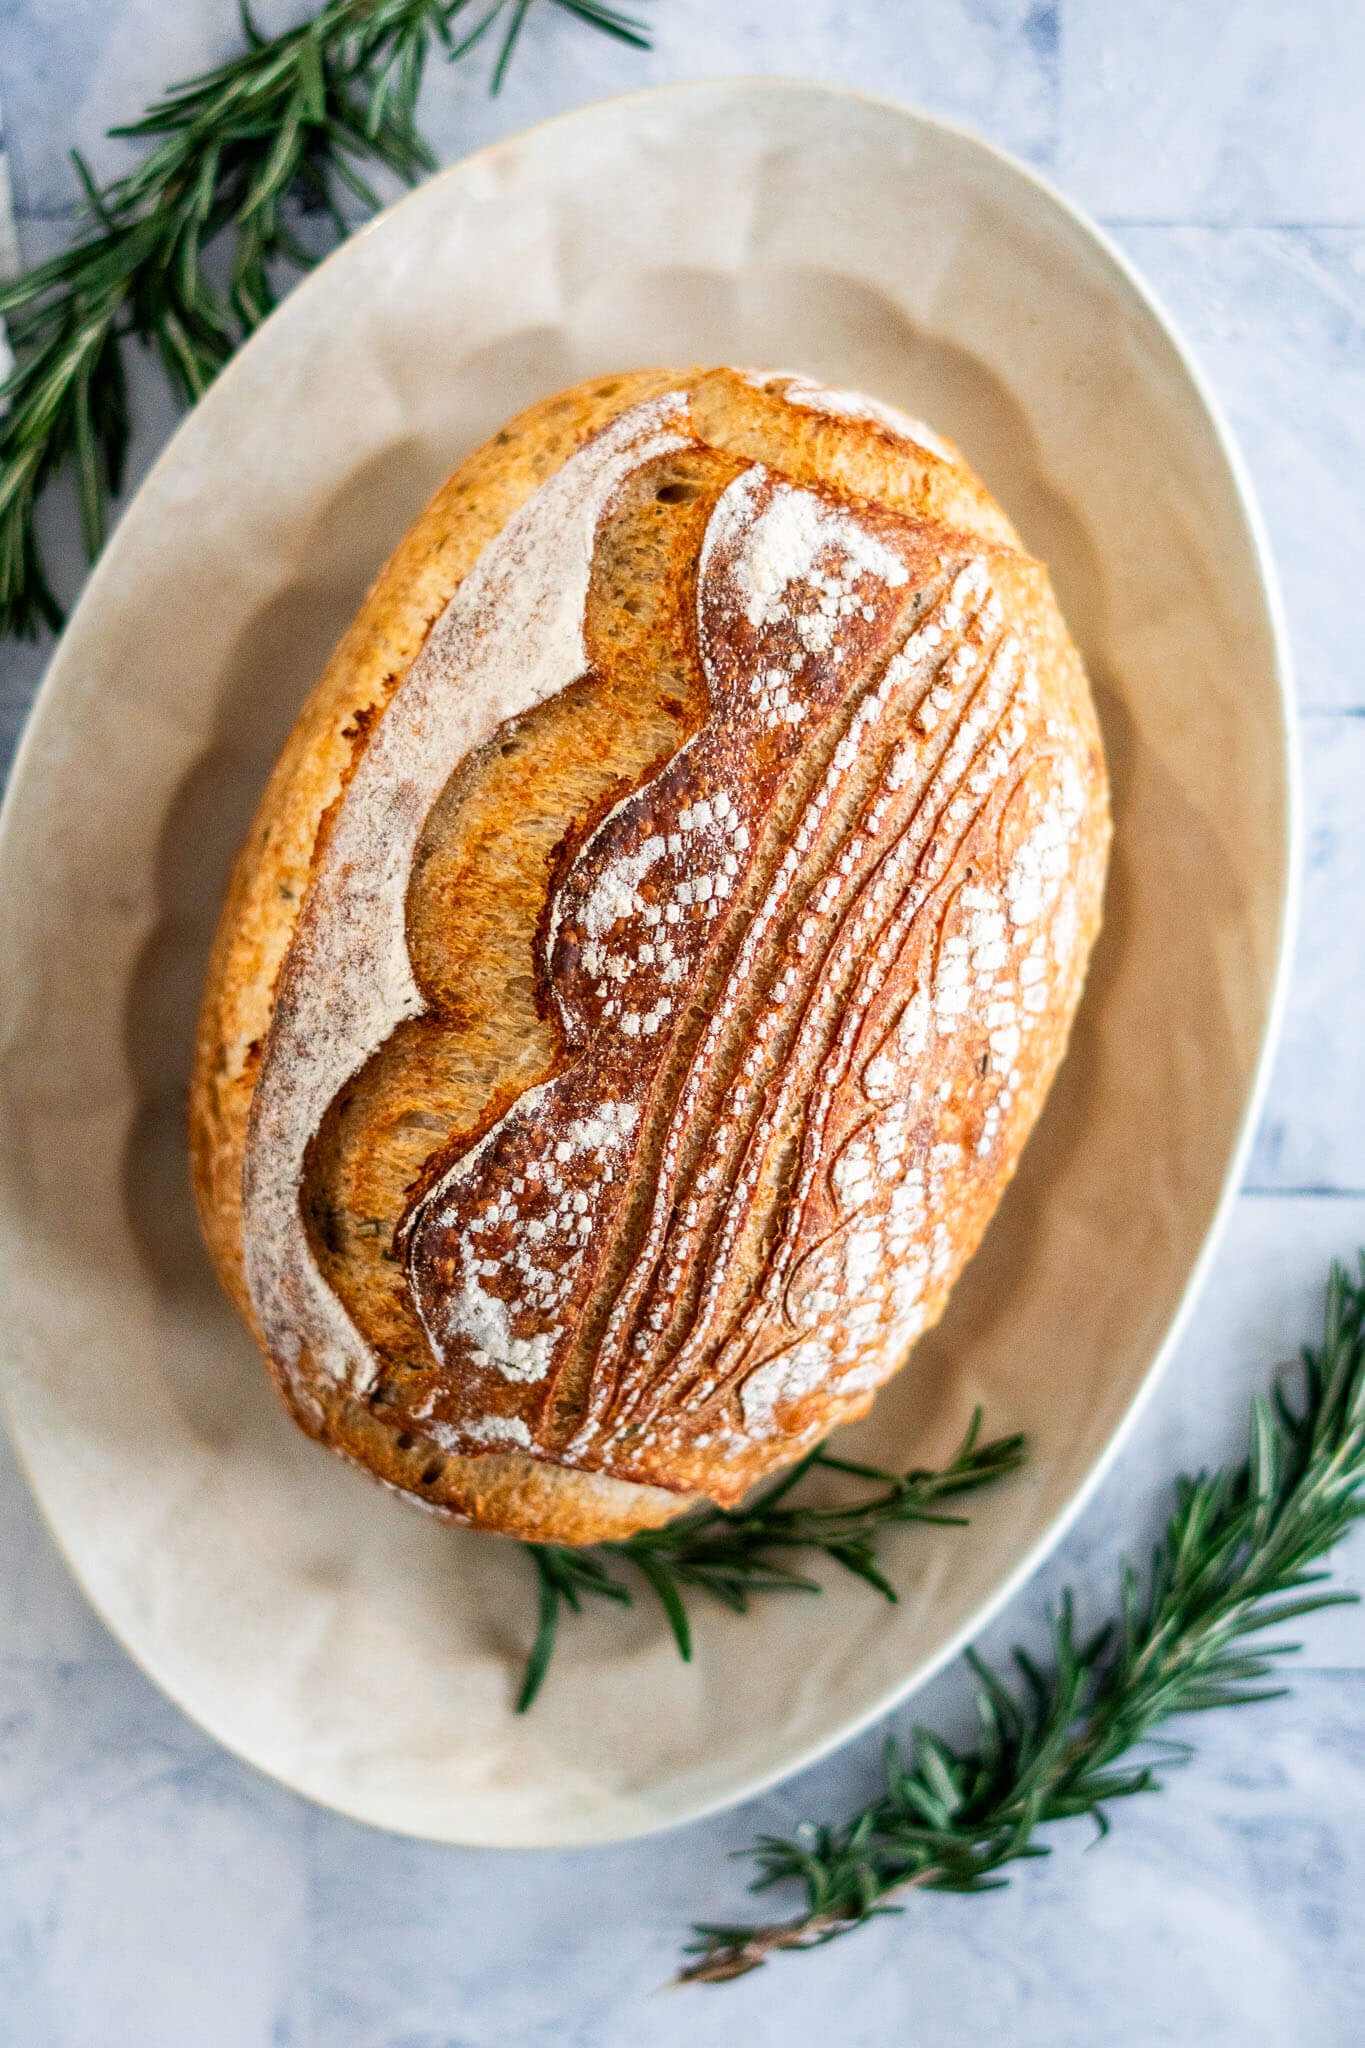
Score
Scoring is the process of making cuts on the surface of the dough just before baking.
Scoring serves multiple purposes, including controlling the dough's expansion during baking, enhancing its appearance, and allowing it to rise properly in the oven.
Expansion/Relief Scoring: This type of scoring is functional, designed to control where the dough will expand during baking. The cuts direct the flow of the dough’s rise, helping to prevent uncontrolled bursting and promoting an even oven spring. These scores are typically more functional and simple.
Artistic/Decorative Scoring: This type of scoring focuses on aesthetics, where bakers create intricate, visually pleasing patterns on the surface of the dough. Common designs include geometric patterns, spirals, or flowers. While these scores can also help with expansion, the primary goal is to enhance the loaf’s visual appeal.
I have a guide on using a doily to decorate your sourdough loaf!
Seam
The seam is the closure point at the bottom of a shaped sourdough loaf.
When placing shaped dough into a banneton, the seam goes face-up so that it ends up on the bottom of the loaf when it’s flipped out for scoring and baking. A tight, well-sealed seam helps the loaf hold its shape during the final proof and prevents it from splitting along the bottom rather than along your score lines during baking.
Not all seams are pretty, but they all smooth out after the proof!

Second Rise
Second rise in sourdough baking refers to the final proofing stage that occurs after the dough has been shaped.
Sourdough bakers generally refer to this as proofing.
Once the dough is shaped into its final form (such as a boule or batard), it undergoes a second rise. This stage allows the dough to expand further as the yeast continues to work, contributing to the final texture and volume of the bread. The second rise is crucial for achieving a light, airy crumb and ensuring proper oven spring during baking.
Proper timing is essential – overproofing can lead to a collapsed loaf, while underproofing can result in a dense texture.
In this glossary and across all my recipes, I use the word proof instead of second rise, but you’ll see both terms used interchangeably across the internet and in cookbooks.
Shape
Shaping refers to the process of forming the dough into its final loaf structure.
Shaping builds surface tension, which supports the dough during fermentation and contributes to the loaf's final structure and appearance.
The shaping process can affect the crumb texture, crust, and overall presentation of the bread. Proper shaping also helps with achieving an even rise and good oven spring, ensuring a well-formed and aesthetically pleasing loaf.
Common shapes for sourdough include boules and batards.
I almost always pre-shape all of my loaves into a rough batard or log regardless of the final loaf shape because I feel that I can get the best surface tension that way!
Slack Dough
Slack dough is dough that feels very soft, loose, and difficult to handle.
High-hydration sourdough is inherently slack, especially early in the bulk fermentation before the gluten has had time to develop. Techniques like coil folds, stretch and folds, and a cold retard all help build structure in dough that would otherwise be unworkable.
If your dough feels impossibly sticky and shapeless, it’s almost certainly slack… not ruined. Don’t add more flour. Give it time, cold, and a few more folds instead.
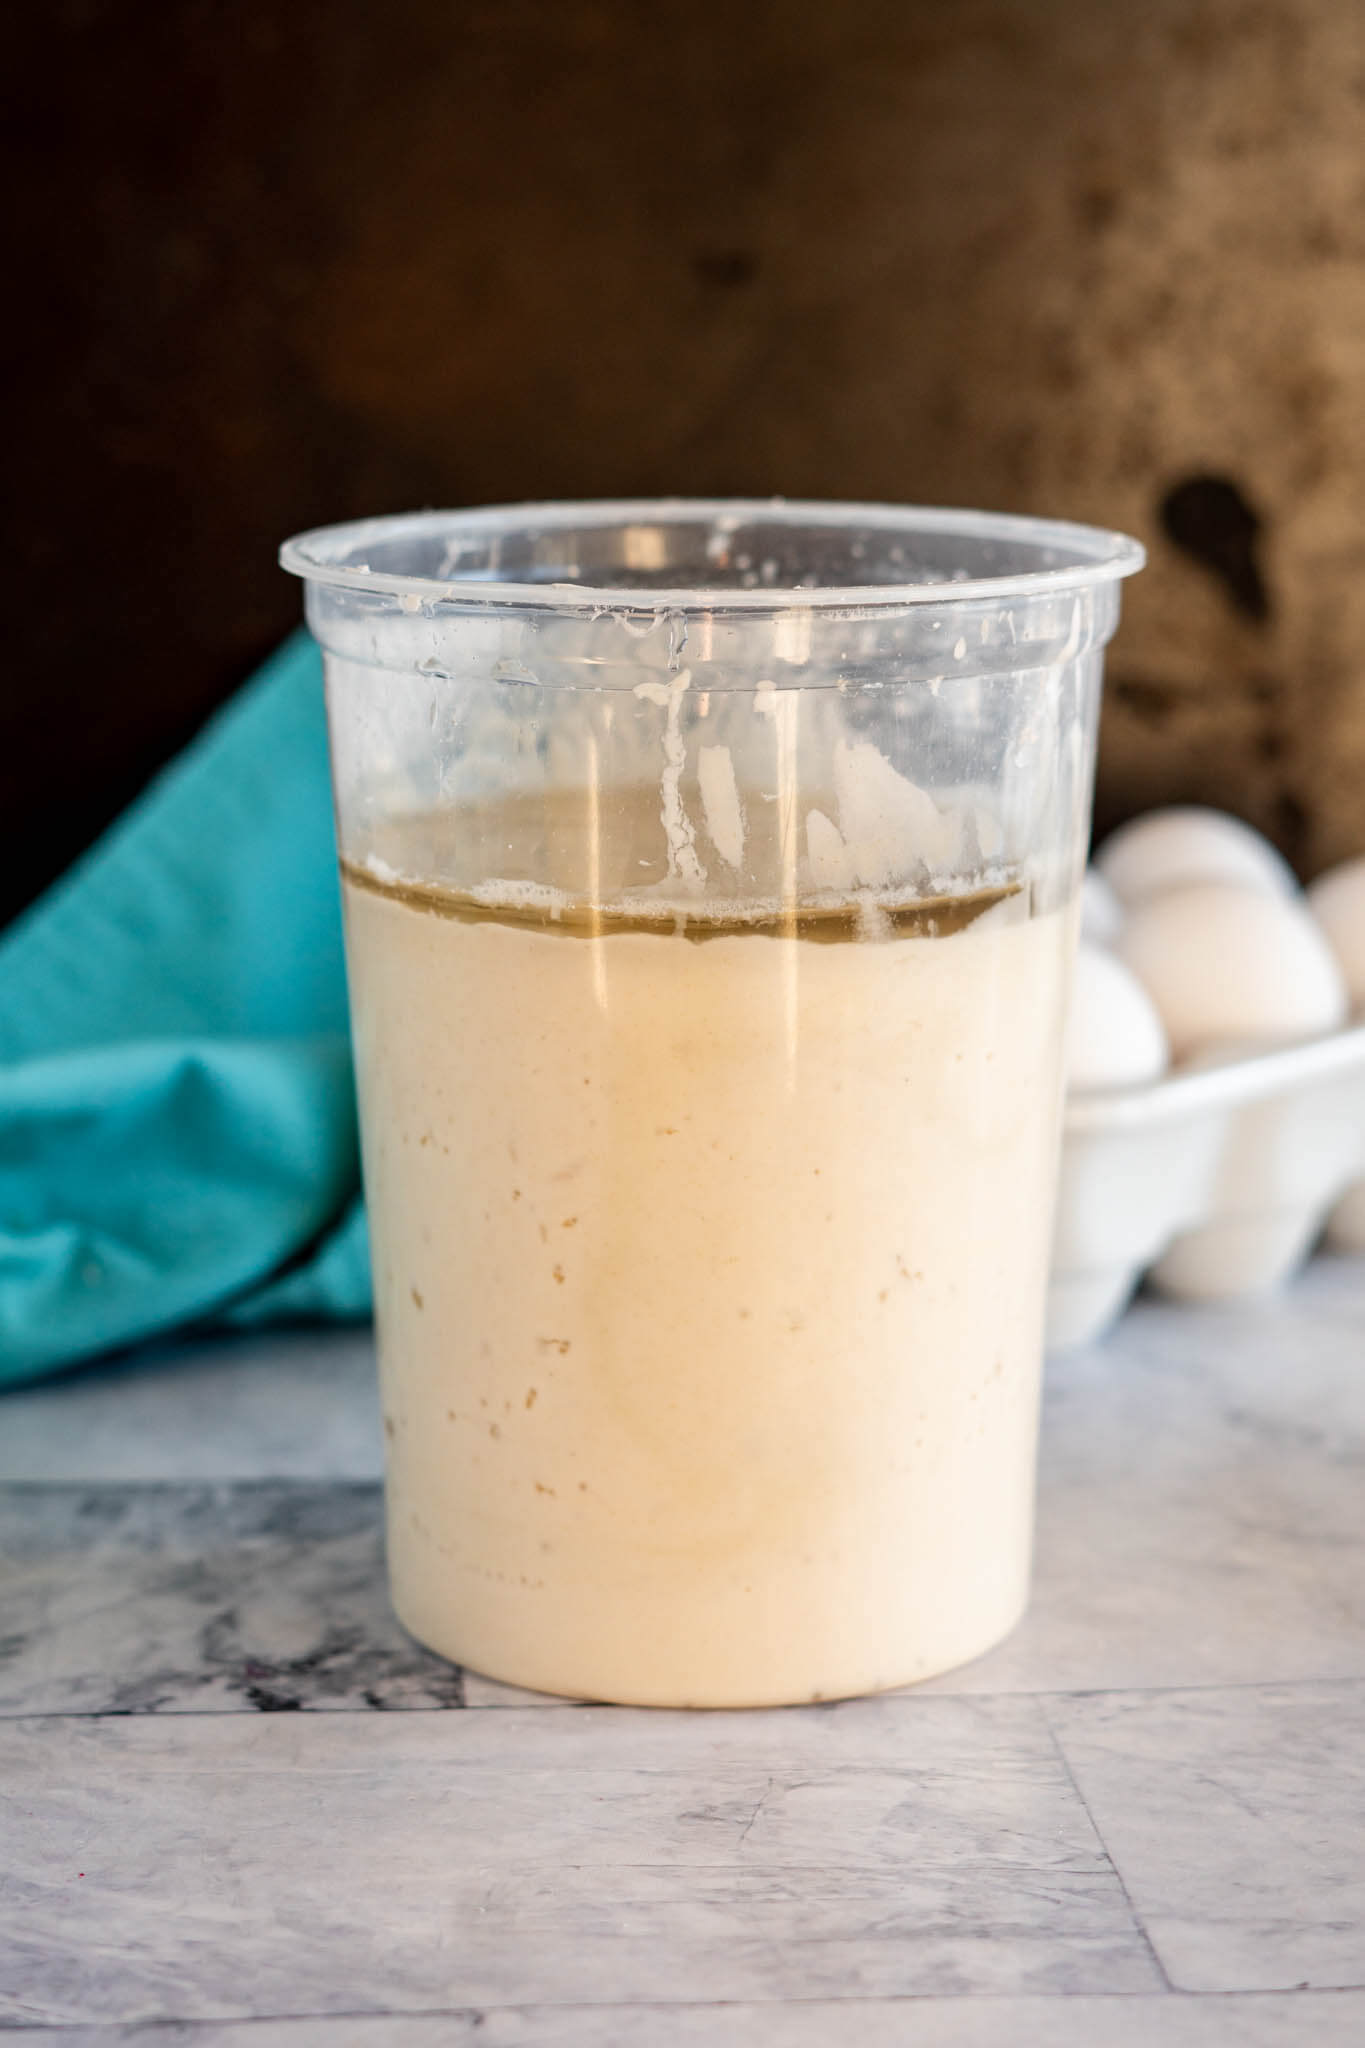
Starter
Sourdough starter is a fermented mixture of flour and water that contains wild yeast and lactic acid bacteria.
The starter serves as the leavening agent for sourdough bread, replacing commercial yeast. Sourdough starter inoculates the dough, ferments, and leavens the dough, contributing to the bread's distinctive tangy flavor, texture, and aroma.
Your starter is maintained over time by regular feeding with fresh flour and water, which keeps the microbial culture active and healthy. A well-maintained starter is key to successful sourdough baking.
Need a starter? I have a super easy 24 hour starter recipe! Struggling with the feeding process? I’ve compiled a list of my 10 best tips for feeding your starter.
Stiff Starter
A stiff starter is a sourdough starter maintained at a lower hydration than a standard starter.
The lower-hydration (50-65%) environment favors lactic acid bacteria over acetic acid bacteria, which tends to produce a milder, less tangy loaf.
Stiff starters are often used in enriched doughs and certain European-style breads, and have been gaining popularity among home bakers who want less sourness in their sourdough.
I bake from a standard 100% hydration starter and haven’t personally made the switch to a stiff starter but I find the science behind it fascinating, and it’s on my list to experiment with!
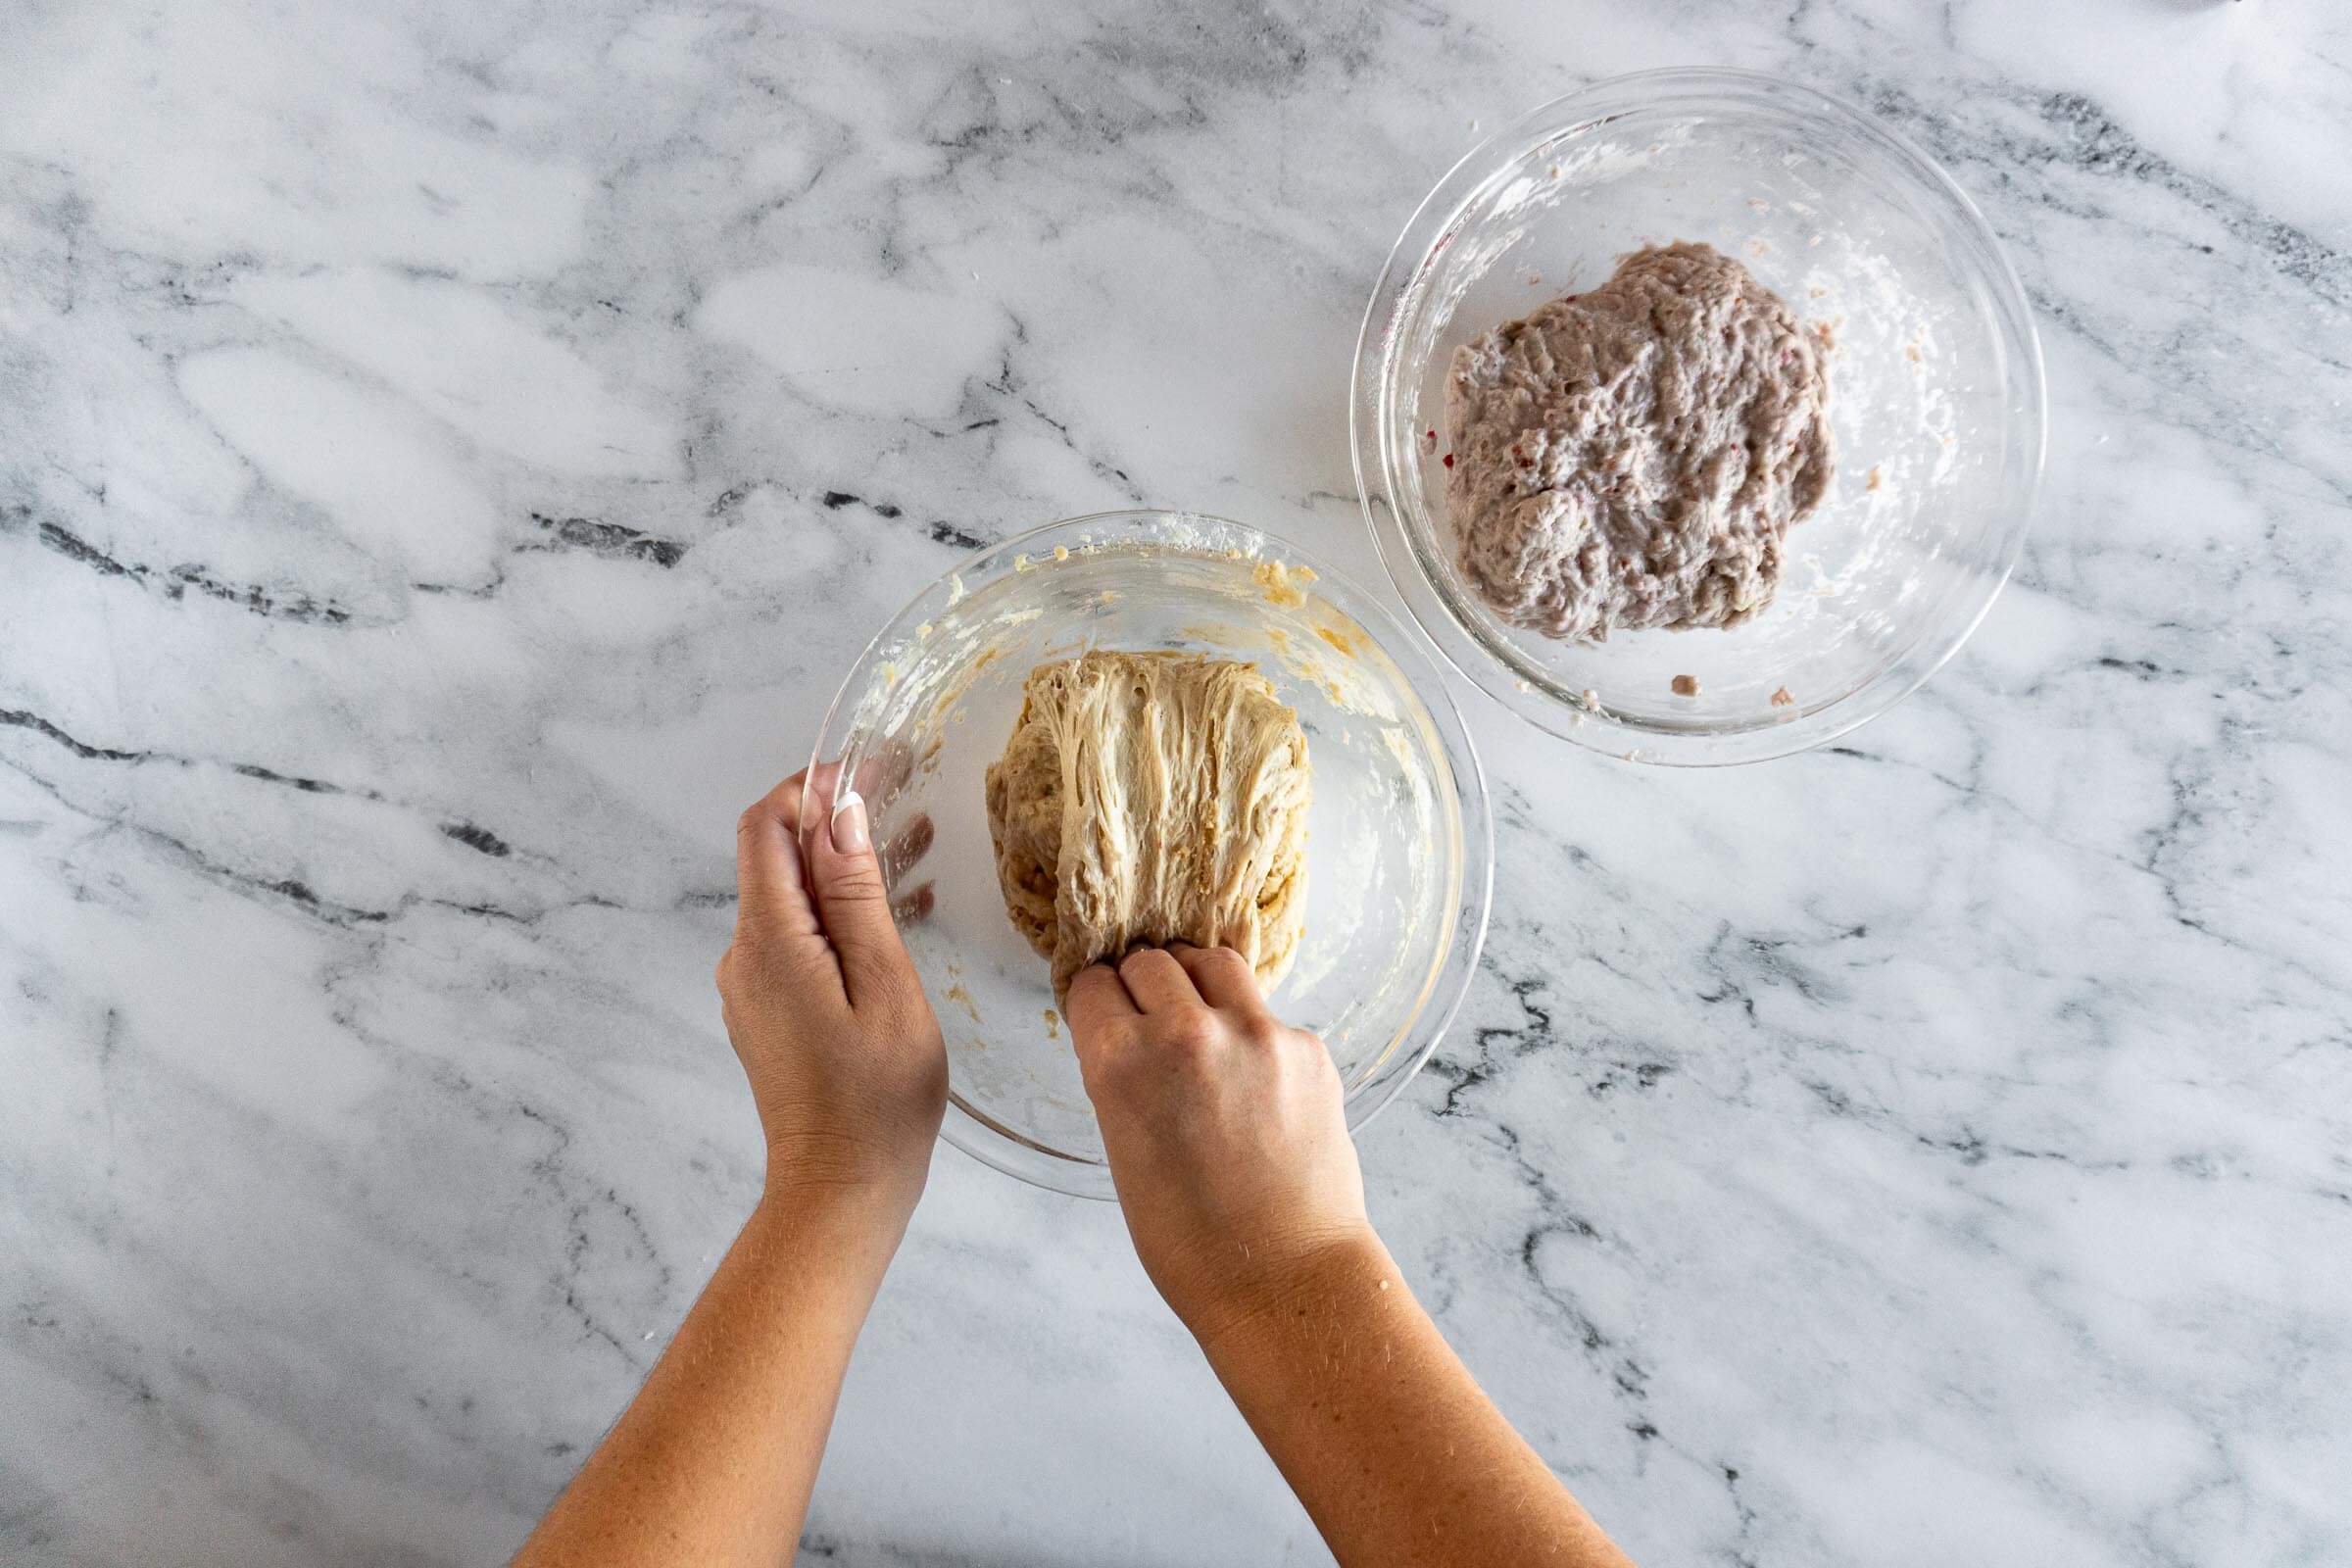
Stretch And Fold
Stretch and fold is a technique used during the bulk fermentation phase to strengthen the dough.
The process involves gently pulling a section of the dough, stretching it upwards, and then folding it back over itself. This is repeated several times at intervals (typically every 30-60 minutes) to strengthen the dough's structure, improve its elasticity, and help incorporate air.
Stretch and fold helps to achieve an open crumb and a well-developed texture in the final loaf.
T
Tang
Tang refers to the distinctive sour flavor in sourdough bread.
This flavor comes from lactic acid and acetic acid produced during fermentation.
The level of tang in sourdough can vary depending on factors such as fermentation time, the amount of starter used, and the conditions during proofing. A longer fermentation or colder proofing typically results in a more pronounced tang. This sourness is one of the defining characteristics of sourdough bread and contributes to its complex flavor profile.
Tension
Tension refers to the tight outer surface of the dough created during the shaping process.
By creating tension, bakers ensure that the dough holds its shape and maintains its structure during the final rise and baking. Proper tension helps to improve the loaf's rise, contributing to a light, airy crumb and a well-defined shape.
It also aids in achieving good oven spring, allowing the dough to expand evenly as it bakes. Tension is developed by folding and shaping the dough to create a taut outer layer while keeping the inner dough soft and hydrated.
Tension takes a little hands-on experience before it really clicks, but here’s what to feel for: the dough should gently resist your hands as you shape it, and the surface should gradually become smooth and soft. If the dough starts to tear, back off. Tearing means you’ve gone too far and are working against the gluten rather than with it.
W
Windowpane Test
The windowpane test helps to evaluate gluten development in dough.
To perform the test, a small piece of dough is gently stretched between the fingers. If it stretches thin enough to let light pass through without tearing, resembling a windowpane, it indicates that the gluten is well-developed.
Proper gluten development is crucial for the dough’s strength, elasticity, and ability to trap gases during fermentation, leading to a better rise and a more open crumb in the final loaf.
If the dough tears easily, it may need more kneading or time in the ferment.
Spoiler: I have never once used the windowpane test. I don’t believe that this test is a crucial one for sourdough baking.

Y
Yeast
In sourdough baking, yeast refers to the wild yeast living in the starter.
This wild yeast ferments the sugars in the flour, producing carbon dioxide gas that leavens the bread, creating rise and an airy crumb. Unlike commercial yeast, wild yeast works alongside lactic acid bacteria in the starter to develop the sourdough’s complex flavors.
It thrives in the acidic environment of the starter and is slower-acting, resulting in a longer fermentation process that enhances the bread’s texture, aroma, and taste.
Z
Zymology
Zymology is the scientific study of fermentation.
Since fermentation is the foundation of sourdough baking, understanding fermentation can help bakers control the flavor, texture, and rise of their loaves.
As an avid fermenter, I believe I am a hobby zymologist!

Let Me Know…
I hope this sourdough glossary has cleared up some of the mysteries behind the many sourdough terms and definitions used in sourdough baking.
Did I miss a term you’re curious about? Drop a comment below – I'd love to expand this glossary and make it even more helpful!