
Easy Sourdough Discard Scones

These flaky sourdough scones are buttery, tender, and incredibly easy to make with either sourdough discard or active starter. Whether you’re looking for a reliable sourdough scones recipe for breakfast, brunch, or afternoon tea, this recipe delivers bakery-style results with crisp golden edges and a soft, flaky crumb. Make them the same day, refrigerate the dough overnight for even more flavor, or freeze unbaked scones for fresh-from-the-oven treats anytime.

Craving The Recipe Details?
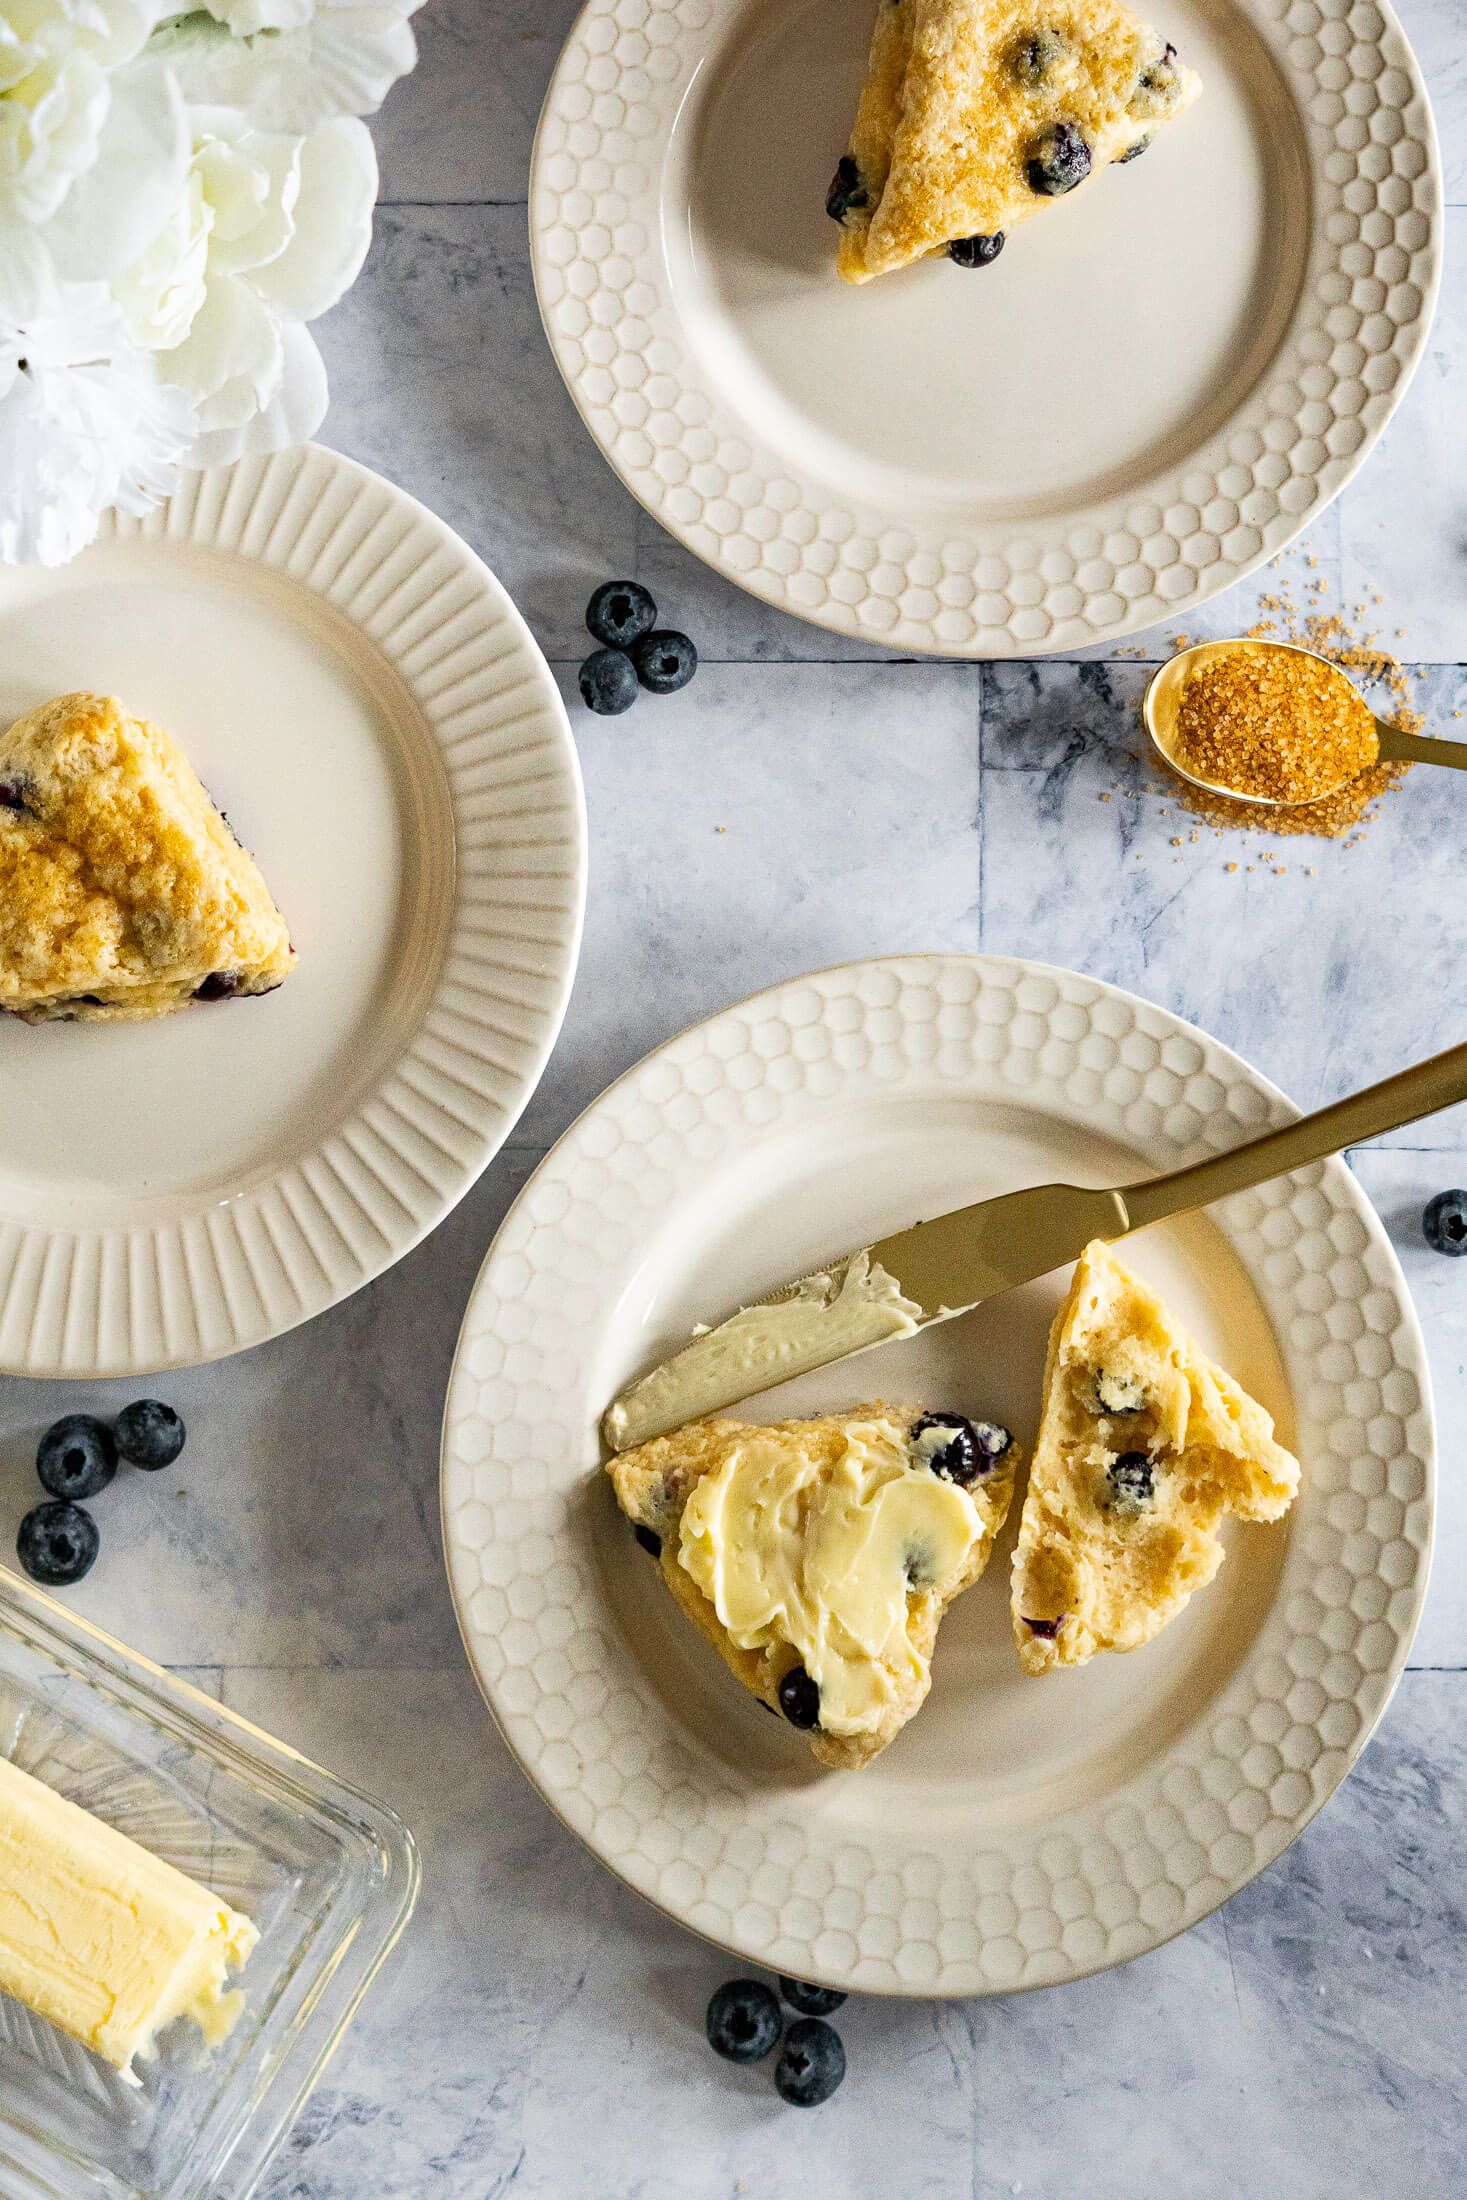
What it is: Tender, golden-edged sourdough discard scones with laminated, flaky layers and customizable mix-in (chocolate chip, blueberry, cranberry orange, and more).
Why you’ll love it: A simple master recipe that uses up 150g of discard, comes together in under an hour, and lets you pick your own flavor adventure.
How to make it: Whisk flour, sugar, baking powder, and salt, then cut in cold butter until sandy. Stir in your mix-ins. Beat discard, cream, egg, and vanilla together, fold into the dry ingredients, laminate and fold the dough creating layers, cut into wedges, chill, then brush with cream, sprinkle with sugar, and bake until golden.
In the years since my sourdough starter was born, I’ve really expanded my baking repertoire.
Partially because I love trying new things and partially because my sourdough bread factory makes a lot of discard and I’m forever looking for fun, new ways to use discard starter!
As it turns out, my kids love sweet scones. I love that they’re an easy to make portable snack and so customizable. My husband loves that they use 150g of discard before the discard takes over the entire fridge. ha!
This sourdough discard scones recipe dedicated to expanding repertoires.
Jump to:
Key Ingredients

Sourdough Discard: This recipe was developed for 100% hydration sourdough discard. 100% hydration discard comes from a starter that is fed equal portions of flour and water by weight. Since baking powder, not the starter, is what gives these scones their rise, you can use fresh, active starter, or fully spent discard interchangeably. There’s no need to feed it or wait for it to bubble first!
Eggs: These add flavor, texture, and structure to the scones which helps differentiate them from homemade biscuits! I love using the gorgeous eggs laid by my backyard chickens in baking recipes like this one.
Substitutions
Don’t have everything on hand? Here’s what works:
- All-Purpose Flour: Sticks to standard unbleached AP for the best structure. Bread flour makes these dense and tough; cake flour works in a pinch but may need slightly more cream.
- Unsalted Butter: No unsalted on hand? Salted butter works, just drop the added salt in the dry ingredients to ¼ teaspoon.
- Heavy Whipping Cream: Half-and-half works in both the dough and the topping wash. Whole milk works in the dough too, though for the brush-on topping, stick with cream or half-and-half, milk alone won’t give you the same golden, glossy finish.
How To Make Sourdough Discard Scones
Make The Dough:
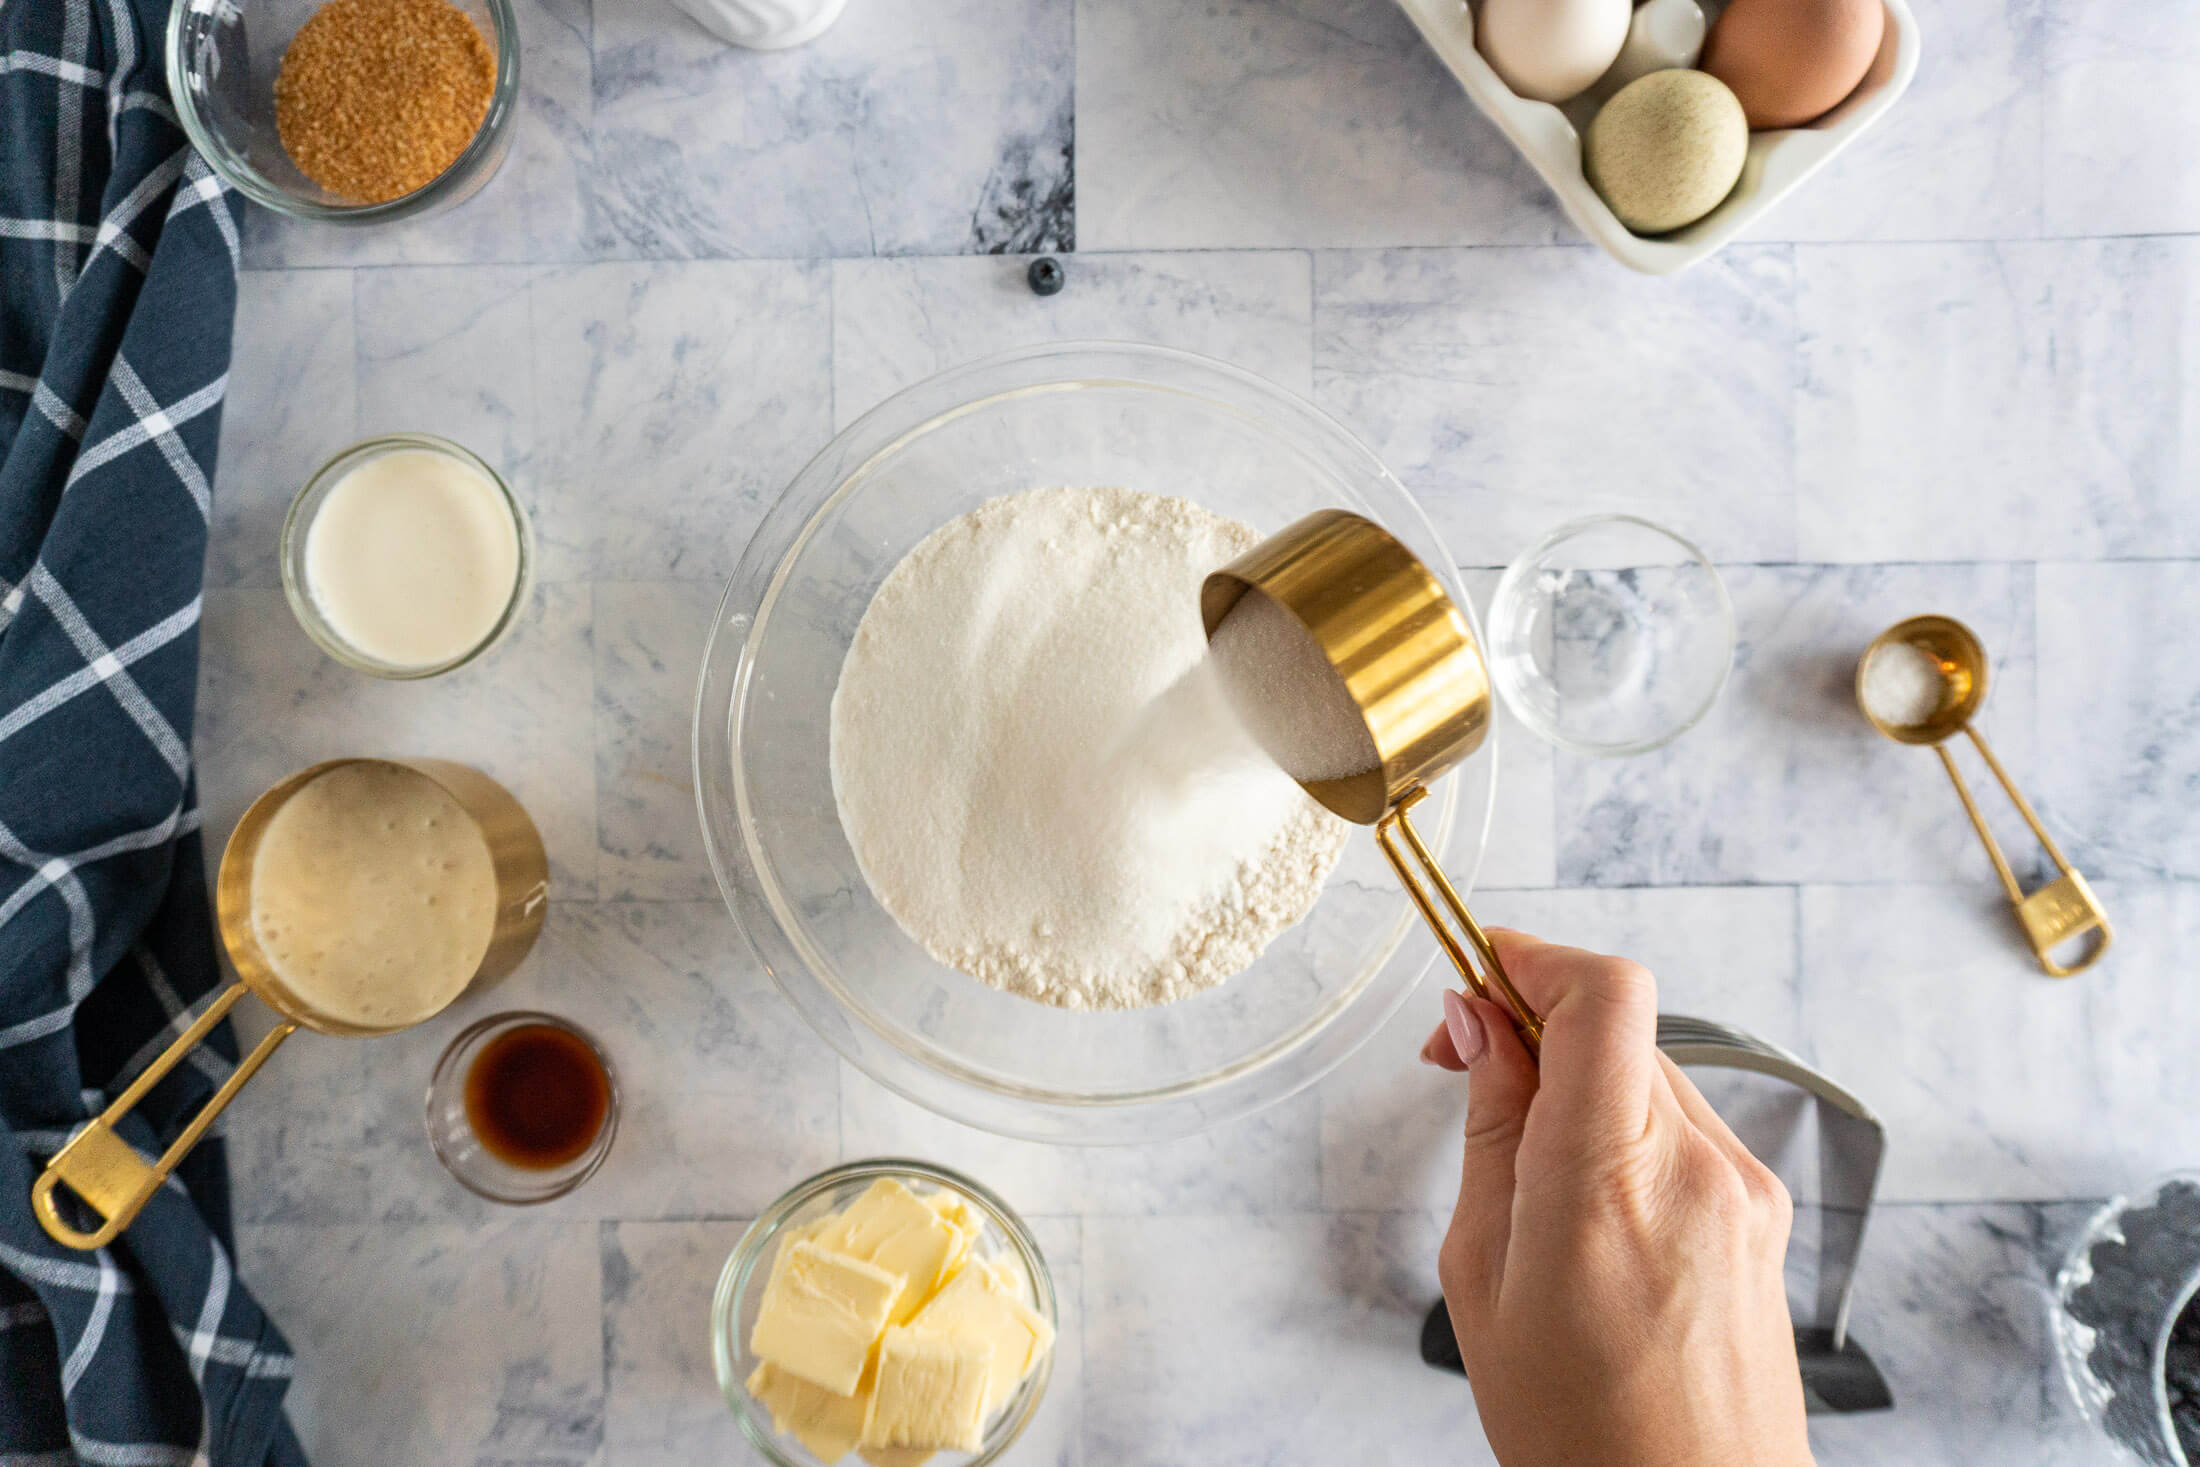
- Step 1: Line a baking sheet with parchment paper, then set aside.
Then in a large mixing bowl, whisk 275g all purpose flour, 100g granulated sugar, 1 tablespoon baking powder, and 1/2 teaspoon fine ground sea salt.
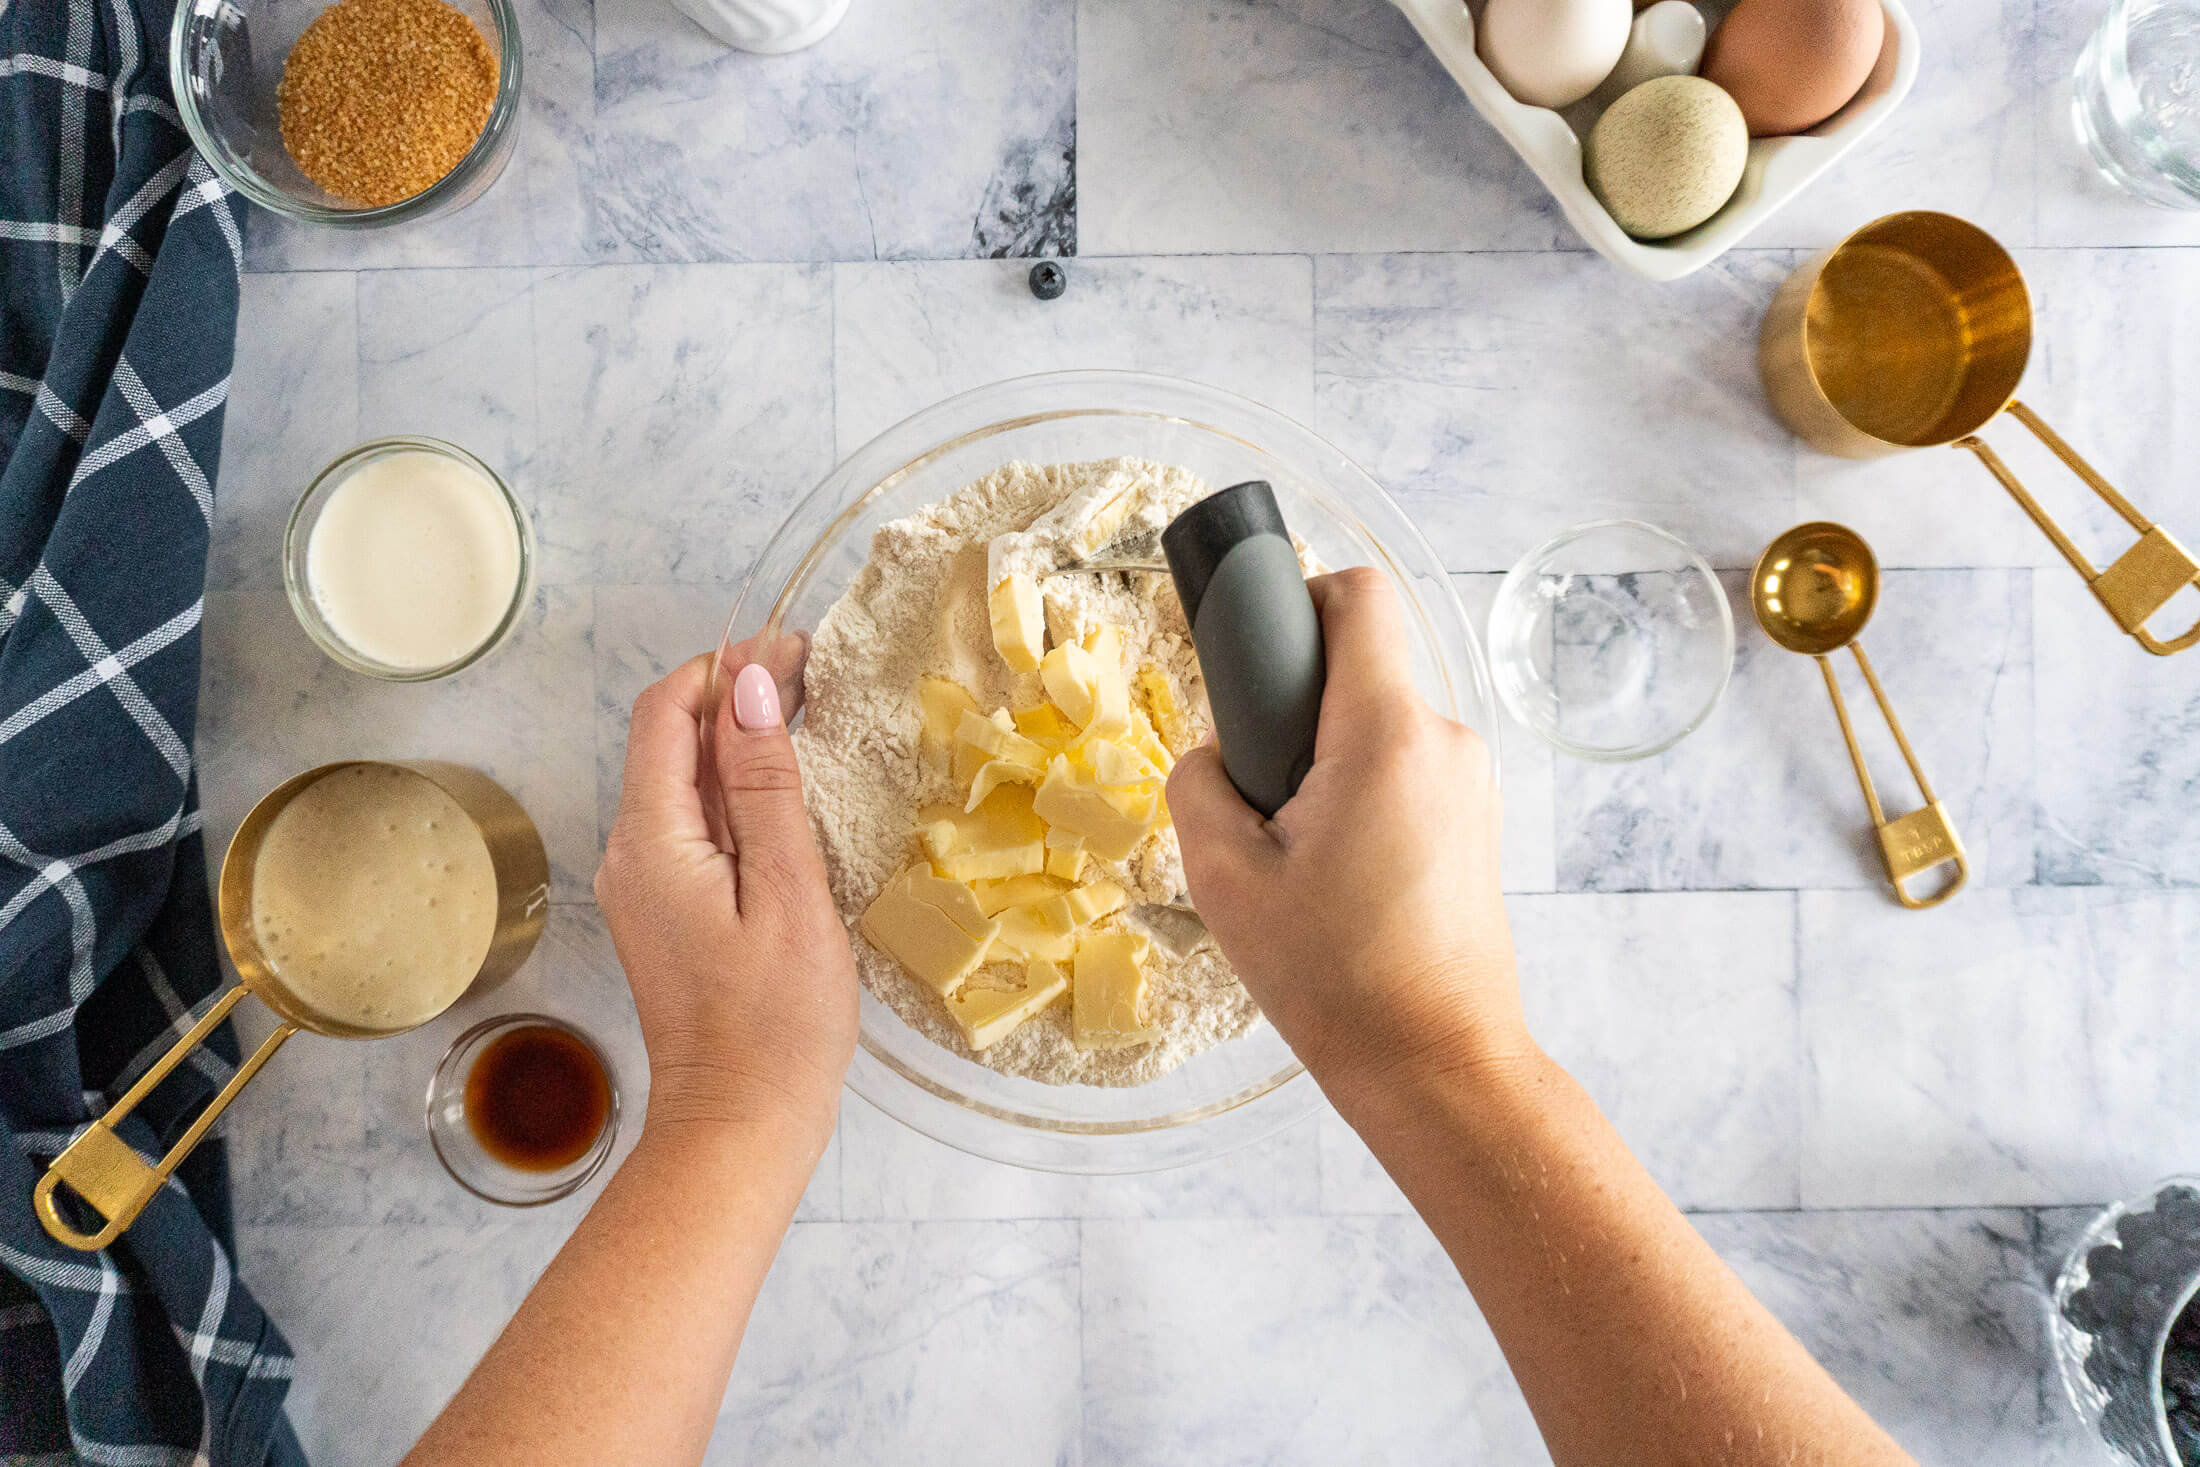
- Step 2: Cube 115g (1/2 cup) of cold butter, then cut into the flour mixture with a pastry blender.
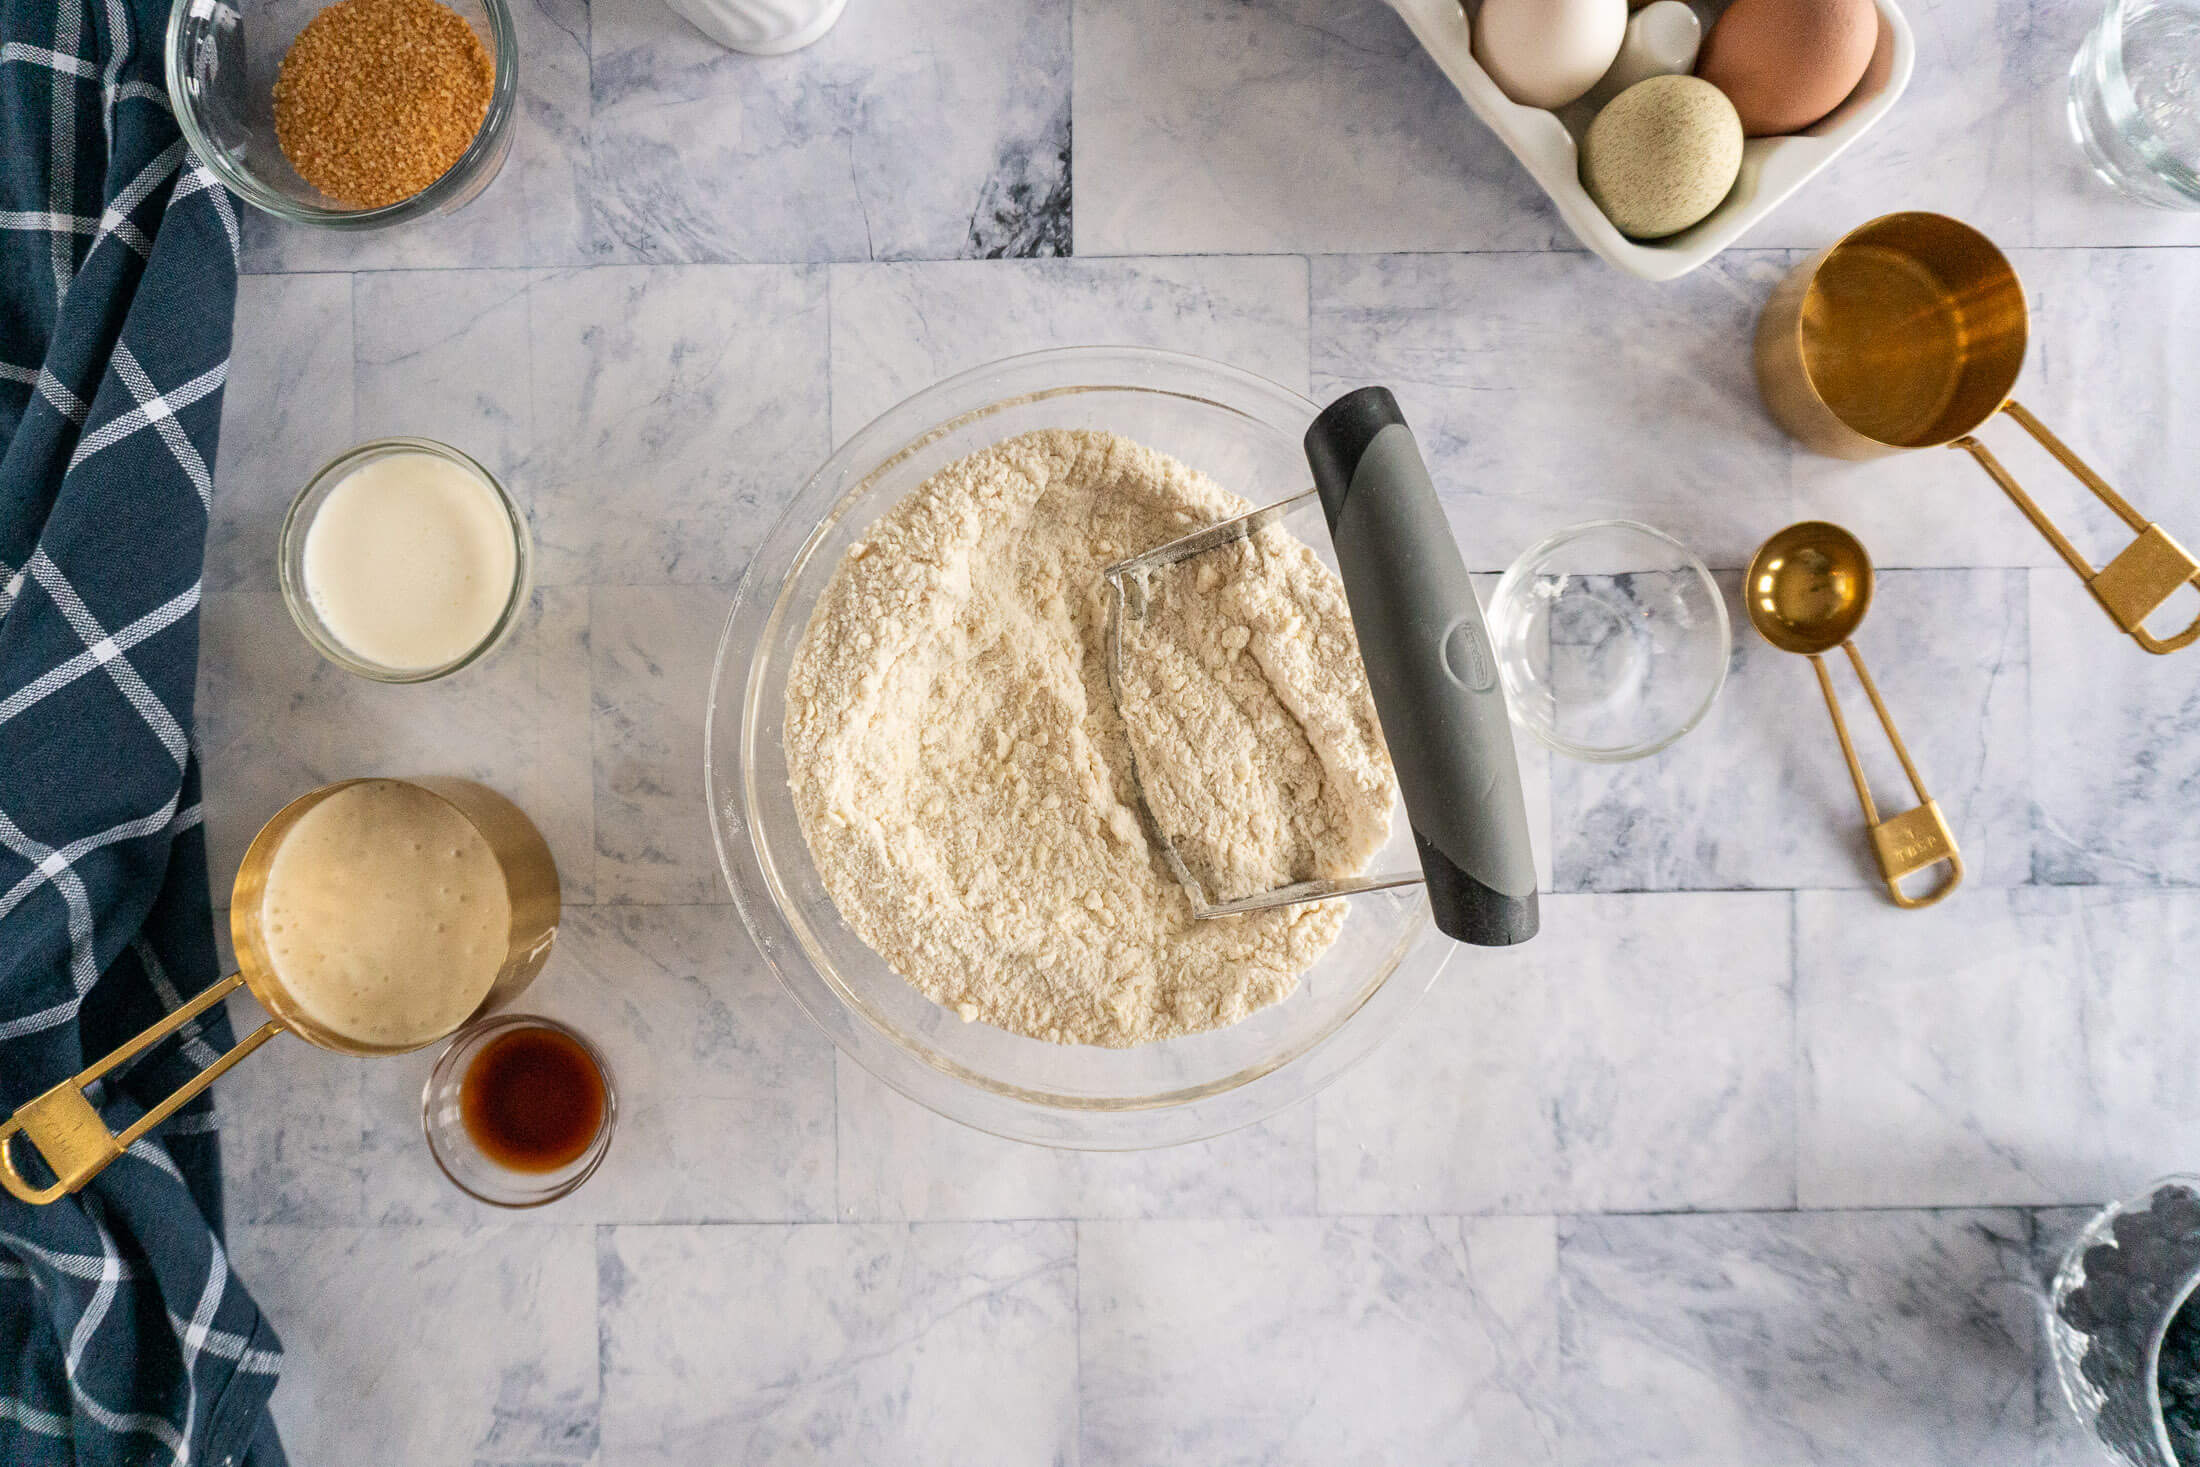
- Step 3: Continue cutting in the butter until only small pebble sized pieces of butter remain and the flour is a sandy texture.
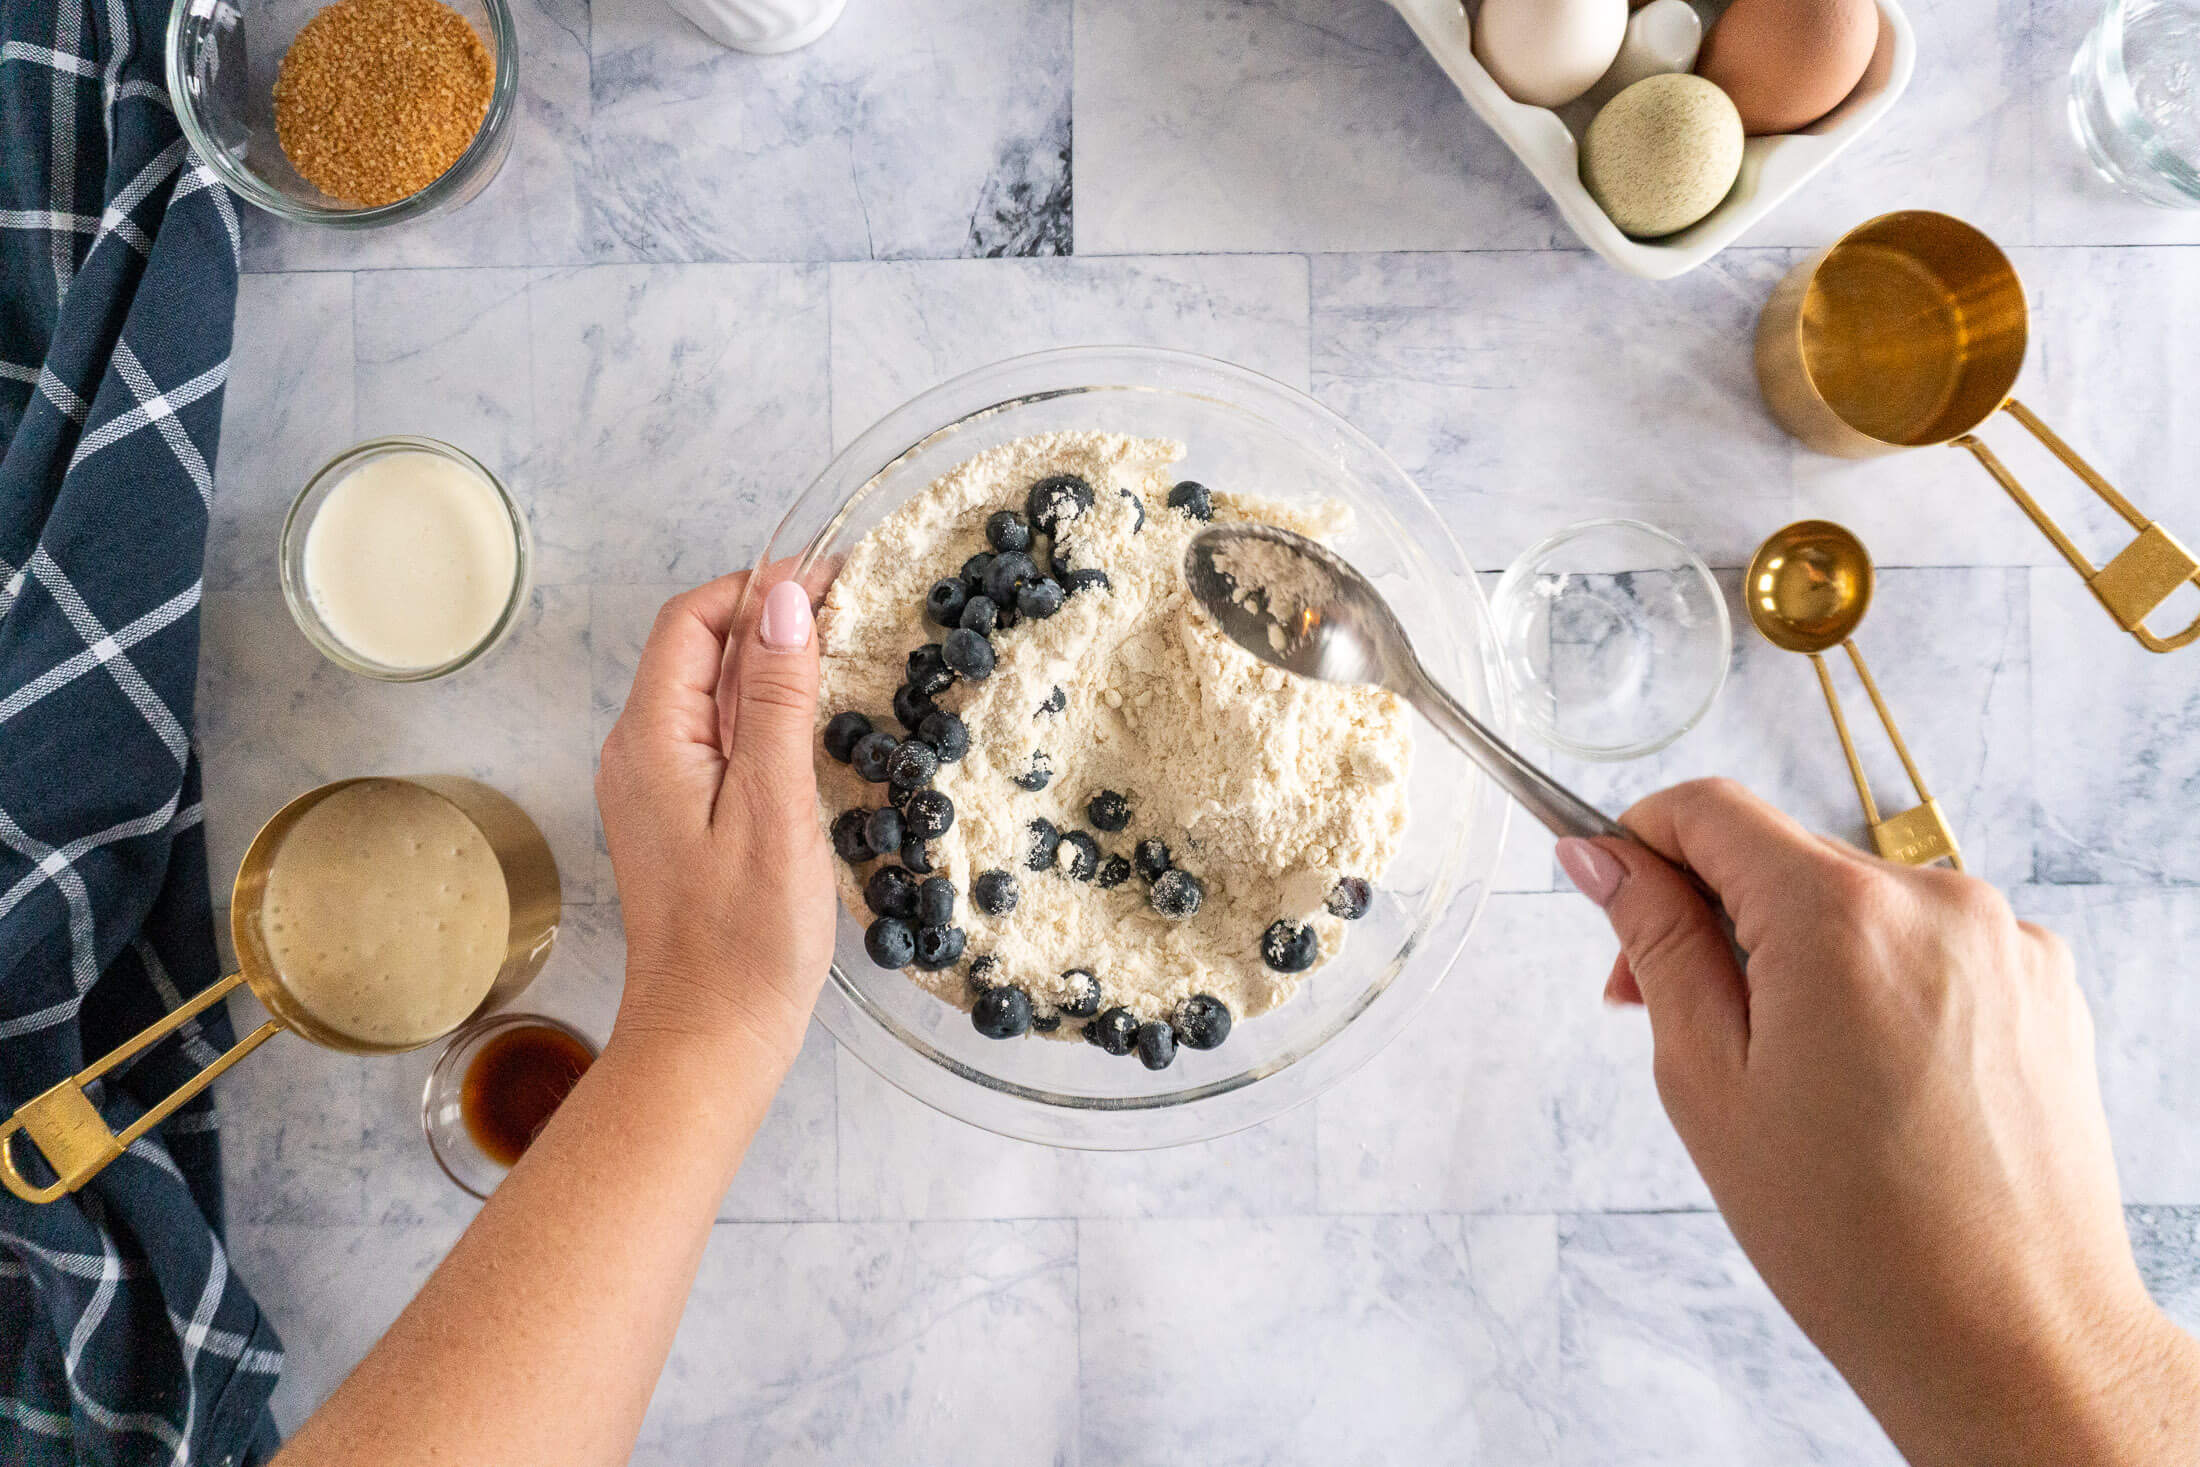
- Step 4: Add up to 1 1/2 cup of mix ins, and stir into the flour mixture to distribute. I used 1 cup of blueberries. See flavor variations section below for more ideas!
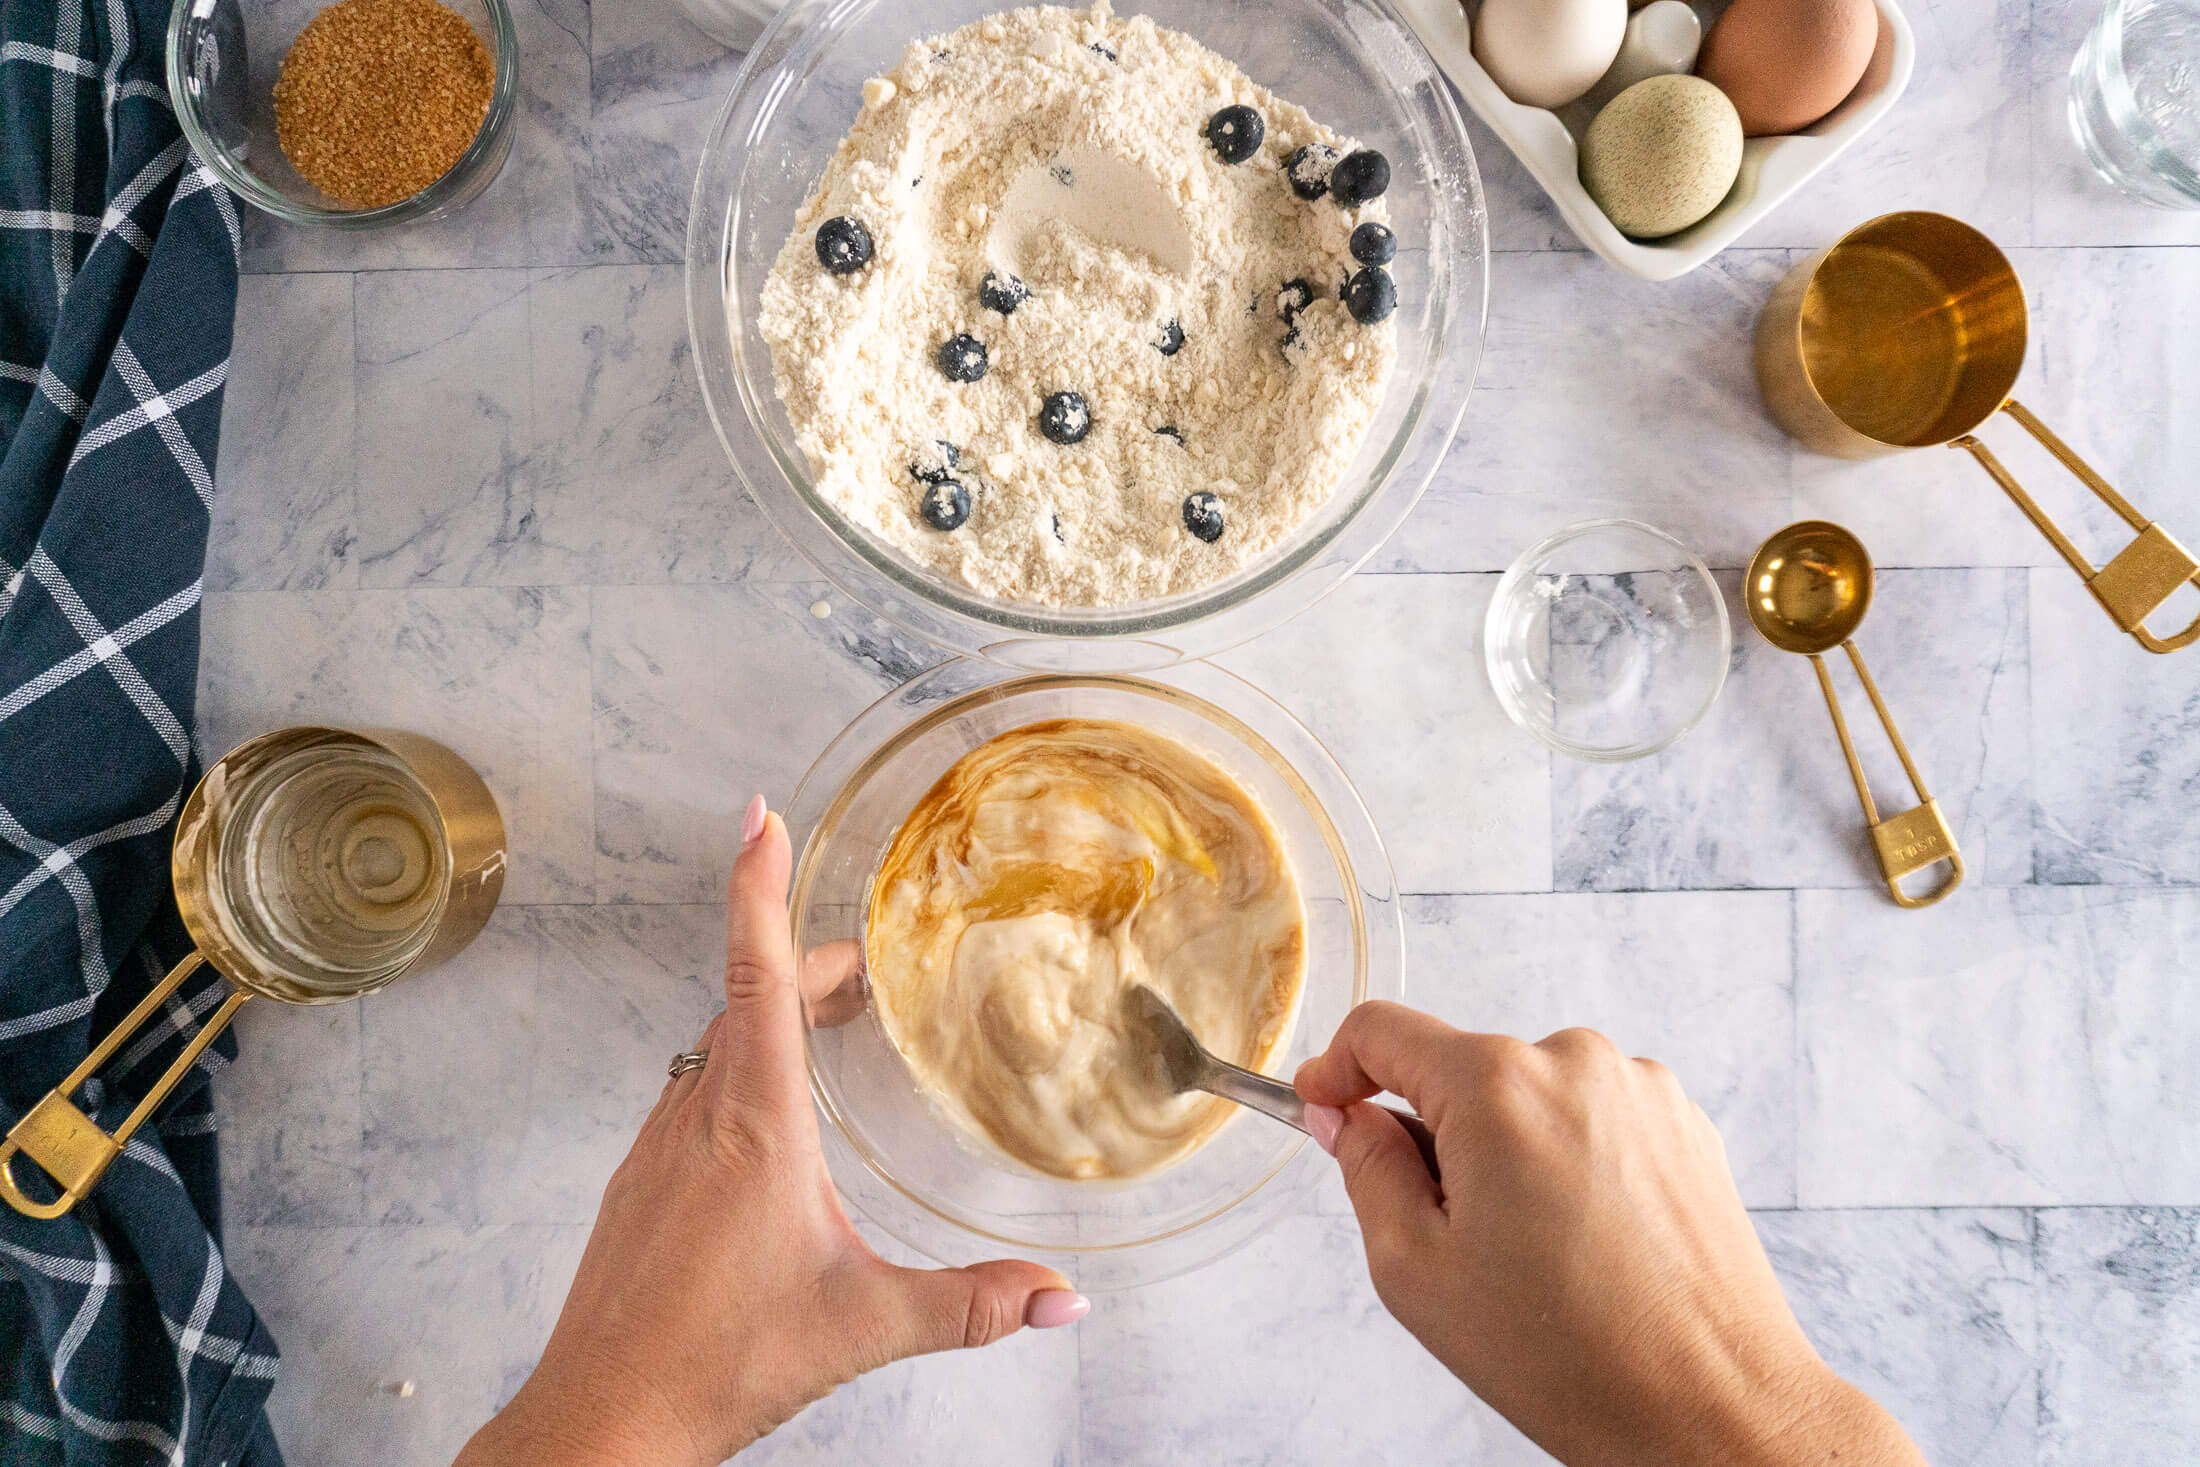
- Step 5: In another bowl, beat together 150g sourdough discard, 45g heavy whipping cream, 1 large egg, and 2 teaspoons of vanilla extract until completely combined.
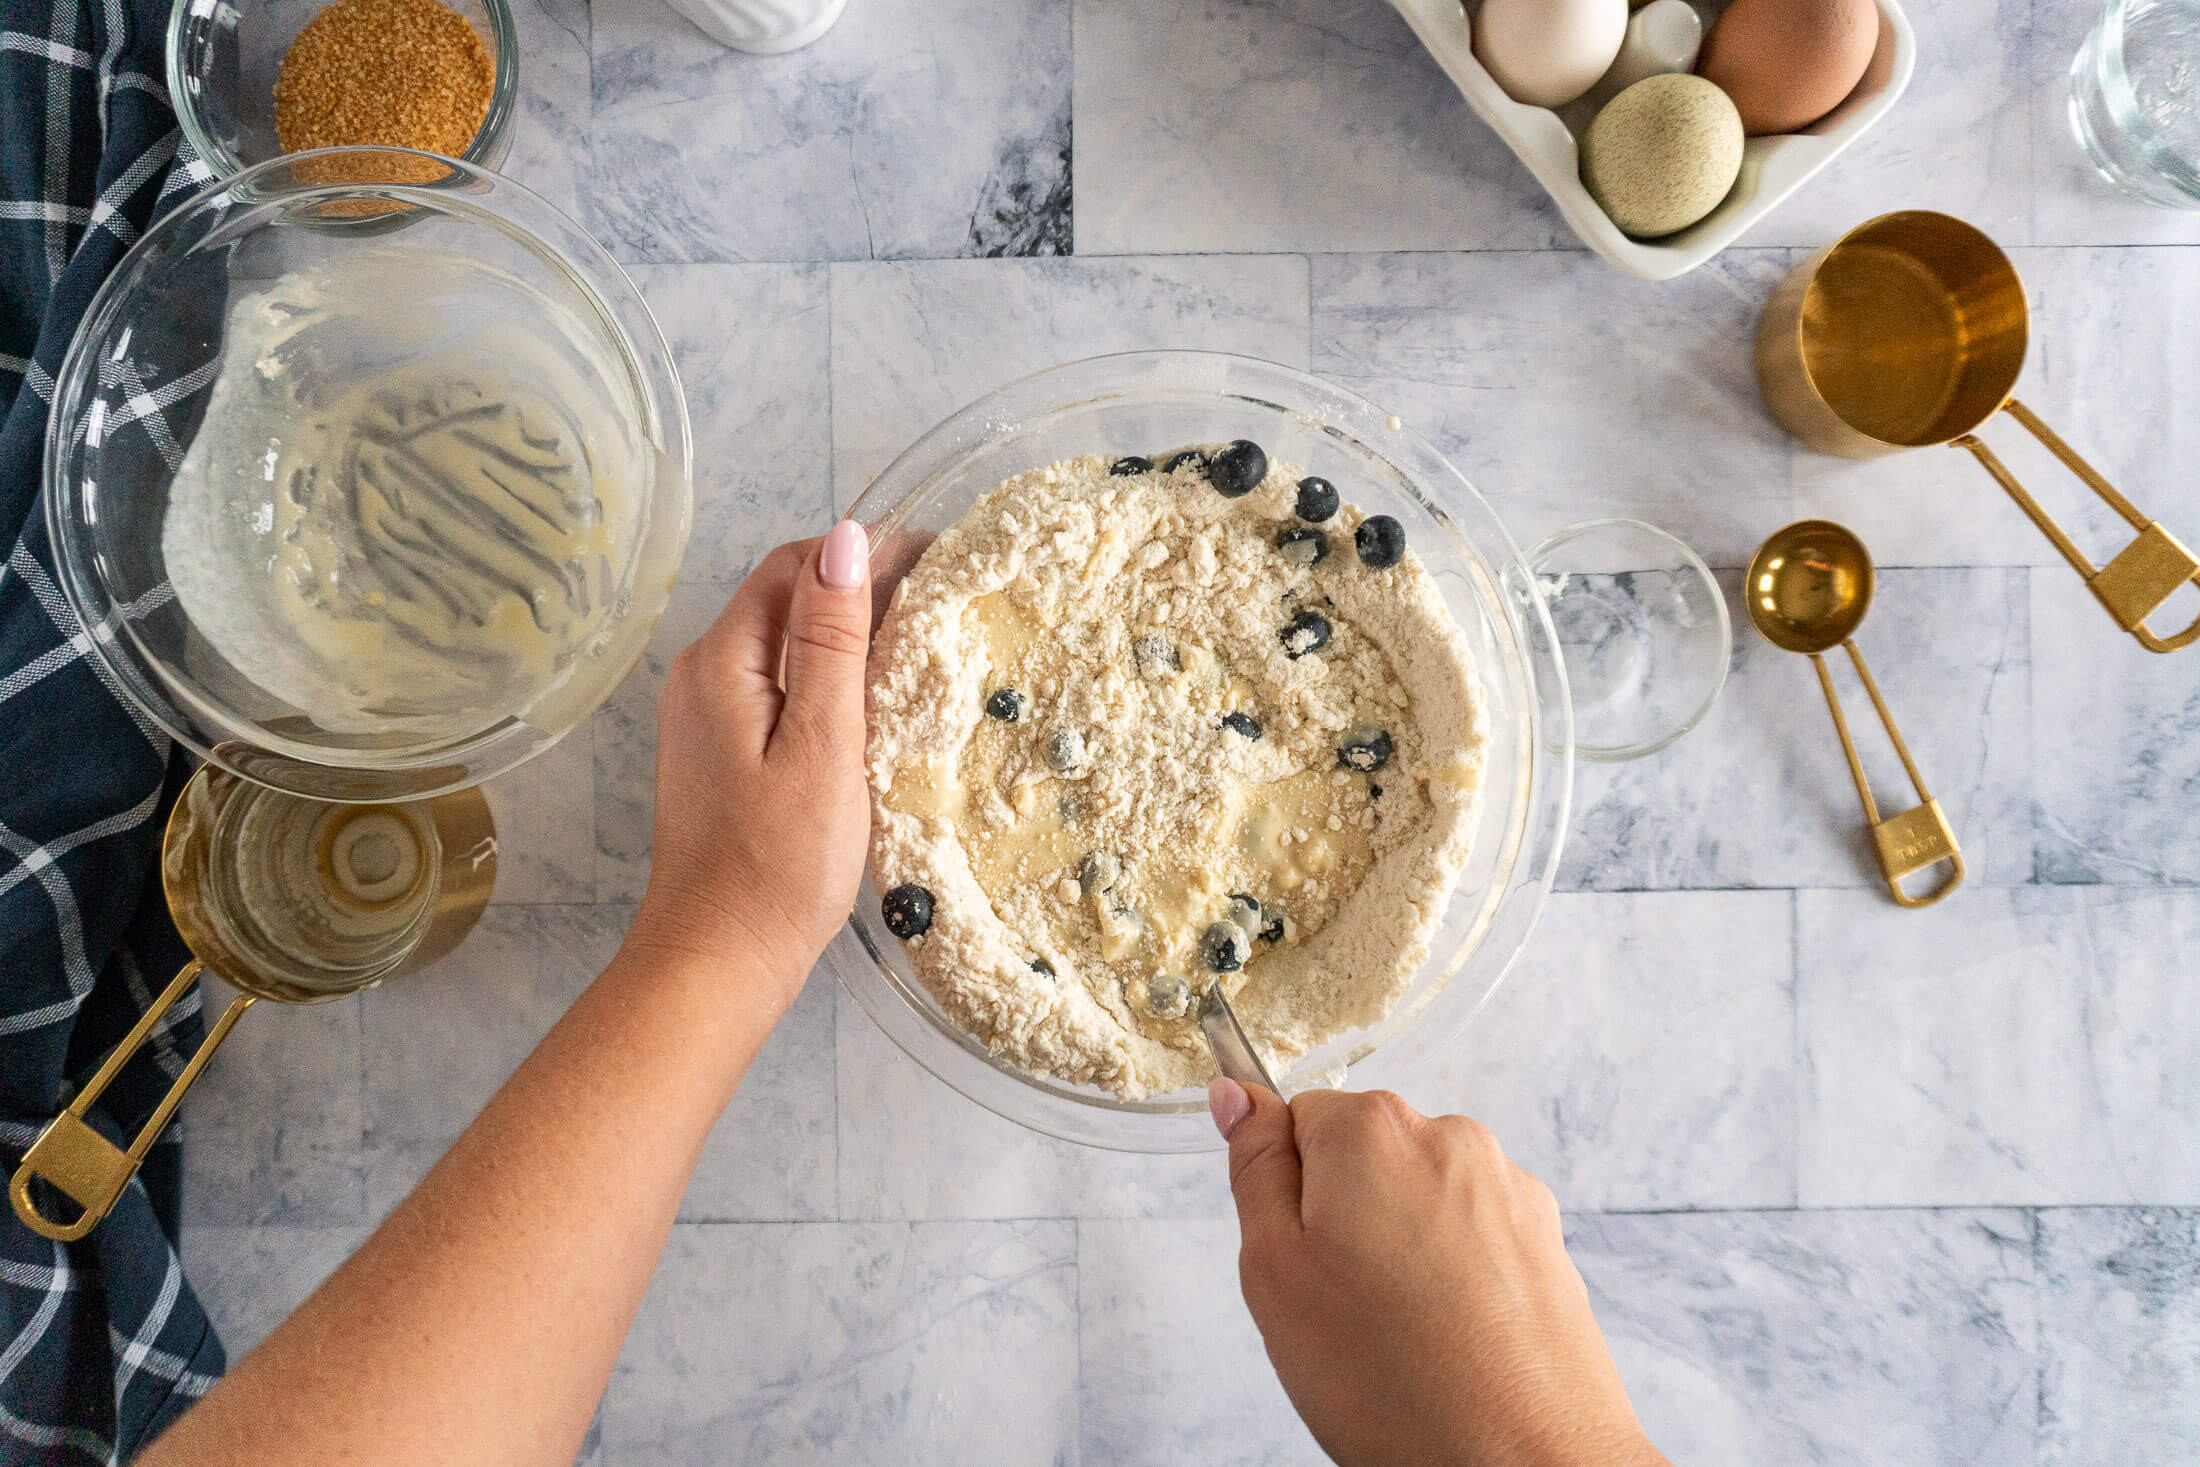
- Step 6: Make a well in the dry ingredients, pour in wet ingredients and stir until it’s just starting to come together. Stirring will toughen the dough – the next step will help to incorporate the rest of the flour.
Laminate + Shape:
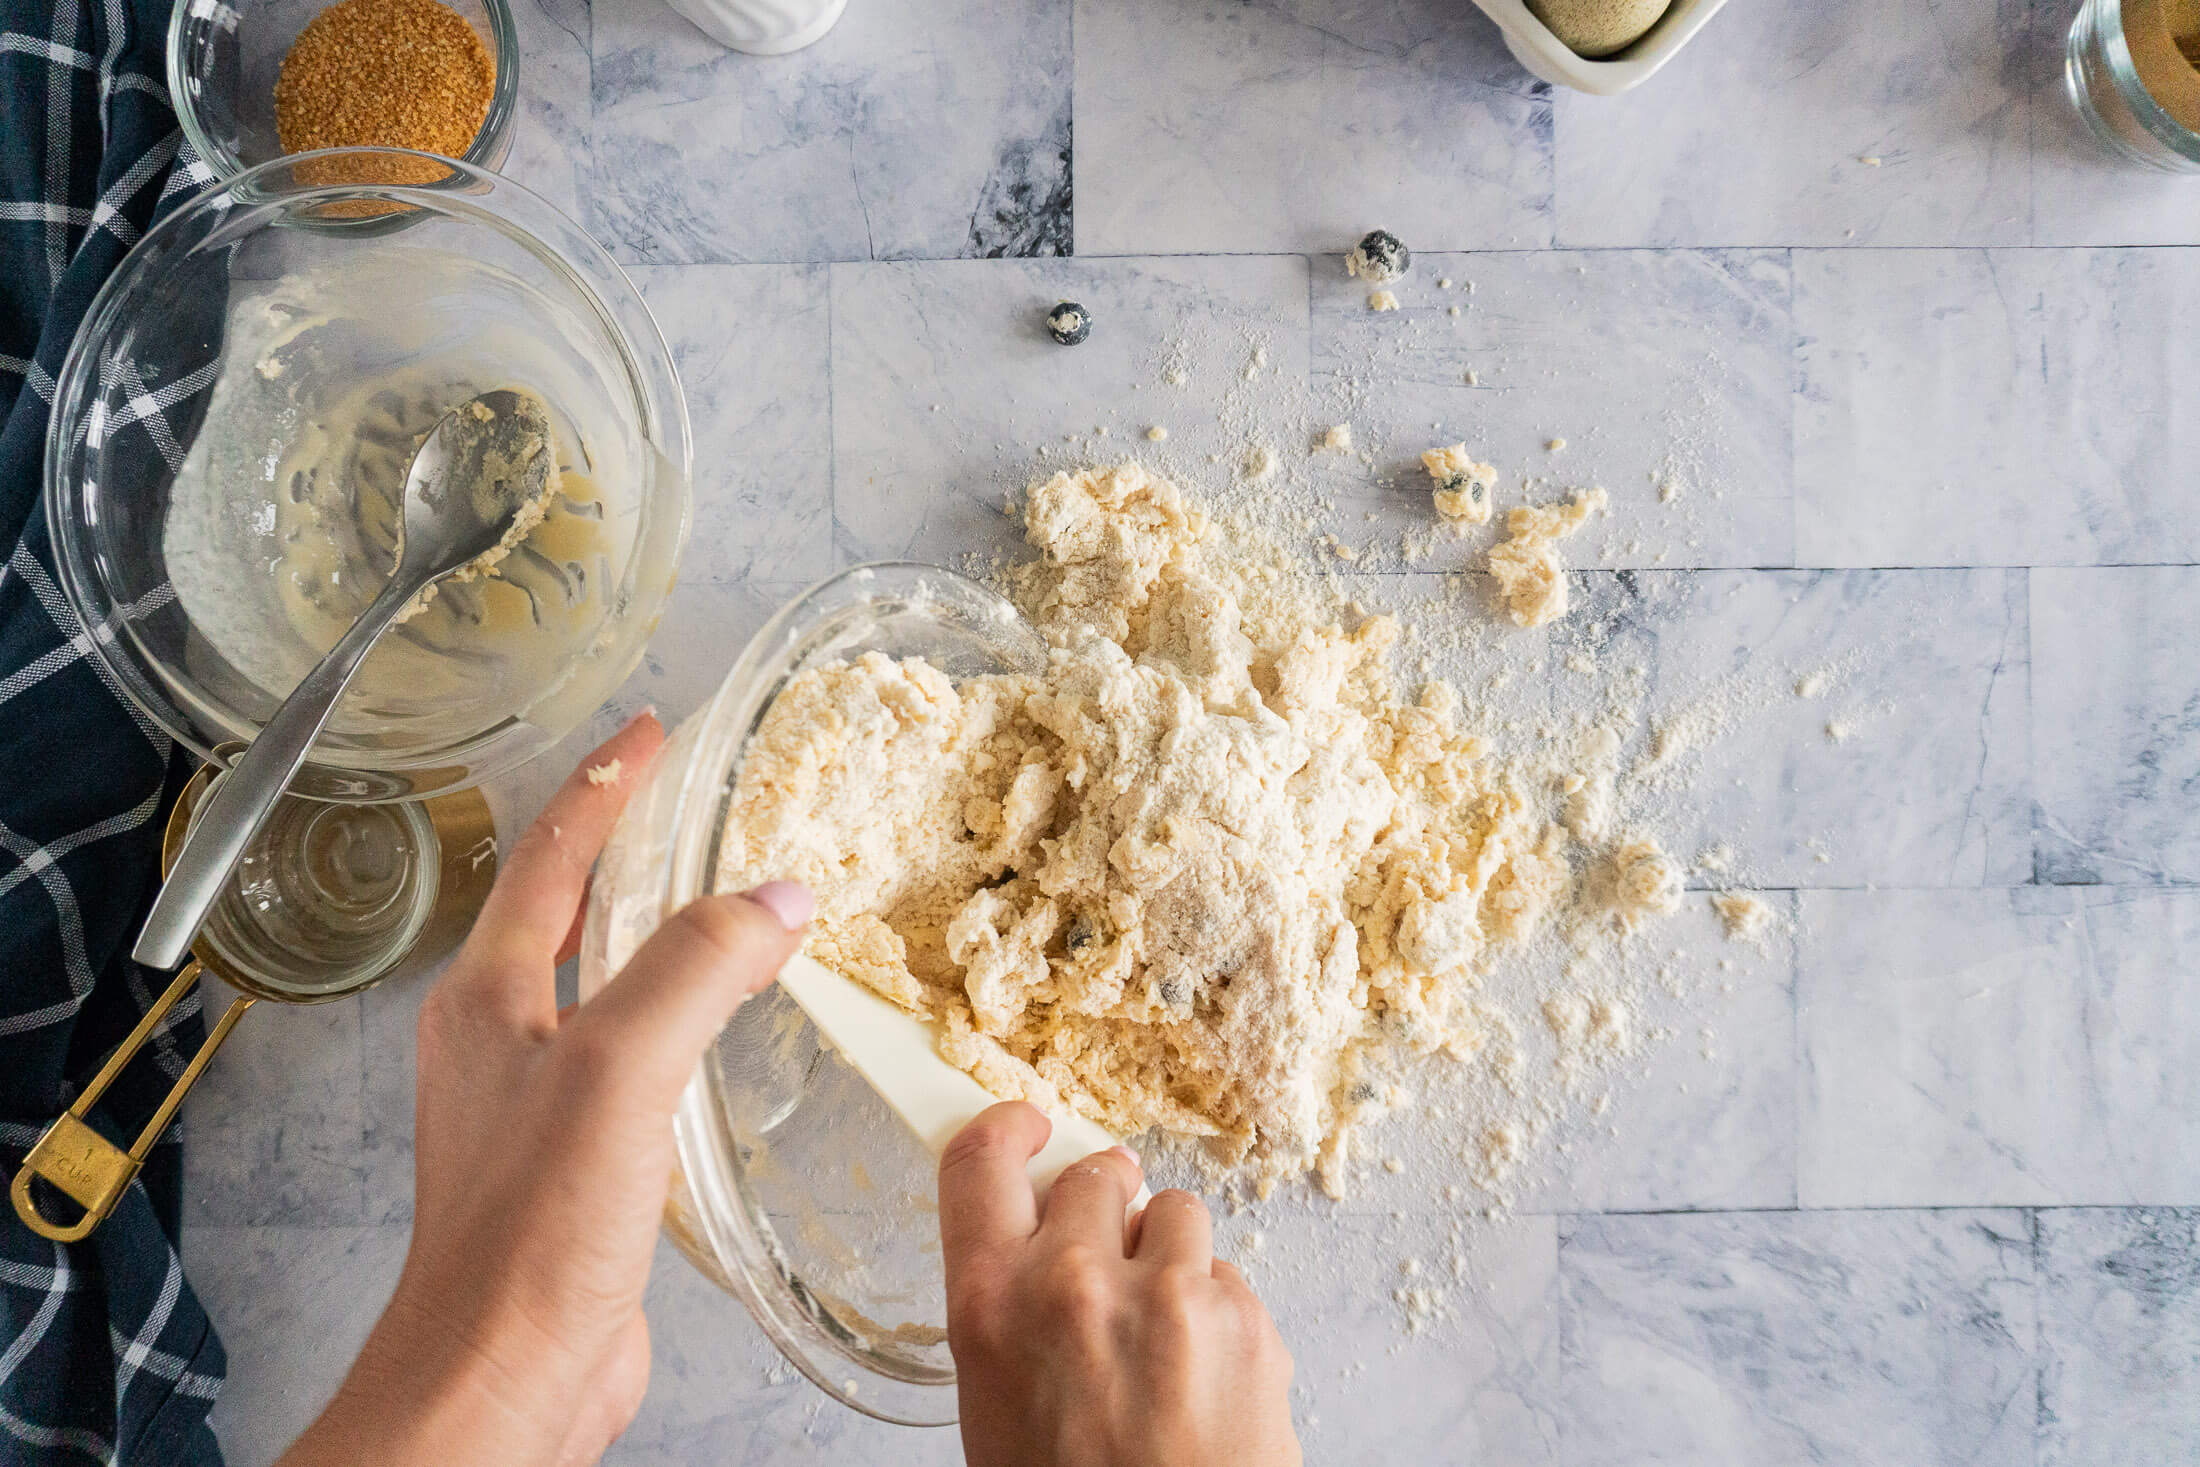
- Step 7: Turn dough out onto a lightly floured surface, it will be somewhat shaggy, that’s ok.
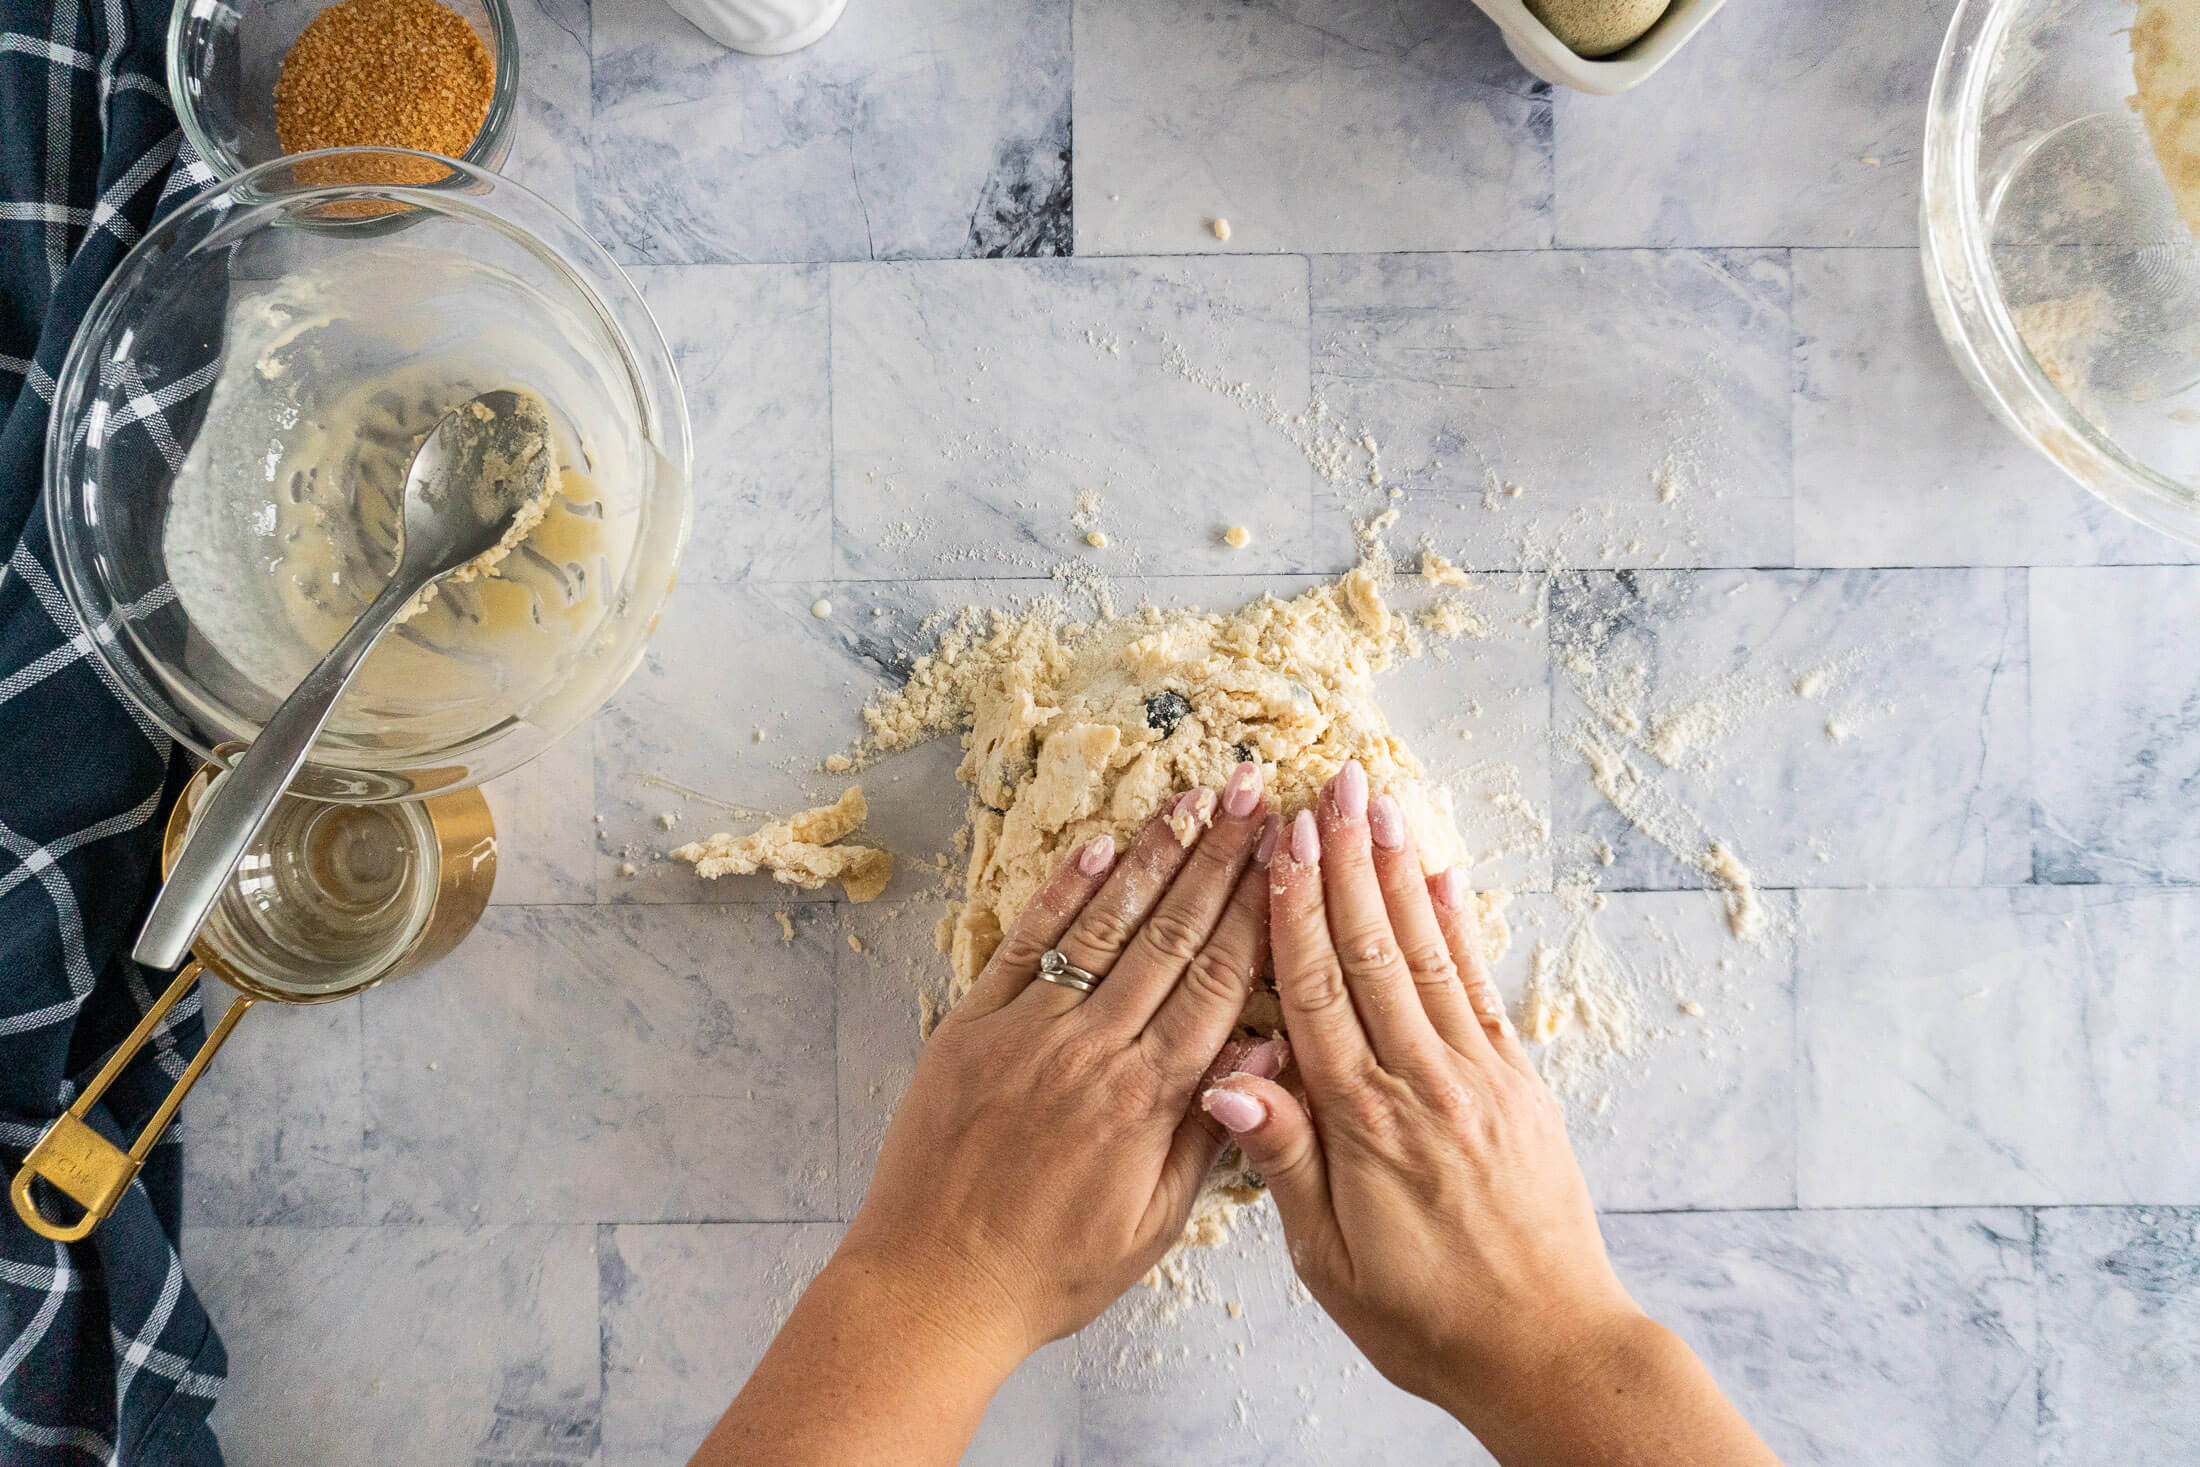
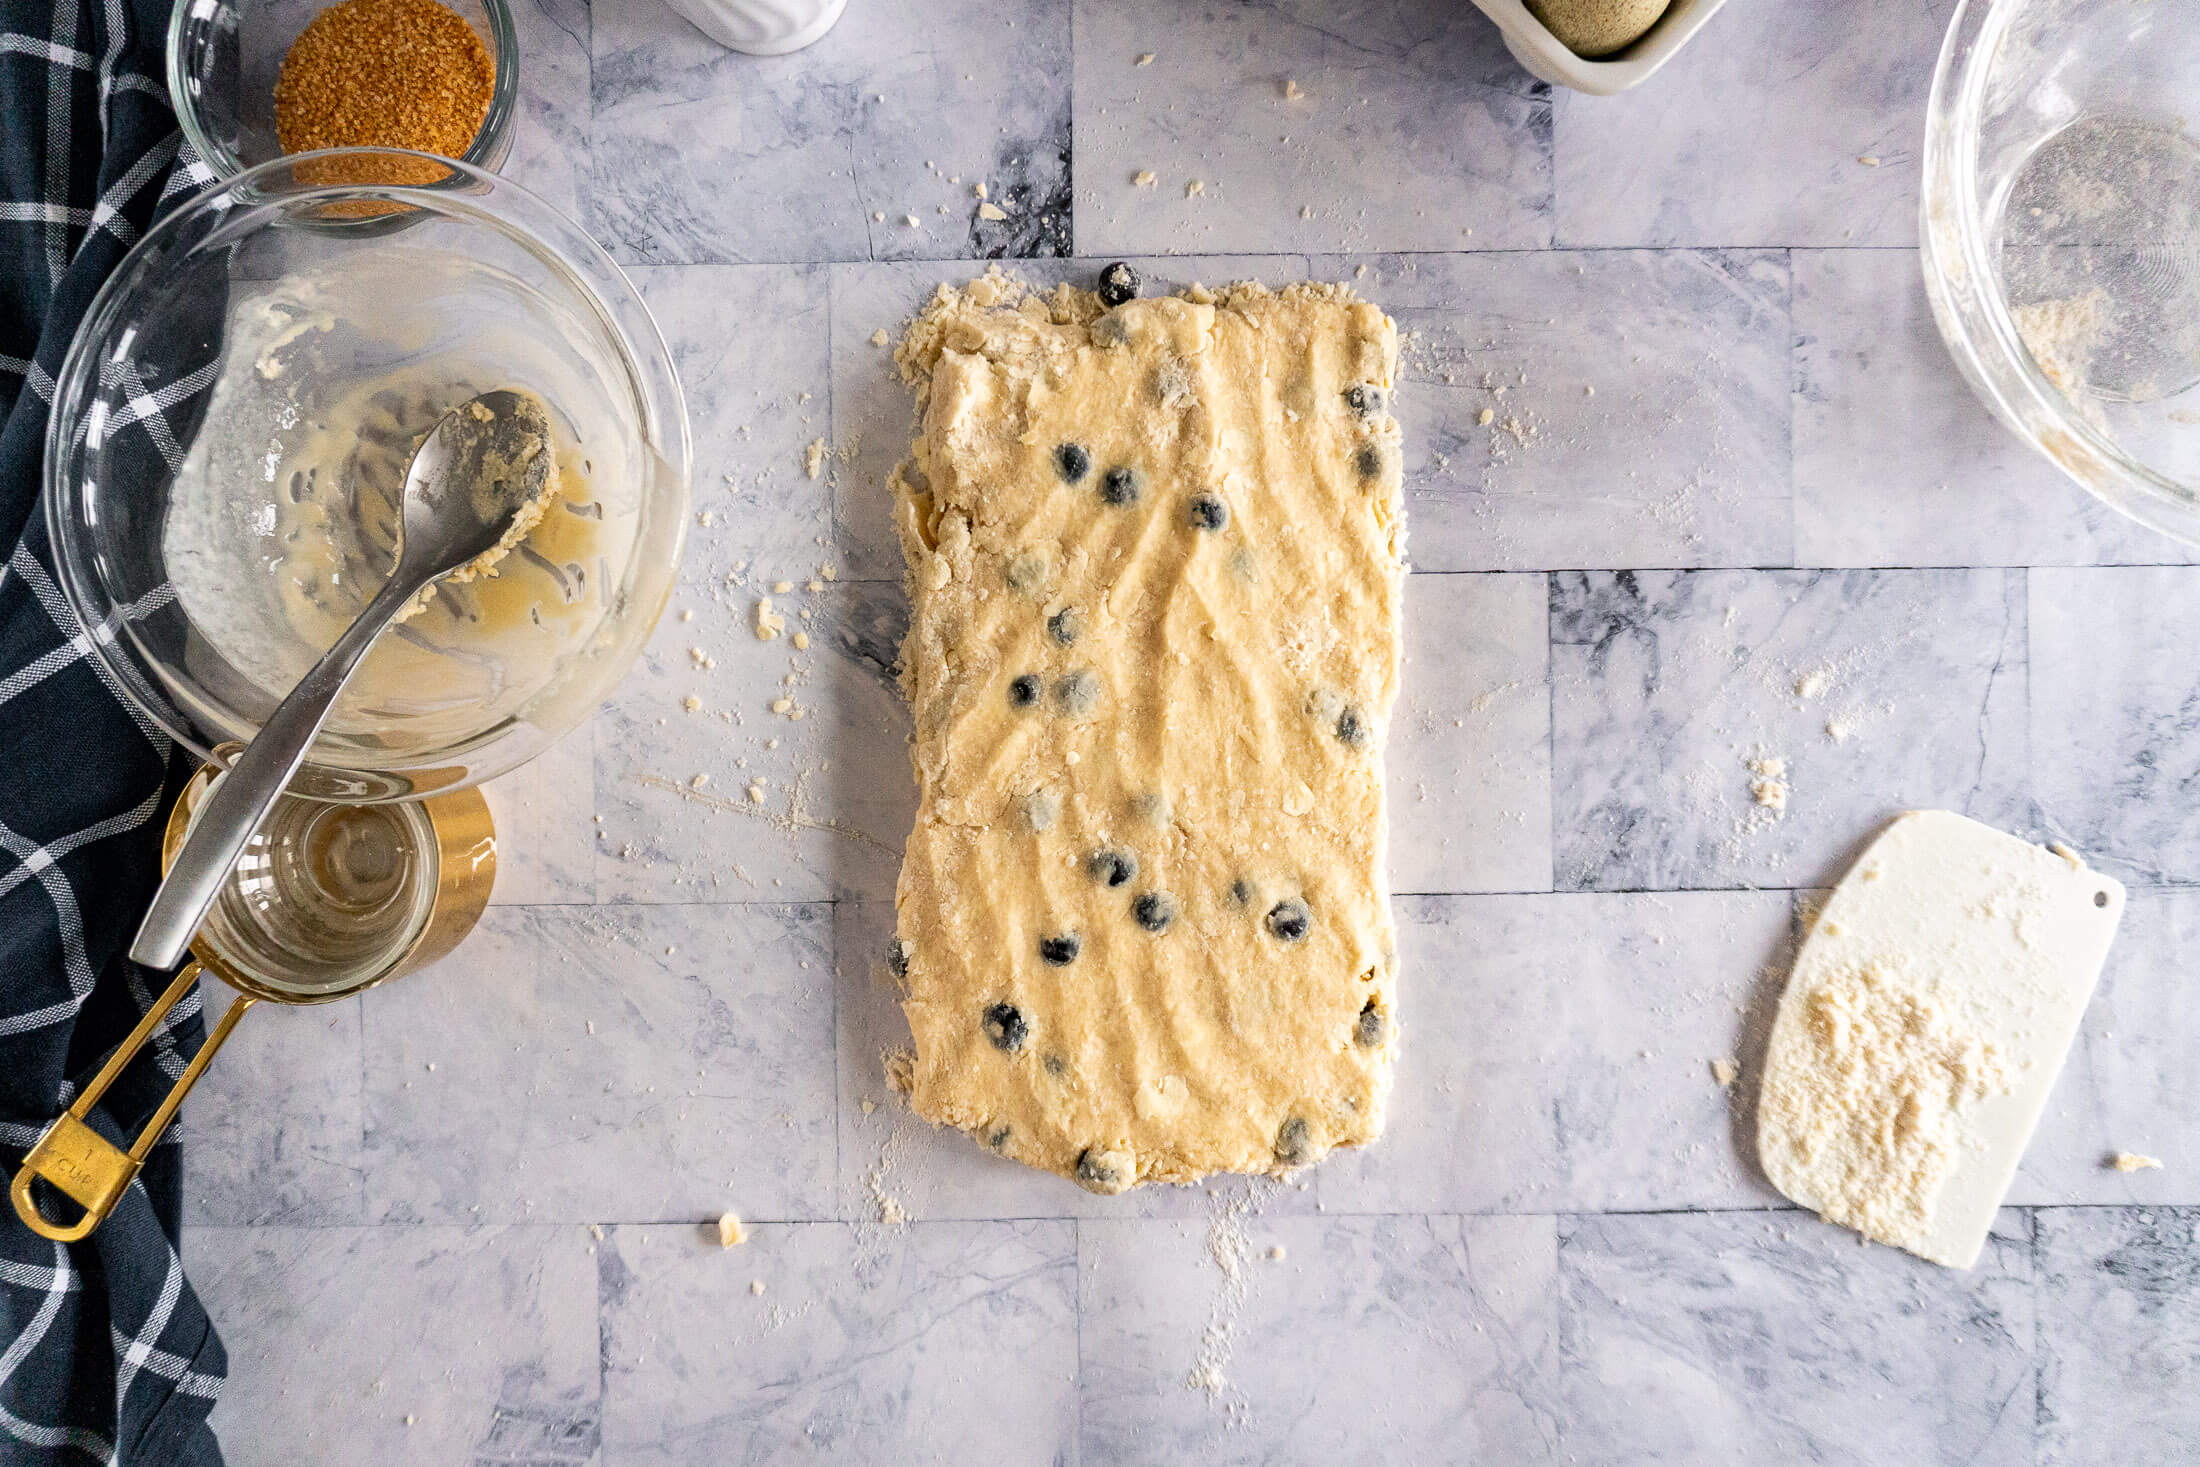
- Step 8: Gently press the dough into a rectangle.
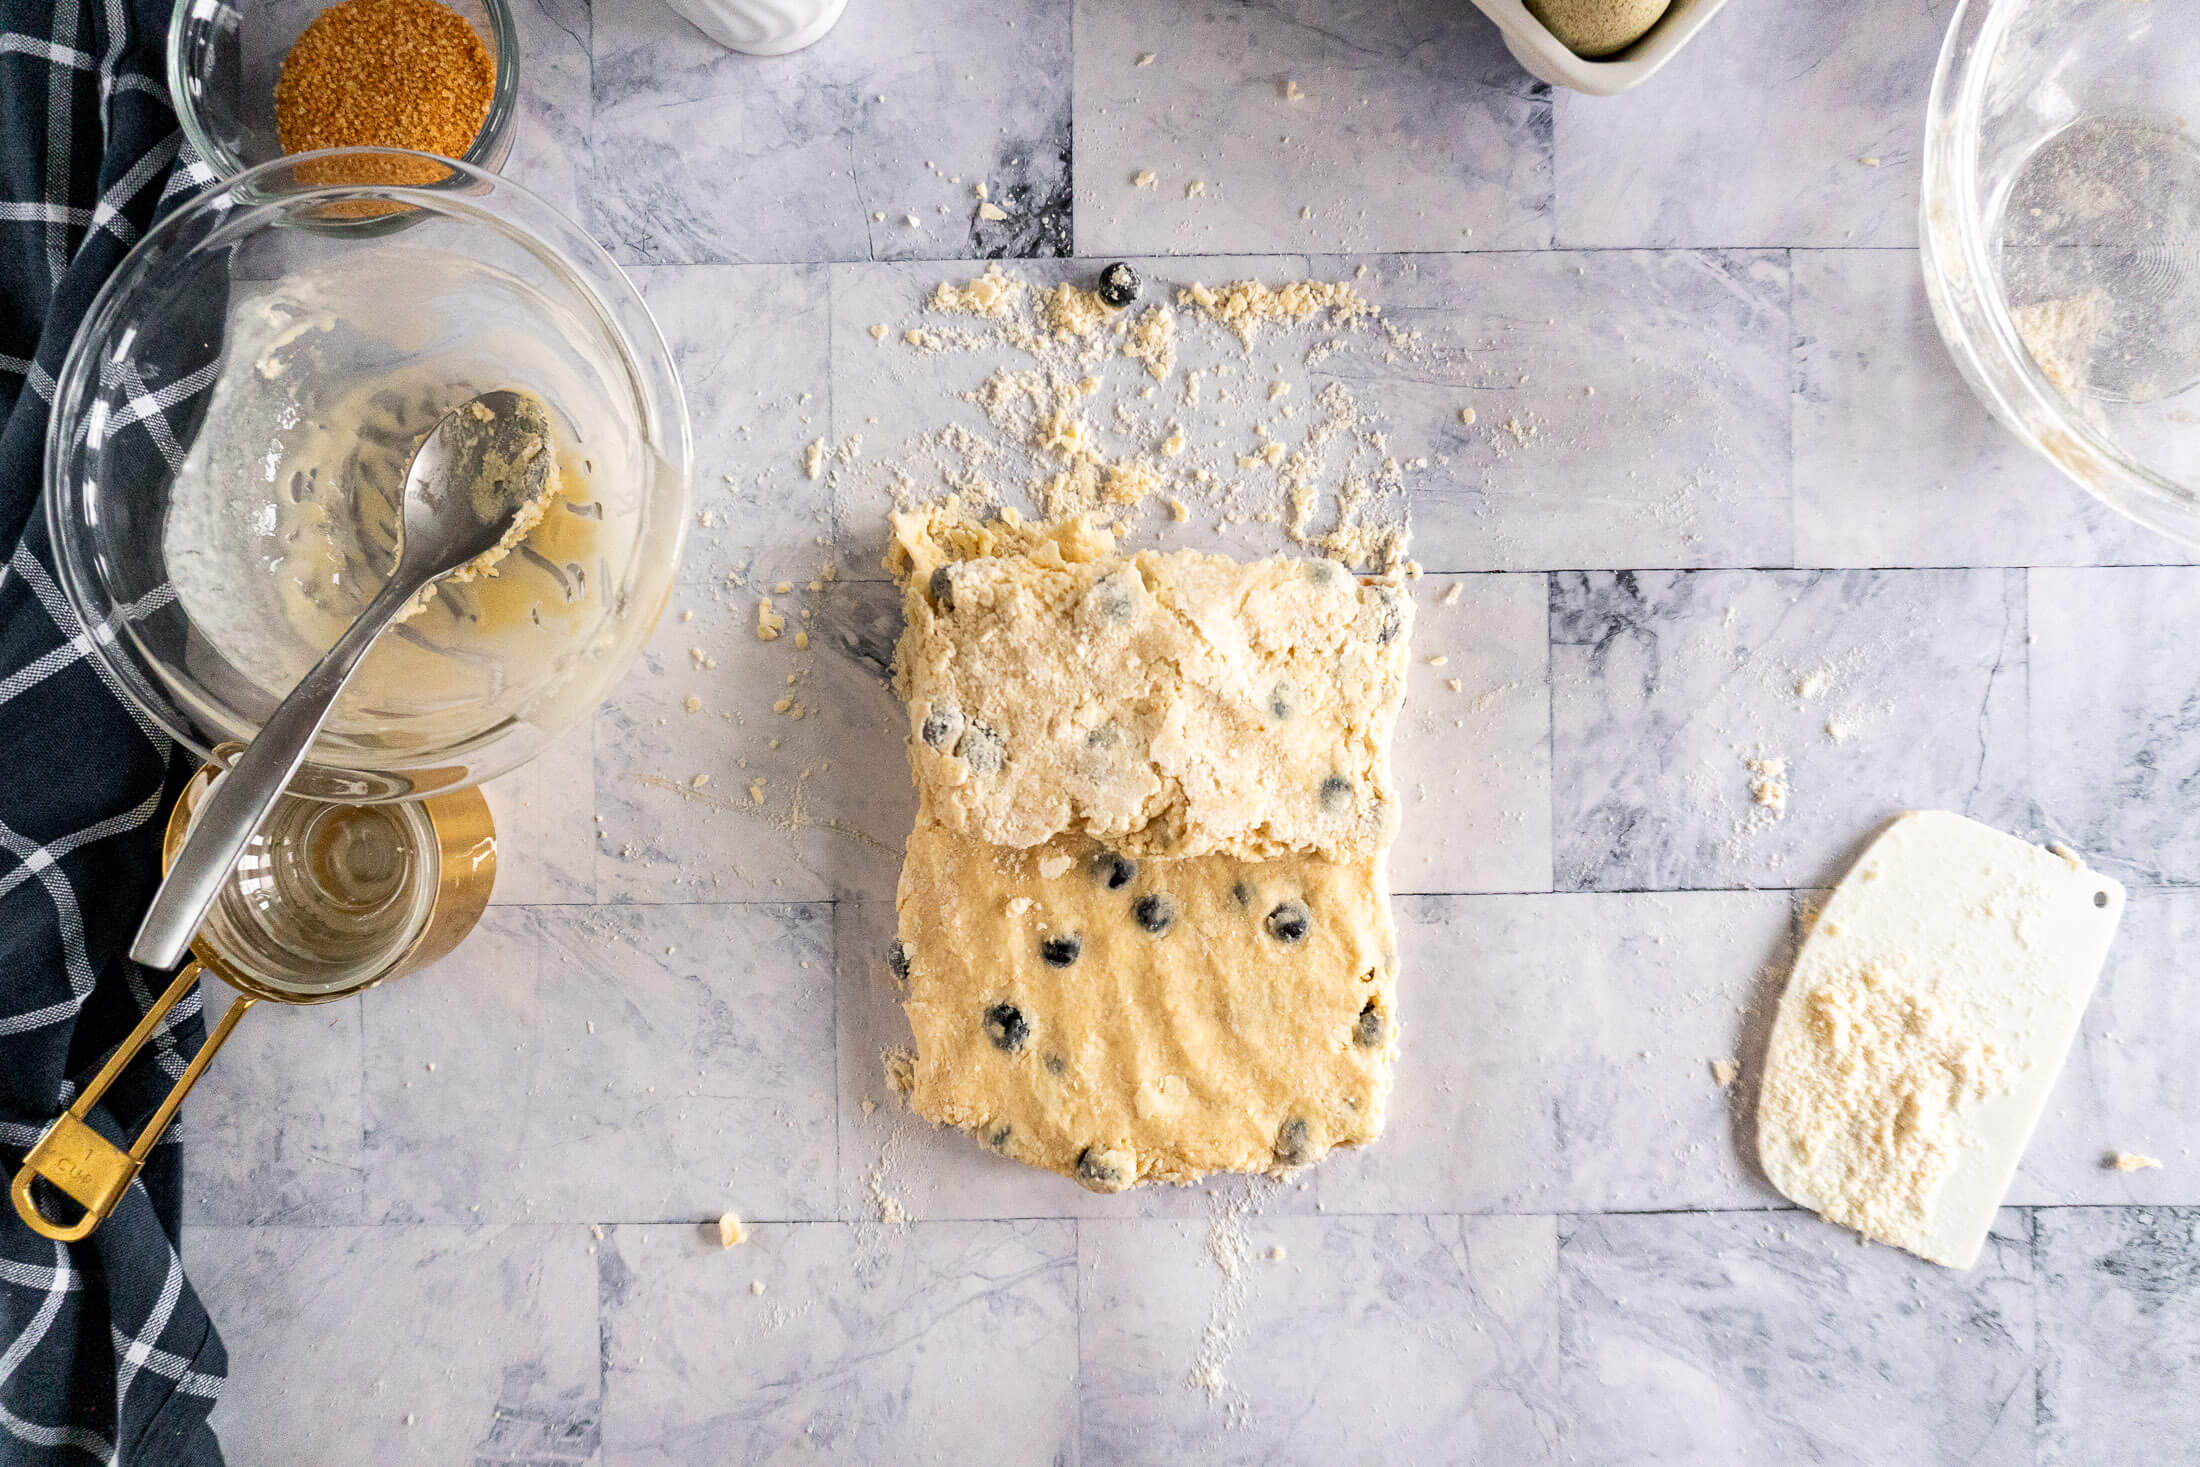
- Step 9: Once the dough is pressed into a rectangle, fold it into thirds like a letter.
This simple lamination technique creates alternating layers of dough and butter. As the scones bake, the cold butter releases steam, separating those layers and creating a lighter, flakier texture.
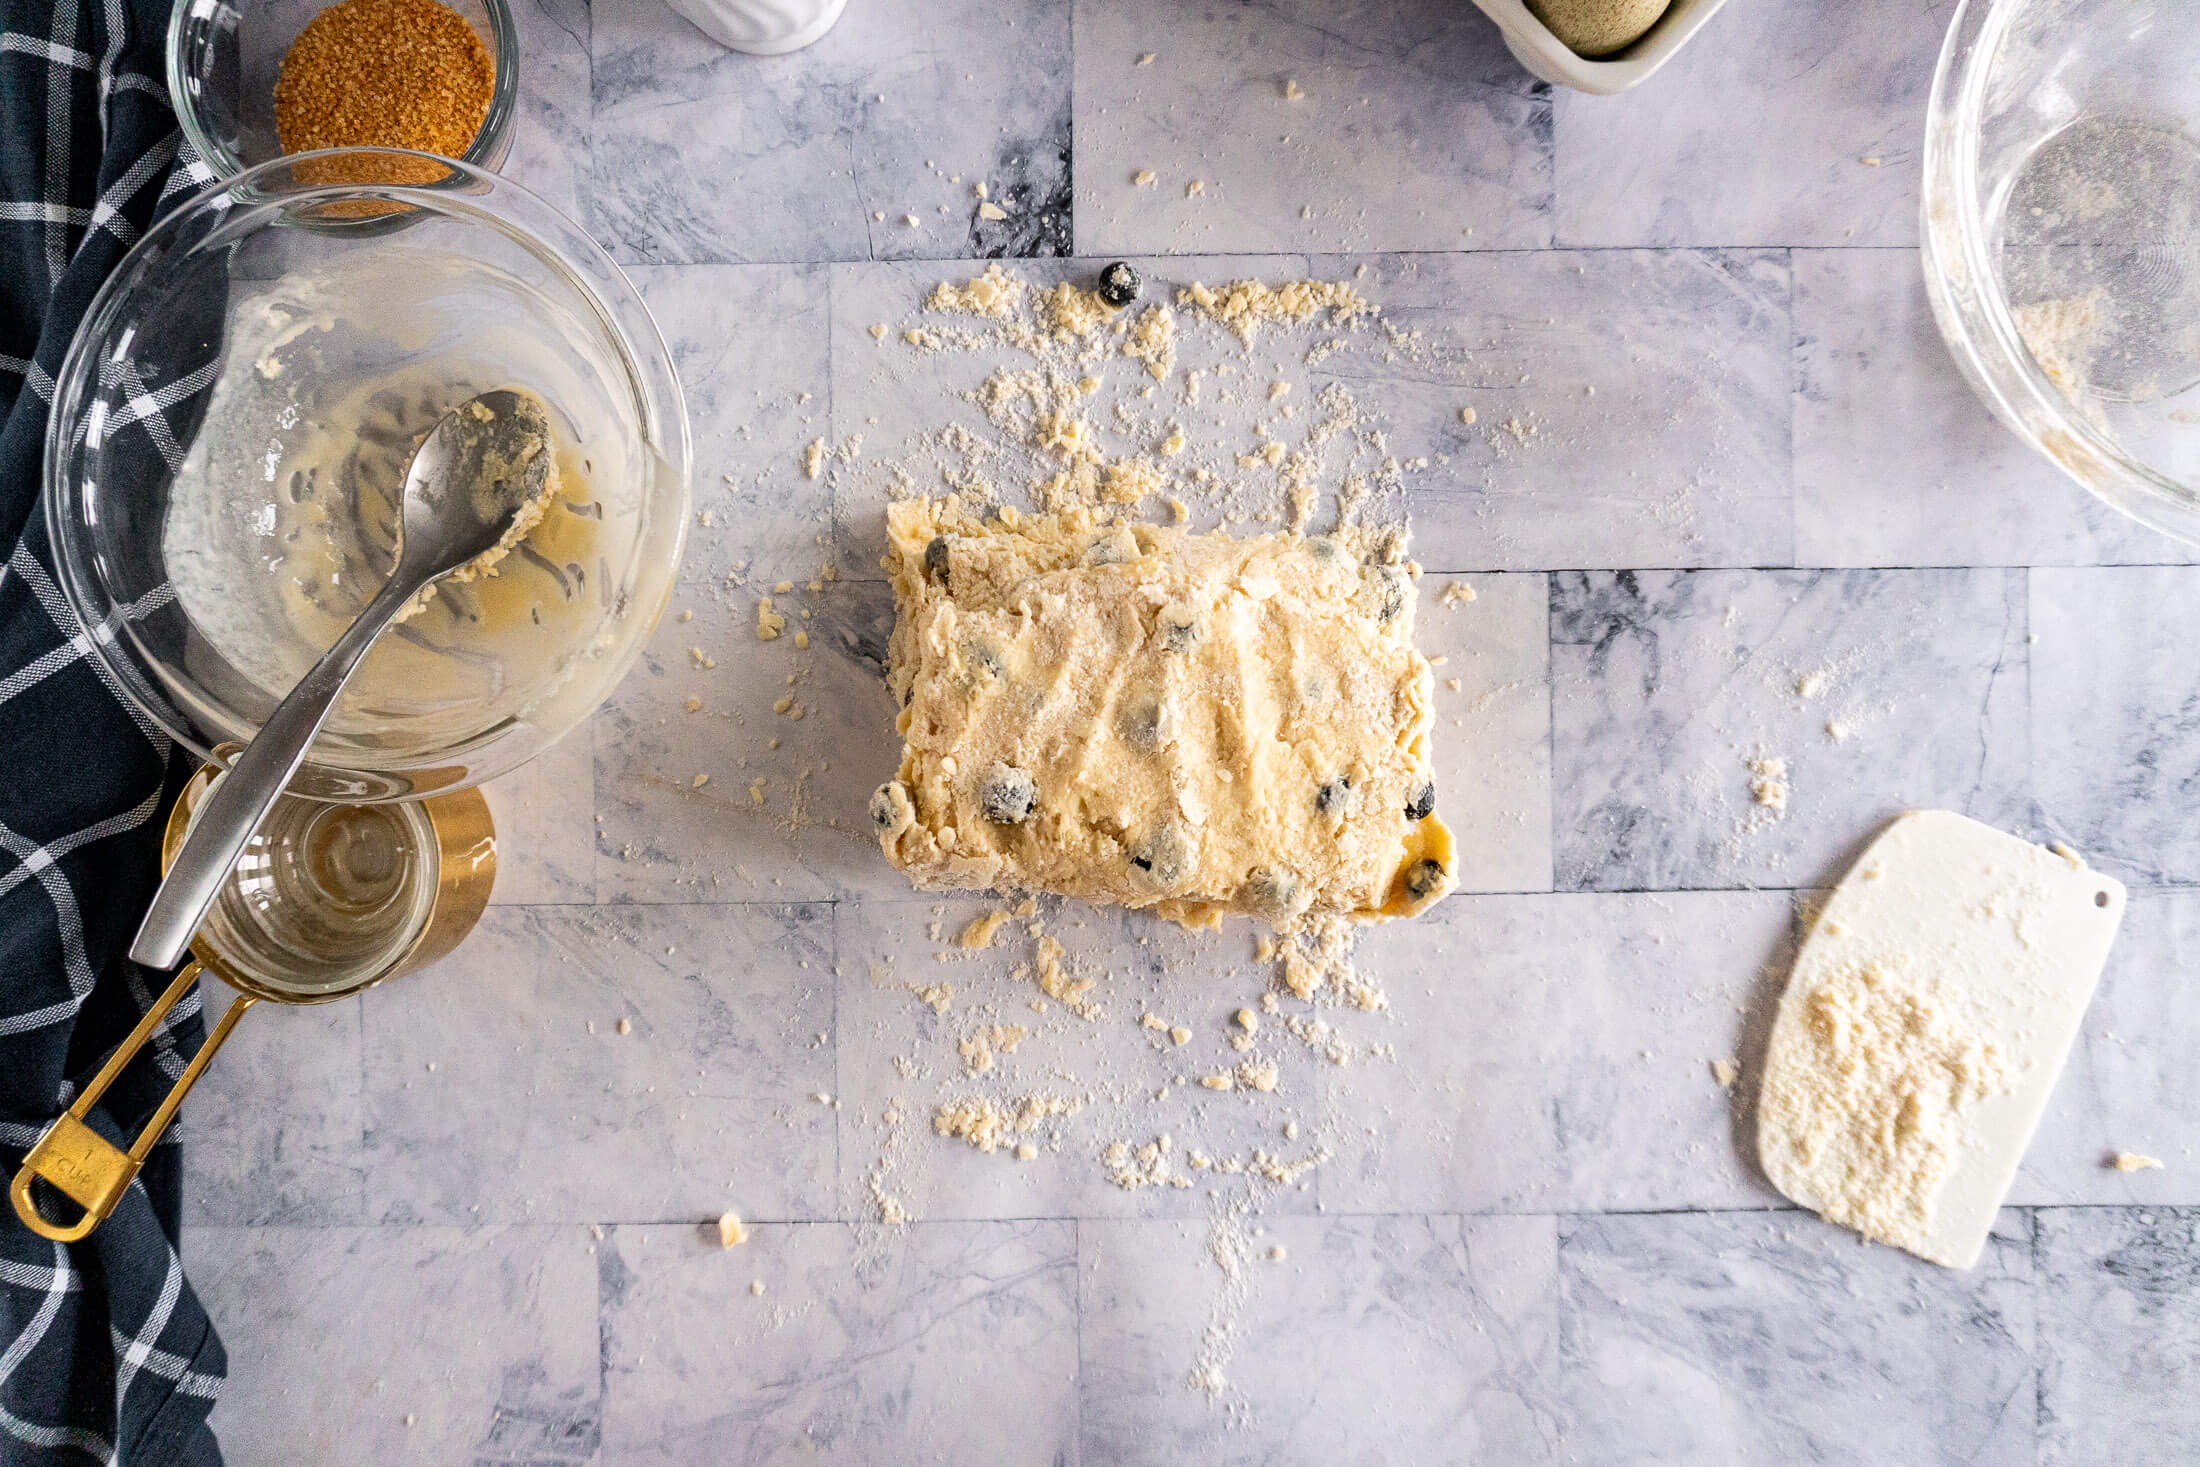
- Step 10: Repeat the process by pressing the dough into a rectangle again and folding into thirds from the opposite direction. These folds help build structure without overworking the dough, resulting in tender scones with distinct flaky layers.
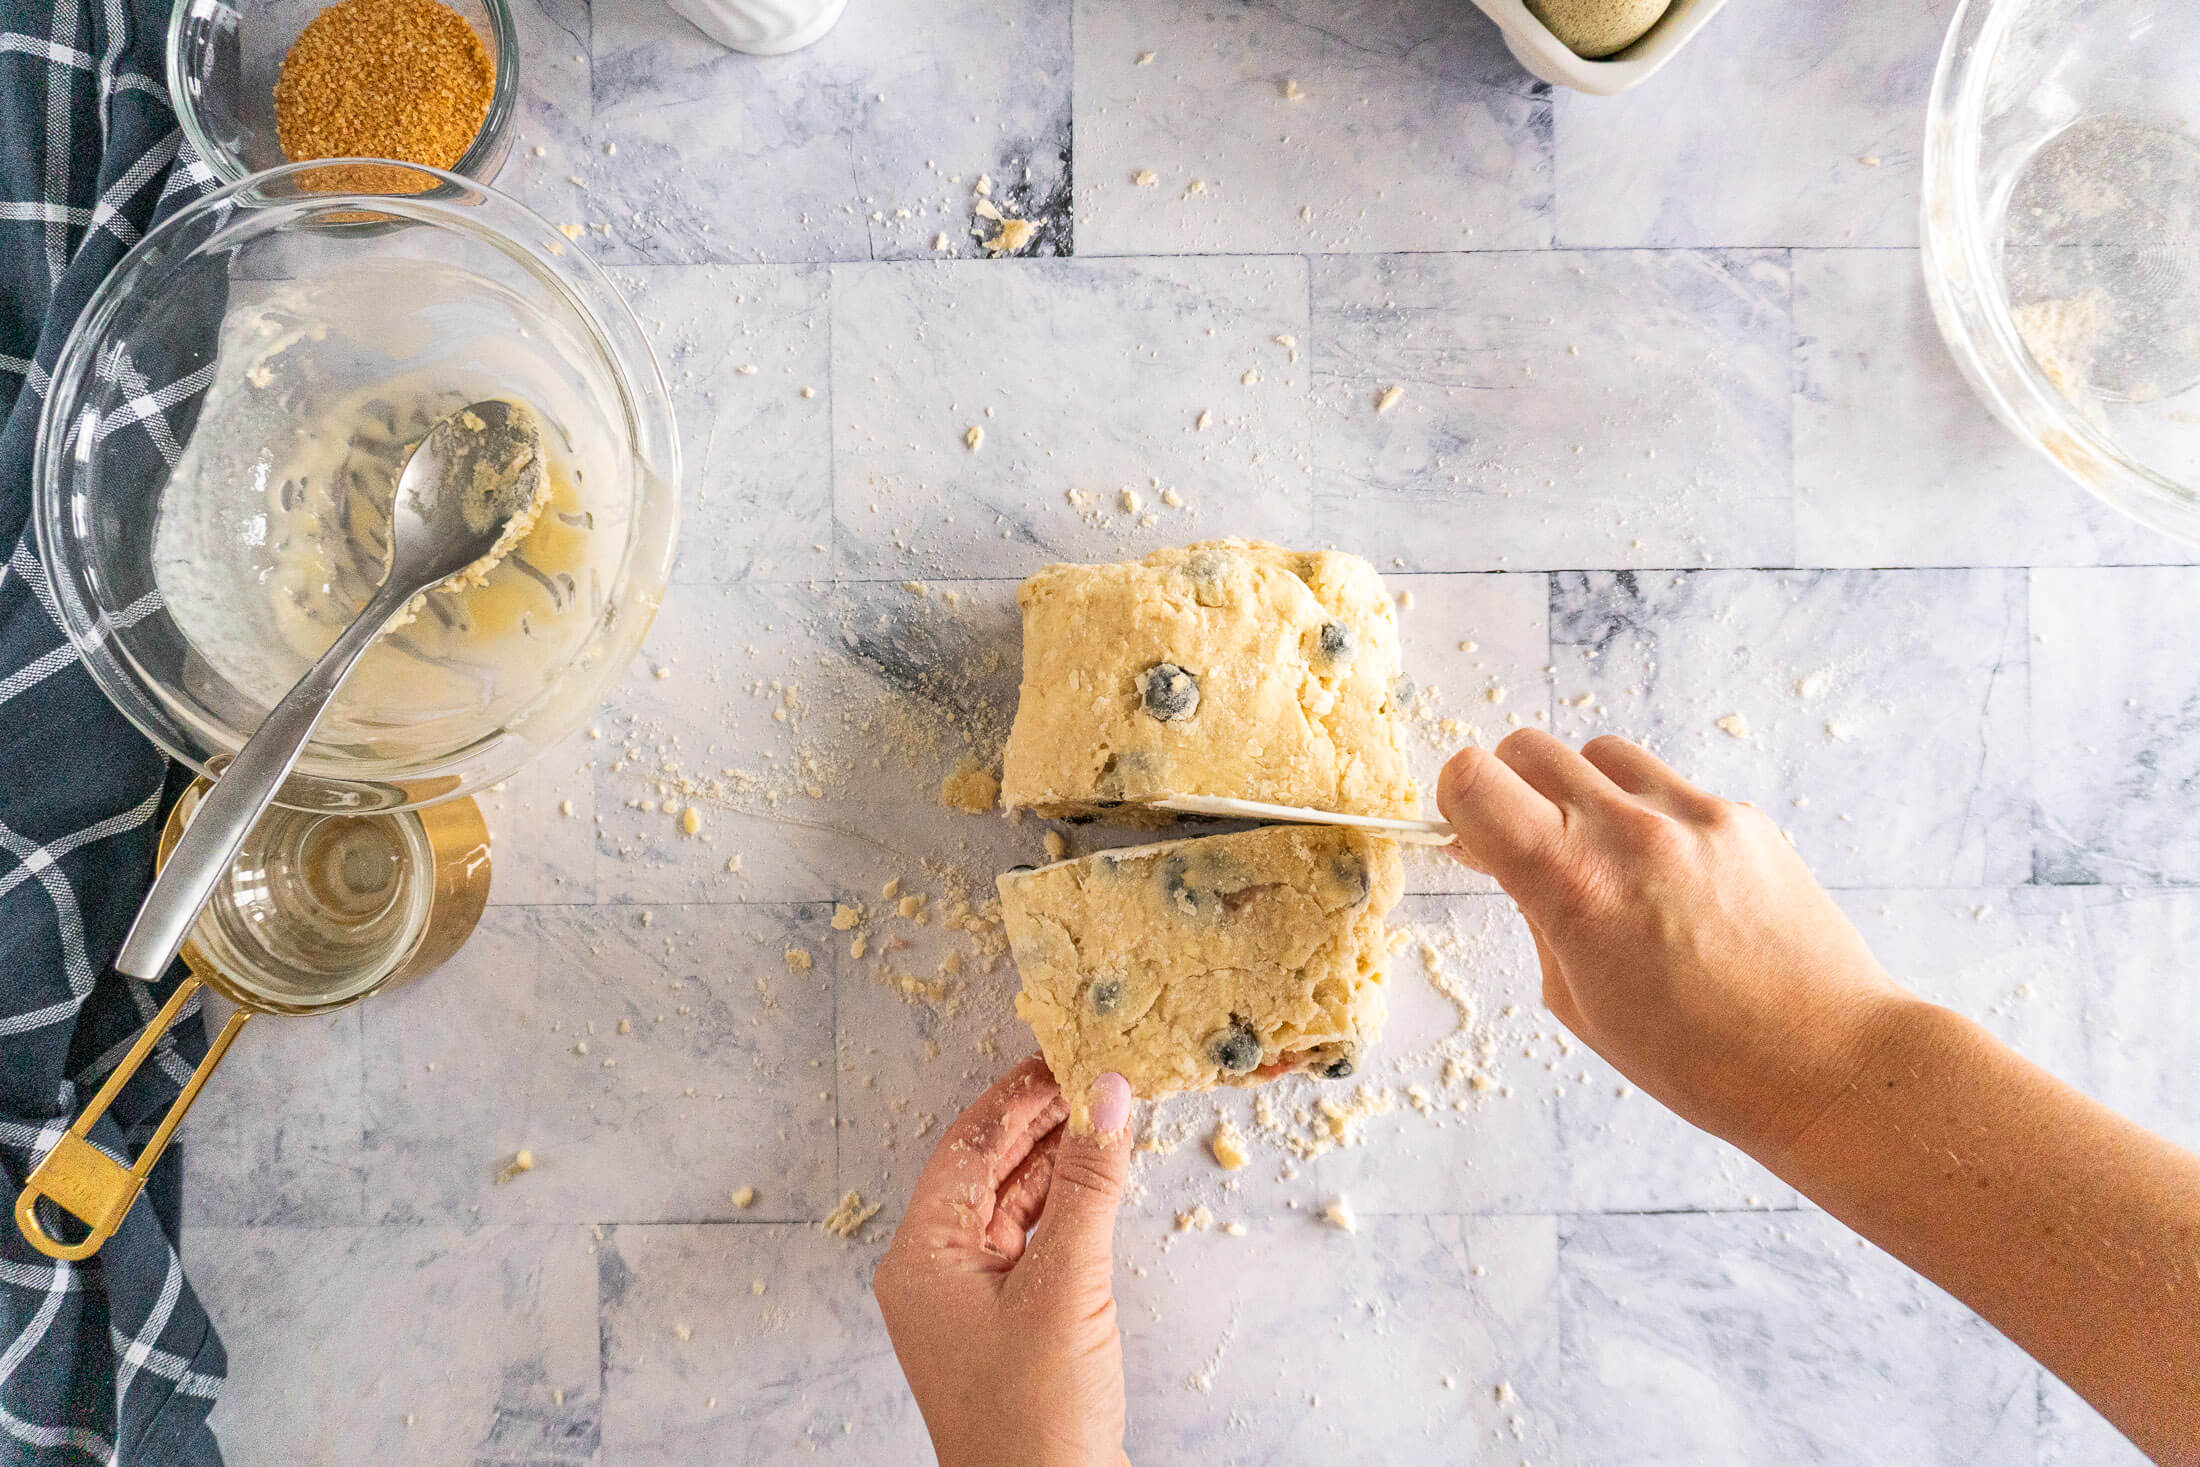
- Step 11: Using a knife or bench scraper, divide the dough into 2 equal portions.
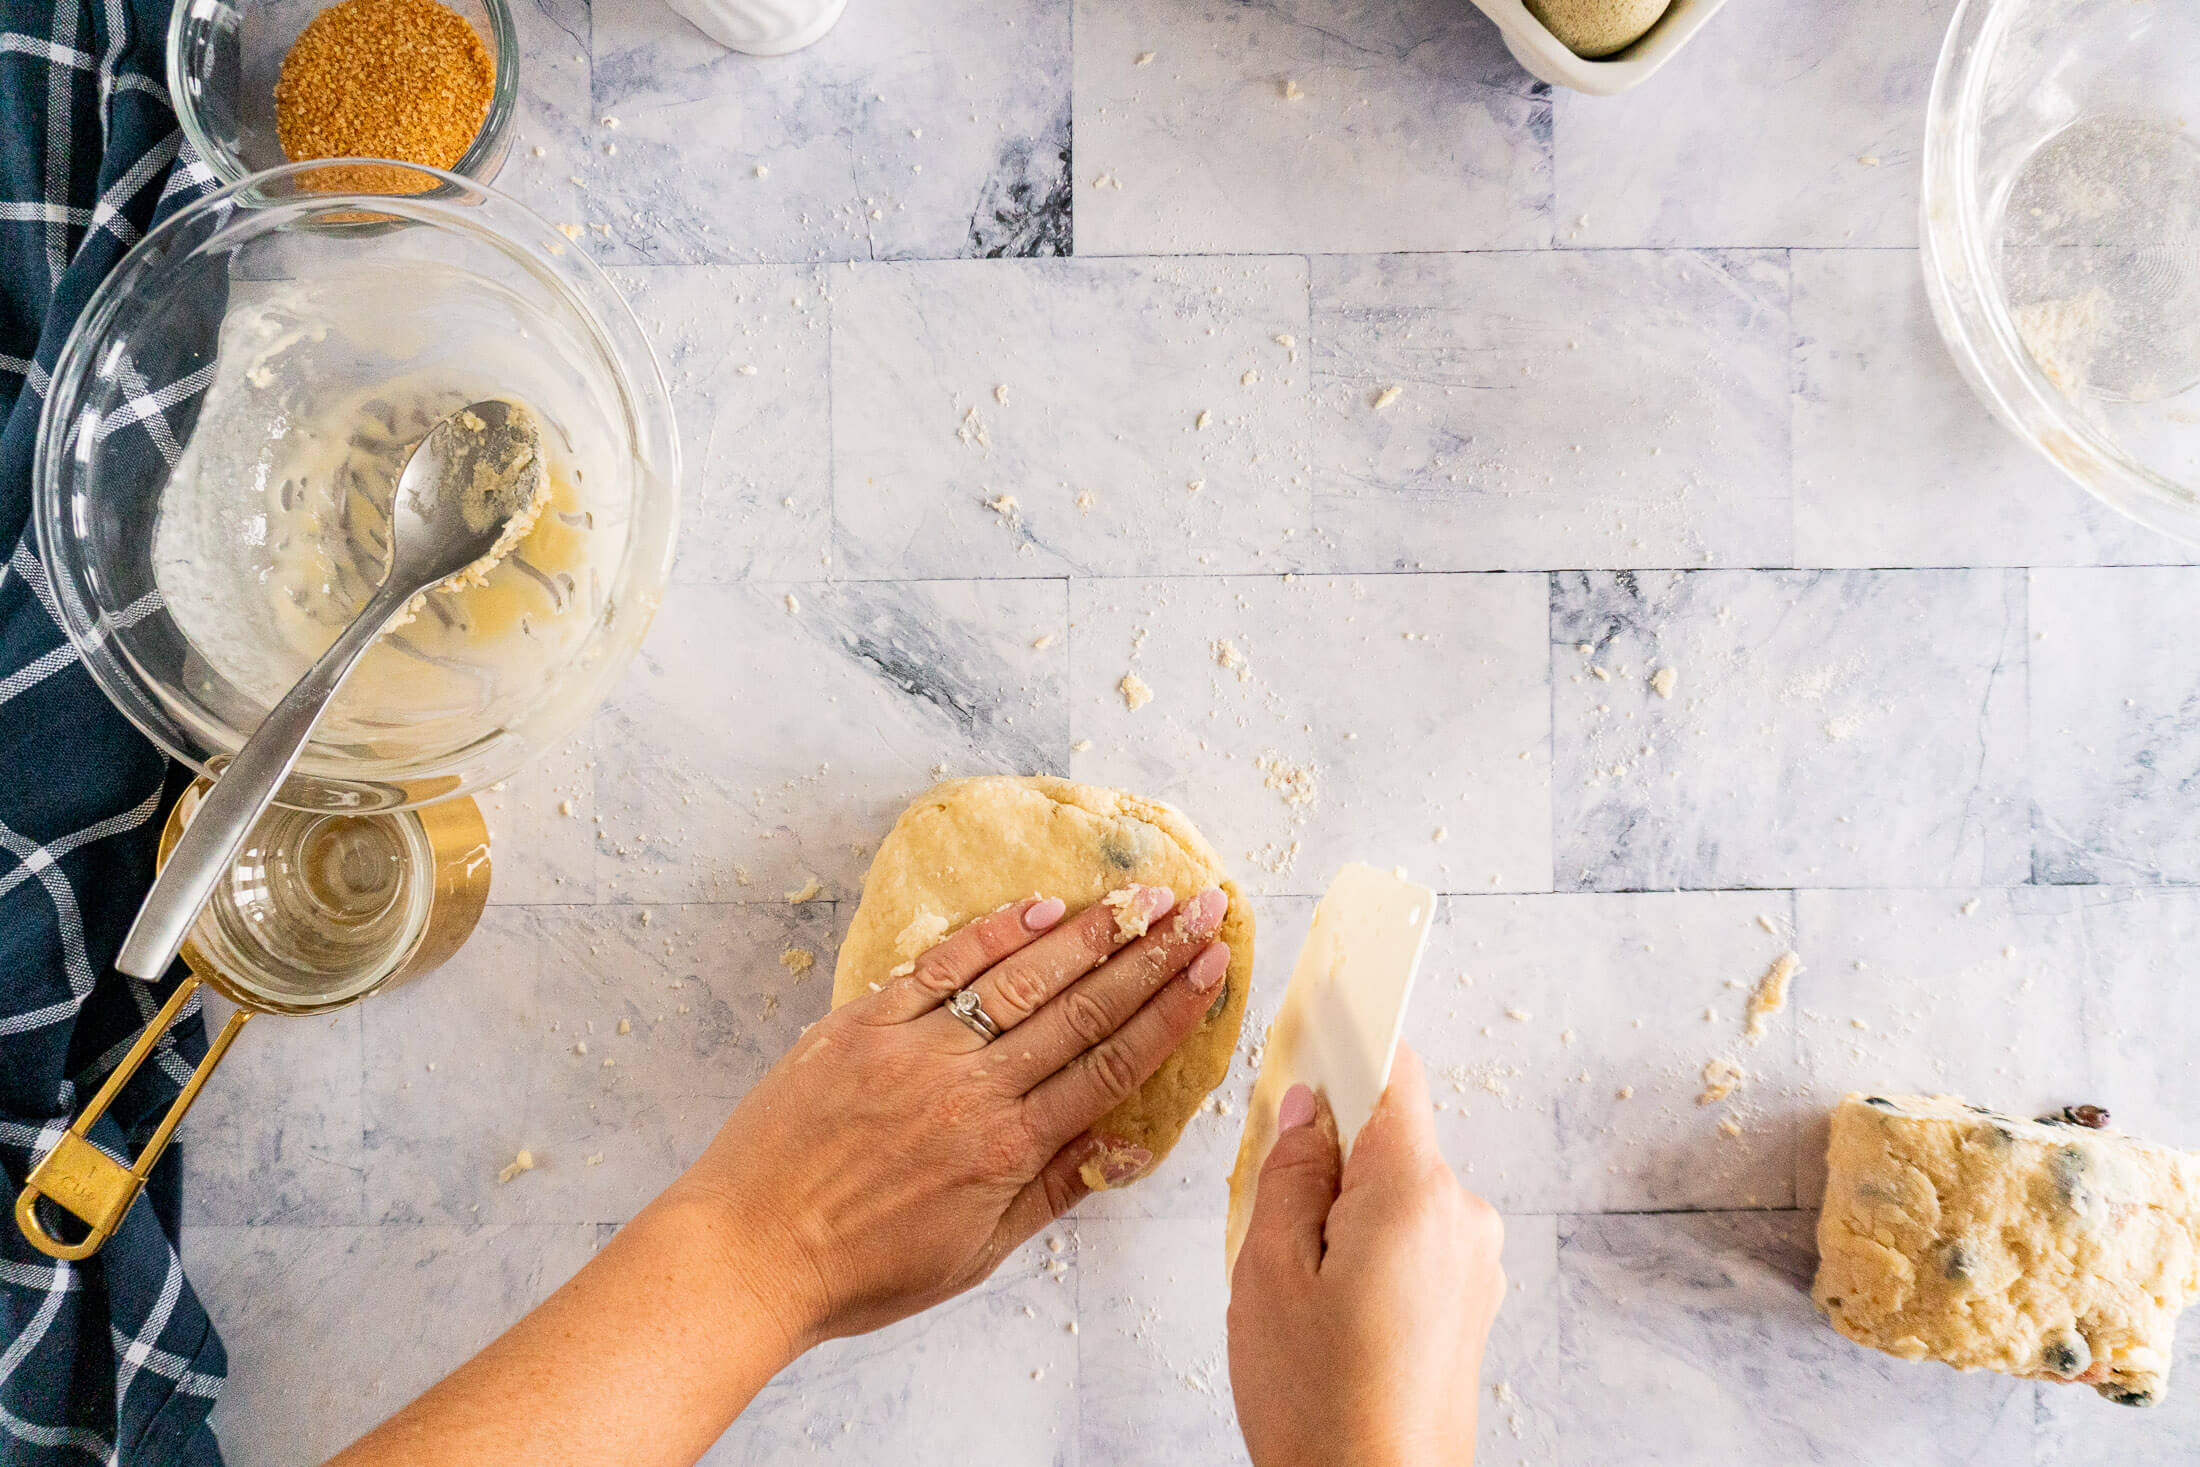
- Step 12: Pat each into a circle about 3/4″ thick.
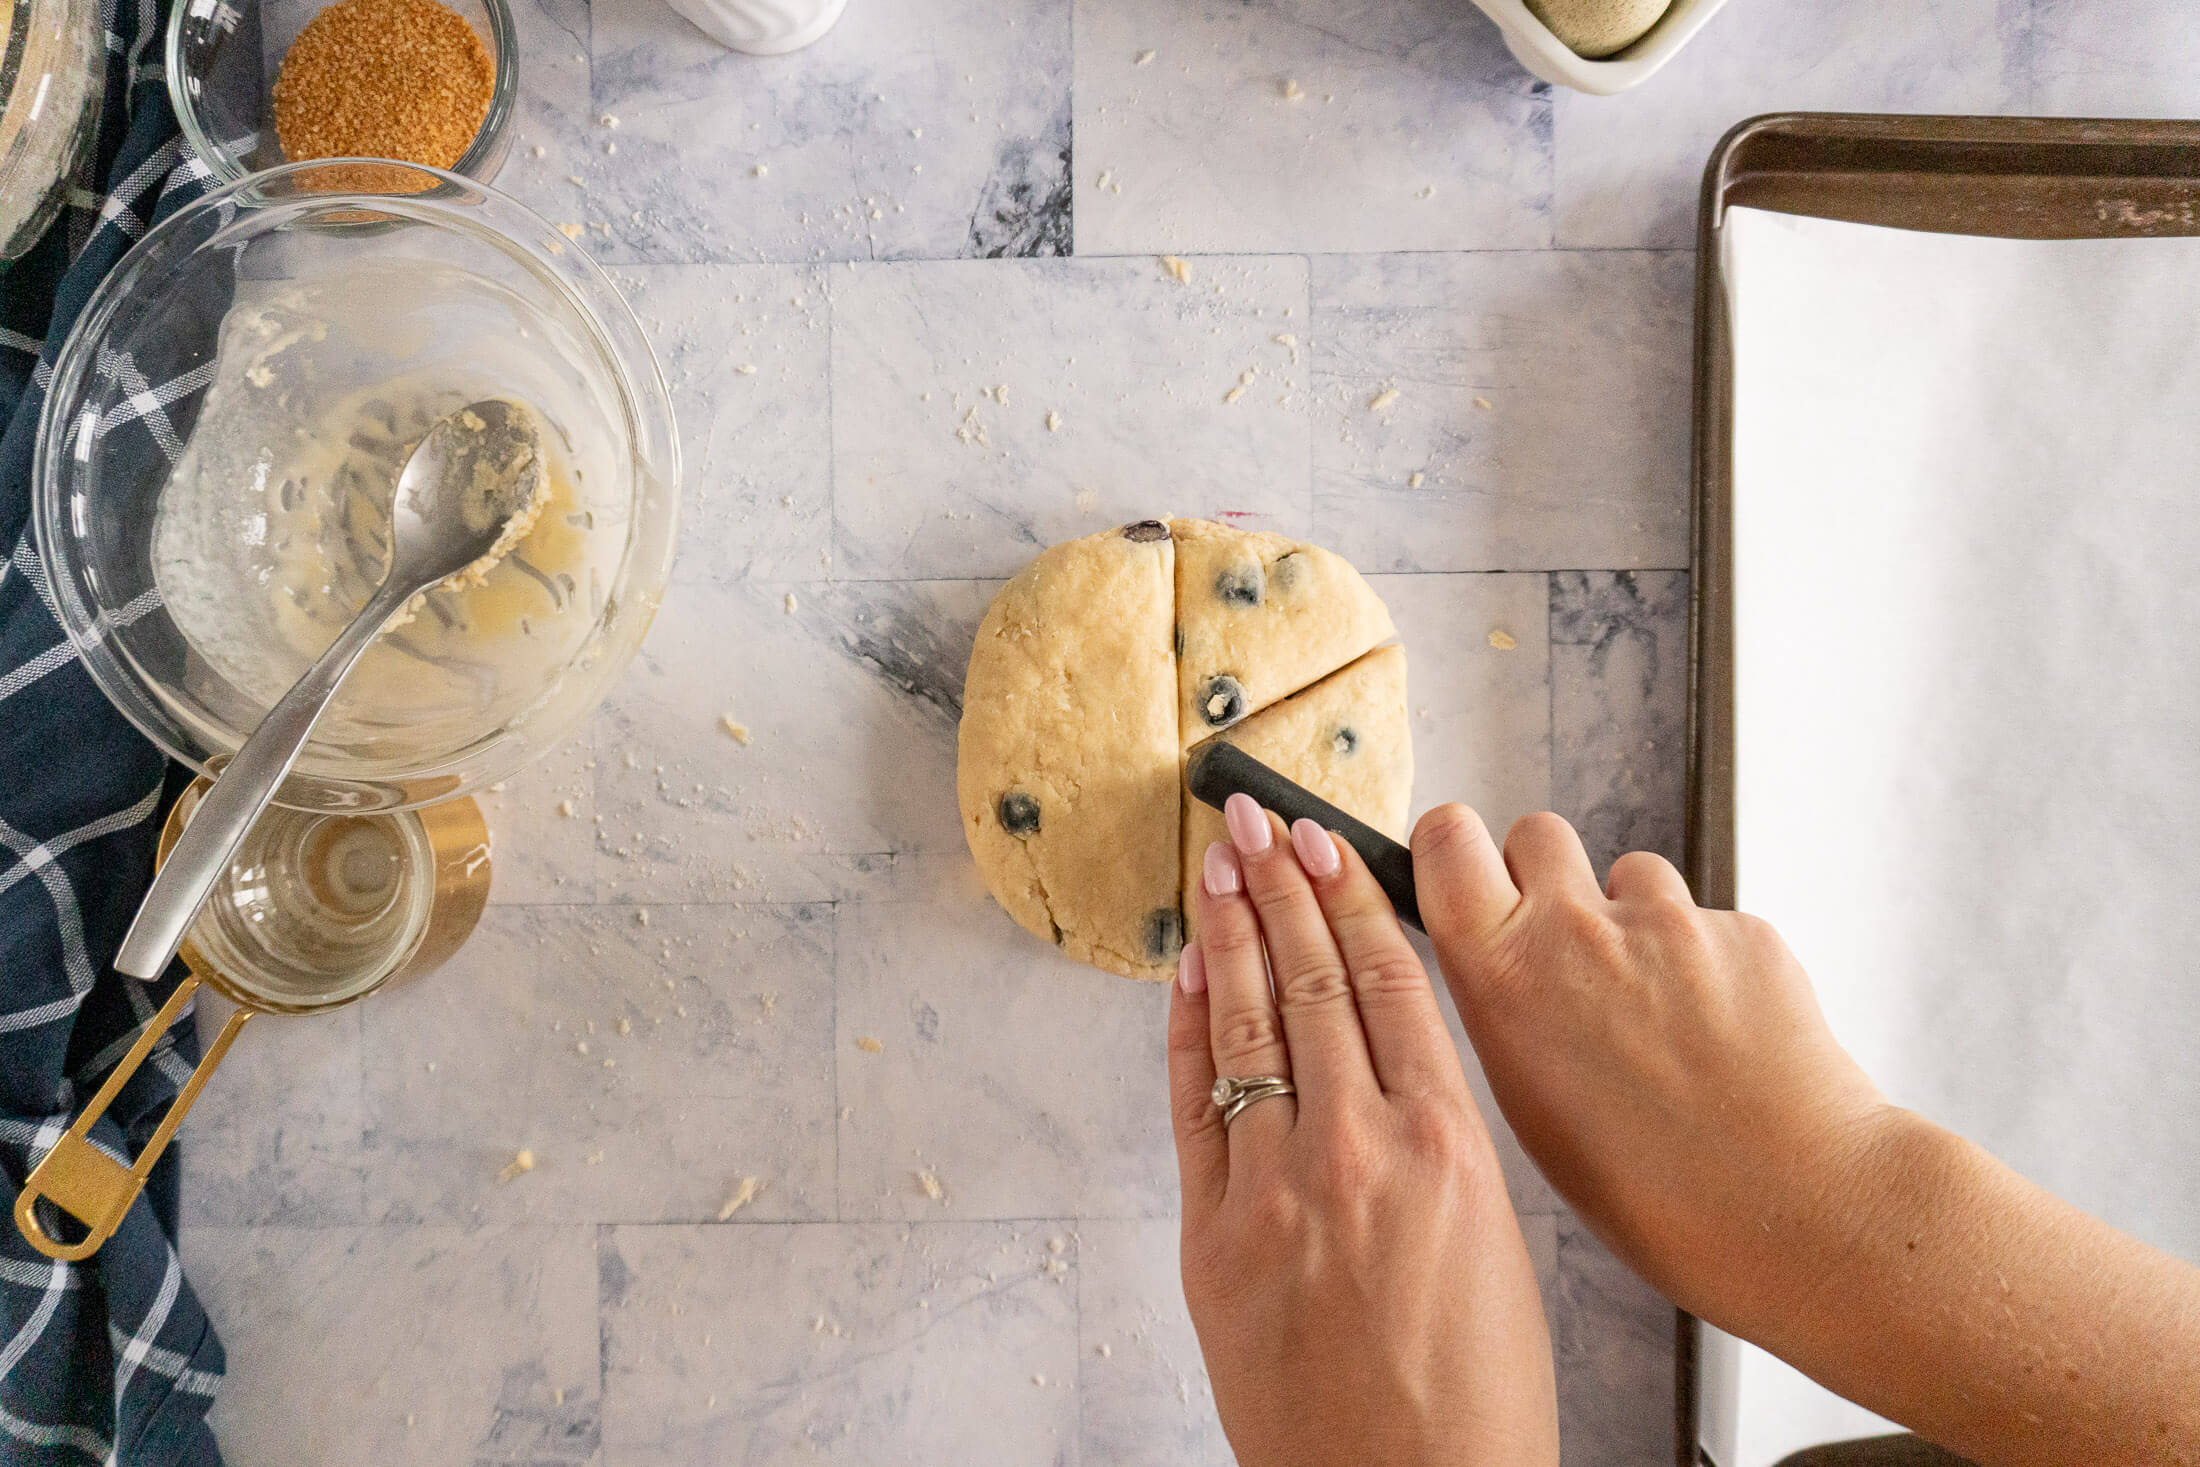
- Step 13: Cut each circle into 6 wedges. The wedges will be smaller or larger depending on the amount of mix-ins added.
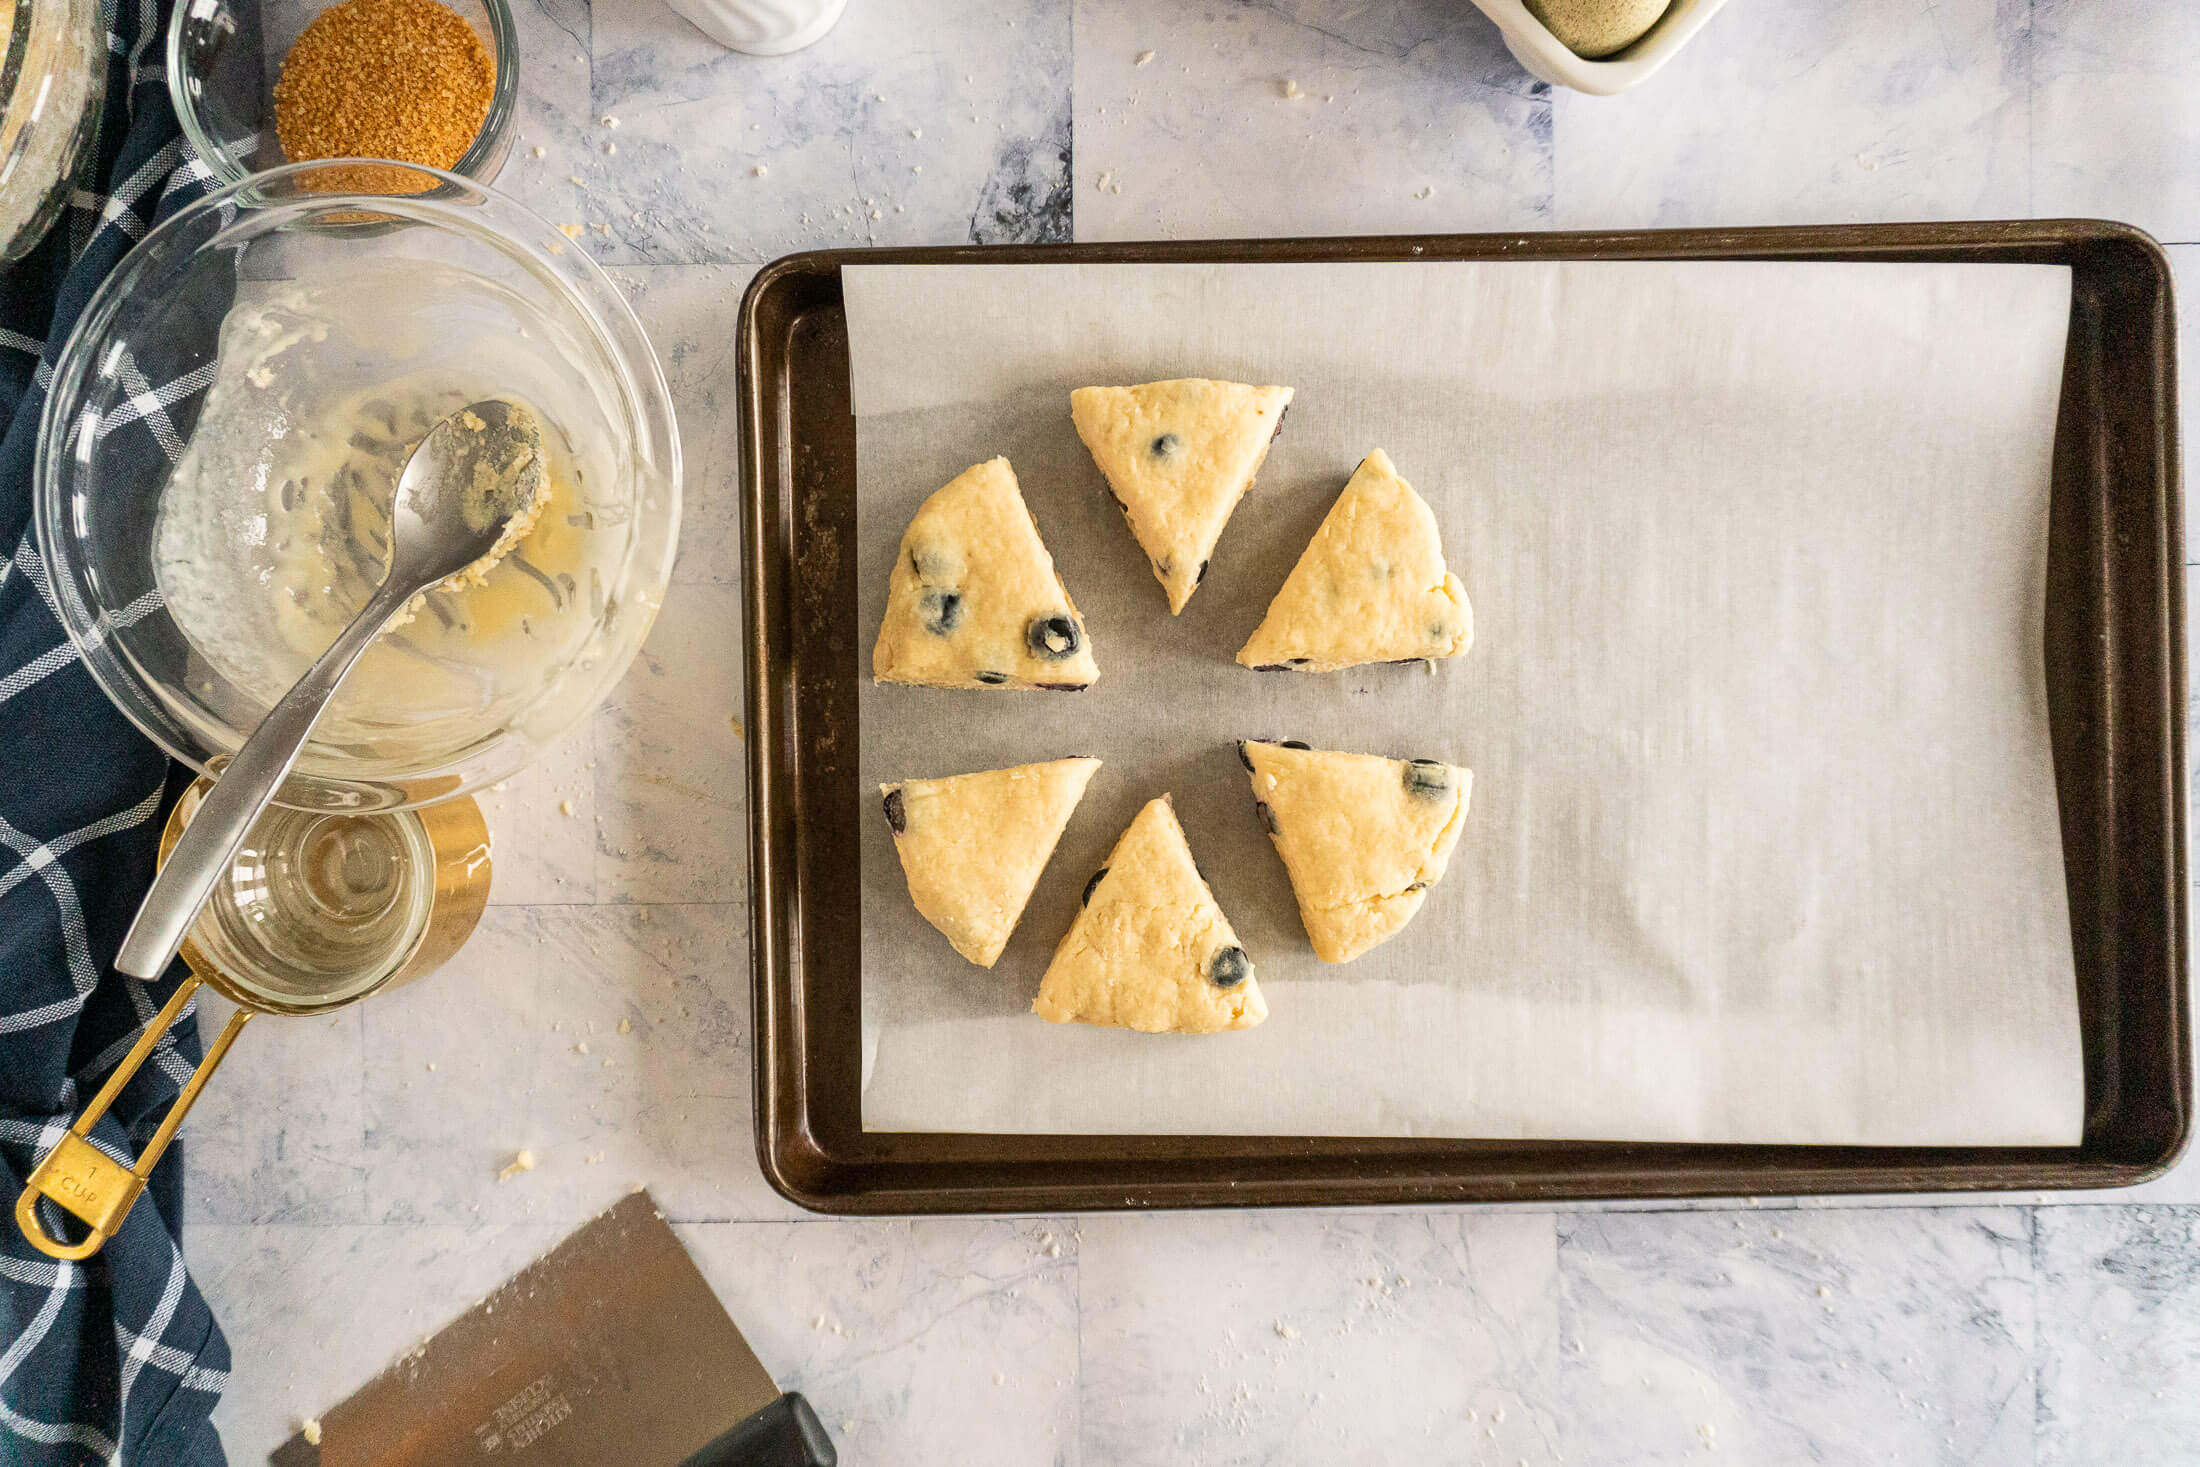
- Step 14: Pick up each wedge, with the bench scraper or a spatula, and transfer to prepared baking sheet. Place baking sheet in freezer for at least 30 minutes.
Bake Today:

- Step 15: Preheat oven to 400 degrees Fahrenheit. Once oven comes to temperature, remove baking sheet from freeze and generously brush the top of each scone with heavy cream.
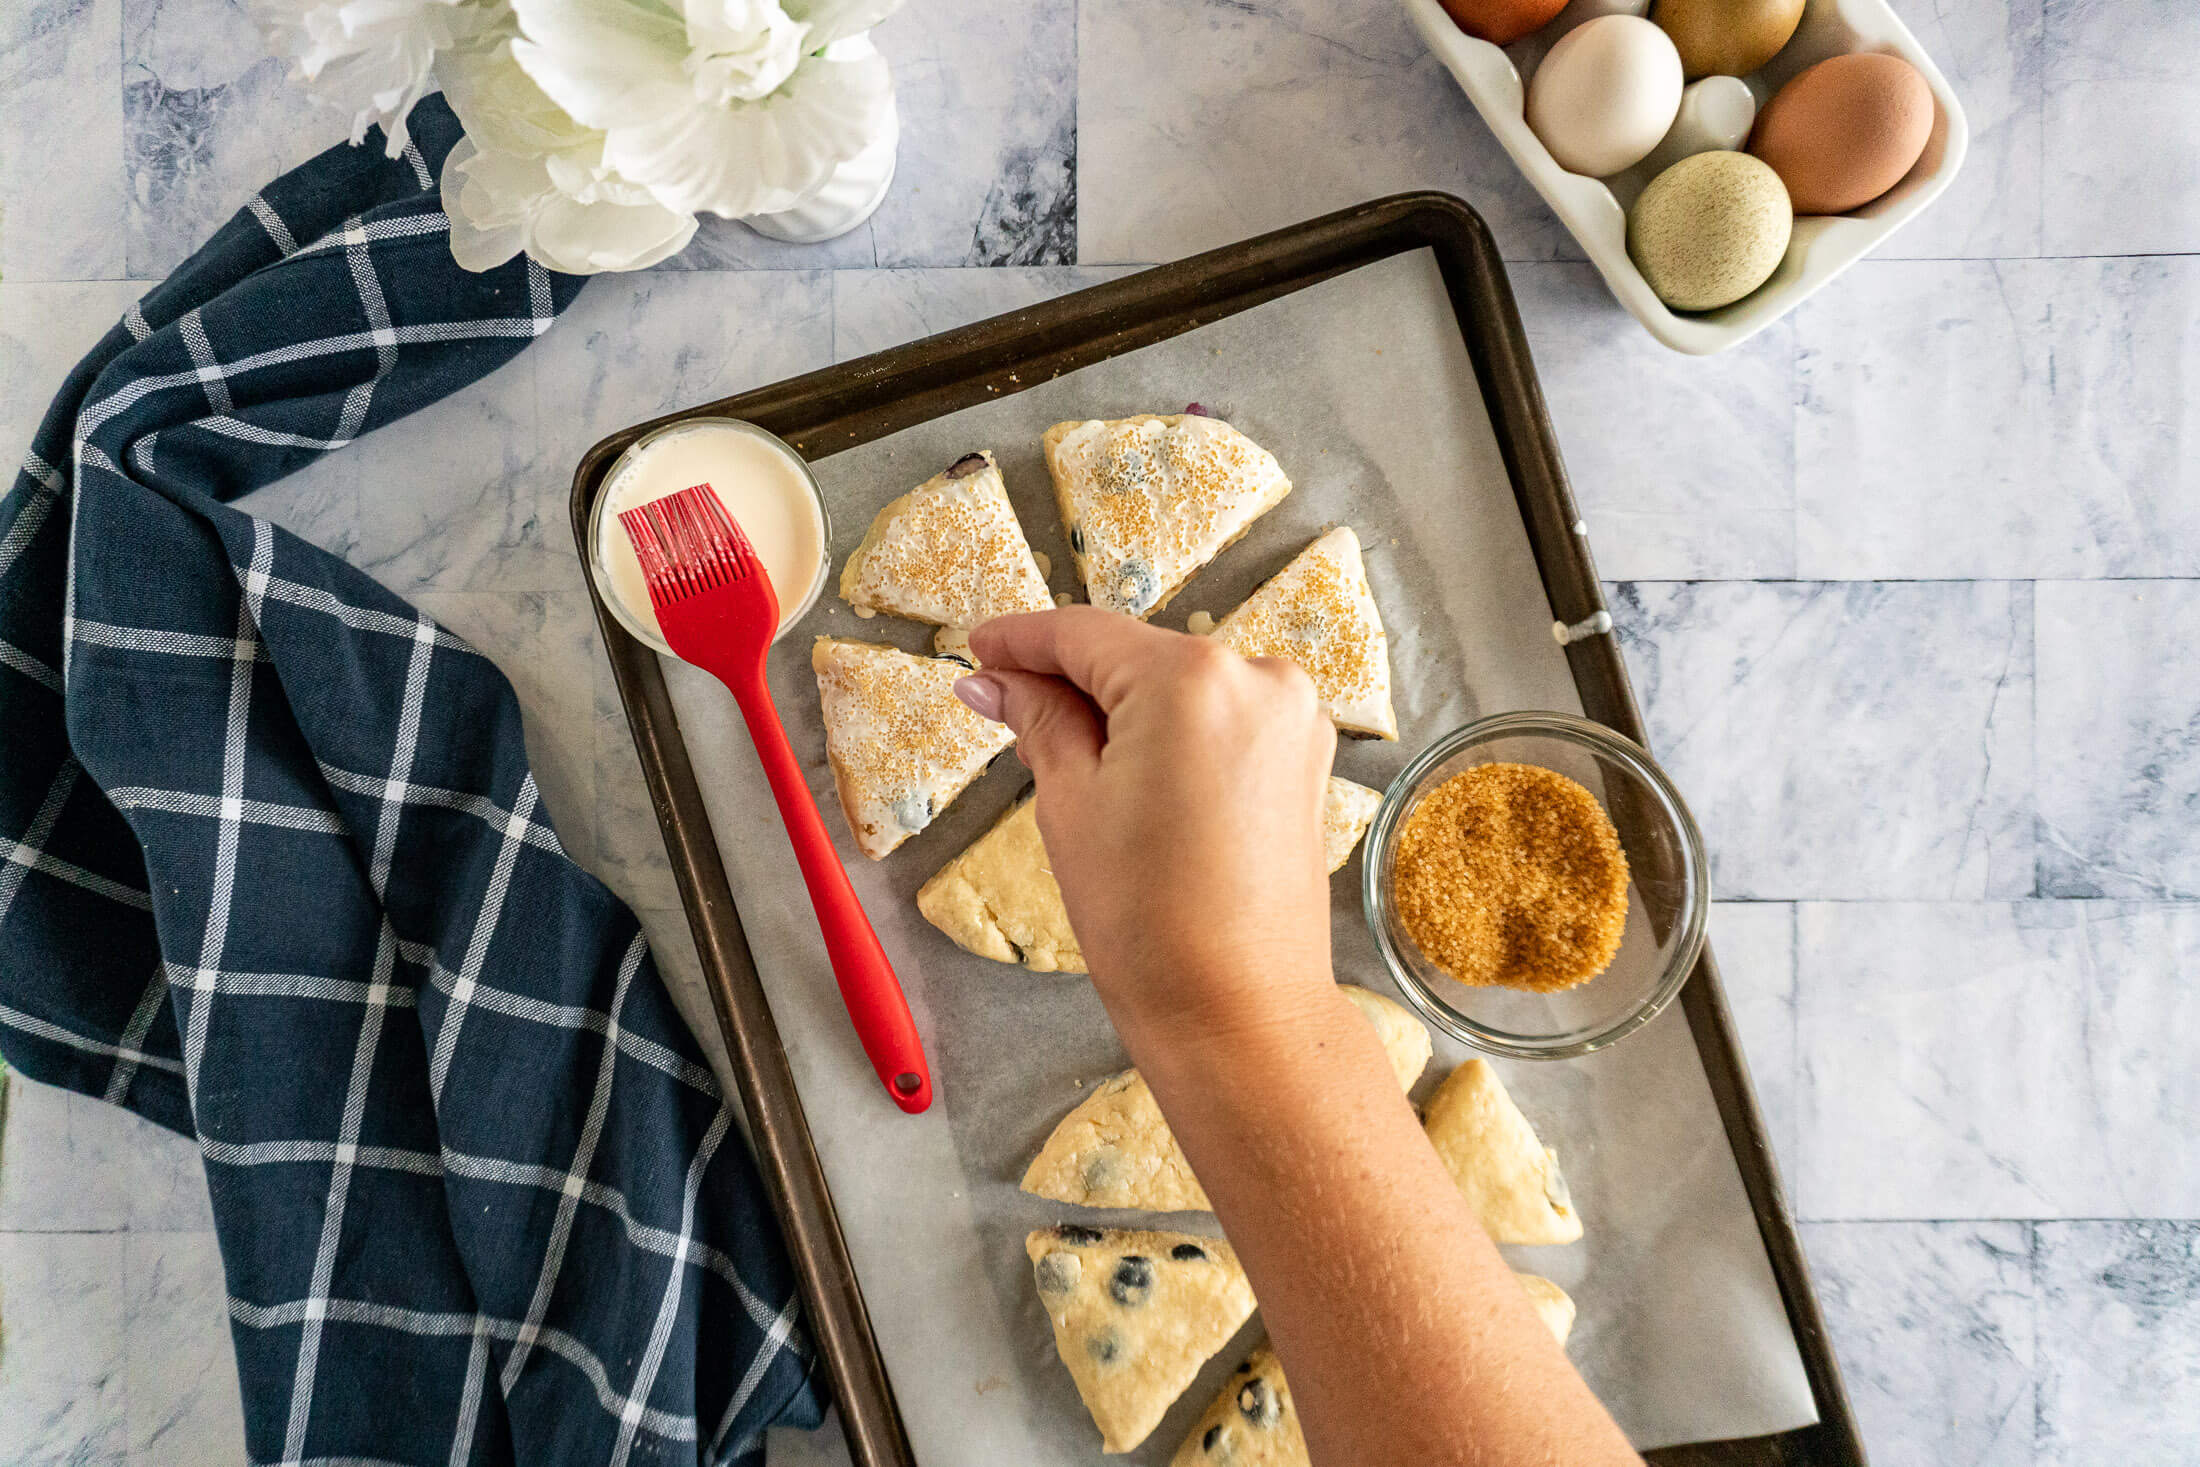
- Step 16: Sprinkle with coarse sugar, I like to use raw sugar but sanding sugar or decorating sugar would work just as well.

- Step 17: Bake the scones at 400f for 16-18 minutes or until the bottoms are nicely browned and the tops are set. Scones don’t really darken on the top, so it’s important to avoid over baking which can make them dry and tough.

- Step 18: Remove from oven and allow to rest on baking sheet for 5 minutes before transferring to a cooling rack.
Make Ahead Sourdough Scones:
- Once scones are shaped and placed in the freezer allow to freeze completely through 2-3 hours. Then wrap tightly in plastic wrap and store in an airtight freezer container until ready to bake.
- When ready to bake, follow the directions in the section above.
Pro Tip: I love to bake a few scones fresh the same day I make the dough and then save the rest in the freezer for another day – all the treat and no clean up!

Why I Laminate Scone Dough
One of the easiest ways to improve homemade scones is by laminating the dough before shaping.
Lamination sounds fancy, but all it means is folding the dough over itself a few times. Each fold creates layers of butter trapped between layers of dough. As the scones bake, those pockets of butter melt and release steam, helping create a lighter, flakier texture.
Many scone recipes skip this step entirely, but I find that taking an extra minute to fold the dough produces taller, more tender scones with better texture and more defined layers.
The key is to work gently and keep the butter cold. If the butter stays cold until it reaches the oven, it will create steam that helps separate the layers as the scones bake.
Expert Tips
- If you’ve never made scones, this recipe is a great way to get into the process, the dough is a bit wetter – which helps when you’re working it. Some scone recipes result in a very dry, craggly dough. I’ve developed this one to be a bit more cohesive and workable to help avoid the tendency to over stir.
- Baking powder provides the leavening in this recipe, so it’s important to ensure that your baking powder is fresh and active, as weak powder can result in flat, dense scones.
Why This Recipe Works
Cold butter creates flaky layers. Keeping the butter cold and cutting it into the dry ingredients leaves small pockets of fat throughout the dough. As the scones bake, those pockets melt and release steam, creating the tender, flaky texture that makes a great scone.
Minimal mixing prevents dense scones. Overworking the dough can breakdown or melt the butter, which can lead to tough, dry scones instead of light, tender ones.
The cream wash promotes even browning. Brushing the tops with cream encourages a golden finish while helping any coarse sugar or toppings adhere during baking.
Sourdough Discard Scones FAQs
Absolutely. After shaping and cutting the scones, freeze them on a baking sheet until solid, then transfer them to an airtight freezer container. When you’re ready to bake, brush with cream, sprinkle with coarse sugar, and bake directly from frozen.
Once completely cooled, store your sourdough scones in an airtight container or wrapped tightly in plastic wrap at room temperature. They’ll stay fresh for up to 4 days.
Sourdough scones also freeze beautifully. Once cooled completely, wrap each scone tightly in plastic wrap and transfer them to a freezer-safe container or freezer bag. They’ll keep well for up to 3 months. Thaw at room temperature before serving or gently reheat for a freshly baked taste.
Absolutely. After shaping, refrigerate the scones for up to 48 hours before baking or freeze them for longer storage. This makes them perfect for holiday breakfasts, brunches, and meal prep.
Dry scones are usually caused by adding too much flour, overworking the dough, or baking them too long. The dough should look slightly shaggy before shaping, and the scones should be removed from the oven as soon as the bottoms are golden brown and the tops are set.
Dry or crumbly dough can also point to something further upstream: your starter’s hydration. This recipe is developed for 100% hydration discard, a starter fed equal parts flour and water by weight. If your starter is fed a different ratio, your discard will be naturally thicker or thinner than what this recipe expects, which changes how much liquid the dough needs.
If your dough feels too dry and won’t come together, add an extra tablespoon of heavy cream at a time until it just holds when pressed between your fingers. If it feels overly sticky or wet, work in an extra tablespoon of flour at a time during shaping. Make small adjustments, a little goes a long way.
Not sure what hydration your starter is? Here’s a Sourdough Hydration Guide
Flat scones are often caused by warm butter or expired baking powder. For the tallest, flakiest scones, use cold ingredients, keep the butter cold throughout the process, and chill the shaped scones before baking.
Long Fermented Scones
If you love the idea of letting the scones ferment to impart more of that yummy sourdough flavor, that’s possible too!
To make fermented scones, shape and portion them, and once they’re on the baking sheet, cover in plastic wrap and place in the fridge for up to 48 hours before baking.
When you’re ready to bake your fermented scones, place them in the freezer while preheating the oven and then follow the baking directions as above!

Sourdough Scone Flavors
There are so many ways to customize these sweet scones to your taste. When you’re using mix ins, aim to use between 1 and 1 1/2 cup worth of inclusions total. For example, 3/4 cup dried cherries and 3/4 cup dark chocolate chunks = 1 1/2 cup total.
Chocolate Chip Scones: Add 1 cup of semi sweet chocolate chips to the dry ingredients.
Cranberry Orange Scones: Mix 1 tablespoon of orange zest into the wet ingredients and 3/4 cup dried cranberries (or 1 cup fresh/frozen) to the dry ingredients.
Blueberry Scones: Combine 1/2 tablespoon lemon zest into wet ingredients then add 1 cup of fresh or frozen blueberries to the dry ingredients and toss to coat before adding the wet ingredients. [Pictured – without lemon zest]
Chocolate Cherry Scones: Add 3/4 cup dried cherries or chopped frozen cherries and 3/4 cup chocolate chips. This one is a favorite in our house!
Raspberry Almond Scones: Reduce vanilla extract to 1 teaspoon and add 1/2 teaspoon almond extract to the wet ingredients. Add generous 1/4 cup sliced almond to dry ingredients then add 1 cup of fresh raspberries as soon as the wet ingredients are added to the dry. Raspberries are delicate, so it’s important to use a gentle hand.
Strawberries + Cream Scones: Add 3/4 cup chopped fresh strawberries and 1/2 cup white chocolate chips to the dry ingredients and toss to coat before adding the wet ingredients.
Psst.. Need a sourdough starter recipe? Want to know more about feeding your starter, storing sourdough starter, how to use discard, or even which is the best jar for your starter?

Try These Sourdough Discard Recipes:



If you tried this Sourdough scones recipe or any other recipe on my blog, please leave a 🌟 star rating and let me know how it went in the comments below. Thanks for visiting!
📖 Printable Recipe
Sourdough Discard Scones Recipe
Ingredients
Dry Ingredients:
- 275 g all purpose flour
- 100 g granulated sugar
- 1 tablespoon baking powder
- ½ teaspoon fine sea salt
- 115 g unsalted butter, cold or frozen
- 1 – 1½ cup mix ins, see notes for flavor options
wet ingredients:
- 150 g sourdough discard
- 45 g heavy whipping cream
- 1 egg, large
- 2 teaspoons vanilla extract
topping:
- 2 tablespoons heavy whipping cream
- 2 tablespoons coarse sugar
Instructions
Make The Dough:
- Line a baking sheet with parchment paper, then set aside.
- In a large mixing bowl, whisk 275g all purpose flour, 100g granulated sugar, 1 tablespoon baking powder, and 1/2 teaspoon fine ground sea salt. Cube 115g (1/2 cup) of butter, then cut into the flour mixture with a pastry blender until only small pebble sized pieces of butter remain and the flour is a sandy texture.
- If using add ins, add them now. See flavor variations section below for ideas!
- In another bowl, beat together 150g sourdough discard, 45g heavy whipping cream, 1 large egg, and 2 teaspoons of vanilla extract until completely combined.
- Make a well in the dry ingredients, pour in wet ingredients and stir until it's just starting to come together. Stirring will toughen the dough – the next step will help to incorporate the rest of the flour.
Laminate + Shape:
- Turn dough out onto a lightly floured surface, it will be somewhat shaggy, that's ok.
- Gently press the dough into a rectangle and fold into thirds as though you're folding a letter. Repeat the process twice more.
- Divide the dough into 2 equal portions, and then gently pat each into a circle about 3/4" thick.
- Use a bench scraper or large knife and cut each circle into 6 wedges. Pick up each wedge, with the bench scraper or spatula and transfer to lined baking sheet.
- Place baking sheet in freezer for at least 30 minutes.
Bake Today:
- Preheat oven to 400 degrees Fahrenheit.
- Once oven comes to temperature, remove baking sheet from freezer and generously brush the top of each scone with heavy cream and sprinkle with coarse sugar.
- Bake the scones at 400f for 16-18 minutes or until the bottoms are nicely browned and the tops are set.
- Remove from oven and allow to rest on baking sheet for 5 minutes before transferring to a cooling rack.
bake another day:
- Once scones are completely frozen, wrap tightly in plastic wrap and store in an airtight freezer container until ready to bake.
- When ready to bake, follow the directions in the section above.
Notes
Expert Tips
- If you've never made scones, this recipe is a great way to get into the process, the dough is a bit wetter - which helps when you're working it. Some scone recipes result in a very dry, craggly dough. I've developed this one to be a bit more cohesive and workable to help avoid the tendency to over stir.
- Baking powder provides the leavening in this recipe, so it's important to ensure that your baking powder is fresh and active, as weak powder can result in flat, dense scones.



Excited to try this out tomorrow! Would we simply reduce or remove sugar for savory scones?
You can definitely try to reduce the sugar – though the dough isn’t overly sweet to begin with!
Can I use half and half instead of heavy whipping cream for scones
It should work, but the scones might be a bit more crumbly – due to the difference in fat content. Let me know if it works!
Okay I just made these with mini chocolate chips and they were AMAZING! What an easy recipe to make with my littles.