
Rustic Sourdough Bread

Rustic sourdough bread is an artisan-style loaf with a deeply caramelized crust and chewy crumb. Unlike softer sandwich bread, a rustic loaf embraces bold crust development, open crumb structure, and the complex flavor that only long fermentation can create.

Craving The Recipe Details?
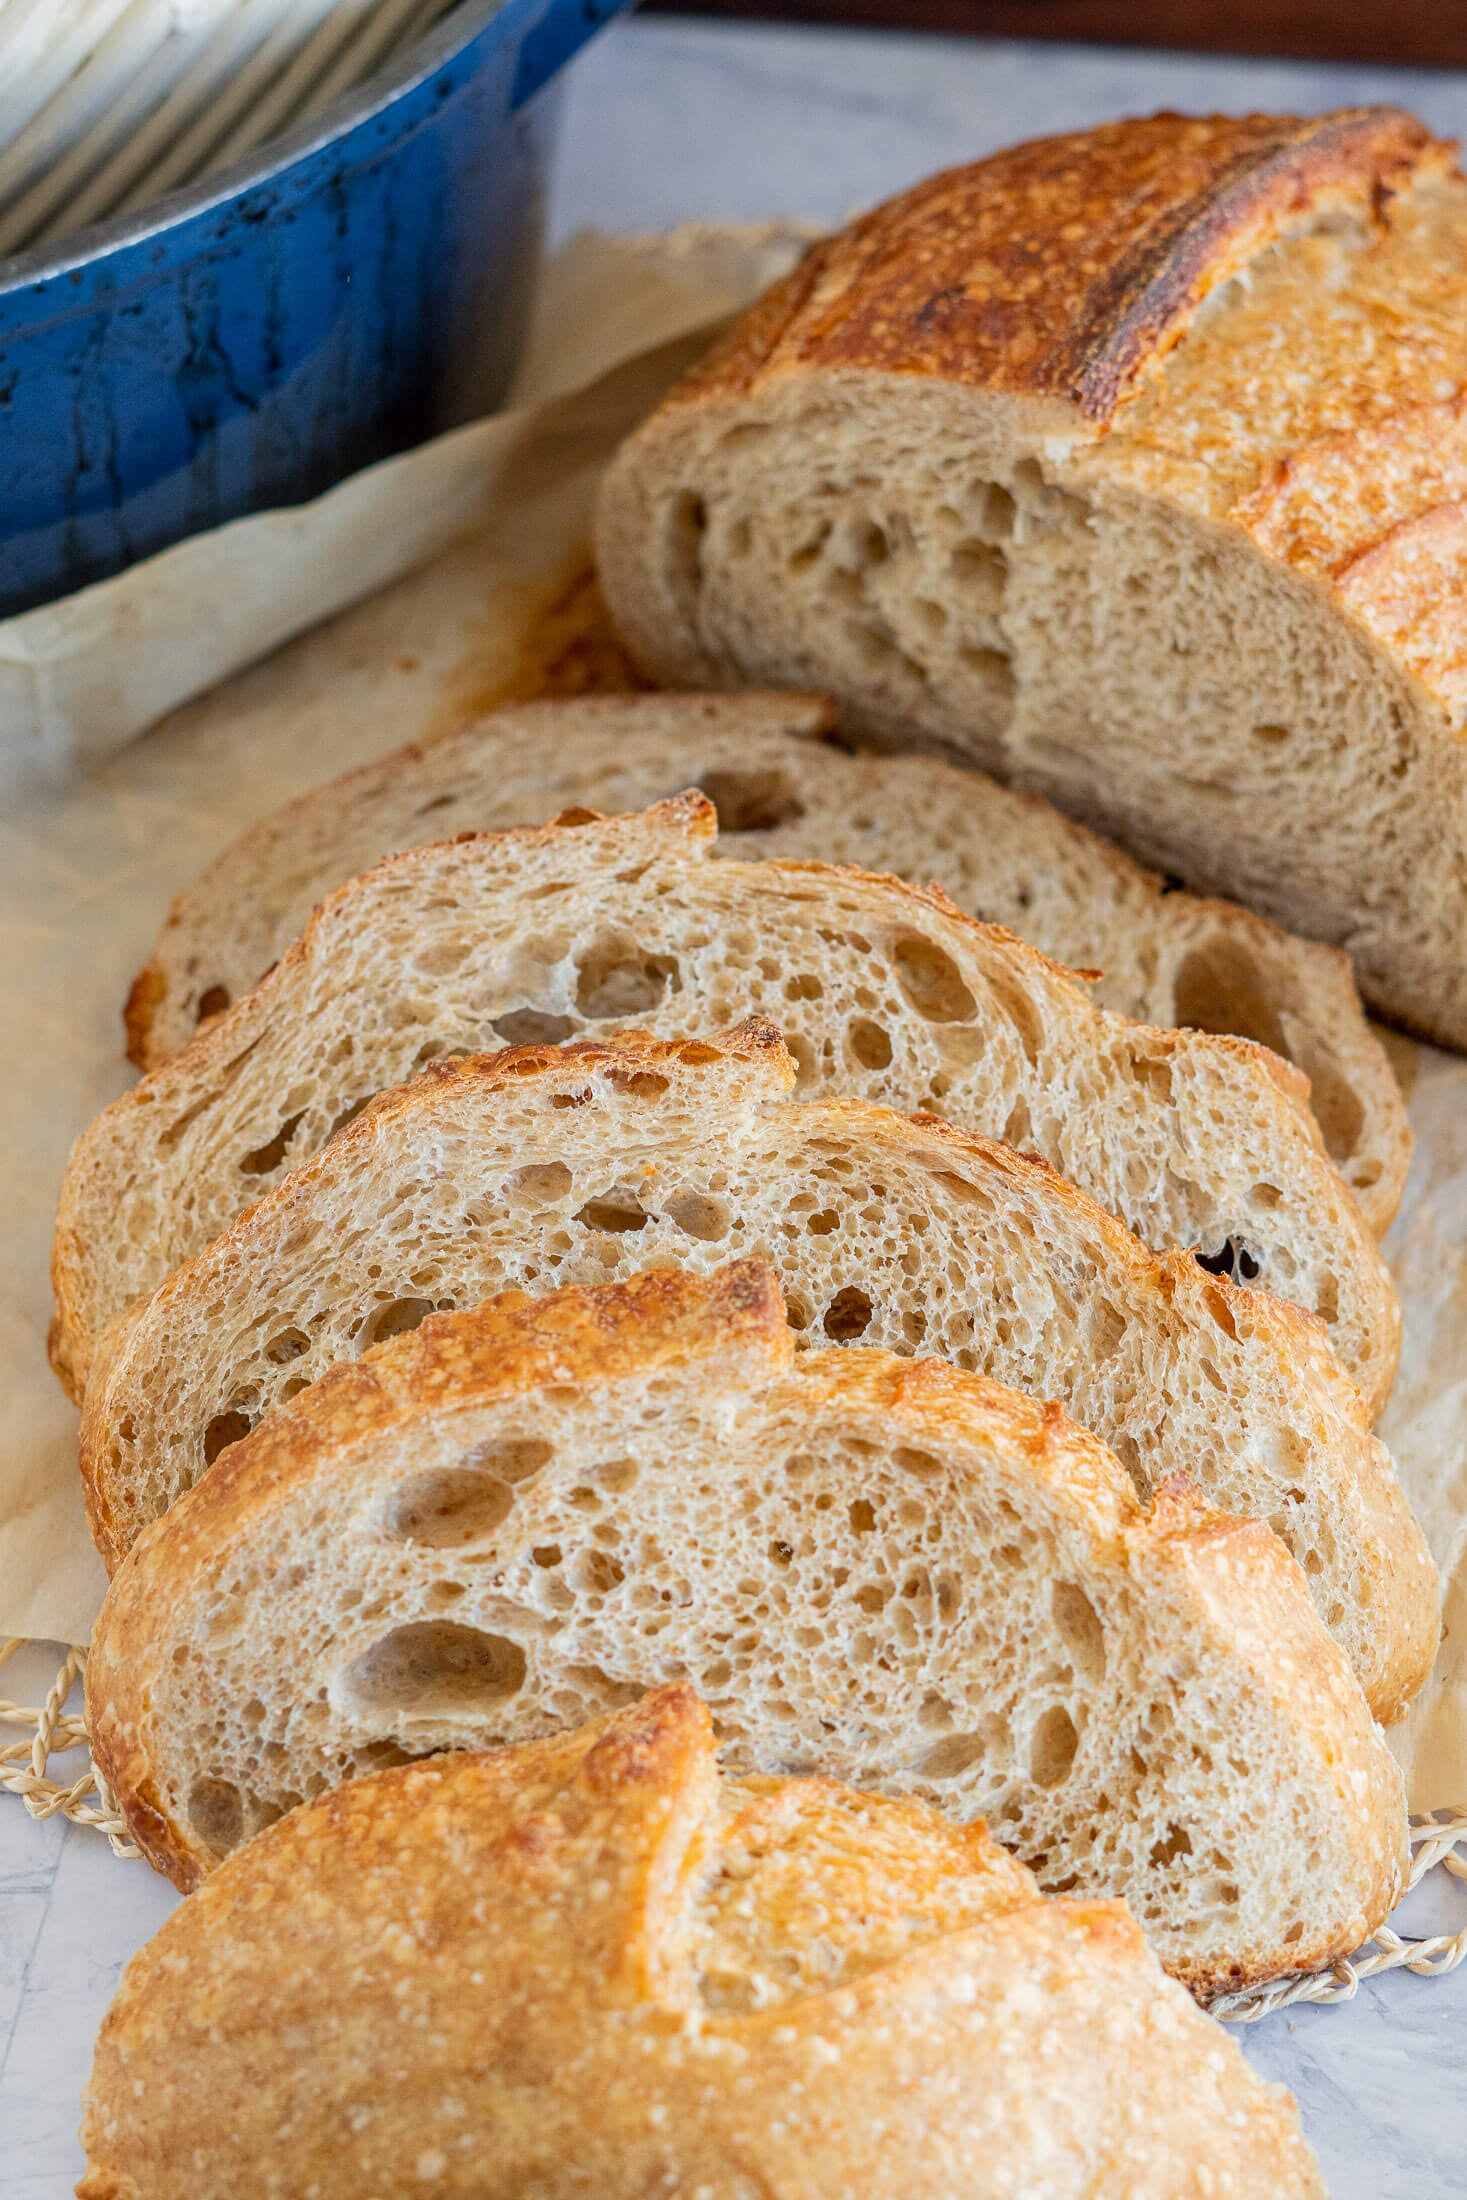
What it is: A hearty, whole wheat sourdough boule or batard with a golden, crispy crust and a chewy, airy crumb, sweetened with a touch of honey.
Why you’ll love it: Real-deal tangy sourdough flavor with wholesome whole grain goodness, worth every hour of the process!
How to make it: Autolyse your flours with warm water and honey, fold in your active starter and salt, do three rounds of stretch and folds during bulk fermentation, shape and cold retard in the fridge overnight (or up to 3 days), then bake in a screaming hot dutch oven for an artisan-style crust.
I’ve baked a lot of sourdough. Same-day loaves, cold fermented loaves, whole wheat loaves, enriched loaves loaded with figs and brie. But this one, this basic, plain, whole-wheat-and-honey loaf, is one I keep coming back to.
A lot of “rustic sourdough” recipes are just white bread with a tang. They’re fine. But I wanted the nuttiness that comes from whole wheat, the complexity that comes from a long cold fermentation, and just enough sweetness from our backyard honey to darken the crust.
This rustic sourdough bread recipe is dedicated to the basics.
Jump to:
- Craving The Recipe Details?
- What Is Rustic Sourdough Bread?
- Key Ingredients
- Variations + Substitutions
- How To Make Rustic Sourdough Bread
- Expert Tips
- Why This Recipe Works
- Rustic Sourdough Bread FAQs
- Baker's Percentages
- Baker’s Timeline
- What to Serve With Rustic Sourdough Bread
- More Great Sourdough Bread Recipes
- 📖 Printable Recipe
What Is Rustic Sourdough Bread?
Rustic sourdough bread is a naturally leavened artisan loaf made with simple, wholesome ingredients like bread flour, whole wheat flour, water, salt, honey, and an active sourdough starter. Unlike enriched sandwich bread, it’s prized for its crisp, deeply caramelized crust, chewy open crumb, and hand-shaped appearance that reflects traditional artisan bread baking rather than perfect uniformity.
What makes rustic sourdough truly rustic is its slow natural fermentation, minimal handling, and steam-assisted bake, often in a preheated Dutch oven, which create a crackly crust, airy interior, and rich, complex flavor. The addition of a small amount of honey and whole wheat flour adds subtle sweetness, deeper color, and extra depth of flavor while still preserving the loaf's classic rustic character.
This recipe uses a moderately hydrated dough (68% hydration) that's approachable for home bakers while still producing the chewy texture, open crumb, and artisan-style loaf that is rustic sourdough bread.

Master Your Sourdough Starter In 5 Days!
From Confused To Confident.
Find success with 5 simple, actionable secrets delivered to you. No more guessing games – just clear, proven steps to a thriving starter.
Key Ingredients
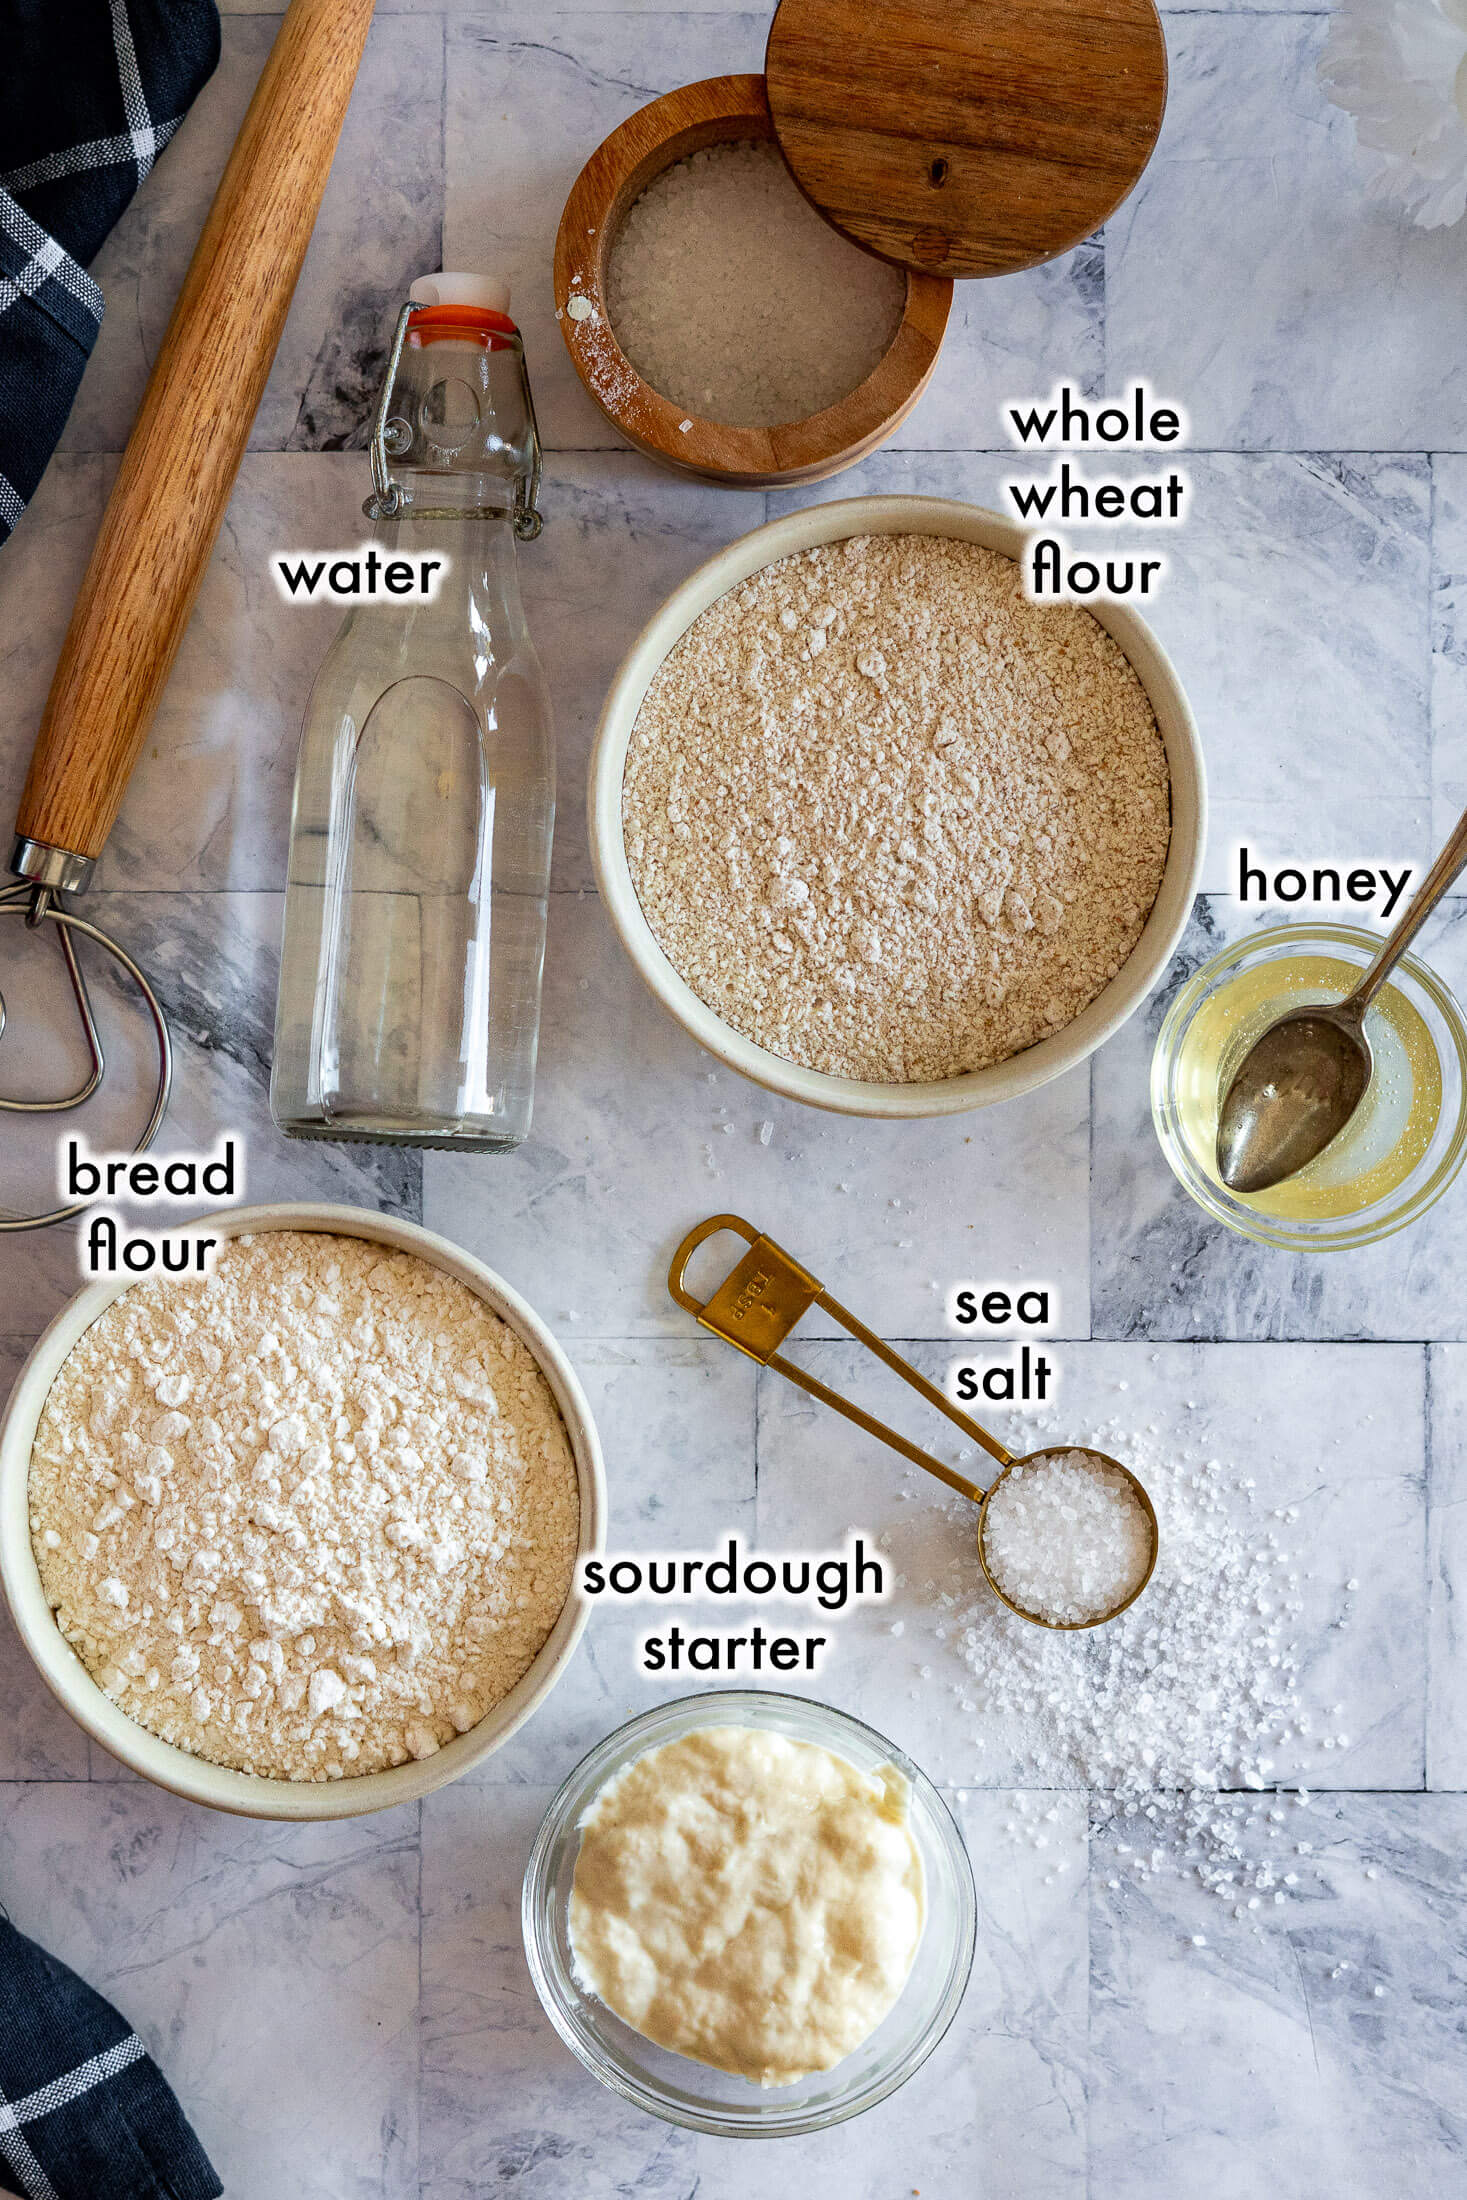
Sourdough Starter: For this recipe, you want to use a fed and active sourdough starter. Your starter should have been before beginning and have at least doubled in size. This recipe is based on a sourdough starter with 100% hydration (equal amounts of flour and water by weight, not volume.)
Honey: I am using raw, unpasteurized honey straight from my homestead honeybees. The honey in this recipe helps to improve caramelization of the crust through the Maillard reaction, supports fermentation, and improves the aroma of the bread.
Bread Flour: Bread flour is my first choice here because its higher protein content (around 12-14%) builds the gluten structure you need for a good rise and a chewy crumb when mixed with more whole wheat flour.
Whole Wheat Flour: The 45% whole wheat in this recipe isn’t incidental, it was chosen through testing to deliver the natural nuttiness and to darken the crust. I wouldn’t adjust the ratio here, but if you’re after something with a more whole wheat intensity, my Whole Wheat Sourdough runs a 50/50 split and is 100% delicious.
A note on hydration: As written, this recipe is approximately 68% hydration (340g water ÷ 500g total flour). That puts it in the medium-hydration range, manageable to work with, forgiving for shaping, and producing a crumb that’s chewy and open without being a sticky, unruly mess. If you’re newer to sourdough, this is a good place to start before working up to the wetter, higher-hydration doughs.
Variations + Substitutions
Bread flour → all-purpose flour: In a pinch, all-purpose flour works in place of bread flour. Your dough will feel slightly wetter and stickier to handle, and the finished crumb will be a bit softer and less chewy, but it will still bake into a beautiful loaf. If you go this route, resist the urge to add more flour; trust the process and use damp hands during your stretch and folds.
Honey → maple syrup or sugar: The honey here is subtle, it’s not making this bread sweet, it’s feeding the fermentation and adding a barely-there warmth. Maple syrup is a 1:1 swap and works beautifully. Granulated sugar at the same weight will do the job too, though you’ll lose a little of that complexity.
How To Make Rustic Sourdough Bread
Autolyse:
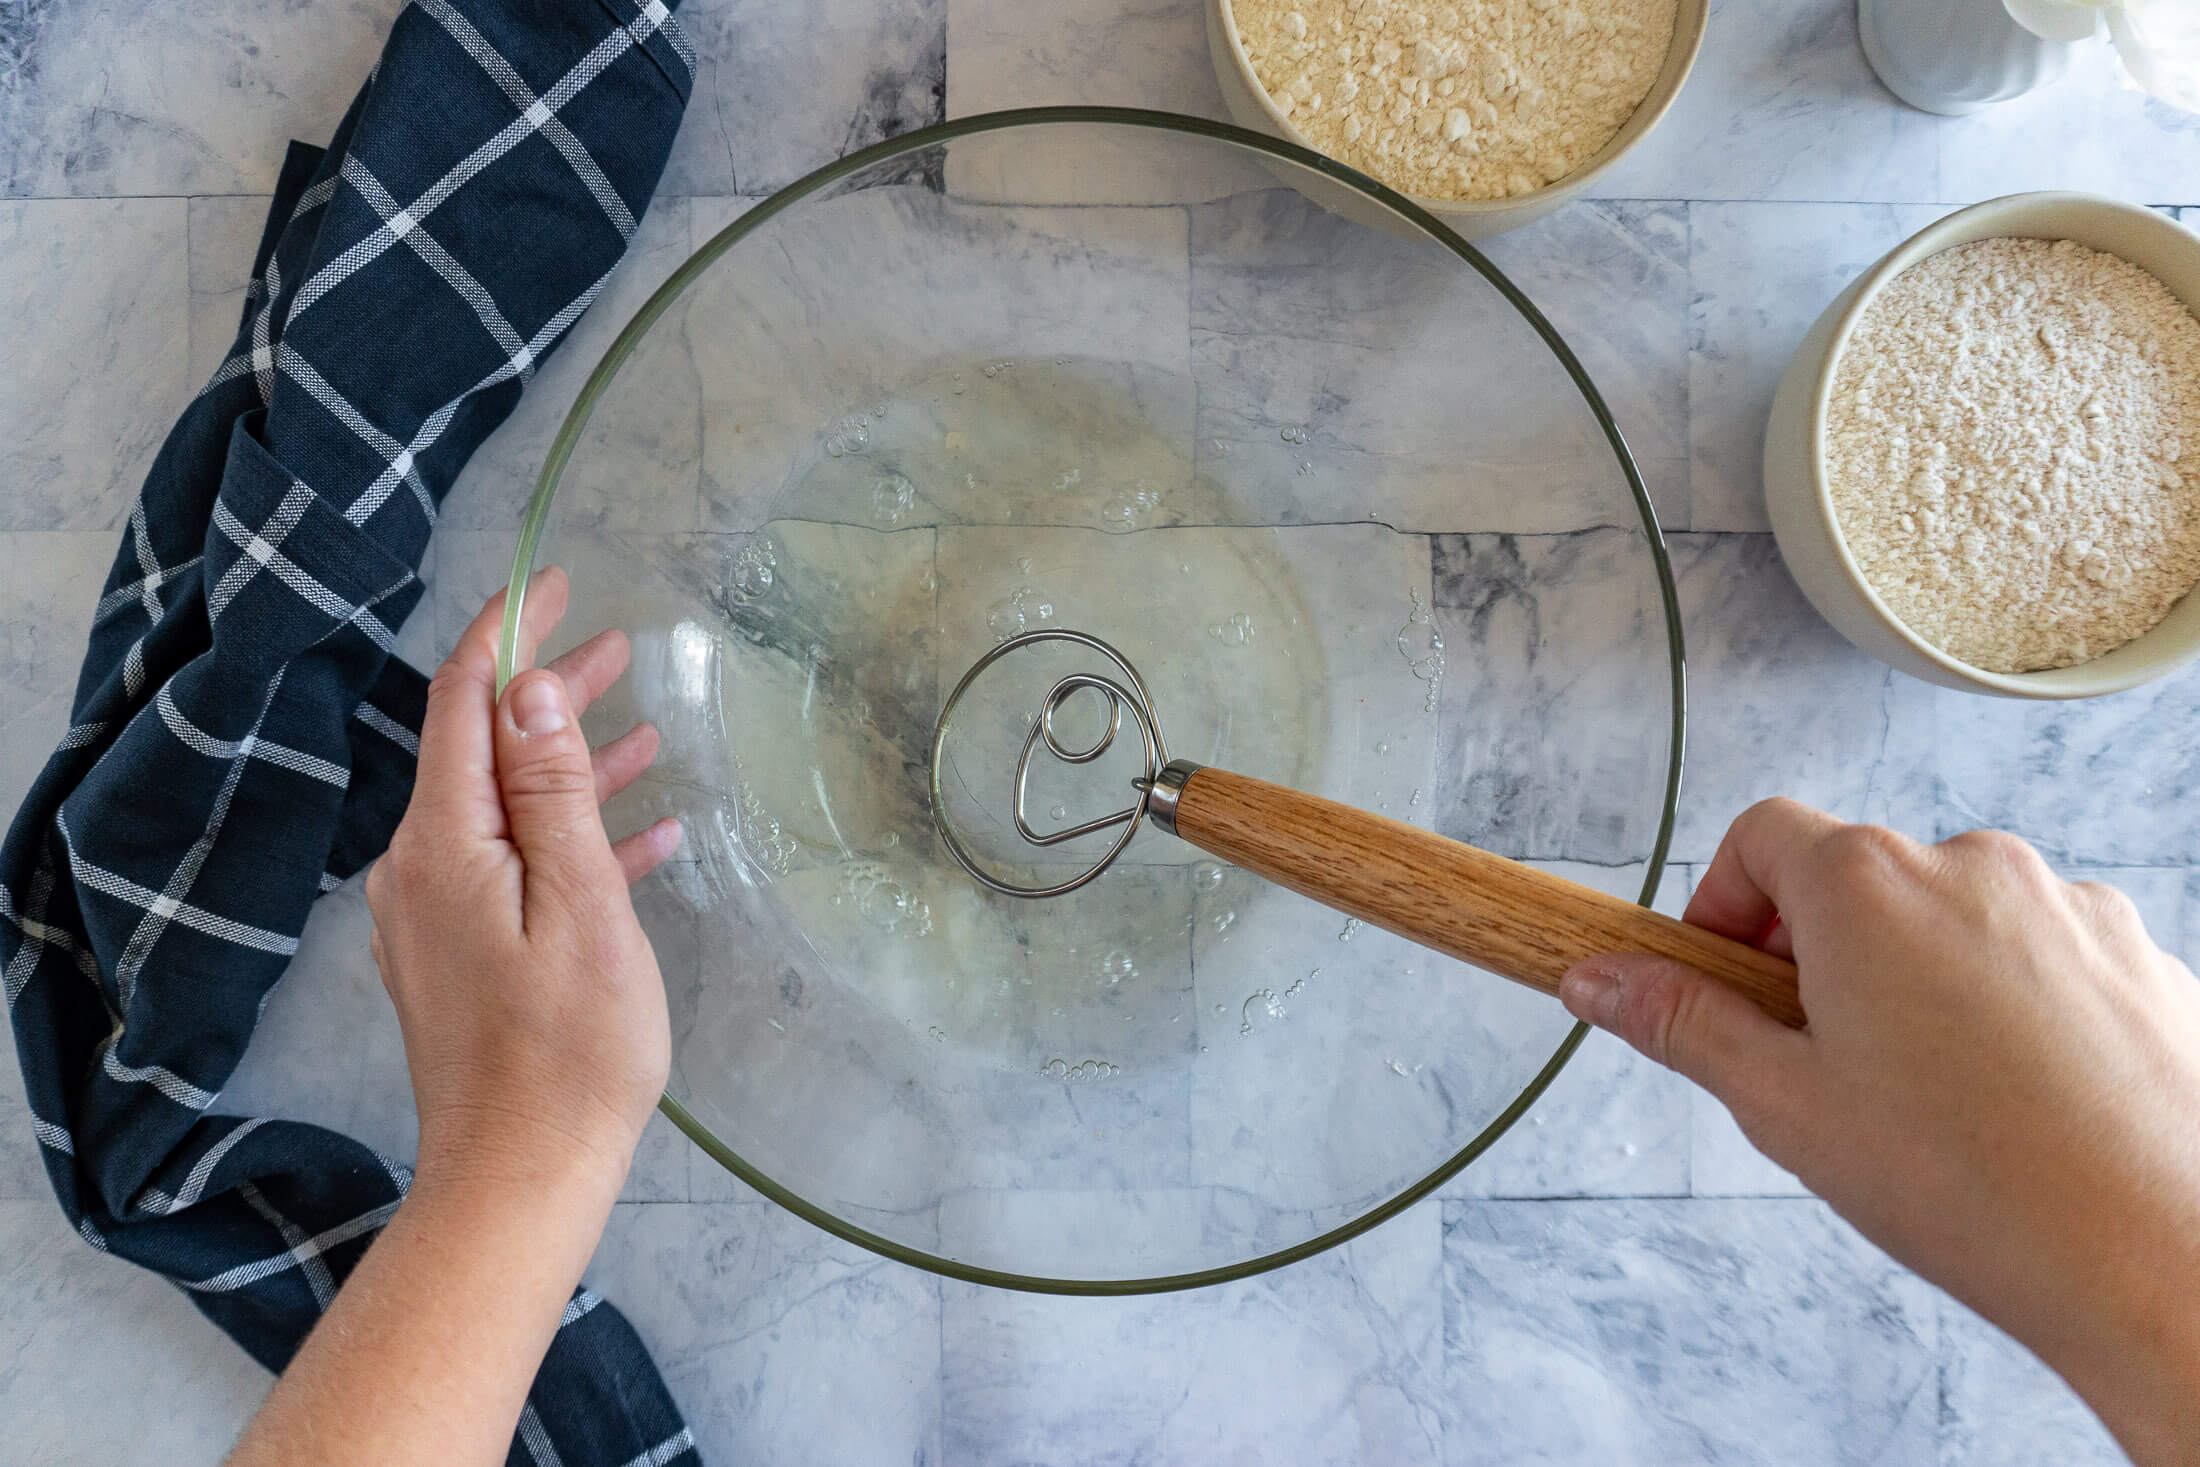
- Step 1: In a large mixing bowl, combine 340g warm water with 40g honey, stir until completely combined.
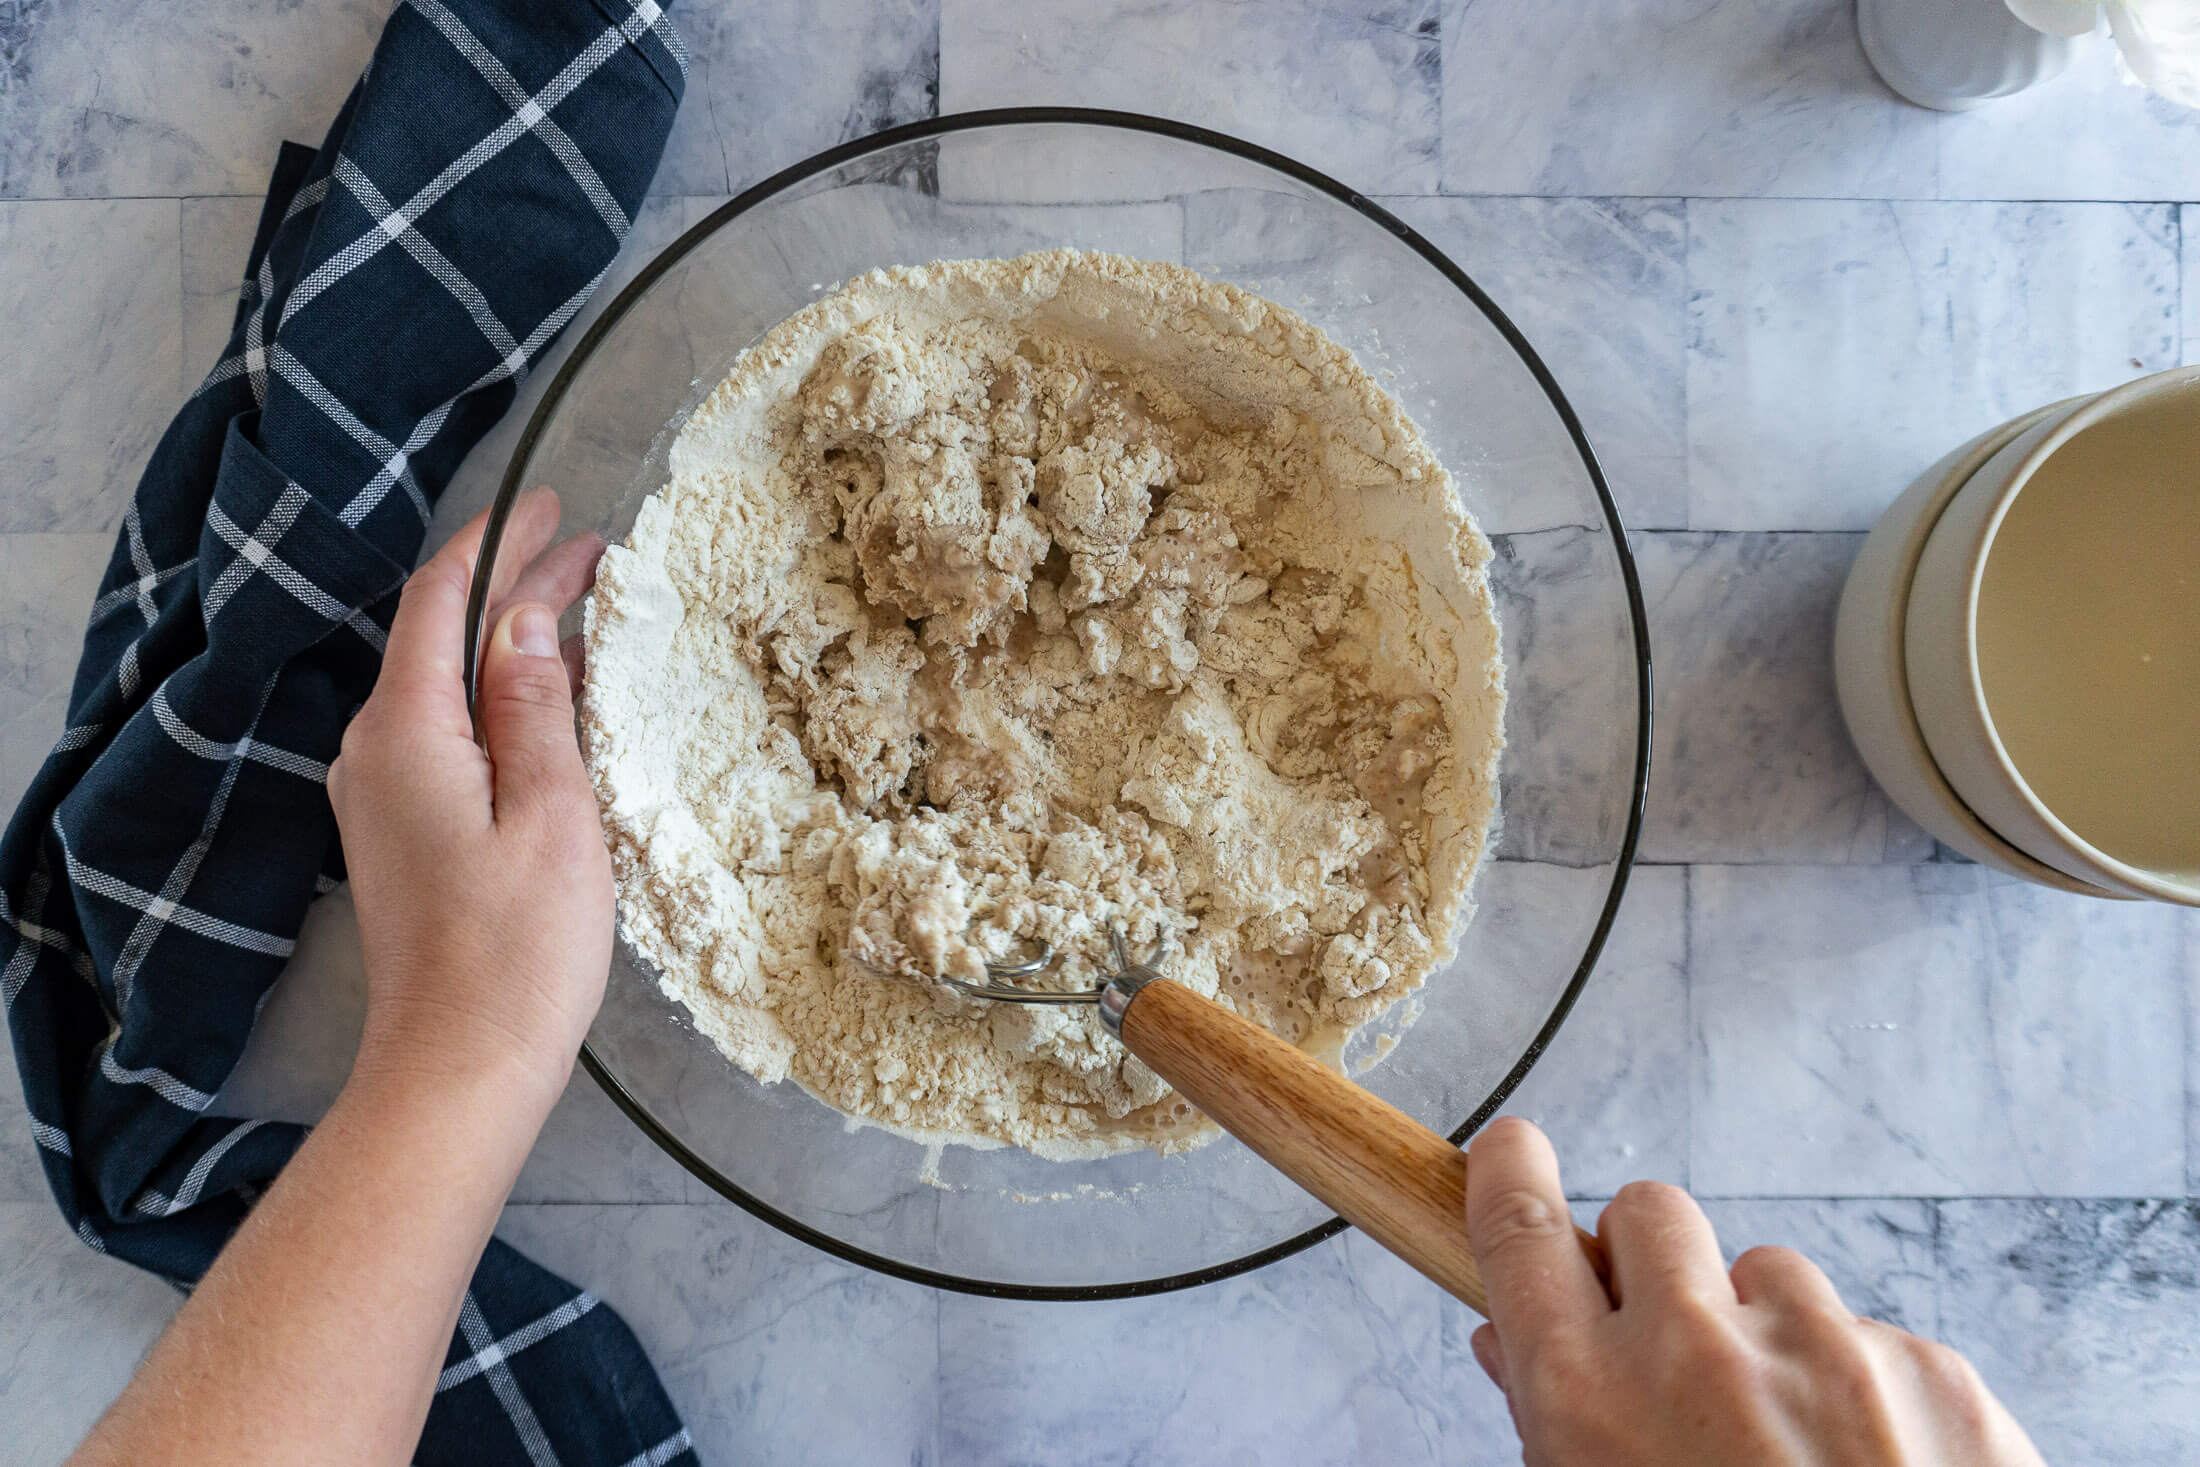
- Step 2: Add 275g bread flour and 225g whole wheat flour and mix until a shaggy dough forms. Knead the dough with your hands until all the dry bits are incorporated.
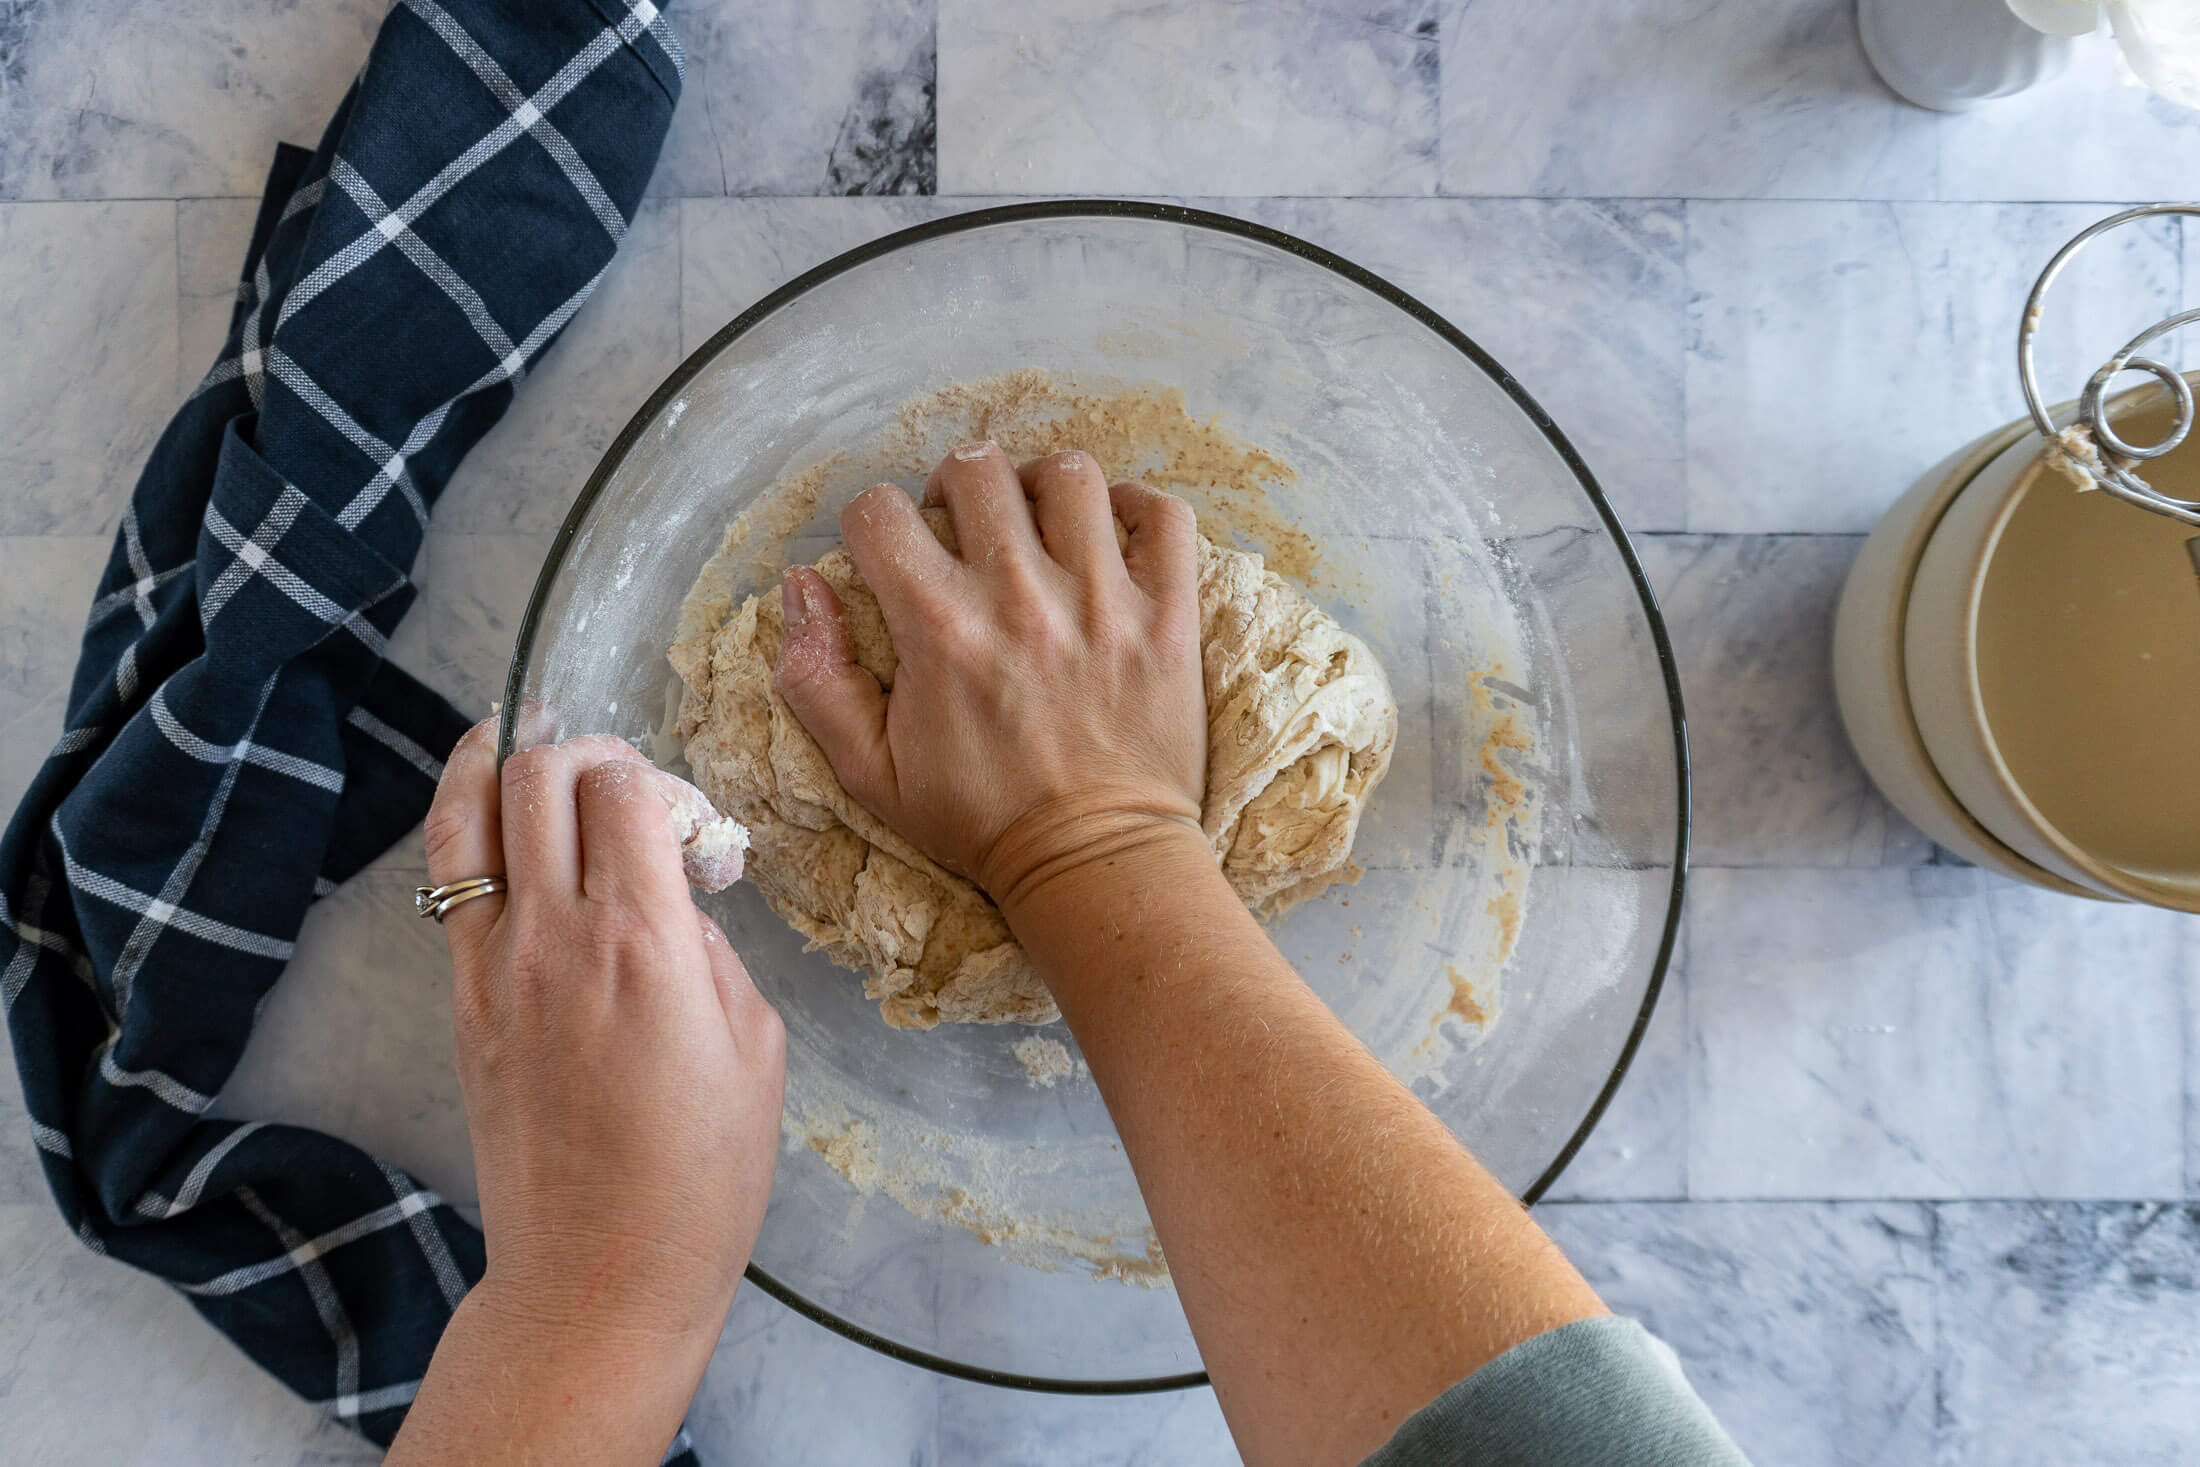
- Step 3: Knead the dough with your hands until all the dry bits are incorporated.
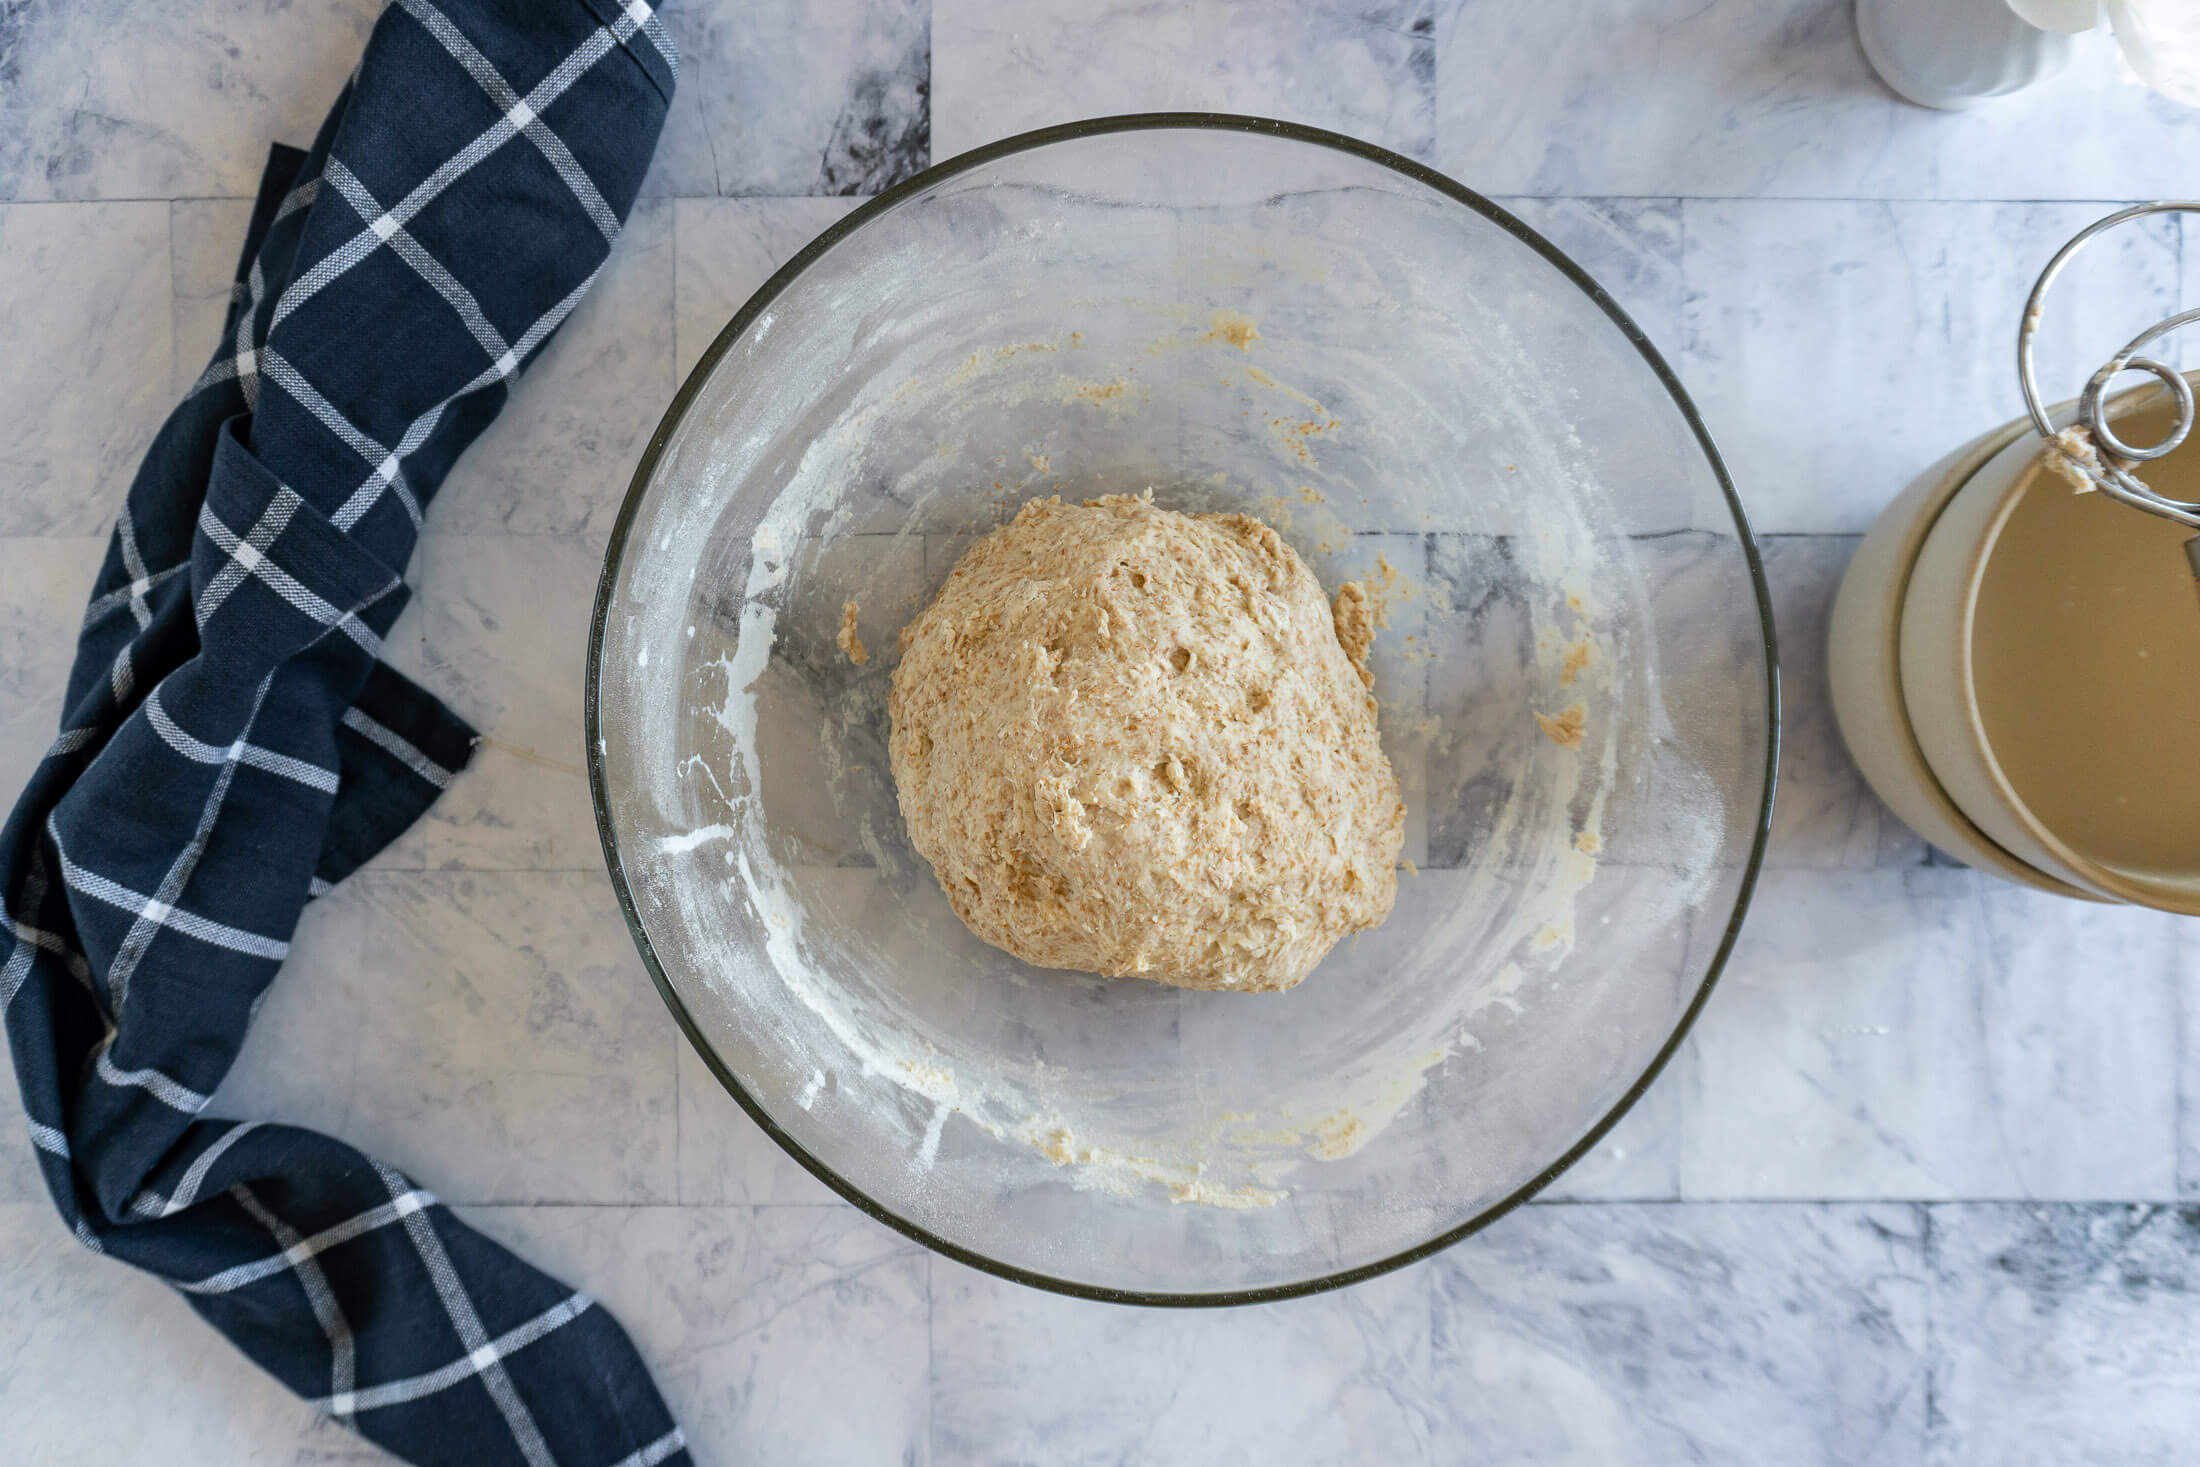
- Step 4: Cover the bowl and set aside to autolyse for 30 – 60 minutes.
Add Sourdough Starter:
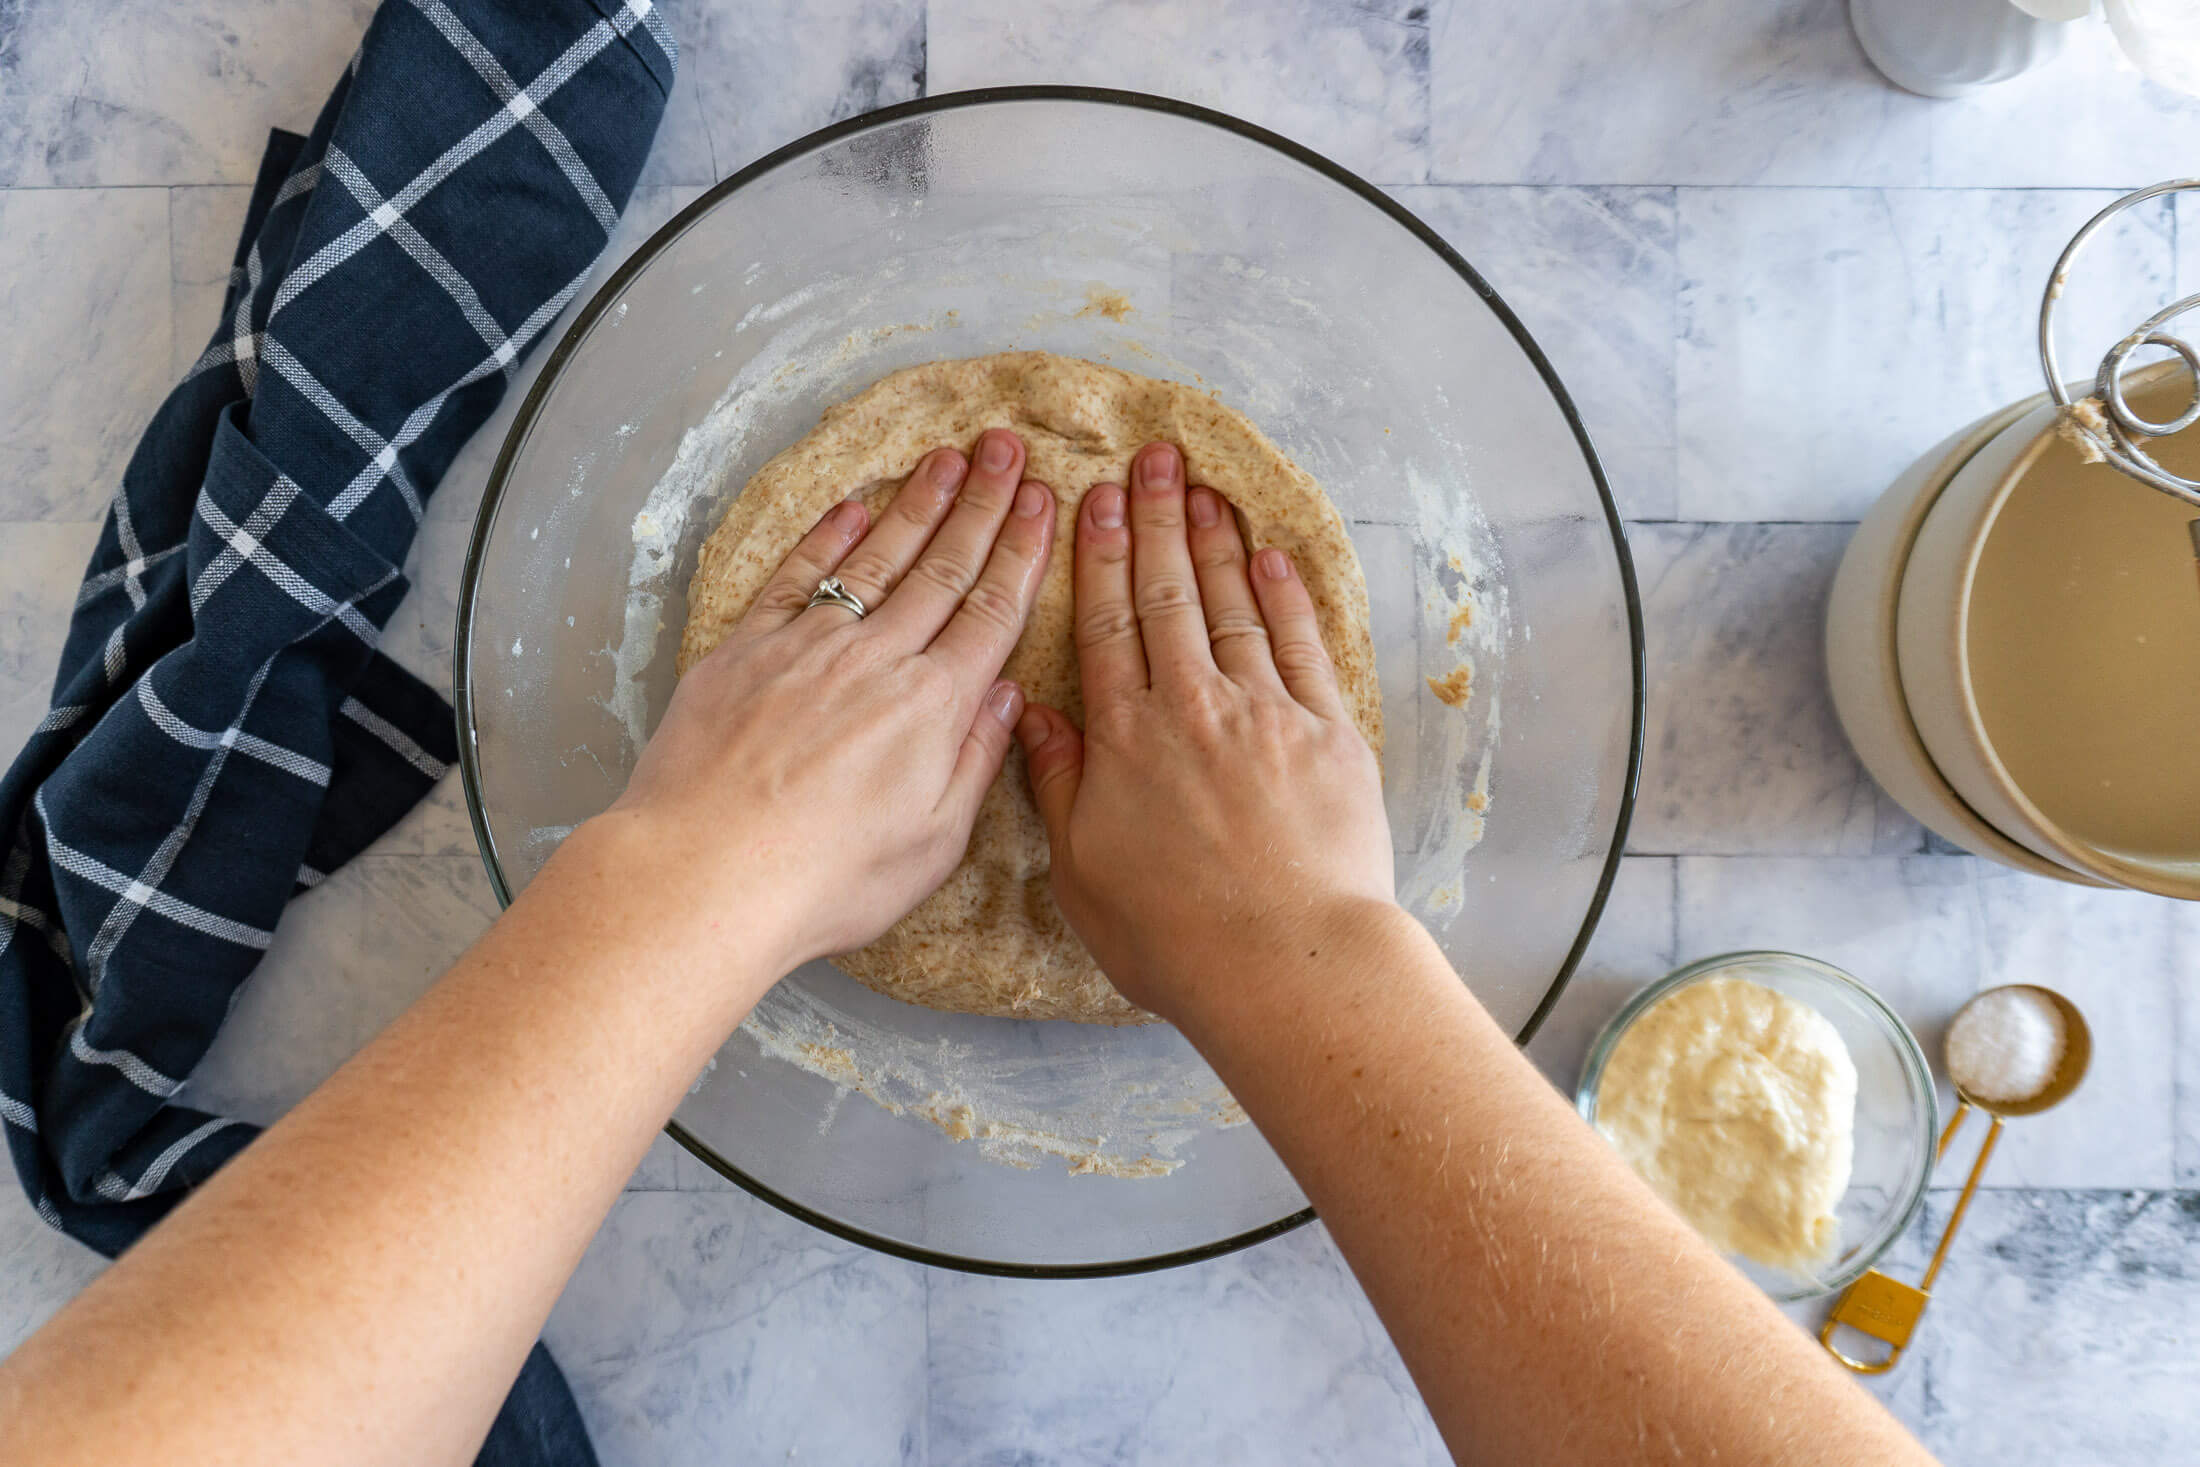
- Step 5: Uncover the bowl and spread the dough in the bowl, I just press it flat with my fingers.
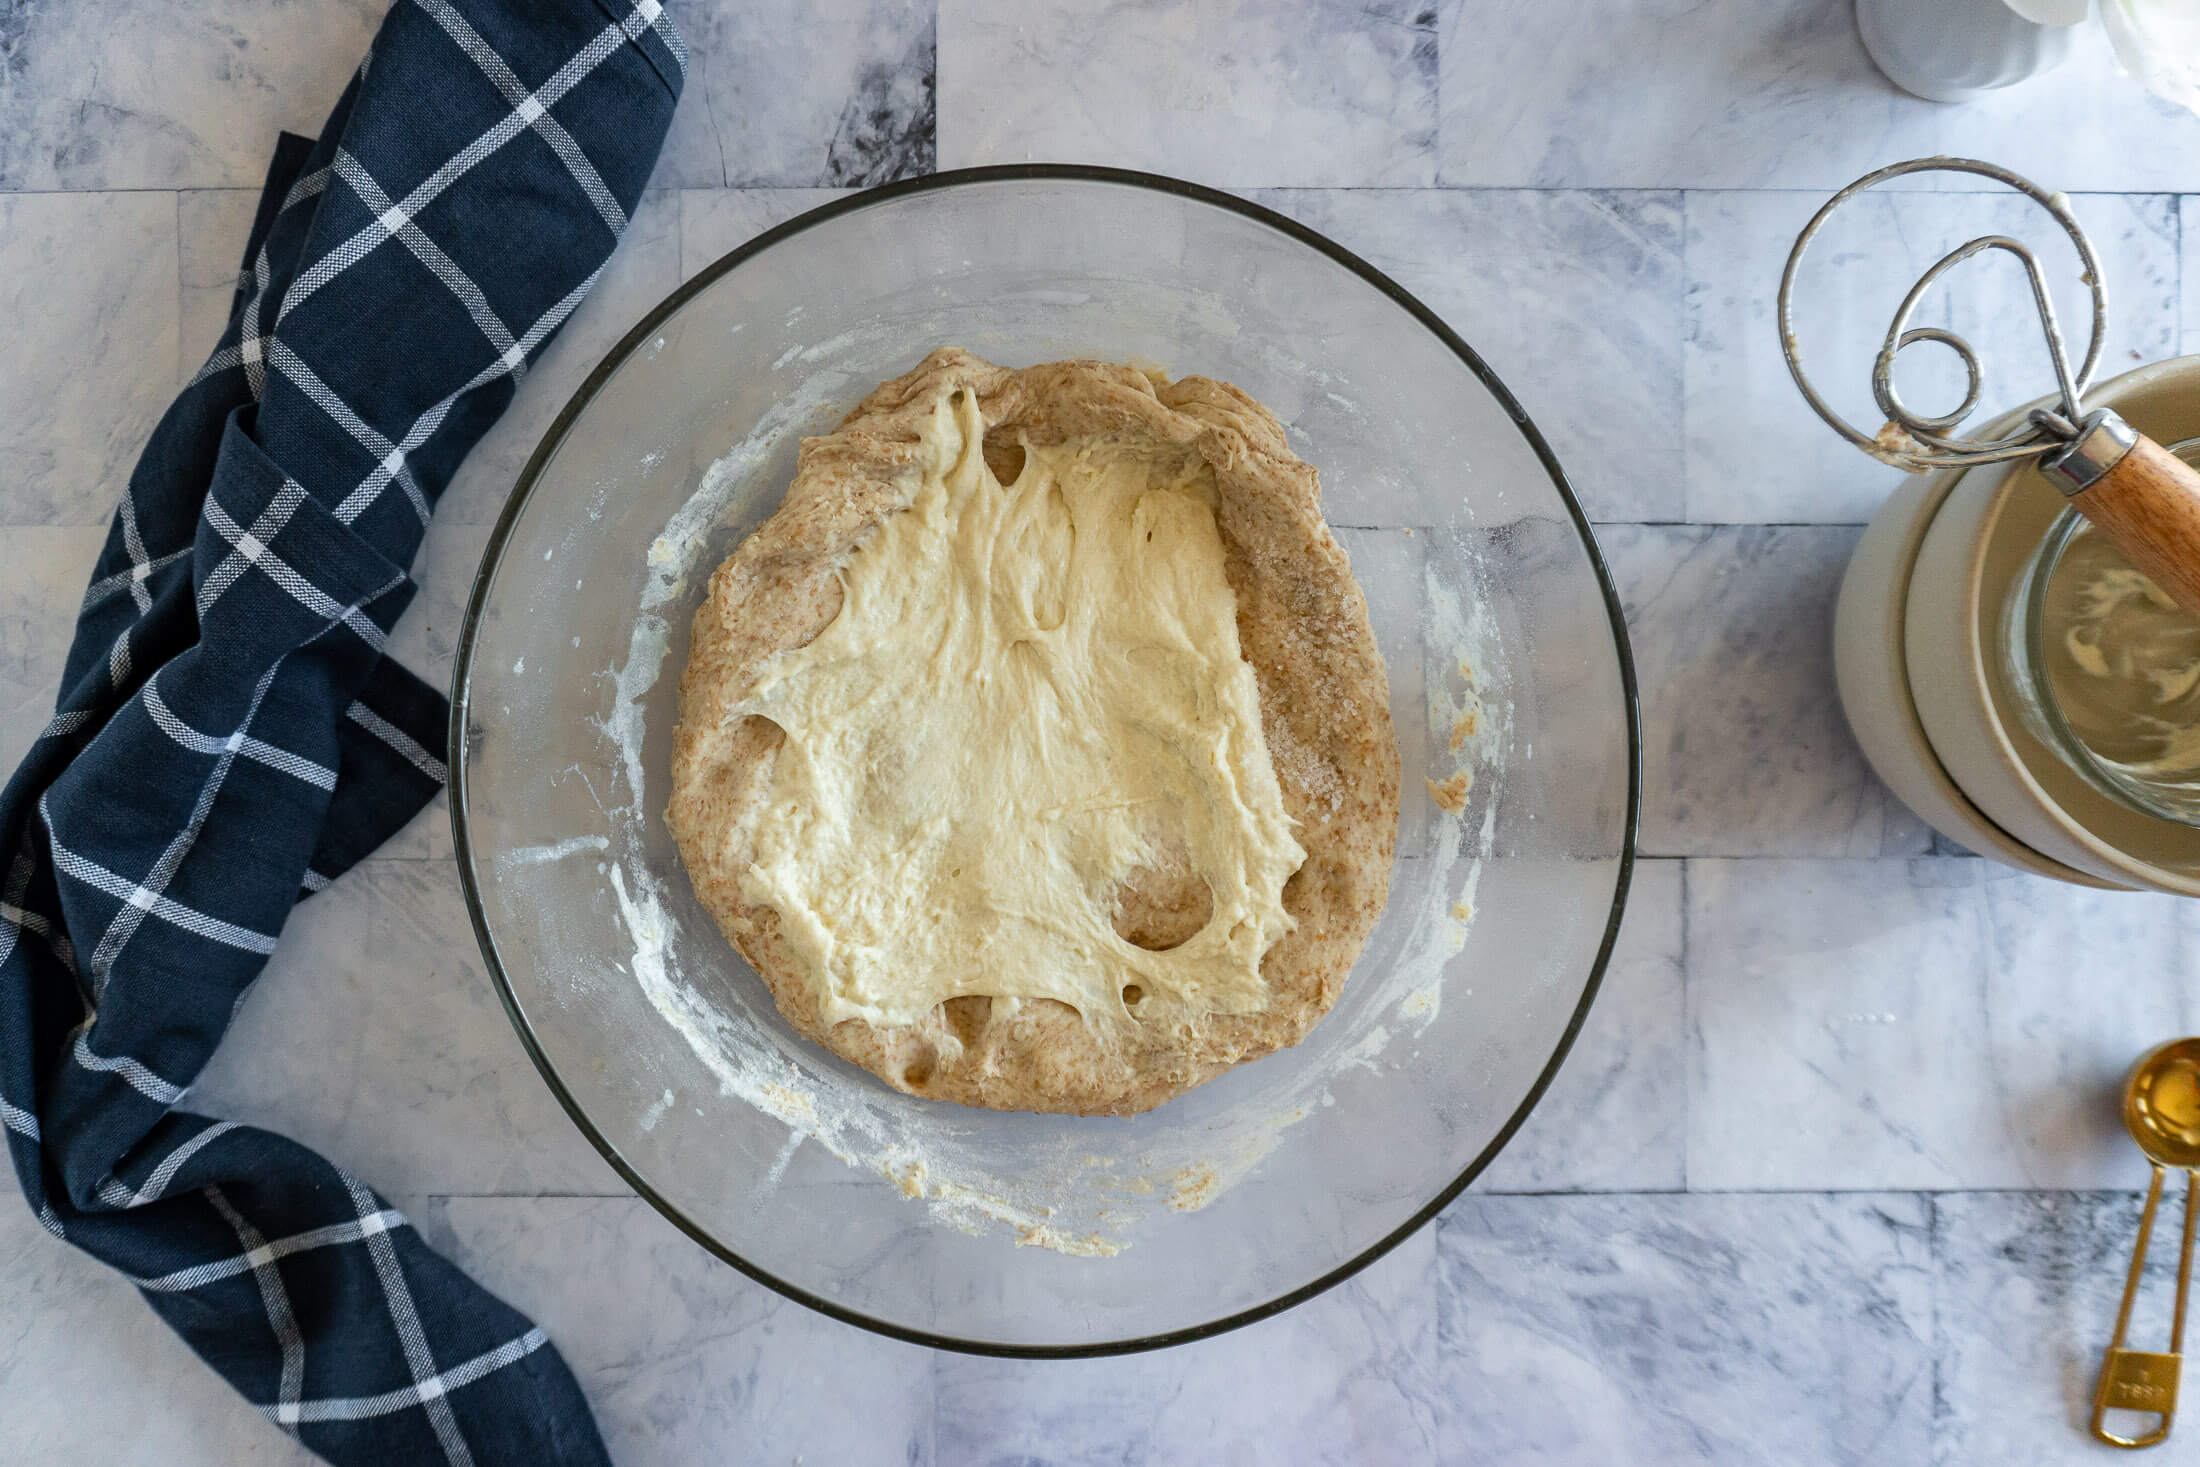
- Step 6: Sprinkle 14g sea salt over the dough, then spread 100g sourdough starter across the surface of the dough.
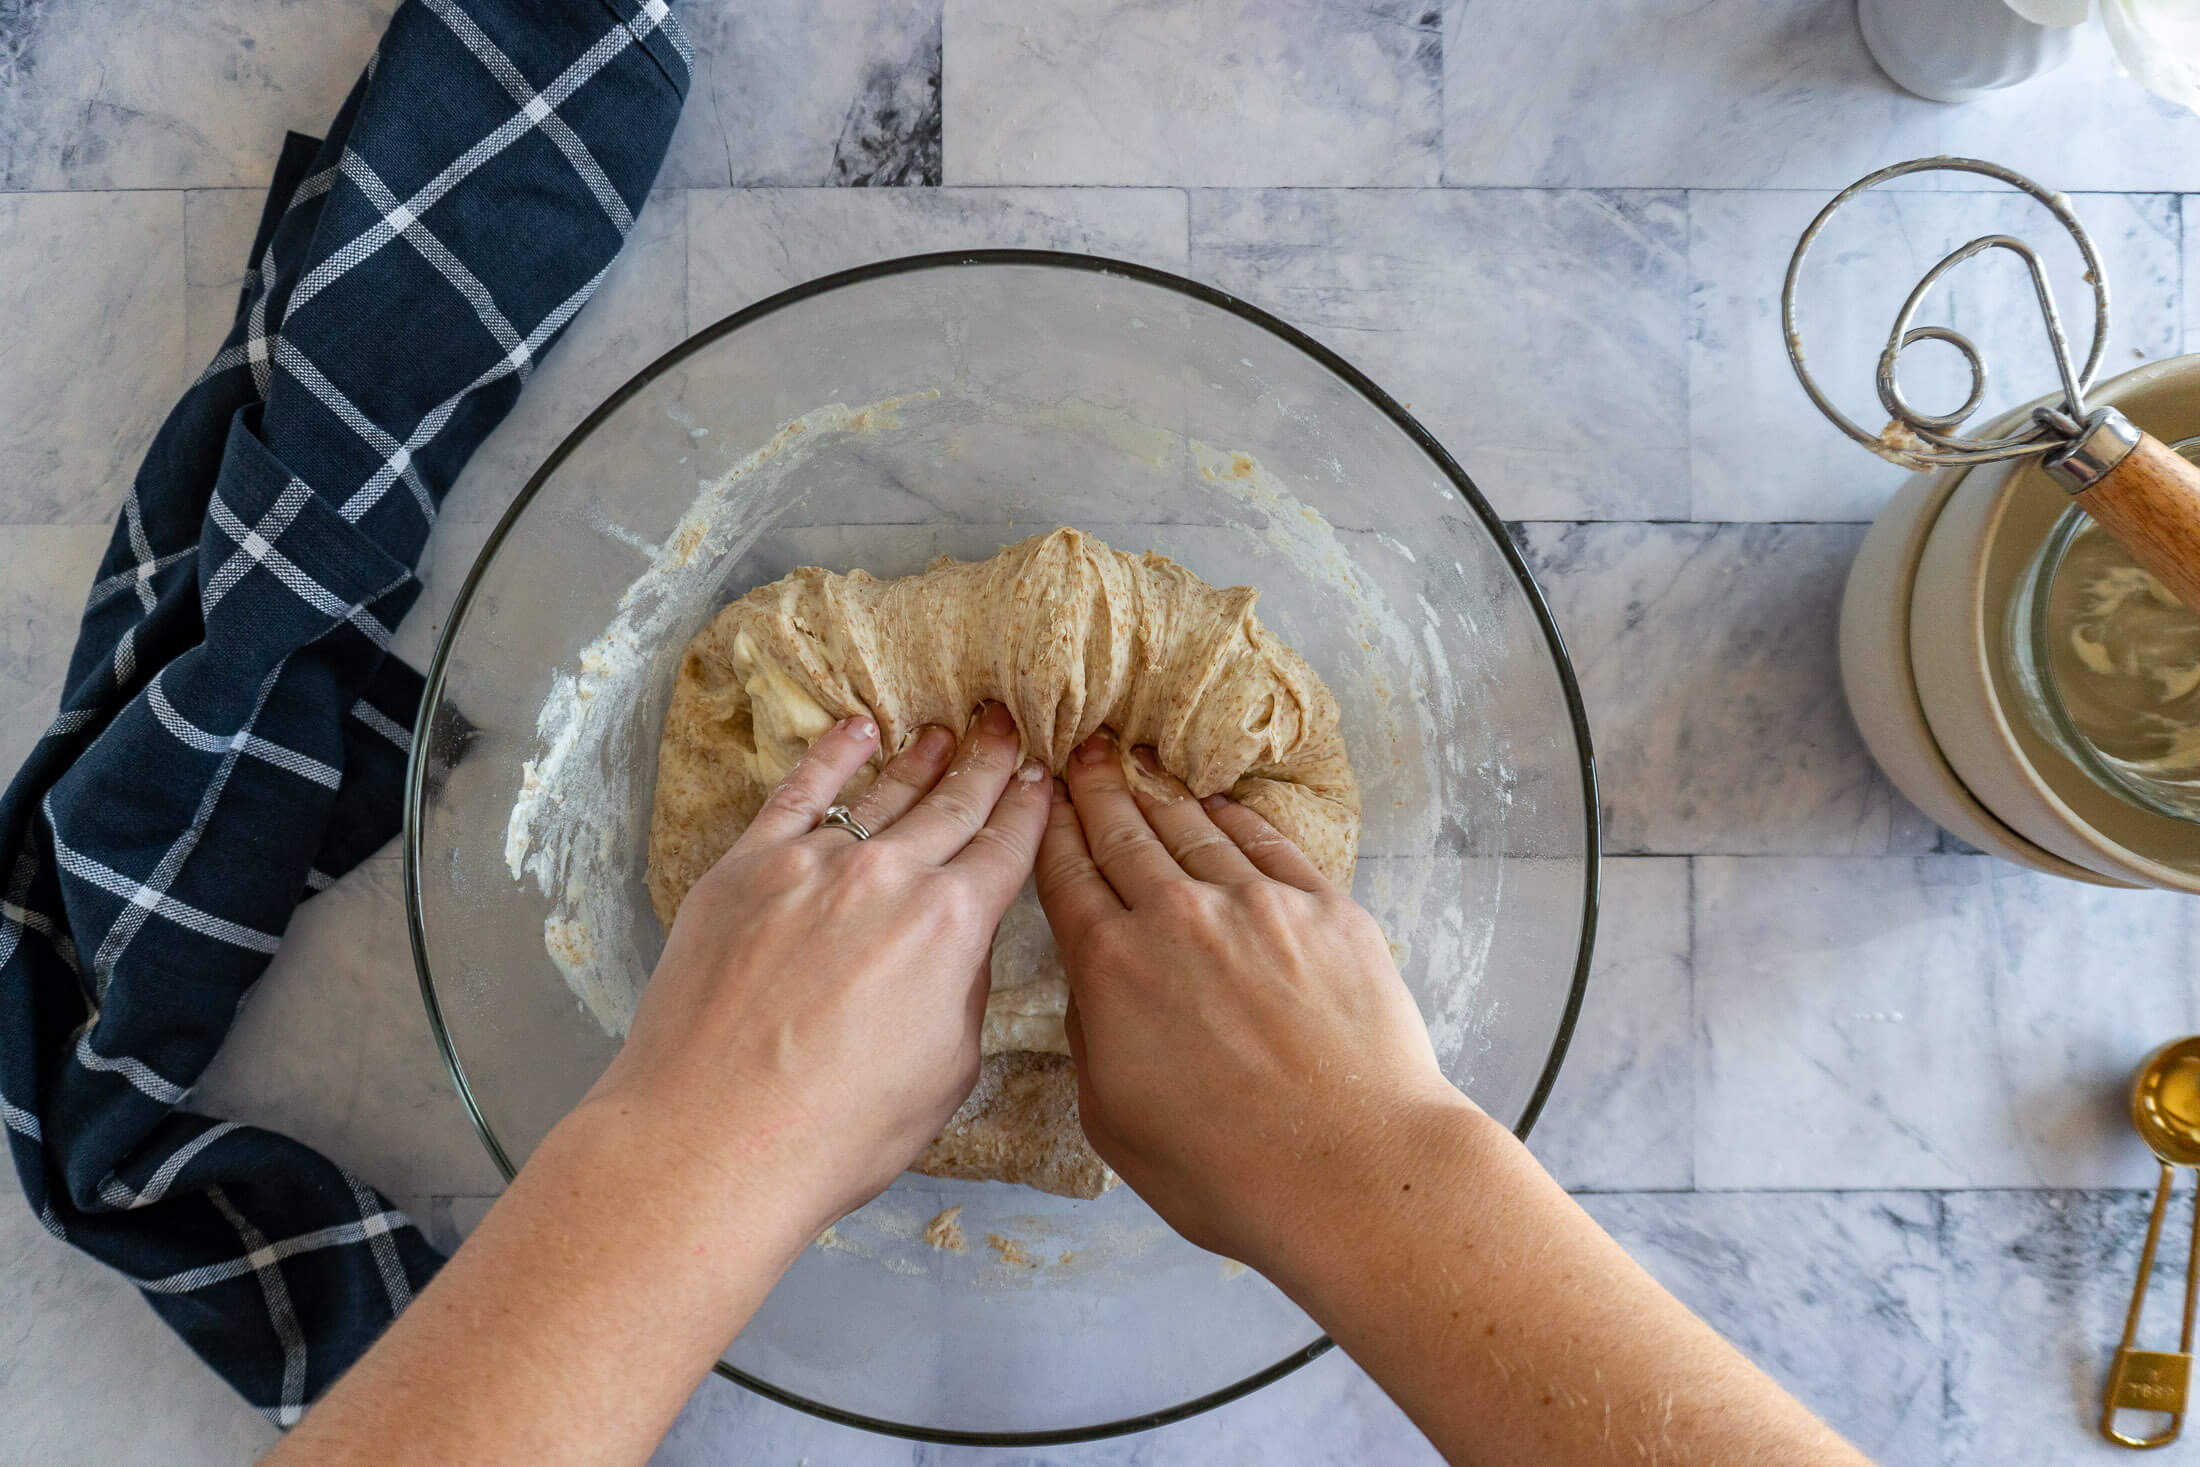
- Step 7: Using damp hands, grab the dough and gently pull it until the flap is long enough to fold over itself, then fold the flap, rotate the bowl 90 degrees, and repeat 4 times to fold in the starter.
Recover the bowl and set aside for 60 minutes.
Stretch And Fold:
Stretch and folds gently strengthen gluten without intensive kneading, allowing the dough to trap more gas during fermentation. This results in better oven spring and the open, chewy crumb rustic sourdough is known for.
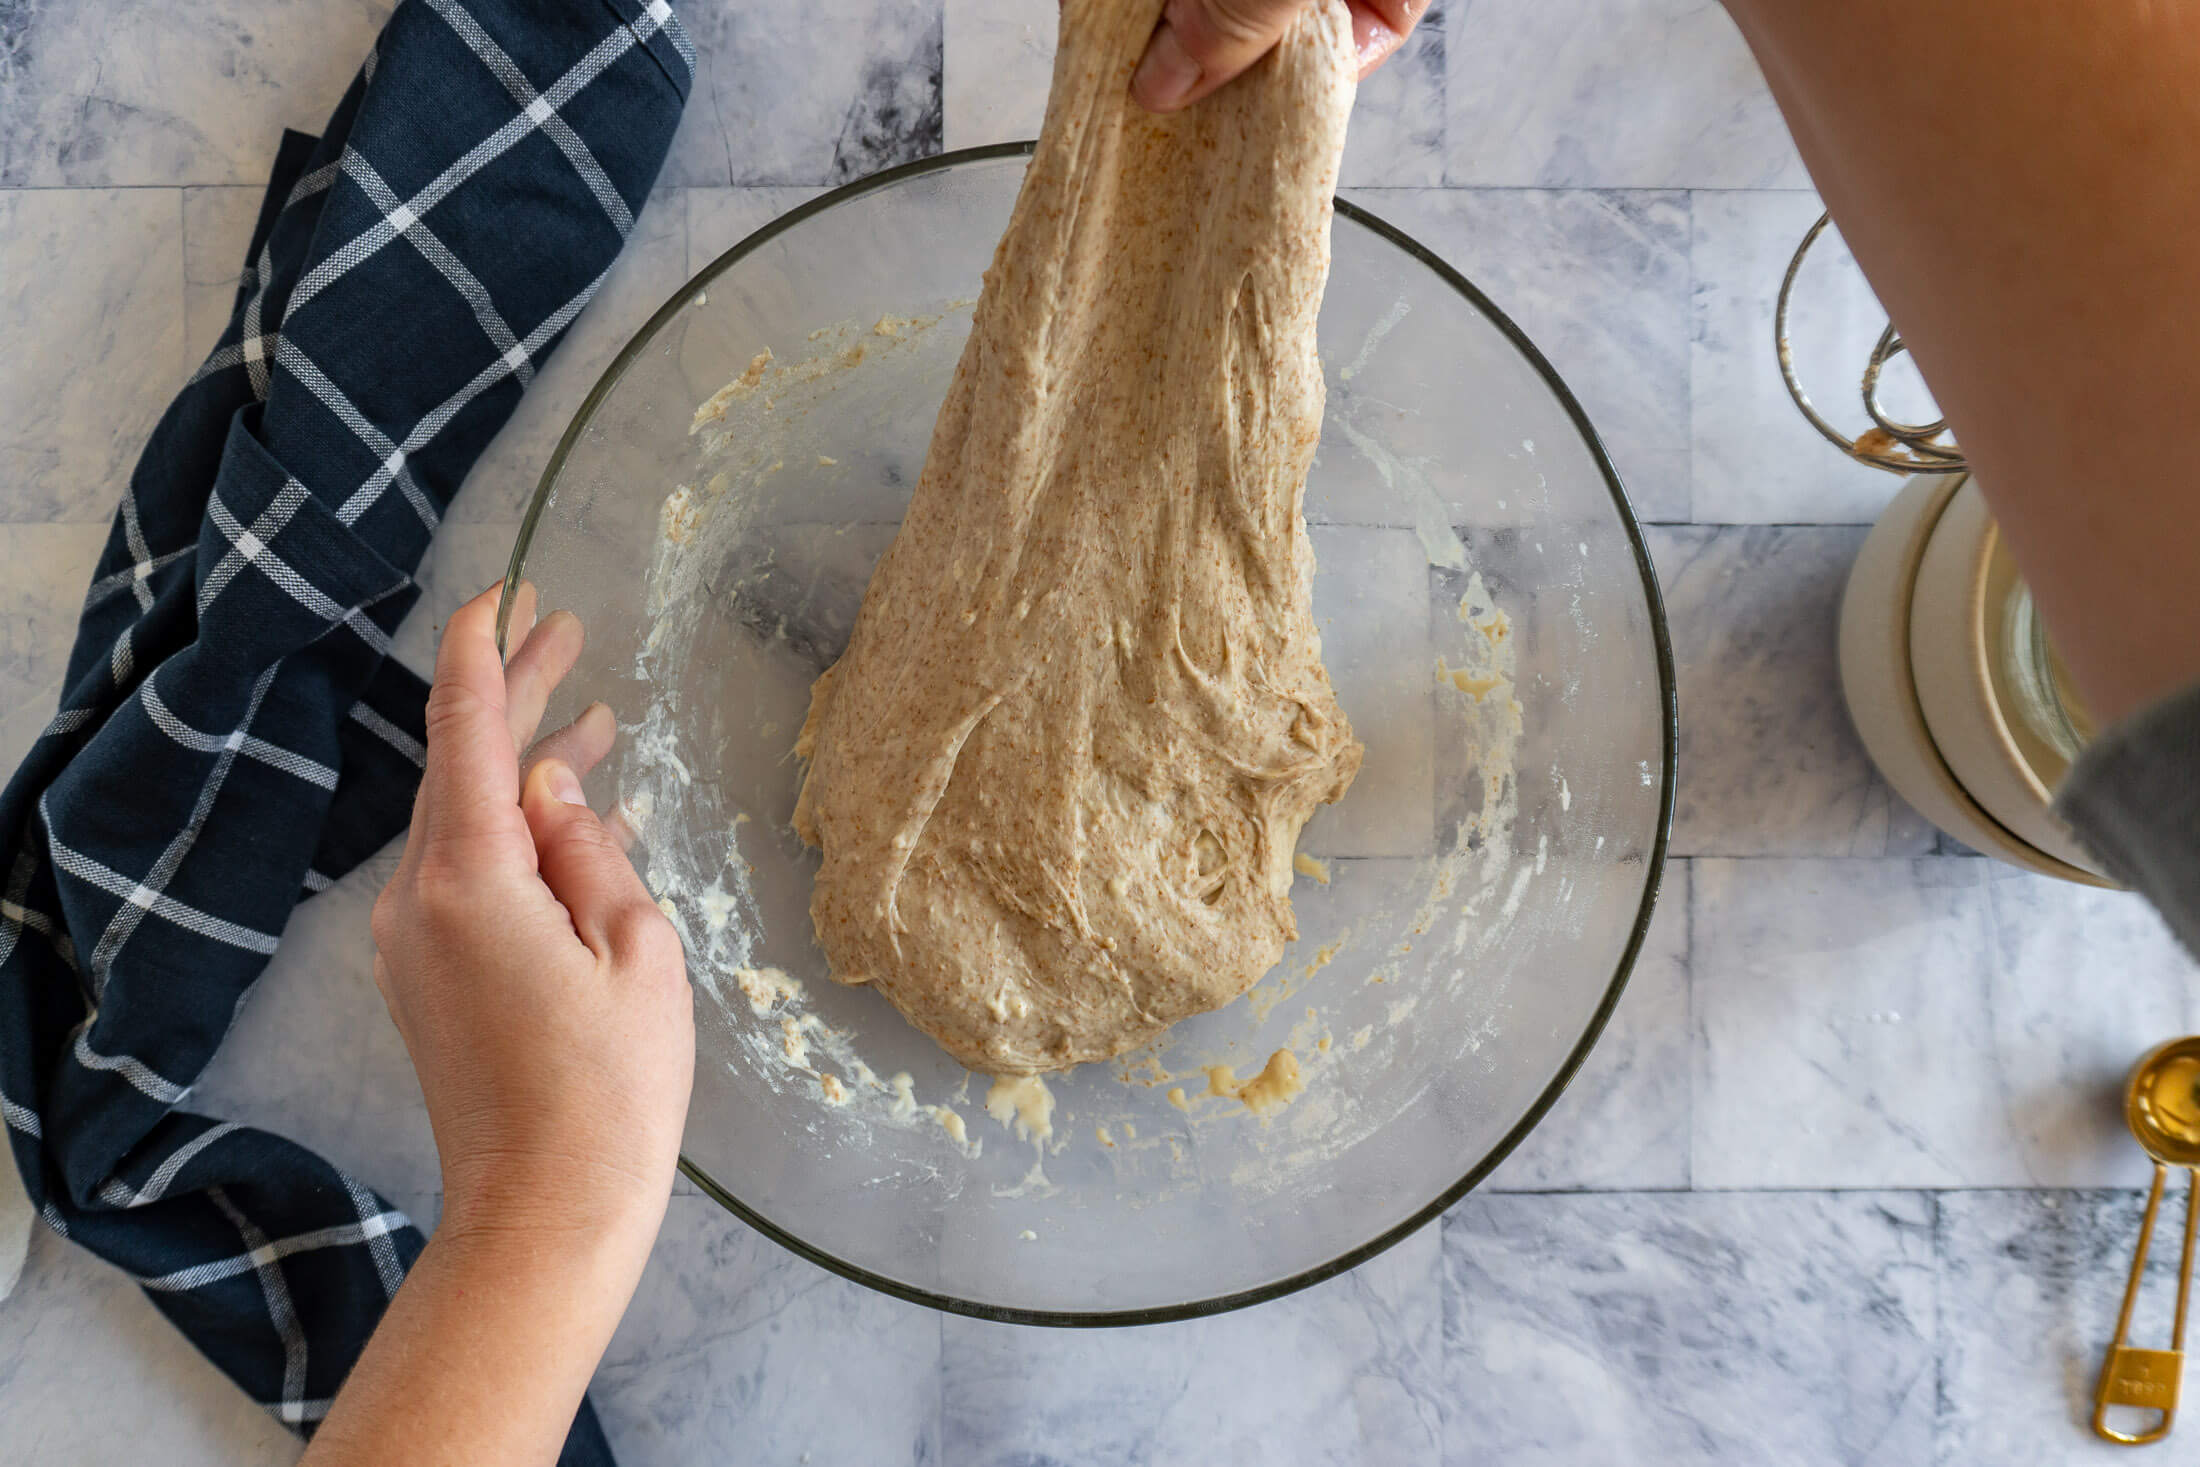
- Step 9: Using damp hands, grab the dough and gently pull it until the flap is long enough to fold over itself, then fold the flap down.
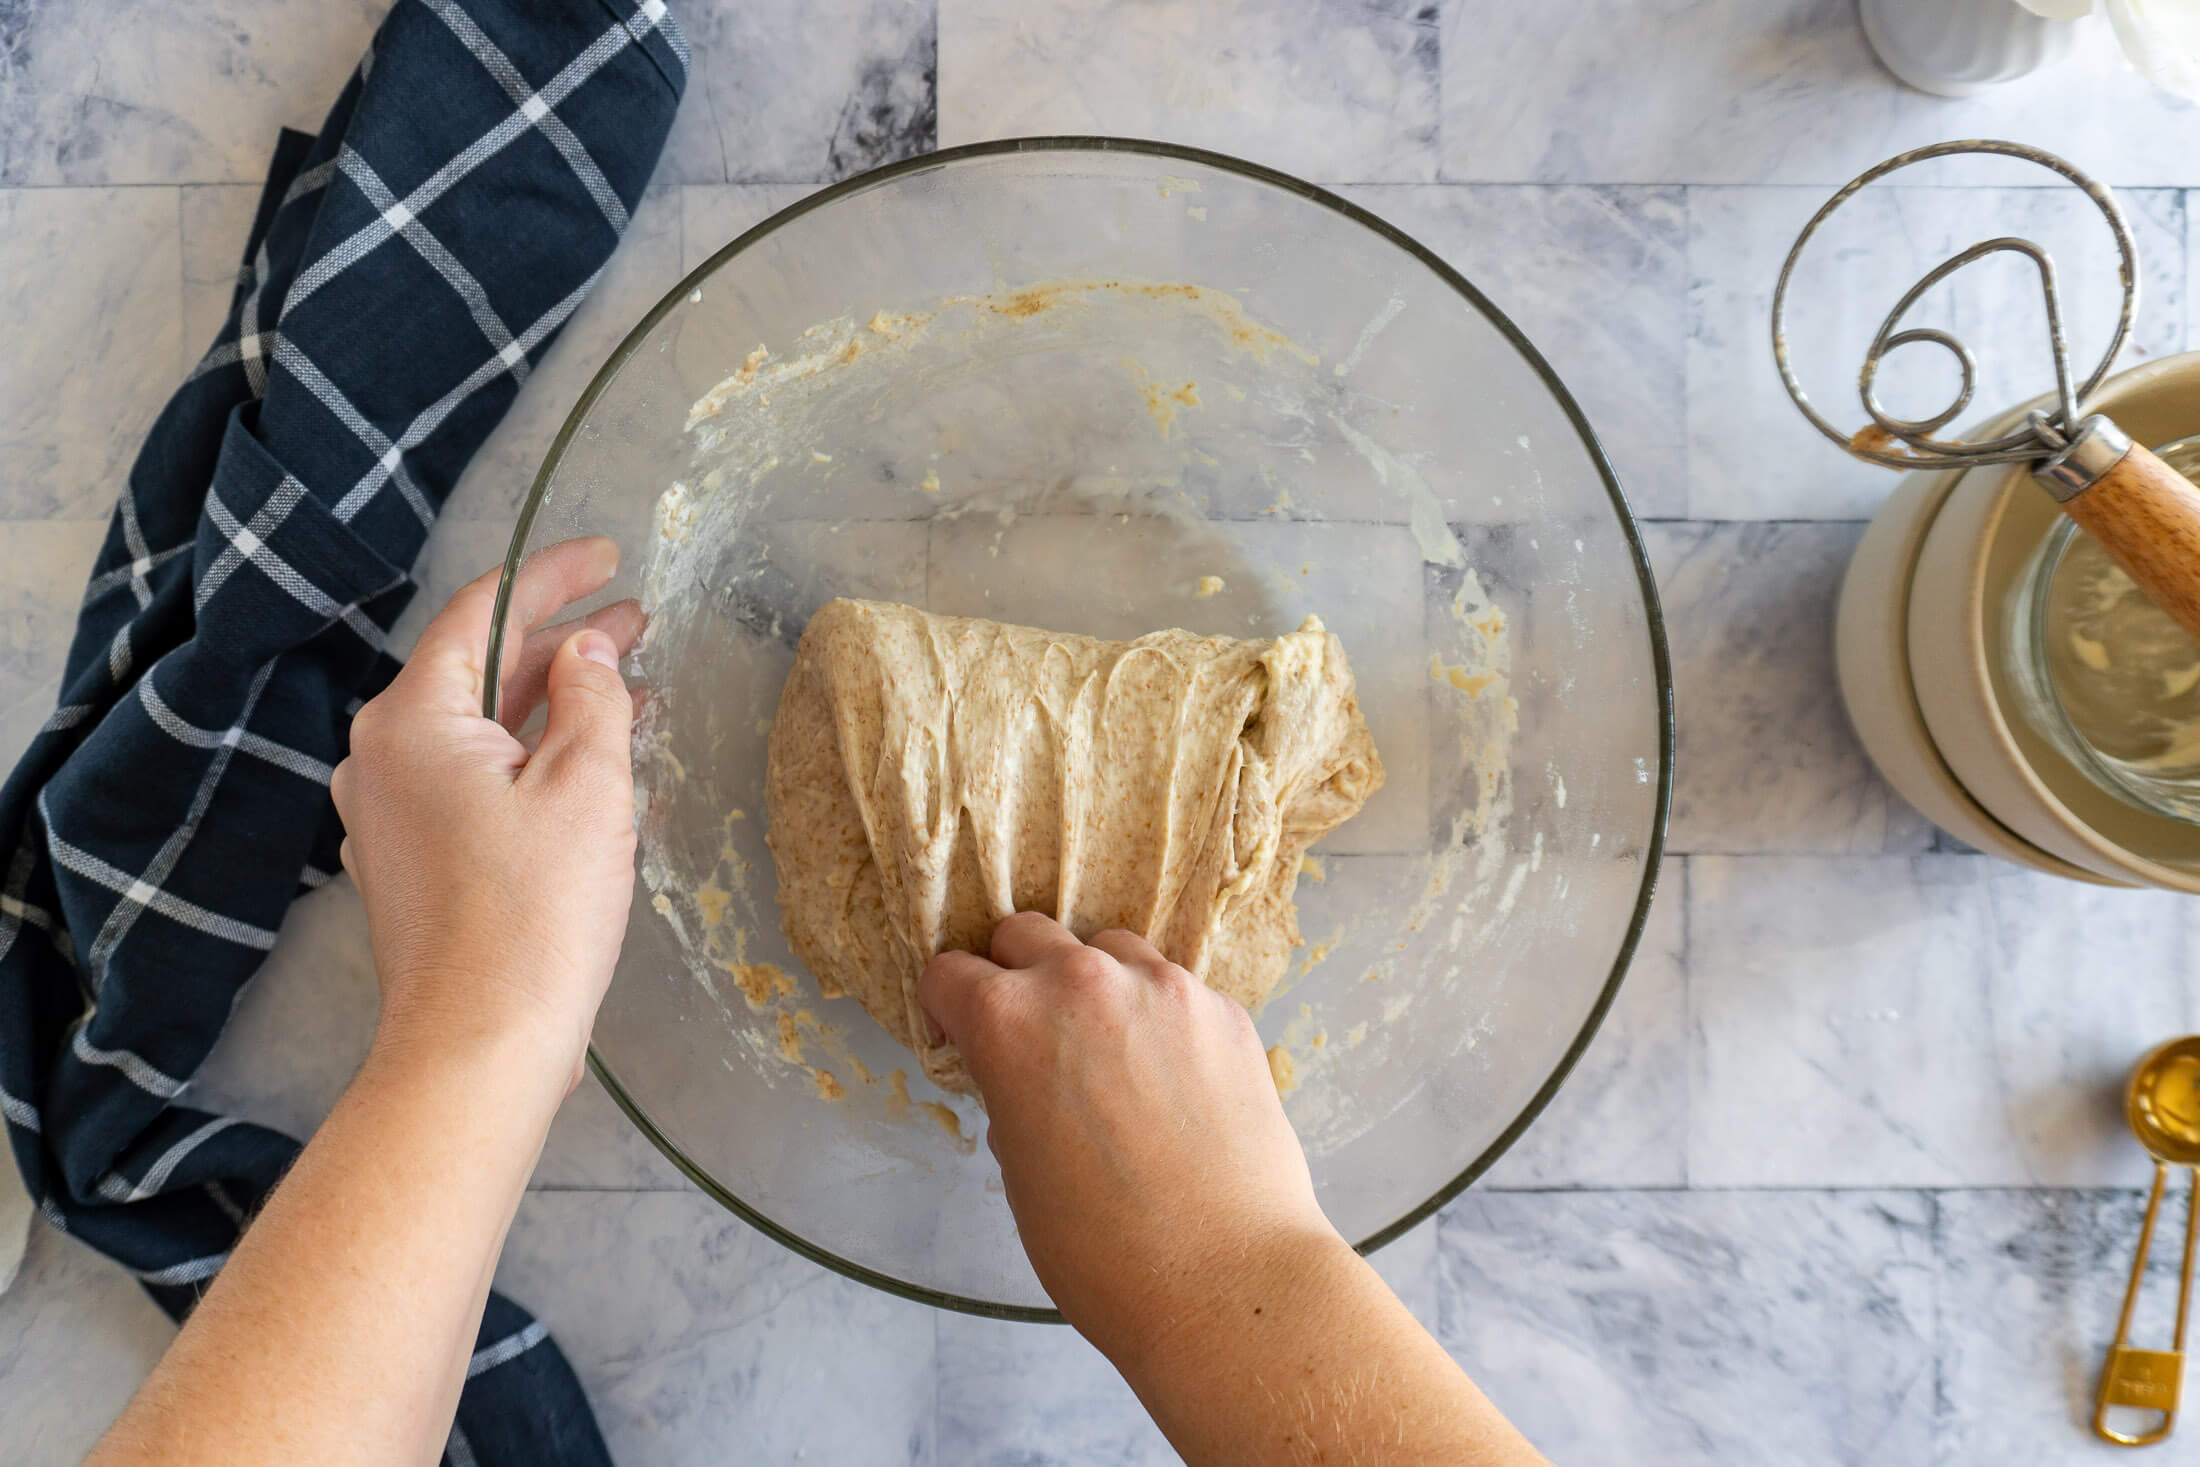
- Step 10: Rotate the bowl 90 degrees, and repeat 4 times. Recover the bowl and rest the dough for 60 minutes.
Bulk Ferment:
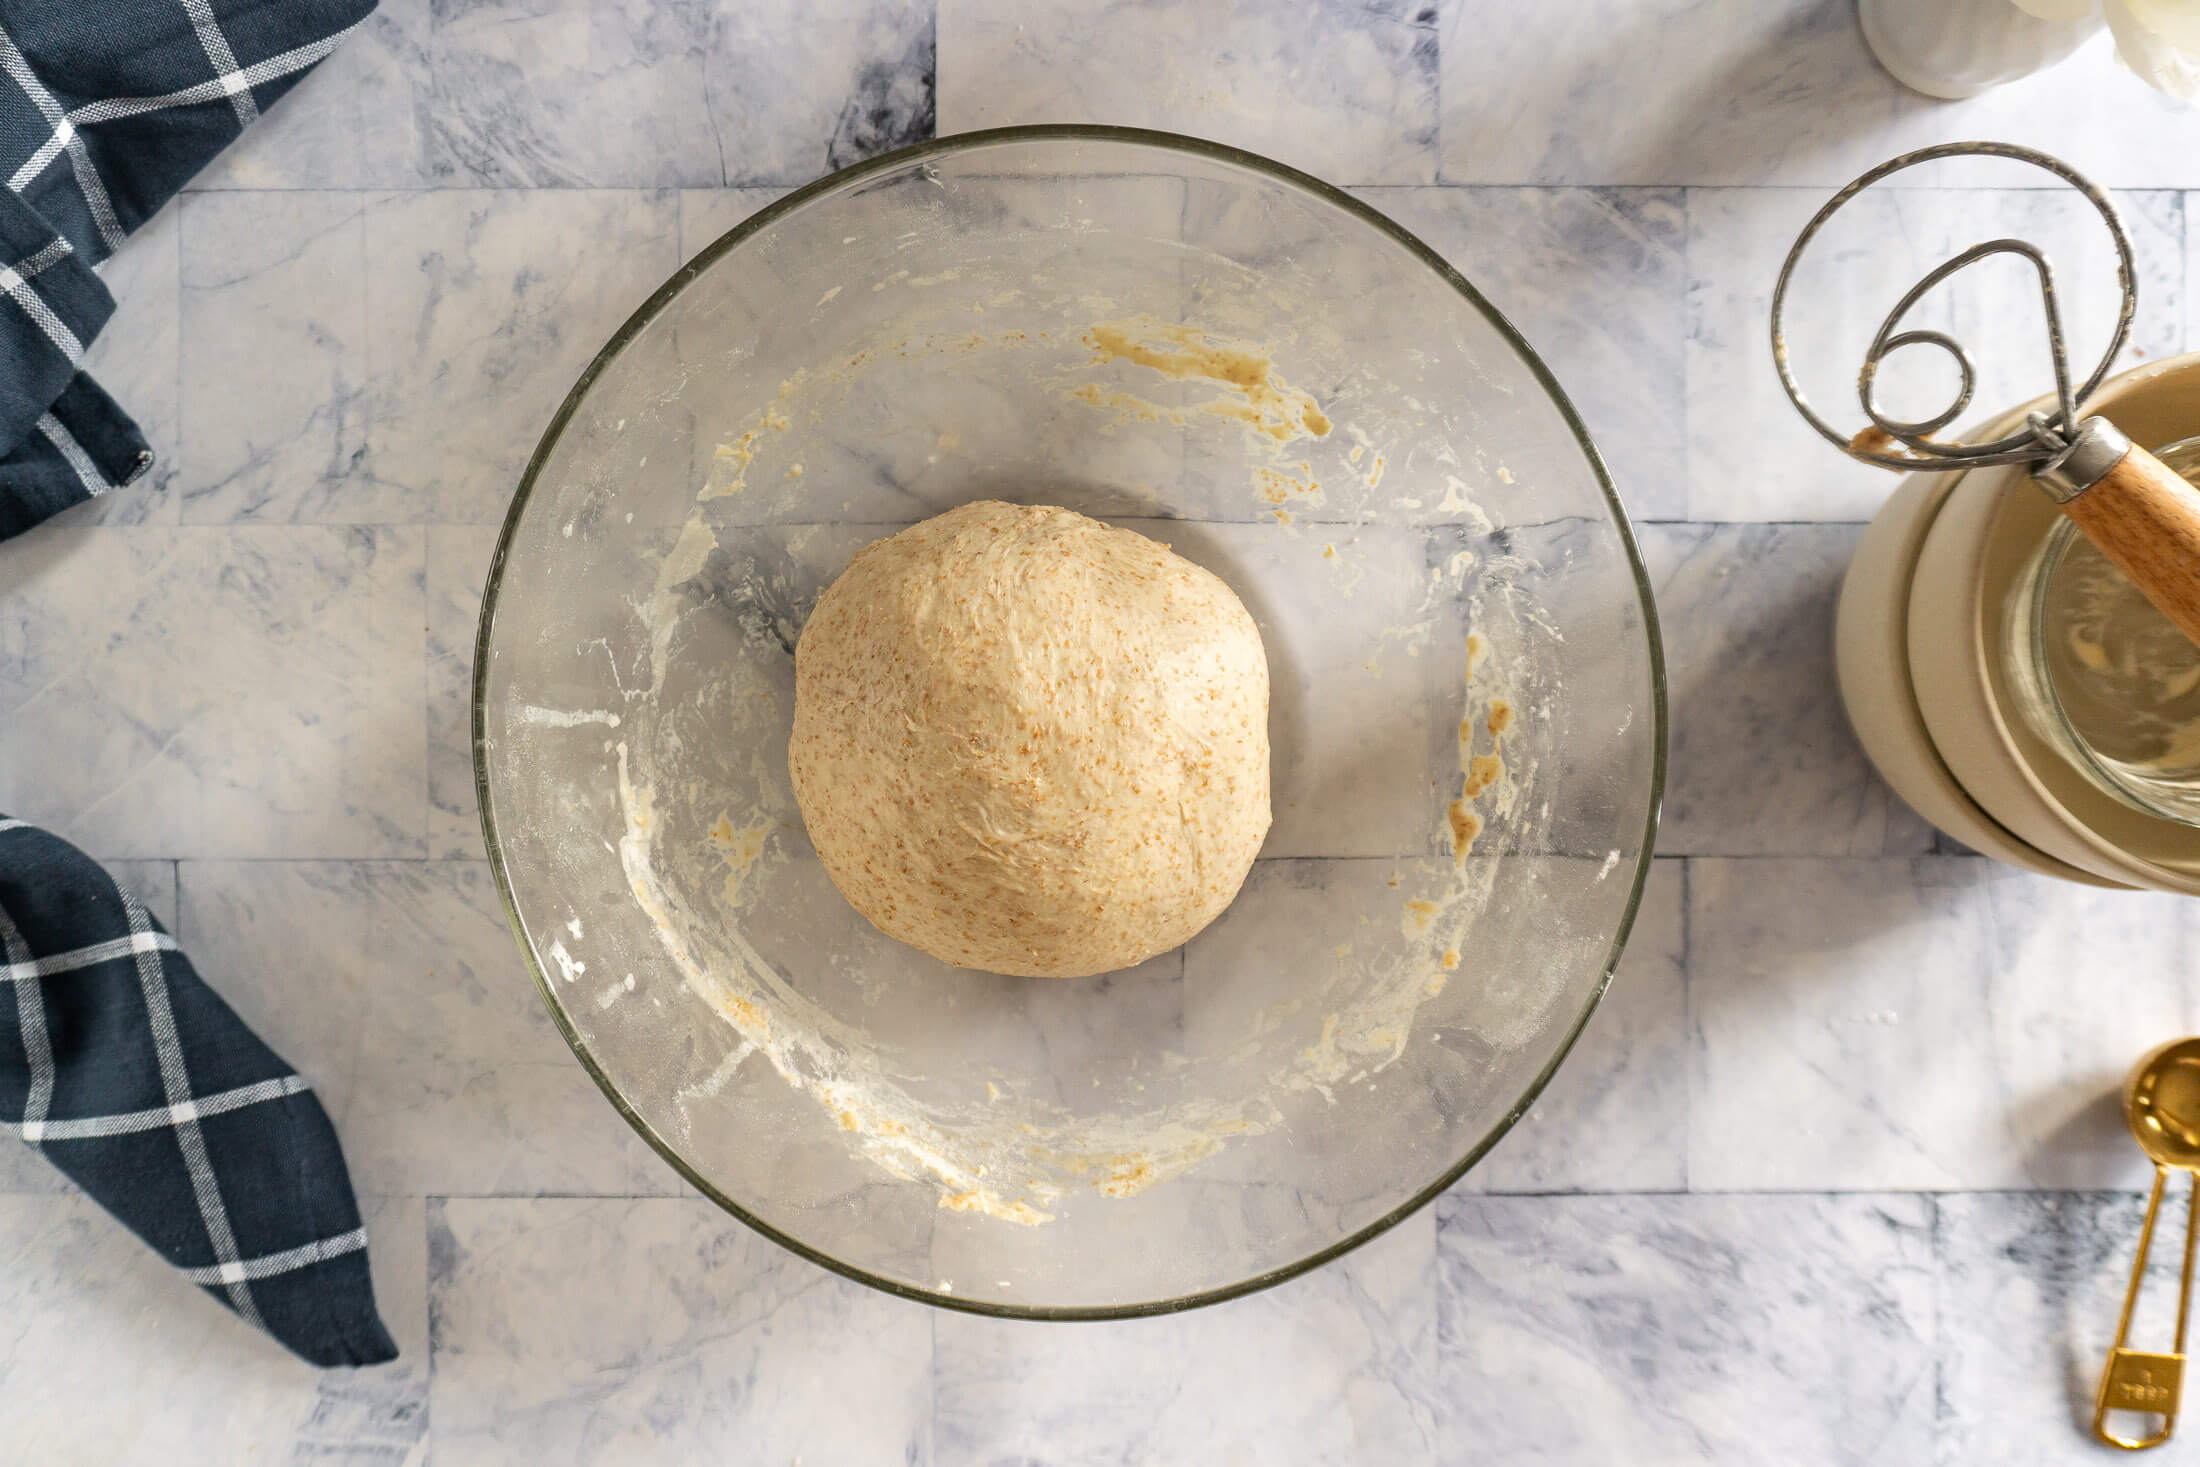
- Step 11: Repeat the stretch and fold process once more, for a total of 3
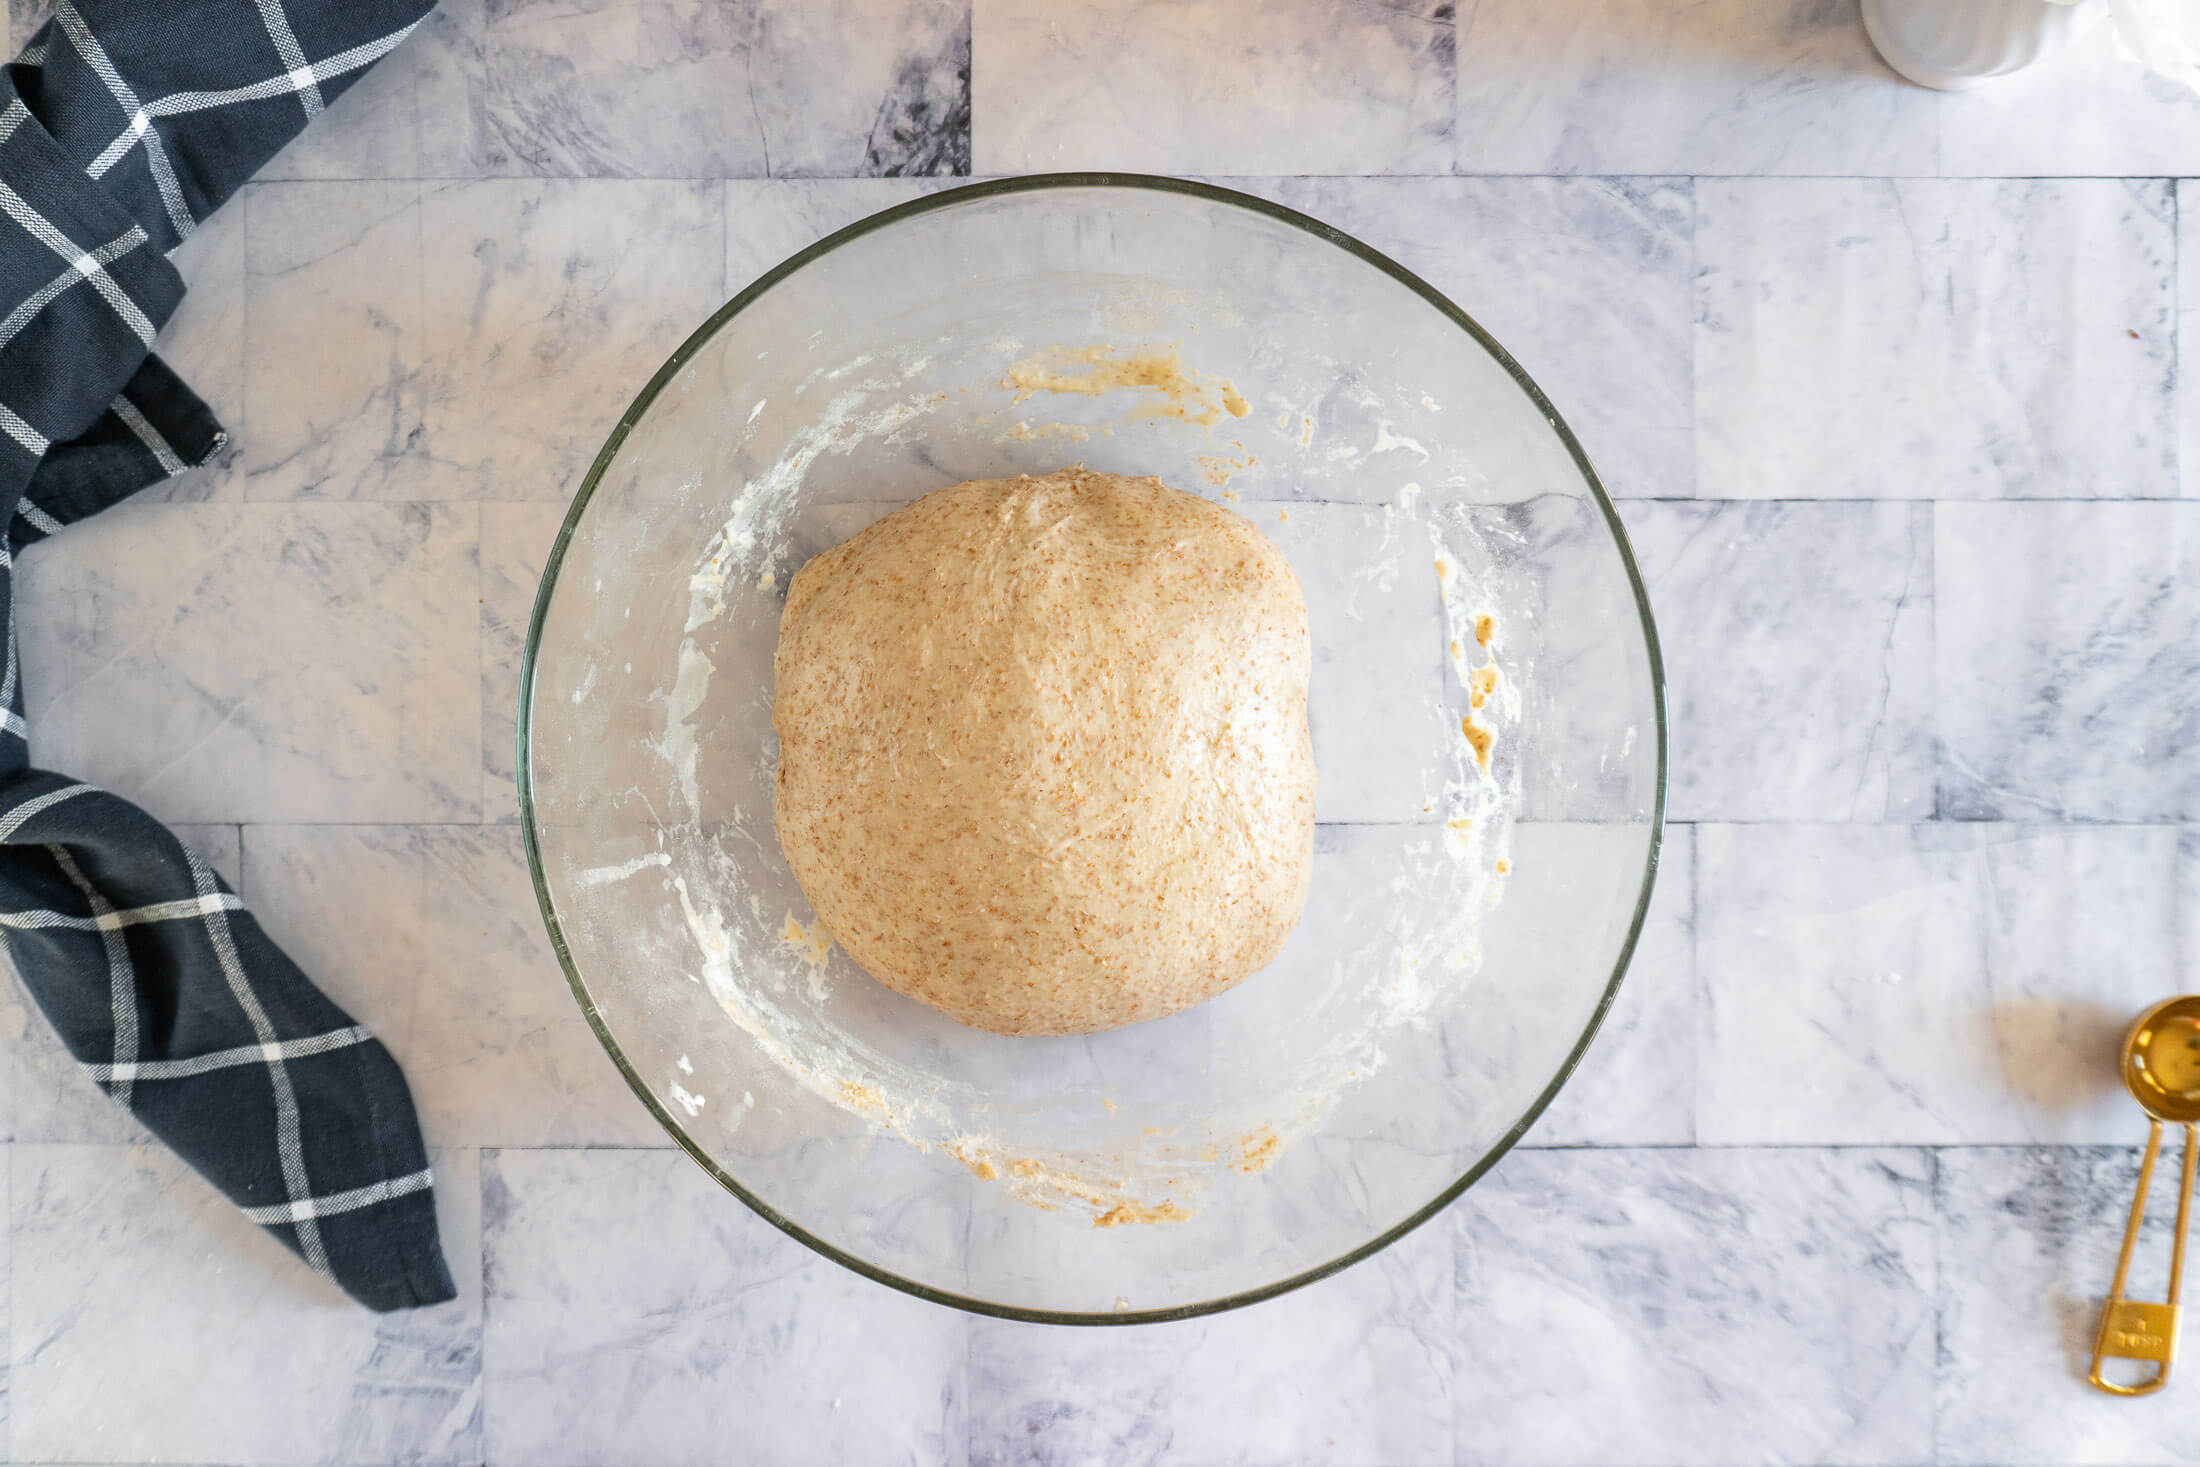
- Step 12: After the last set of stretch and folds, recover the bowl, and set aside for 2 hours to finish the bulk ferment.
Shape:
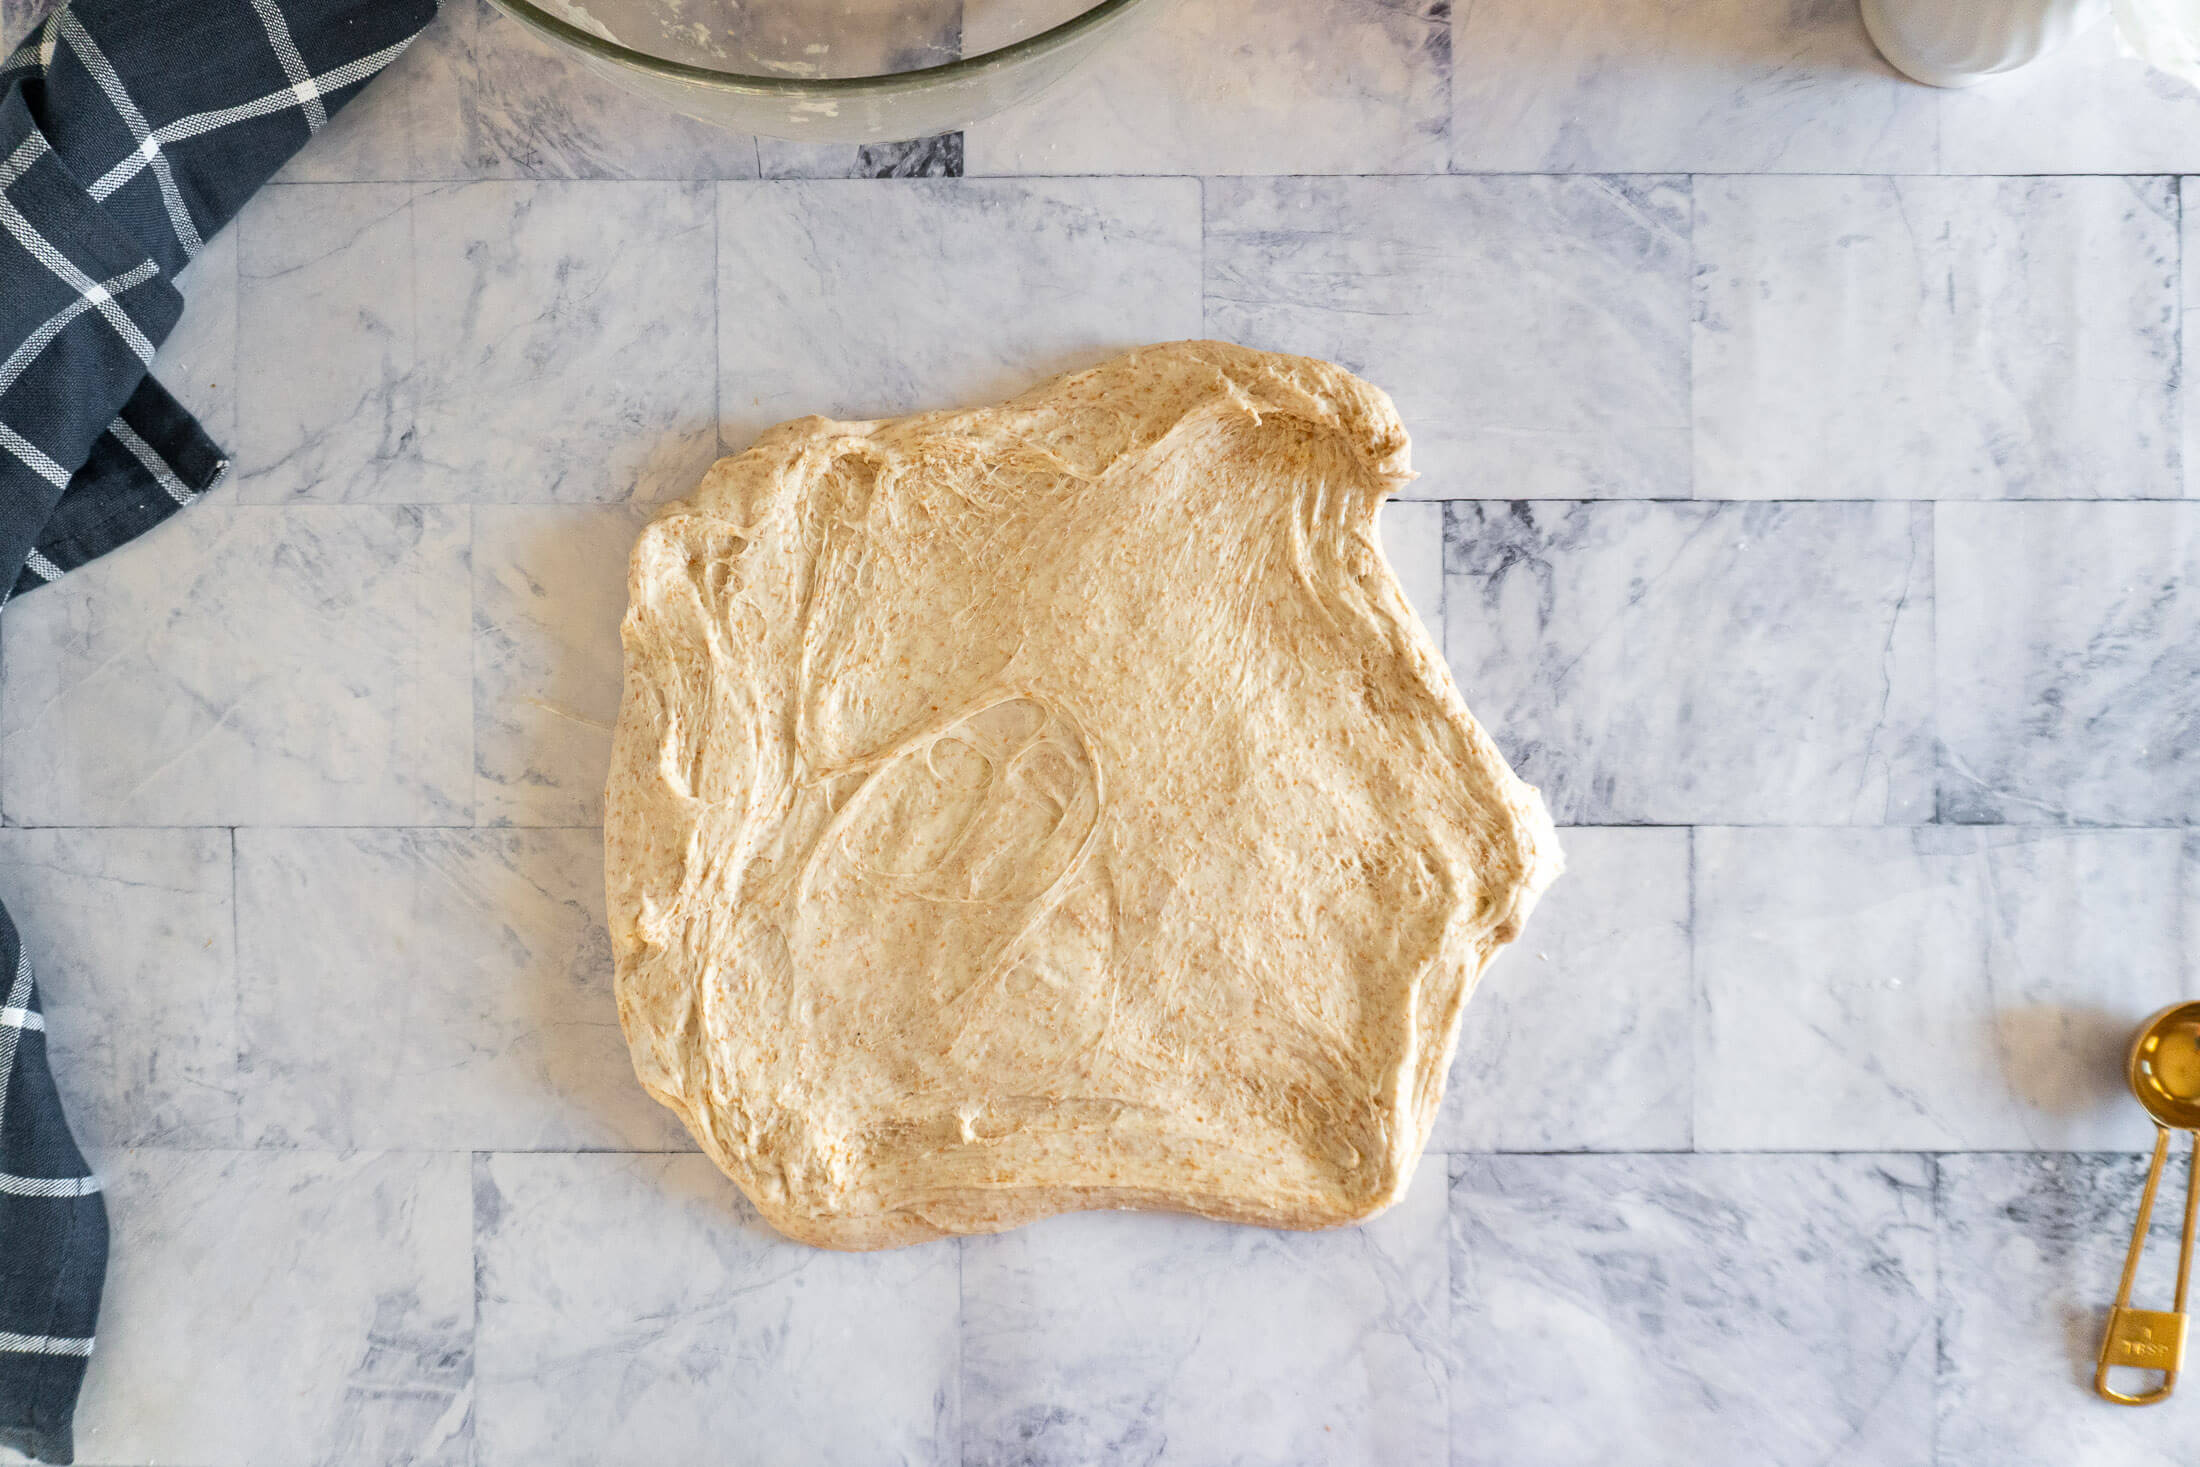
- Step 13: Observe your dough, at the end of the bulk ferment, the dough should have risen in the bowl, and have a smooth surface with visible bubbles. If the dough is domed in the bowl it is ready to work with, if the dough is flat it may need more time in the bulk ferment.
When the dough is ready, uncover the dough and transfer to a work surface or countertop. Gently press and spread the dough into a large rectangle.
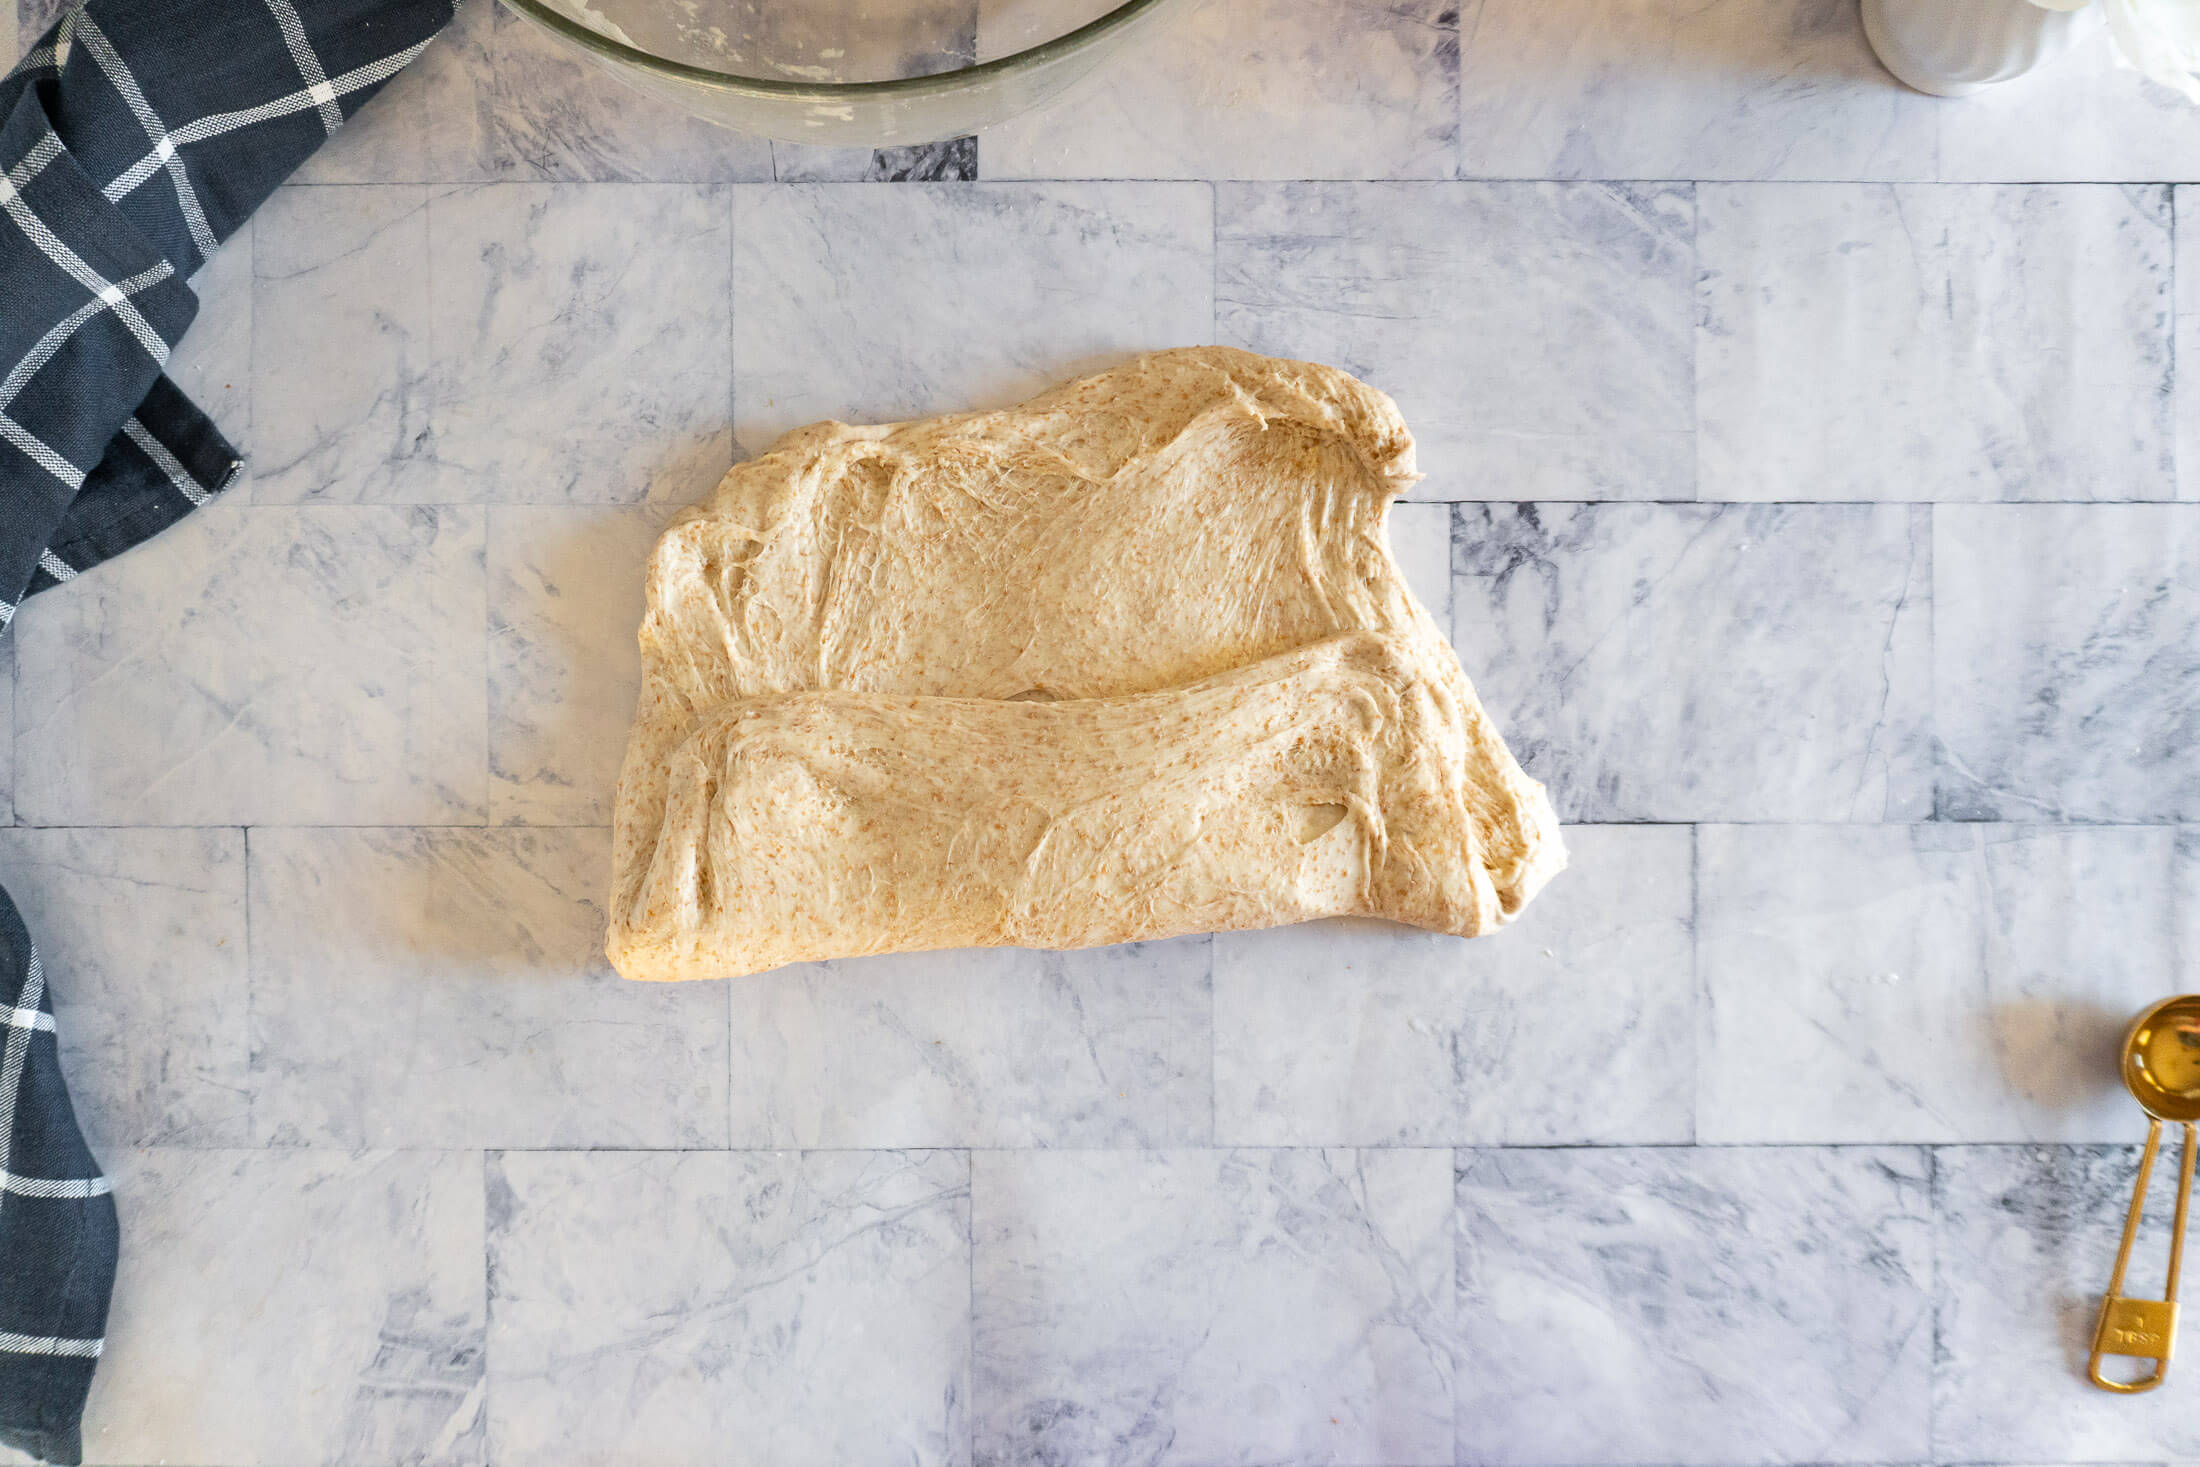
- Step 14: Fold up the bottom third of the dough as though you were folding a letter, and then fold the top down.
Rotate the dough 90 degrees and roll up into a large log. Cover with a kitchen or tea towel and rest for 30 minutes.
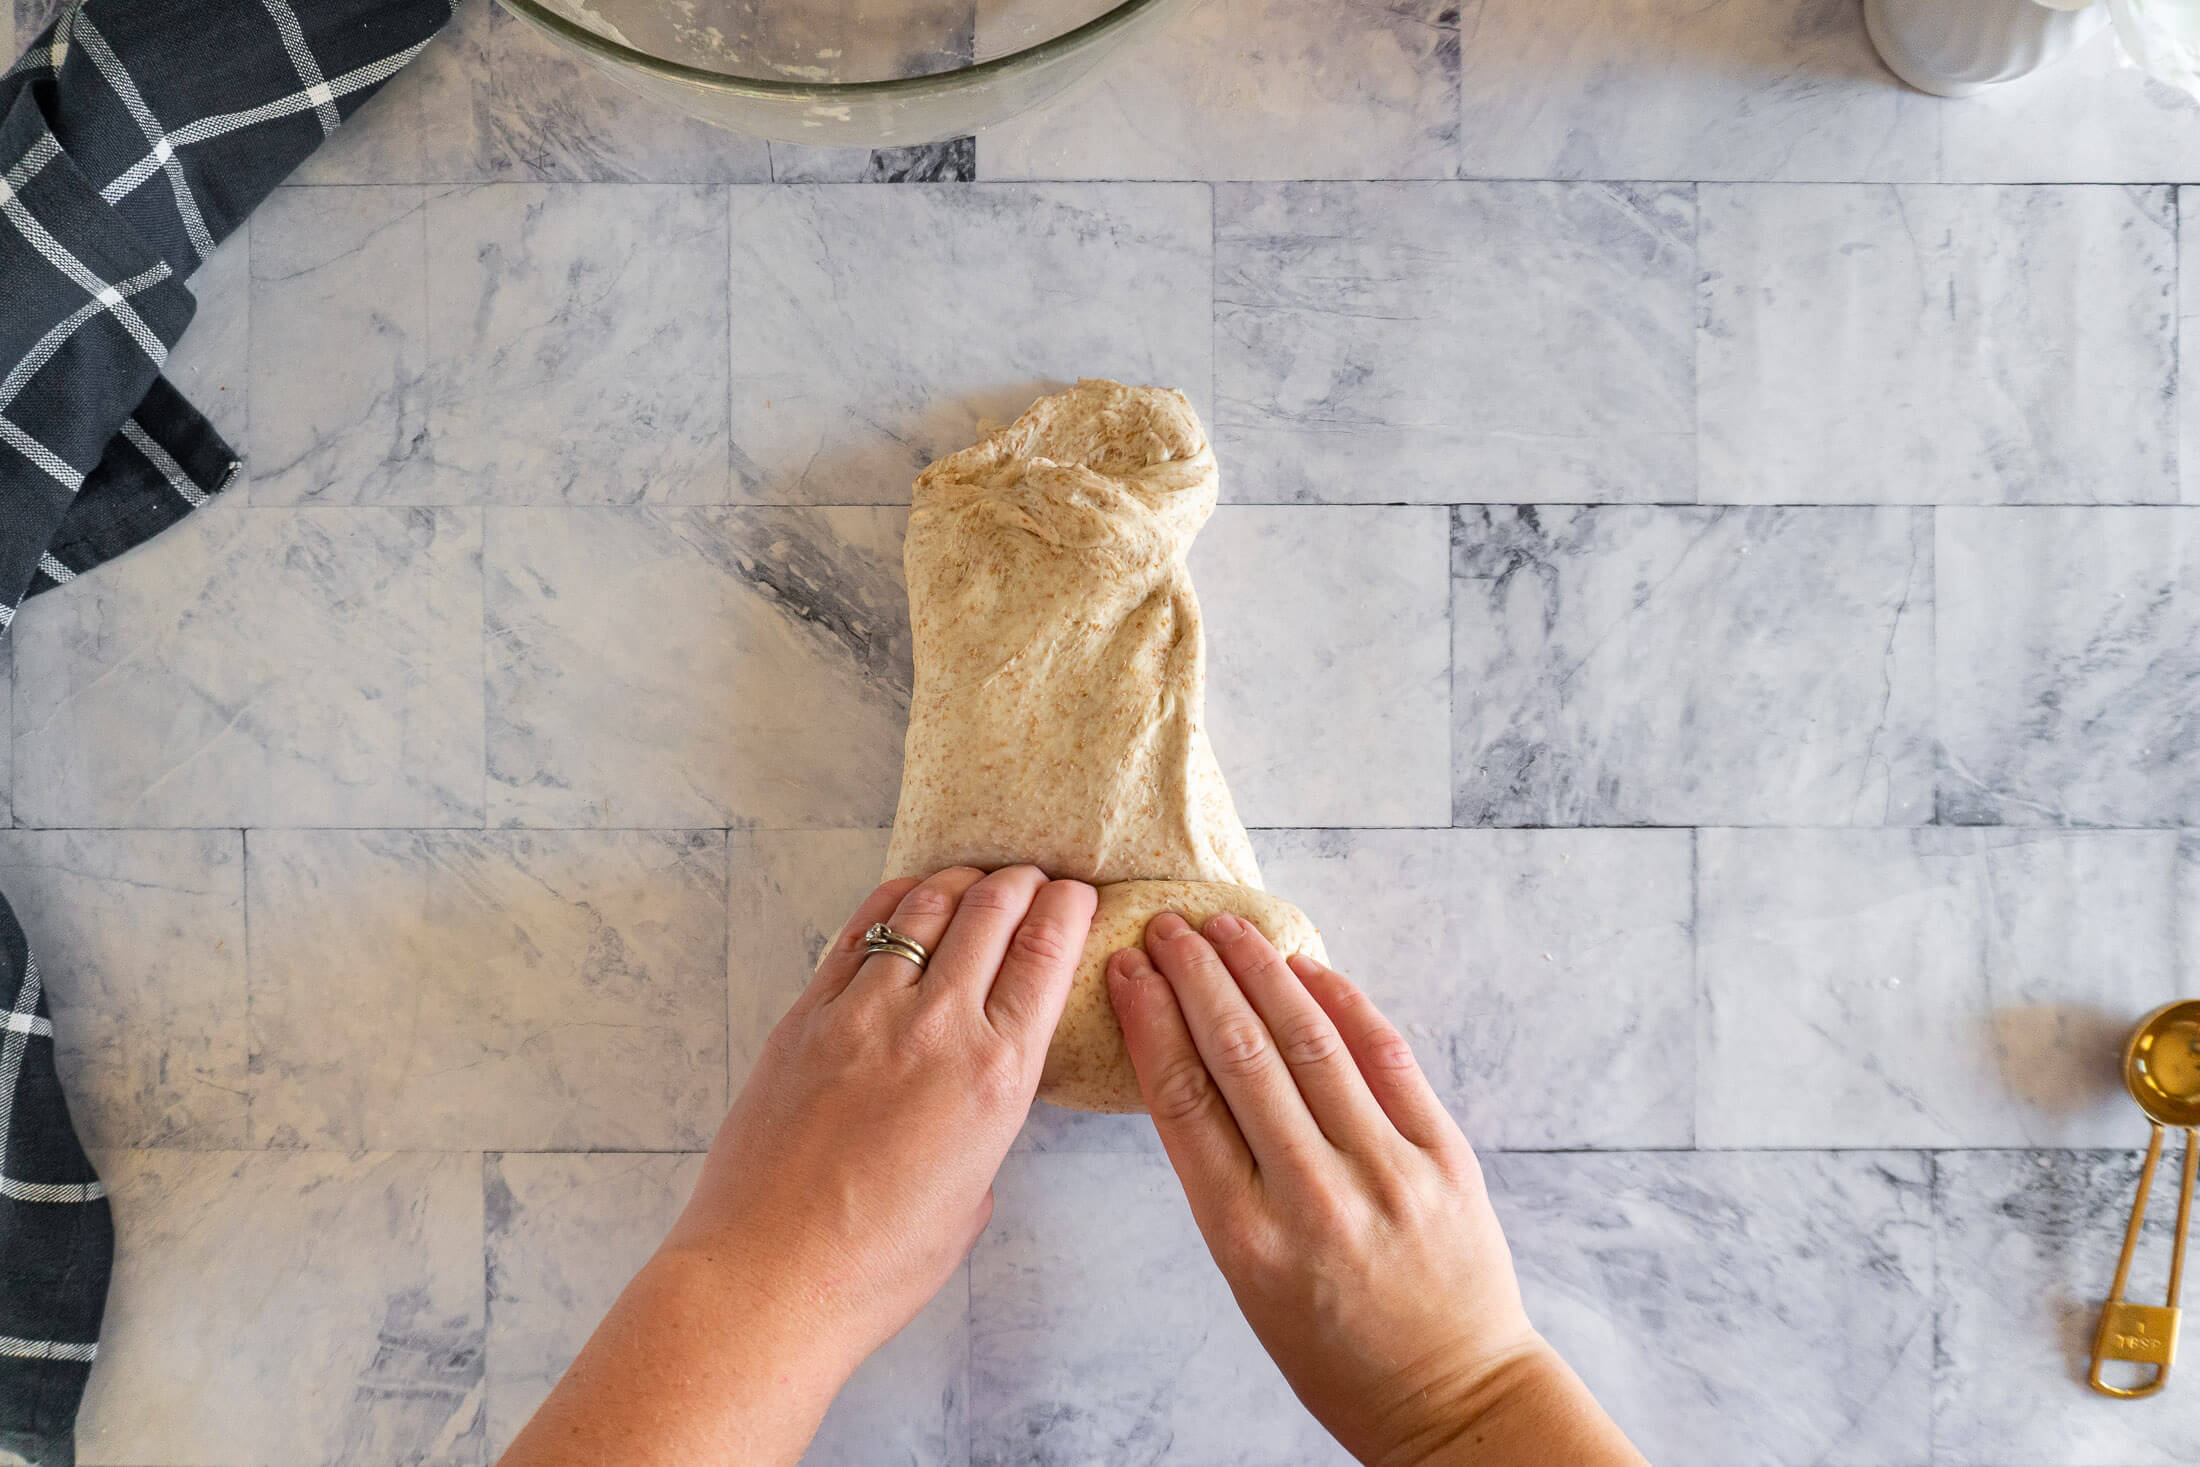
- Step 15: After the rest, flip the dough over, gently press the dough flat then roll it again. Pinch the ends if you’re making a batard or tuck them in if your making a boule.
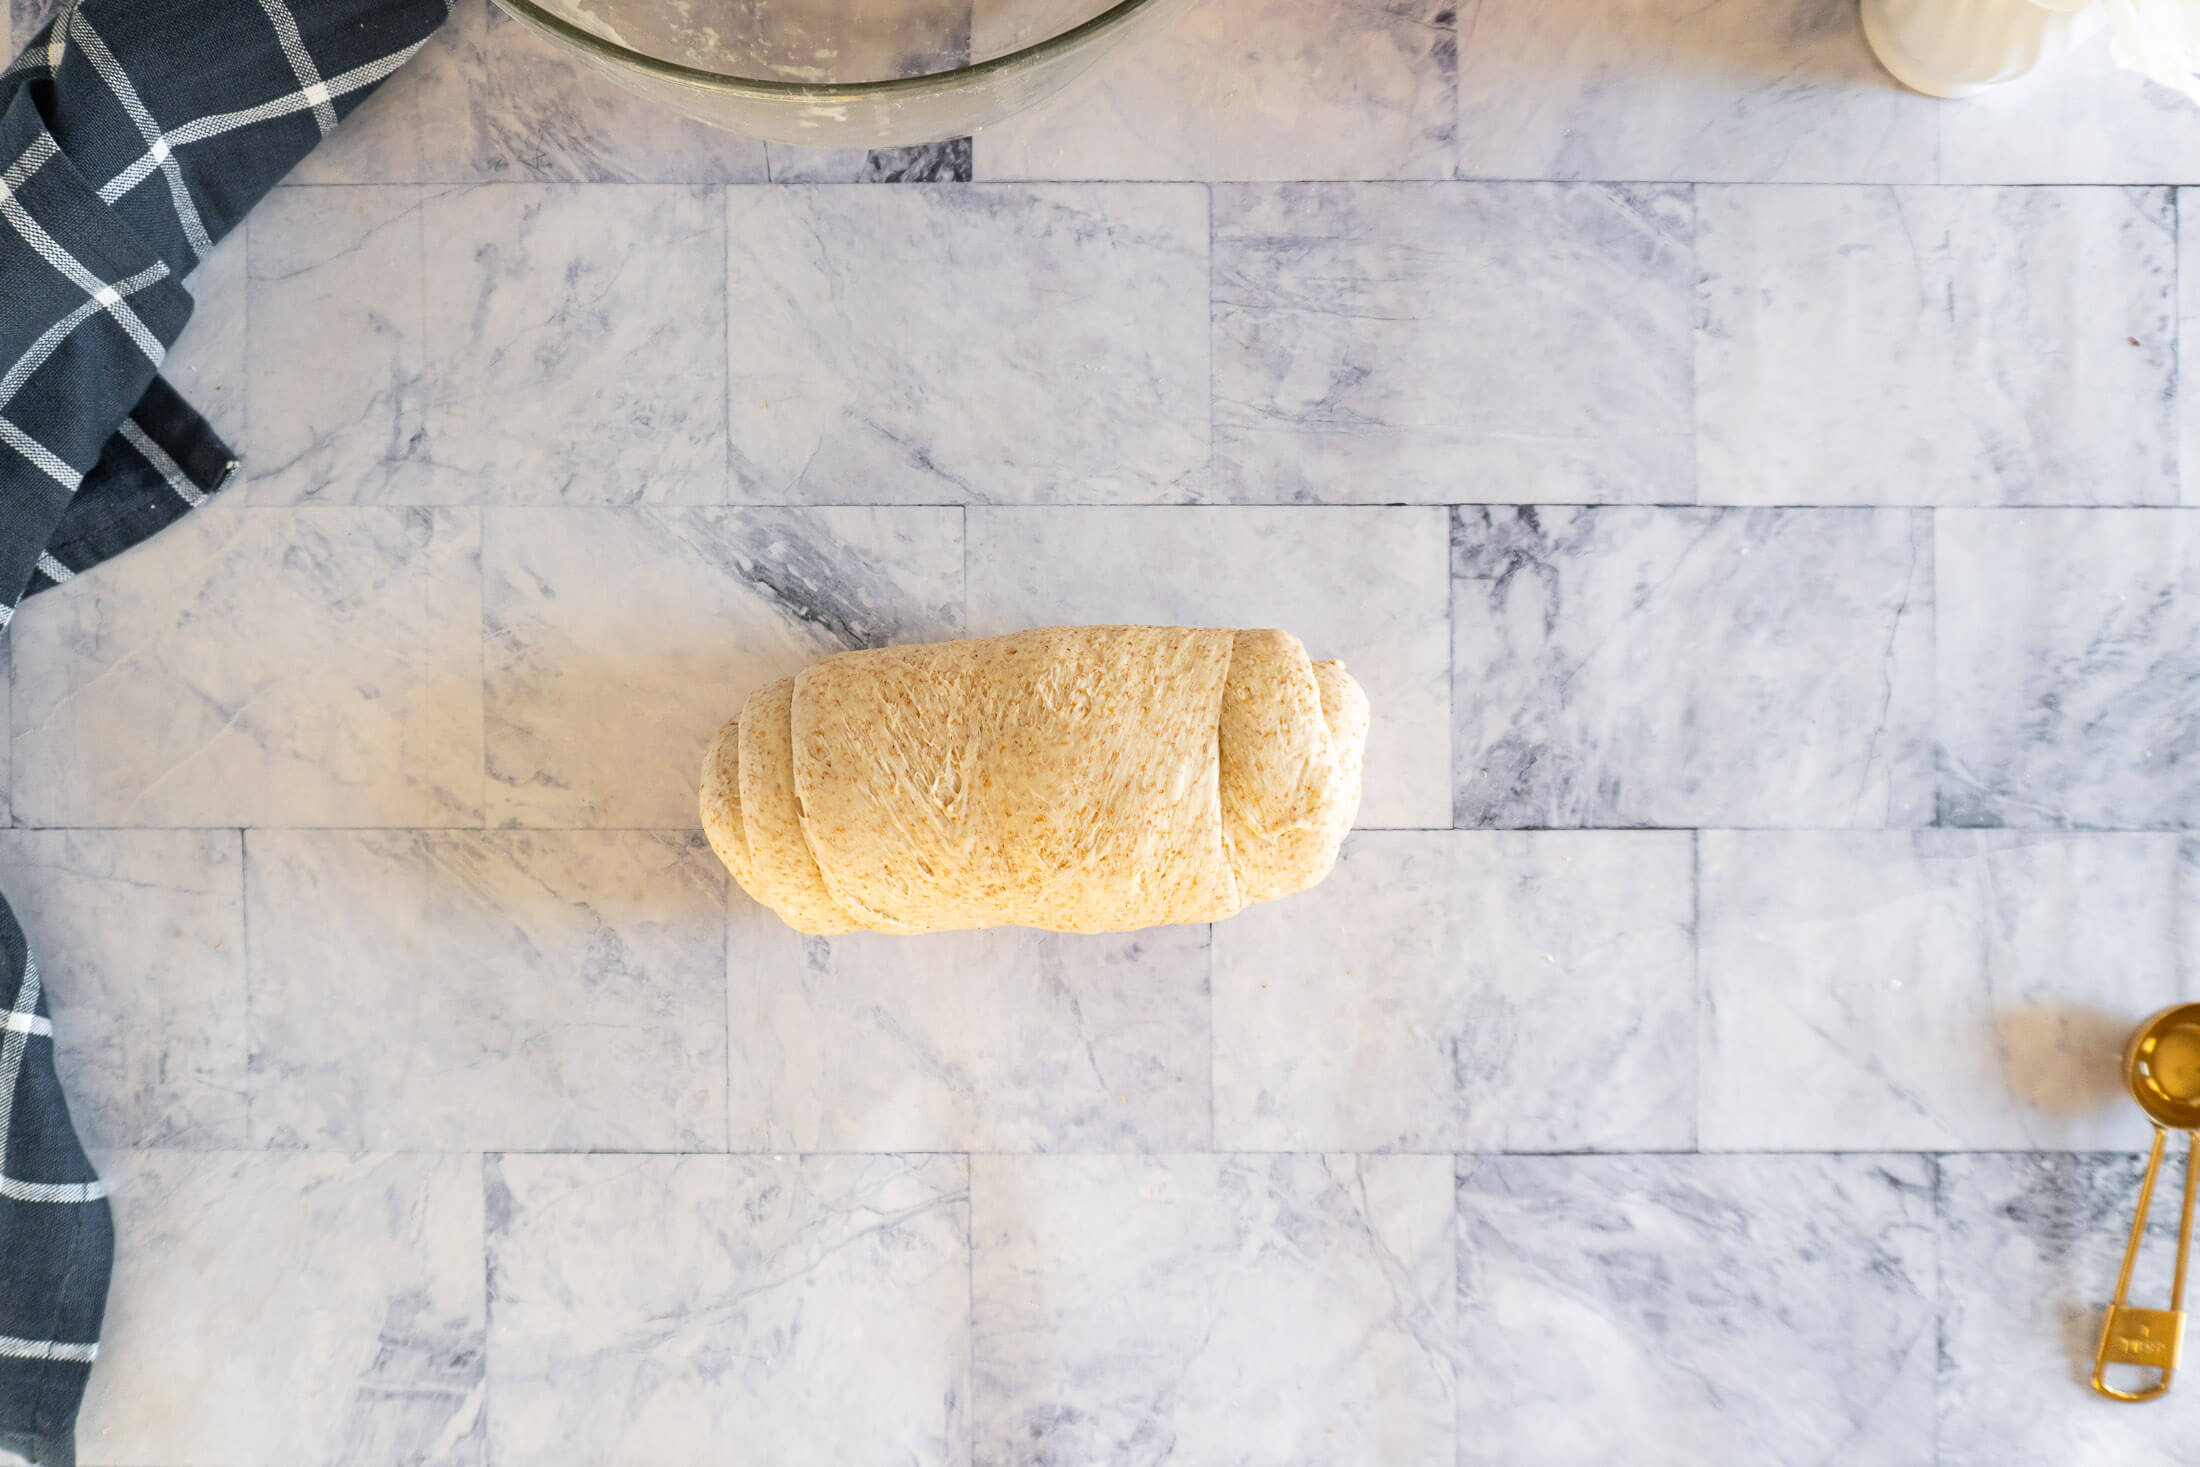
- Step 16: Dust the dough with rice flour then tuck seam side up into a banneton.
If you don’t have a banneton, don’t worry, I have a guide to Proofing Basket and Banneton Alternatives!
Prove + Cold Retard:
- Step 17: Prove the rustic sourdough loaf in the banneton for 2 hours before covering and placing in fridge to cold retard for up to 3 days. If you want to bake it right after proving, you’re welcome to, but the flavor is better after resting in the fridge.
Bake:
- Step 18: Place your dutch oven, cloche, or desired baking dish in the oven and preheat to 450f.
Once the oven is preheated, invert the banneton onto a sheet of parchment paper.
Note: If you don’t have a dutch oven, I do have a guide on open baking sourdough bread without a dutch oven.
- Step 19: Use a lame, sharp knife, or clean razor blade to score the dough, I usually like to make one deep curved slash, but you can get as fancy as you like!
- Step 20: Carefully remove the dutch oven from the oven, and using the parchment paper as a sling, transfer the sourdough loaf from the counter into the dutch oven.
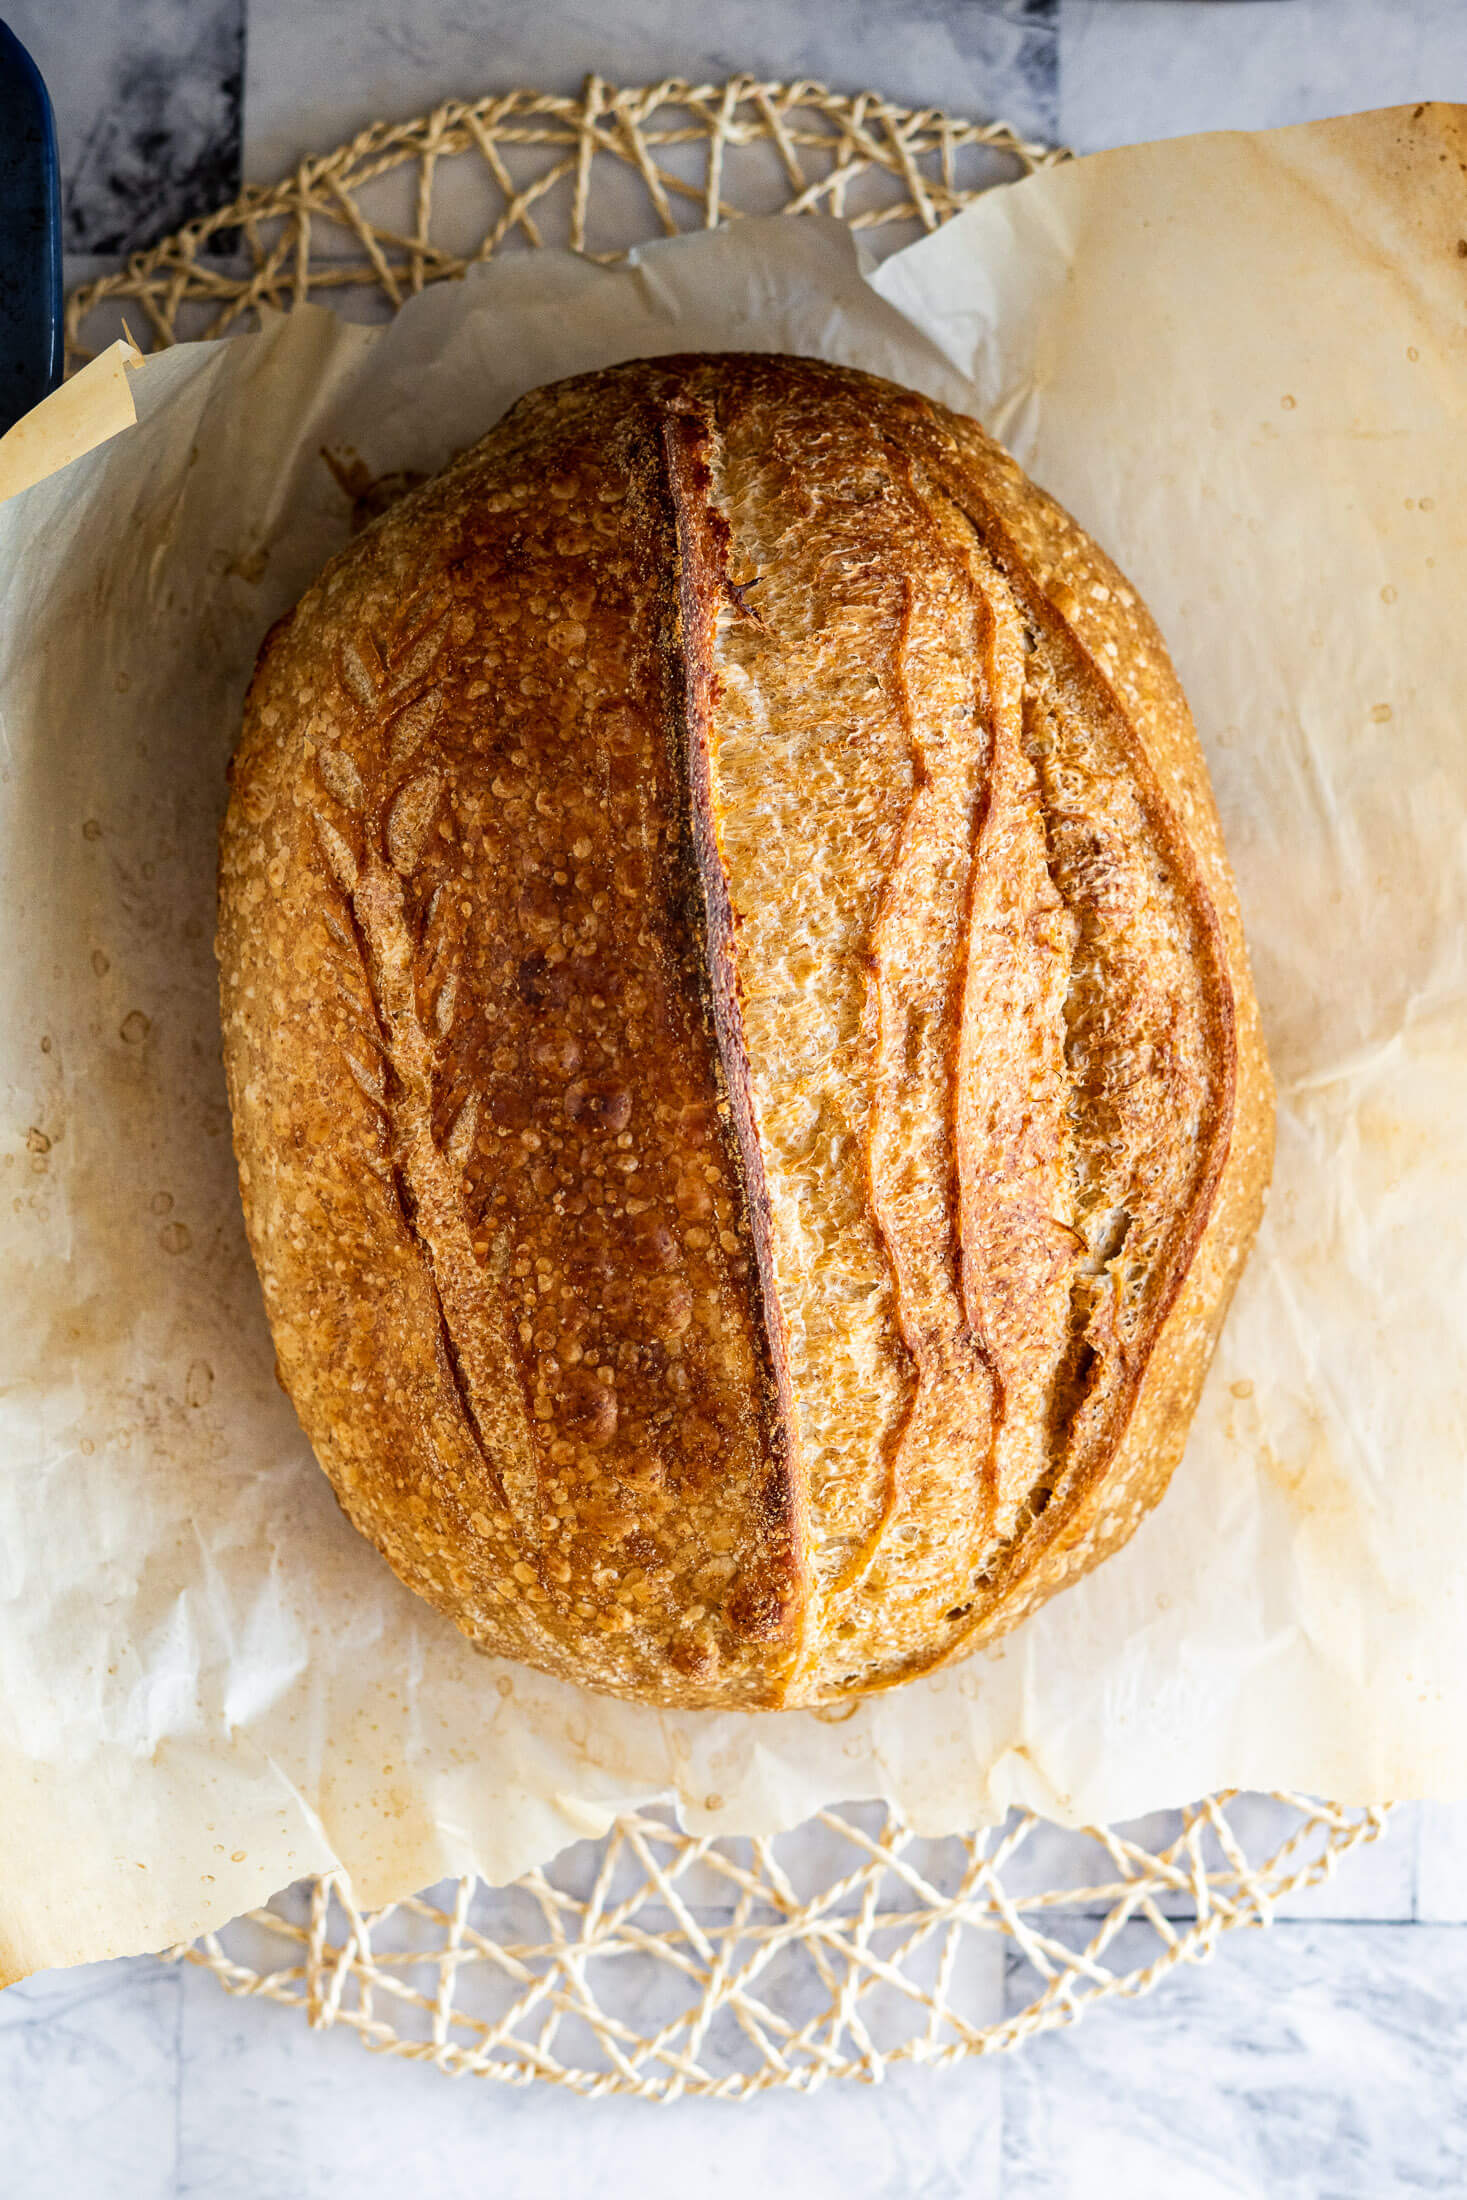
- Step 21: Bake the dough at 450f covered for 30 minutes and uncovered at 450f for 10-15 minutes, or until the loaf is cooked through and the crust is nicely browned. You can test the doneness of the loaf with an instant-read thermometer. Bread is cooked once it reaches 205 – 210 degrees Fahrenheit internal temperature.
Cool:
- Step 22: Remove baked bread from the dutch oven and transfer it to a wire mesh cooling rack to cool completely before slicing. I like to leave it for at least 2 hours before slicing, as slicing too soon can affect the crumb and texture of your loaf.
Expert Tips
- This recipe uses a higher proportion of whole grain flour, so we lean on a little bit of baking magic called an autolyse. It's a simple rest period that gives the flour time to fully hydrate, which helps strengthen gluten development and improves the final texture of the bread.
- I recommend using unbleached bread flour alongside the whole wheat in this recipe. Whole wheat adds flavor and nutrition, but it can also weigh dough down and lead to a denser loaf on its own. The bread flour helps balance that out by providing extra structure and strength.
- If you enjoy baking with whole grains, you might also like my rosemary sourdough bread, which combines whole wheat flour with fragrant rosemary for a really flavorful loaf, or my whole wheat sourdough which has a higher proportion of whole wheat flour.
- If your dough looks a little rough or shaggy after the second stretch and fold, don't worry, that can happen when the starter is added after the autolyse. Just turn it out onto a lightly floured surface and give it a brief knead with a bit of flour until it comes back together, then carry on with the rest of the recipe as written.
- My bulk fermentation and dough proofing is done at 70-ish degrees fahrenheit, but if you’re in a warm place, your rising times will need to be shortened.
- New to bannetons?? I have a guide on banneton use and maintenance!
Why This Recipe Works
Autolyse builds gluten without kneading. Mixing the flour, water, and honey together and letting it rest before adding the starter gives the whole wheat flour time to fully hydrate and allows gluten networks to develop on their own, resulting in a stronger, more elastic dough with less effort.
Cold retarding deepens flavor and improves scoring. Resting the shaped loaf in the fridge slows fermentation way down, giving the wild yeast more time to produce the complex, tangy flavors sourdough is known for, and the cold dough is easier to score.
Baking covered in a dutch oven mimics a professional bread oven. The lid traps steam released from the dough during the first 30 minutes of baking, keeping the crust soft and pliable long enough for maximum oven spring before it sets into that signature crackly, golden crust.
Rustic Sourdough Bread FAQs
For short-term storage, keep the loaf cut side down on a cutting board for up to 12 hours, then transfer it to a bread bag after 12 or so hours.
For longer storage, you can freeze it, cool the loaf completely, wrap it tightly in plastic wrap, slide it into a bread bag, and freeze for up to 1-2 months. When you’re ready to enjoy it, just unwrap and let it come to room temperature for 1-2 hours before slicing.
“Regular” sourdough can refer to almost any naturally leavened loaf, including enriched varieties made with butter or eggs. Rustic sourdough is specifically a lean loaf; no dairy, no commercial yeast, minimal additives. The emphasis is on long fermentation, a thick crust, and an open, chewy crumb. This recipe fits that definition: flour, water, salt, starter, and a small amount of honey.
No, not for this recipe. Discard doesn’t have the leavening power needed for a naturally fermented loaf. You need a fed, active starter that has at least doubled in size after feeding. Save your discard for sourdough brownies, sourdough pasta, or sourdough peanut butter cookies.
A Dutch oven is the easiest way to replicate the steam environment of a professional bread oven, which is what gives sourdough its crust. That said, it’s not your only option. I have a guide on baking sourdough without a Dutch oven with several alternatives that work well.
Not necessarily. A banneton gives your loaf its shape and those beautiful spiral ridges, but you can proof your dough in a bowl lined with a well-floured tea towel instead.
Rice flour is the best for dusting – it doesn’t absorb into the dough the way regular flour does, so your loaf releases cleanly. I have a full guide to banneton alternatives if you need it.
Master Your Sourdough Starter In 5 Days!
From Confused To Confident.
Find success with 5 simple, actionable secrets delivered to you. No more guessing games – just clear, proven steps to a thriving starter.
Baker's Percentages
| Ingredient | Weight | Percentage (%) |
|---|---|---|
| Flour | 500g | 100% |
| Bread Flour | 275g | 55% |
| Whole Wheat Flour | 225g | 45% |
| Water | 340g | 68% |
| Starter | 100g | 20% |
| Honey | 40g | 8% |
| Salt | 14g | 2.8% |
Baker’s Timeline
Day 1:
- 9:00 AM: Combine water, honey, bread flour and whole wheat flour to autolyse
- 10:00 AM: Incorporate sourdough starter and salt via first stretch and fold
- 11:00 AM: Second stretch and fold
- 12:00 PM: Third stretch and fold, bulk ferment 2 hours
- 2:00 PM: Bulk ferment complete, pre shape
- 2:30 PM: Final shape, proof rustic sourdough loaf in banneton 2-3 hours
- 5:30 PM: Proofing complete, place banneton in fridge to cold retard (up to 3 days)
Day 2:
- 9:00 AM: Place dutch oven into oven and preheat
- 9:45 AM: Bake rustic sourdough bread
What to Serve With Rustic Sourdough Bread
This bread is honest and versatile, it doesn’t need much, but it makes everything around it better.
With jam or preserves. A thick slice with a smear of homemade blackberry jam or raspberry jam is the kind of breakfast that makes you feel like you have your life together. The whole wheat and the bright fruit are a genuinely great pairing.
For soup dunking. This is the bread’s highest calling. A chewy, crusty sourdough slice alongside a bowl of smoked French onion soup is a cold-weather combination that never gets old. The thick crust holds up to dunking without falling apart in the bowl.
As a tartine base. Toast a slice, add cultured butter, a few sliced fermented cherry tomatoes, and a crack of pepper.
More Great Sourdough Bread Recipes


If you tried this Rustic Sourdough Bread recipe or any other recipe on my blog, please leave a 🌟 star rating and let me know how it went in the comments below. Thanks for visiting!
📖 Printable Recipe
Rustic Sourdough Bread Recipe
Ingredients
- 340 g water, warm
- 40 g honey
- 275 g bread flour
- 225 g whole wheat flour
- 100 g sourdough starter
- 14 g sea salt, fine
Instructions
autolyse:
- In a large bowl, add 340g warm water with 40g honey, stir until completely combined.
- Add 275g bread flour and 225g whole wheat flour and mix until a shaggy dough forms. Knead the dough with your hands until all the dry bits are incorporated.
- Cover the bowl and set aside to autolyse for 30 – 60 minutes.
add sourdough starter:
- Uncover the bowl and spread the dough in the bowl, and sprinkle 14g sea salt over the dough, then spread 100g sourdough starter across the surface of the dough.
- Using damp hands, grab the dough and gently pull it until the flap is long enough to fold over itself, then fold the flap, rotate the bowl 90 degrees, and repeat 4 times to fold in the starter.
- Recover and set aside for 1 hour.
stretch and fold:
- Using damp hands, grab the dough and gently pull it until the flap is long enough to fold over itself, then fold the flap, rotate the bowl 90 degrees, and repeat 4 times to fold in the starter. This makes 1 set of stretch and folds.
- Recover and set aside for 1 hour before performing another set of stretch and folds before recovering.
- Repeat once more, for a total of 3 sets of stretch and folds. Then cover, and set aside for 2 hours to finish the bulk ferment.
shape:
- Uncover the dough and transfer to a work surface or countertop. Gently press and spread the dough into a large rectangle.
- Fold up the bottom third of the dough as though you were folding a letter, and then fold the top down.
- Rotate the dough 90 degrees and roll up into a large log. Cover with a kitchen towel and rest for 30 minutes.
- After the rest, flip the dough over, gently press the dough flat then roll it again. Pinch the ends if you're making a batard or tuck them in if your making a boule.
- Dust the dough with rice flour then tuck seam side up into a banneton.
prove + cold retard:
- Prove the rustic sourdough loaf in the banneton for 2 hours before covering and placing in fridge to cold retard for up to 3 days. If you want to bake it right after proving, you're welcome to, but the flavor is better after resting in the fridge.
bake:
- Place your dutch oven, cloche, or desired baking dish in the oven and preheat to 450f.
- Once the oven is preheated, invert the banneton onto a sheet of parchment paper.
- Use a lame, sharp knife, or clean razor blade to score the dough.
- Carefully remove the dutch oven from the oven, and using the parchment paper as a sling, transfer the sourdough loaf from the counter into the dutch oven.
- Bake the dough at 450f covered for 30 minutes and uncovered at 450f for 10-15 minutes, or until the loaf is cooked through and the crust is nicely browned. You can test the doneness of the loaf with an instant-read thermometer. Bread is cooked once it reaches 205 – 210 degrees Fahrenheit internal temperature.
cool:
- Remove baked bread from the dutch oven and transfer it to a wire mesh cooling rack to cool completely before slicing.
Notes
Expert Tips
- This recipe uses a higher proportion of whole grain flour, so we lean on a little bit of baking magic called an autolyse. It's a simple rest period that gives the flour time to fully hydrate, which helps strengthen gluten development and improves the final texture of the bread.
- I recommend using unbleached bread flour alongside the whole wheat in this recipe. Whole wheat adds flavor and nutrition, but it can also weigh dough down and lead to a denser loaf on its own. The bread flour helps balance that out by providing extra structure and strength.
- If you enjoy baking with whole grains, you might also like my rosemary sourdough bread, which combines whole wheat flour with fragrant rosemary for a really flavorful loaf, or my whole wheat sourdough which has a higher proportion of whole wheat flour.
- If your dough looks a little rough or shaggy after the second stretch and fold, don't worry, that can happen when the starter is added after the autolyse. Just turn it out onto a lightly floured surface and give it a brief knead with a bit of flour until it comes back together, then carry on with the rest of the recipe as written.
- My bulk fermentation and dough proofing is done at 70-ish degrees fahrenheit, but if you’re in a warm place, your rising times will need to be shortened.
- New to bannetons?? I have a guide on banneton use and maintenance!



I was trying the Rustic SD today and watching my great-son at the same time. Not a good idea. I missed the step where you add the salt with the starter. I added it with dry ingredients.
Wish me luck. I’ll follow up when all is done.
Hey Susan, stuff happens and sourdough is resilient! I’m sure it will turn out great <3
I’m so glad I found your site. Looking forward to making this Rustic Sourdough! This is my very first sourdough loaf I’m baking!
I followed your “reviving old sourdough starter” to a T, after storing a sourdough starter gift from a friend for over 5 months without getting up the courage to actually use it, lol.
Anyway, do you think this is a good choice for my first attempt???
Hey Lindy, this one is a bit of a more complicated recipe for your first go, that said, I have tried my best to break it down so it can be successfully made on your first attempt. I might suggest Same Day Sourdough for your first try, only cause it’s all done in the same day!
HI, I tried your cinnamon raisin sourdough recipe and had the best result I have every had. Thanks. I am wondering when you say bread bag what do you mean- a plastic bag or something else.
Thanks so much,
Rebecca Roy
So happy to hear that Rebecca! Yes, you’re exactly right, when I say bread bag I just mean a plastic bag – some reuse bags from store bought loaves, I actually bought a pack of loaf bags just for this purpose! That said, you can use any food safe bag you have on hand.