
How To: Revive Sourdough Starter

Don’t throw away that neglected starter sitting in your fridge, revive your sourdough starter and bring it back to bubbly, active life with this simple feeding schedule and troubleshooting guide. Even starters forgotten for months can be brought back from the brink.


Master Your Sourdough Starter In 5 Days!
From Confused To Confident.
Find success with 5 simple, actionable secrets delivered to you. No more guessing games – just clear, proven steps to a thriving starter.
Jump to:
Watch Me Revive My Starter!

Raise your hand if this sounds familiar…
You’re cleaning the fridge mid-September and you come across the sourdough starter you haven’t seen since May when the sunshine was calling and the shorts came out.
“Oh my god. FRED!”
Don’t worry, you can revive a sourdough starter that’s been long neglected in the fridge! Even if you neglected it as long as I did…
May 12, 2021 and September 15, 2021:
- 126 days
- … or 18 weeks
- … or 4 months & 3 days
So don’t throw out that old sourdough starter just yet!
This guide to reviving sourdough starter is dedicated to shorts season.

Expert Tips
- Almost any sourdough starter can be revived! Don’t panic, your fermenty baby is gonna be ok, and you’ll be back to sourdough bread baking in no time!
- Take a critical look at your neglected starter, the section below details what to look for. If you think your starter has gone bad, scrap it and start fresh.
- Always try to feed your starter with the flour it was raised on. For example, if you’ve always fed it bread flour, keep feeding it bread flour. The same goes for whole wheat, whole grain, all purpose, rye flour, or gluten-free.

Moldy Sourdough Starter
While almost any starter can be revived, I don’t play with mold. Fermenting foods takes a little bit of intuition and a little bit of ruthlessness. If something looks, smells, feels, or just could be bad – it finds the garbage quickly!
Look:
If your old starter has any kind of mold, toss that bad boy, start fresh with my 24-hour starter recipe, and you’ll be just fine! After the mold, look at the hooch – if it has grey or black-ish looking hooch, we’re in business! If the starter or hooch is pink-tinged, it’s gotta go!
Smell:
If the starter smells tangy, like vinegar, alcohol or even nail polish remover, it’s safe to use. If it has a musty or moldy smell, toss and start over!
Feel:
After a long fridge nap, your starter should be thin and liquid. If it’s thick or chunky, toss it and start over!
Read More: How To Tell If Your Sourdough Starter Is Bad
Reviving Sourdough Starter
- Remove the unfed sourdough starter from the fridge and allow it to rest at room temperature for 3-4 hours.
- Look closely at the starter, discard immediately if your starter has mold, a pink tinge, or smells musty. These are signs that bacteria have overtaken the yeasts. If the starter passes the test, stir in the hooch, or pour it off. I prefer to stir it back in to keep my hydration levels correct, but it can be poured off too.
- In a clean jar or container, mix 50g of the unfed starter with 50g warm water, stir until combined, then add in 50g flour.
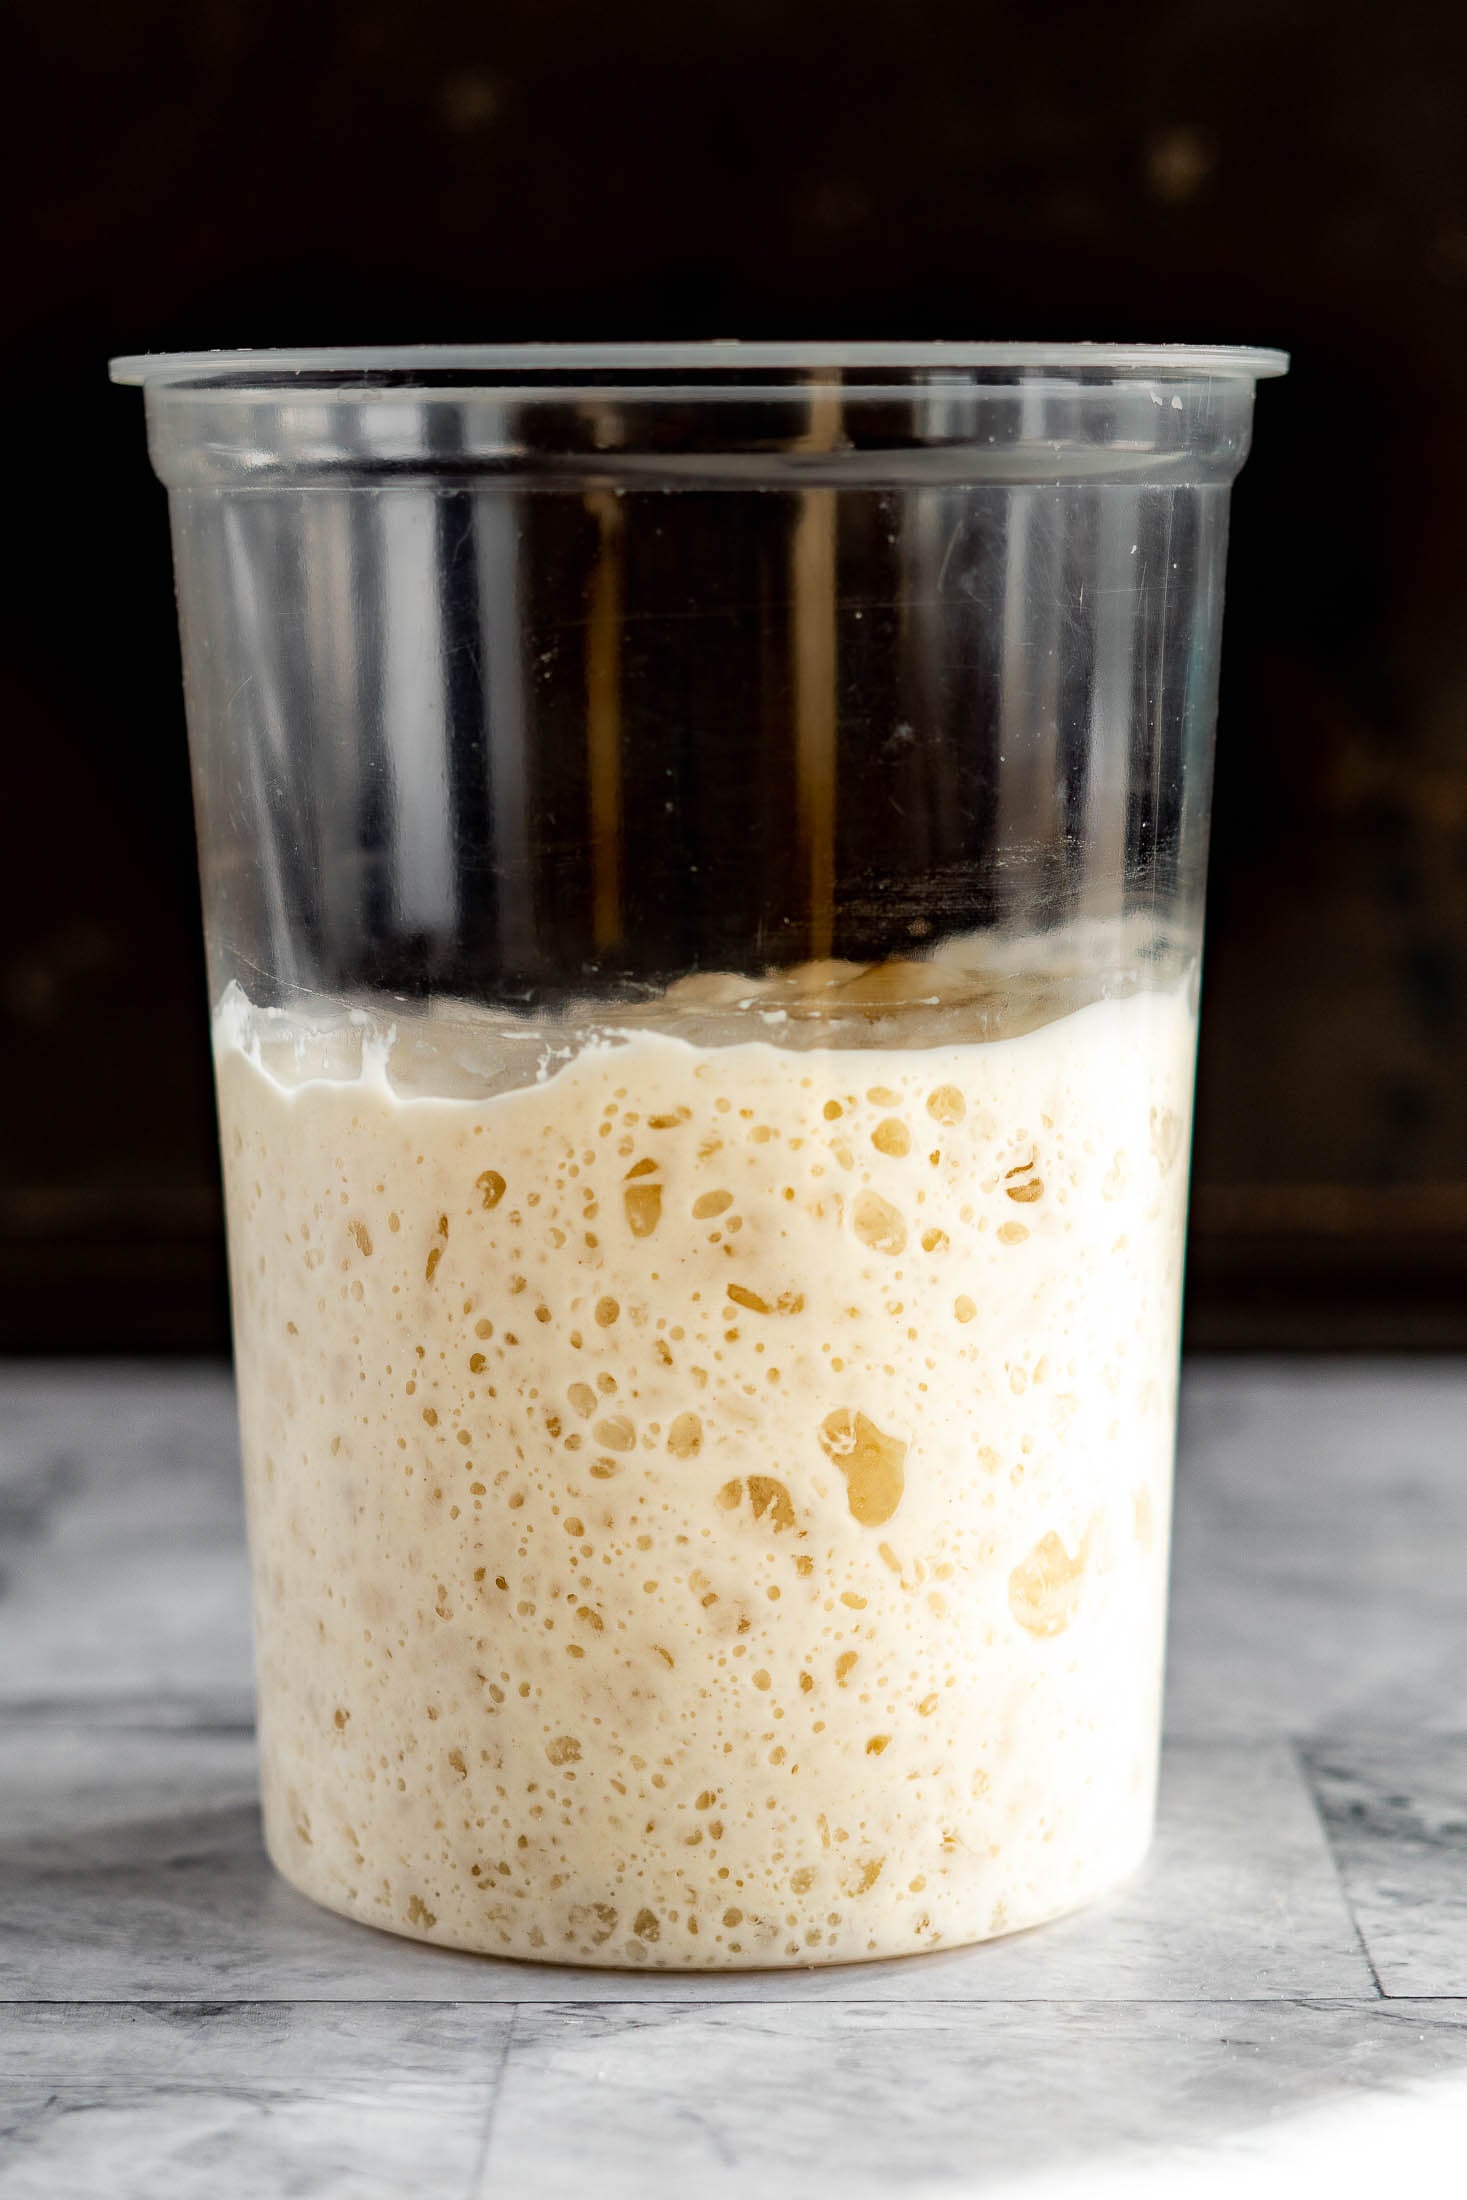
- Set aside the fed starter for 12 hours, then feed it again using a fresh clean jar, combine 50g starter, 50g water and 50g flour. Mark the side of your jar with the height of the starter. Watch the starter for signs of activity. It may be a little bit sluggish, but you should start to see a few bubbles here and there.
- If the starter is close to doubling within 12 hours, wait 24 hours before feeding again. If the starter is not close to doubling by 12 hours later, feed it again – and repeat until the starter doubles within 12 hours, then reduce to a 24 hour feeding period.
- Once the starter is revived and doubling regularly, it should be maintained on the counter and fed every 24 hours for 4-5 days. This will help get your starter healthy again before it’s placed back in the fridge.
- Ensure to feed your starter weekly or bi-weekly once it’s in the fridge to keep it healthy and active and ready for sourdough baking!


It’s Not Just You!
Other people have accidentally neglected their sourdough starter too! Here is what they had to say after saving their fermenty friends:
I was going to toss my sourdough starter thinking it I had to toss it. Thanks to this website I am reviving. This is the best site I have ever seen. Love the pictures and step by step instructions. This is now my source for all things sour dough.
– Dee
My starter would not rise and I needed an understanding and solutions. This article helped a lot!
– J
Sourdough Starter Feeding + Maintenance
There’s a lot to sourdough, but there’s also not a lot to sourdough! One of the things you’ll have to decide is how often you’ll be baking. For me, in the fall and winter months, I bake much much more frequently. So I actually use different sourdough feeding and maintenance methods depending on the time of year.
Daily to Bi-weekly Baker
- you’ll want to keep your starter at room temperature and feed it daily. This will keep it warm and active whenever you’re ready for it!
- feed it around every 24 hours. You can play with the feeding schedule a bit, once you get to know your starter and how hungry it is. The starter should be fed after the culture doubles in size and deflates.
Weekly or Less Frequent
- keep your sourdough in the fridge! This slows down the fermentation time considerably and allows you to feed your sourdough only once a week.
- simply remove it from the fridge, then stir and feed, and rest for 12-24 hours at room temperature before starting with your recipe. Once the fed starter doubles, it is ready to use!

Put That Sourdough Starter To Work!


Long-Term Sourdough Storage
If I had been smart, I would have used the remainder of my sourdough from the fridge and revived a backup I saved much earlier last year. But I’m always up for a challenge, so I decided to revive my starter. If that’s not for you, check read my post about long-term sourdough starter storage.
Freeze it:
- Freezing a sourdough starter is a quick and easy way to take a break from your starter.
- It’s quick and easy to do.
- Requires no feeding until thawed.
To revive the frozen starter simply allow it to thaw at room temperature before feeding it with equal parts of starter, flour, and water.


Dry it:
- Dehydrating sourdough starter is bit more involved than freezing, but kinder to the yeast in the starter.
- Requires no special tools.
- May take a bit longer to revive than a frozen starter.
To revive the dried sourdough starter, mix equal parts, by weight, of the dried starter and warm water. Allow it to completely re-hydrate the starter and then feed it with equal parts of starter, flour, and water.


Master Your Sourdough Starter In 5 Days!
From Confused To Confident.
Find success with 5 simple, actionable secrets delivered to you. No more guessing games - just clear, proven steps to a thriving starter.
📖 Printable Recipe
How To: Revive Sourdough Starter
Ingredients
- 50 g unfed sourdough starter
- 500 g flour, divided
- 500 g water, divided
Instructions
- Remove the unfed sourdough starter from the fridge and allow it to rest at room temperature for 3-4 hours.
- Look closely at the starter, discard immediately if your starter has mold, a pink tinge, or smells musty. These are signs that bacteria have overtaken the yeasts.
- If the starter passes the test, stir in the hooch, or pour it off. I prefer to stir it back in to keep my hydration levels correct, but it can be poured off too.
- In a clean jar or container, mix 50g of the unfed starter with 50g warm water, stir until combined, then add in 50g flour.
- Set aside the fed starter for 12 hours, then feed it again using a fresh clean jar, combine 50g starter, 50g water and 50g flour. Mark the side of your jar with the height of the starter.
- Watch the starter for signs of activity. It may be a little bit sluggish, but you should start to see a few bubbles here and there.
- If the starter is close to doubling within 12 hours, wait 24 hours before feeding again. If the starter is not close to doubling within 12 hours, feed it again 12 hours after the initial feed- and repeat until the starter doubles within 12 hours, then reduce to a 24 hour feeding period. When the starter has reached the 24 hour feeding cycle, it is ready to bake with.
- Once the starter is revived and doubling regularly, it should be maintained on the counter and fed every 24 hours for 4-5 days. This will help get your starter healthy again before it's placed back in the fridge.
- Ensure to feed your starter weekly or bi-weekly once it's in the fridge to keep it healthy and active.
Video


I had starter in the fridge for almost a year! I thought it was done for until I found this page! It is now doubling and I am going to dehydrate some, as well as get a loaf in the oven! Thanks so much for all the great details and directions on reviving my starter!
Yay! Happy to hear this!
can you use like 40 water 40 sour dough and 40 flour. I don’t have 50 g of sourdough starter that I need to revive. Is this OK?
Martha Mc
Absolutely!
Can I use the discard from the first feed of starting to revive my starter? For discard recipes or do I just need to throw it out? it was only in the fridge for a few weeks but it was a fairly new starter (only 2 months old).
I usually don’t only because its so sour, but if you want to, I can’t see it being a problem!
I left my sourdough starter in the back of my fridge for 6 months, followed the instructions word for word and John Dough is back in action 🤣🤣
Heck Ya John Dough! Happy to hear!
As soon as you said John and back in action I was thinking of a bad-ass sourdough starter like John McClane from Die Hard lol
My covid lockdown sourdough starter was in the back of the fridge for 5 years! Followed your directions, it took about a week, and it’s happy and bubbly. Thank you!
YAY!! That’s awesome to hear Lise!
My sourdough starter sat in my fridge for a year, unattended. I followed your instructions and it took 3 days and that baby came right back. I am excited to get to baking. Thank you so much for your simple to follow directions. Now that fall is here in Alaska, my oven is gonna get busy. Have a blessed day. 10/11/2025. Mrs.Vickie
Happy to hear that! Have a great baking season!
Thanks for this article. I’m on day 5 trying to revive a starter someone gave me 3 months ago! Yesterday I finally got it to double but today it’s only 1/3 higher again🤦🏻♀️. What am I doing wrong?
Hey Sarah, you’re not doing anything wrong! If it’s gone up by a third I would try giving it 24 hours after your next feed to see if you can get a full rise out of it!
I took my starter out of the fridge … it was good … without thinking … I added flout to it and water in the same jar before discarding any .. what should I do now ?
Nothing wrong at all, just keep feeding it, and it will be just fine!
Getting ready to transition to 24 hour feeding. Do I need to discard any or do I just add more flour and water? Thanks!
Yes, you’ll always discard – it helps to keep your starter size manageable.