
Same Day Sourdough Bread

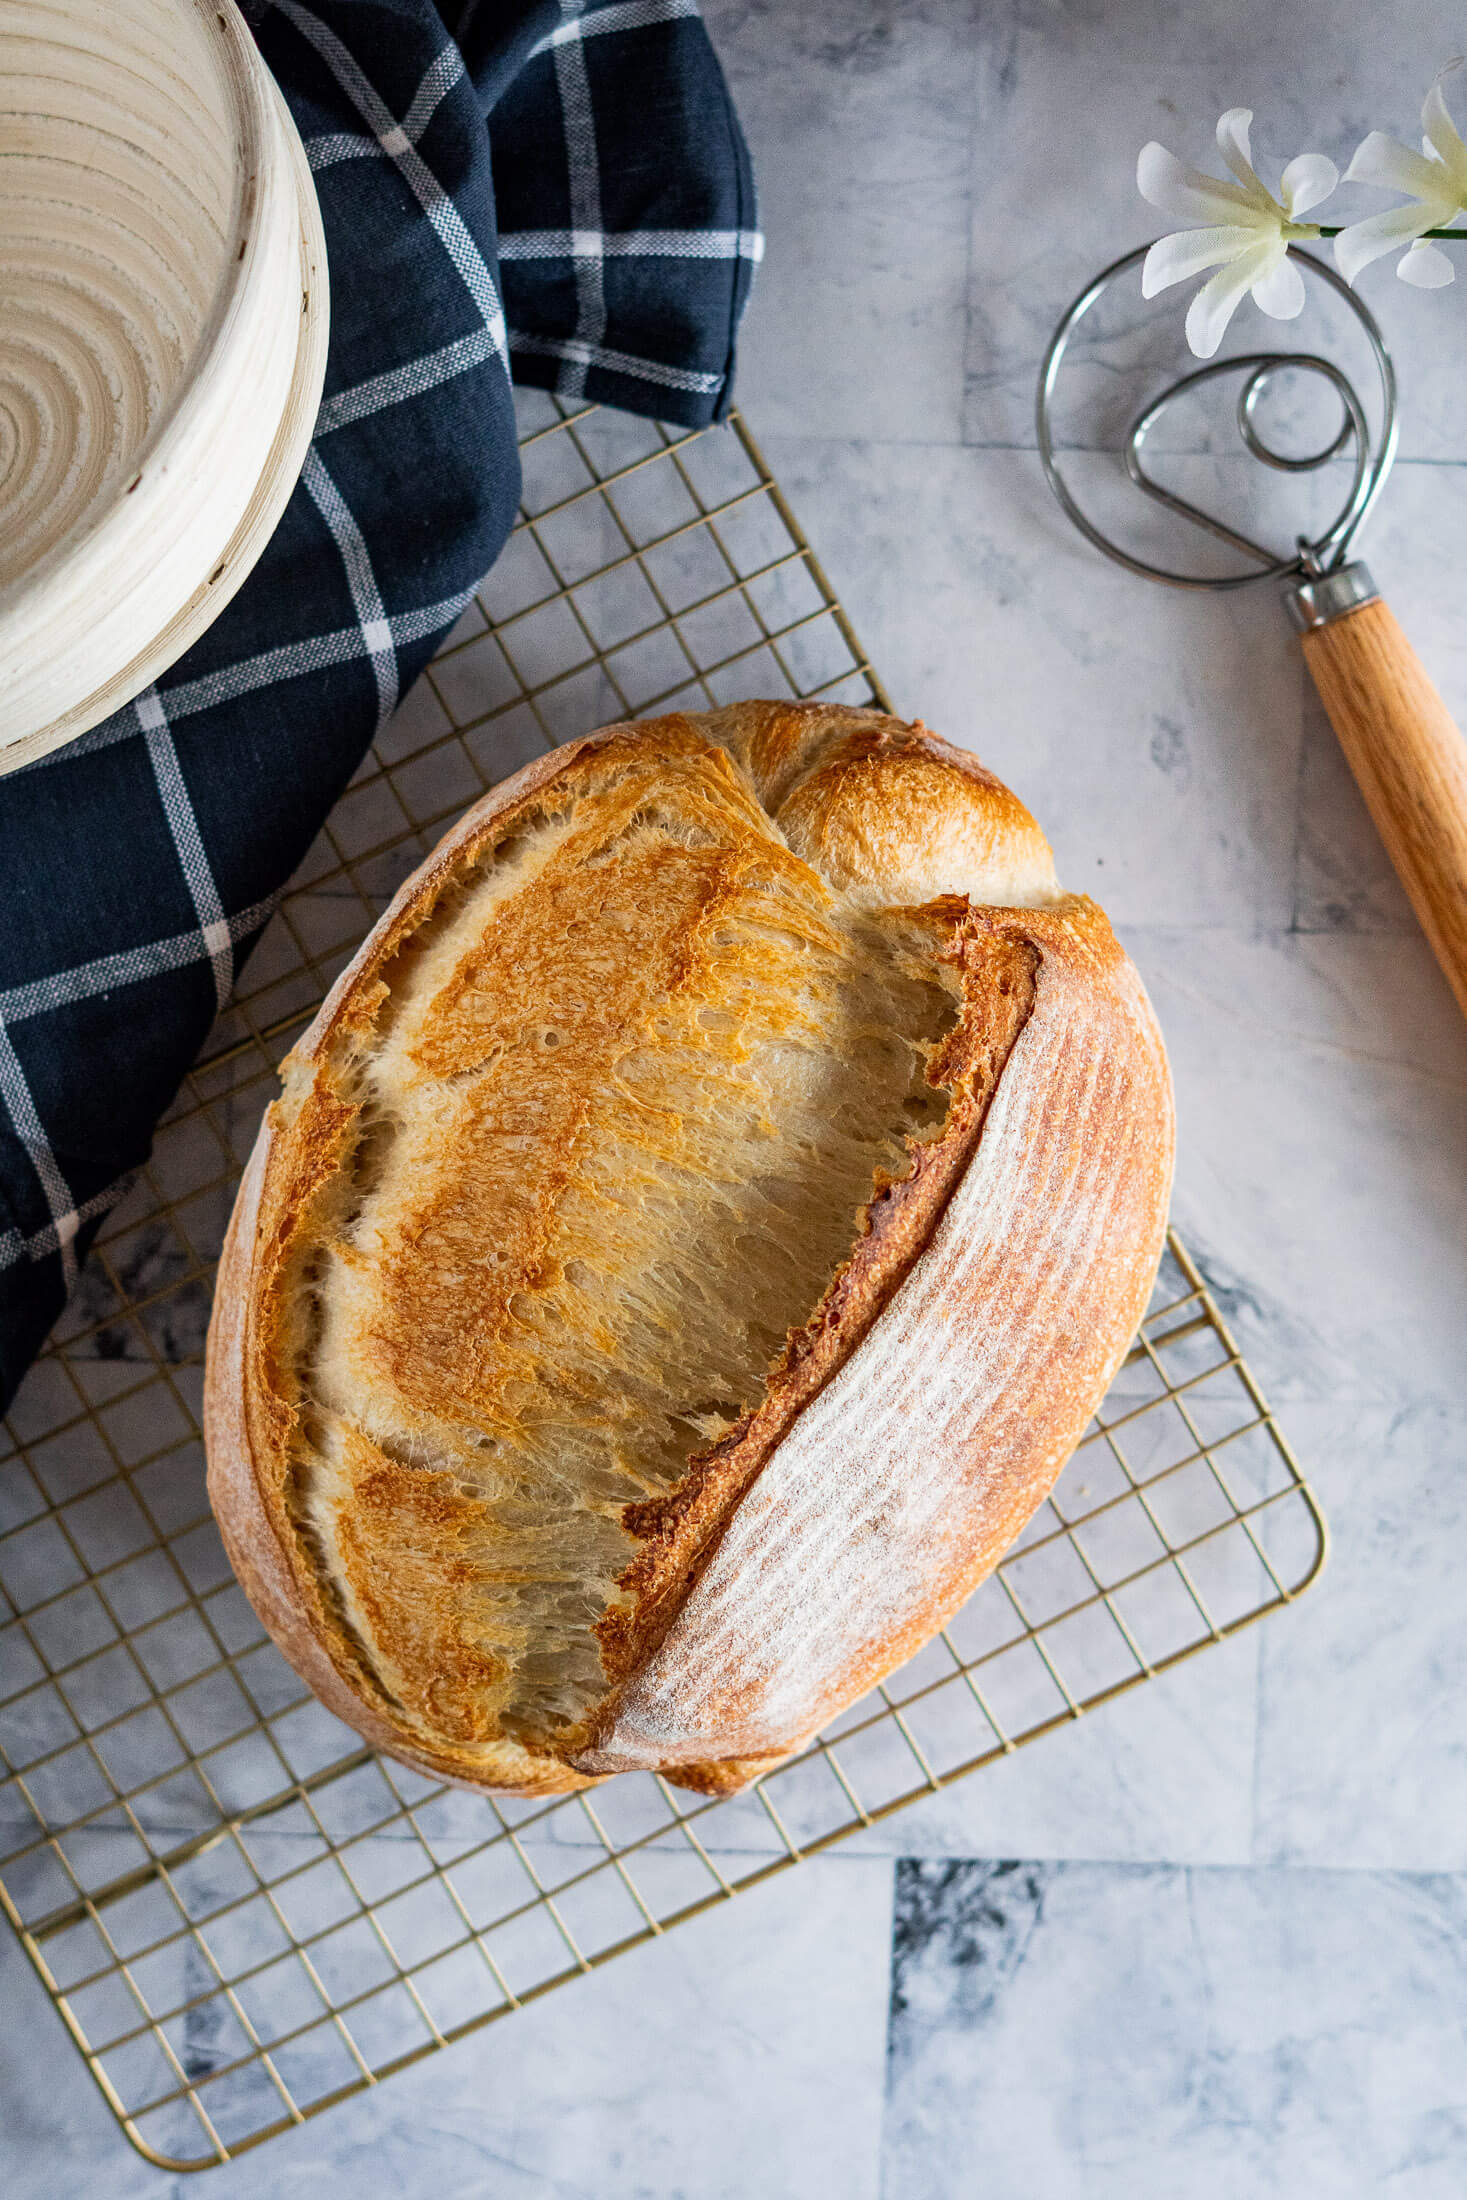
This same day sourdough bread is everything: soft, tangy, and airy inside with that signature crisp crust. Best of all? You can make it from start to finish today. No overnight rise, no fuss, just simple steps and incredible bread.
Once you've mastered this loaf, check out my whole wheat sourdough bread, rustic sourdough bread, and dill pickle sourdough bread for even more delicious bakes.

Craving The Recipe Details?
What it is: A quick, same day sourdough bread. No multi-day fermenting required.
Why you'll love it: You get big sourdough flavor and texture in ~8 hours, using only starter, water, flour, and salt. It's easy, satisfying, and great for when you're short on time.
How to make it: Mix sourdough starter with water, bread flour, and salt. Perform 3 sets of stretch and folds, shape, and proof, then bake!
Craving sourdough but short on time? This same day sourdough recipe delivers tender, flavorful bread today!
Don’t get me wrong, I love the traditional process. There’s something deeply satisfying about slow fermentation, just like when I make my everything bagel sourdough or sourdough focaccia. Watching simple flour and water transform into something incredible never gets old.
But life happens. Sometimes you need bread today. Whether it’s to accompany tonight’s oven roasted cross rib roast or you’ve just a hankering for some fresh sourdough! That’s exactly why I created this recipe.
This same day sourdough bread recipe is dedicated to happenings.
Fair warning: you’ll still need a bit of foreplanning and an active starter, but instead of days, you’re just a few hours from mixing to slicing.
Jump to:
Key Ingredients
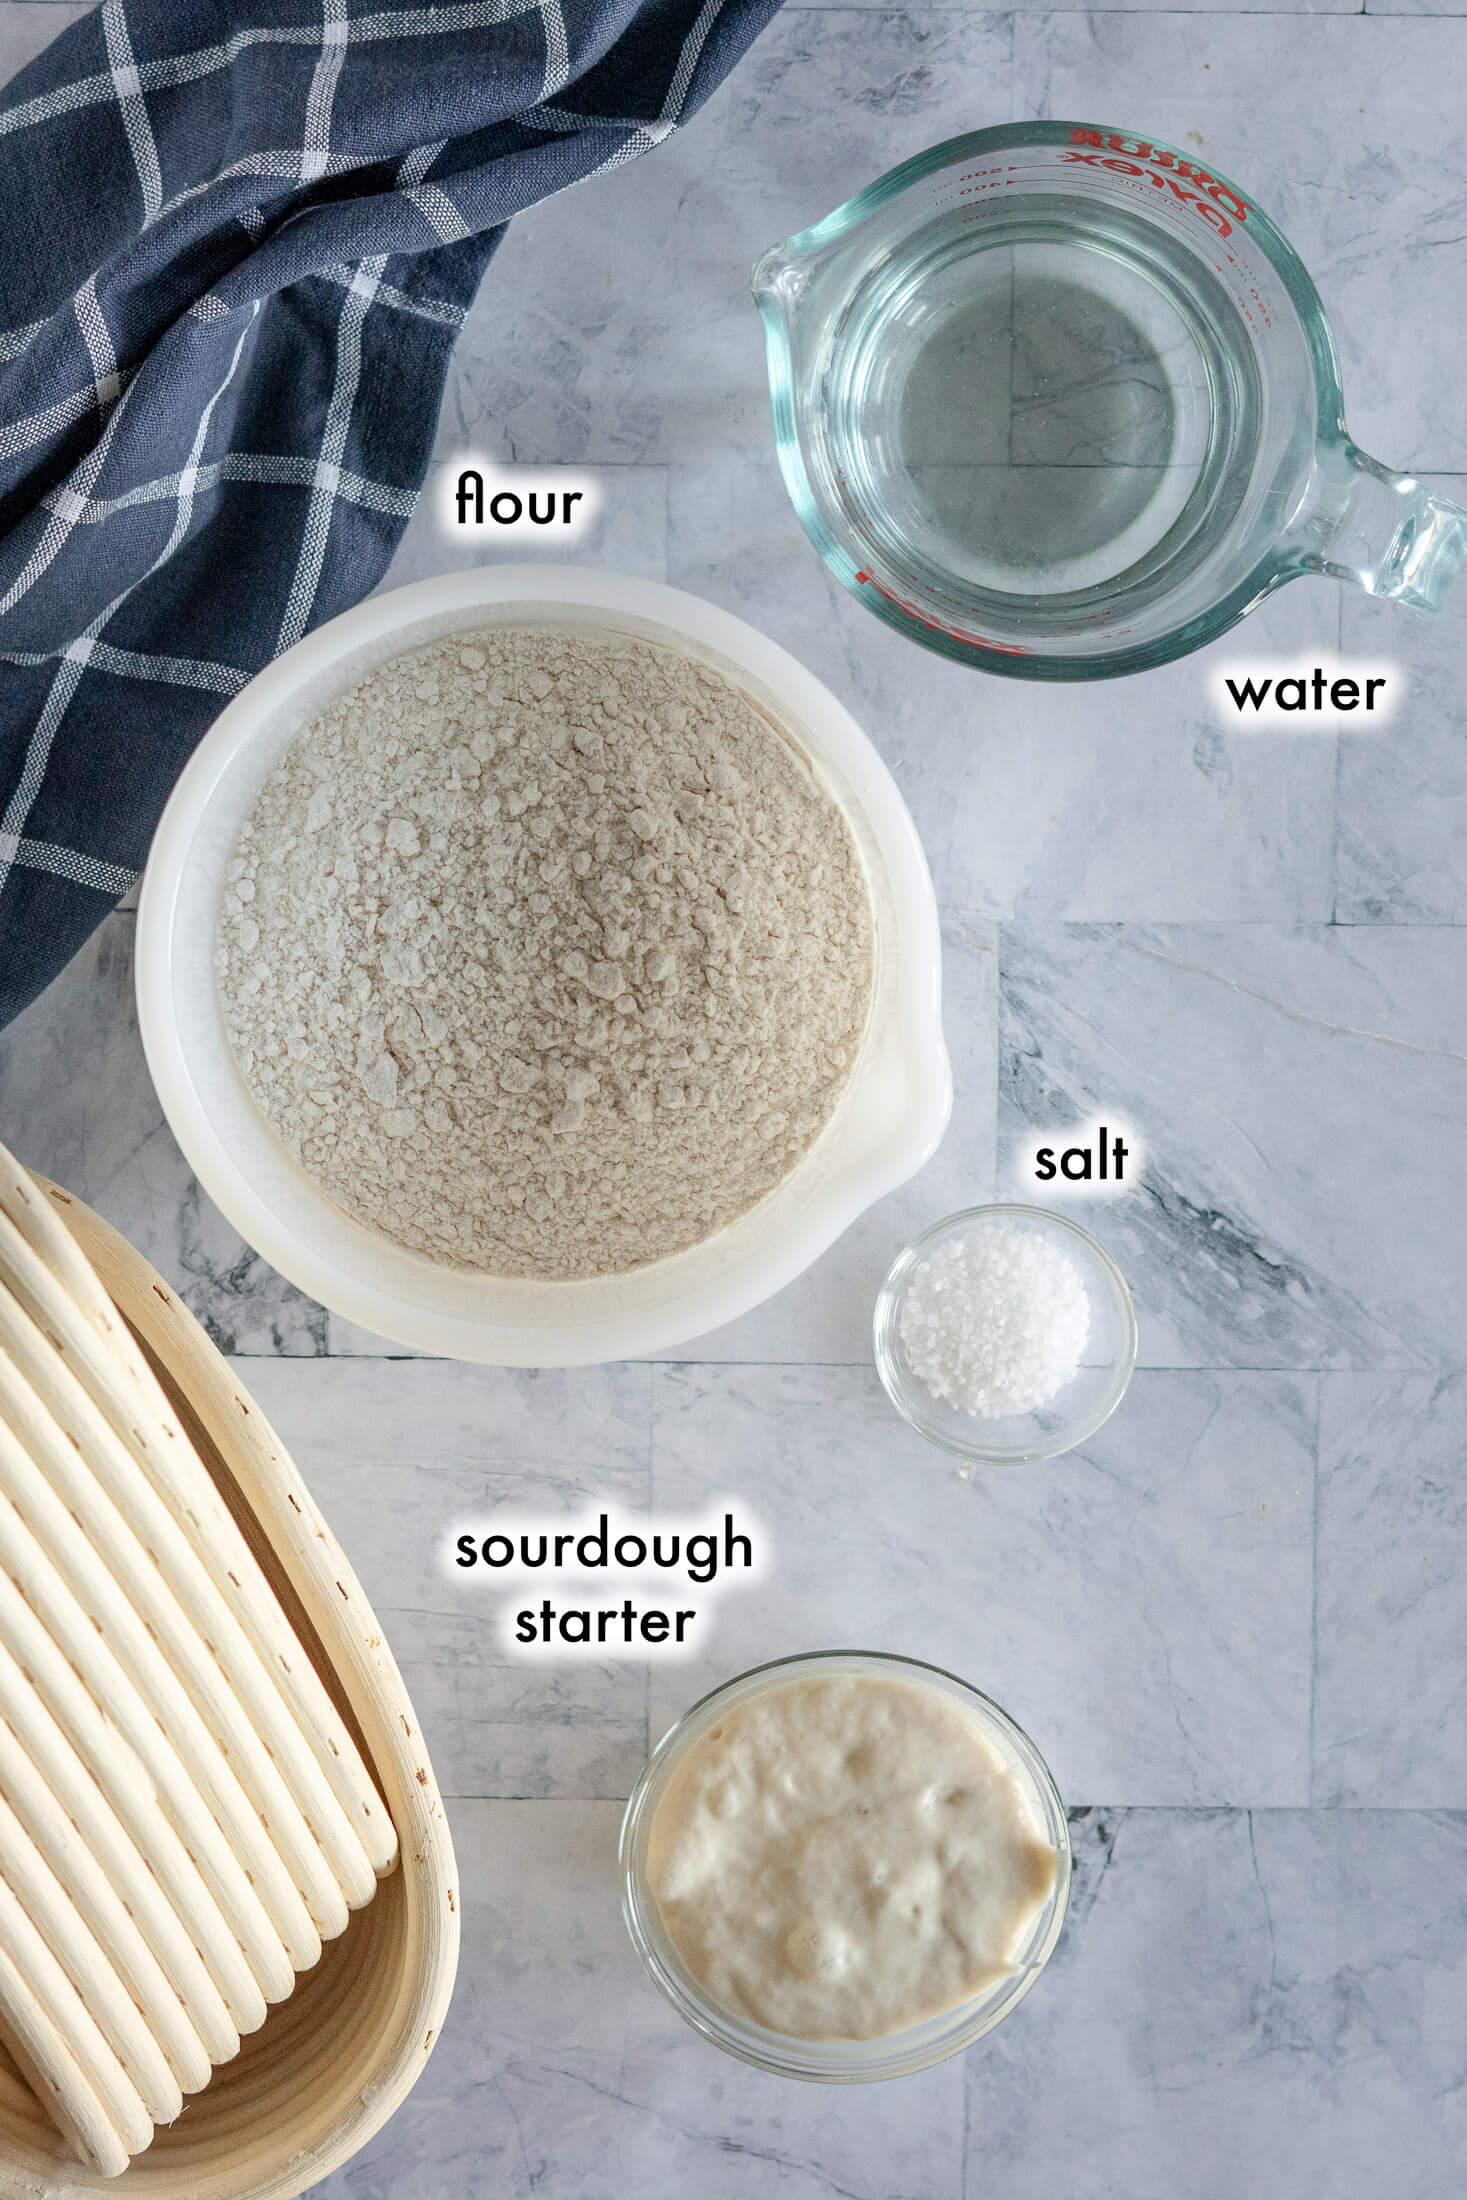
Sourdough Starter: Use a fed and active starter. It should’ve been fed about 8 hours before (the night before works great) and doubled in size. This recipe assumes 100% hydration (equal parts flour and water by weight).
Bread Flour: Go with high-protein (~13%) unbleached flour for best results. Either all-purpose or bread flour works beautifully.
Salt: I use hand-ground kosher salt, but any fine salt works. Salt does more than just season, it enhances the dough’s natural flavors and aromas while tightening the gluten structure, making it easier to trap those beautiful air bubbles.
See the recipe card for full information on ingredients and quantities.
2 Critical Components For Same Day Sourdough Bread
1. An Active, Ready-to-Go Starter (and Lots of It)
This recipe doesn’t mess around! It uses a full 150 grams of starter, which is significantly more than most sourdough recipes. That high ratio is key to getting same-day results, but it also means your starter needs to be really active to pull its weight.
Unlike my other sourdough recipes where you can feed in the morning and mix a few hours later, for this recipe we want that starter fully active the first thing in the morning. That’s why I recommend feeding it the night before. This gives the yeasts plenty of time to wake up, eat, and multiply so they can power through the faster fermentation schedule.
If your house runs warm or your starter gets bubbly fast, feed it with cold water to slow things down slightly. It won’t stop fermentation, just helps your starter peak closer to when you’re actually ready to bake.
Adjust Your Feeding Ratio: Feed your starter 1:5:5 ratio in the evening to ensure it has plenty of food overnight. For example, 20g starter, 100g water, 100g flour.
2. A Warm, Consistent Environment
Fast sourdough isn't just about the starter. It's also about the environment you give your dough. In my cold-proofing guide, I explain how lowering temperature slows fermentation. The opposite is also true: keeping your dough warm speeds everything up, which is exactly what we want when baking same day sourdough.
For best results, aim to keep your dough around 75°F (24°C) during mixing, bulk fermentation, shaping, and proofing. This temperature is the sweet spot where your wild yeasts and bacteria are at their most active without overproofing the dough.
Here are a few easy ways to create that warm microclimate:
- Use a Brod + Taylor Proofing Box
- Use the proof setting on your oven or microwave
- Tuck the bowl in a warm spot near a heat register
How To Make Same Day Sourdough Bread:
Make The Dough (8 am):

- Step 1: In a large mixing bowl, combine 330g warm water (~75f) with 150g of active sourdough starter until mostly combined. I like to use a Danish dough whisk, but a wooden whisk, silicone spatula, or even your hands will work.

- Step 2: Add 500g bread flour and 10g salt to the bowl and mix until a shaggy dough forms. Knead the dough with your hands until all the shaggy bits are incorporated.
Cover the bowl and set aside in a warm place (~75f) for 45 – 60 minutes.
Stretch And Fold (9-11 am):

- Step 3: Uncover the bowl and using damp hands, grab the dough and gently pull it until the flap is long enough to fold over itself, then fold the flap, rotate the bowl 90 degrees, and repeat 4 times.

- Step 4: Recover the bowl, and set it aside for 30 minutes, then repeat the stretch and fold process at least 3 more times over the next 2 hours. The intervals can be as short as 15 minutes, or as long as 60 minutes, but it should be completed at least 4 times. You’ll notice after the second stretch and fold how much the dough has softened and begun to look like actual bread dough!
Bulk Ferment (11 am-1 pm):

- Step 5: Complete one final stretch and fold, then cover the bowl and set aside for 2 hours to bulk ferment. I like to use a reusable shower cap for covering my bowls, the patterns are fun, funky, and bright, but they also work amazingly well, are lined with plastic to help keep the moisture in the dough, and are reusable for ages. There are plastic bowl covers available, too.

- Step 6: It is important to keep the dough bowl in a warm place, around 75 degrees Fahrenheit to encourage the microbes to work quickly!
At the end of the bulk ferment, observe your dough. At this point, the dough should have risen in the bowl, and have a smooth surface with visible bubbles. If the dough is domed in the bowl it is ready to work with, if the dough is flat it may need more time in the bulk ferment.
Shape (1 – 1:15 pm):

- Step 7: Lightly flour the work surface and use a bowl scraper to turn the dough out onto the floured surface. Try to get the smooth top part face down so that the sticky underside is on top facing you, this will make shaping the dough easier.

- Step 8: Fold the edges into the middle, alternating sides as though lacing the dough together. Then starting from the top, fold the dough into thirds as you would a letter.

- Step 9: Roll the dough tightly into a log, pulling the dough along the counter to create surface tension. Stop there if making a batard, or tuck the long ends underneath to create a boule.

- Step 10: Dust the top of your boule or batard with rice flour, then use a bench scraper to pick up the dough, flip the dough, and place it upside down, or seam side up, into a banneton to prove.
Prove (1:15 – 3 pm):

- Step 11: Cover the banneton either using a damp kitchen towel or a shower cap. During the proving period, the dough will rise and become puffy in the banneton, but it should be watched – as over-proofing can cause the dough to bake up flat. This process will take a different amount of time based on the ambient temperature in your kitchen.
Test the dough: gently poke it and observe how the dough reacts. If the dough feels tight and dense and looks like it hasn’t relaxed in the basket, it is likely under proofed. Underproofed dough will resist your poking and spring back almost immediately. If the dough feels airy but still elastic and looks relaxed in the basket, it is properly proofed. Properly proofed dough will be easily poked, and the indent will slowly fill back in but may not even totally recover. Overproofed dough feels sticky and lacks elasticity, it will likely look slack in the basket and your indentation won’t rebound.
Learn More: How to use and maintain your banneton baskets!
Pre-heat Oven (3 pm):
- Step 12:Place your dutch oven, cloche, or desired baking dish and its lid in the oven and preheat to 450f. If you don’t have a dutch oven, I do have a recommendation on how to bake sourdough bread without a dutch oven.
- Step: 13 Meanwhile, place the banneton in the freezer. Although this seems counterintuitive, the 30 minutes in the freezer won’t adversely affect your dough, it will just make it easier to remove from the banneton, score, and transfer to the dutch oven.
Bake (3:30 pm):

- Step 14: Once the oven is preheated, remove the dough from the freezer and invert the banneton onto a piece of parchment paper. Use a lame, sharp knife, or clean razor blade to score the dough, I usually like to make one deep curved slash, but you can get as fancy as you like!

- Step 15 Carefully remove the dutch oven from the oven, and using the parchment paper as a sling, transfer the sourdough loaf from the counter into the dutch oven.

- Step 16: Bake the dough at 450f covered for 30 minutes and uncovered at 450f for 10-15 minutes, or until the loaf is cooked through and the crust is golden brown. You can test the doneness of the loaf with an instant-read thermometer. Bread is cooked once it reaches 205 – 210 degrees Fahrenheit internal temperature.
Cool (4:15 – 6:15pm):
- Step 17: Remove baked bread from the dutch oven and transfer it to a wire mesh cooling rack to cool completely before slicing. I like to leave it for at least 2 hours before slicing, as slicing too soon can affect the crumb and texture of your loaf.
- Step 18: Check out my guide on storing sourdough bread to ensure it stays fresh for days, or learn how to freeze sourdough bread for a rainy day.
Expert Tips
- Don’t forget to feed your starter the night before!
- Adjust Your Feeding Ratio: Feed your starter 1:5:5 ratio in the evening to ensure it has plenty of food overnight. For example, 20g starter, 100g water, 100g flour.
- If you’re overwhelmed with all things sourdough, I can help you! I have sourdough guides on everything from making a 24 hour sourdough starter to sourdough starter feeding tips, to using up discard, and more.
- Don’t have a proofing basket? You don’t need one, check out these banneton alternatives!
- Using the Brod + Taylor proofing box has revolutionized my sourdough baking. With the proofing box, not only do I get more consistent bakes, but I can easily speed up the entire sourdough baking process by creating a favorable microclimate.
- I’ve included times in the directions within the body of the post and a baker’s schedule to help give you an example of how I work this recipe into my day. You can shuffle the times as they work for you.
Same Day Sourdough FAQs
Absolutely, it’s delicious! But let’s be honest: it won’t have the same tangy complexity as a long-fermented loaf.
When you speed up the process, you’re prioritizing rise over flavor development. Those microbes need time to create that signature sourdough tang, and in same day bread, we’re asking them to focus on lift instead.
Think of this as a milder, gentler version of sourdough. It still has that tender crumb and subtle depth, just without the sharp bite.
Not for this one. You need a vigorous, active starter to pull off same-day sourdough. Discard just doesn’t have enough oomph to rise the loaf in such a short timeframe. Save your discard for brown butter sourdough brownies or sourdough discard peanut butter cookies instead!
Nope! If life gets in the way, you can always pop the dough in the fridge overnight after shaping and bake it fresh in the morning. It’ll actually develop a bit more flavor that way.
Yes! This recipe leans heavily on two things: a high quantity of active starter and a warm environment. Together, they encourage fast fermentation and rising. It’s all about giving those microbes the best possible conditions to work quickly.
If you’ve got leftovers, you’ve got serious willpower! Here’s how to keep your bread fresh:
Short-term (up to 18 hours): Store your loaf cut-side down on a cutting board. The crust will stay nice for about 12 hours, though it gets crispier after that. After 16-18 hours, transfer it to a bread bag to keep it from drying out completely.
Long-term (1-2 months): Let the loaf cool to room temperature, wrap it tightly in plastic wrap, slide it into a bread bag, seal, and freeze your sourdough bread. When you’re ready to eat it, remove from the freezer, unwrap, and let it come to room temperature (1-2 hours) before slicing.
Baker’s Schedule
Here is a sample of a baking schedule that works for my starter and average temperature of 75f through the process, though you can and likely will need to adjust based on your own ambient temperatures etc.
| Time | Action |
|---|---|
| 8:00 am | Mix dough |
| 9:00 – 11:00 am | Stretch and fold every 30 minutes |
| 11:00 am – 1:00 pm | Bulk ferment |
| 1:00 – 3:00 pm | Shape and prove |
| 3:00 pm | Preheat oven and freeze loaf |
| 3:30 pm | Bake sourdough |
Recommended Equipment
Brod + Taylor folding proofing box: As mentioned above, this proofing box has revolutionized my sourdough baking, and really reinvigorated my love of the dough. As an added bonus, it folds up in a nice compact little package when it’s not in use.
Want To See More Sourdough Bakes?


If you tried this Same day sourdough bread recipe or any other recipe on my blog, please leave a 🌟 star rating and let me know how it went in the comments below. Thanks for visiting!
📖 Printable Recipe
Same Day Sourdough Bread
Ingredients
- 330 g water, warm
- 150 g sourdough starter, active
- 500 g bread flour
- 10 g sea salt, fine
Instructions
Make The Dough:
- In a large bowl, combine 330g warm water with 150g of active sourdough starter until mostly combined. Add 500g bread flour and 10g salt to the bowl and mix until a shaggy dough forms. Knead the dough with your hands until all the shaggy bits are incorporated.
- Cover the bowl and set aside for 45 – 60 minutes.
Stretch And Fold:
- Uncover the bowl and using damp hands, grab the dough and gently pull it until the flap is long enough to fold over itself, then fold the flap, rotate the bowl 90 degrees, and repeat 4 times.
- Recover the bowl, and set it aside for 30 minutes, then repeat the stretch and fold process at least 3 more times over the next 2 hours.
Bulk Ferment:
- Complete one final stretch and fold, then cover the bowl and set aside for 2 hours to bulk ferment. It is important to keep the dough bowl somewhere warm, around 75f, to encourage the microbes to work quickly!
Shape:
- Observe your dough, at this point, the dough should have risen in the bowl, and have a smooth surface with visible bubbles. If the dough is domed in the bowl it is ready to work with, if the dough is flat it may need more time in the bulk ferment. Lightly flour the work surface and use a bowl scraper to turn the dough out onto the floured surface. Try to get the smooth top face down so that the sticky underside is on top facing you, this will make shaping the dough easier.
- Fold the edges into the middle, alternating sides as though lacing the dough together. Then starting from the top, fold the dough into thirds as you would a letter, then roll the dough tightly into a log, pulling the dough along the counter to create surface tension. Stop there if making a batard, or tuck the long ends underneath to create a boule.
- Dust the top of your boule or batard with rice flour, then use a bench scraper to pick up the dough, flip the dough, and place it upside down, or seam side up, into a banneton to prove.
Prove:
- Cover the banneton either using a damp kitchen towel or a shower cap. During the proving period, the dough will rise and become puffy in the banneton, but it should be watched – as over-proofing can cause the dough to bake up flat. This process will take a different amount of time based on the ambient temperature.To test the dough, gently poke it and observe how the dough reacts. If the dough feels tight and dense and looks like it hasn't relaxed in the basket, it is likely under proofed. Underproofed dough will resist your poking and spring back almost immediately. If the dough feels airy but still elastic and looks relaxed in the basket, it is properly proofed. Properly proofed dough will be easily poked, and the indent will slowly fill back in but may not even totally recover. Overproofed dough feels sticky and lacks elasticity, it will likely look slack in the basket and your indentation won't rebound.
Pre-Heat Oven:
- Place your dutch oven, cloche, or desired baking dish in the oven and preheat to 450f. Meanwhile, place the banneton in the freezer – 30 minutes in the freezer won't adversely affect your dough, it will just make it easier to remove from the banneton, score, and transfer to the dutch oven.
Bake:
- Once the oven is preheated, remove the dough from the freezer and invert the banneton onto a sheet of parchment paper. Use a lame, sharp knife, or clean razor blade to score the dough.
- Carefully remove the dutch oven from the oven, and using the parchment paper as a sling, transfer the sourdough loaf from the counter into the dutch oven.
- Bake the dough at 450f covered for 30 minutes and uncovered at 450f for 10-15 minutes, or until the loaf is cooked through. You can test the doneness of the loaf with an instant-read thermometer. Bread is cooked once it reaches 205 – 210 degrees Fahrenheit internal temperature.
Cool:
- Remove baked same day sourdough bread from the dutch oven and transfer it to a wire mesh cooling rack to cool completely before slicing. I like to leave it for at least 2 hours before slicing, as slicing too soon can affect the crumb and texture of your loaf.
Notes
- Don't forget to feed your starter the night before!
- Adjust Your Feeding Ratio: Feed your starter 1:5:5 ratio in the evening to ensure it has plenty of food overnight. For example, 20g starter, 100g water, 100g flour.
- Using the Brod + Taylor proofing box has revolutionized my sourdough baking. With the proofing box, not only do I get more consistent bakes, but I can easily speed up the entire sourdough baking process by creating a favorable microclimate.
| Time | Action |
|---|---|
| 8:00 am | Mix dough |
| 9:00 – 11:00 am | Stretch and fold every 30 minutes |
| 11:00 am – 1:00 pm | Bulk ferment |
| 1:00 – 3:00 pm | Shape and prove |
| 3:00 pm | Preheat oven and freeze loaf |
| 3:30 pm | Bake sourdough |


WONDERFUL BREAD !!!
So happy to hear you love this one day sourdough bread recipe!