
Quick Sourdough Starter

This quick sourdough starter is made with a pinch of yeast to jump-start fermentation. It’s easy to make and ready in 24 hours. This recipe is beginner friendly so anyone can start making real sourdough recipes at home!
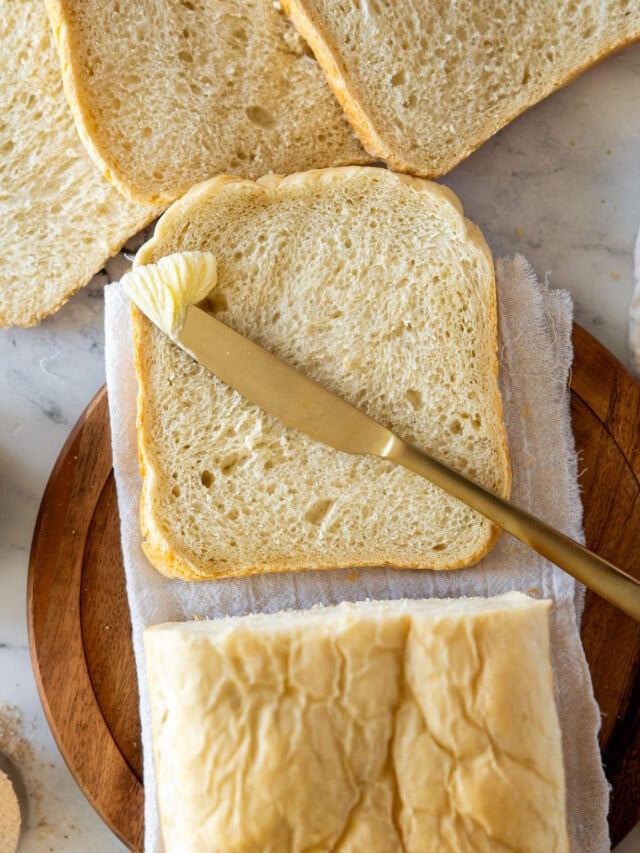
Once your quick starter is ready, you can bake same day sourdough bread, make sourdough discard pasta, or try sourdough pizza dough.
Craving The Recipe Details?
What it is: A quick-start method for creating an active sourdough starter ready to use in ~24 hours.
Why you'll love it: You get a healthy, bubbly starter without waiting a week (or two).
How to make it: Combine filtered water, flour, and active dry yeast and let ferment for 18h in a warm spot. On Day 2, discard, then feed. Once the starter is bubbly and doubles in volume, usually within 6-8 h, it's ready to use.
Is A Quick Sourdough Starter Real Sourdough?
YES! A quick sourdough starter made with yeast does become a true sourdough starter over time. Adding yeast simply jumpstarts fermentation, but it doesn't prevent wild microbes from taking over.
Many bakers worry whether a sourdough starter with yeast is ‘authentic.’ Research on sourdough microbiomes shows that sourdough ecosystems naturally shift as they're fed, refreshed, and exposed to local flour and environment. Even when a starter begins with Saccharomyces cerevisiae (commercial baker's yeast), the microbial community gradually transitions toward the wild yeasts and lactic acid bacteria typically found in mature sourdough cultures.
It stands to reason that with regular feedings, environmental exposure, and time, the starter's genetics "refresh," and the commercial strain often becomes a minor player or even disappears.
In other words: I wholeheartedly believe that my 5 year old quick-started starter has absolutely developed into a full, authentic sourdough starter with its own unique wild microbiome.
Why This Recipe Works
This fast sourdough starter method is perfect for both beginners and experienced bakers who want to start baking sourdough ASAP!
By giving your wild yeast a head start with a little bit of commercial yeast in the mix, you get a bubbly, active starter ready to bake with in just one day, not 7 to 10. It’s still real sourdough with all that tangy flavor, just without the patience-testing timeline.
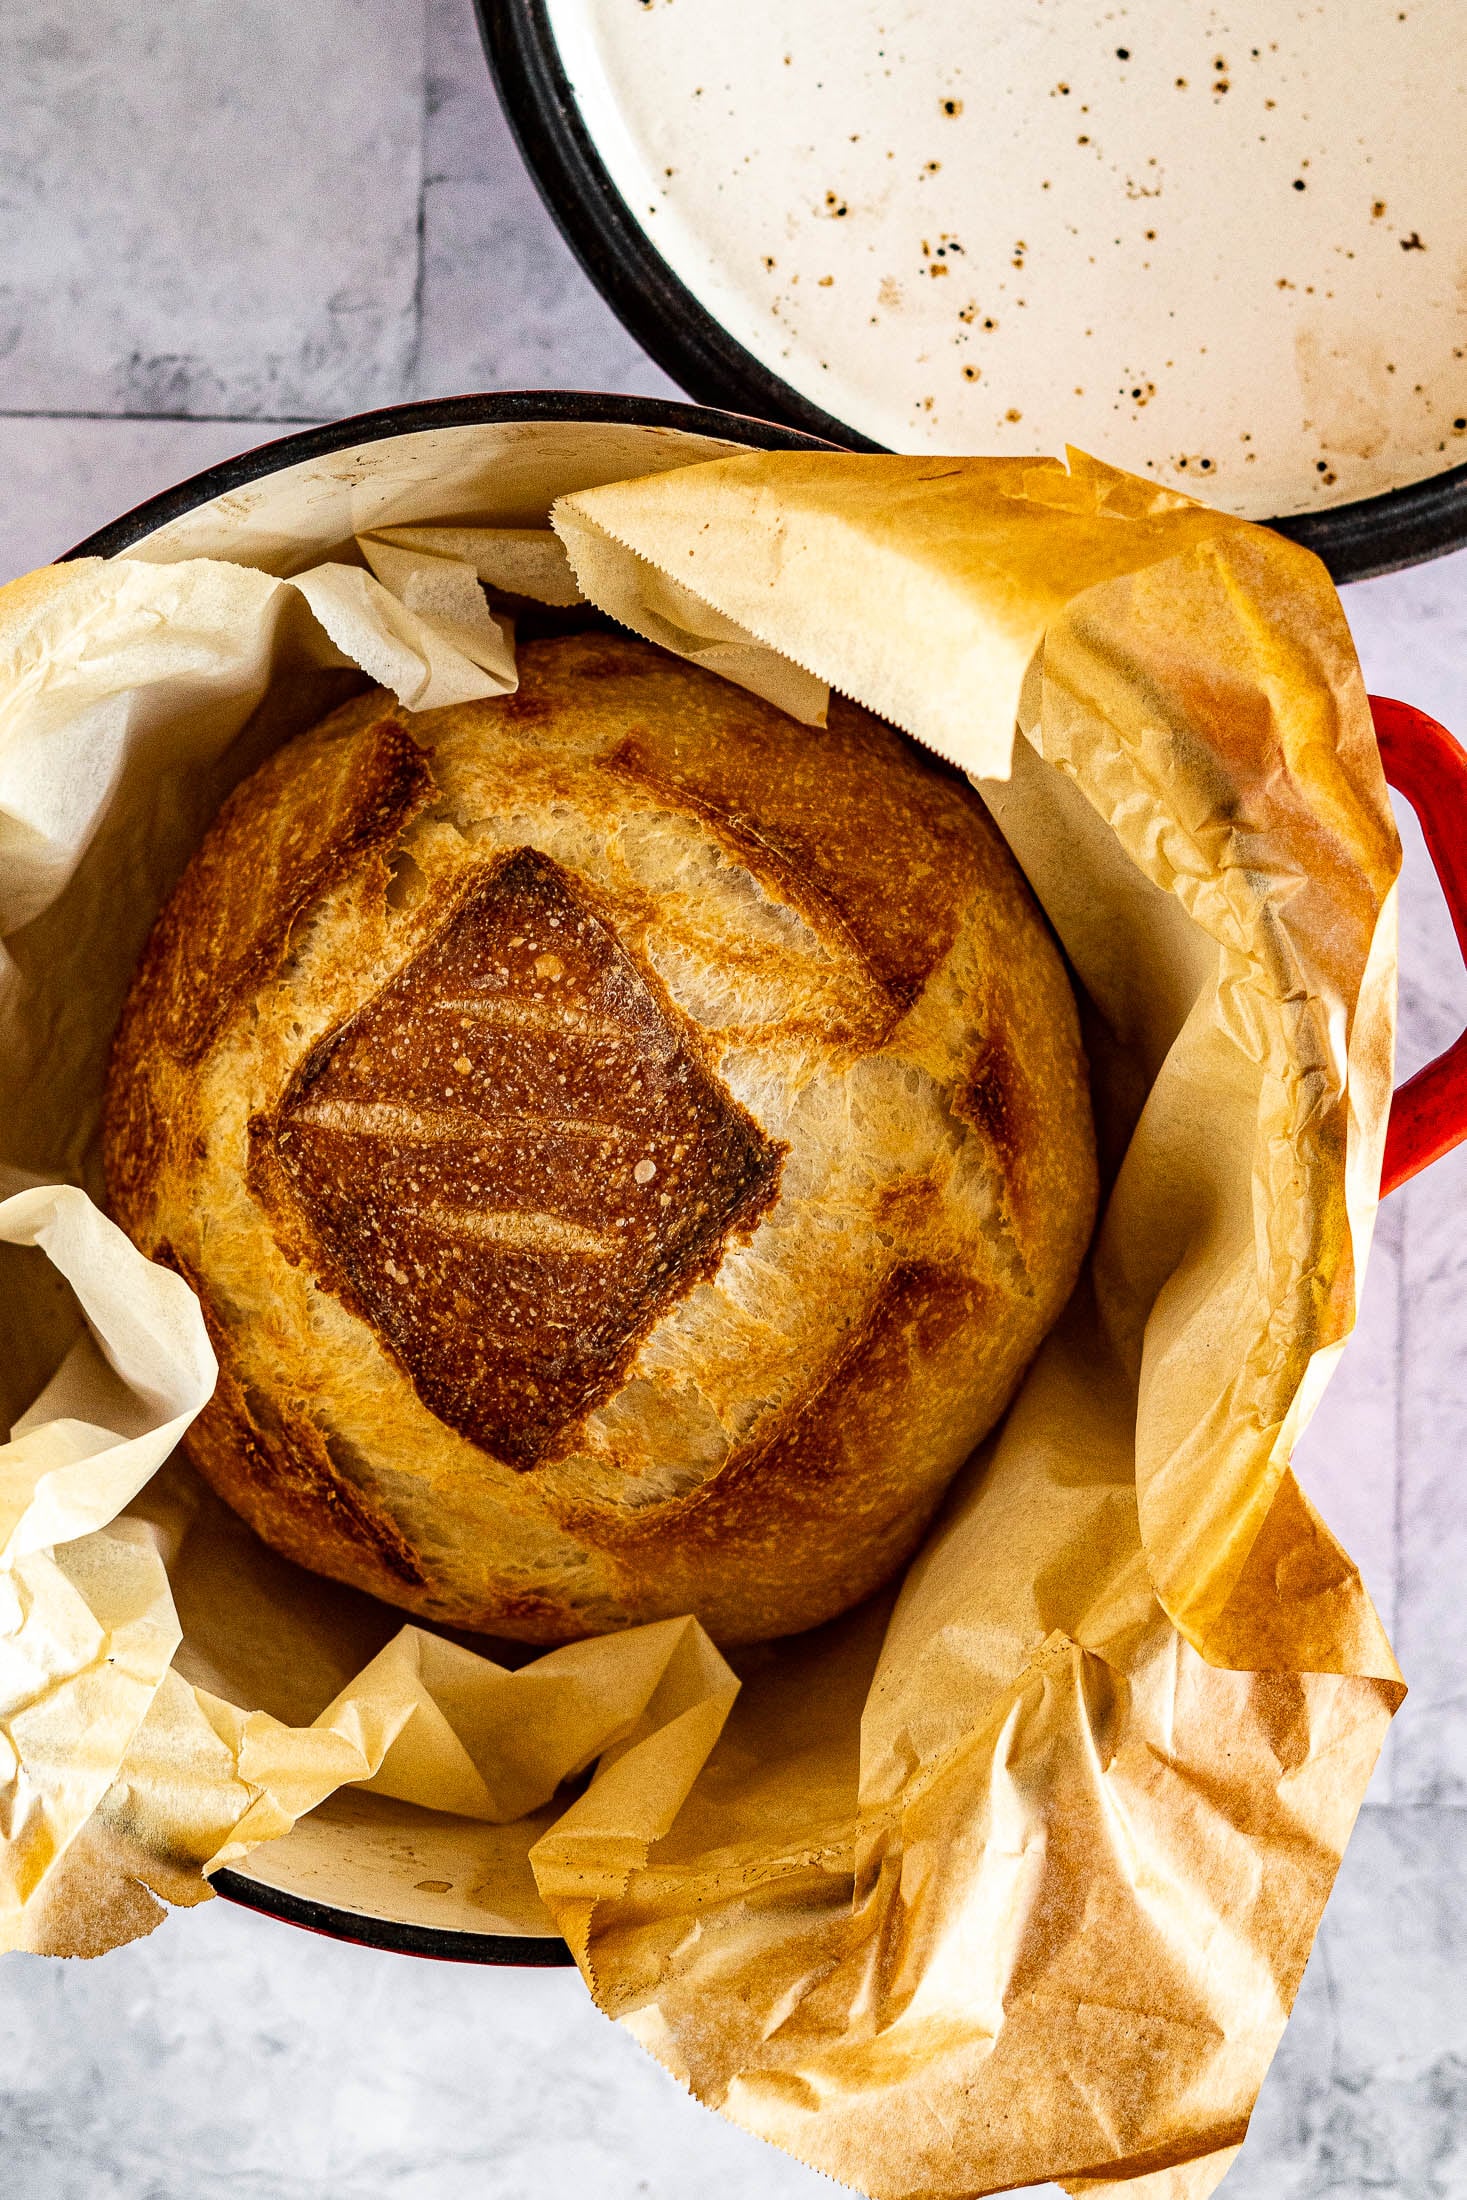
And once your starter is established, the possibilities are endless. Use it fresh for rustic sourdough bread with its tangy crust and open crumb, or toss the discard into your bread machine for an easy sourdough loaf in just a few hours. Feeling adventurous? Try everything bagel sourdough or chocolate sourdough bread for something totally different.
This quick sourdough starter is dedicated to real sourdough – just faster!
December 2025 update: I am still using the same starter I made in this tutorial – we’ve not missed a beat!
Jump to:
- Craving The Recipe Details?
- Is A Quick Sourdough Starter Real Sourdough?
- Why This Recipe Works
- Key Ingredients
- How To Make A Quick Sourdough Starter With Yeast
- Expert Tips
- How To Use Sourdough Starter
- Quick Sourdough Starter FAQs
- Sourdough Starter Feeding And Storage
- Starter Vs. Discard
- Using Sourdough Discard
- What’s Hooch?
- Is My Starter Healthy?
- Has My Starter Gone Bad?
- Easy Sourdough Starter Recipes
- 📖 Printable Recipe

Master Your Sourdough Starter In 5 Days!
From Confused To Confident.
Find success with 5 simple, actionable secrets delivered to you. No more guessing games – just clear, proven steps to a thriving starter.
Key Ingredients
Flour: This recipe calls for unbleached all purpose flour. This can be substituted for organic flour or unbleached bread flour.
Water: Use filtered water at room temperature, treated tap water can kill yeast. Be mindful of the temperature as well, cold water slows fermentation, and hot water kills yeast entirely. I do use my well water for my starter and it’s always fine.
Yeast: Use active dry yeast. The larger granules take longer to re-hydrate and are slower to propagate in the starter. This is ideal for a 18 hour fermentation.
See the recipe card for full information on ingredients and quantities.
How To Make A Quick Sourdough Starter With Yeast
Day 1:
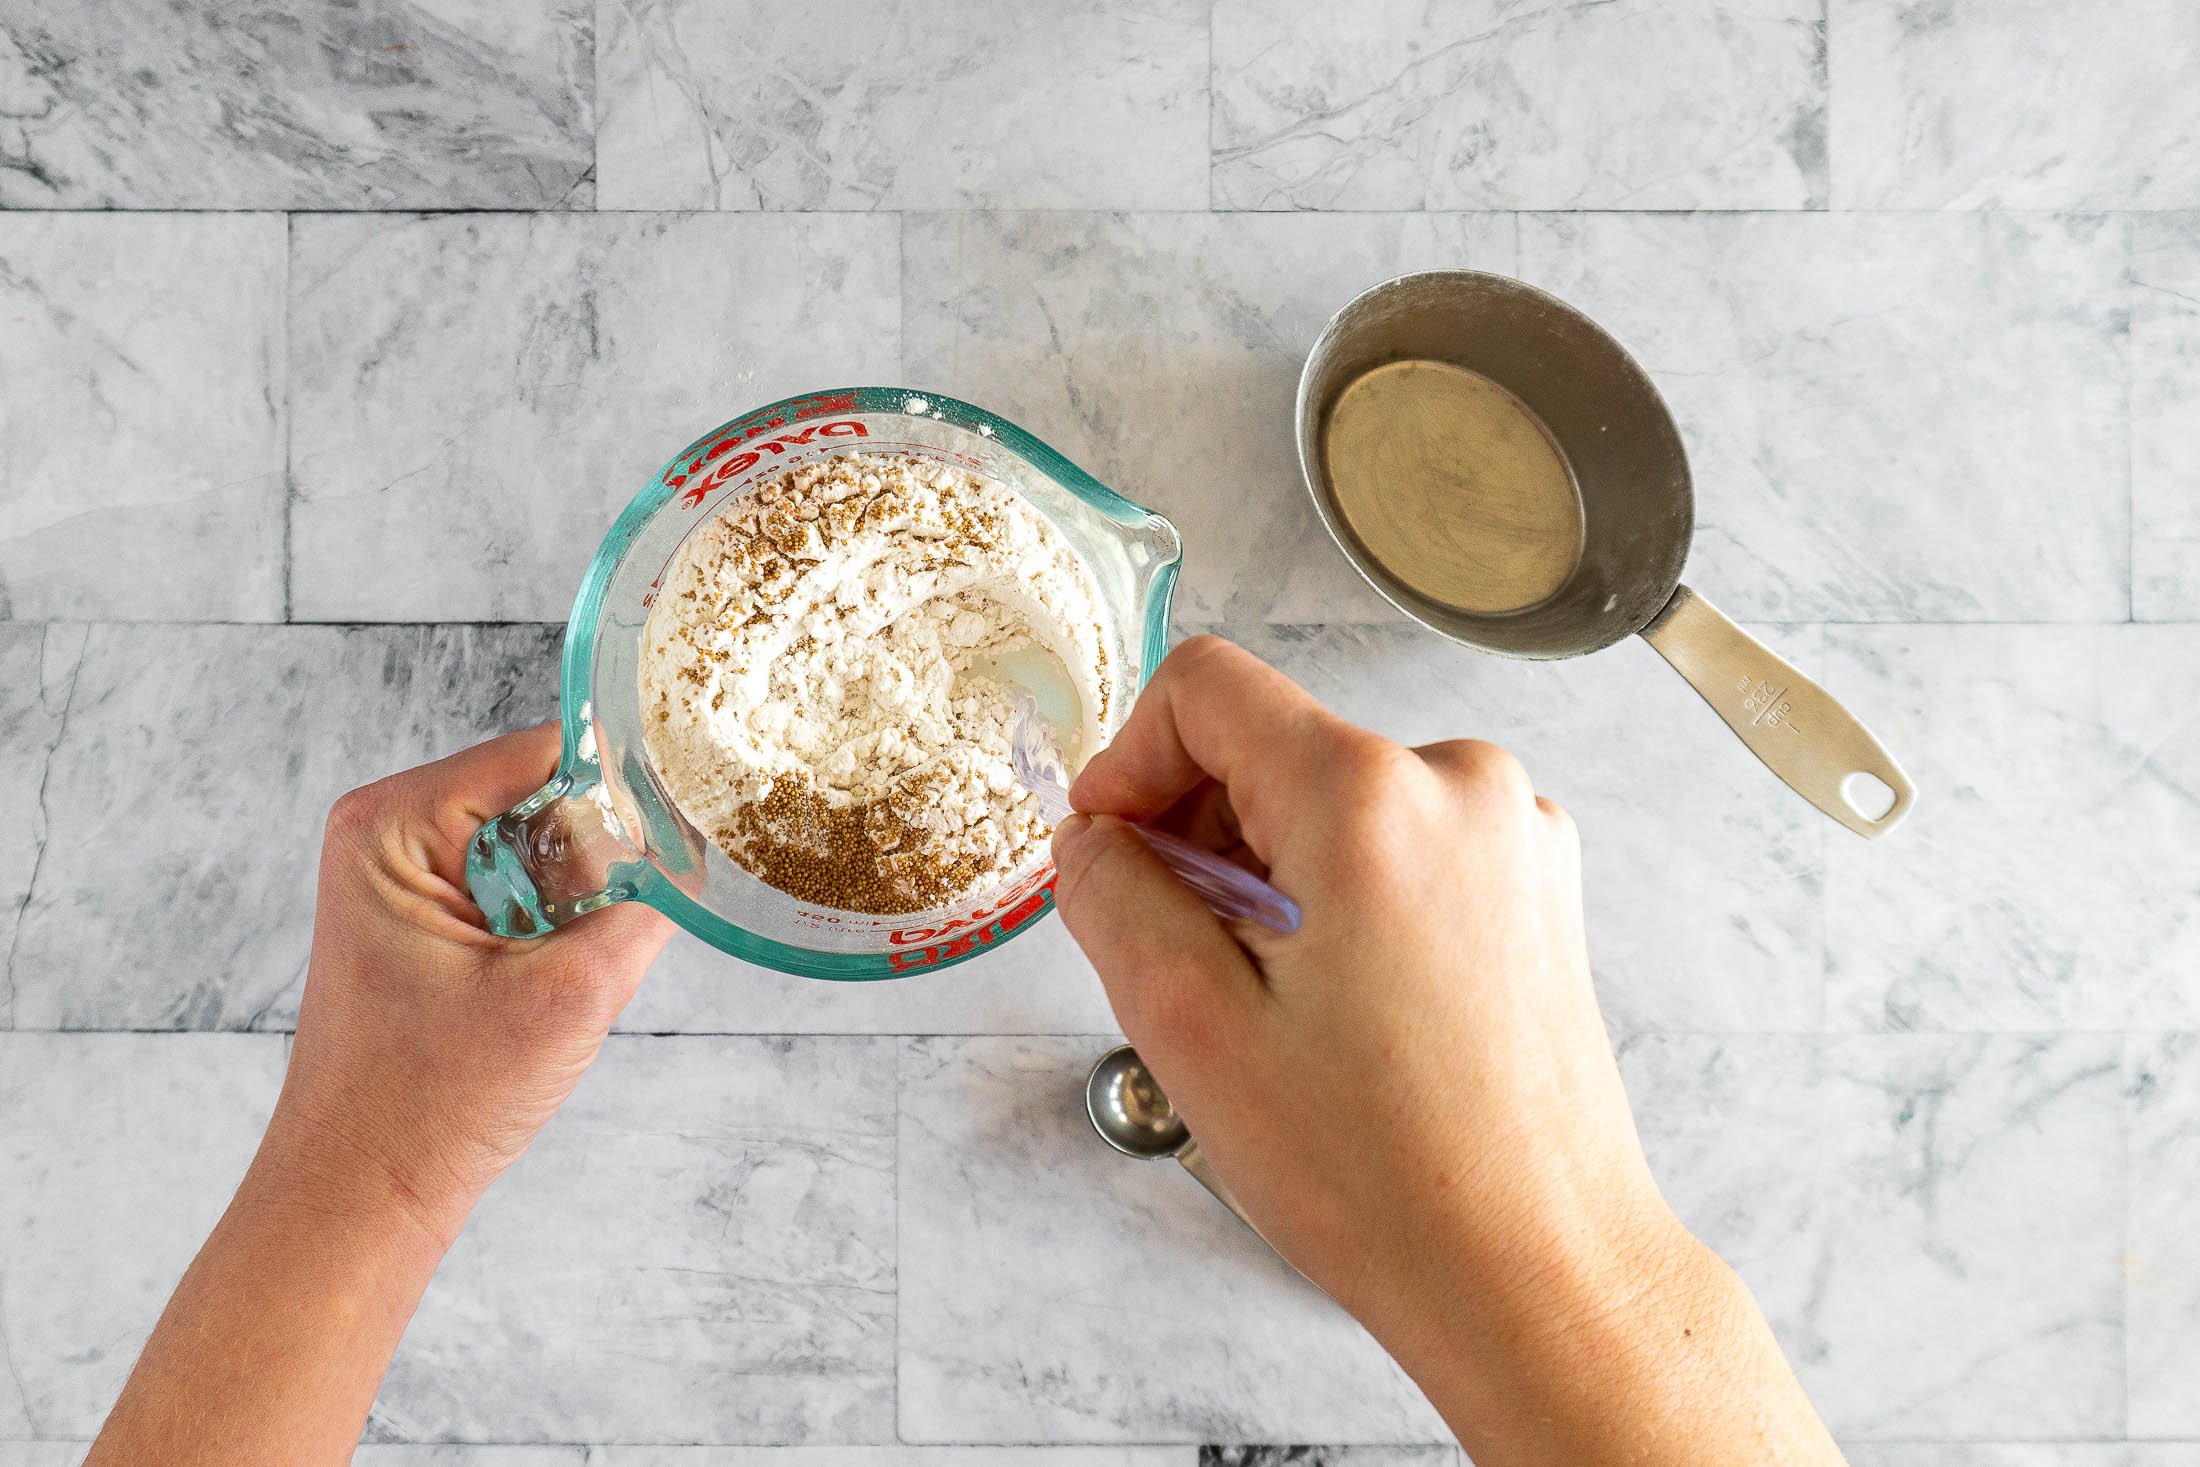
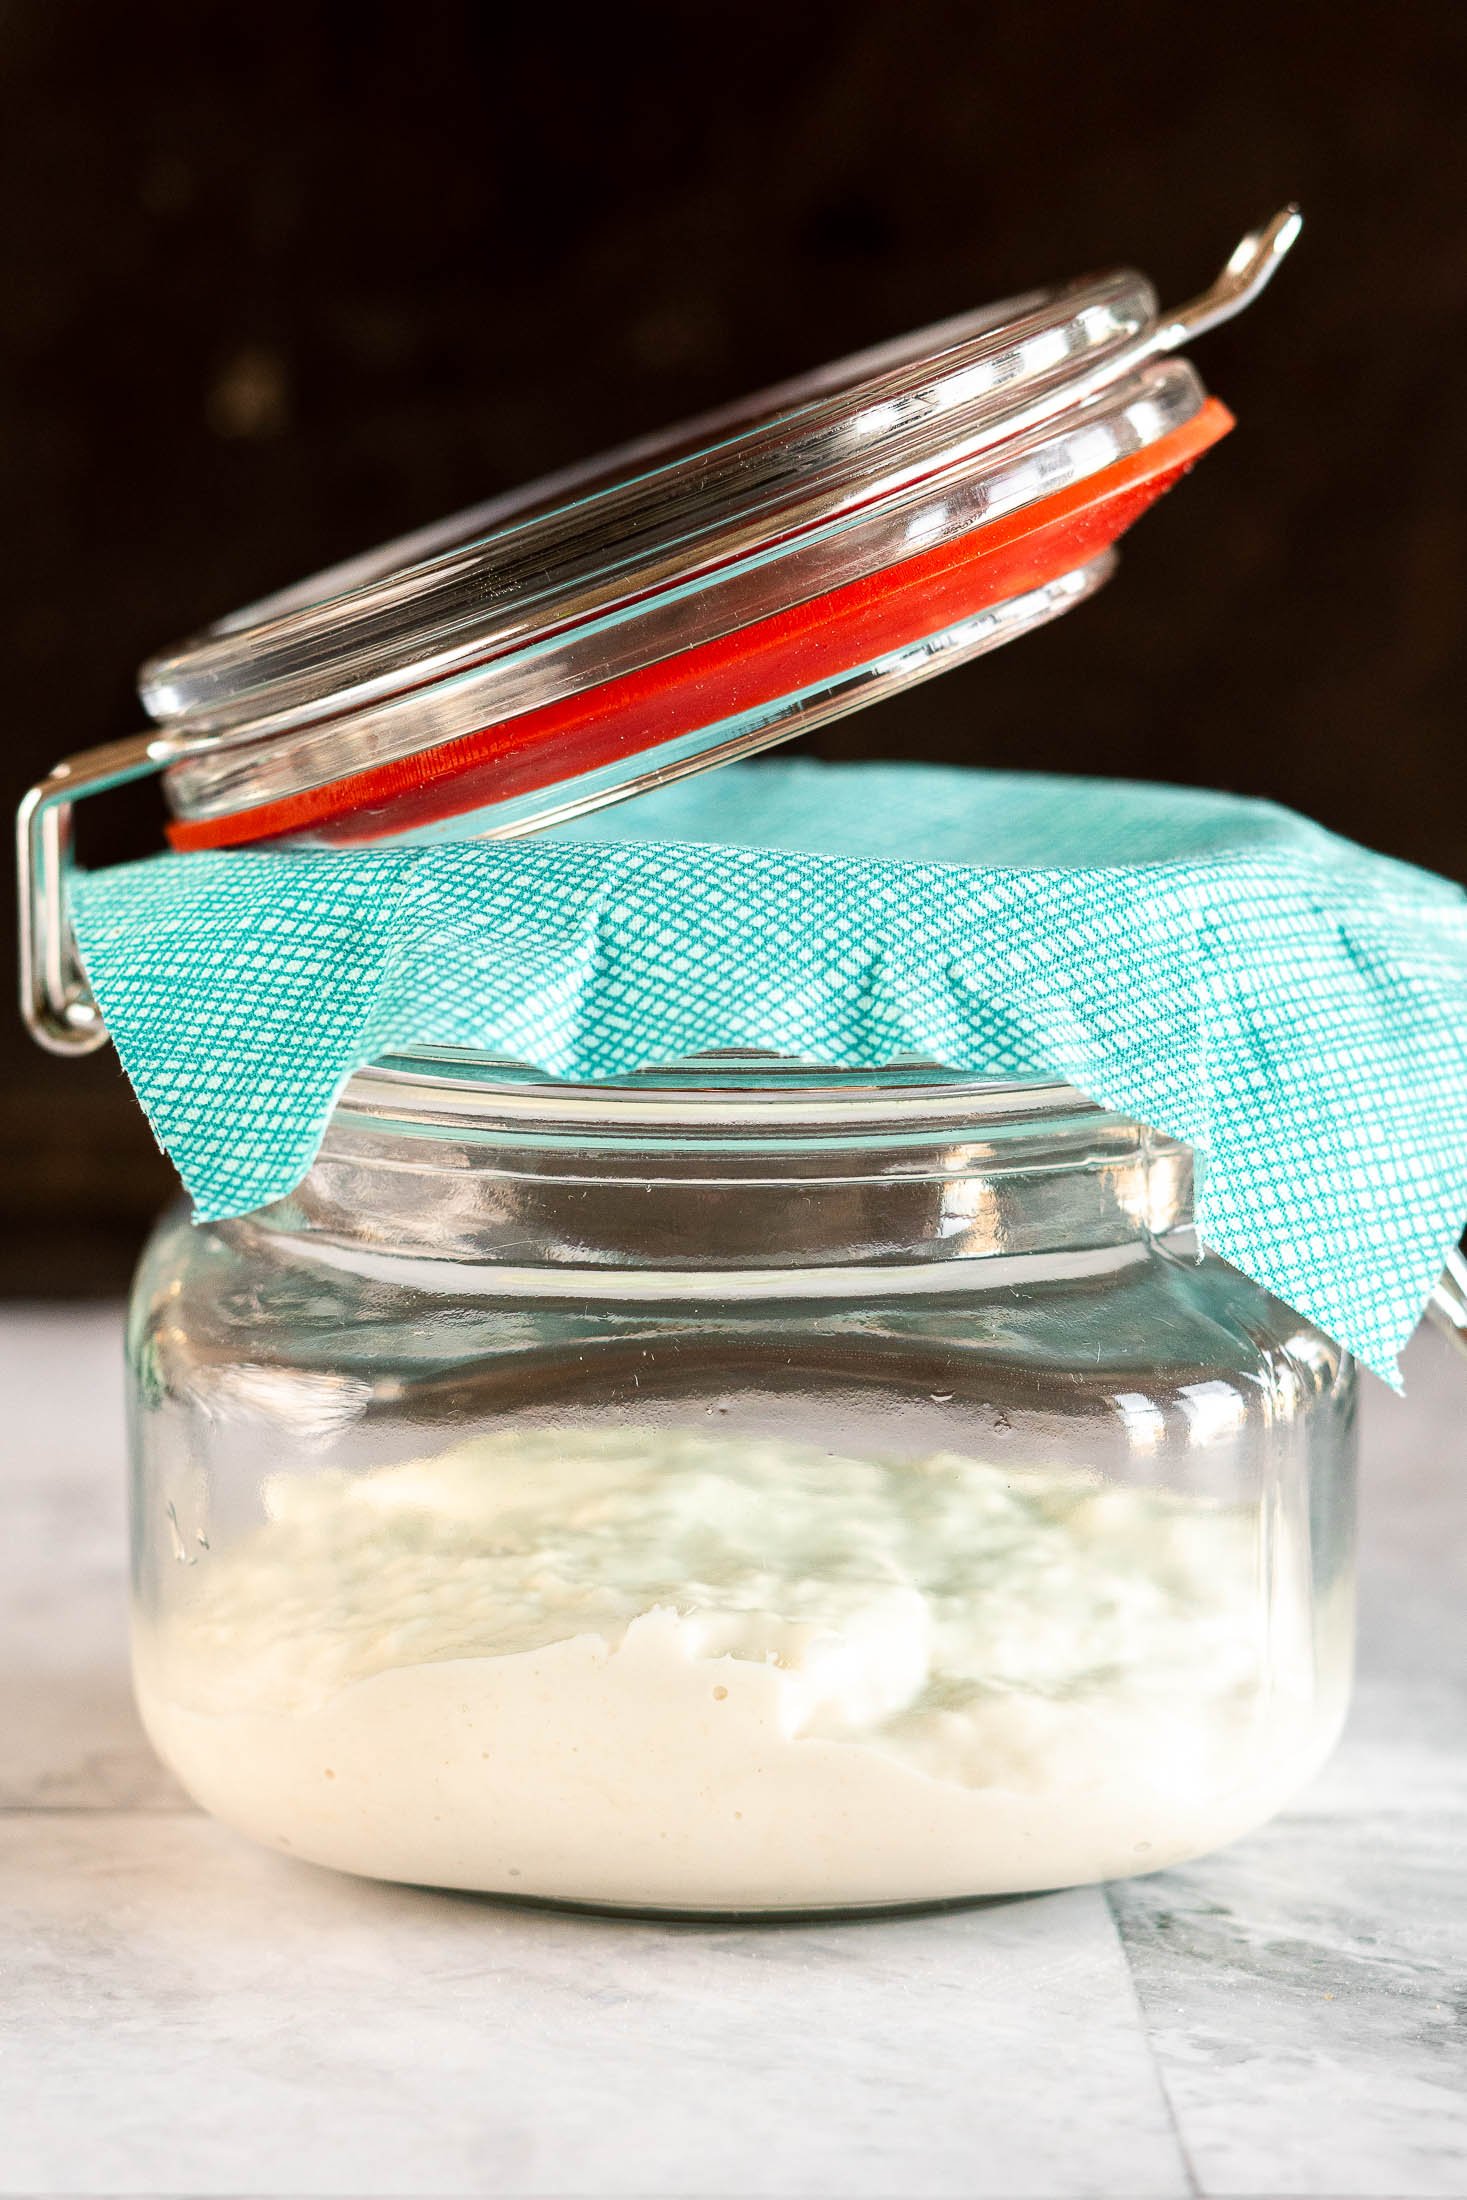
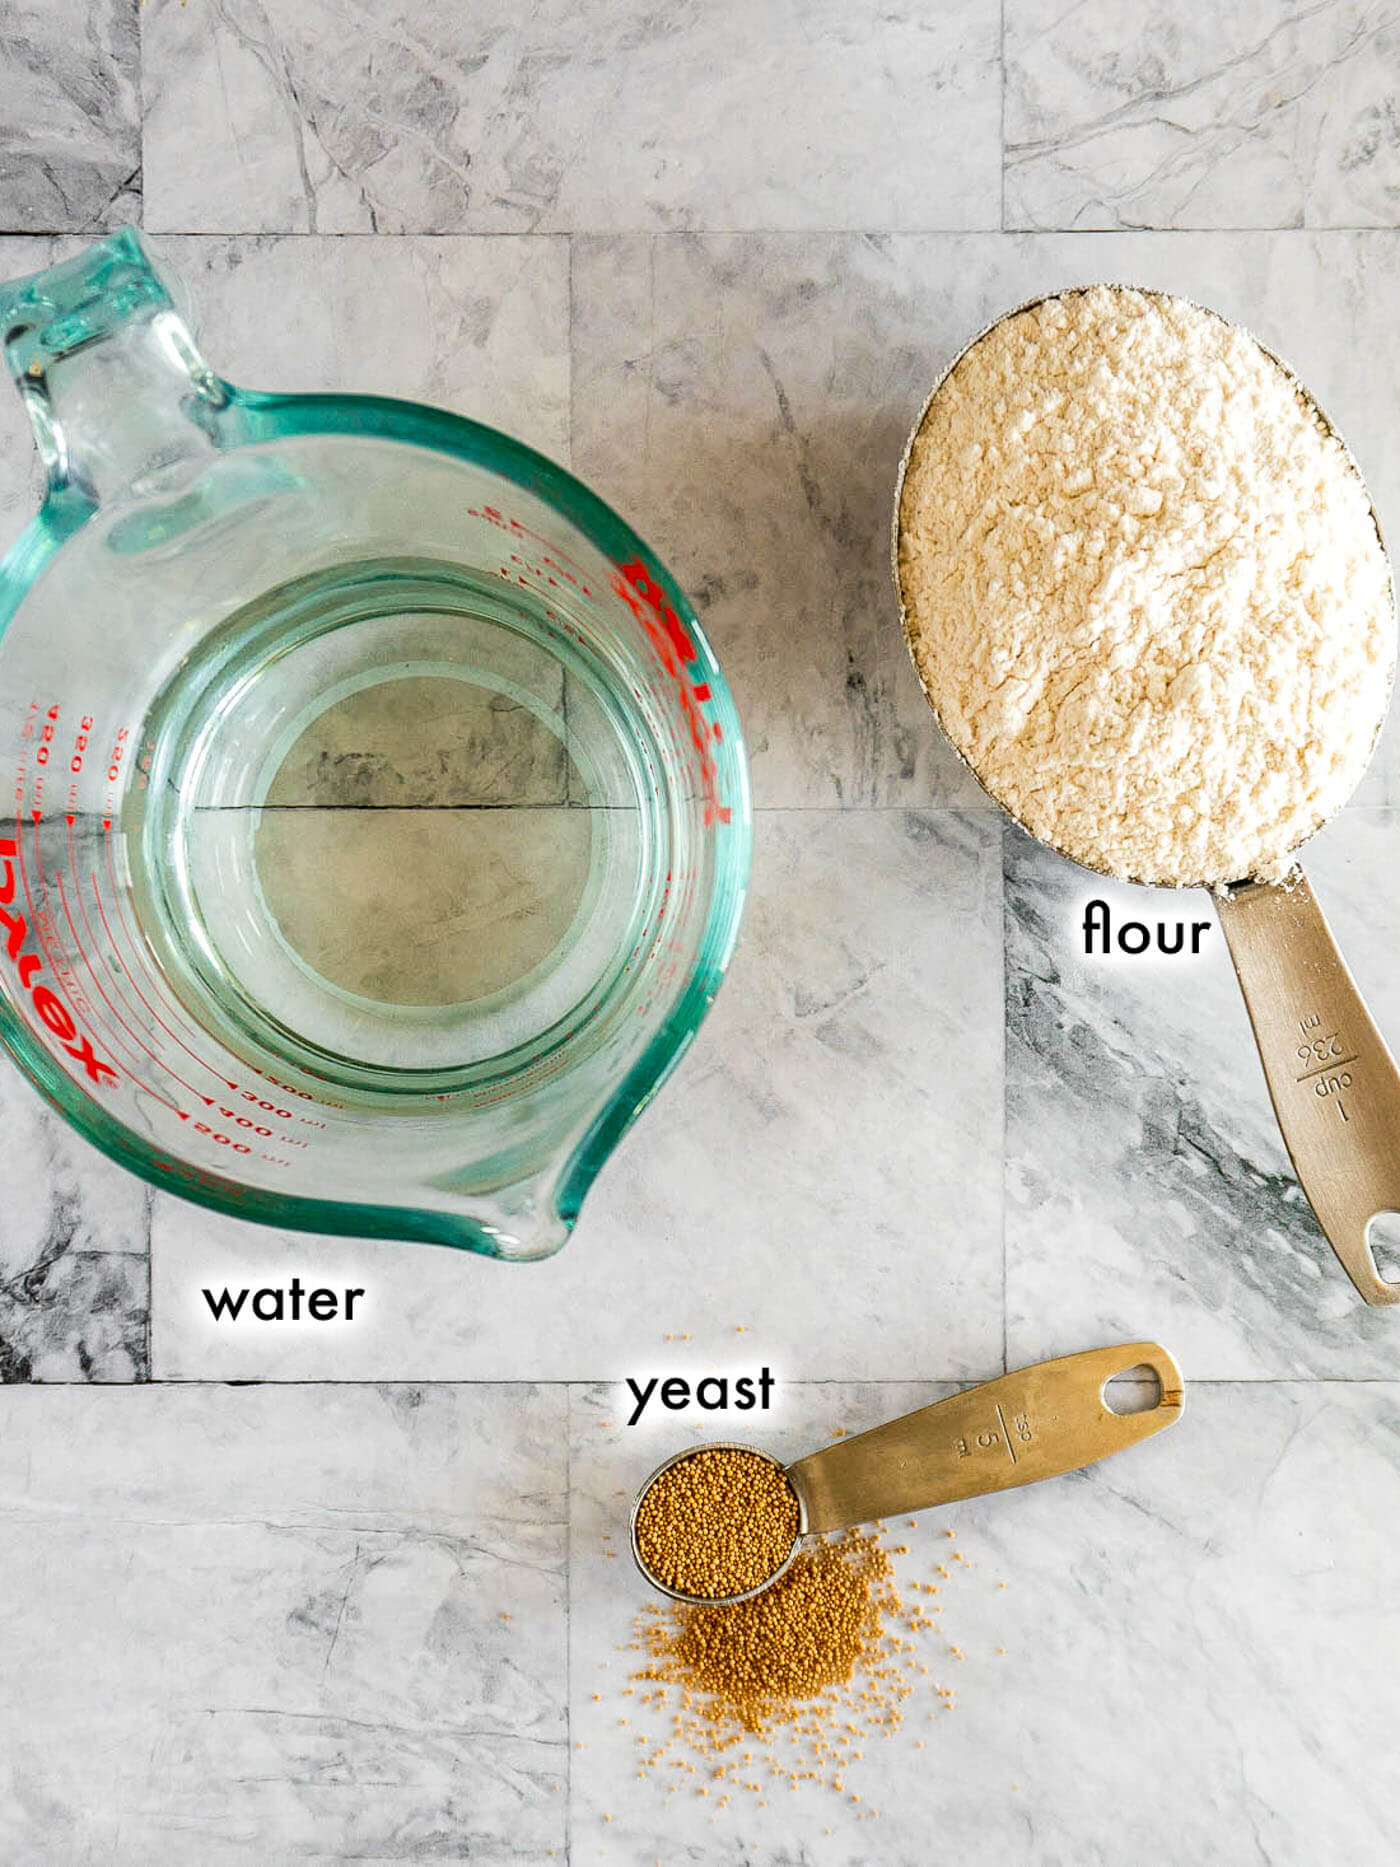
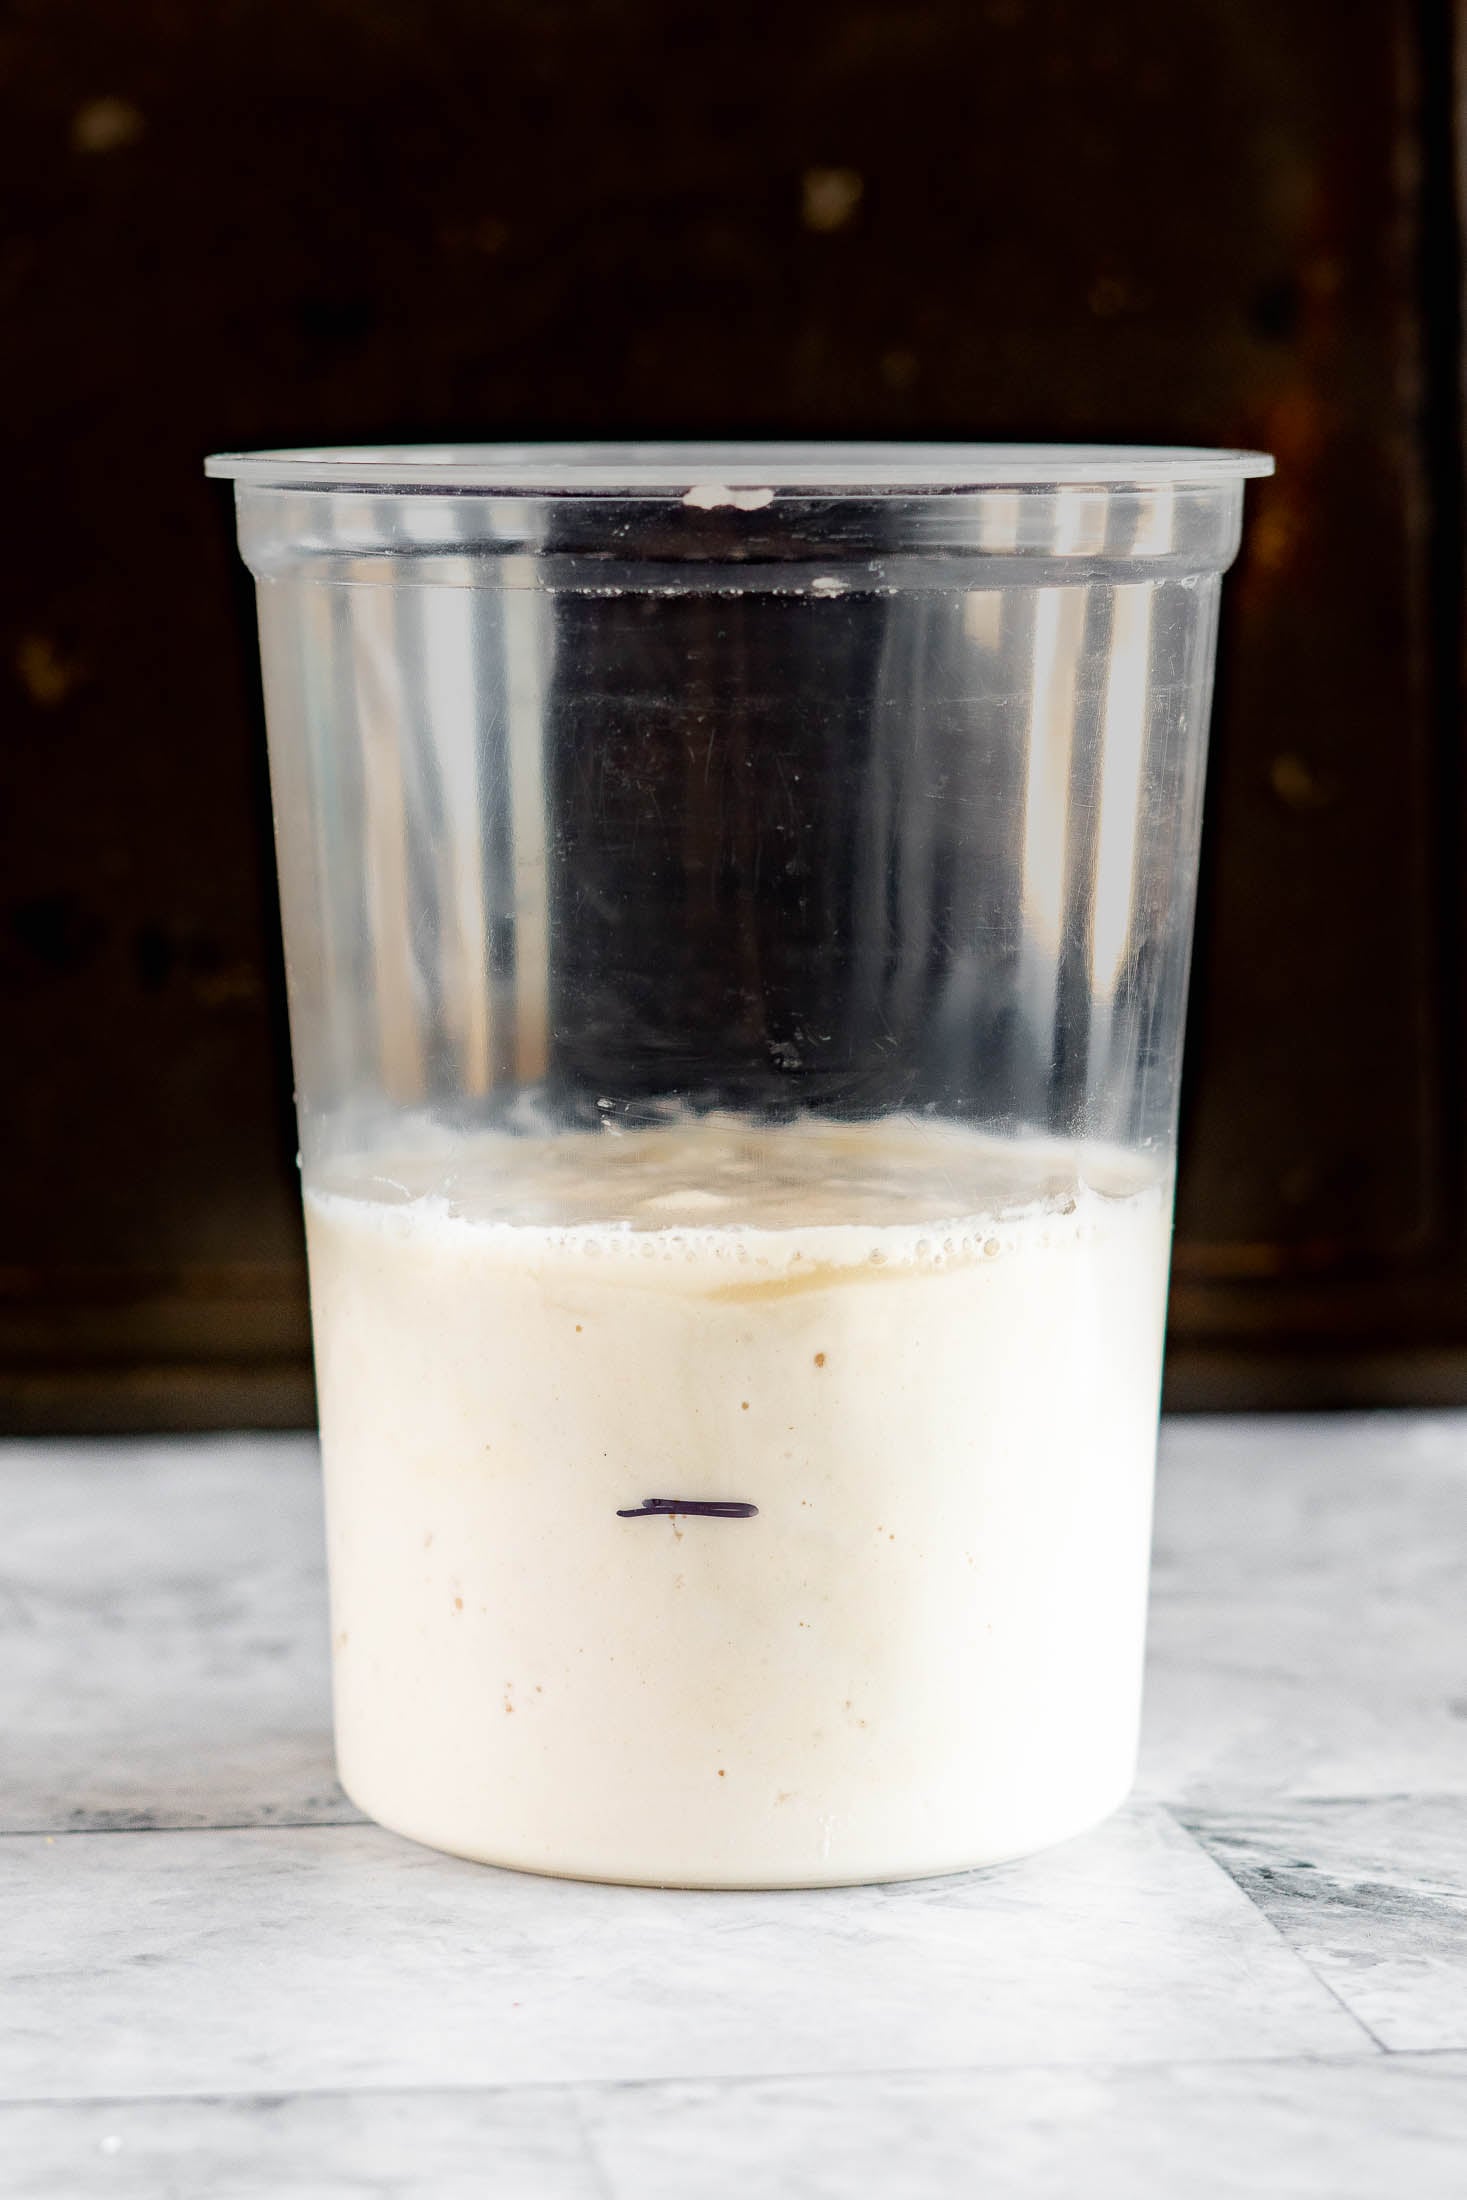
- Step 1: In a large, non-metallic container, mix 100g unbleached all purpose flour, 100g room temperature water, and 1/2 teaspoon of active dry yeast until completely combined. No need to proof the yeast.
- Step 2: Either cover the container with a clean kitchen towel or transfer it to a glass or plastic container with at least 3 times the volume of the starter – it will grow!
Do not seal airtight – your starter needs to breathe.
Set the starter in a warm spot, free of temperature swings, and drafts to ferment for 18 hours.
Day 2:
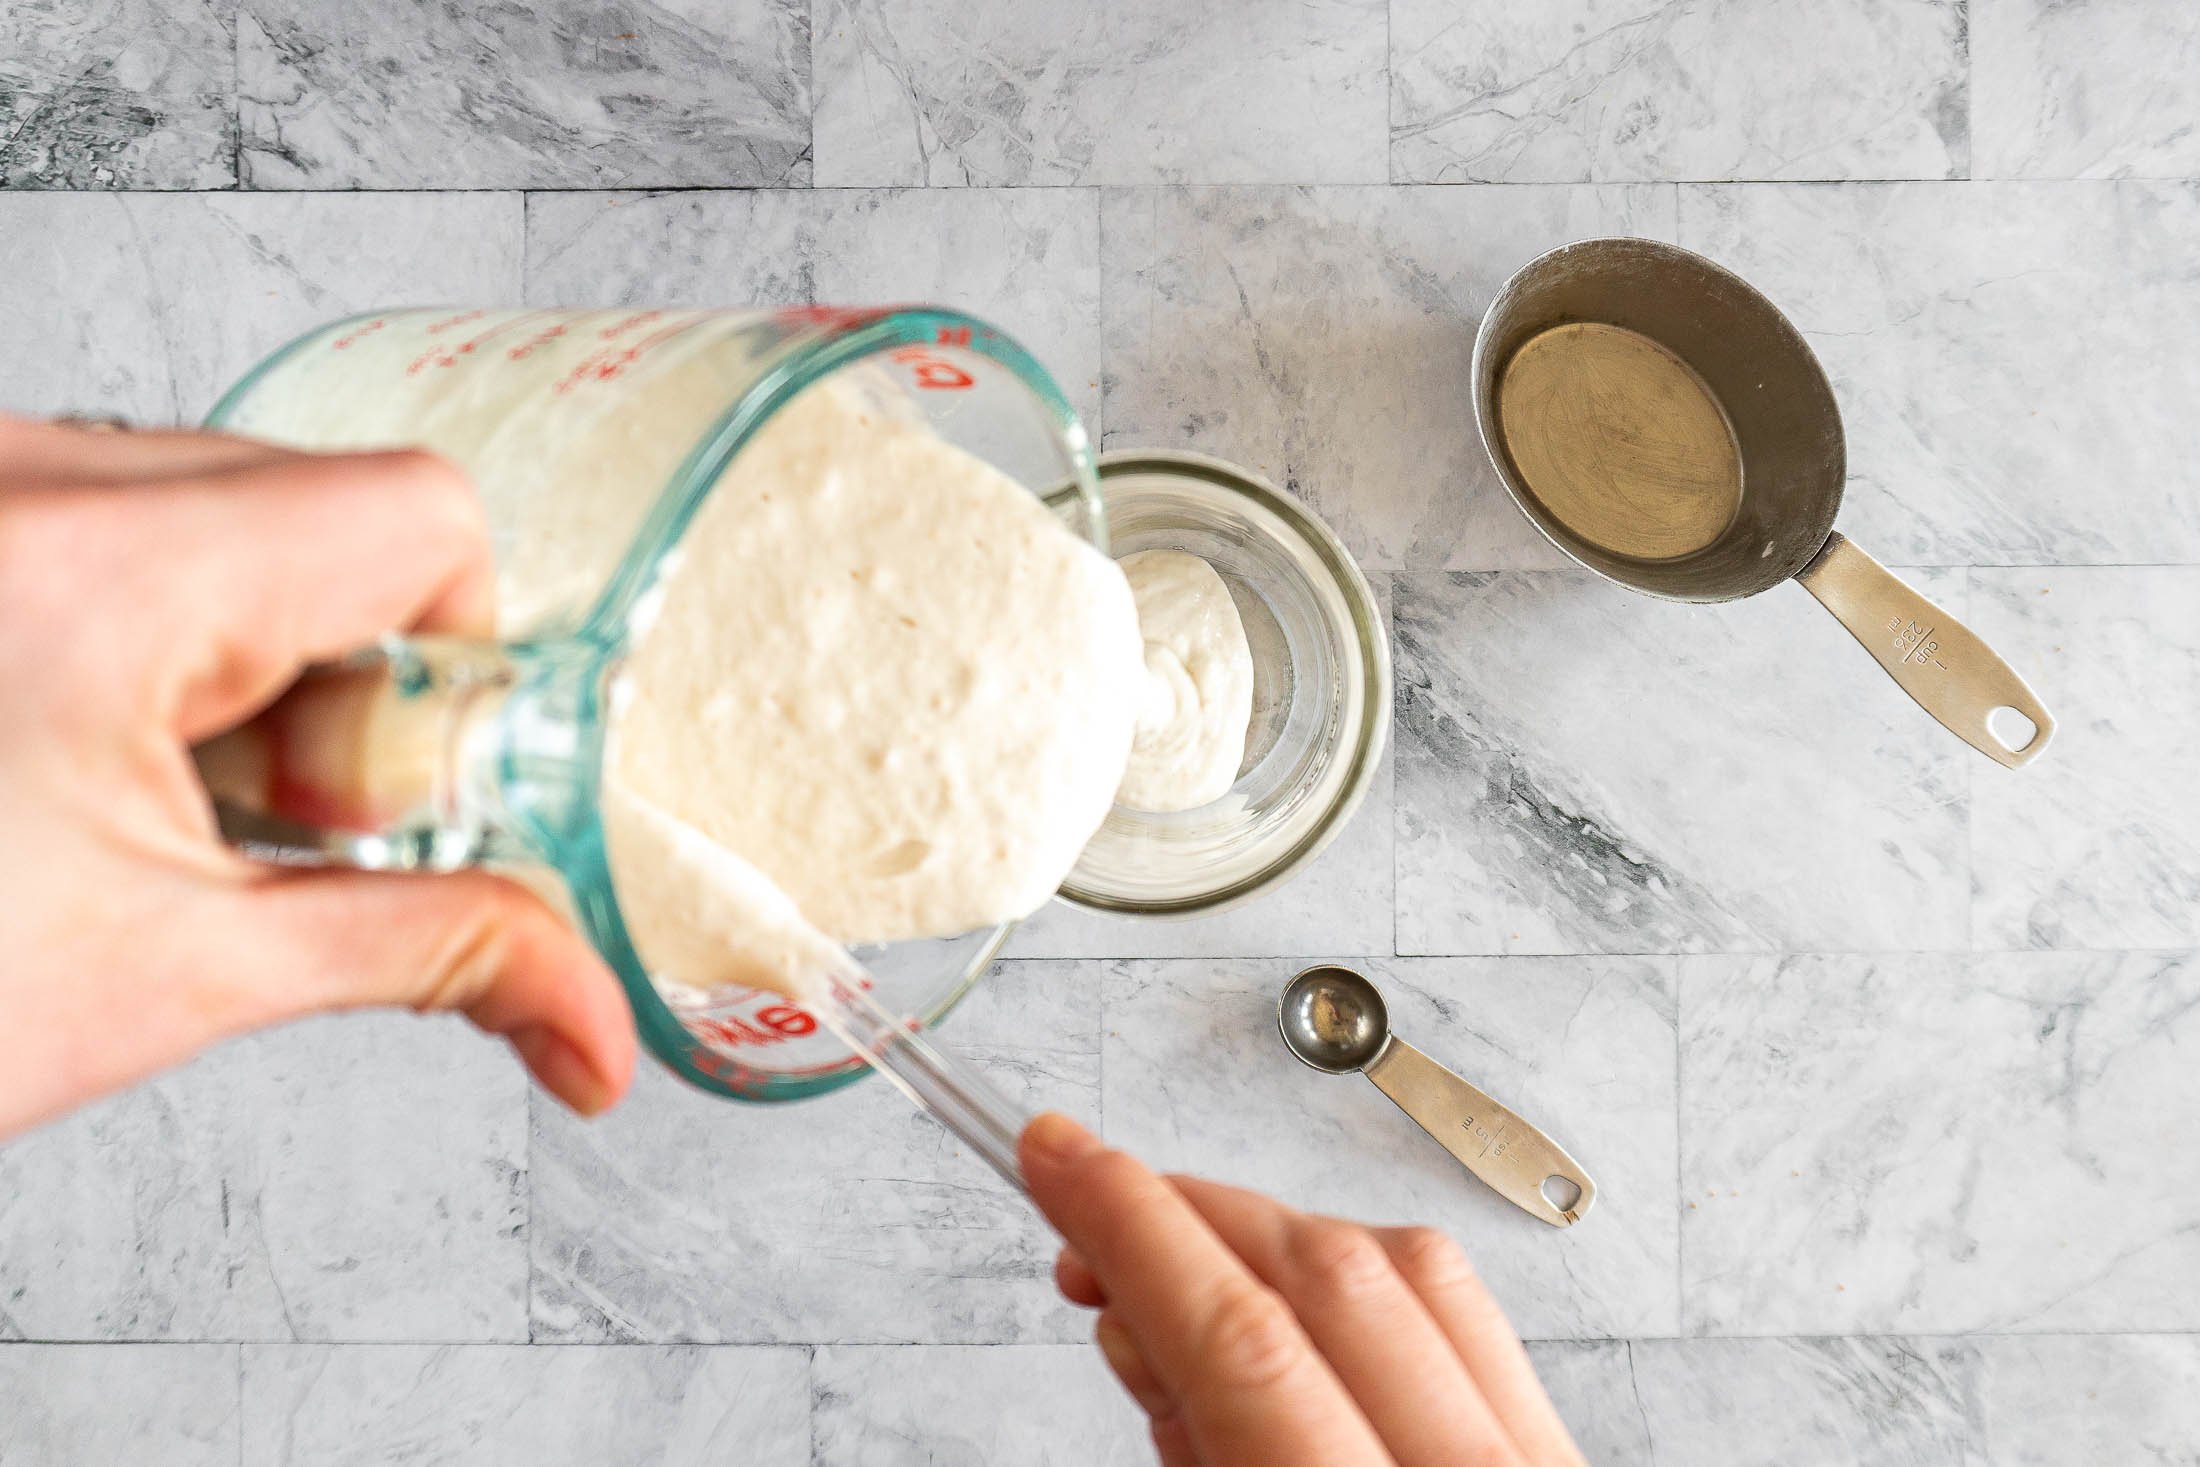
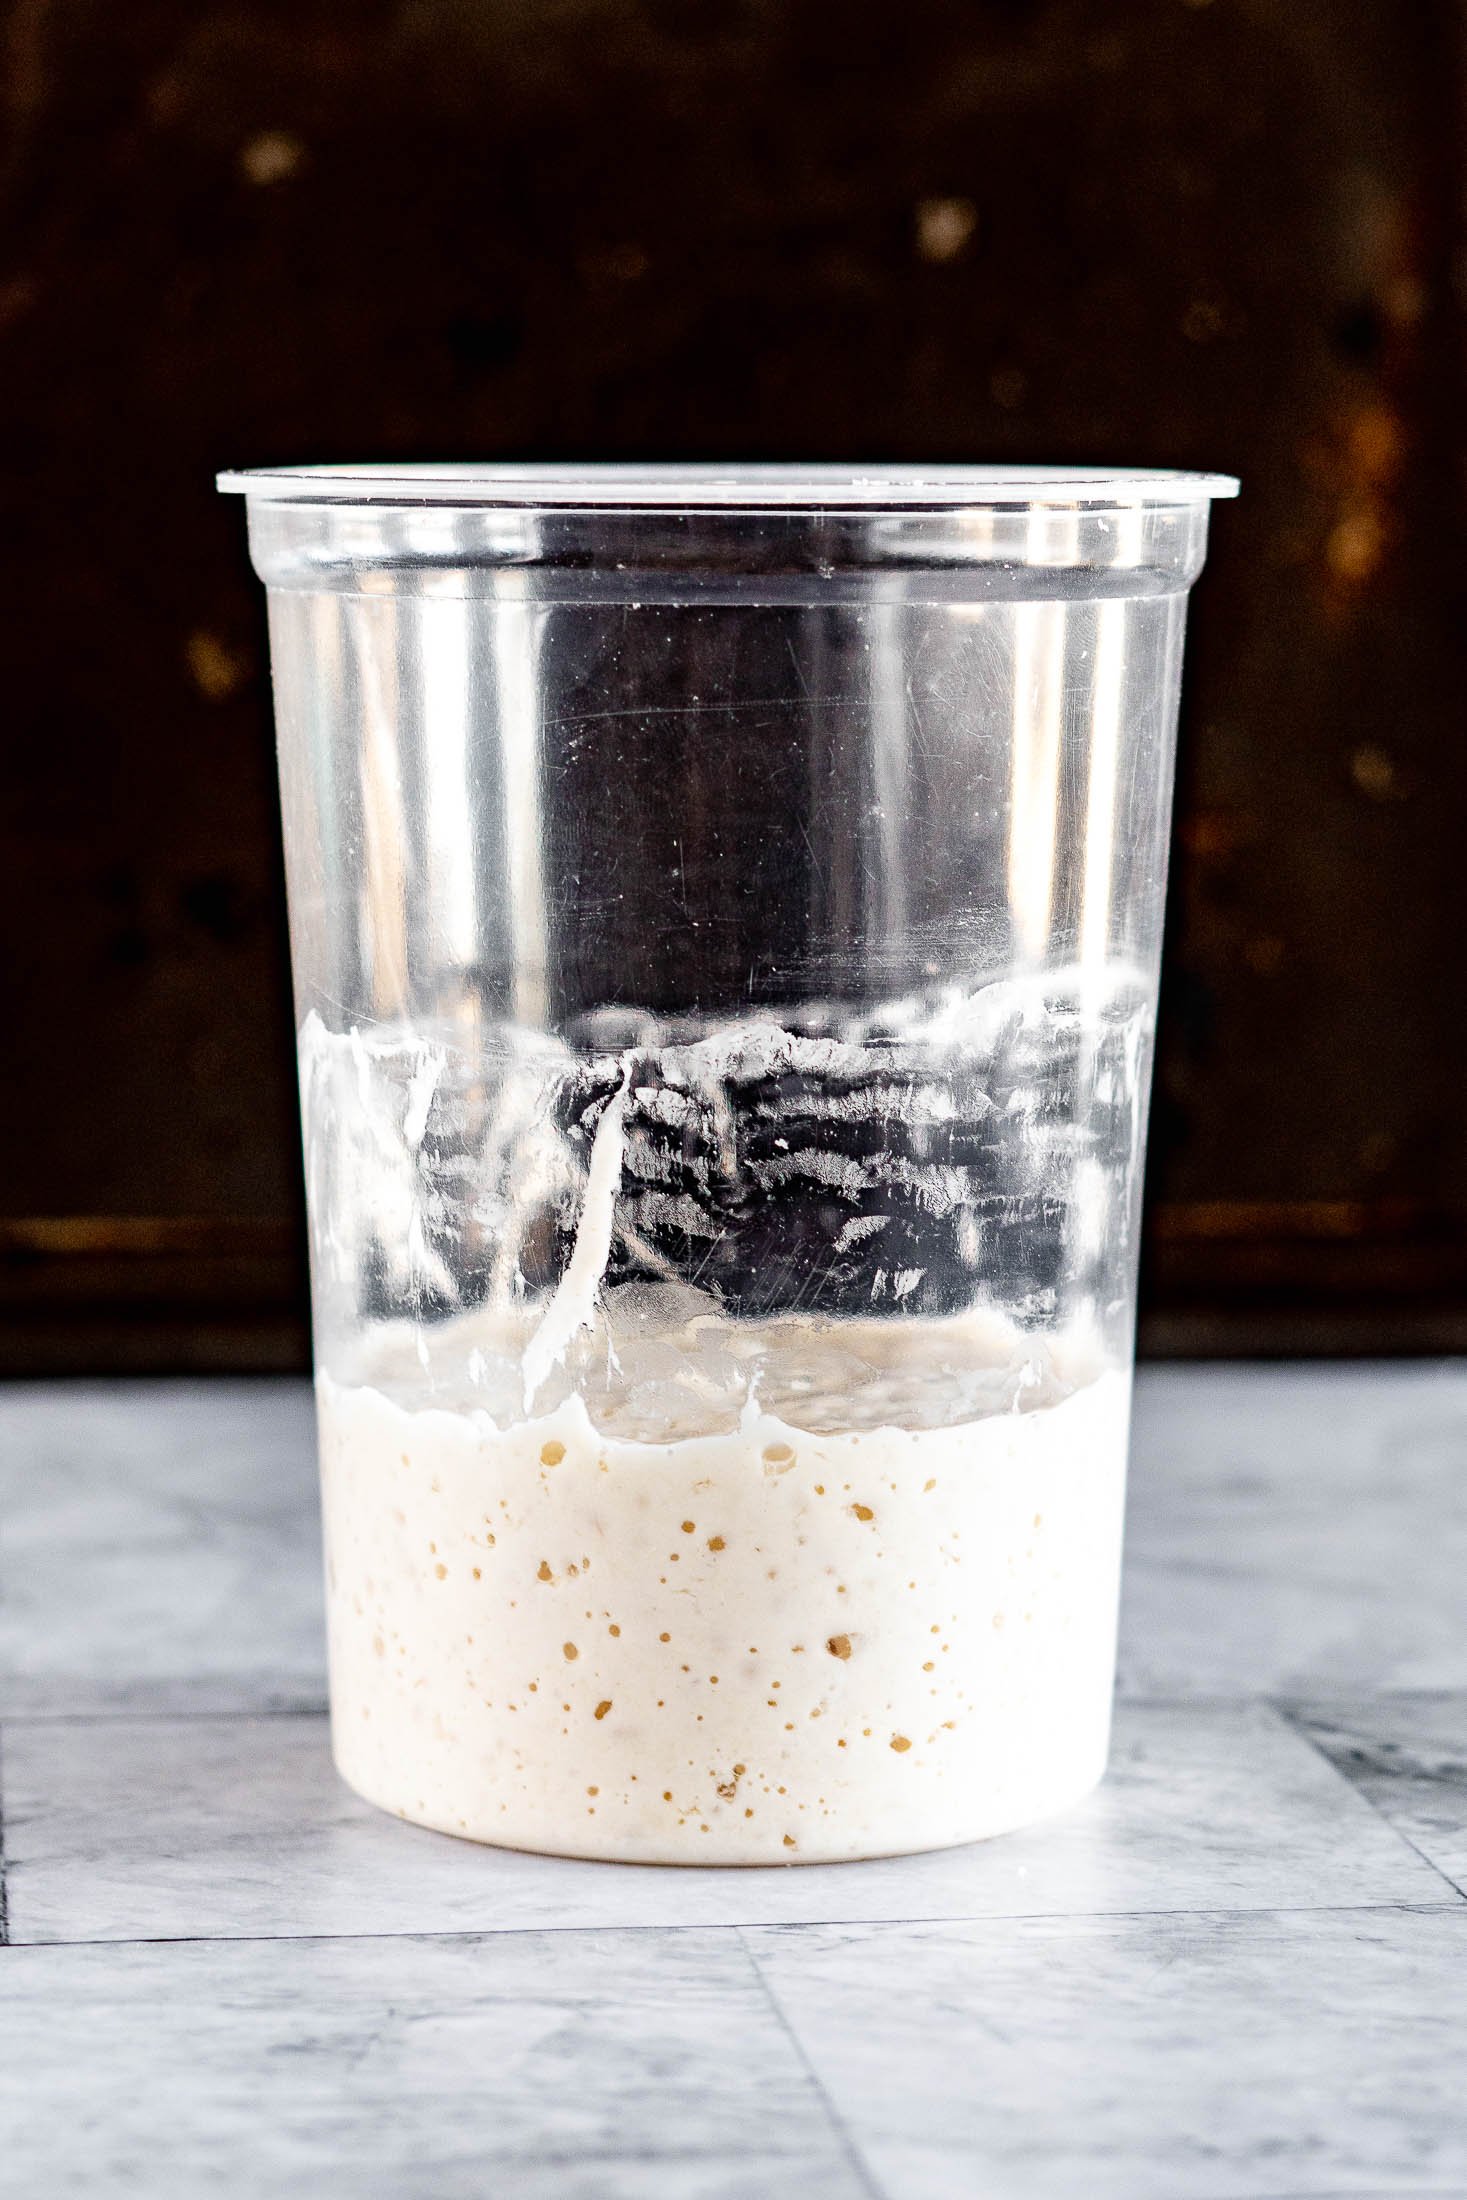
- Step 3: After 18 hours, stir down the bubbles and transfer 50 g of starter to a clean starter jar and feed it by mixing in 50 g warm water until mostly combined, then add 50 g unbleached all purpose flour and stir until completely combined.
If you notice a layer of liquid (hooch) on the bottom of the jar, stir this in before discarding.

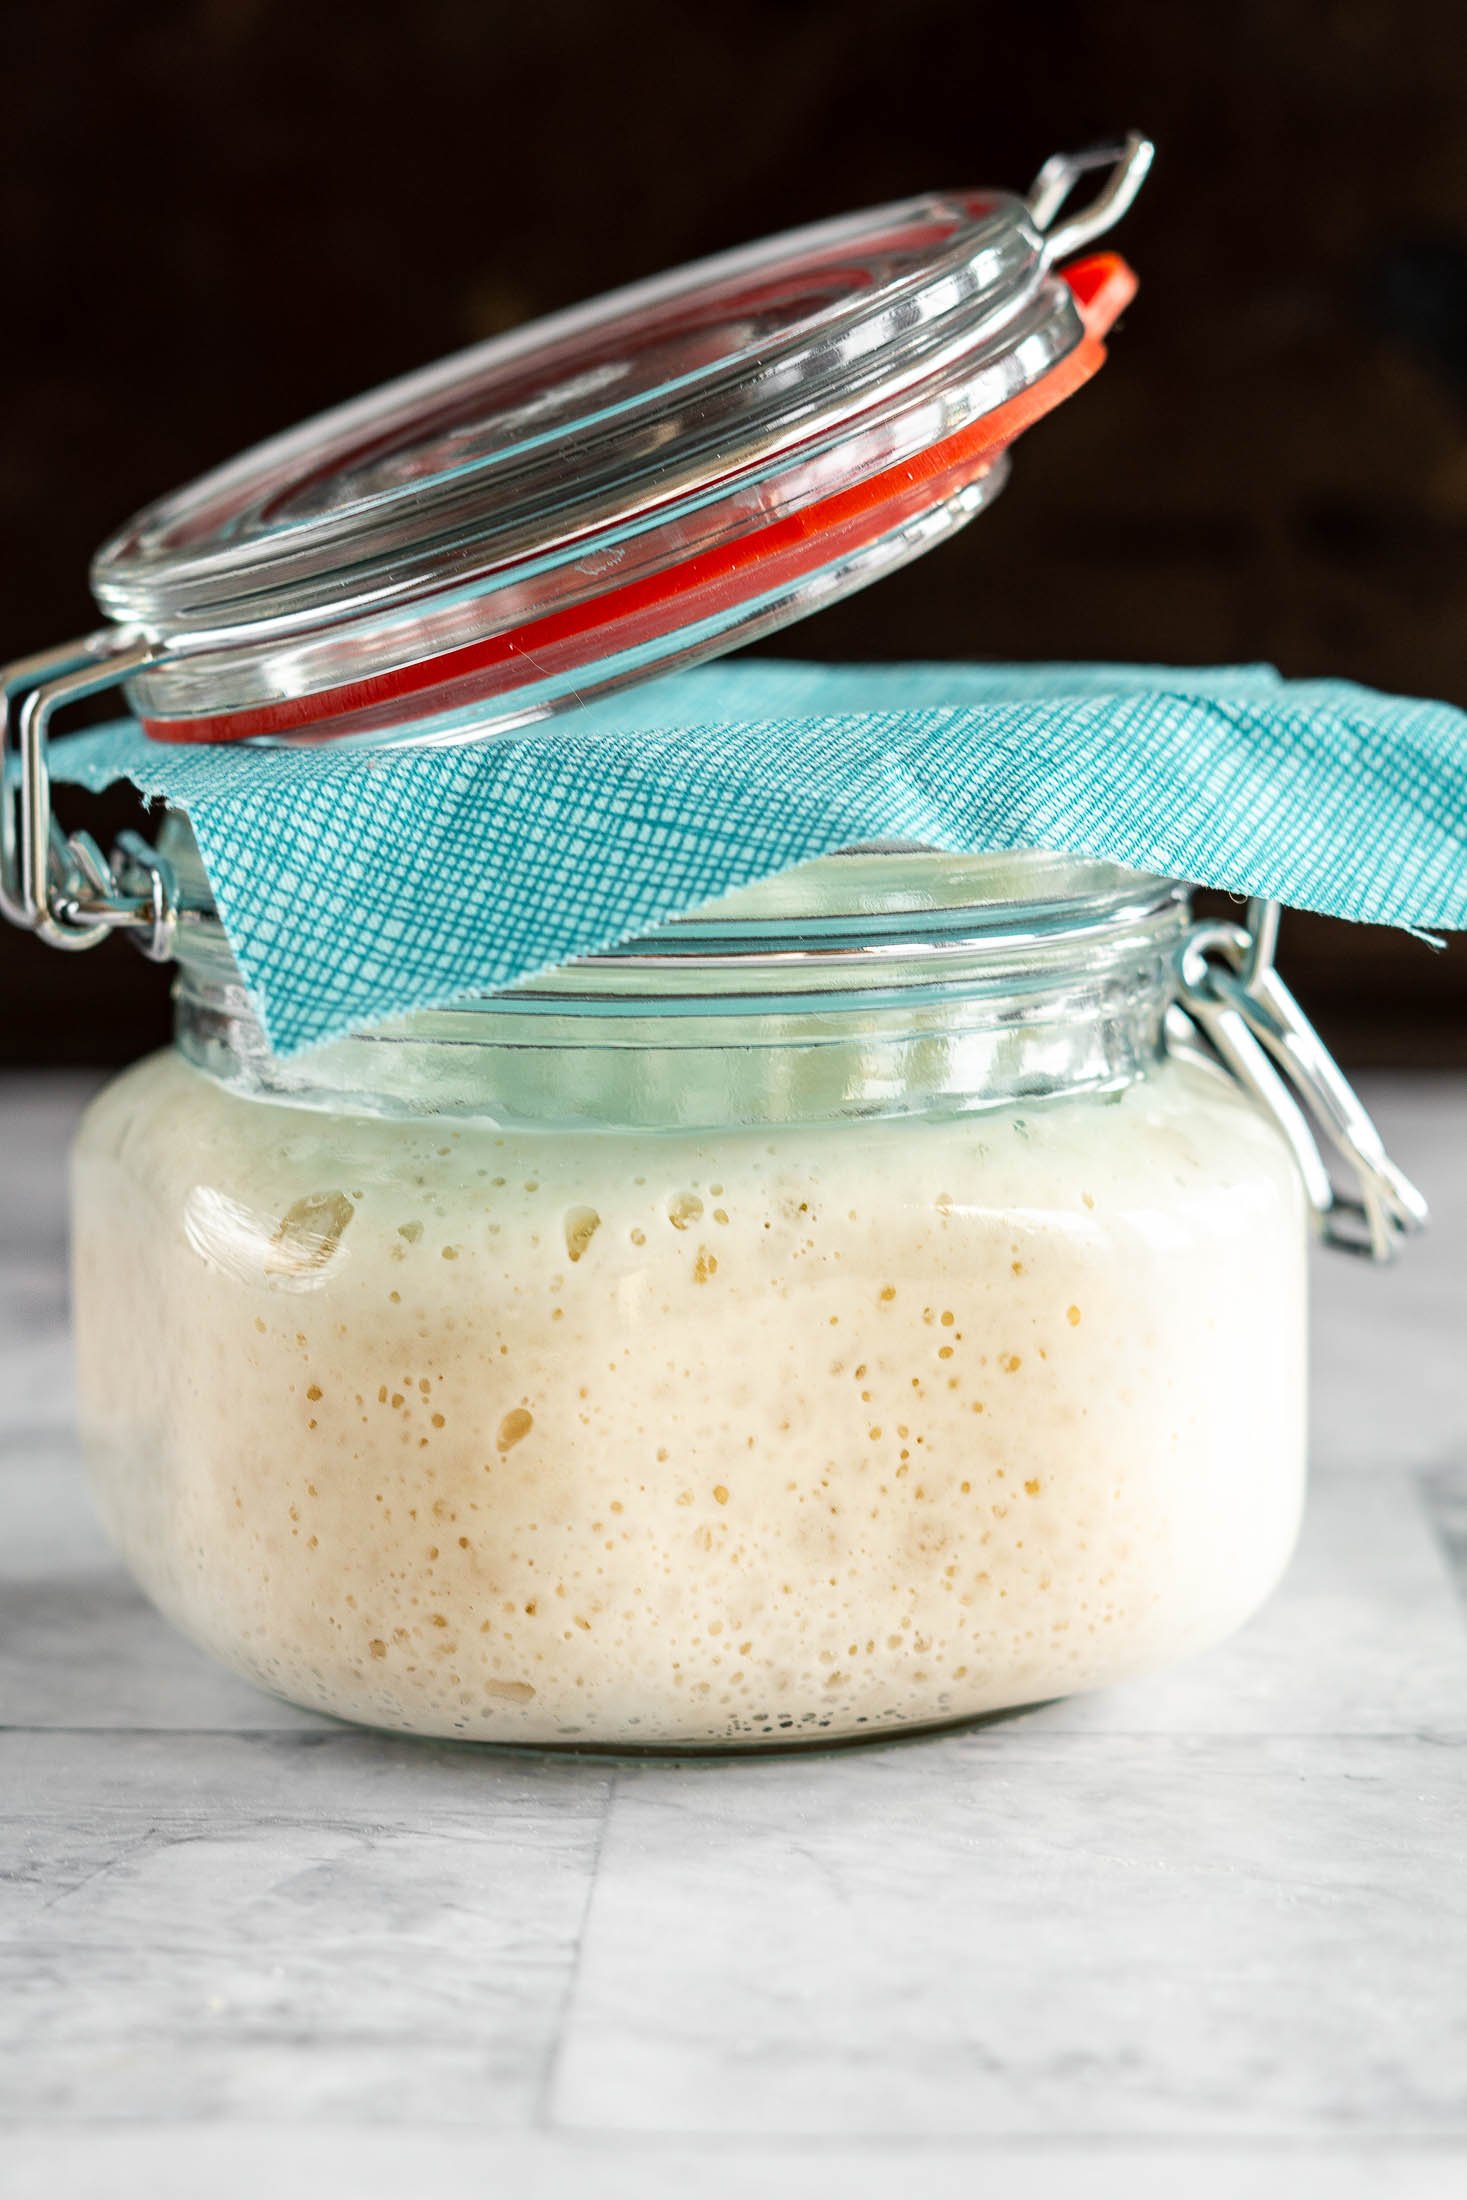
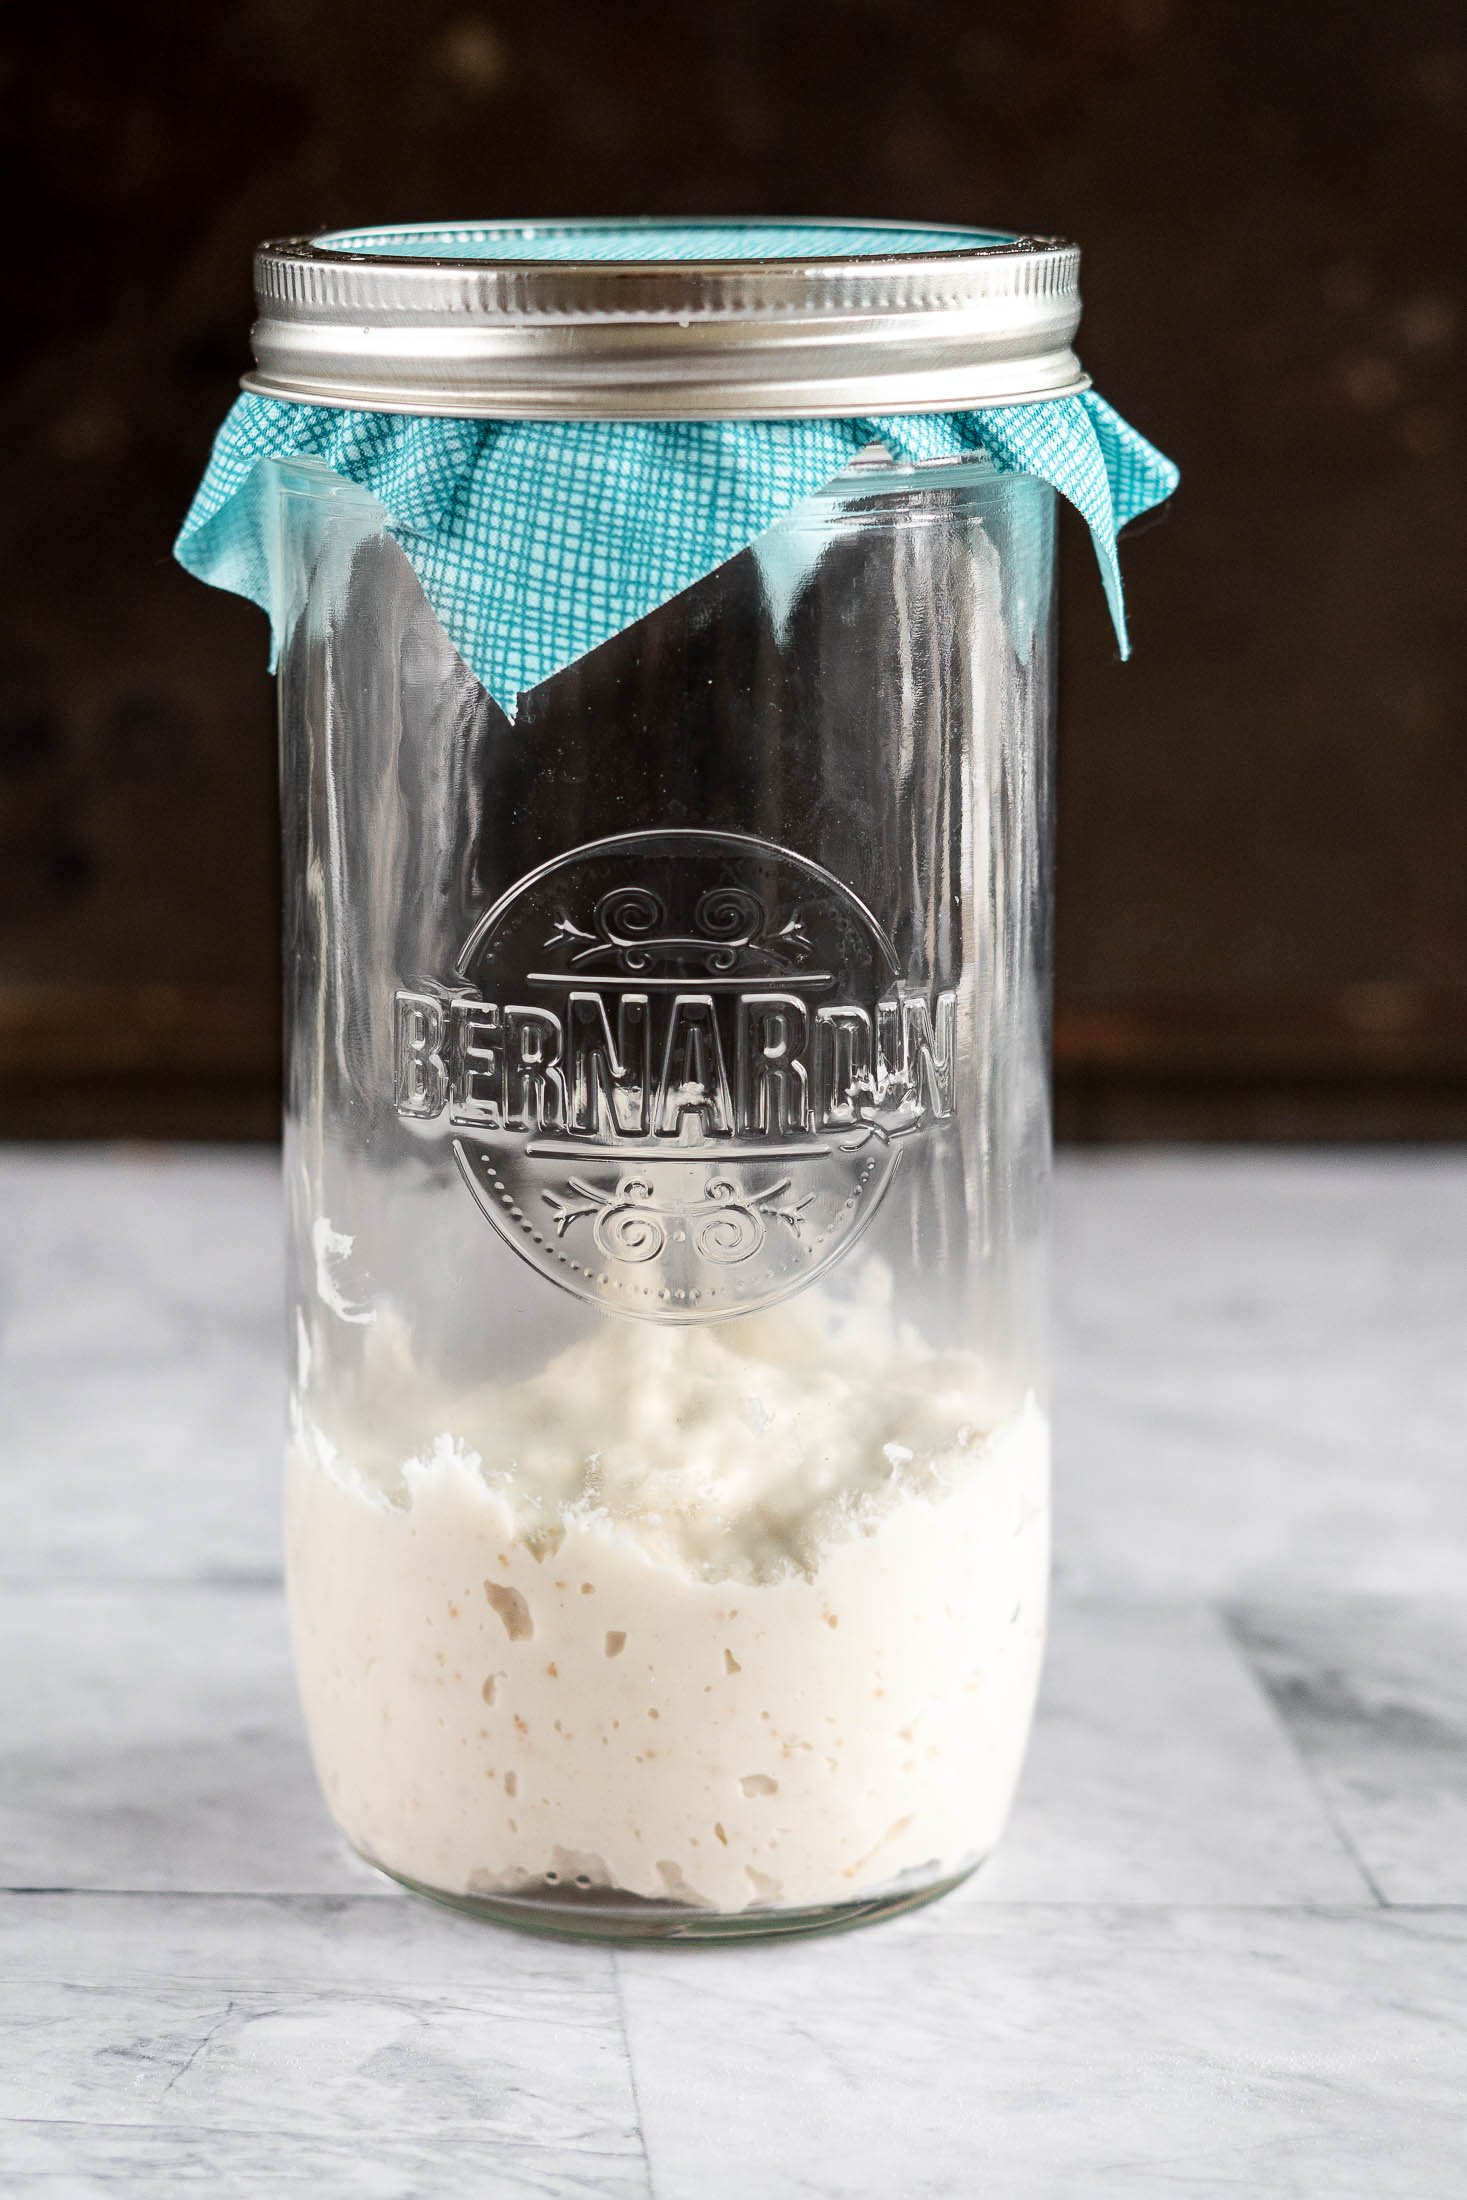
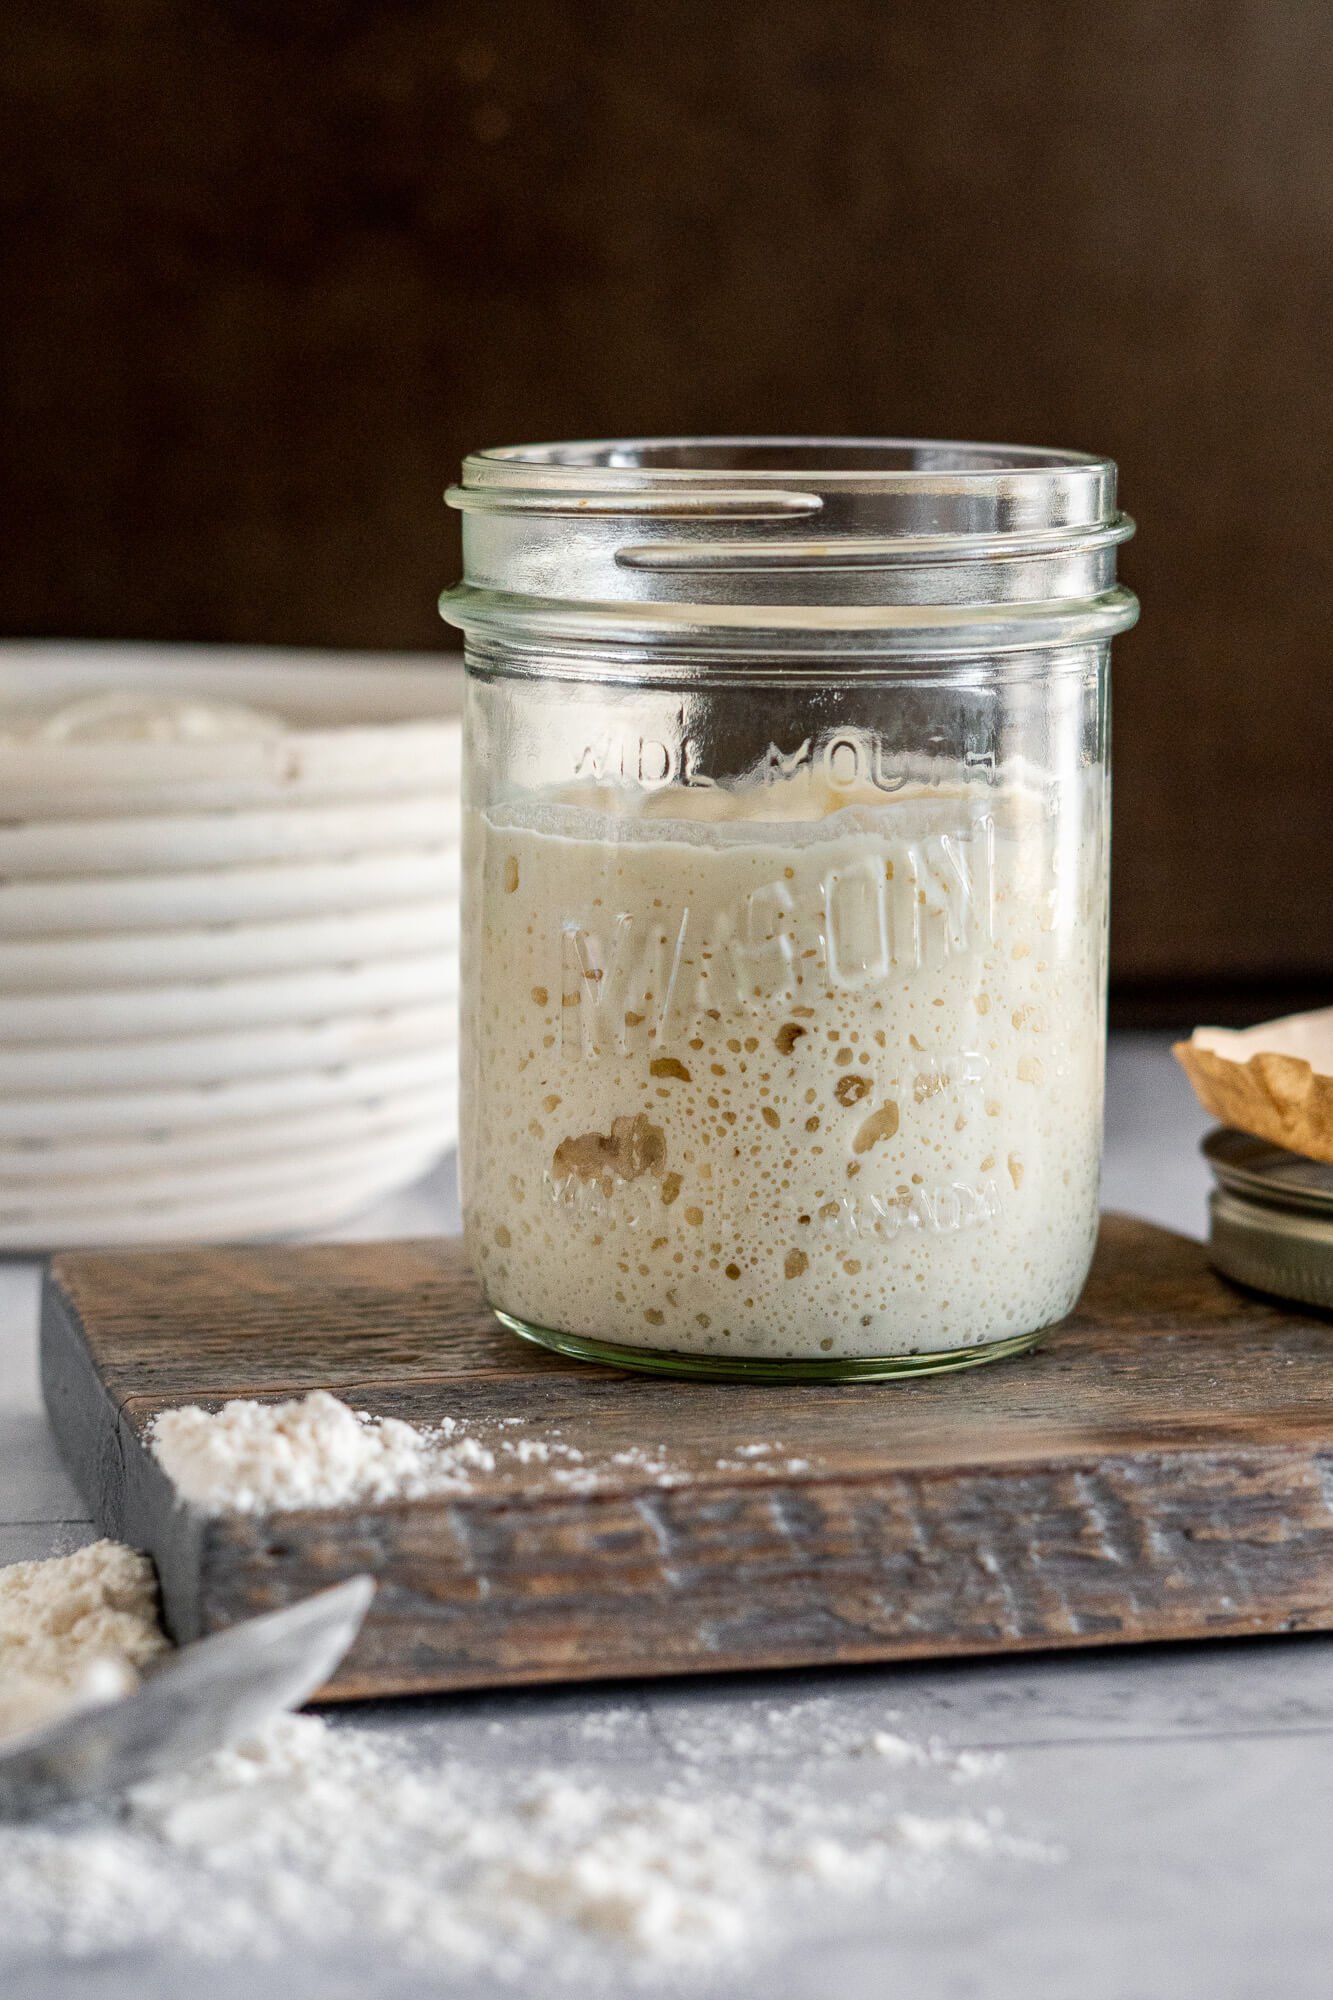
- Step 4: Once the fed starter is fed, bubbly, and doubled in volume it’s ready to use! This will take between 6 and 12 hours depending on your kitchen (environment) and starter.
NOTE: You can save any amount of starter you’d like, but just remember it must be fed 1:1:1 ratio of starter:water:flour to keep your starter at 100% hydration.
Day 3 + Onward:

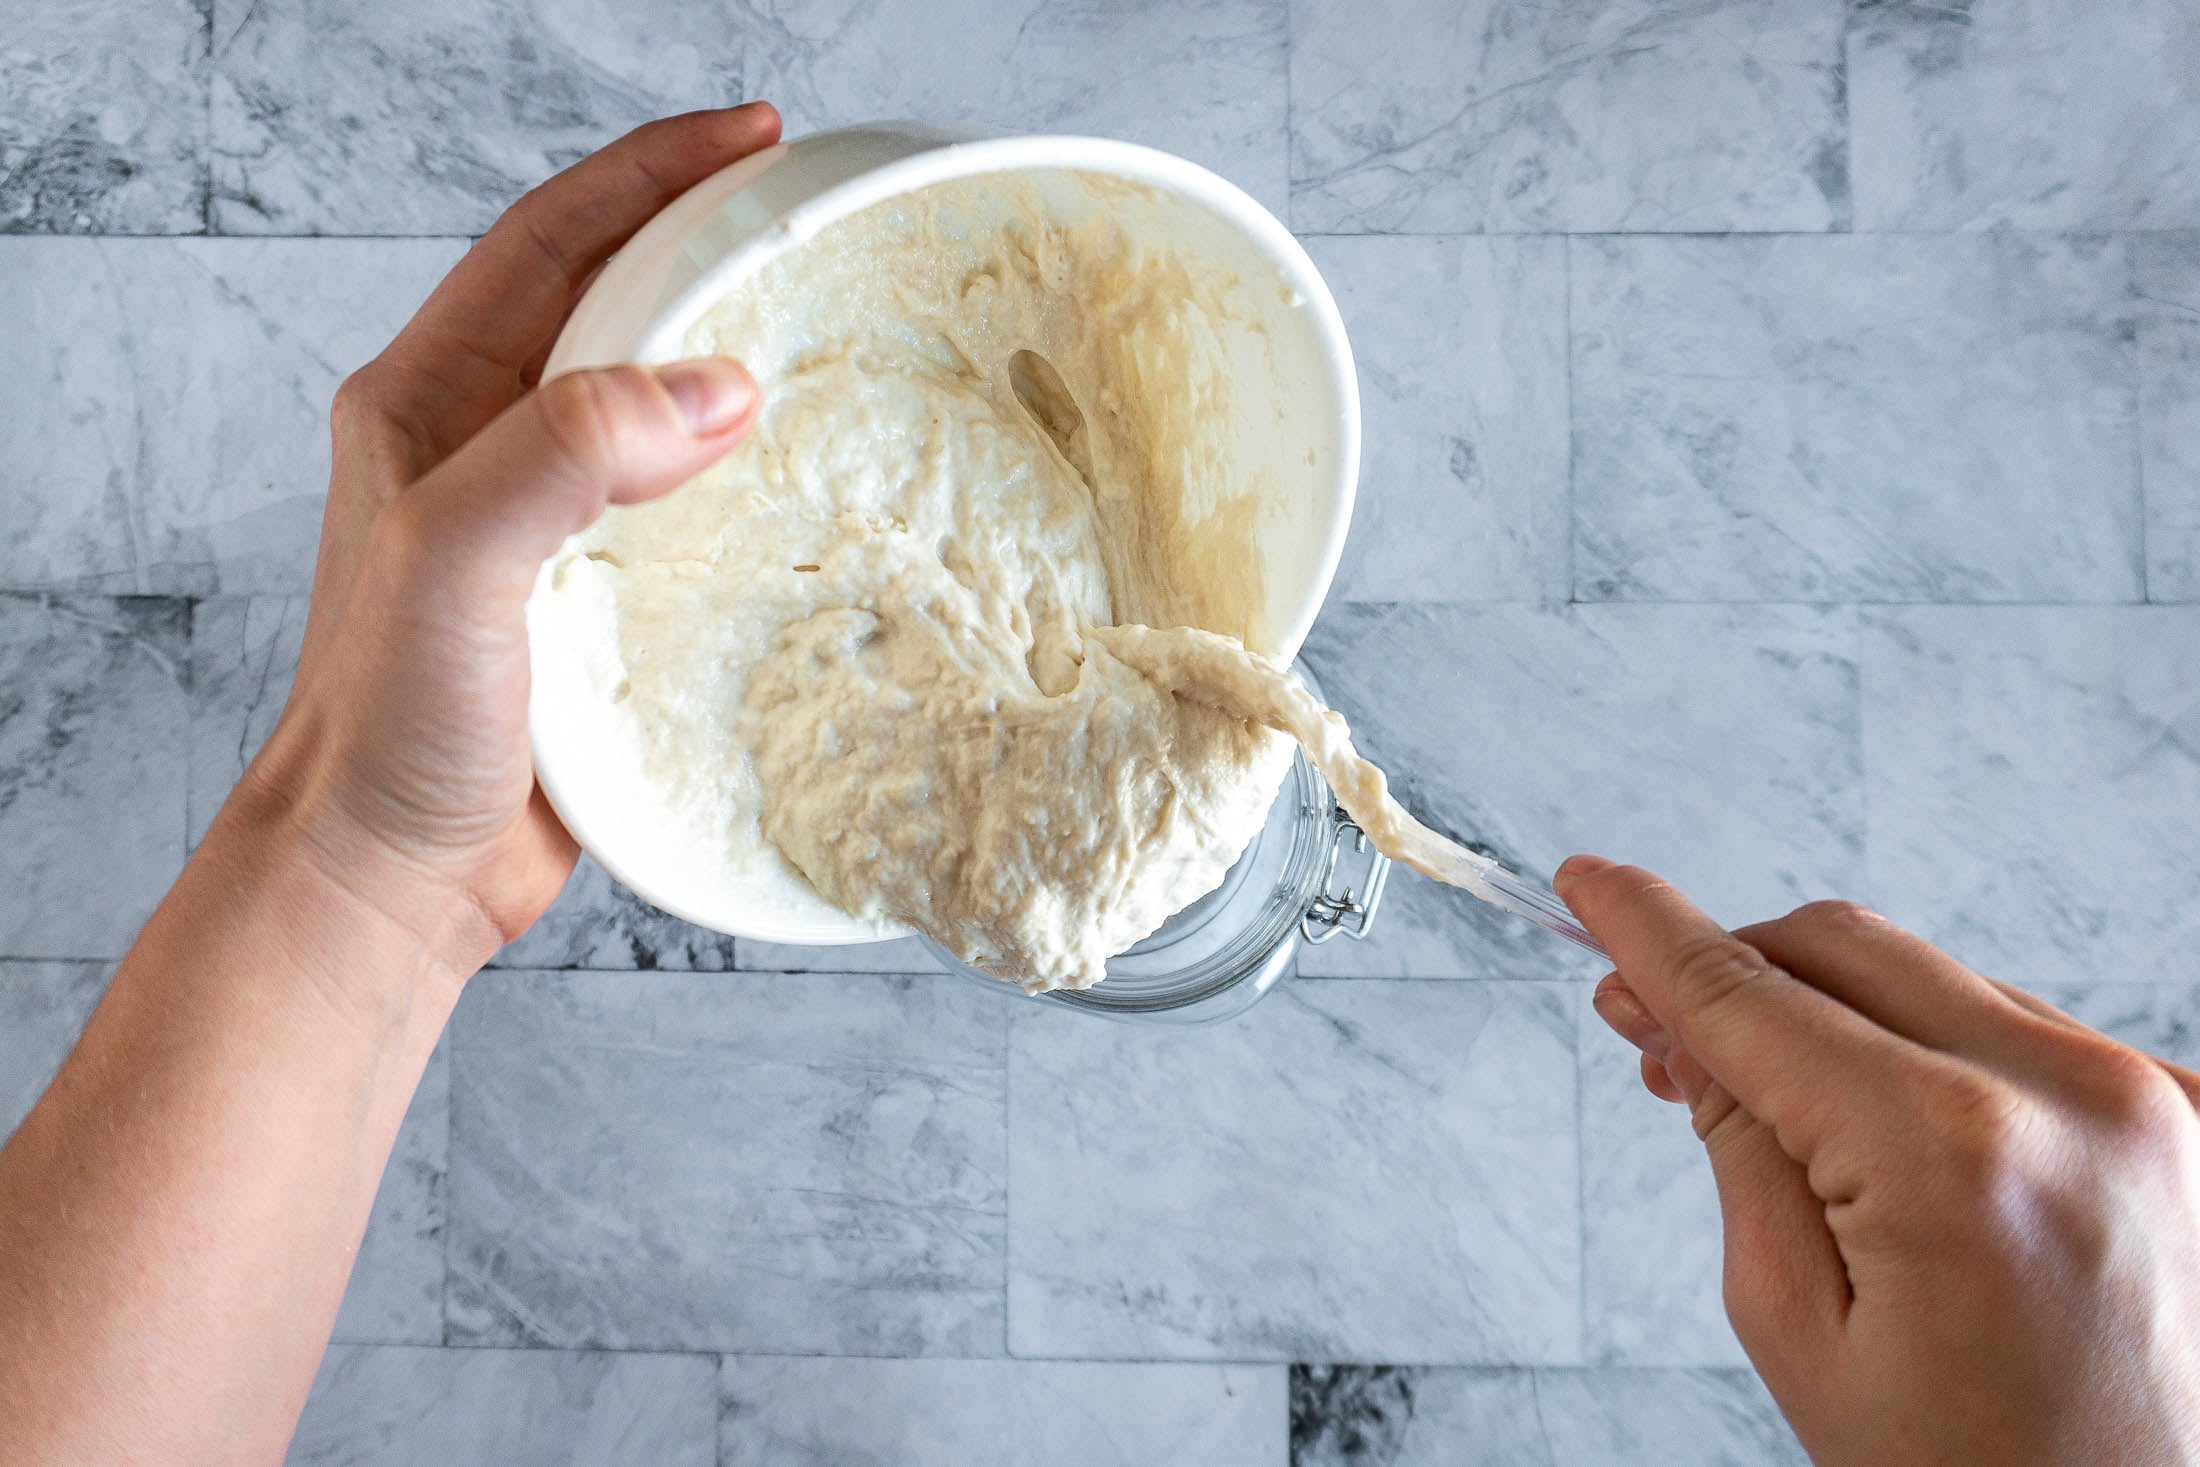
- Step 5: Transfer 50 g of starter to a clean starter jar and feed it by mixing in 50 g warm water until mostly combined, then add 50 g unbleached all purpose flour and stir until completely combined.
- Step 6: See the following section for more information on storage!
Expert Tips
- Start Here! If you’re intimidated by a 7 -10 day sourdough starter, this is a great starting point. You’re going to see activity every day and can start baking by the second day, although the flavor, complexity and leavening power will only improve over time.
- Keep It Clean: Each feeding time transfer your starter to a clean jar or container, add the water to the starter and stir until completely combined before adding the flour. This step is helpful in ensuring the starter is completely distributed and in my experience results in a stronger, faster rise.
- Get into a routine: If you’re a counter keeper, try to always feed at the same time daily e.g., if you feed at 8am, feed again at 8am each day. I like to feed my babies while my morning coffee is brewing. If they’re in the fridge, I like to keep them front and center and feed them each Sunday!
- Let it breathe: Keep your starter in a non-airtight, breathable container. If using a mason jar, simply set the flat lid on top of the jar and spin on the ring only enough to keep the flat lid in place.
How To Use Sourdough Starter
- About 6 hours before you’re ready to bake, feed your starter according to the recipe with a 1:1:1 (starter:water:flour) ratio and set it in a warm place for it to activate.
- Once your starter has doubled in volume, follow your favorite sourdough recipe.
Float test:
There’s a lot of talk about the float test on the internet. Some swear that it’s a great way to test the viability of your starter for use in bread making, others say it doesn’t matter.
Personally, I think it makes sense that once the yeast has activated and started to create bubbles in the starter, the starter will float due to added buoyancy from the trapped air. That said, I do not use it.
To do the float test, simply drop a small amount of sourdough starter in a glass of water, if it floats, it’s all good! If it doesn’t float, might be time to feed your starter!
Quick Sourdough Starter FAQs
Yes you can use commercial yeast in a sourdough starter! Adding a small amount of yeast jumpstarts fermentation by introducing a predictable population of yeast right away. This speeds up the early bubbling and rising you normally wait days to see.
However, commercial yeast doesn't replace the wild yeast and bacteria that make sourdough unique. Over time, your local wild microbes will take over as long as you continue feeding the starter regularly.
If your sourdough starter is sluggish, it may need to run through a sourdough starter revival, but if you’re impatient, you can absolutely use yeast. To boost a sluggish starter, simply add a small amount of yeast (a scant ⅛ teaspoon) during your next feed. This bumps up fermentation fast so you can get back to baking!
Adding yeast significantly speeds up the rise, you'll see bubbling and expansion within hours instead of days. This can help your first loaves rise more predictably.
– Faster rise = milder flavor. At first. A yeasted starter hasn't had time to fully develop the tangy notes associated with long-fermented sourdough.
– Over time, the flavor deepens. As you continue feeding the starter, the wild yeast and lactic acid bacteria gradually overtake the added commercial yeast. Within a short time, it behaves and tastes like a traditional sourdough starter.
If your goal is a fast, dependable starter with true sourdough character, starting your journey with a quick starter is a great option.
Both types work, but I prefer active dry yeast when making sourdough starter. In my testing, active dry yeast performed better as it rehydrates more gradually, giving the starter a gentler, more controlled fermentation.
Absolutely! Once your quick sourdough starter has been fed and doubled or so, you can use it in any sourdough recipe calling for active starter and you can use the discard in any sourdough discard recipe!
It will continue to increase in strength as it ages, like any sourdough starter.
Sourdough Starter Feeding And Storage
This all depends on your baking proclivities!
Daily To Bi-Weekly Baker
If you plan on baking daily or few times a week, you’ll want to keep your starter at room temperature. This will keep it warm and active whenever you’re ready for it!
To keep your starter alive, you’ll need to feed it every 12-24 hours. You can play with the feeding schedule a bit, once you get to know your starter and how hungry it is. The starter should be fed after the culture doubles in size and begins to deflate, but doesn’t completely flatten.
You’ll know your starter has begun to deflate by the slide marks left on your jar.
Weekly Or Less Frequent Baker
Not a huge baker? Don’t have a lot of time to devote to the sourdough? Don’t let this deter you. You can bake beautiful sourdough bread as frequently or infrequently as you like.
If you’re an infrequent baker, store your sourdough starter in the fridge! This slows down the fermentation speed considerably and allows you to feed your sourdough only once a week. Due to the length of time between feeds, the refrigerated starter may have hooch forming on the top, this is totally fine, stir it in and feed as required.
If keeping your starter in the fridge, simply remove it from the fridge, stir and feed, and rest for about 12 hours, or until doubled in volume, before baking.

Starter Vs. Discard
They both contain the same ingredients, and come from the same place, so what’s the difference?
Starter is fed and active sourdough starter, while discard is unfed and inactive sourdough starter. Starter is generally used 6-8 hours after a feeding when it’s bubbly and at its most active. Discard is either harvested when your starter is hungry, before it’s fed again or is separated from the starter during a feed as the “discard” portion, and saved for future recipes.
Starter that has at least doubled in size and is active can leaven bread, while a nearly inactive discard cannot. Discard can, however, be used in recipes that use a secondary leavening agent, like baking soda, baking powder or yeast.
Master Your Sourdough Starter In 5 Days!
From Confused To Confident.
Find success with 5 simple, actionable secrets delivered to you. No more guessing games – just clear, proven steps to a thriving starter.
Using Sourdough Discard
Discard can be used in many recipes, sweet or savoury. The fermented discard will add a layer of flavor and tenderness that a base recipe cannot achieve. Discard can also be used to start ANOTHER sourdough starter – this is great for gifting, starting a second starter with a different flour (and therefore, different flavour), or storing longer term if you’re particularly fond of your starter.
Discard can be used immediately, or kept at room temperature for approximately 24 hours, or stored in the fridge in an airtight container for up to 7 days before use.
Use Discard In Any Recipe
Your sourdough discard can also be worked into nearly any recipe. It just requires a bit of math. (I know… SORRY!)
- Know your starter’s hydration. This is easy if you’re following my quick sourdough starter recipe, my hydration is 100%.
- Weigh your discard. Let’s use 100g as an example. If your 100g discard is 100% hydration, that means it’s made up of 50g flour and 50g water.
- Adjust your recipe. Subtract 50g from the total flour required and 50g from the total water required, then add the 100g discard!
If Your Recipe Uses Cups Instead of Grams:
The math is less accurate but should still work for most recipes. Check out this handy dandy chart over at King Arthur Flour.
Using this chart, we know that 1 cup of all-purpose flour = 120g and 1 cup of water = 227g. So 50g of flour is approximately 1/3 cup, and 50g of water is about 3 1/2 tablespoons. Reduce your recipe by 1/3 cup flour and 3 1/2 tablespoons water.
What’s Hooch?
No, we’re not talking about that relative brewing moonshine in the guest bathtub! We’re talking sourdough hooch!
Sourdough starters release a liquid while they’re eating away at the fresh flour you’ve fed them. This alcohol is given off by the yeast as it ferments. Hooch can range in color from clear to dark grey, and generally darkens more as it’s left longer.
Repeat after me “hooch is not bad!” Hooch is a sign that your quick sourdough starter is hungry! If you see your starter consistently giving off hooch, it’s time to adjust your feeding schedule.
Now, what do you do with the hooch? Some pour it off, some stir it in. I personally stir it in, this helps me keep my hydration levels consistent and can add a bit more tang to the starter.
Is My Starter Healthy?
To determine the health of your starter, first start by spending some time with it! Use your senses:
Smell:
Your starter will have a scent. This is normal! We are growing a community of yeast and bacteria, here. It’s gonna smell, and the smell isn’t necessarily indicative of the health of your starter as much as the types of yeasts growing in it.
These scents are normal:
- Fed starter:
- fruity
- yeasty
- cheesy
- overripe fruit
- Hungry starter:
- vinegar
- wine
- nail polish remover
- gym socks
Your starter may smell strongly, but it shouldn’t be offensive. If the starter smells like rotting meat or otherwise completely awful, it’s time to start over.
Appearance:
A happy starter will look different at different times of it’s feeding cycle.
- Fed starter:
- the starter will be thick, like peanut butter
- Active starter:
- dotted with large and small bubbles throughout
- domed on the surface
- double in volume within 8-12 hours
- Hungry starter:
- deflated
- thinner consistency than a freshly fed starter
- may have a darkish liquid (hooch) on top
- slide marks visible on the jar
Has My Starter Gone Bad?
There are only a few things that can go wrong with your starter. Here are the two most common:
Bad bacteria taking up residence:
Sometimes, the bad bacteria overwhelm the good bacteria and create a hostile environment! You’ll know this has happened to your starter when you see a faint orange or pink streak on the surface. Or actual fuzzy mold forms on top. Or it smells so foul you don’t think you could handle cooking with it.
In either case, it’s time to start fresh and either create another starter, revive from discard, or ask a friend for some starter.
Death of the yeast:
A strong starter is pretty hard to kill – even though I managed to kill mine, he got lost in the back of the fridge for 3 months. Yikes. Neglect can cause your wild yeast to die off, making it easier to be invaded by bad bacteria. Lack of feeding, or temperatures over 90f can have adverse effects on your starter.
If the starter is dead, you will likely have a large amount of dark hooch on the top, and the starter will not activate after feedings. It’s time to start over!
November 2021 update – I just revived a sourdough starter that had gone unfed in the fridge for over 4 months!
December 2025 update – That revived starter is still going strong!
Master Your Sourdough Starter In 5 Days!
From Confused To Confident.
Find success with 5 simple, actionable secrets delivered to you. No more guessing games – just clear, proven steps to a thriving starter.
Easy Sourdough Starter Recipes


If you tried this Quick Sourdough Starter recipe or any other recipe on my blog, please leave a 🌟 star rating and let me know how it went in the comments below. Thanks for visiting!
📖 Printable Recipe

Quick Sourdough Starter With Yeast
Ingredients
Day 1:
- 100 g filtered water
- 100 g unbleached all purpose flour
- 1/2 teaspoon active dry yeast
Day 2:
- 50 g filtered water
- 50 g unbleached all purpose flour
Day 3 Onward:
- 50 g filtered water
- 50 g unbleached all purpose flour
Instructions
Day 1:
- In a large, non-metallic container, mix 100g unbleached all purpose flour, 100g room temperature water, and 1/2 teaspoon of active dry yeast until completely combined. No need to proof the yeast.
- Either cover the container with a clean kitchen towel or transfer it to a glass or plastic container with at least 3 times the volume of the starter - it will grow! Do not seal airtight - your starter needs to breath.
- Set the starter in a warm spot, free of temperature swings, and drafts to ferment for 18 hours.
Day 2:
- After 18 hours, stir down the bubbles and transfer 50 g of starter to a clean starter jar and feed it by mixing in 50 g warm water until mostly combined, then add 50 g unbleached all purpose flour and stir until completely combined.You can save any amount of starter you’d like, but just remember it must be fed 1:1:1 ratio of starter:water:flour to keep your starter at 100% hydration. discard all but 50 g of starter and feed it with 50 g room temperature water and 50 g unbleached all purpose flour. If you notice a layer of liquid (hooch) on the bottom of the jar, stir this in before discarding.
- Once the fed starter is fed, bubbly, and doubled in volume it's ready to use! This will take about 6-8 hours depending on your kitchen and starter.
Day 3 Onward:
- Each feed transfer 50 g of starter to a clean starter jar and feed it by mixing in 50 g warm water until mostly combined, then add 50 g unbleached all purpose flour and stir until completely combined. You can save any amount of starter you'd like, but just remember it must be fed 1:1:1 ratio of starter:water:flour to keep your starter at 100% hydration.
- See storage directions below!


I kept it in the fridge for 1 week. Fed it 1:1 flour and water and it hasn’t doubled. I tried leaving it in the counter and feeding it again about 12 hours later but it still won’t double. Any tips or do I need to start over?
Sorry for the delay, soccer tournament weekend!
It may take a little time to reactivate. Did you have any luck? Did you happen to watch the video I linked in the post about reviving the starter?
I am on day four my starter is doing awesome growing like a weed. I did not throw out on day two I added flower water starter at a one to one to one ratio. I put it in three jars. I am always running out of starter, especially when I make bagels. I’m a little confused on the reason to discard other than getting too much starter. I keep it in the fridge and pull it out, let it warm up and feed it when I bake. Help I may have done this wrong. I love your website. It has helped me the most because the more I read the more I get confused. Blessings.
Hey Claire, yup, the reason we discard is to ensure that we aren’t overrun with starter, as it grows exponentially assuming you aren’t using it! For example; day 1 – 50g, day 2 – 150g, day 3 – 450g, day 4 – 1350g, day 5 – 4050g
The cool thing with sourdough is that if it works for you, you aren’t doing it wrong!
Really appreciate how clear your instructions are and NOT leaving anything out, like we should know some of this process. Also that its not a huge amount of starter. I made my starter yesterday in a really neat jar…a special one with little bubbles of glass on outside and then I made a colorful cover/hat for her….bigger that jar opening…by a couple of inches…and the square it up and stitched the corners down with colorful buttons…just having fun….named her…..she was ready to be fed this an and hope we are enjoying a little loaf of bread later…thanks for your blog! Off to explore more of it..
Thank you!! My starters have never been that strong. I started this a couple hours ago in a jar that was 3/4 times bigger than the starter and it’s nearly at the top already with hundreds of bubbles.
This was a most excellent tutorial. The pictures of the process were fantastic. I can actually do this and will now start.
Thank you so much for your recipe and instructions, Been looking for awhile for a good starter recipe and I have found it, with clear How to do instructions. Thank you so much : )
So happy to hear they were helpful Sharon!
Hi. Thank you for sharing your recipe. I am super new and on day 6 of my starter. I have been saving the discard and decided I was ready to bake. So I re-fed the discard Ans now have a whole bunch of it but I’m unsure what to do with it. I had not looked at your recipes and now realize I have way too much! Good problem ti have I guess?
Question is. What do I do with it all?? Toss or refrigerate again? Some people told me you cannot use discard till after day 10?? I’m so confused 😩. Thank you
Sourdough has a steep learning curve, so don’t feel too bad about being confused. Generally, people recommend not to use discard until day 10 because by that point, the good yeasts and bacteria have overtaken the less desirable microbes, I used mine straight away because I used commercial yeast to kick start my starter wayyyy back when I started it a few years ago – I felt that it was properly inoculated and could be used safely – that’s a personal choice, though.
I have had the problem of too much discard, so I wrote a couple articles on how to use discard and how to store discard. If you feel uneasy about using the discard in recipes, it’s best to get rid of it. Keep the discard from day 10 onwards and then you don’t have an ick! While your starter is a baby I recommend only keeping about 50g starter and feeding it 50g water/50g flour, or even less. You could even do 25g:25g:25g until its reliably doubling within 8-12 hours.
Hope that helps!
@Ally, thank you so much for your quick reply! I love how easy and simple your instructions are. But going down the rabbit hole of reading more to learn as I prepare to bake I got so confused. Makes sense. I started like you with commercial yeast (didn’t know you could do it any other way haha). I’m super excited to start baking some of your recipes!! 😊
No problem at all!
That rabbit hole is deep… and wide. HA! Every time I think I know everything there is to know, I get knocked back a peg or two. The one good thing with sourdough is that while the first few iterations may flop, it doesn’t mean they aren’t at least edible in some way – breadcrumbs, croutons, etc. My chickens have even gotten a few sideways loaves haha.
My best advice is stick with it. It will click one day, and you’ll develop your own baking style and routine, it will be awesome. My same day sourdough recipe is a nice one because it doesn’t take 3 days. I am very into my rustic sourdough right now – it has whole wheat and uses an autolyse process, which isn’t complicated, but might be one to circle back to when you’re ready.
Good luck and reach out if you need any help, I’ll get back to you!
Can I use the same amount of rye flour with the same amount of water? Will it work?
I have a rye sourdough starter recipe!
Hi Ally,
Late morning, I started my starter and it has almost tripled in under 8 hours. If I want to make sourdough dinner rolls in two days (Thanksgiving), do I need to wait the 24 hrs before I separate the discard? Can I separate out 50 grams and feed it again sooner? Thank you.
Hey Marilynn, if the starter has tripled and not deflated, you can use it as starter, if it has started to delfate, I’d feed it again before using it. You can feed it tonight and then again tomorrow morning before making your rolls (assuming you don’t want to stay awake for it to rise!) and you’ll be on your way!
Hi! I’m so glad I found this. I’ve been trying sourdough starter recipes and none of them were taking off! I did this one this morning and it doubled within hours and has now fallen. I just wanted to make sure that’s ok? Thanks!
Hey Stephanie, you bet, this one rises and falls quickly because it’s reactiviating dried yeast, keep on with the feeding schedule as listed and you’ll be baking in no time!
I’m new to sourdough baking. I have been working with my starter for a few weeks and struggling with the thickness and odd activity consistency. This article helped me understand where I’ve been making mistakes (most importantly not using weight instead of volume) as I was measuring 1:1 by volume but leaning a little heavy on leaving starter (not discarding enough). Evidently, starving my starter. Thank you!
If i make this 5pm wednesday and feed it 9am thursday will it be ready to use after around 3hrs?thanks
Hey Saoirse, My guess is that it will be ready – you’ll just want to wait for it to at least double in volume before starting the bread. As the starter continues to age it will become stronger and your bread will improve!
@Ally, thank you so much!
Hi, I have been trying to get a starter up and working. I will have bubbling after 24 hours but after the first feeding it does nothing and the bubbles do not return. I do get the liquid either on top or beneath and have tried pouring it off or mixing it in. What am I doing wrong?
You’re not doing anything wrong! Sourdough starters are picky critters!
So to clarify you’re feeding it every 24 hours and it’s not inflating or deflating at all? There’s no way that you could be missing the rise? or a slight rise? Are you marking the starter jar? Another way to know for sure is to mix it then transfer to a clean jar where the slide marks and rise would be very evident. What are you using as a container?
I prefer a clear, straight sided sourdough starter jar, it makes it easier to see any rise, fall, and easier to clean.
The next question is going to be what is the temperature in your kitchen? It’s summer here, so my kitchen is much warmer than usual, and if yours is too, then chances are your starter could be rising faster than you expect it to, and you could be missing the rise – for example if you’re feeding before work and not home for 3-6 hours after the feeding. IF it is really hot in your kitchen, the microbes are much more active and your starter may require more than one feeding a day – which could be very possible if you’re seeing hooch on your starter.
What is the consistency of your starter? After you feed it it should be thick and sticky almost like peanut butter, when hungry it should be thinner and
easier to handle. If that’s not the case, are you making sure to weigh your ingredients each time you feed the starter?
That was a lot of questions, sorry, but it will make it easier to troubleshoot – we will get this figured out!
After the first 24 hours my starter didn’t really seem any bigger and got a hard shell over the whole thing? I had it in a bowl and had a towel around it. Did I do something wrong??
Hey Morgan, I don’t think you did anything wrong! It’s hard to measure rise in a bowl, so I do recommend using a straight sided container for your starter, as for the shell, because the towel allows airflow, the top layer just dried out. You can peel off the top layer and salvage the stuff underneath – after the next feed, put a less porus cover over the starter. I like to use mason jars and rest the jar lid on top, or a deli take out container that’s not airtight and place the lid on top. It’s important that the cover isn’t airtight, but prevents some airflow. Hope that helps!
@Ally, I had the same thing happen and I mixed the shell in. It absorbed right in and kept on trucking. Is there a caution about doing that often? Thanks I really enjoyed this tutorial and I agree with others about being confused before reading your explanation. I am on day 2 but I started mine before I found you. So no yeast but it a growing and bubbling way more than I expected for the first day. My suspicion is that there’s a lot of yeast in the air because I’ve been baking bread the past few days and resting it over night on the counter. Thanks for taking the time to explain this process!!
Hi Tatum,
No, I can’t see it being a problem to mix it in! It’s probably easier to just discard it, though – much harder to mix a semi solid blob lol. I’m glad you enjoyed the read <3 Keep me posted on your starter's progress - I'm interested to hear how it goes because I'm pretty sure you're right about the yeast rich environment you started it in!