What Is Autolyse?
As an Amazon Associate I earn from qualifying purchases.
The absolute shortest answer to the question of “What is autolyse?” is that it’s a simple process in which the flour and water portions of a bread recipe are combined and rested for a time before the remainder of the ingredients are added and the recipe is followed.
I know, you’re thinking why am I reading an entire article about mixing water and flour together and waiting before I finish making my sourdough? Well, because you’re like me, a sucker for the deeper knowledge, and this process is a really interesting one.
This guide to autolyse is dedicated to deeper knowledge.

Jump to:
Let’s Rewind.
In the 60’s and 70’s, a renowned French baking expert, Professor Raymond Calvel noticed a change in French bread.
Spurred by the mechanization and modernization of bakeries, French bread was losing its charm, the characteristic flavor and crumb that made it French bread! Bakeries were experiencing a revolution of sorts, adding kneading machines and shaping machines, developing intensified kneading techniques, and experimenting with yeast loads in bread to increase productivity.
In bread, higher productivity is often fraught with lesser quality, and this was the case in France. Calvel called the bread lifeless and described the crumb as chalky and pale white, which was in stark contrast to traditional French bread. This new age bread was more like bland sandwich bread, instead of its rustic ancestor with creamy white and lively crumb.
Calvel, who extensively researched breadmaking techniques, published an article in 1974 detailing the process and benefits of autolyse. These methods are still in use today. He believed that this method would protect the dough from over-oxidization and loss of color in the crumb.
DID YOU KNOW? Autolyse is pronounced ah-tow-lease when referring to bread baking instead of ah-tow-lice because it’s referencing the French noun autolyse.

What Is Autolyse – The Long Answer
Autolyse, also called autolysis, was developed as a bridge between dough development and low energy kneading. It proved that modern bakeries (and us, as home bakers) could produce quality bread quickly if they used the right techniques.
During the autolysis process, the baker combines water and flour, in whole or in part, of the recipe and allows those ingredients to rest for a period of time, usually, it’s 20-60 minutes.
Autolysis can be thought of as a jump start to dough development.
Dough Development
Dough development is a broad, loosely defined term, and although the term is intended to capture the changes that occur as soon as the ingredients are combined, the term misses out on a lot of nuances.
The physical changes in the dough are a direct result of the formation of gluten, which requires both the hydration of the proteins in the flour and mechanical manipulation of the dough itself.
Just throwing all the ingredients in a bowl and mixing until just combined does not a bread make!

Benefits Of Autolyse
Autolysis helps dough development in a number of ways:
Using autolyse as part of your baking process has benefits on dough development, but it also has benefits for the baker as well!
- Water is absorbed by wheat proteins, allowing them to swell and gain mobility. Which starts the process of gluten development.
- Reduces kneading time: By allowing autolysis to start the gluten development, the time you need to spend physically kneading the dough can be significantly reduced, saving time and effort.
- Improved rise and texture: The increased extensibility, or “stretchiness”, of the dough as a result of the autolyse method can lead to better rise during baking and a more desirable, airy texture in the finished bread.
- Enhanced flavor: Autolysis can also impact the flavor of your bread. By reducing oxidation, the process helps to preserve the natural, complex flavors of the flour. The result is a loaf with an enhanced, robust taste that’s sure to please any bread lover.
- Easier handling: The autolyse process can also make the dough easier to handle and shape. This is particularly beneficial for new bakers, who may find a well-developed, pliable dough simpler to work with.
- Softens whole grains: Coarse grains can damage hard-fought gluten bonds. This is particularly beneficial if you’re baking with whole wheat flour or other whole grain flour.
- Reduces oxidization: Oxidation in bread dough occurs during mixing and kneading, where the dough absorbs oxygen, and can bleach the dough, leading to a loss in flavor and a less appealing final product. Reducing oxidization is helpful in maintaining better color, texture, and flavor, which is why many bakers prefer artisan bread.
Autolyse isn’t just a technique for professional bakers – it’s a valuable tool for any home baker looking to elevate their bread baking. So next time you’re getting ready to mix up a loaf of bread, take a few extra minutes to autolyse your dough and observe the results.
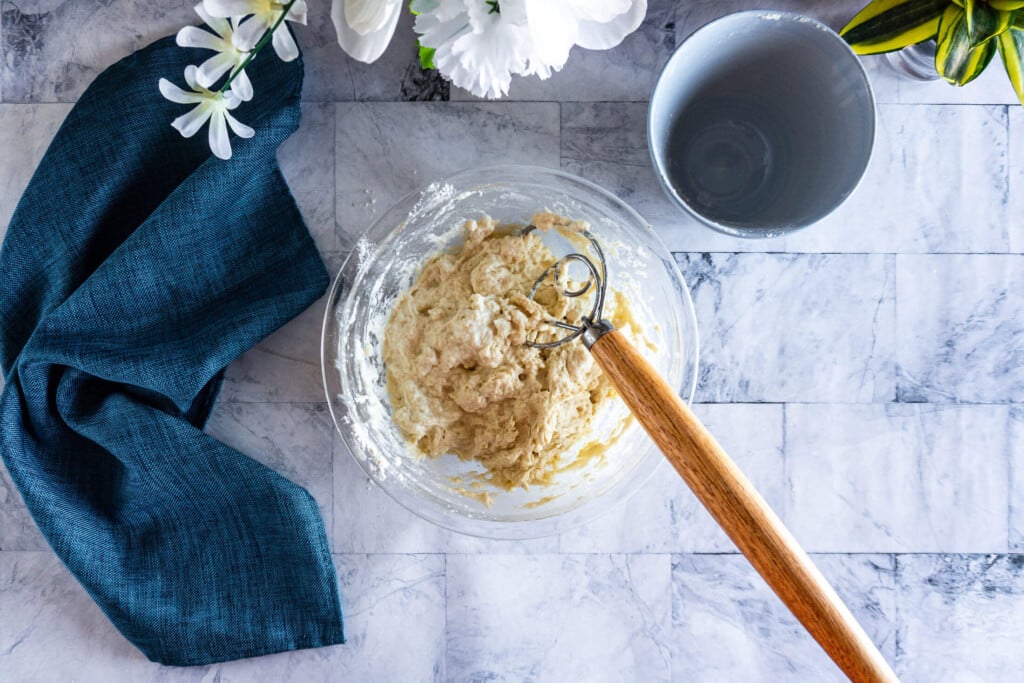
You can see in the photos below, the gummy texture of the dough before autolyse and the smoothness after a 30-minute rest.


Autolyse Vs Bulk Fermentation
Autolyse and bulk fermentation are two key stages in the process of making sourdough bread, each with its unique role.
- Autolyse: This is a process where flour and water are mixed together and left to rest before adding the starter and salt. Autolyse usually spans for 15-60 minutes and allows the flour to fully hydrate and for enzymatic activity to start breaking down the starches and proteins. This results in a dough that’s easier to shape, has better texture, and more complex flavors.
- Bulk Fermentation: During this stage, the yeast and bacteria in the sourdough starter begin to consume the sugars in the dough, producing carbon dioxide gas and ethanol, and developing that characteristic sourdough flavor. The timing for bulk fermentation is highly variable, depending on the temperature, starter vigor, and recipe, but the start time is always the same. The stopwatch starts ticking on the bulk as soon as the yeast (sourdough starter) is added to the dough.
In general, autolyse is a pre-fermentation step that focuses on hydrating the flour and starting enzyme activity for improved dough handling and flavor, while bulk fermentation is the stage where the dough rises and flavor develops as a result of yeast activity.
What Is Fermentolyse?
Yeast can be added to the flour and water mixture during dough autolysis, but the necessary transformation of the ingredients happens without the aid of fermentation. When yeast is added to the autolyse, this is known as fermentolyse.
In general, autolyse is a pre-fermentation step that focuses on hydrating the flour and starting enzyme activity for improved dough handling and flavor, while bulk fermentation is the stage where the dough rises and flavor develops as a result of yeast activity.
Most of my recipes use fermentolyse versus autolyse. If you choose to adapt a recipe to use fermentolyse, just remember that the bulk fermentation time starts with the fermentolyse.
More Sourdough Baking Guides
Tips
- Make sure the water and flour are fully incorporated before walking away and letting the autolyse work its magic – there are few things worse than trying to incorporate half-hydrated flour clumps later on!
- Instead of risking forgetting to add salt, especially if you’re doing a fermentolyse, I like to measure it out while I’m weighing all the other ingredients and sprinkle it right on top of the premixed dough. Then I’m able to tidy up my workspace and not worry I’ve forgotten an important ingredient.
- A longer autolyse generally results in a shorter required mixing time and a more sensitive dough to over-mixing. Though, if you’re hand mixing and using coil folds or stretch and folds, this is less of a concern.

When To Use Autolyse
Autolyse is just one of many tools in the sourdough baking toolbox. It’s an easy way to make your life a little easier and your bread a little tastier, just like cold proofing in the fridge and banneton baskets, but it’s not necessary.
Here are a few times that I’d recommend using autolyse:
- when you have time. If it fits into your schedule, great!
- Bakerpedia recommends using autolyse for a variety of dough types; including whole wheat bread, brioche, croissant, and even white pan bread.
- when your recipe has a high quantity of whole grains.
- when you’re hand mixing.
Recipes That Use Autolyse
When To Avoid Autolyse
There are times that using autolyse doesn’t make sense, and they include:
- recipes with a high percentage of “stretchy” grains, like spelt.
- King Arthur recommends not using autolyse when making rye sourdough, as rye develops gluten differently and it can cause reduced quality.
- when using freshly milled grains.

Incorporating Autolyse Into Your Sourdough Baking
If your recipe, time, and process is a candidate for autolyse, it’s very easy to include the process in your baking.
Step By Step:
- Combine water and flour in a bowl. It might be easier to add flour in a few separate additions, though I usually just add it all and mix it with my dough whisk until completely combined. If it gets too thick using a bowl scraper to turn the dough and press in any dried bits really helps a lot!
- Cover the bowl with a lid, reusable shower cap, or plastic wrap, and allow to rest for 15-60 minutes.
- Fold the starter and salt into the autolysed dough before proceeding with the remainder of the recipe.


Pin This Guide To Sourdough Autolyse!


