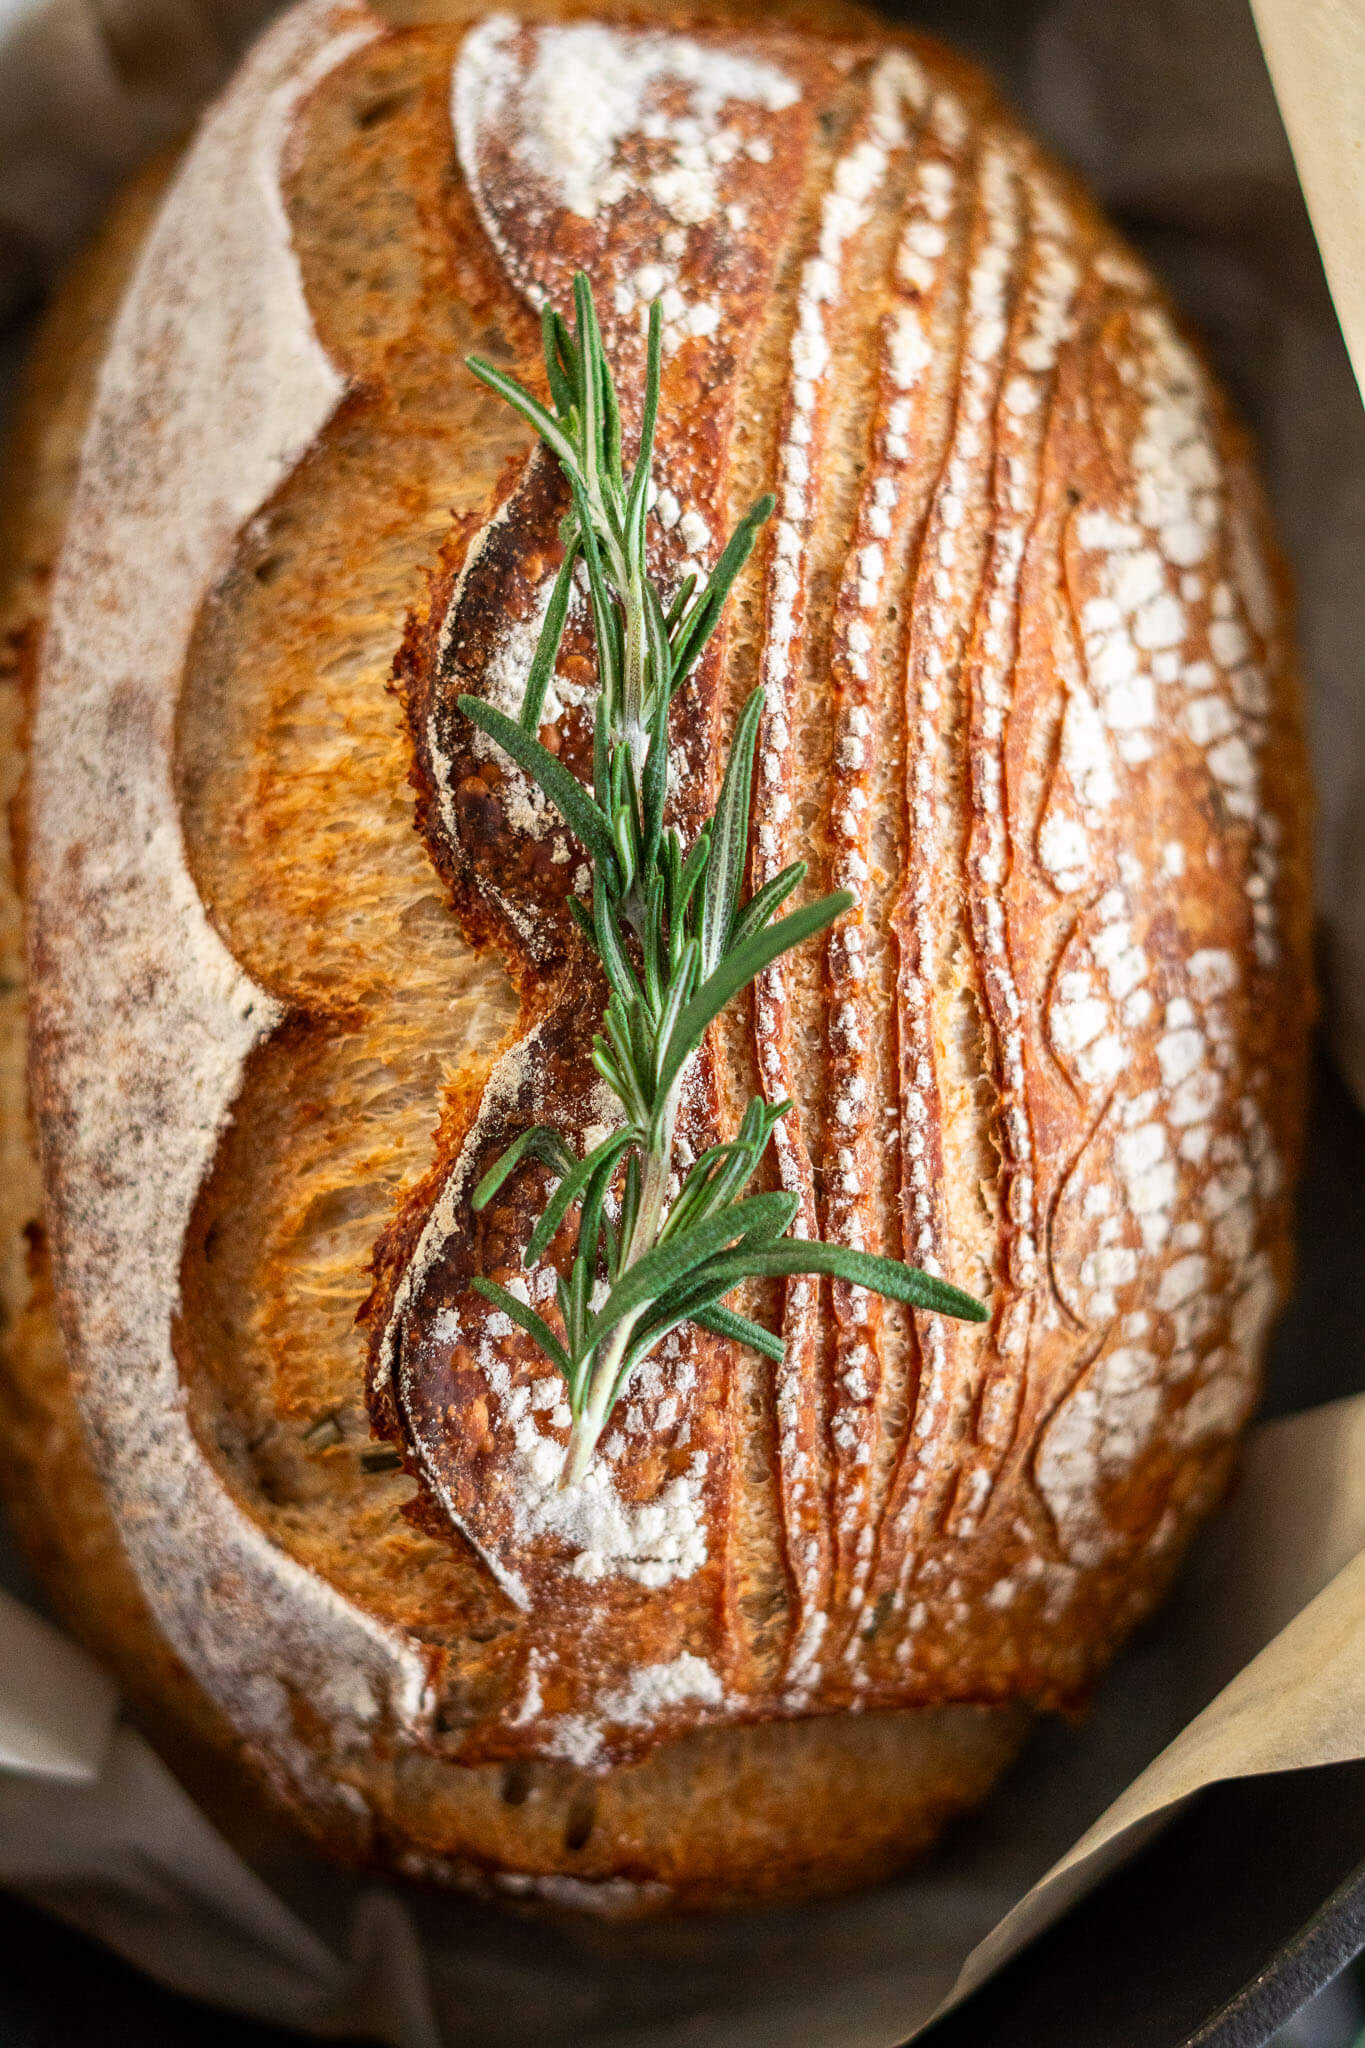
Rosemary Sourdough Bread

This rosemary sourdough bread is a whole wheat and bread flour boule, infused with fresh rosemary and a drizzle of raw honey. It’s slow-fermented with an 18-72 hour cold retard for deep, complex flavor, and baked in a Dutch oven at 450°F for a crackly, golden crust with a chewy, open crumb. If you’ve made sourdough before and want a loaf with real character, this is the one.

Craving The Recipe Details?
What it is: A savory, aromatic sourdough loaf made with whole wheat flour, fresh rosemary, and a touch of honey.
Why you’ll love it: Slow sourdough fermentation develops a gently tangy flavor and a chewy, satisfying texture, while baking gives it a golden crust that’s just as good toasted as it is eaten plain.
How to make it: Autolyse your flours with water, fold in your active starter, honey, rosemary, and salt, then build structure through three sets of stretch and folds. Shape, prove, cold retard in the fridge, and bake in a dutch oven at 450°F for a stunning, bakery-worthy loaf.
There’s something about the combination of earthy rosemary, nutty whole wheat, and a touch of raw honey that just works. It’s got the same satisfying, slow-fermented quality as my fig and brie sourdough or caramelized onion and gouda sourdough. It’s the kind of loaf that makes the house smell like you’ve been doing something important all day.
This is an intermediate sourdough recipe. It uses whole wheat flour (which requires a bit more coaxing than all bread flour) and benefits from a cold retard in the fridge, ideally 18 – 72 hours. The active hands-on time is about 45 minutes spread across the day; the rest is fermentation doing its work. If you’ve made sourdough before and you’re ready to bake something with a little more character, this is the one.
Whether you’re serving it alongside a smoked roast beef or a cross rib roast, dipping into it with a dish of olive oil, or just toasting a thick slice with good butter, this loaf delivers every single time!
This rosemary sourdough bread recipe is dedicated to fresh sprigs.
Jump to:
Key Ingredients

Sourdough Starter: For this recipe, you want to use a fed and active sourdough starter. Your starter should be fed approximately 8 hours before beginning and have at least doubled in size. This recipe assumes a 100% hydration starter (fed at equal parts flour and water by weight).
Rosemary: Fresh rosemary gives the best flavor, the volatile oils that carry that woodsy, pine-like aroma dissipate quickly with heat, so fresh needles hold up better through fermentation and baking than dried. I harvest sprigs from my garden every fall and freeze them whole; frozen rosemary works almost as well as fresh and has saved more than one winter bake. If you only have dried, substitute at 1 scant teaspoon per ½ tablespoon fresh, and expect a slightly more muted, less aromatic result.
Honey: I am using raw, unpasteurized honey straight from my homestead honeybees and it does more work in this recipe than you might expect! Honey acts as a natural dough conditioner and can help improve dough strength and baking performance. Whole wheat flour is nutty and earthy but the bran can carry a slight bitterness, honey's sweetness softens that edge. It's subtle, but you'd notice if it were missing.
Flour: This recipe uses 275g bread flour and 225g whole wheat flour, a 55/45 ratio. Bread flour provides the protein and gluten strength needed for a good rise and open crumb; while the whole wheat adds a nutty, earthy flavor than an all-white loaf. Whole wheat flour absorbs water more slowly than bread flour, which is exactly why we’re using an autolyse.
Is your sourdough starter not rising? Learn how to fix it!
Variations + Substitutions
- Swap all 225g whole wheat flour for additional bread flour for a lighter, more open crumb with a milder flavor. Reduce the autolyse to 20-30 minutes.
- Add 6-8 cloves of coarsely mashed roasted garlic or smoked garlic when you fold in the starter for a deeper, more complex savory loaf.
- Fold in 60-80g of dry sun-dried tomatoes, roughly chopped, during the second set of stretch and folds.
- Add 80-100g of roughly chopped Kalamata or Castelvetrano olives during the second stretch and fold – pat them dry first to keep the dough from getting greasy.
- Swap fresh rosemary for fresh thyme, or use both together at half quantities each. Use rosemary salt in place of the fine sea salt for a subtle extra layer of herby flavor throughout the crumb.
How To Make Rosemary Sourdough Bread
Autolyse:

- Step 1: In a large mixing bowl, combine 340g warm water with 275g bread flour and 225g whole wheat flour and mix until a shaggy dough forms.

- Step 2: Knead the dough with your hands until all the dry bits are incorporated.

Add Sourdough Starter:

- Step 4: Uncover the bowl and spread the dough in the bowl, I just poke it flat with my fingers like I’m making sourdough focaccia.

- Step 5: Spread 100g sourdough starter, 40g honey, 1/2 tablespoons chopped rosemary, and 14g fine sea salt across the surface of the dough.

- Step 6: Using damp hands, grab the dough and gently pull it until the flap is long enough to fold over itself, then fold the flap, rotate the bowl 90 degrees, and repeat 4 times to fold in the starter.
Note: Once the starter, and honey are completely enclosed in by the stretch and folds, stop! Continuing can cause the dough to become sticky. Don’t panic if the dough feels a bit wet or gooey, it will come together with future stretch and folds.

- Step 7: Recover and set aside for 1 hour.
Stretch And Fold:

- Step 8: Using damp hands, grab the dough and gently pull it until the flap is long enough to fold over itself, then fold the flap, rotate the bowl 90 degrees, and repeat 4 times. This is considered one set of stretch and folds. Recover the bowl and let the dough rest for 60 minutes.
Note: If the dough is not coming together after the first set, turn it out onto a lightly floured surface and knead briefly with a little flour until it smooths out, then return it to the bowl and continue the stretch and fold process.

- Step 9: Repeat the stretch and fold process two more times, each followed by a 60 minute rest, for a total of 3 sets.
Bulk Ferment

- Step 10: After your third and final set of stretch and folds, cover the bowl and set aside for 2 hours to finish the bulk ferment.

- Step 11: Observe your dough, at this point, the dough should have risen in the bowl, and have a smooth surface with visible bubbles. If the dough is domed in the bowl it is ready to work with, if the dough is flat it may need more time in the bulk ferment.
Shape:

- Step 12: Uncover the dough and transfer to a work surface or countertop. Gently press and spread the dough into a large rectangle.
- Step 13: Fold up the bottom third of the dough as though you were folding a letter, and then fold the top down.

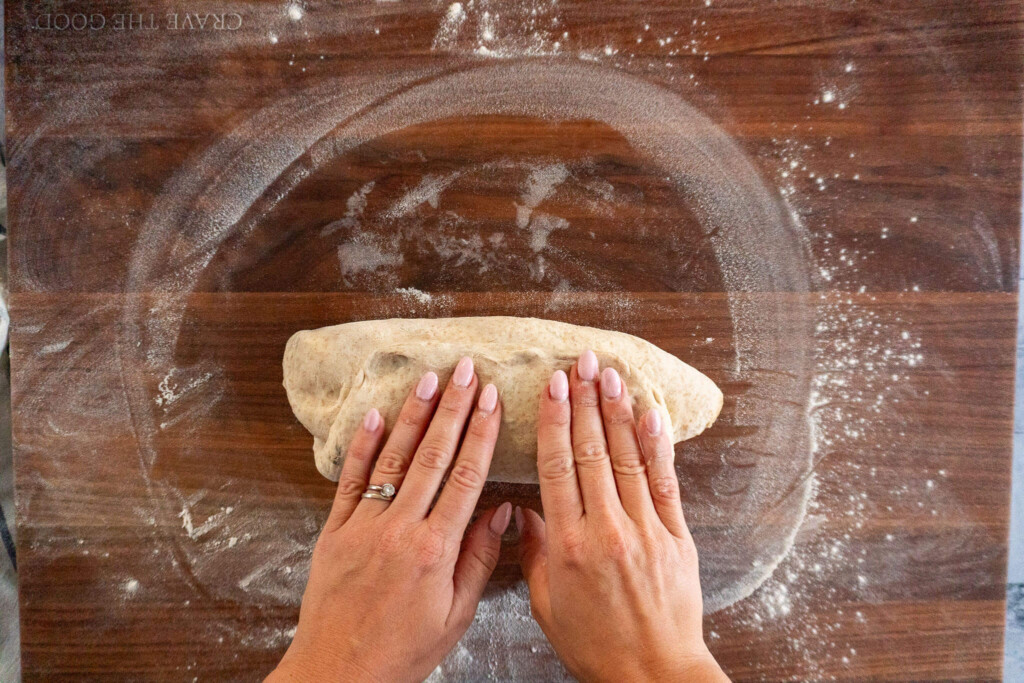
- Step 14: Rotate the dough 90 degrees and roll up into a large log. Cover with a kitchen or tea towel and rest for 30 minutes.

- Step 15: After the rest, pick up the dough with a dough scraper and flip it over, gently press the dough flat then roll it again. Pinch the ends if you’re making a batard or tuck them in if your making a boule.
Dust the dough with rice flour then tuck seam side up into a banneton.
Don’t have a banneton basket? I have a guide on bannetons and banneton alternatives!
Prove + Cold Retard:

- Step 16: Prove the rosemary sourdough loaf in the banneton for 2 hours in a warm place before covering and placing in fridge to cold retard for up to 3 days. If you want to bake it right after proving, you’re welcome to, but the flavor is better after resting in the fridge.
Bake:

- Step 17: Place your dutch oven, cloche, or desired baking dish in the oven and preheat to 450f.
Once the oven is preheated, invert the banneton onto a sheet of parchment paper. Use a lame, sharp knife, or clean razor blade to score the dough, I usually like to make one deep curved slash, but you can get as fancy as you like!
If you don’t have a dutch oven, I have a guide on open baking sourdough bread.

- Step 18: Carefully remove the dutch oven from the oven, and using the parchment paper as a sling, transfer the sourdough loaf from the counter into the dutch oven.

- Step 19: Bake the dough at 450f covered for 30 minutes and uncovered at 450f for 10-15 minutes, or until the loaf is cooked through and the crust is nicely browned. You can test the doneness of the loaf with an instant-read thermometer. Bread is cooked once it reaches 205 – 210 degrees Fahrenheit internal temperature.
Cool:
- Step 20: Remove baked bread from the dutch oven and transfer it to a wire mesh cooling rack to cool completely before slicing. I like to leave it for at least 2 hours before slicing, as slicing too soon can affect the crumb and texture of your loaf.
Expert Tips
- I developed this recipe to have a subtle rosemary flavor, I find it to be more versatile that way. If you’re looking to have more rosemary punch, double the amount of chopped rosemary to 1 tablespoon.
- This recipe has a high proportion of whole grain flour, so we’ll be using a little bit of baking magic called autolyse. This easy process helps to improve the texture of the baked bread and improve gluten structure in the dough.
- I recommend using bread flour in conjunction with whole wheat in this recipe because whole wheat has the tendency to result in dense baked goods while bread flour, with its high protein content, provides a lot of structure. In a pinch, you could sub all of the whole wheat with bread flour.
- Use this recipe as a base! Feel free to add other flavors. I think that smoked garlic, smoked onions, fermented garlic, sun dried tomatoes, or even dehydrated cherry tomatoes would be amazing paired with rosemary this recipe!
- If after the second stretch and fold the dough is looking a little ragged, don’t fret, that can happen when adding honey after autolyse. Turn the dough onto a floured surface and knead it with a little bit of flour till it comes together then continue along with the recipe.
Why This Recipe Works
Autolyse softens whole wheat for better gluten development. Whole wheat flour absorbs more water and can feel dense, but allowing the flour and water to autolyse (rest) before adding salt and starter helps hydrate the bran and strengthens gluten formation, resulting in a lighter, more open loaf. It also gives the bran particles time to soften so they’re less likely to cut through developing gluten strands which is a problem that makes many whole wheat loaves tighter and denser than they need to be.
Honey conditions the dough and softens whole wheat’s bitterness. Raw honey acts as a natural dough conditioner, supporting gluten strength and baking performance. The bran in whole wheat flour can carry a faint bitterness, and honey’s natural sweetness rounds that edge without tipping the loaf into sweet territory. The fructose and glucose in raw honey also promote deeper, more even crust browning through the Maillard reaction, contributing to this loaf’s deeply golden crust.
Stretch and folds gently build structure without overworking the dough. Whole wheat dough can be more fragile once mixed because the bran and germ interfere with gluten development. Using stretch and folds instead of aggressive kneading builds strength incrementally, allowing the gluten network to develop and relax in turns rather than being overworked all at once. Each set tightens the dough a little more, and the rest periods between sets let the gluten align and the fermentation gases distribute evenly.
Cold proofing deepens flavor and improves handling. A fridge ferment slows yeast activity while allowing lactic acid bacteria to keep producing organic acids slowly over many hours. The result is a more complex, pronounced tang than a same-day bake can achieve. The cold also firms the dough significantly, making it easier to score cleanly with a lame and helping it hold its shape in the oven before the crust sets, I find a cold ferment results in better ear development and oven spring!

Rosemary Sourdough Bread FAQs
Fresh rosemary is preferred because the volatile oils that give rosemary its piney, resinous aroma are significantly more potent when the herb is fresh. Dried rosemary can be substituted at a ratio of 1 scant teaspoon per ½ tablespoon of fresh.
One tip from the homestead: if you grow rosemary, harvest and freeze whole sprigs in the fall. Frozen rosemary performs nearly identically to fresh and is far better than dried for bread baking.
Knowing when to stop bulk fermentation is the single most important skill in sourdough baking; go too short and the loaf won’t rise; go too long and the gluten degrades and you get a flat, gummy crumb. Here’s what to look for in this rosemary sourdough specifically:
Volume: The dough should be 50-75% larger than when you started, not necessarily doubled. With whole wheat, a full double is less common because the bran cuts gluten strands and limits expansion.
Surface: Look for a domed, slightly domed top with visible bubbles breaking through the surface. A flat or sunken surface means either more time is needed, or the dough has overfermented.
Jiggle test: Gently shake the bowl. A properly fermented dough jiggles like set Jello, it moves as a single mass with a slight wobble. If the dough doesn’t move, it needs more time, but if it sloshes around, it may be overproofed.
Poke test (optional): Wet a fingertip and poke the dough about ½ inch deep. It should spring back slowly and only partially. If it springs back immediately, the dough is likely underfermented, and doesn’t spring back at all, the dough is likely overfermented.
At a typical room temperature of 70-72°F, this takes approximately 4-6 hours after your final stretch and fold. Cooler kitchens will need longer; warmer kitchens move faster.
Underfermented dough will be dense with poor oven spring. Overfermented dough will be sticky and slack. When in doubt, a slightly underfermented dough is easier to recover from than an overfermented one.
There are a couple of ways to store sourdough bread to help prolong its quality after cutting.
Your loaf can be kept cut side down on a cutting board for up to 12 hours before the crust becomes too crisp. This is our go-to. I recommend transferring it to a bread bag after 12 hours though.
Your sourdough loaf can also be frozen. To freeze sourdough bread, cool the loaf to room temperature, then tightly wrap it in plastic wrap, slide it into a bread bag, seal it up, and stick it in the freezer for 1-2 months. To use after freezing, remove the loaf from the freezer, unwrap, and allow it to come to room temperature (1 -2 hours) before slicing and enjoying.
This dough is approximately 68% hydration when calculated from the flour and water alone (340g water ÷ 500g total flour). However, the 40g of raw honey adds meaningful liquid to the mix, honey is roughly 17-20% water by weight, contributing an additional 7-8g of liquid. That brings the true working hydration closer to 69-70%.
Learn more about sourdough hydration.
Absolutely. A banneton (also called a proofing basket) gives the dough its shape and helps wick away surface moisture during the cold retard, which contributes to better crust development, but it’s not the only way to proof a sourdough loaf. A well-floured bowl lined with a lint-free kitchen towel works beautifully, as does a colander lined with a floured cloth. The key is dusting heavily with rice flour (not all-purpose) wherever the dough will touch the fabric, since rice flour doesn’t absorb moisture the same way and prevents sticking far more reliably.
I have a full guide to banneton alternatives that walks through every option with tips for each, if you’re working without one, start there.
Baker’s Timeline
Day 1:
- 9:00 AM: Combine water, bread flour, and whole wheat flour - autolyse
- 10:00 AM: Add sourdough starter, honey, rosemary, and salt. First stretch and fold
- 11:00 AM: Second stretch and fold
- 12:00 PM: Third stretch and fold, bulk ferment
- 2:00 PM: Bulk ferment complete, pre shape
- 2:30 PM: Final shape, place dough into banneton, beginning of the proof
- 4:30 PM: Proofing complete, place banneton in fridge to cold retard
Day 2:
- 9:00 AM: Place dutch oven into oven and preheat oven
- 9:45 AM: Bake rosemary sourdough bread

Baker’s Percentages
| Ingredient | Percentage |
|---|---|
| Bread Flour | 55% |
| Whole Wheat Flour | 45% |
| Water | 68% |
| Starter | 20% |
| Honey | 8% |
| Salt | 2.8% |
| Rosemary | ~ 0.5% |
Recommended Equipment
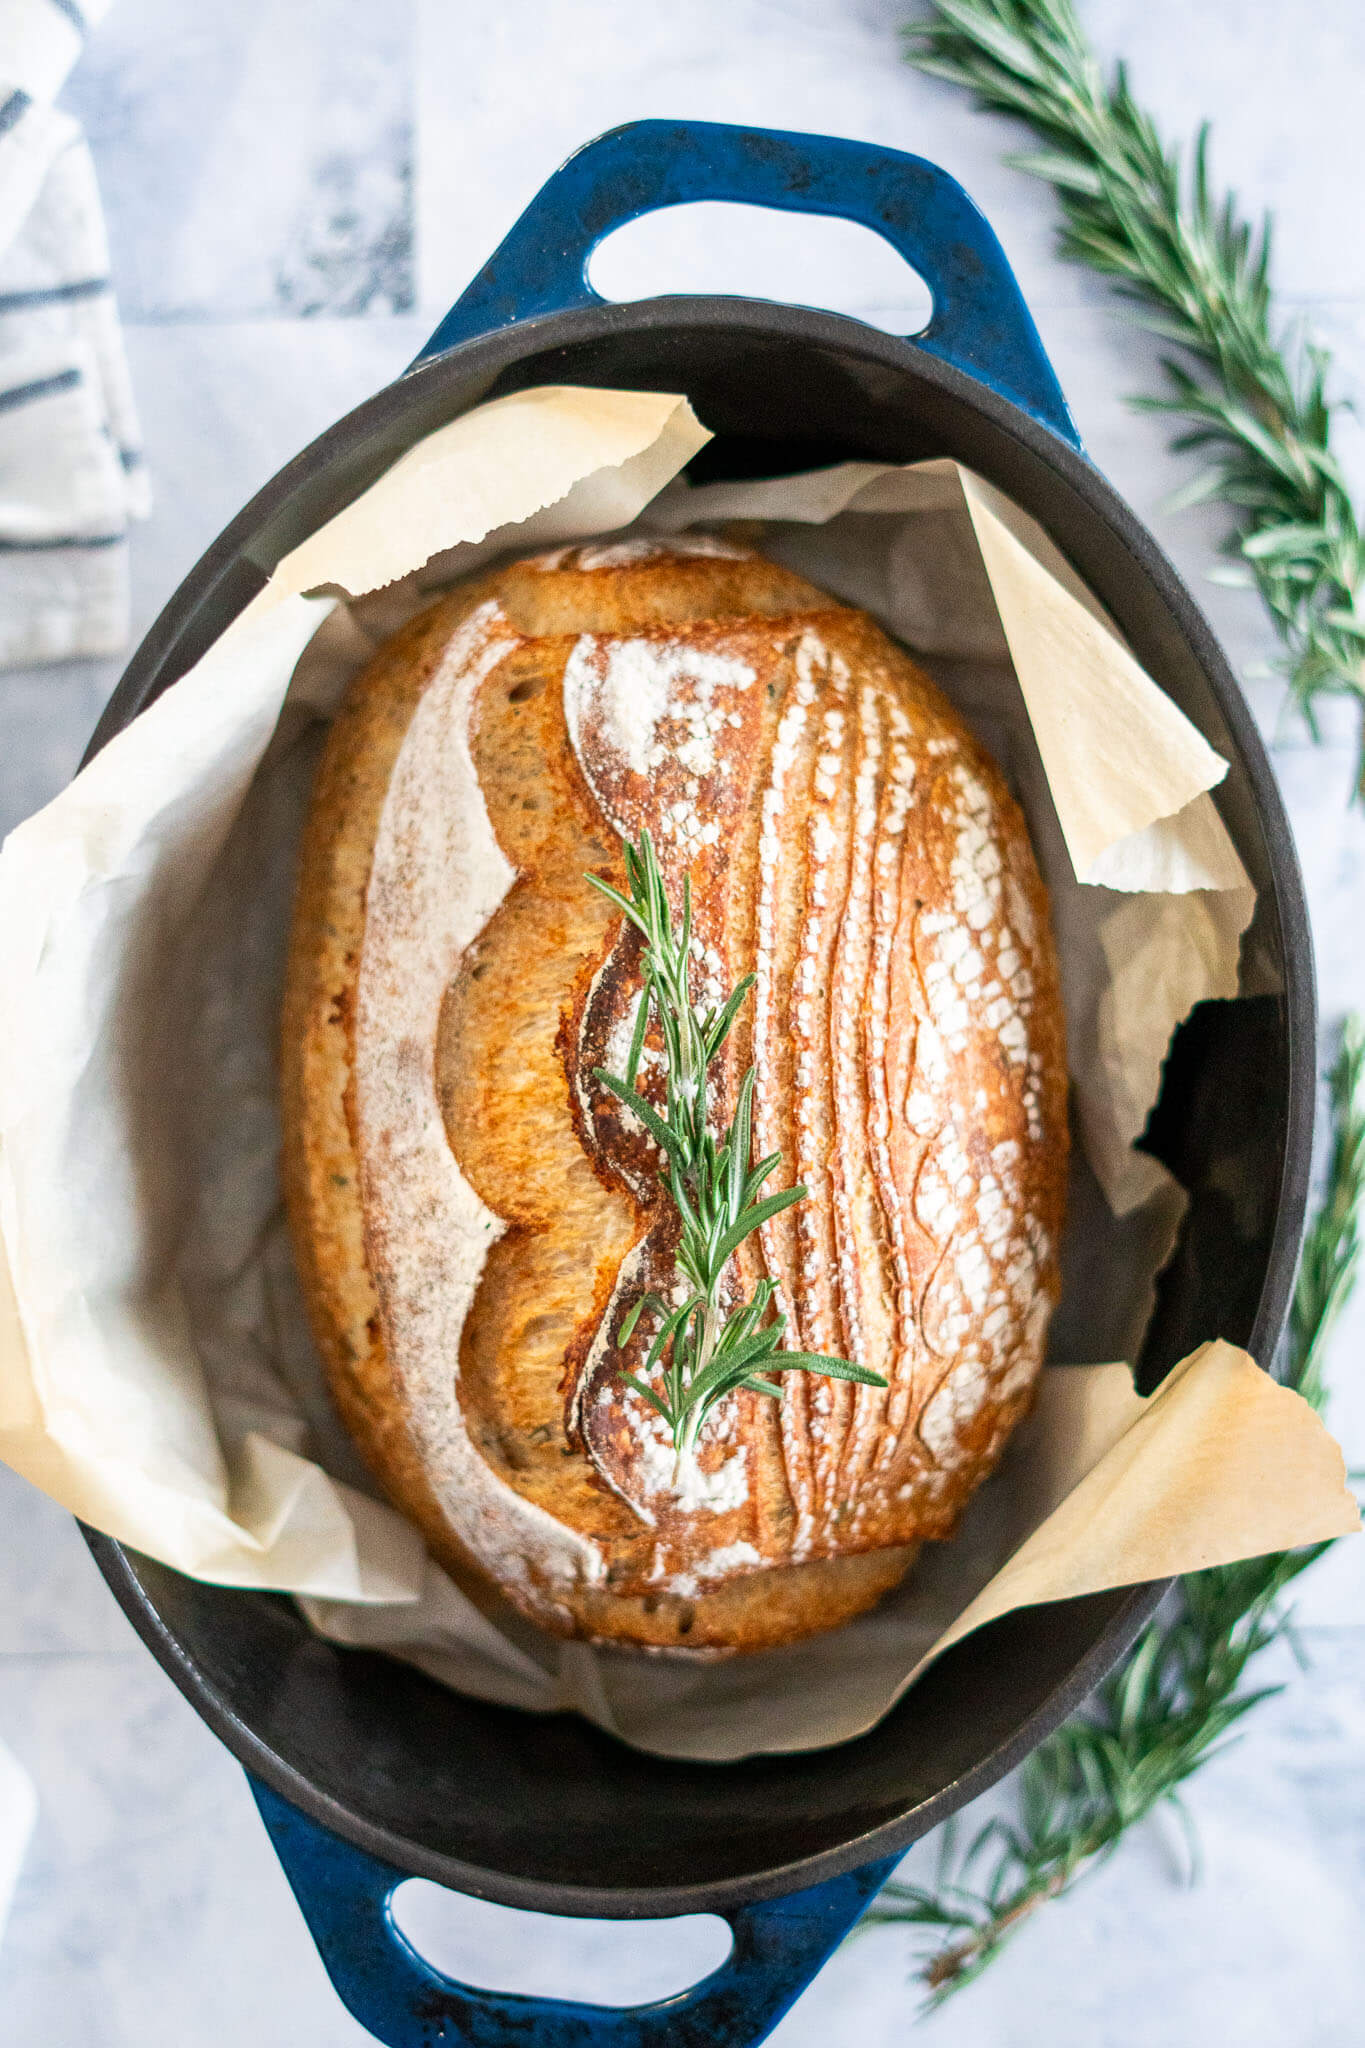
Cast iron dutch oven: Much of the success of this bread depends on having a heavy-ass cast iron dutch oven, as it traps in steam and boosts the oven spring of your sourdough.
The blue one in these photos is a large oval dutch oven that I find perfect for baking batards. As an added bonus, due to the shape, I can fit this dutch oven and a round one in the oven to bake double the volume! If you don’t have a dutch oven, I have a guide on baking sourdough bread without a dutch oven.
Scale: It’s really hard to make sourdough without a scale. Sorry, but them’s the facts! bread baking and bread dough are a bit of a science. A good kitchen scale will treat you well over a huge range of recipes, not just sourdough. Think of homemade bacon!
Try These Sourdough Bread Recipes:


If you tried this Rosemary Sourdough Bread recipe or any other recipe on my blog, please leave a 🌟 star rating and let me know how it went in the comments below. Thanks for visiting!
📖 Printable Recipe
Rosemary Sourdough Bread
Ingredients
- 340 g water, warm
- 275 g bread flour
- 225 g whole wheat flour
- 100 g sourdough starter, active
- 40 g raw honey
- 14 g fine sea salt
- ½ tablespoon fresh rosemary, chopped
Instructions
Autolyse:
- In a large mixing bowl, combine 340g warm water with 275g bread flour and 225g whole wheat flour and mix until a shaggy dough forms. Knead the dough with your hands until all the dry bits are incorporated.
- Cover the bowl and set aside to autolyse for 30 – 60 minutes.
add sourdough starter:
- Uncover the bowl and spread the dough in the bowl, I just poke it flat with my fingers, and spread 100g sourdough starter, 40g honey, 1/2 tablespoons chopped rosemary, and 14g fine sea salt across the surface of the dough.
- Using damp hands, grab the dough and gently pull it until the flap is long enough to fold over itself, then fold the flap, rotate the bowl 90 degrees, and repeat 4 times to fold in the starter. This is considered one set of stretch and folds. Don't panic if the dough feels a bit wet or gooey, it will come together during the later stretch and folds.
- Recover and set aside for 1 hour.
stretch and fold:
- Uncover and perform a set of stretch and folds. Recover and set aside for 1 hour before performing another set of stretch and folds before recovering. If the dough is not coming together after the second set of stretch and folds, turn it out onto a floured surface and knead it with a little bit of flour till it comes together before covering and resting for 1 hour.
- Repeat once more, for a total of 3 sets of stretch and folds. Then cover, and set aside for 2 hours to finish the bulk ferment.
shape:
- Uncover the dough and transfer to a work surface or countertop. Gently press and spread the dough into a large rectangle.
- Fold up the bottom third of the dough as though you were folding a letter, and then fold the top down.
- Rotate the dough 90 degrees and roll up into a large log. Cover with a kitchen or tea towel and rest for 30 minutes.
- After the rest, flip the dough over, gently press the dough flat then roll it again. Pinch the ends if you're making a batard or tuck them in if your making a boule.
- Dust the dough with rice flour then tuck seam side up into a banneton.
prove + cold retard:
- Prove the rosemary sourdough loaf in the banneton for 2 hours before covering and placing in fridge to cold retard for up to 3 days. If you want to bake it right after proving, you're welcome to, but the flavor is better after resting in the fridge.
bake:
- Place your dutch oven, cloche, or desired baking dish in the oven and preheat to 450f.
- Once the oven is preheated, invert the banneton onto a sheet of parchment paper.
- Use a lame, sharp knife, or clean razor blade to score the dough, I usually like to make one deep curved slash, but you can get as fancy as you like!
- Carefully remove the dutch oven from the oven, and using the parchment paper as a sling, transfer the sourdough loaf from the counter into the dutch oven.
- Bake the dough at 450f covered for 30 minutes and uncovered at 450f for 10-15 minutes, or until the loaf is cooked through and the crust is nicely browned. You can test the doneness of the loaf with an instant-read thermometer. Bread is cooked once it reaches 205 – 210 degrees Fahrenheit internal temperature.
cool:
- Remove baked bread from the dutch oven and transfer it to a wire mesh cooling rack to cool completely before slicing. I like to leave it for at least 2 hours before slicing, as slicing too soon can affect the crumb and texture of your loaf.
Notes
Expert Tips
- I developed this recipe to have a subtle rosemary flavor, I find it to be more versatile that way. If you're looking to have more rosemary punch, double the amount of chopped rosemary to 1 tablespoon.
- This recipe has a high proportion of whole grain flour, so we'll be using a little bit of baking magic called autolyse. This easy process helps to improve the texture of the baked bread and improve gluten structure in the dough.
- I recommend using bread flour in conjunction with whole wheat in this recipe because whole wheat has the tendency to result in dense baked goods while bread flour, with its high protein content, provides a lot of structure. In a pinch, you could sub all of the whole wheat with bread flour.
- Use this recipe as a base! Feel free to add other flavors. I think that smoked garlic, smoked onions, fermented garlic, sun dried tomatoes, or even dehydrated cherry tomatoes would be amazing paired with rosemary this recipe!
- If after the second stretch and fold the dough is looking a little ragged, don't fret, that can happen when adding honey after autolyse. Turn the dough onto a floured surface and knead it with a little bit of flour till it comes together then continue along with the recipe.