
Sourdough Focaccia

Golden, pillowy sourdough focaccia with crispy edges, yes please! This easy, no-knead recipe turns simple ingredients into a masterpiece perfect for dipping, sandwiches, or snacking straight off the pan.

I’ve been on a bit of a sourdough tear these past few months. I mean, you might be able to tell by all my sourdough recipes; sourdough pitas, sourdough cinnamon rolls, sourdough chocolate chip cookies, sourdough banana bread, etc…
At this point, I’ve got sourdough starters in both fridges, some dehydrated – ready for emergencies, some tucked away in the freezer. Basically, I’ve got sourdough babies. Everywhere.
And they are hungry! I am going through a 10kg bag of flour weekly. That’s 22lbs for my American friends. My freezer space is dwindling from all the sourdough baking. And while shocking to say, I think I’ve actually had enough sourdough bread for a while.
But those cute little, bubbly babies are so inspiring. I can’t help but look at them and create ideas.
This sourdough focaccia recipe is dedicated to my hungry babies!
Jump to:
Expert Tips
- New to sourdough? Check out my easy, peasy, have you sourdough cooking in 24 hours sourdough starter recipe!
- Focaccia dough is a high hydration dough which means it behaves a lot differently than other dough recipes you're likely used to. It's soft and won't be able to be kneaded in the traditional sense. This is totally normal!
- The proofing times I've used are based on a temperature between 77 and 80f. If your home is cooler, it will defintely take longer. It's spring right now in Alberta, so my home is much cooler, but I keep my dough warm in my Brod + Taylor Bread Proofer.
- This recipe takes a long time. But don’t worry, there’s very little actual hands-on time, it just takes a while. Be prepared to give it 2 days.
- To get the timing just right, immediately before the bulk ferment, transfer the dough to the fridge until 12-15 hours before desired baking time, then remove it from the fridge and allow it to rise for 12 hours at room temperature before carrying on with the final rise and baking. This can help fit the baking process into your schedule better.

Master Your Sourdough Starter In 5 Days!
From Confused To Confident.
Find success with 5 simple, actionable secrets delivered to you. No more guessing games – just clear, proven steps to a thriving starter.

Key Ingredients
Sourdough Starter: Use a fed and active starter. The sourdough starter should be very bubbly and risen at least twice its size since feeding.
Olive Oil: Focaccia needs olive oil. A lot of olive oil. That’s the secret to the beautifully browned and chewy crust. I would avoid extra virgin olive oil, if at all possible, due to its lower smoke point than regular olive oil.

How To Make Sourdough Focaccia
Prepare The Dough:

- In the mixing bowl of a stand mixer, add 1 cup sourdough starter and 2 cups warm water. Stir together until loosely combined – this can be difficult if your starter is dense like mine, but it doesn’t need to be completely dissolved, just reasonably dispersed in the water.

- Add in 5 cups of flour and 2 teaspoons coarse kosher salt, and knead using the dough hook attachment for 5- 7 minutes at the lowest speed. It will take a while to come together, and it will be a wet dough, but it should pull away from the sides of the bowl and stick to the dough hook.
Cover the bowl with plastic wrap and set it aside to rest for 30 minutes.

- Uncover the bowl and perform a series of stretch and folds, this is stretching the dough from one side of the bowl and folding it over the opposite side of the bowl. Rotate the bowl a quarter turn and repeat for a total of 4 folds. Recover the dough, and repeat twice more; 30-minute rest then stretch and fold.

- Either transfer the sourdough focaccia dough to a large bowl or keep in your mixer’s bowl, and recover the bowl and set it aside for bulk fermentation for 12 – 18 hours.

Final Rise:

- Once the dough has risen, add 3 tablespoons of olive oil to a 9 x 13″ baking dish. My baking dish has a textured bottom, so I buttered the base of the bottom before adding oil just to ensure we had no sticking!

- Drizzle some more olive oil (about 1 tablespoon) on top of the focaccia dough, then using oiled hands or an oiled bowl scraper, carefully deflate and turn the dough out of the bowl into the prepared baking dish. I like to use a bowl scraper for this, and just glide it between the sides of the bowl and the dough, it works great.

- Once the dough is in the baking dish, fold in all 4 sides, long sides first, then short, to create a rough rectangular envelope. Flip the focaccia dough over so the seam side is down.

- Cover the baking dish with plastic wrap and set aside to rise for another 2-4 hours, or until doubled and puffy. It took just over 2 hours to double in my house, at 73f.
Once the dough has doubled, preheat oven to 425f.
Bake the Focaccia:

- Bake the focaccia at 425f for 20-25 minutes or until golden brown.
- Cool on a wire rack for at least 15-20 minutes before slicing. Garnish with fresh thyme and a bit more flaked salt if desired.
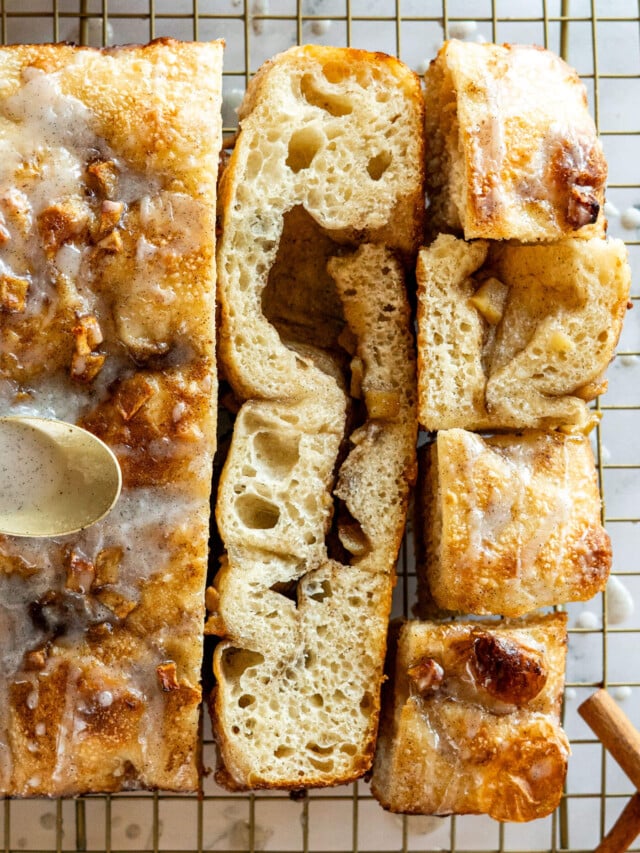
Next up: Apple Cinnamon Sourdough Focaccia

- Oil your fingers with a good glug of oil and spread the oil along the top of the dough. Then, using your fingers start to poke or dimple the surface of the sourdough focaccia.

- Stretch it to fit the pan if it hasn’t spread out completely. Sprinkle generously with flaked sea salt.

More Sourdough Starter Recipes!


Variations + Substitutions
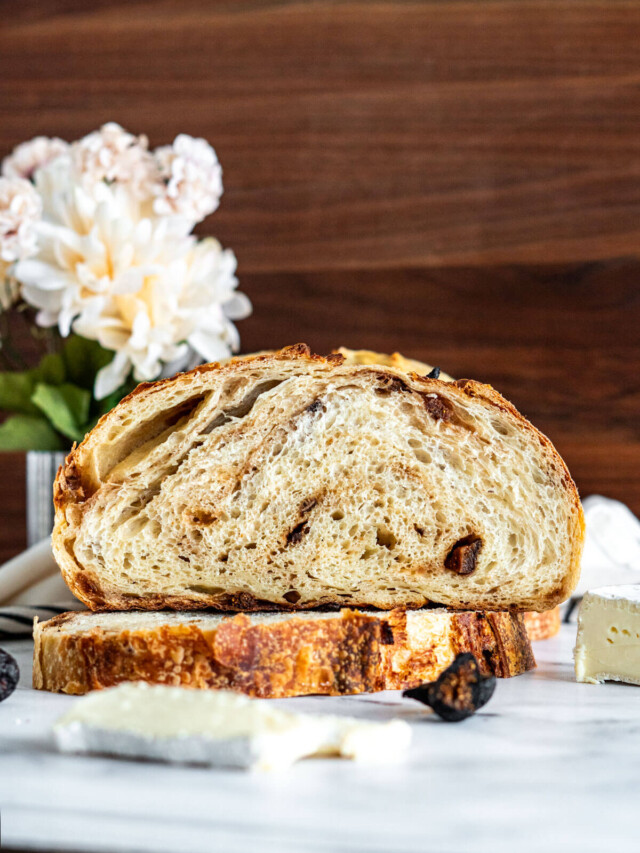
Don’t let the simplicity turn you off this recipe, there are tons of topping ideas for focaccia!
- hard cheeses, like parmesan, asiago,
- roasted or smoked garlic
- crumbled homemade bacon
- fresh herbs, like rosemary or chives
- halved cherry tomatoes or olives
- everything bagel seasoning
Really, there’s nothing holding you back except your imagination! Get wild. Try a parmesean, bacon, chive focaccia. Or garlic, cherry tomato, slivered red onion focaccia!
Batch + Storage
Batch:
This sourdough focaccia recipe makes one 9 x13 inch focaccia loaf. This recipe can be doubled and baked in 2 9×13 pans or halved and baked in an 8×8 pan.
Storage:
Once cooled and cut, the sourdough focaccia can be stored at room temperature in an airtight bag or container for up to 2 days before it starts to get stale.
The focaccia can also be frozen for later. Once completely cooled to room temperature and cut into desired pieces, wrap each slice in a layer of plastic wrap then slide into a freezer-friendly ziplock bag or airtight container and store in the freezer for up to 6 weeks.
Thaw the frozen focaccia at room temperature then reheat in a 300f oven until warmed throughout ant the crust is crispy. It can also be reheated in an air fryer set to 250f for 2-3 minutes.

Serving Suggestions
- Use your focaccia for sandwiches
- Dip in balsamic vinegar and oil
- Make focaccia pizza
📖 Printable Recipe

Sourdough Focaccia Bread Recipe
Ingredients
- 1 cup 240 g active sourdough starter, stirred down
- 2 cups 454 g warm water
- 5 cups 600 g unbleached all purpose flour or bread flour, measured using the scoop + level method (see notes)
- 2 teaspoons 12 g coarse kosher salt
- 5 tablespoons olive oil, divided
- flaked salt + fresh thyme for garnish, optional
Instructions
- In the mixing bowl of a stand mixer, add 1 cup (240 g) active sourdough starter, and 2 cups (454 g) warm water. Stir the starter and water together until loosely combined.
- Attach the dough hook, add in 5 cups (600 g) unbleached all purpose flour or bread flour, and 2 teaspoons (12 g) coarse kosher salt, and knead the dough for 5- 7 minutes. It will take a while to come together, and it will be a wet dough, but it should slightly pull away from the sides of the bowl and stick to the dough hook.
- Transfer the dough to a large mixing bowl, with enough room for it to double, and cover with plastic wrap and allow to rest for 30 minutes.
- Uncover the bowl and perform a series of stretch and folds, recover the dough, and repeat twice more; 30-minute rest then stretch and fold.
- Recover the bowl and set it aside to rise – 12 – 18 hours.
- Once the dough has risen, add 3 tablespoons olive oil to a 9 x 13" baking dish (If your dish has a textured bottom, you may want to butter it first).
- Drizzle some more olive oil on top of the focaccia dough, then using oiled hands or an oiled bowl scraper, carefully deflate and turn the dough out of the bowl into the prepared baking dish.
- Once the dough is in the baking dish, fold in all 4 sides, long sides first, then short, to create a rough rectangular envelope. Flip the dough over so the seam side is down.
- Cover the baking dish with plastic wrap and set aside to rise for another 2-4 hours, or until doubled and puffy.
- Once the dough has doubled, preheat oven to 425f.
- Oil your fingers with a good glug of oil and spread the oil along the surface of the dough. Then, using your fingers start to poke the surface of the sourdough focaccia. Stretch it to fit the pan if it hasn’t spread out completely. Sprinkle generously with flaked salt.
- Bake the focaccia at 425f for 20-25 minutes or until browned.
- Cool focaccia on a cooling rack for at least 15-20 minutes before slicing.
- Garnish with flaked salt + fresh thyme before serving.
Notes
Batch:
This sourdough focaccia recipe makes one 9 x13 inch focaccia loaf. This recipe can be doubled and baked in 2 9×13 pans or halved and baked in an 8×8 pan.Storage:
Once cooled and cut, the sourdough focaccia can be stored at room temperature in an airtight bag or container for up to 2 days before it starts to get stale. The focaccia can also be frozen for later. Once completely cooled to room temperature and cut into desired pieces, wrap each piece in a layer of plastic wrap then slide into a freezer-friendly ziplock bag or airtight container and store in the freezer for up to 6 weeks. Thaw the frozen focaccia at room temperature then reheat in a 300f oven until warmed throughout ant the crust is crispy. It can also be reheated in an air fryer set to 250f for 2-3 minutes.variations + substitutions
Here are some ideas for focaccia toppings:- hard cheeses, like parmesan, asiago,
- roasted or SMOKED GARLIC
- crumbled BACON
- fresh herbs, like rosemary or chives
- halved cherry tomatoes or olives
- everything bagel seasoning


What setting do you use on stand mixer?
The lowest speed!
I made sourdough focaccia pizza with your recipe. It was delicious!! I did everything the same, except I took it out of the oven after 15 minutes and put all the pizza toppings on and then returned it to the oven for another 15 minutes. Yummy! Thank you for this recipe!
That sounds so delicious! I do have a sourdough pizza recipe, too if you’d like to try it. It’s so good!
When should I add the coarse kosher salt? Does it only go on top of the dough before baking? Or should it be added with the flour to be mixed into the dough?
Hi Rachel, salt should be added with the flour to the water and starter mixture. The flaked or finishing salt should be sprinkled on top of the focaccia just before baking. Hope that helps!
This turned out great! I did half the recipe, just to try it out, and used about a 7×11 baking dish. I did have to put it in the refrigerator a couple of times for several hours, just due to
“life’s scheduling”, and it still turned out excellent. It had wonderful sour flavor, light, airy, very tasty. I will definitely be using this recipe again. Thank you for sharing.
Coleen, I love the “life’s scheduling”! I am going to use that from now on. I’m glad you enjoyed the recipe <3
I make this weekly, great recipe, I mix it up adding different toppings. I love this bread because it comes out light and airy and has tons of favor. The only thing I do different than the recipe is use cooking spray on my pan before adding olive oil, the bread often sticks without it. Highly recommend this bread.
This is dangerously good. My company couldn’t get enough- and neither could I. I have frozen this focaccia with good results as well!