
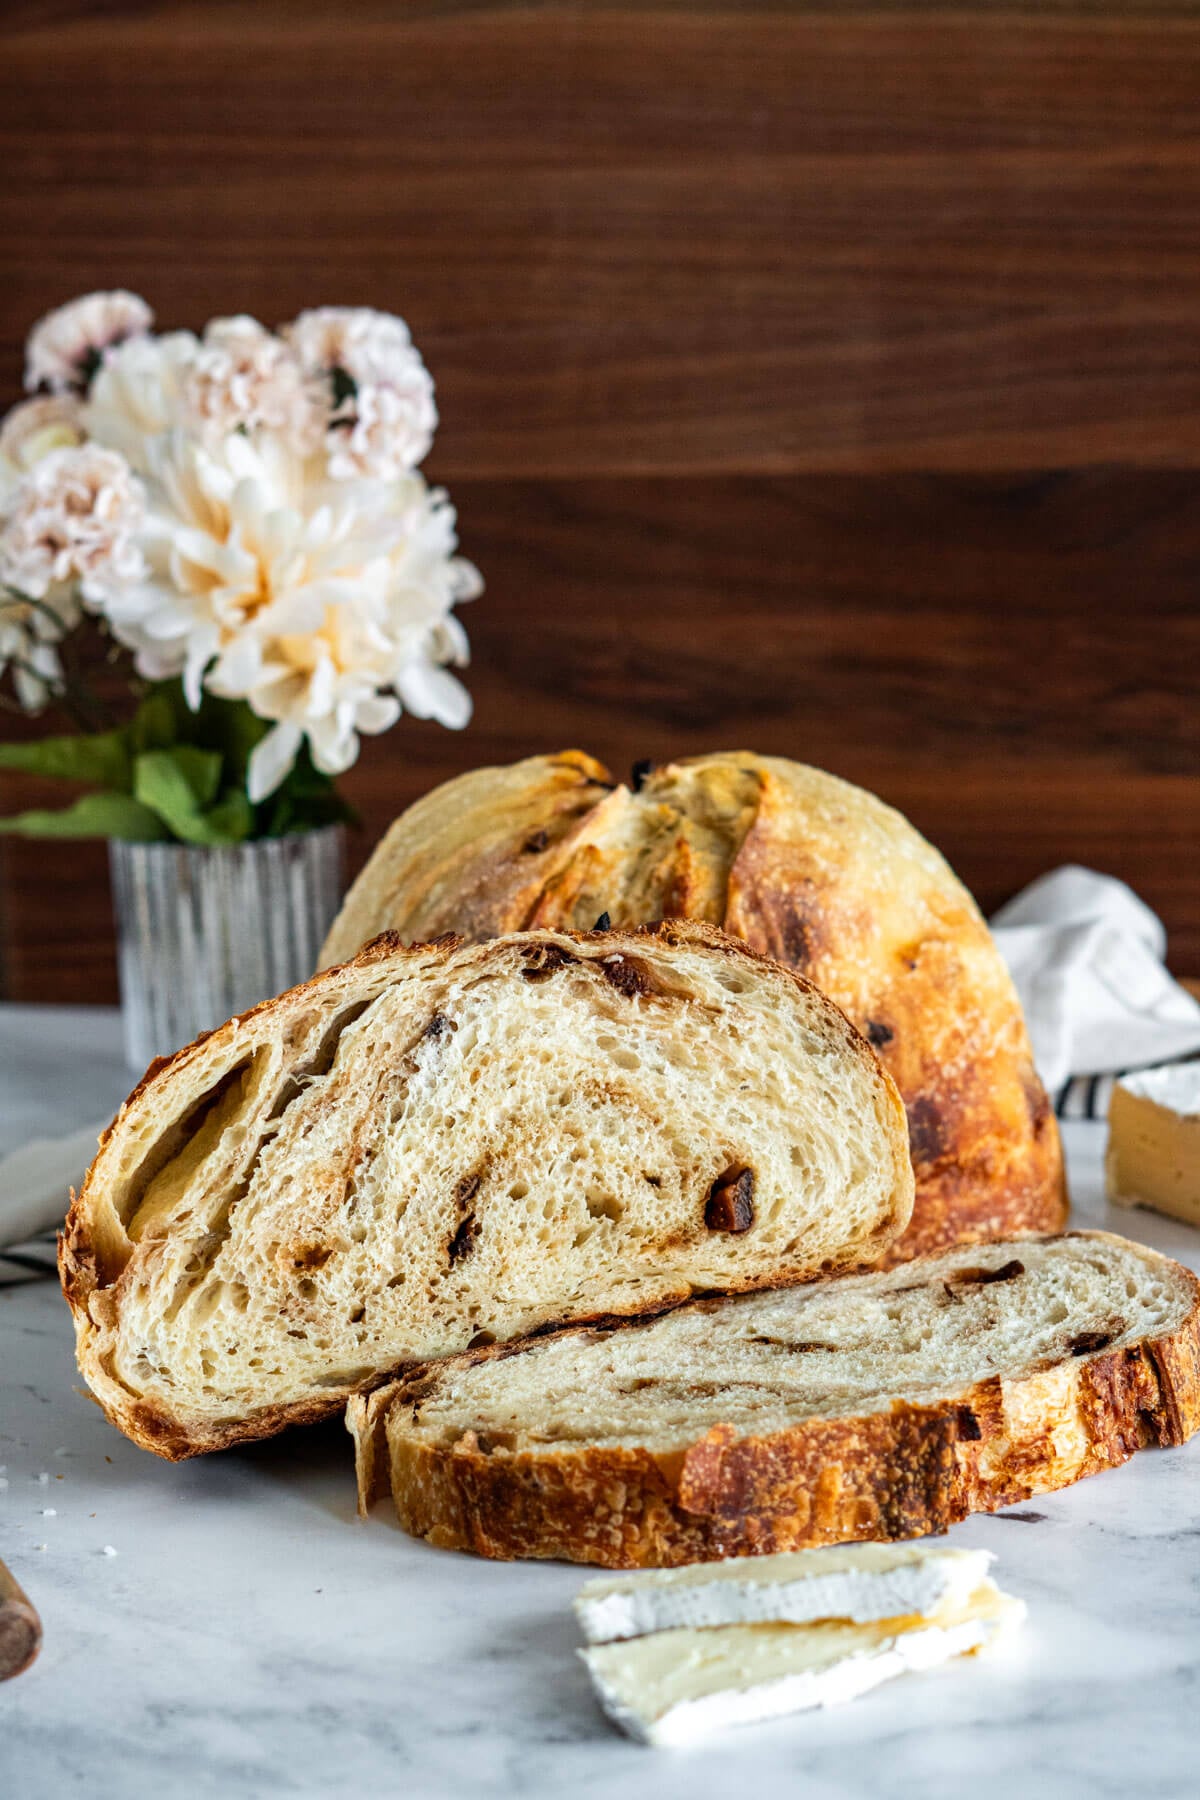
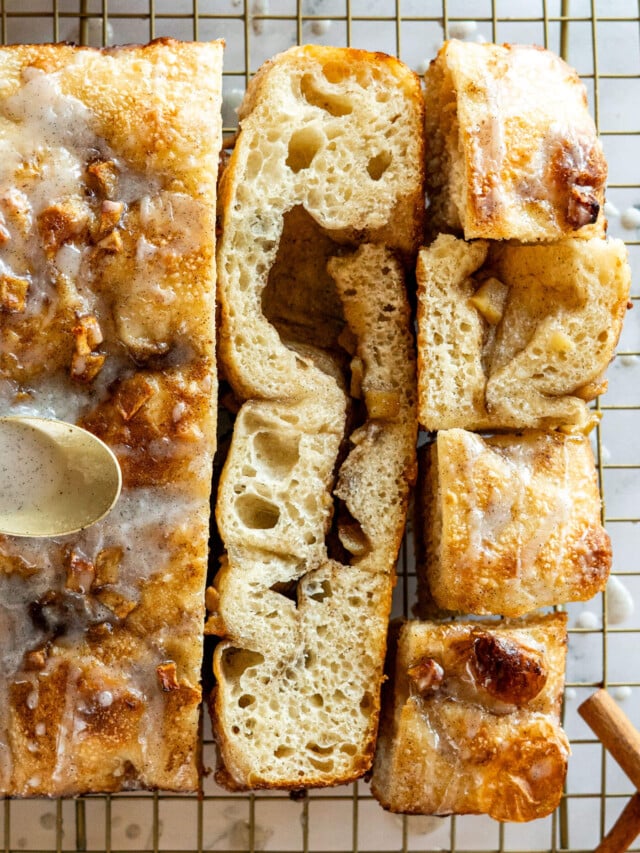
Fig and Brie Sourdough

Brie and Fig sourdough bread brings together the best of sweet and savory: sweet, jammy figs folded into a tangy, chewy sourdough crumb, with pockets of creamy brie in every bite.
Craving The Recipe Details?
What it is: A naturally leavened artisan loaf enriched with figs. This brie and fig sourdough variation combines sweet fruit and creamy cheese for a balanced sweet-savory flavor with a tender crumb and crisp crust.
Why you’ll love it: Sweet, savory, tangy, and impossibly good. This fig sourdough bread is fancy enough to impress but easy enough for any sourdough baker.
How to make it: Whisk your active starter into water, mix in flour and salt, fold in the figs and brie during the first stretch and fold, bulk ferment, shape, and cold retard before baking in a dutch oven to golden perfection.
Craving something a little fancy? This fig and brie sourdough is where bread baking meets your charcuterie board!
Don’t get me wrong, there’s a time and place for a classic loaf. There’s something deeply satisfying about a simple, tangy sourdough; like my same day sourdough or bread machine sourdough. A perfectly baked plain loaf never gets old.
But sometimes you want to make something that makes people stop and stare before they even take a bite. Whether it’s for a dinner party spread, a weekend brunch, or you’ve just been dreaming about something a little more, this is that recipe.
This fig and brie sourdough bread is dedicated to a little fancy.

Master Your Sourdough Starter In 5 Days!
From Confused To Confident.
Find success with 5 simple, actionable secrets delivered to you. No more guessing games – just clear, proven steps to a thriving starter.
Jump to:
Key Ingredients
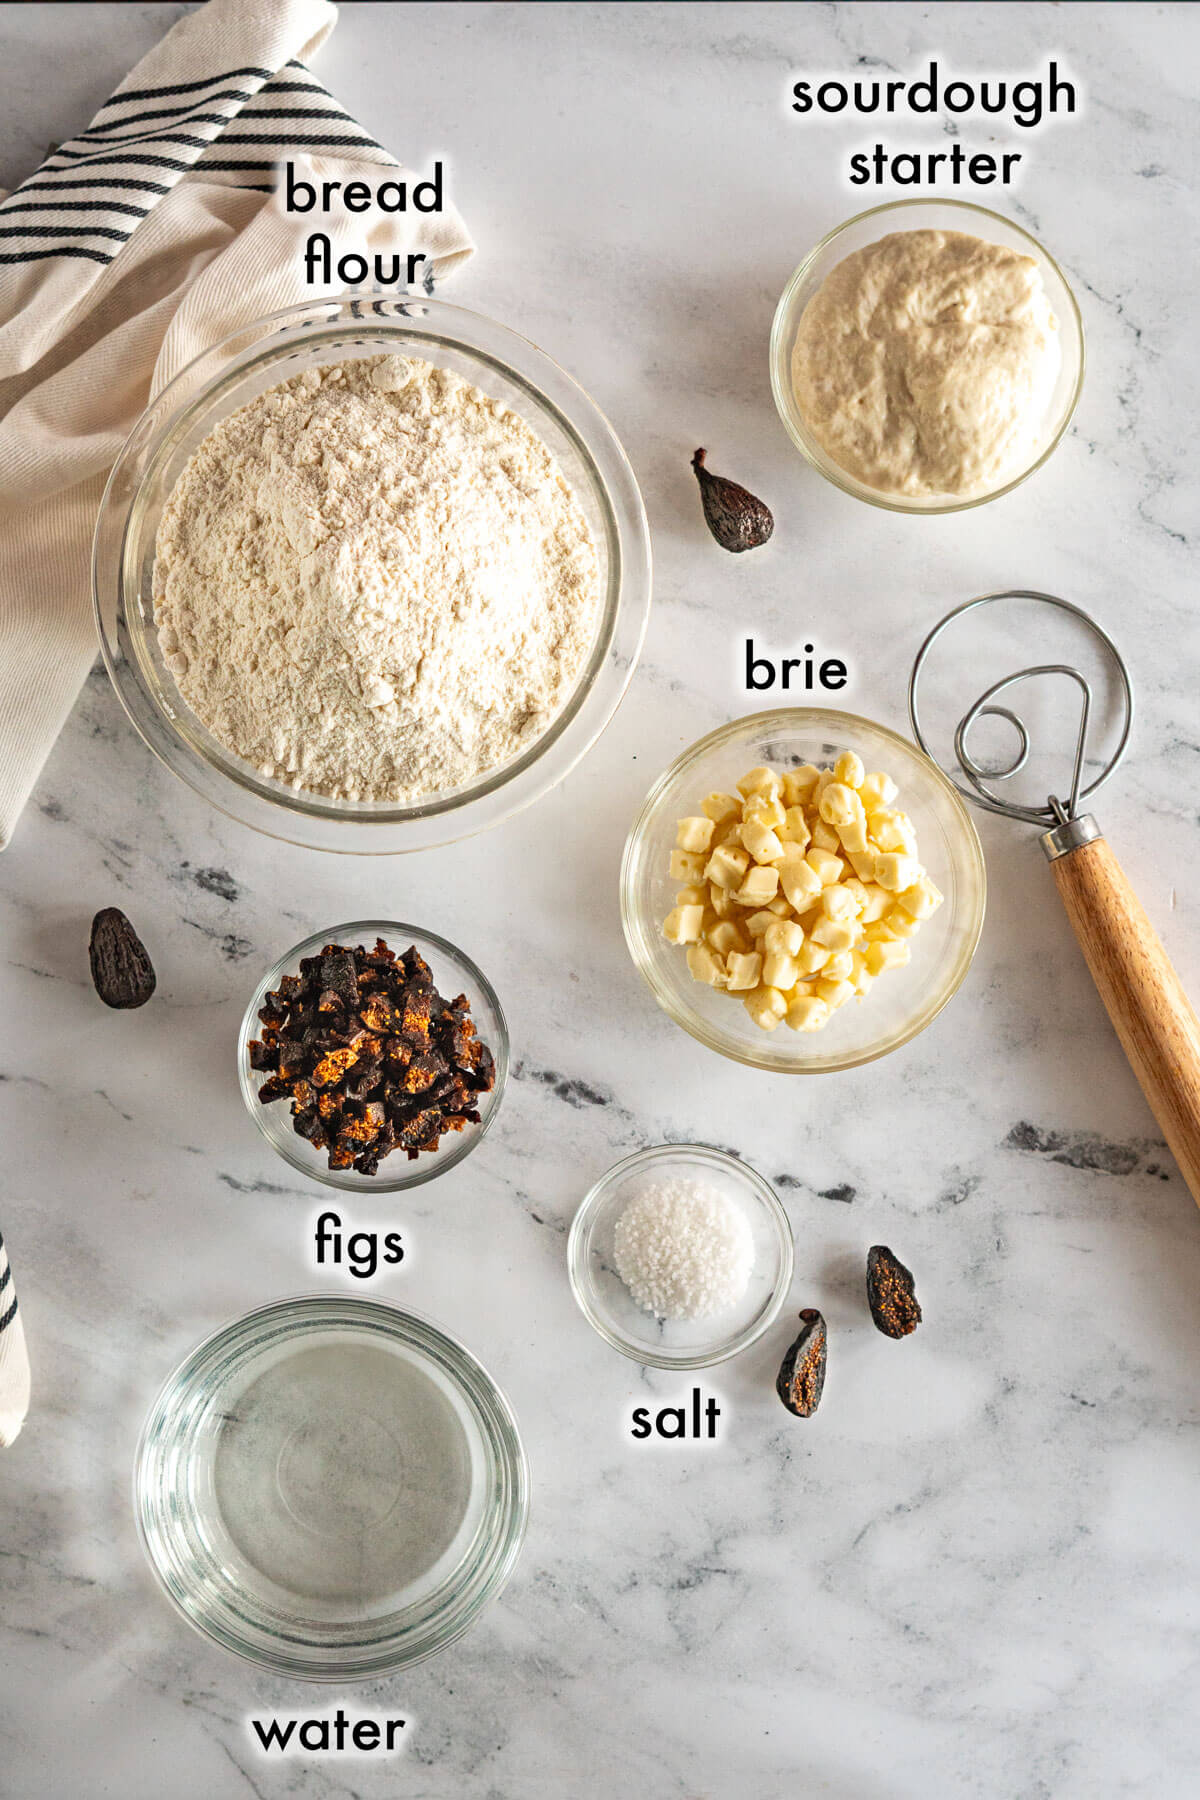
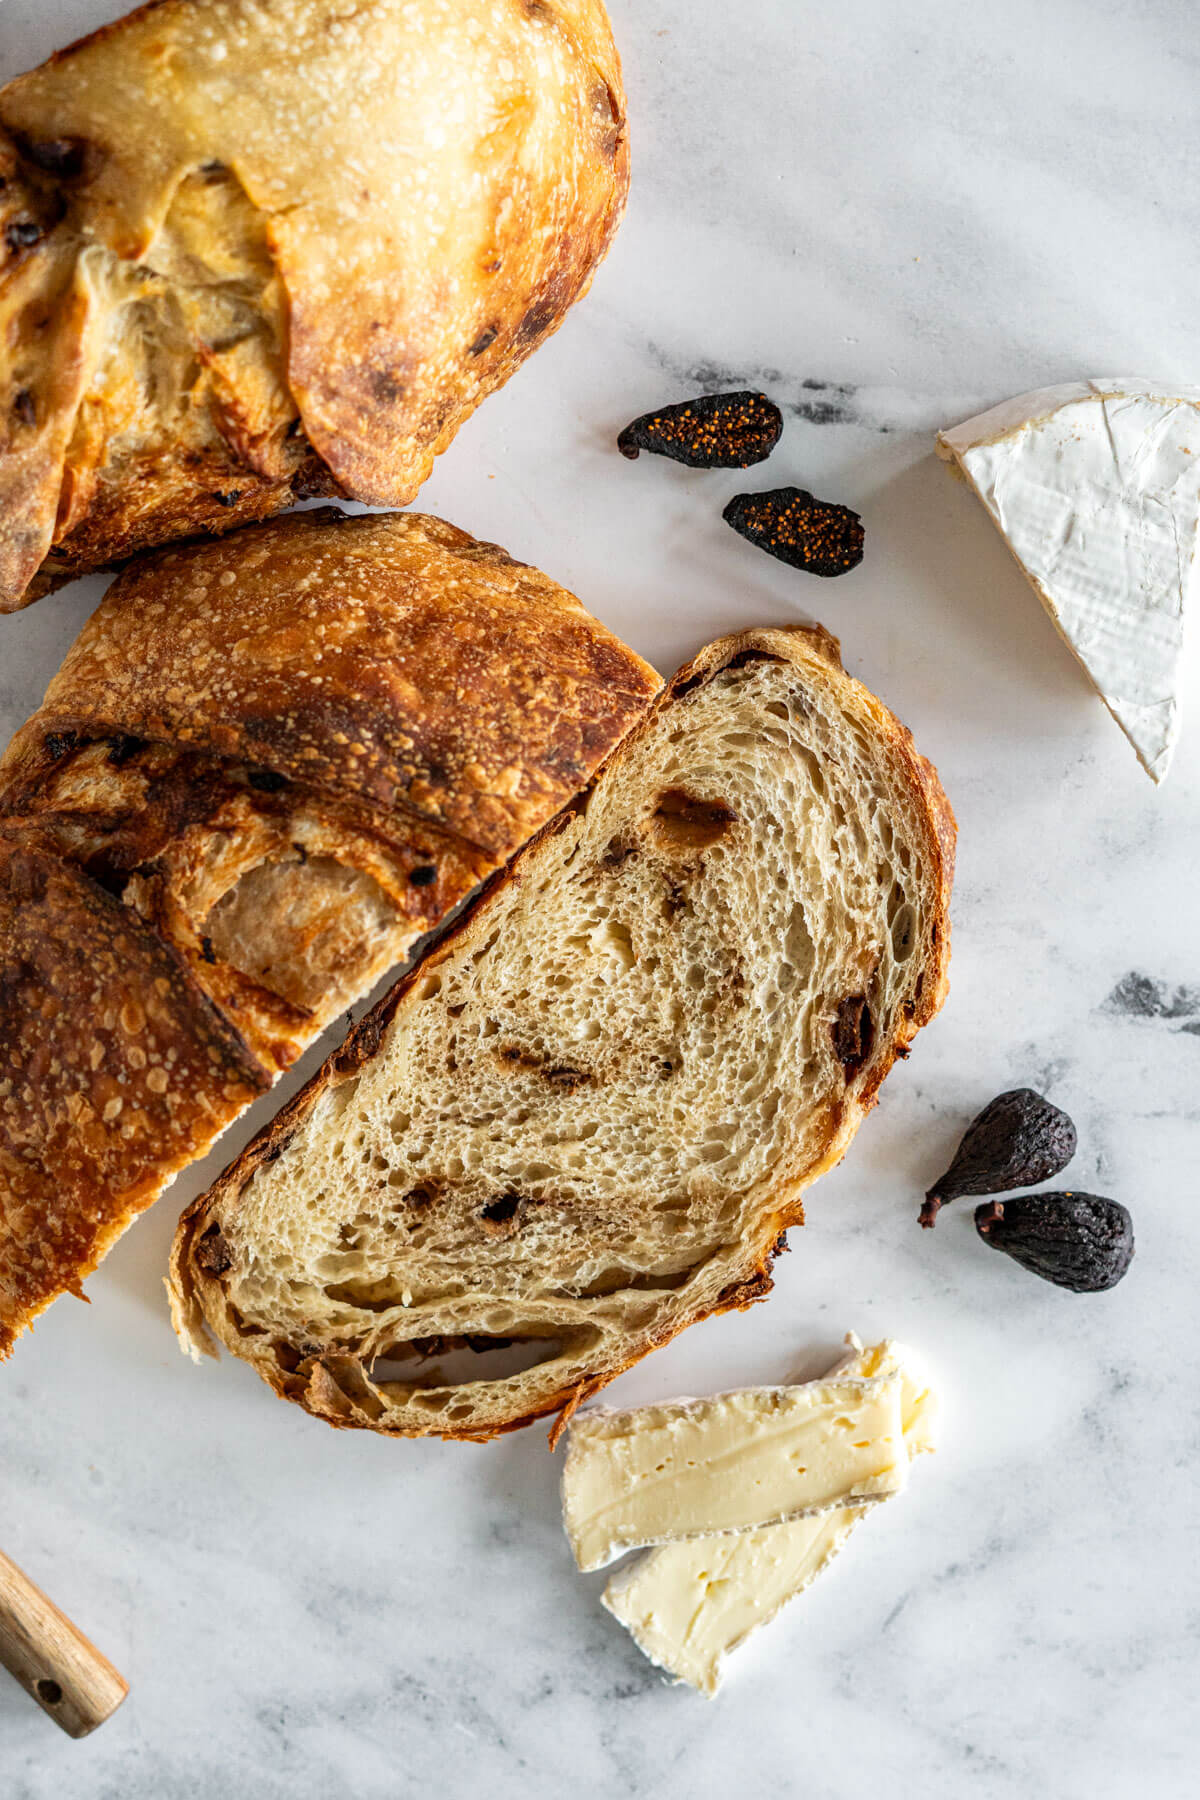
Figs: I use dry Mission figs in this recipe, they’re the easiest to come by and their sweet, rich flavor pairs so beautifully with sourdough. Calimyrna figs are also a great choice as their mild, honey-like flavor compliments the creaminess of the brie.
Brie: I like double cream brie, I find it to be a bit, well, creamier! I also like to remove the rind, in testing, I’ve found that step to be worthwhile, as the rind can hinder the melting and leave unsightly spots in the dough.
Sourdough Starter: This recipe requires a fed and active sourdough starter at 100% hydration. Your starter should have been recently fed and should have at least doubled in size.
Psst… Curious about feeding your starter, storing sourdough starter, using sourdough discard, or finding the best jar for your starter? Check out my helpful guides for all the details!
How To Make Fig Sourdough Bread With Brie
Make The Dough:

- Step 1: In a large bowl, combine 340g of room temperature water and whisk in 100g of active sourdough starter until the water is milky and the starter is broken up.
Note: I prefer to mix my water with the starter before adding flour in recipes that use a fermentolyse, I find it’s easier to ensure the yeast is fully incorporated into the dough.

- Step 2: Add 500g unbleached bread flour on top of the sourdough starter mixture, mix until a shaggy dough forms. If required, knead the dough with your hands until all the dry bits are incorporated.

- Step 3: Sprinkle 12g of salt across the surface of the dough.

- Step 4: Cover the bowl and set aside for 60 minutes.
Stretch And Fold:

- Step 5: Prior to the first stretch and fold, sprinkle the 70g of chopped figs and 80g of peeled, cubed brie over the dough. Adding the inclusions at this point ensures even distribution through the dough throughout the stretch and fold process.

- Step 6: Using damp hands, grab one side of the dough, stretch it upward, and fold it over the center. Rotate the bowl a quarter turn and repeat until you've completed four folds, this is one set of stretch and folds.

- Step 7: Recover the bowl, and set it aside for 60 minutes.

- Step 8: Repeat the stretch and fold process every 60 minutes for a total of 4 sets.
Bulk Ferment:

- Step 9: After the final set, cover the bowl and allow the dough to bulk ferment for about 3 hours in a warm spot.

- Step 10: The dough is ready when it has risen, looks slightly domed, and shows visible bubbles along the surface and edges. If it appears flat or dense, allow more time.
Pre-Shape + Shape:

- Step 11: Uncover the dough and transfer to a work surface or countertop. Gently press and spread the dough into a large rectangle. Fold up the bottom third of the dough as though you were folding a letter, then fold in the right then left bottom corner towards the center. Continue rolling up into a batard or log shape.

- Step 12: Cover with a clean kitchen towel or inverted bowl and rest for 30 minutes.

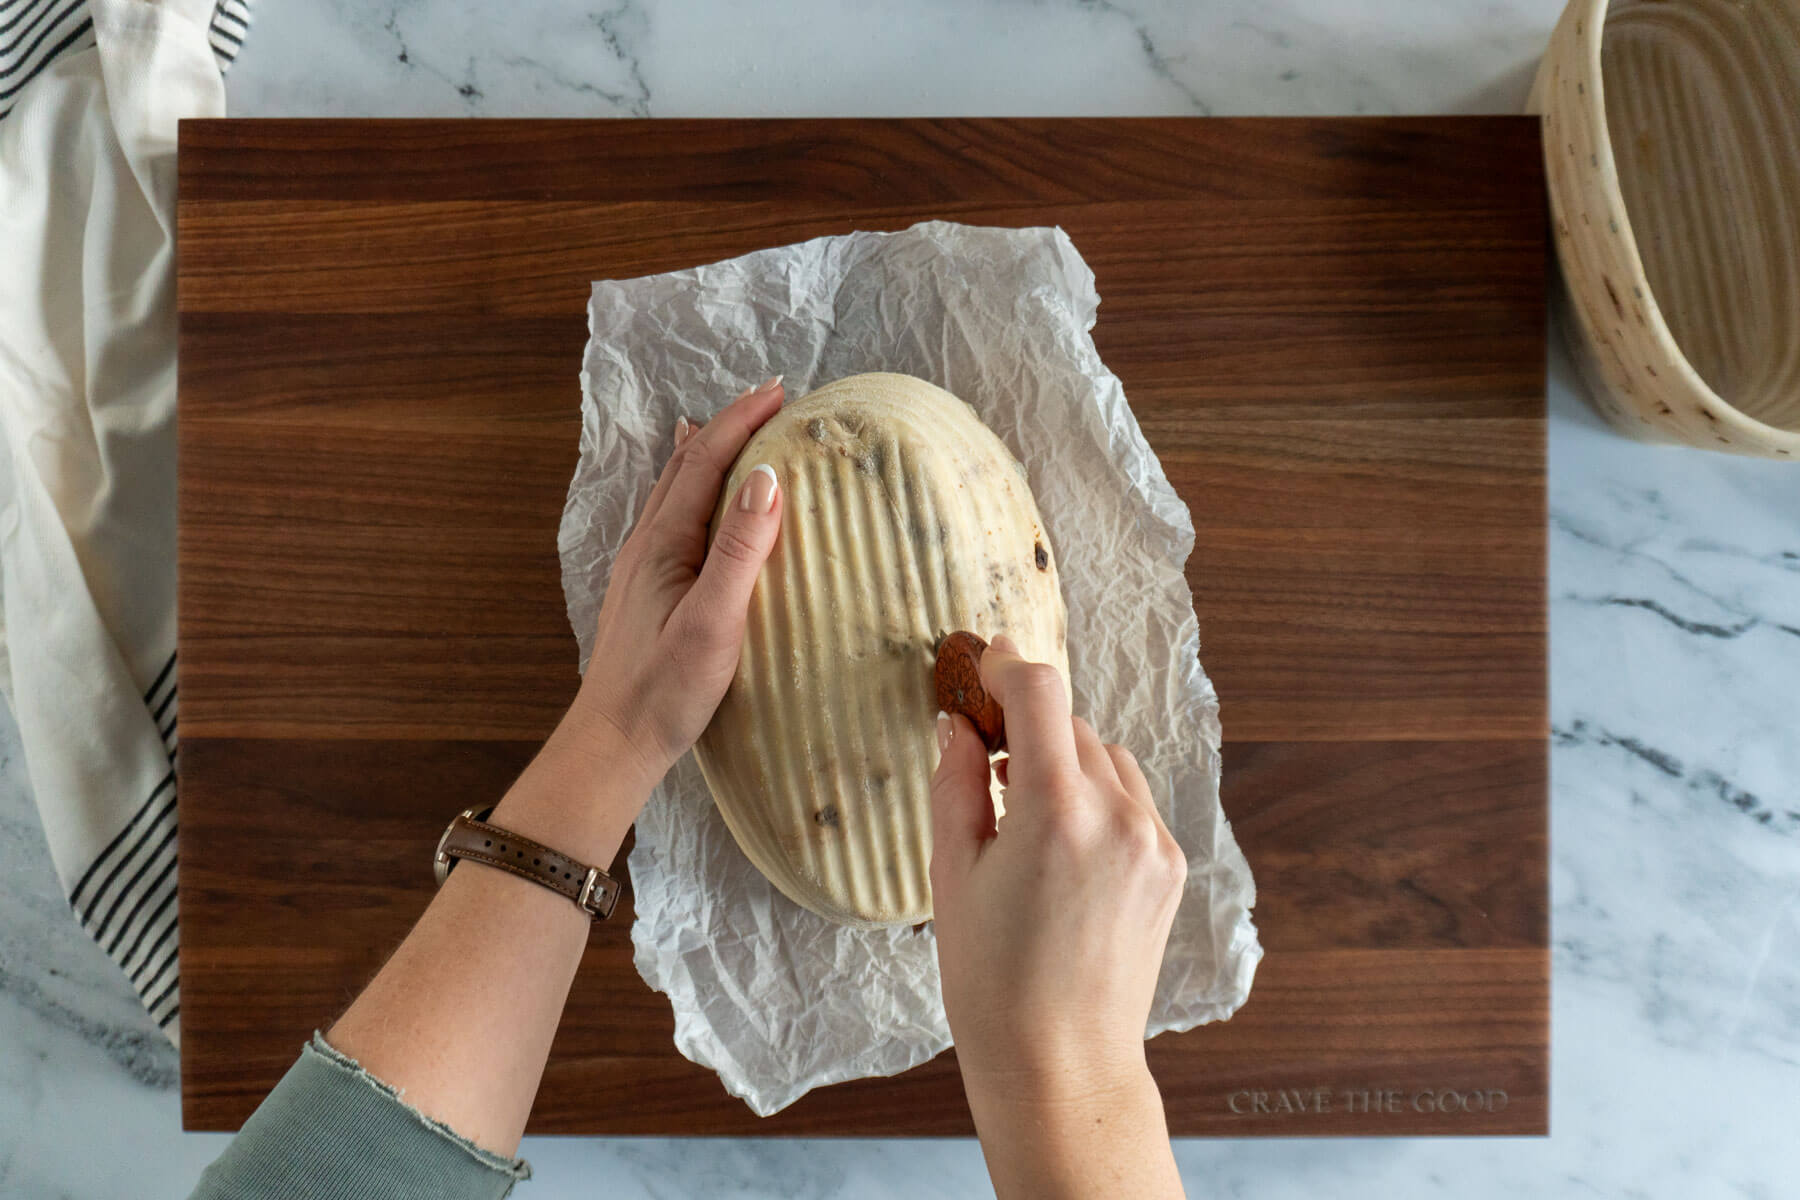
- Step 13: After the rest, pick up the dough with a dough scraper and flip it over, gently press the dough flat then roll it again. Pinch the ends if you're making a batard or tuck them in if your making a boule.

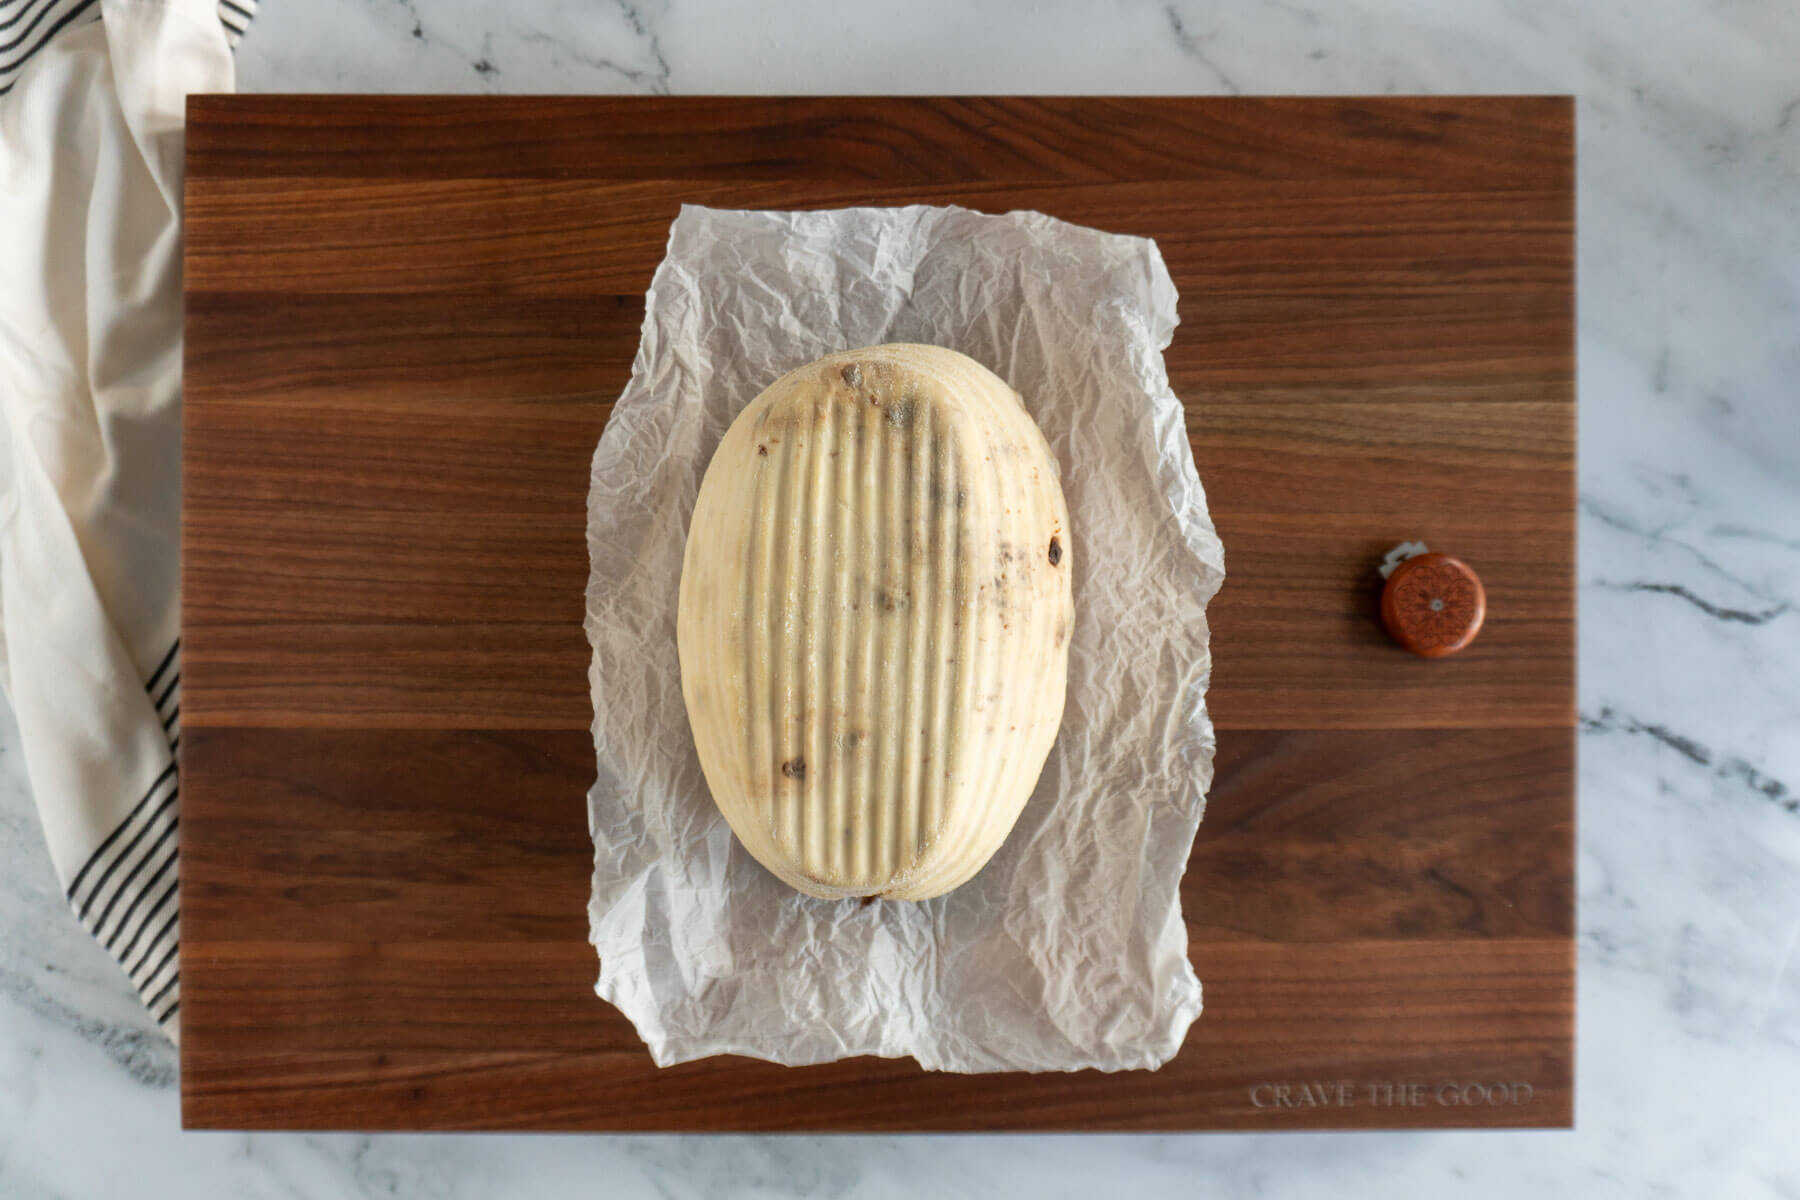
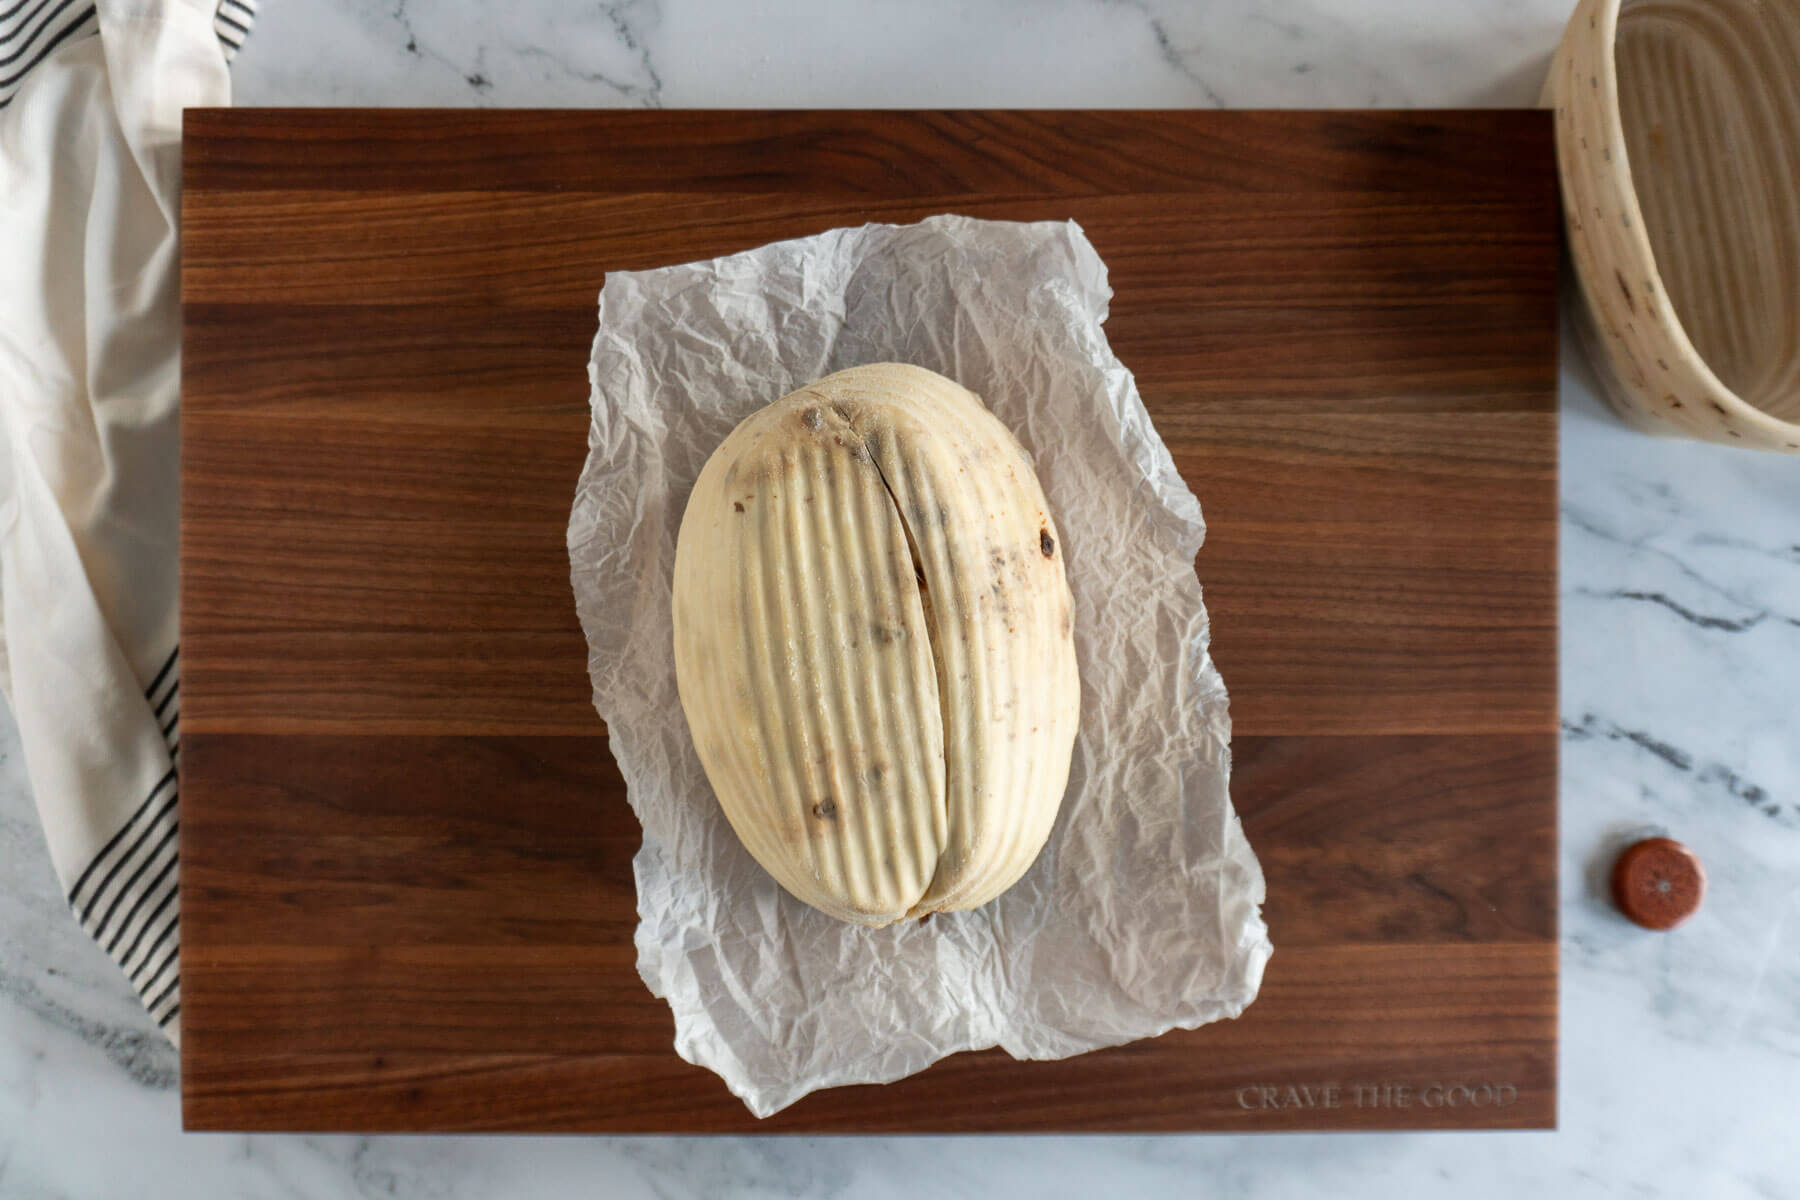
- Step 14: Dust the top of the loaf with rice flour then tuck seam side up into a banneton.
Don't have a banneton basket? I have a guide on bannetons and banneton alternatives!
Prove + Cold Retard:

- Step 15: Prove the fig sourdough loaf in the banneton for 2-3 hours in a warm place before covering and placing in fridge to cold retard for up to 3 days. The dough should have risen in the banneton by around 50%.

- Step 16: If you want to bake it right after proving, you're welcome to, but the flavor is better after resting in the fridge.
Bake:
- Step 17: Place your dutch oven, cloche, or desired baking dish in the oven and preheat to 450f. If you don't have a dutch oven, I do have a guide on open oven sourdough bread baking.
- Step 18:Once the oven is preheated, invert the banneton onto a sheet of parchment paper.
- Step 19: Use a lame, sharp knife, or clean razor blade to score the dough, I usually like to make one deep curved slash, but you can get as fancy as you like!
- Step 20: Carefully remove the dutch oven from the oven, and using the parchment paper as a sling, transfer the sourdough loaf from the counter into the dutch oven.
- Step 21: Bake the dough at 450f covered for 30 minutes and uncovered at 450f for 10-15 minutes, or until the loaf is cooked through and the crust is nicely browned. You can test the doneness of the loaf with an instant-read thermometer. Bread is cooked once it reaches 205 - 210 degrees Fahrenheit internal temperature.
Cool:
- Remove baked bread from the dutch oven and transfer it to a wire mesh cooling rack to cool completely before slicing. I like to leave it for at least 2 hours before slicing, as slicing too soon can affect the crumb and texture of your loaf.
Expert Tips
- Rather than laminating in the inclusions in this recipe, I recommend including them during the first stretch and fold. This helps to ensure that you’ve got a really consistent distribution through the entire dough.
- Handle the dough gently during the shaping process because the cheese and figs can easily tear the dough you’ve worked so hard for. I’ve included a step by step photo guide above to show my process when shaping – it involves a lot more pressing into shape than laminating but always yields a great result for me.
- My bulk fermentation and dough proofing is done at 70-ish degrees fahrenheit, but if you’re in a warmer place, your rising times will need to be shortened.
Baker’s Percentages
| Ingredient | Percentage |
|---|---|
| Flour | 100% |
| Water | 68% |
| Starter | 20% |
| Salt | 2.4% |
| Figs | 14% |
| Brie | 16% |
Fig Sourdough FAQs
There are a few great ways to store sourdough bread to keep it fresh and delicious after baking.
For short-term storage, we just place our loaves cut-side down on a cutting board. This method works great for up to 12 hours, though the crust may get a little too crisp if left much longer. It’s our favorite option since we usually finish the loaf before that happens! If you need more time, transfer it to a bread bag after about 16-18 hours to maintain its quality.
Freezing a Whole Loaf:
If you’re looking to store your bread longer, freezing is a fantastic option. To freeze sourdough bread, let the loaf cool completely to room temperature. Then, wrap it tightly in plastic wrap, place it in a bread bag, seal it, and pop it in the freezer. Your sourdough will stay fresh for 1-2 months. When you’re ready to enjoy it, simply remove it from the freezer, unwrap it, and let it thaw at room temperature for 1-2 hours before slicing and savoring!
Freezing Slices:
For easy, grab-and-go portions, slice the cooled loaf and lay the slices in a single layer on a baking sheet. Freeze until solid, then transfer to a freezer-safe bag or container. This way, you can pull out just what you need. Toast or let thaw at room temperature and you’re good to go!
Fresh figs can be used in this recipe, but they add more moisture to the dough which can make it more difficult to manage. Fresh figs also have a more mild flavor, and usually cost more than their dried counterparts.
In my testing I found that dry figs lead to a more consistent result and are easier to come by here in chilly Northern Alberta!
Always remove the rind from the brie before using it as a sourdough inclusion. While the rind is edible, it won't melt into the dough the way the creamy center does. Leaving it on can create chewy or tough patches in the crumb. Removing it ensures the cheese melts into the crumb that complements the figs without disrupting the texture of your loaf.
Why This Recipe Works
Adding inclusions at the first stretch and fold. Rather than laminating the figs and brie in before the bulk ferment, folding them in early means every stretch and fold works them deeper into the dough, so you get even distribution.
Long bulk ferment improves complexity. Allowing the dough to ferment fully after the stretch and folds builds gluten strength while developing balanced acidity to complement the sweetness of the figs.
Cold retard gives flexibility and better flavor. Popping the shaped loaf in the fridge for up to 3 days doesn’t just fit your schedule, it actually improves the bread. The slow, cold fermentation deepens the tang, improves the crumb and makes the figs and brie flavors bloom even more.
Serving Suggestions
This fig and brie sourdough pulls double duty: it’s beautiful enough to be the centerpiece of a cheese board and satisfying enough to be breakfast. Here’s how I love to serve it:
On a cheese board: Slice it thickly and let it anchor your next charcuterie spread. Surround it with an extra wedge of brie, a drizzle of honey, candied walnuts, and fresh or dried figs.
Toasted: A quick toast transforms day-old slices. The brie pockets get gooey again, the figs caramelize slightly, and the crust crisps back up beautifully. Spread with salted butter or a swipe of fig jam and it’s honestly better than it was on day one.
For brunch: Serving warm slices with a smear of creamed honey and some soft scrambled eggs on the side is a genuinely unreasonable amount of delicious for any morning.
For a light meal: Top with prosciutto, fresh arugula, and a drizzle of good olive oil for an open-faced situation that will answer any cravings
More Sourdough Recipes


If you tried this Brie and Fig Sourdough bread recipe or any other recipe on my blog, please leave a 🌟 star rating and let me know how it went in the comments below. Thanks for visiting!
📖 Printable Recipe

Fig And Brie Sourdough Bread
Ingredients
- 340 g water, room temperature
- 100 g sourdough starter, active
- 500 g unbleached bread flour
- 12 g sea salt
- 70 g dried mission figs, chopped
- 80 g double cream brie, peeled and cubed
Instructions
Make The Dough:
- In a large bowl, combine 340g of room temperature water and whisk in 100g of active sourdough starter until milky.
- Add 500g unbleached bread flour on top of the sourdough starter blend and mix until a shaggy dough forms. If required, knead the dough with your hands until all the dry bits are incorporated. Sprinkle 12g of salt across the surface of the dough.
- Cover the bowl and set aside for 60 minutes.
Stretch + Fold:
- Prior to the first stretch and fold, sprinkle 80g peeled and cubed brie and 70g of chopped dried figs over the dough.
- Using damp hands, gently stretch a flap of dough over the center, rotate the bowl 90°, and repeat 3 more times to complete one set of stretch-and-folds. Recover the bowl, and set it aside for 60 minutes.
- Perform 4 total sets of stretch and folds, spaced 60 minutes apart.
Bulk Ferment:
- After the final stretch and fold then cover the bowl and set aside for 3 hours to finish the bulk ferment. It is important to keep the dough bowl somewhere warm to encourage the microbes to work quickly!
Pre-Shape + Shape:
- Observe your dough, at this point, the dough should have risen in the bowl, and have a smooth surface with visible bubbles. If the dough is domed in the bowl it is ready to work with, if the dough is flat it may need more time in the bulk ferment.
- Uncover the dough and transfer to a work surface or countertop. Gently press and spread the dough into a large rectangle. Fold up the bottom third of the dough as though you were folding a letter. Fold in the right side about a third of the way across width wise then repeat with the left. Roll from the folded bottom to the top creating a log. Cover with a clean tea towel and rest for 30 minutes.
- After the rest, pick up the dough with a dough scraper and flip it over, gently press the dough flat then roll it again. Pinch the ends if you're making a batard or tuck them in if your making a boule. Dust the dough with rice flour then tuck seam side up into a banneton.
Prove + Cold Retard:
- Prove your sourdough loaf in the banneton for 2-3 hours in a warm place. The dough should have risen in the banneton by around 50% before covering and placing in fridge to cold retard for up to 3 days.
Bake:
- Place your dutch oven, cloche, or desired baking dish in the oven and preheat to 450f.
- Once the oven is preheated, invert the banneton onto a sheet of parchment paper. Use a lame, sharp knife, or clean razor blade to score the dough, I usually like to make one deep curved slash, but you can get as fancy as you like!
- Carefully remove the dutch oven from the oven, and using the parchment paper as a sling, transfer the sourdough loaf from the counter into the dutch oven.
- Bake the dough at 450f covered for 30 minutes and uncovered at 450f for 10-15 minutes, or until the loaf is cooked through and the crust is nicely browned.
Cool:
- Remove baked bread from the dutch oven and transfer it to a wire mesh cooling rack to cool completely before slicing.


I love the combination of dried figs and Brie cheese, so I was really excited to bake this recipe.
The flavor is amazing —sweet figs with creamy Brie 🧀
Thank you so much for your sharing. Your recipe is clear and easy to follow. Really appreciated.
Happy you loved the recipe, Jen!
This recipe is so great – I actually love to make it when I know we’re having a charcuterie night, that way we get figs and brie on the board but also in a slice of bread!