
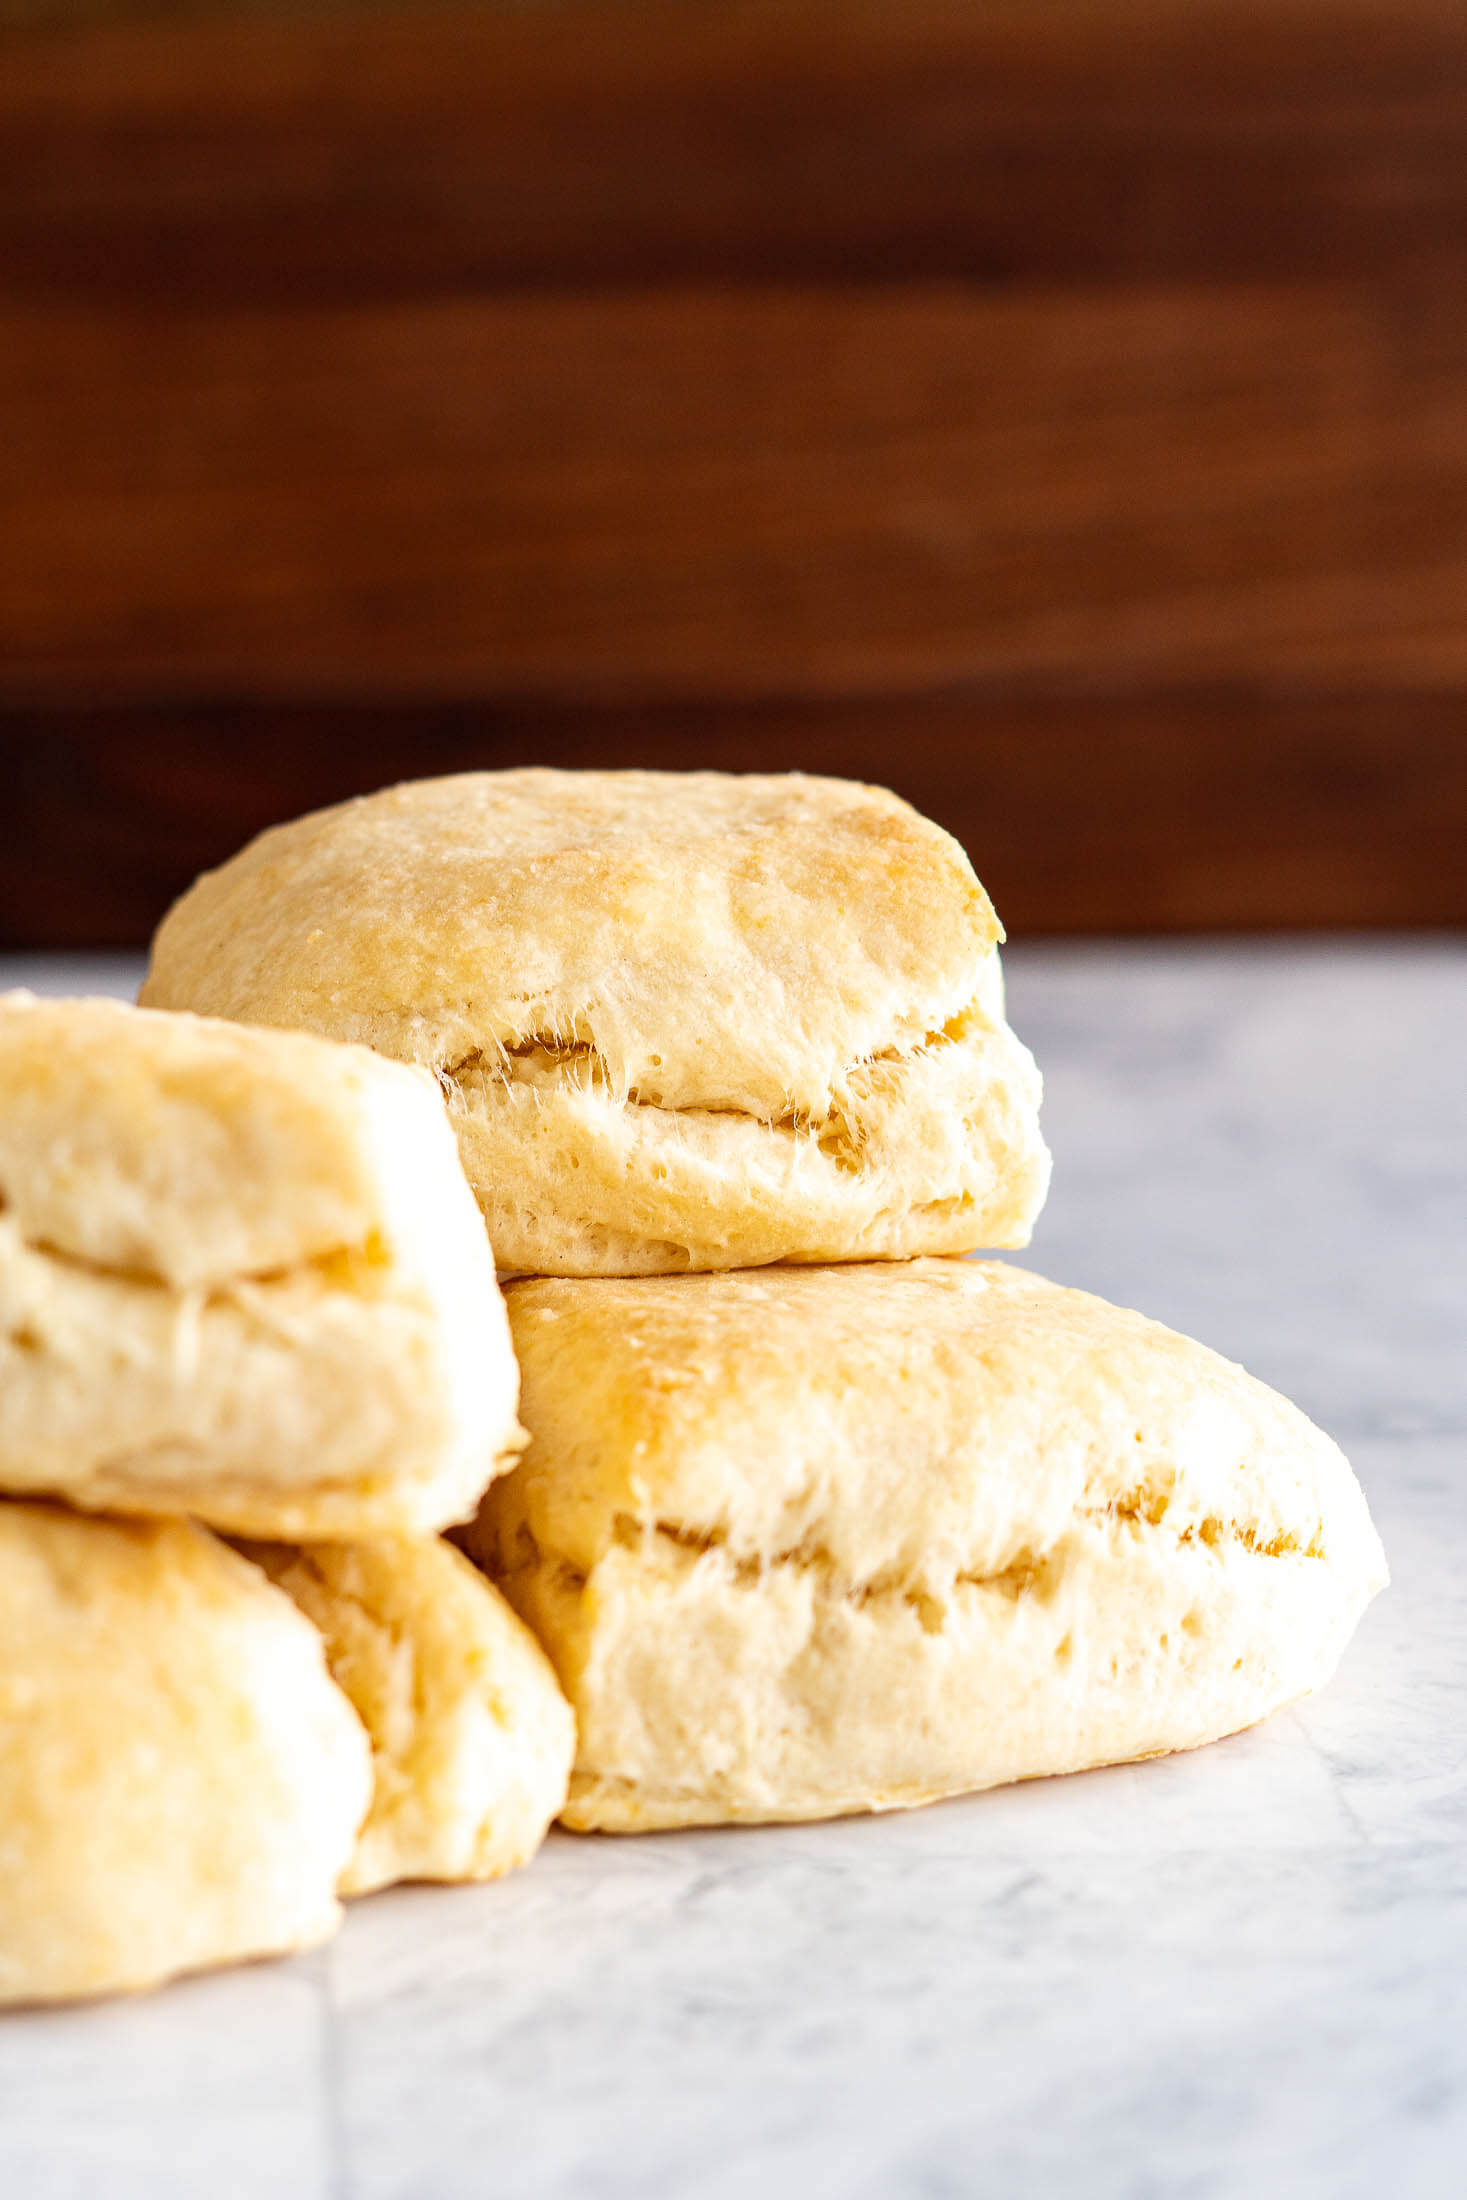
Easy No Milk Biscuits

Tender, flaky, and made without milk. This no milk biscuit recipe is easy to make, on your table in under an hour, and impossible to resist! These biscuits are perfect with homemade raspberry jam, creamed honey, or served along side a cross rib roast and gravy.

Craving The Recipe Details?
What it is: Fluffy, golden biscuits made without milk, ready in under an hour with minimal effort.
Why you’ll love it: Soft, tender, and buttery-tasting biscuits that come together quickly. Perfect for anytime you crave homemade comfort.
How to make it: Combine flour, baking powder, salt, butter, and water, mix until just combined, cut the dough, and bake until golden brown.
Love biscuits but don’t have any milk? You’re in luck! This recipe is an adaptation of the classic buttermilk biscuit, tweaked for people like me – whose kids drink all the milk!
Serve them warm alongside scrambled eggs and home-smoked bacon for a hearty breakfast spread, or split them open and slather with easy no pectin peach jam, homemade blackberry jam, or whipped sweet butter. Craving comfort food? They’re perfect for soaking up creamy potato bacon soup, topping a chicken pot pie, or serving alongside smoked brisket chili for a stick to your ribs kind of dinner.
This easy homemade biscuits recipe is dedicated to tweaking.
Jump to:
Key Ingredients
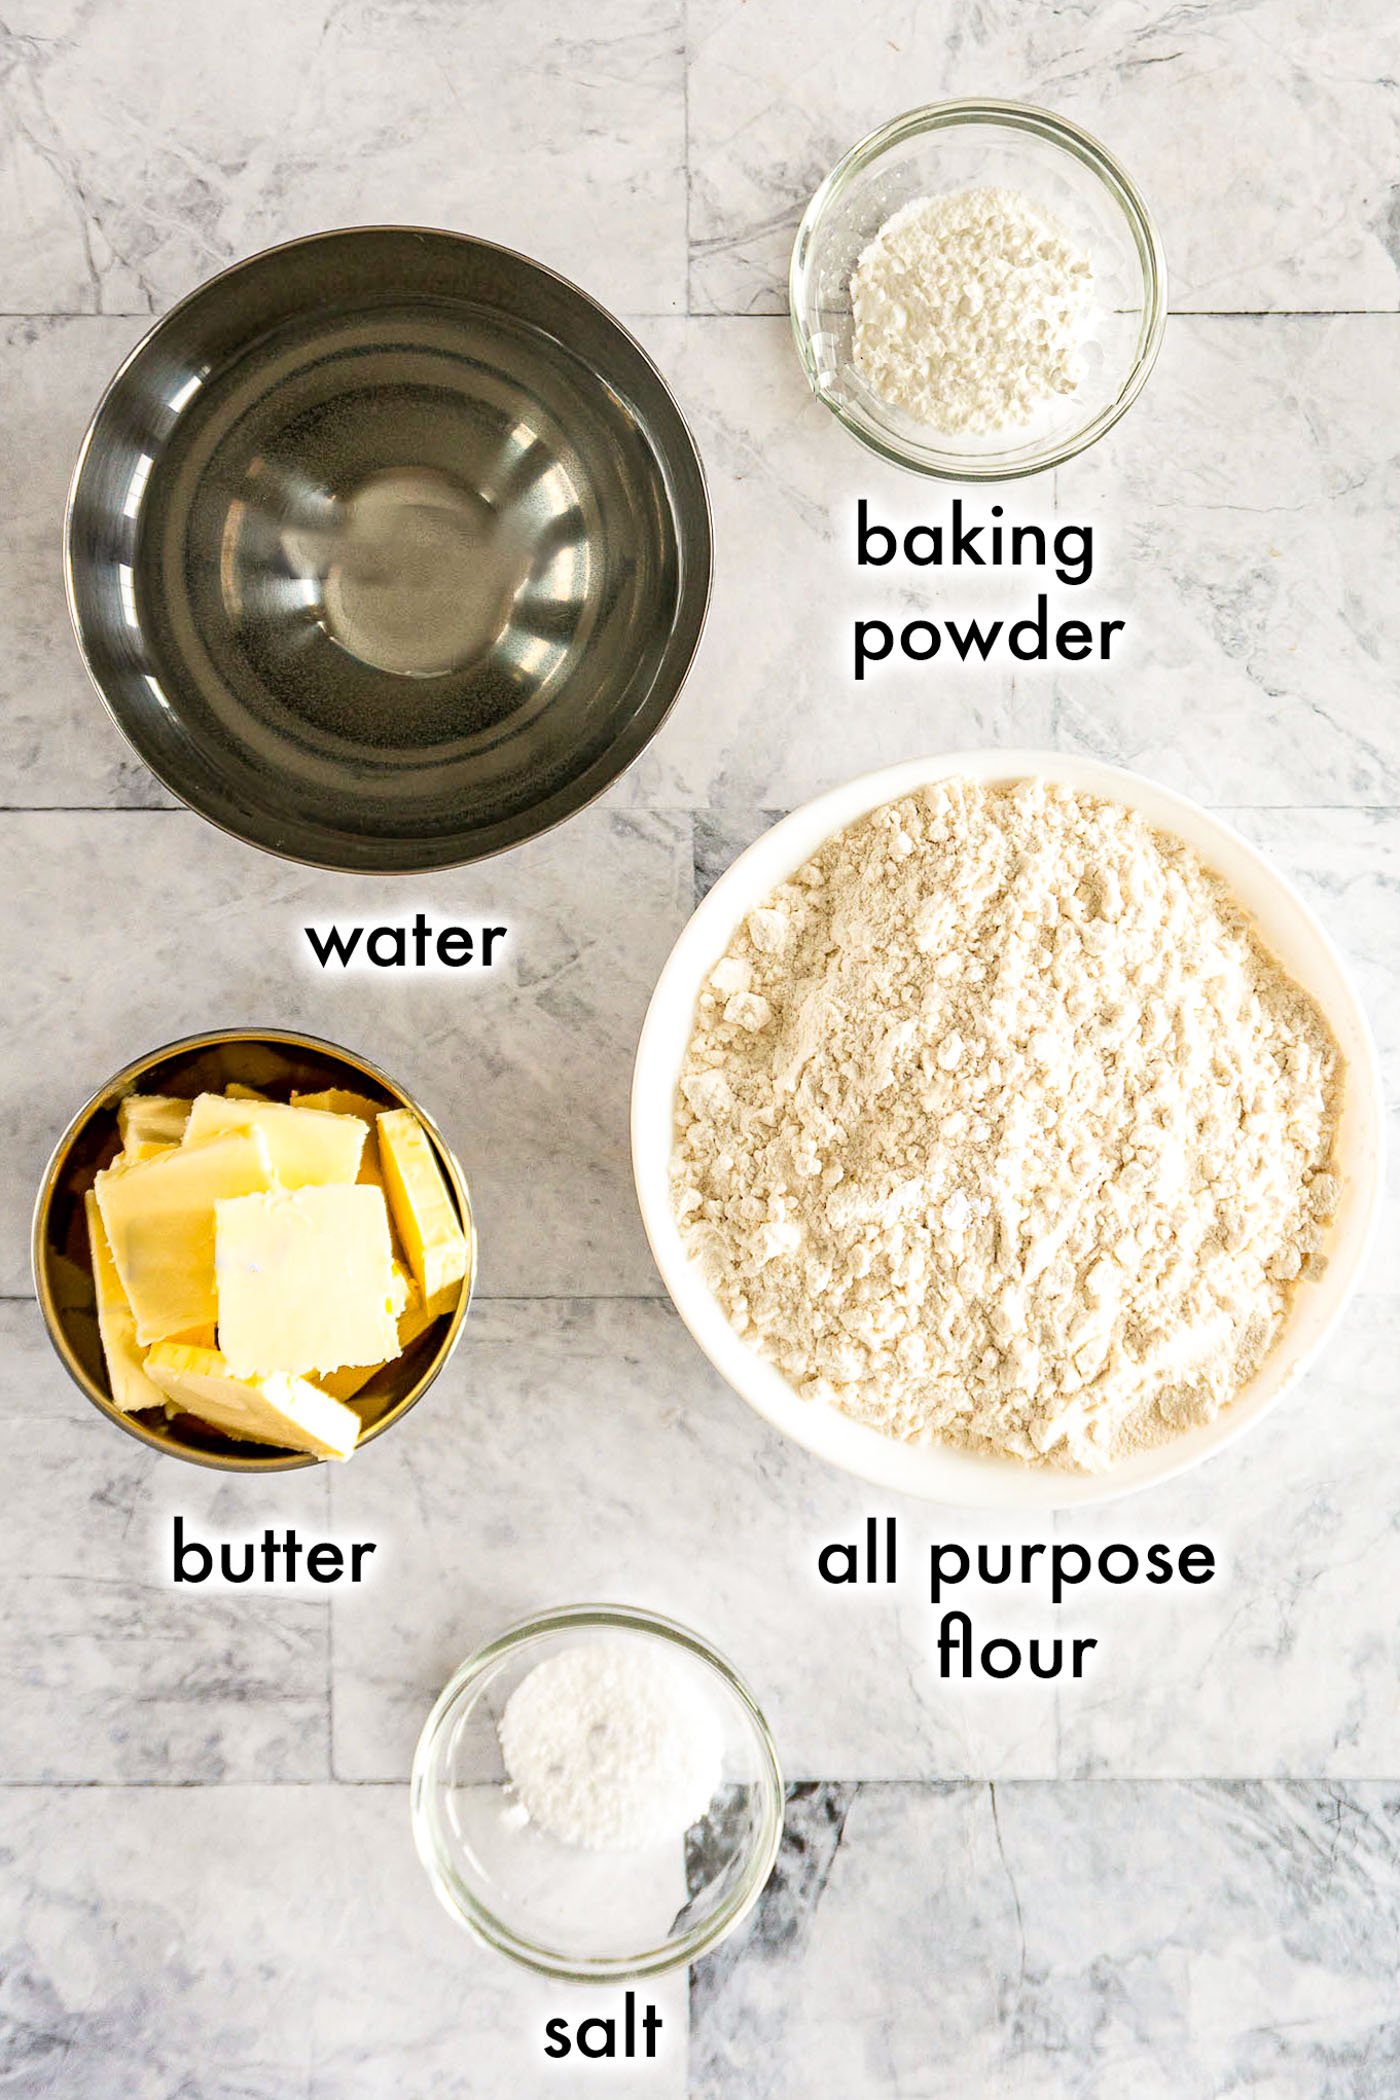
- All purpose flour: is ideal for biscuits because its lower protein makes the dough soft and tender.
- Butter: adds rich flavor, moisture, and fat, giving biscuits a tender texture.
- Baking Powder: helps biscuits rise and stay fluffy without adding salty or sour flavors.
See the recipe card for full information on ingredients and quantities.
Variations + Substitutions
- Most biscuits are made with milk or buttermilk, so the water can easily be subbed for milk.
- Add a tablespoon of sugar for a sweeter, breakfast biscuit.
- Add some fresh chopped herbs or spices to your dough before blending for savory treat.
- Whole wheat biscuits: substitute up to 1 cup of all-purpose flour with whole wheat flour.
How To Make Biscuits Without Milk

- Step 1: Combine 2 cups flour, 2 teaspoons baking powder, and 1/2 teaspoon salt in the bowl of your food processor. Add 1/2 cup cold, cubed butter and pulse 5 – 8 times, until the mixture starts to look coarse and crumbly. See below for manual directions.
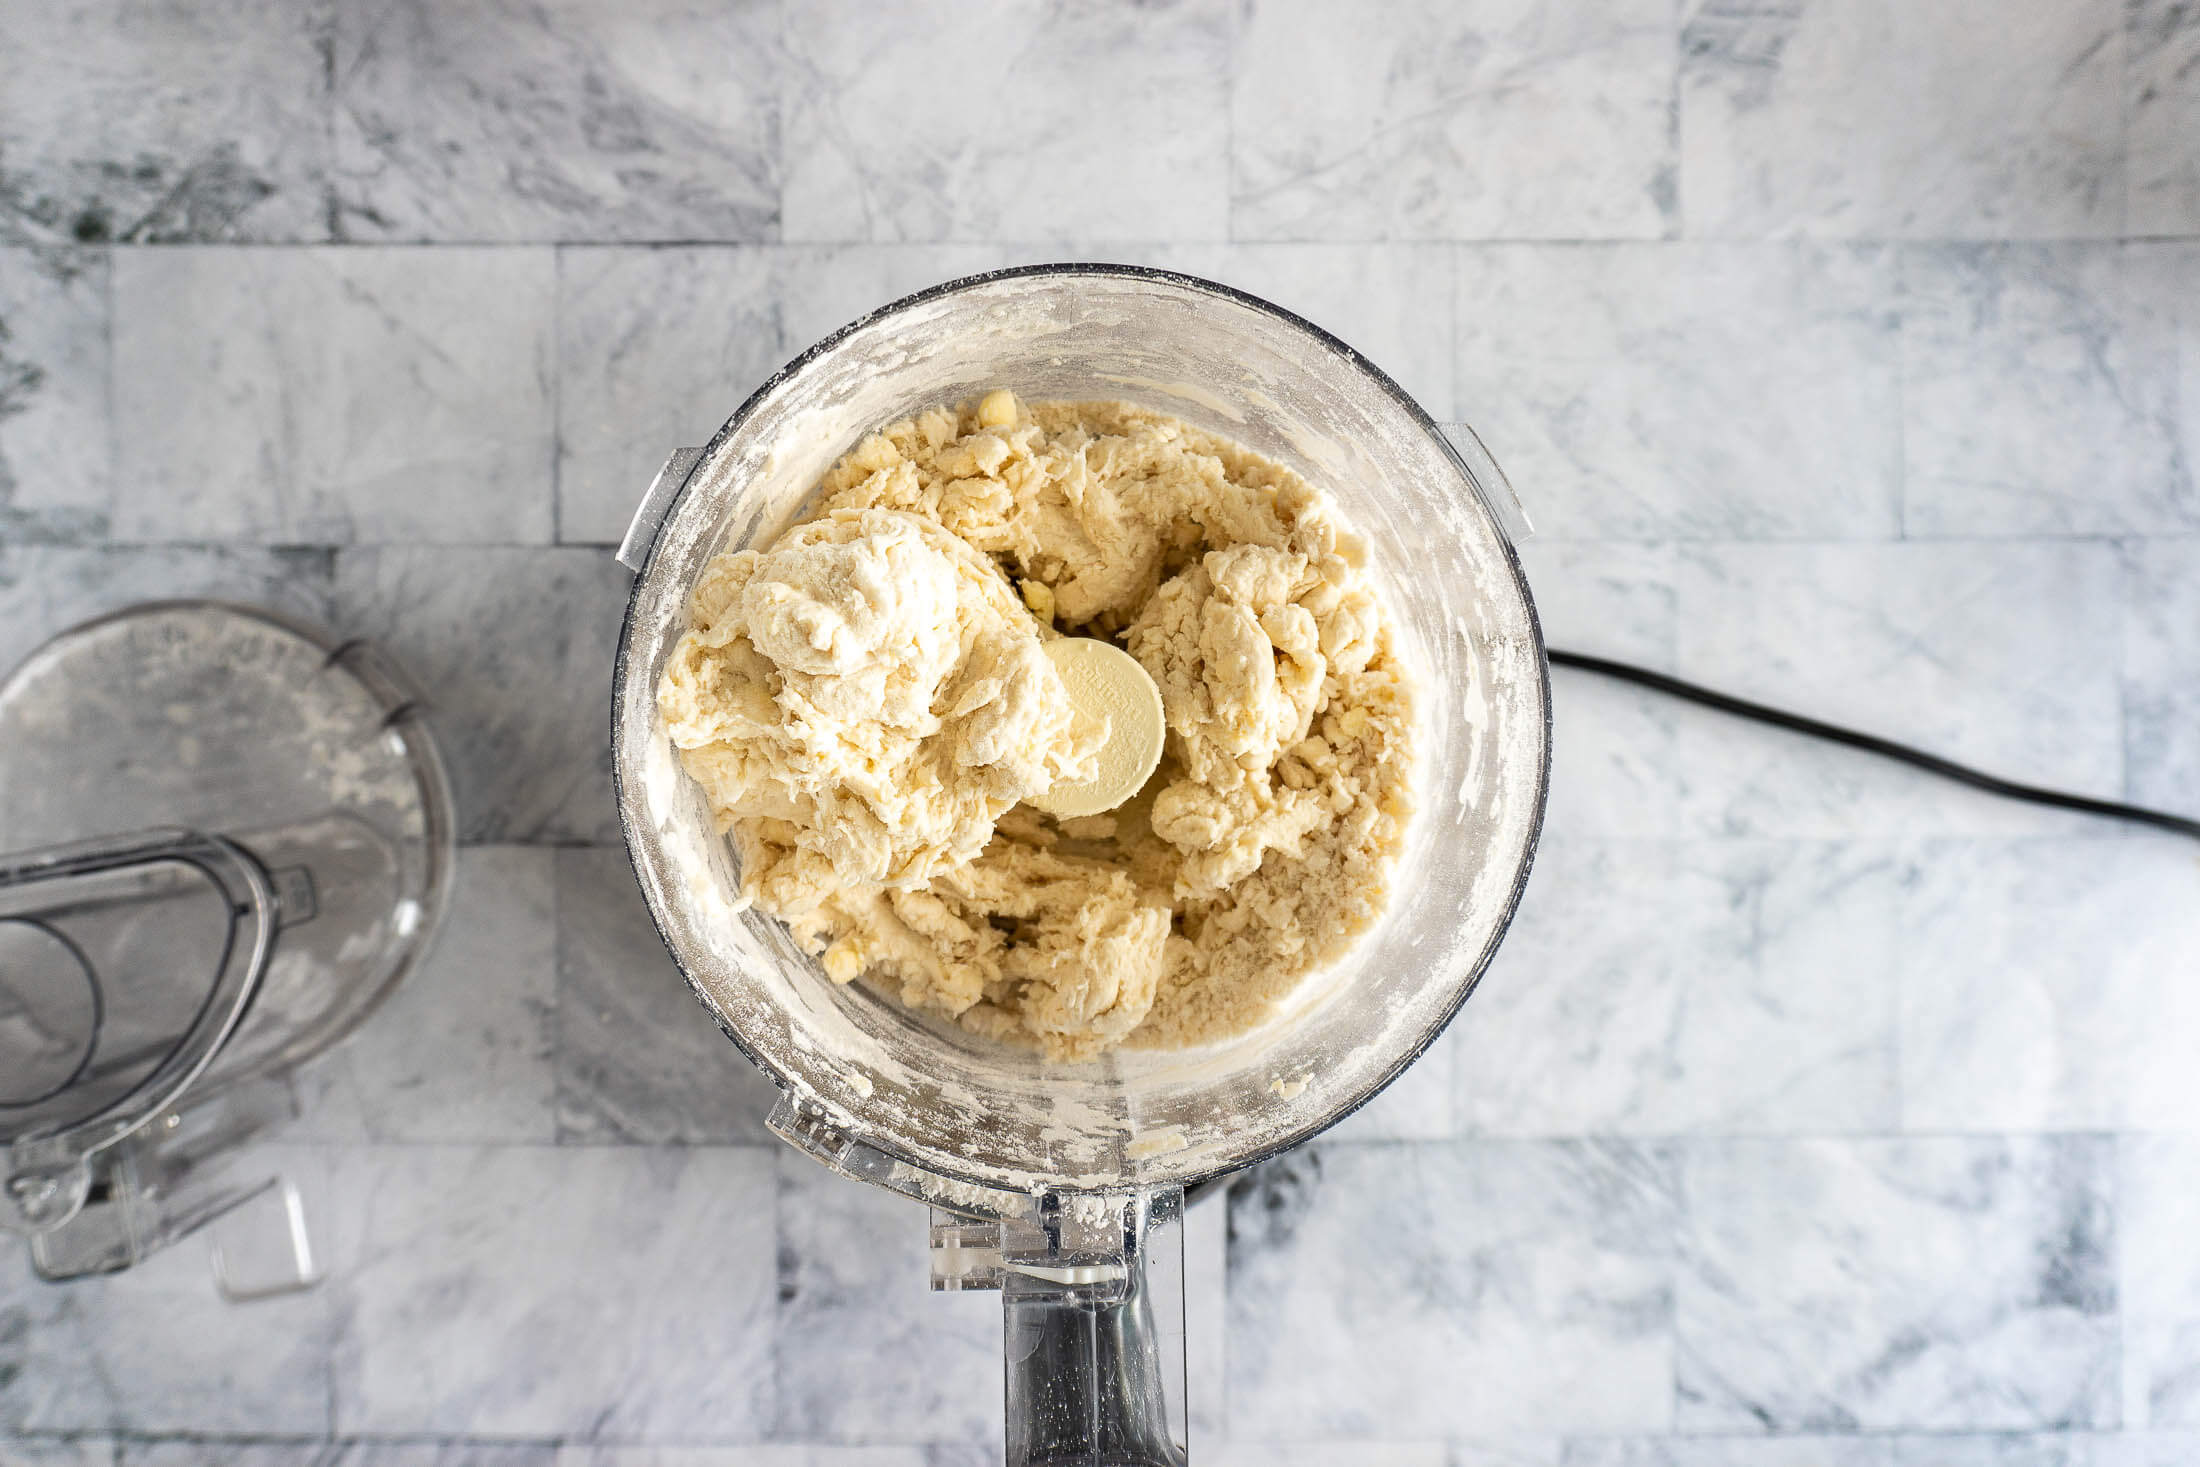
- Step 2: Add 3/4 cup cold water and pulse another 5-8 times – avoid over-mixing here!

- Step 3: Turn the dough onto a floured surface and press the dough together. Knead slightly, if required, but the dough should be somewhat dry and crumbly, you’re just folding it onto itself until it’s mostly in one piece.
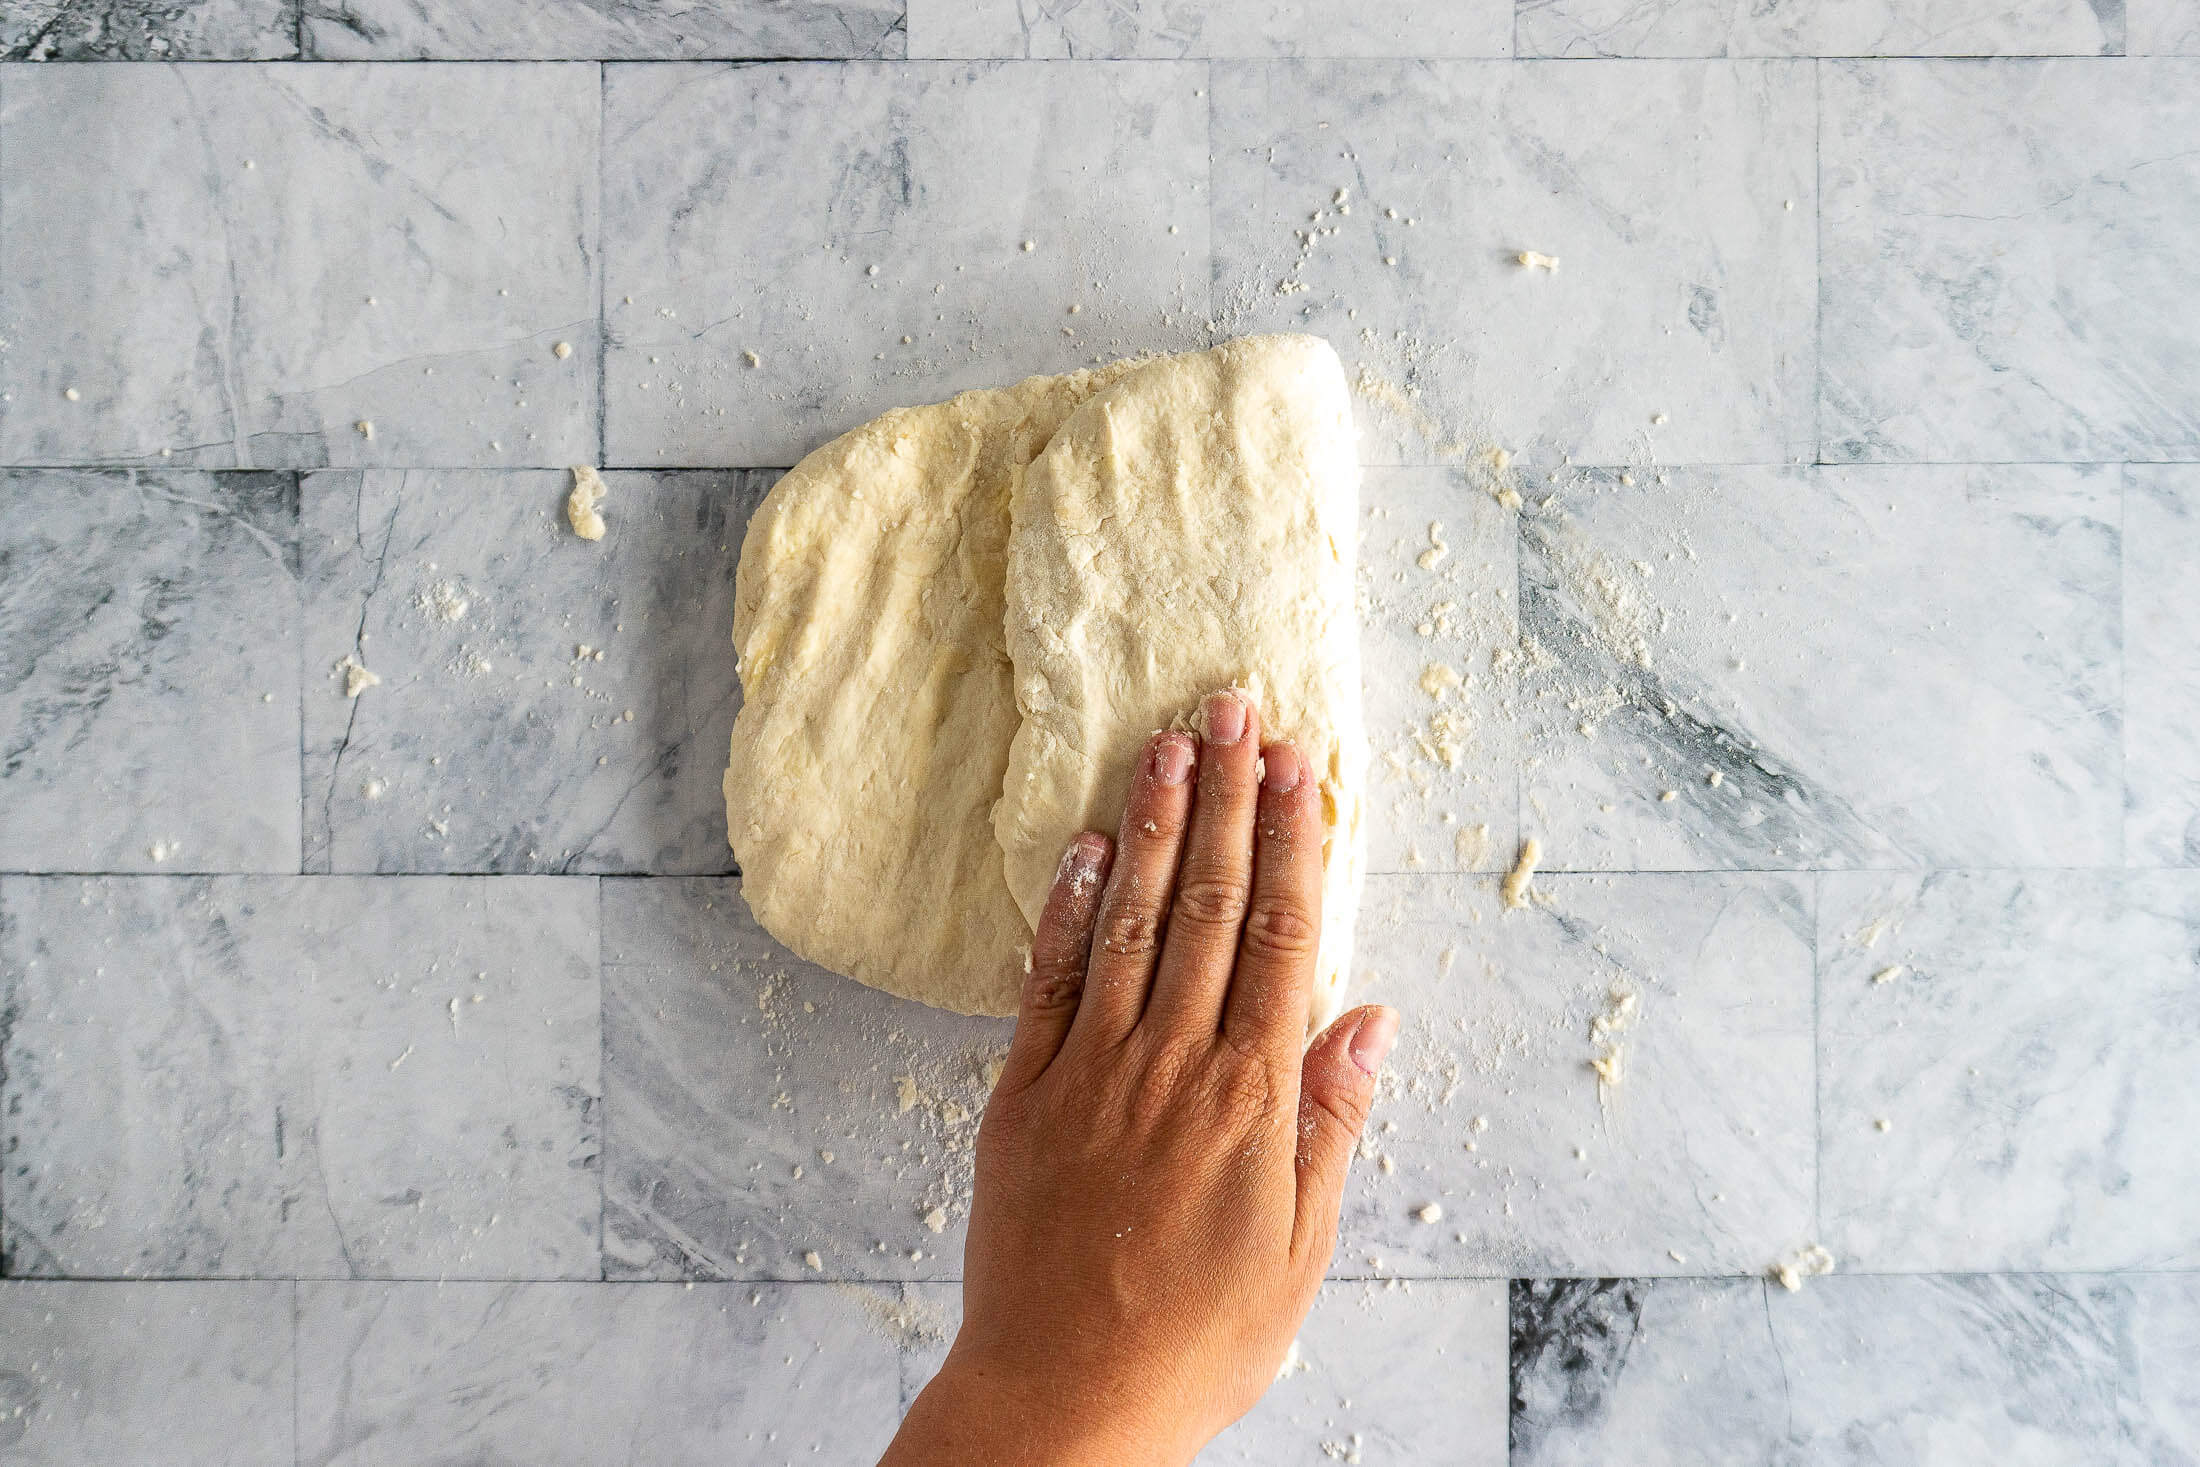
- Step 4: Press the dough into a rectangle about 1 inch thick. Fold the dough into thirds, short edges into the middle. Rotate a quarter turn, press the dough into a rectangle and fold again.
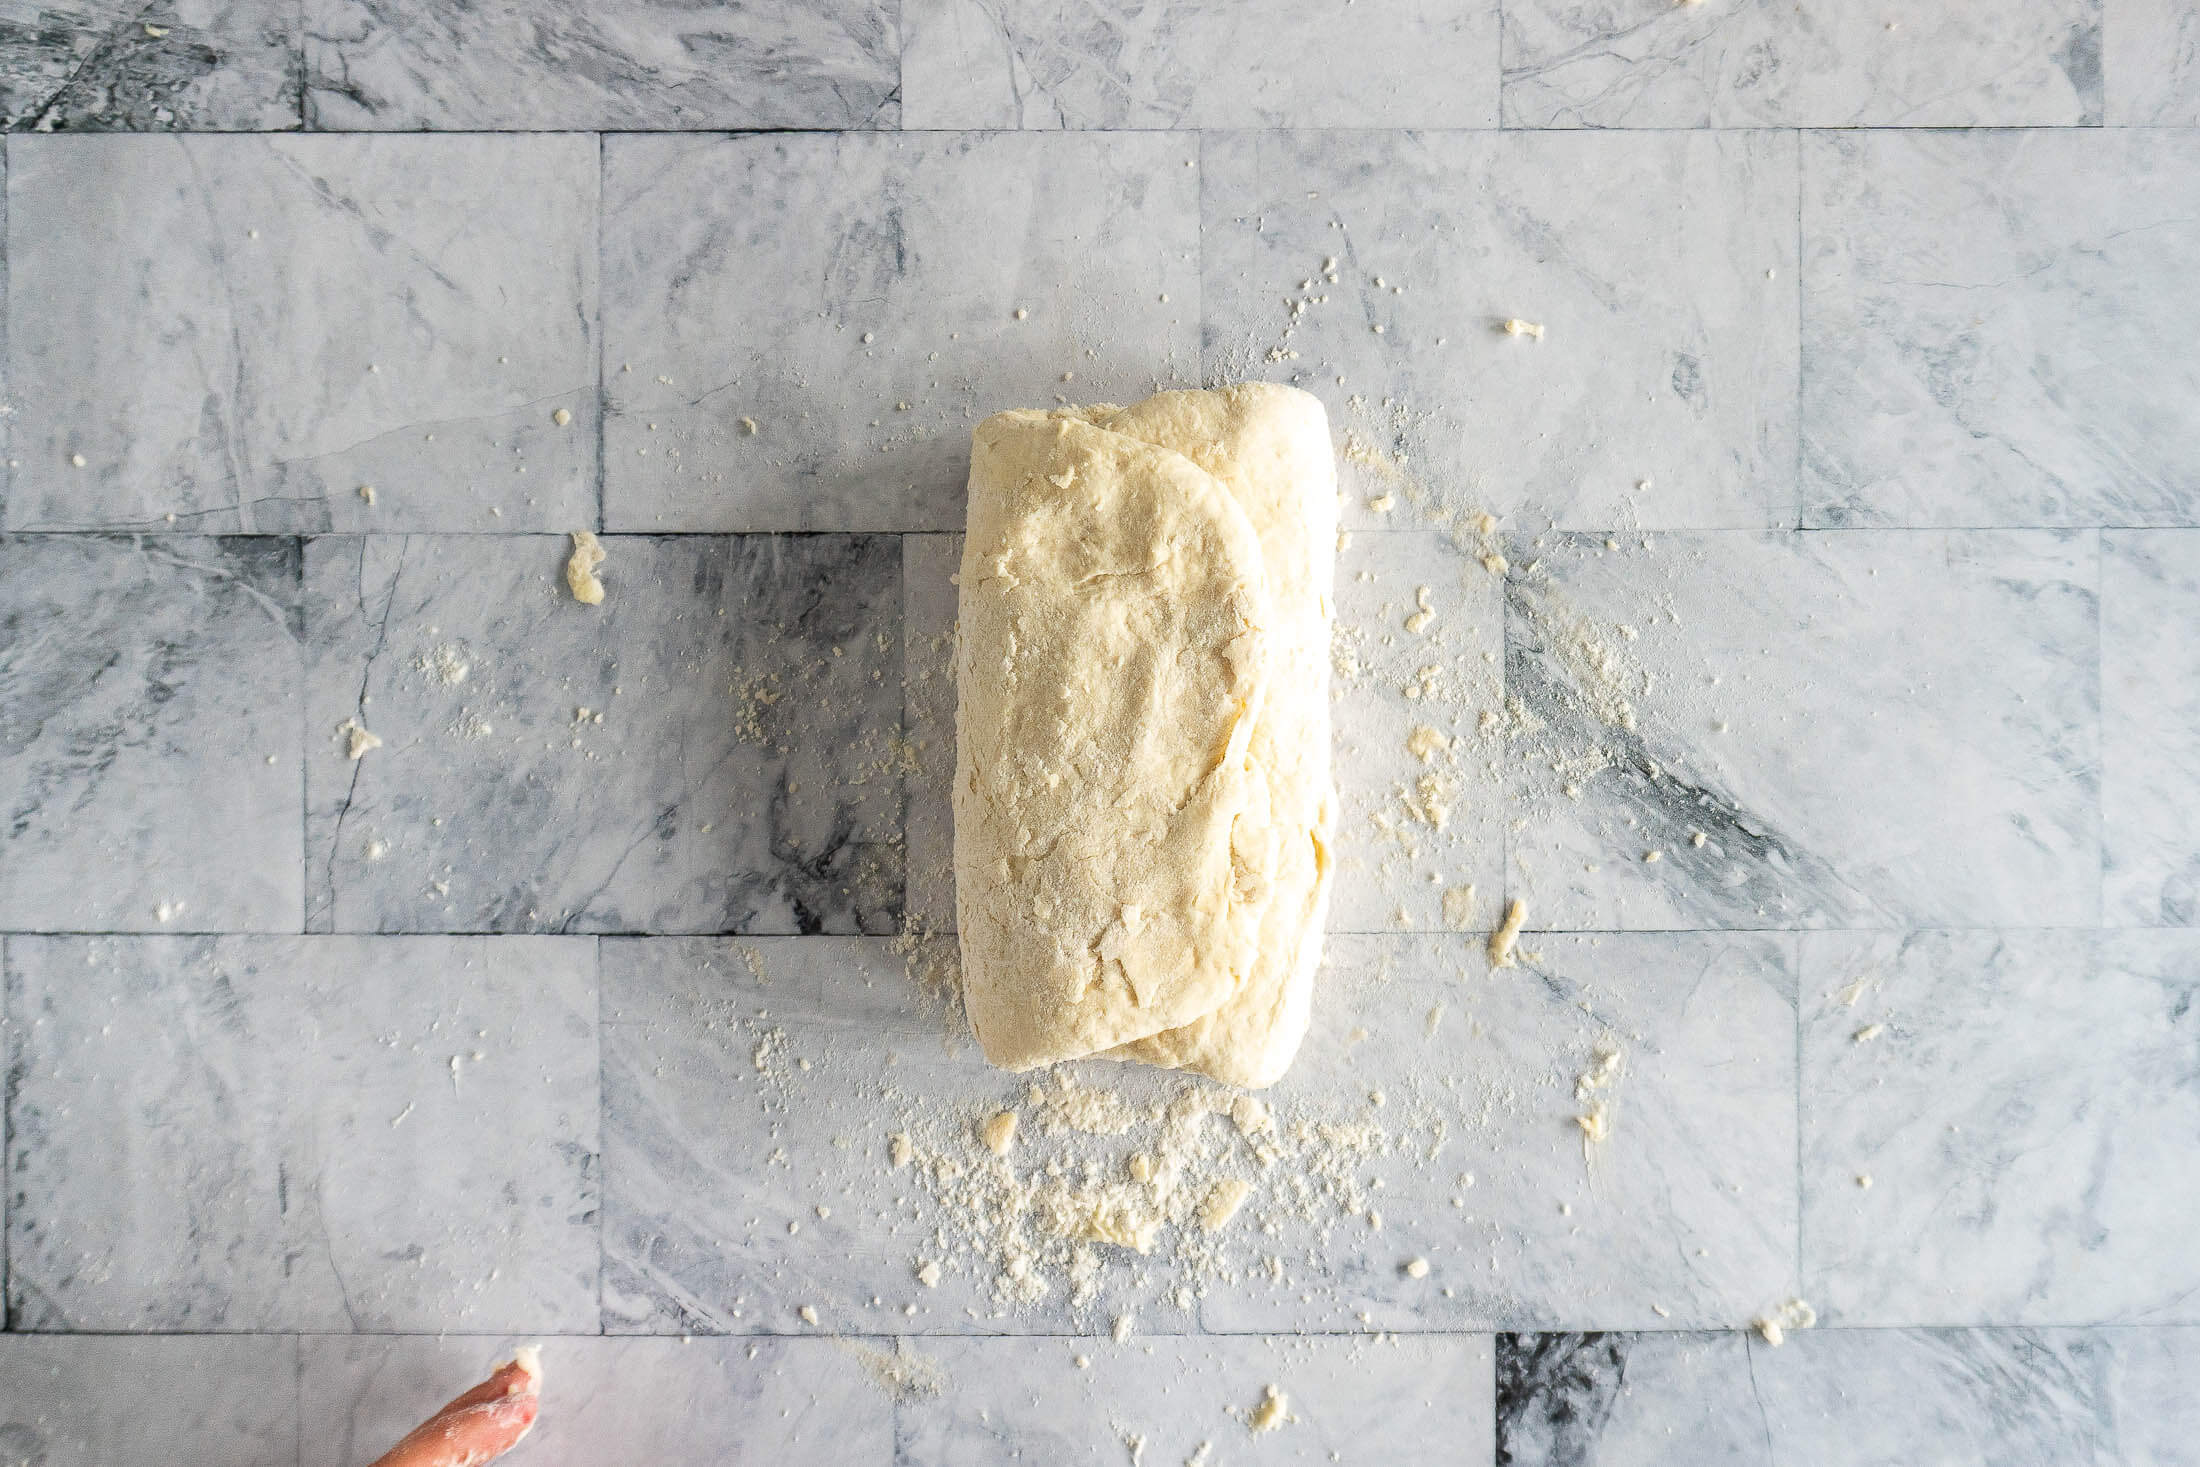
- Step 5: Rotate a quarter turn, press the dough into a rectangle and fold again.
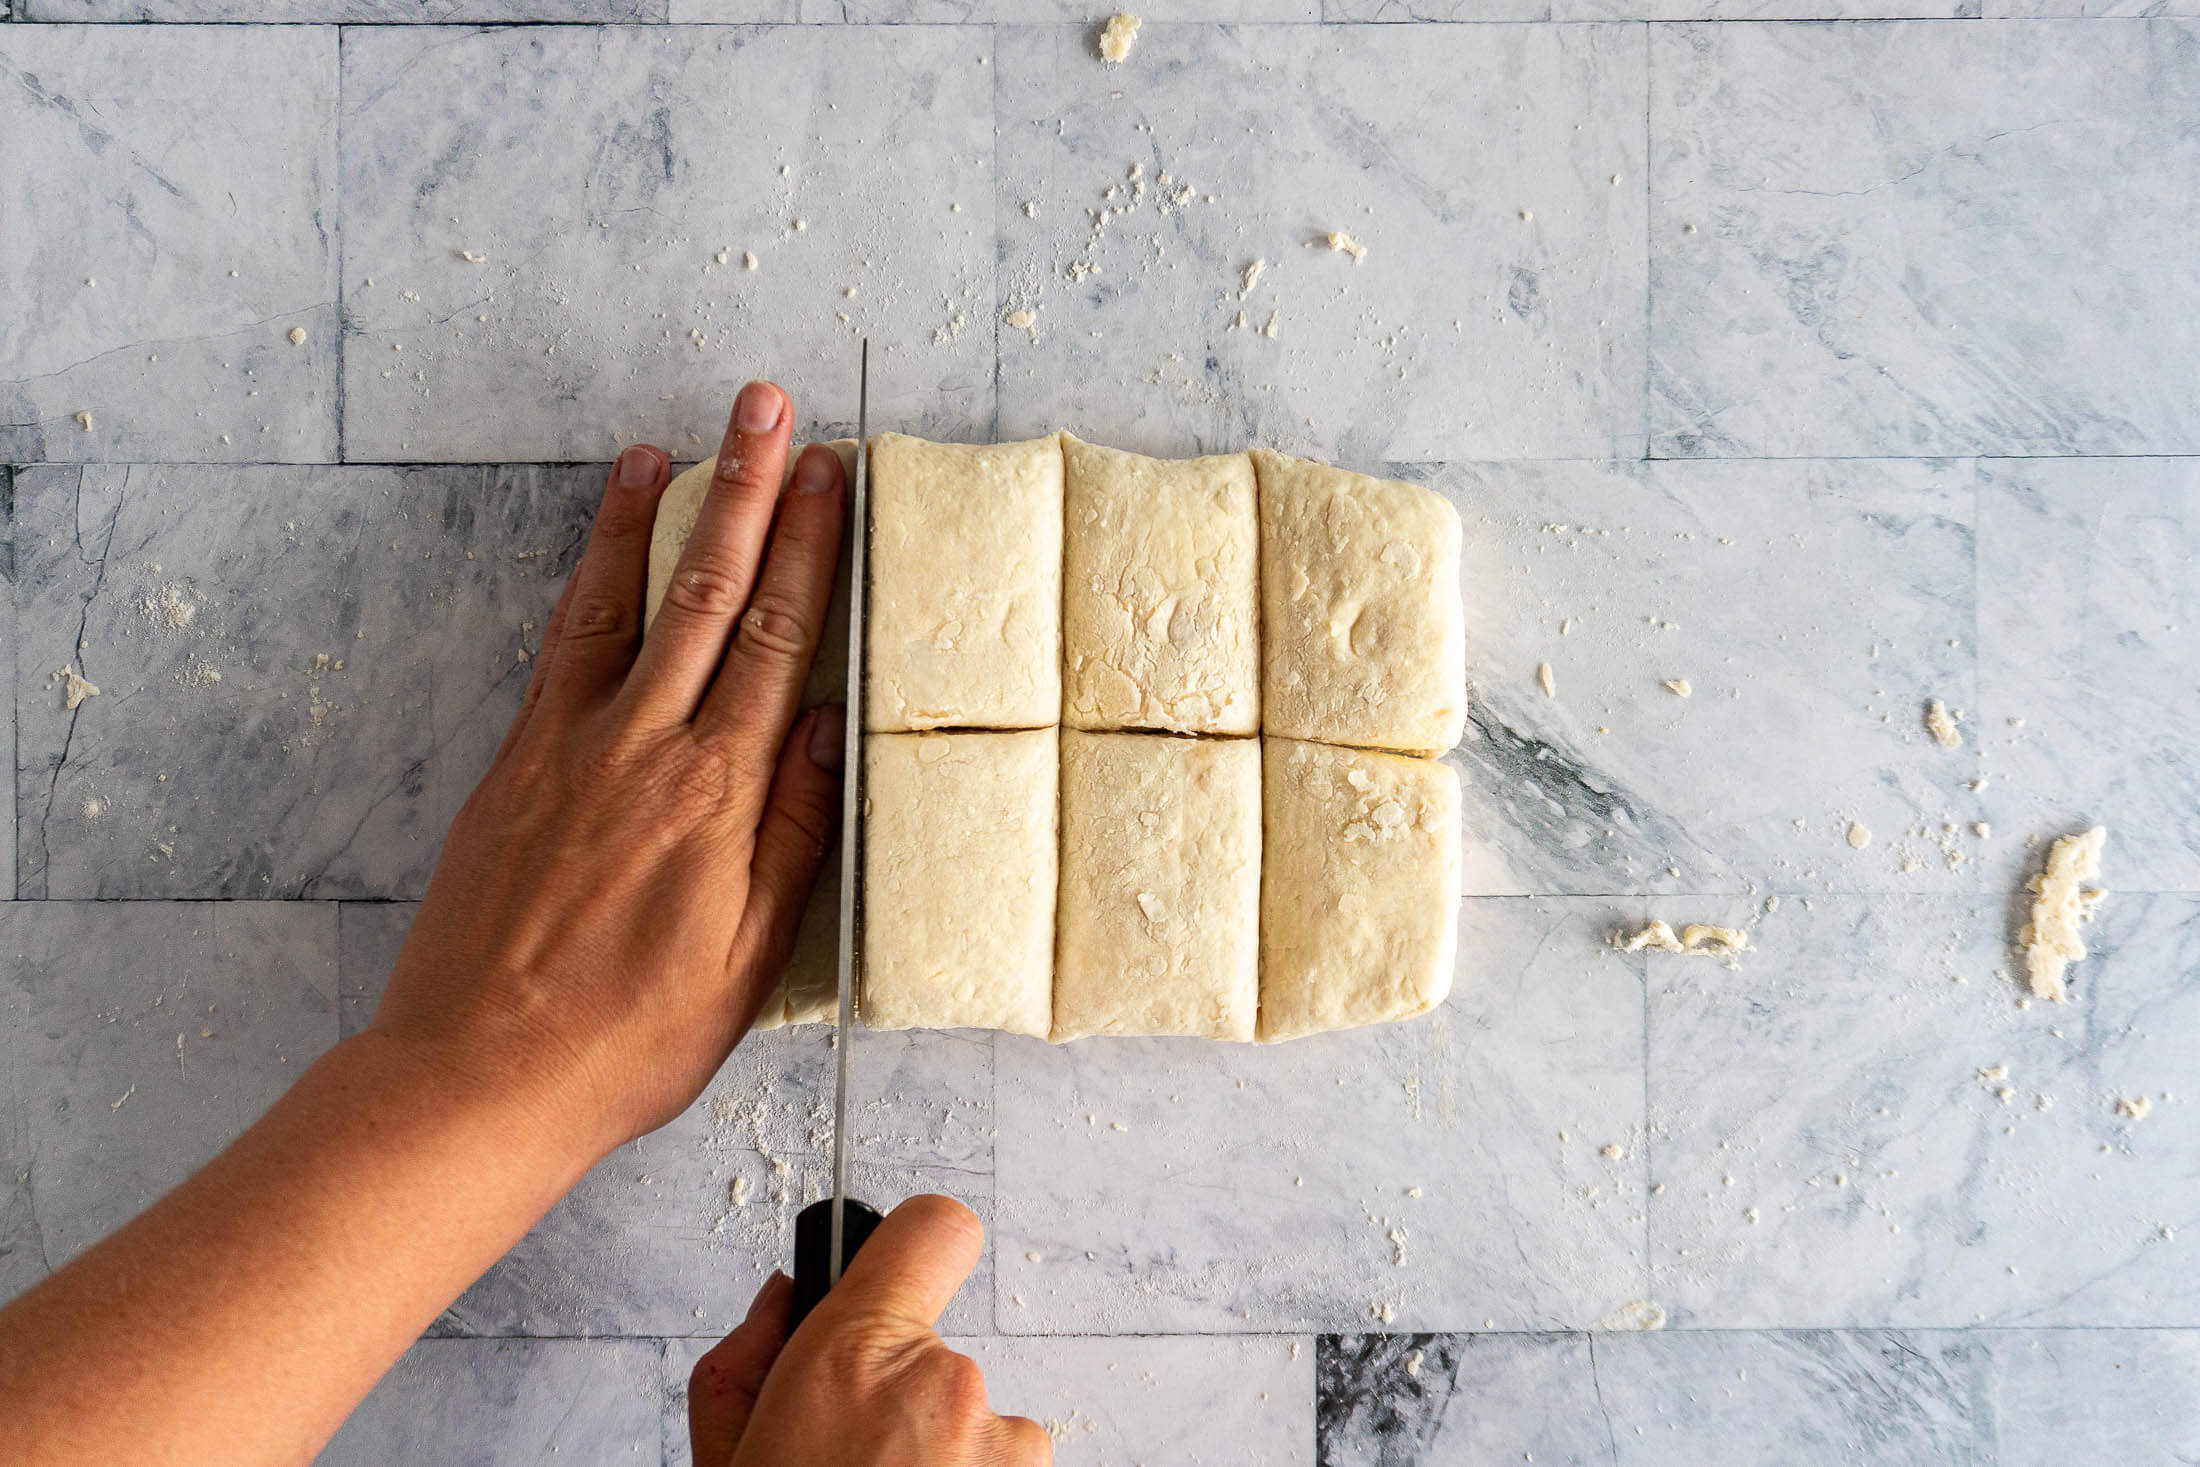
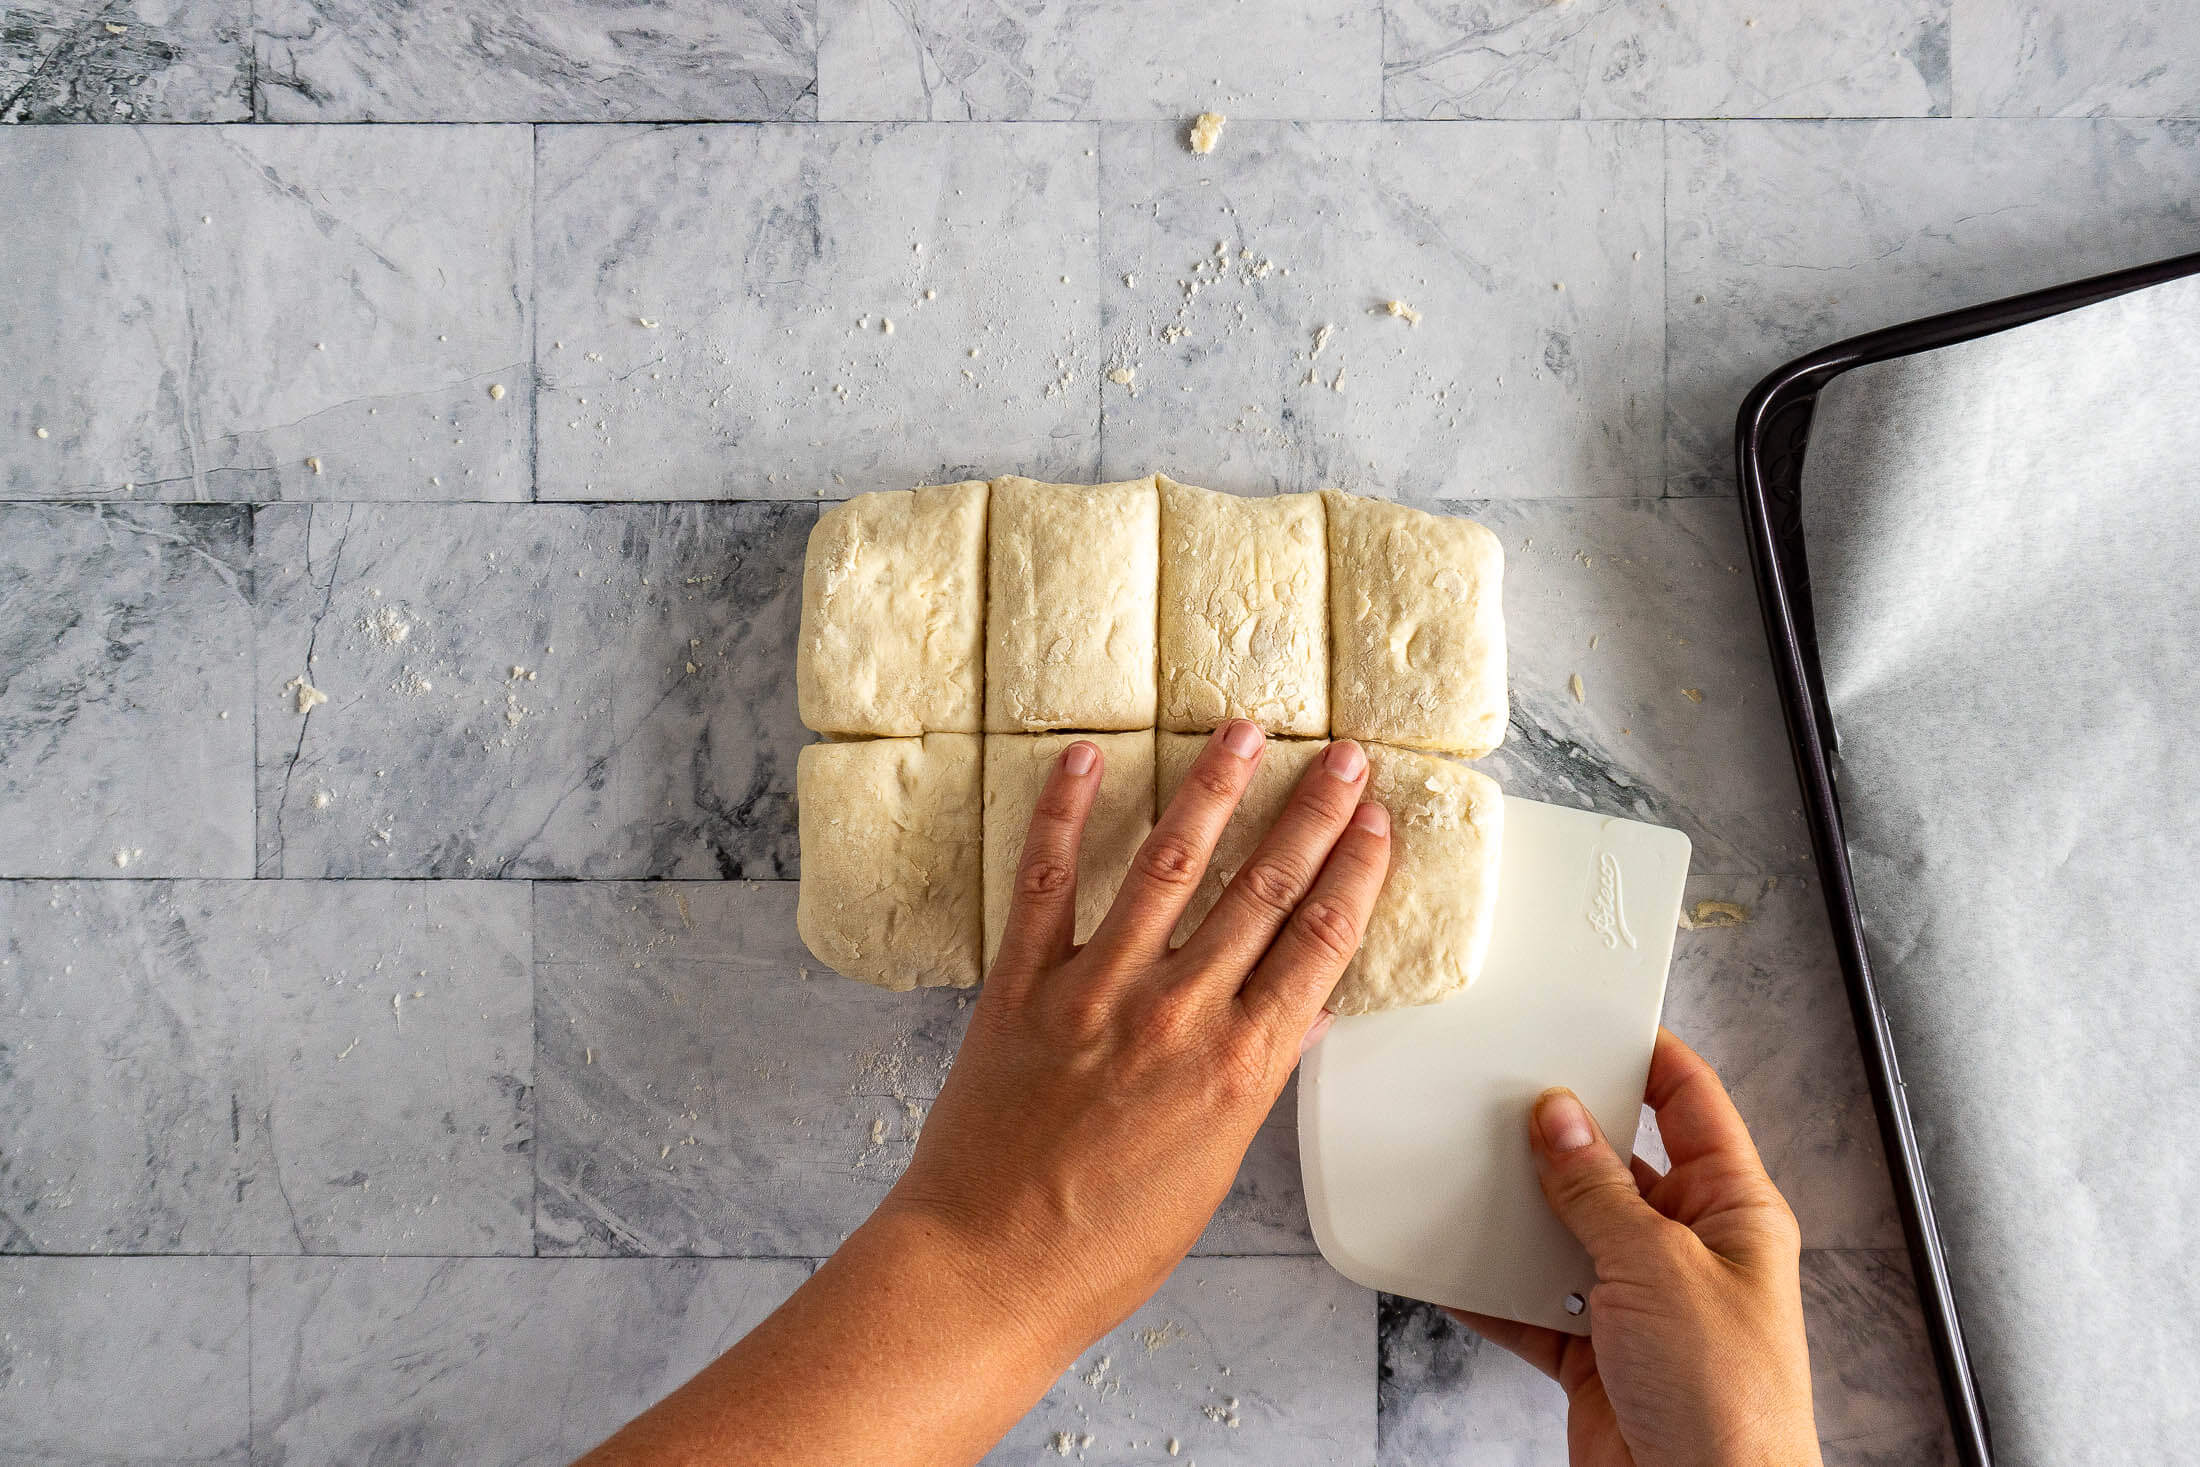
- Step 6: Cut the biscuits as desired. I prefer square but you may prefer round.
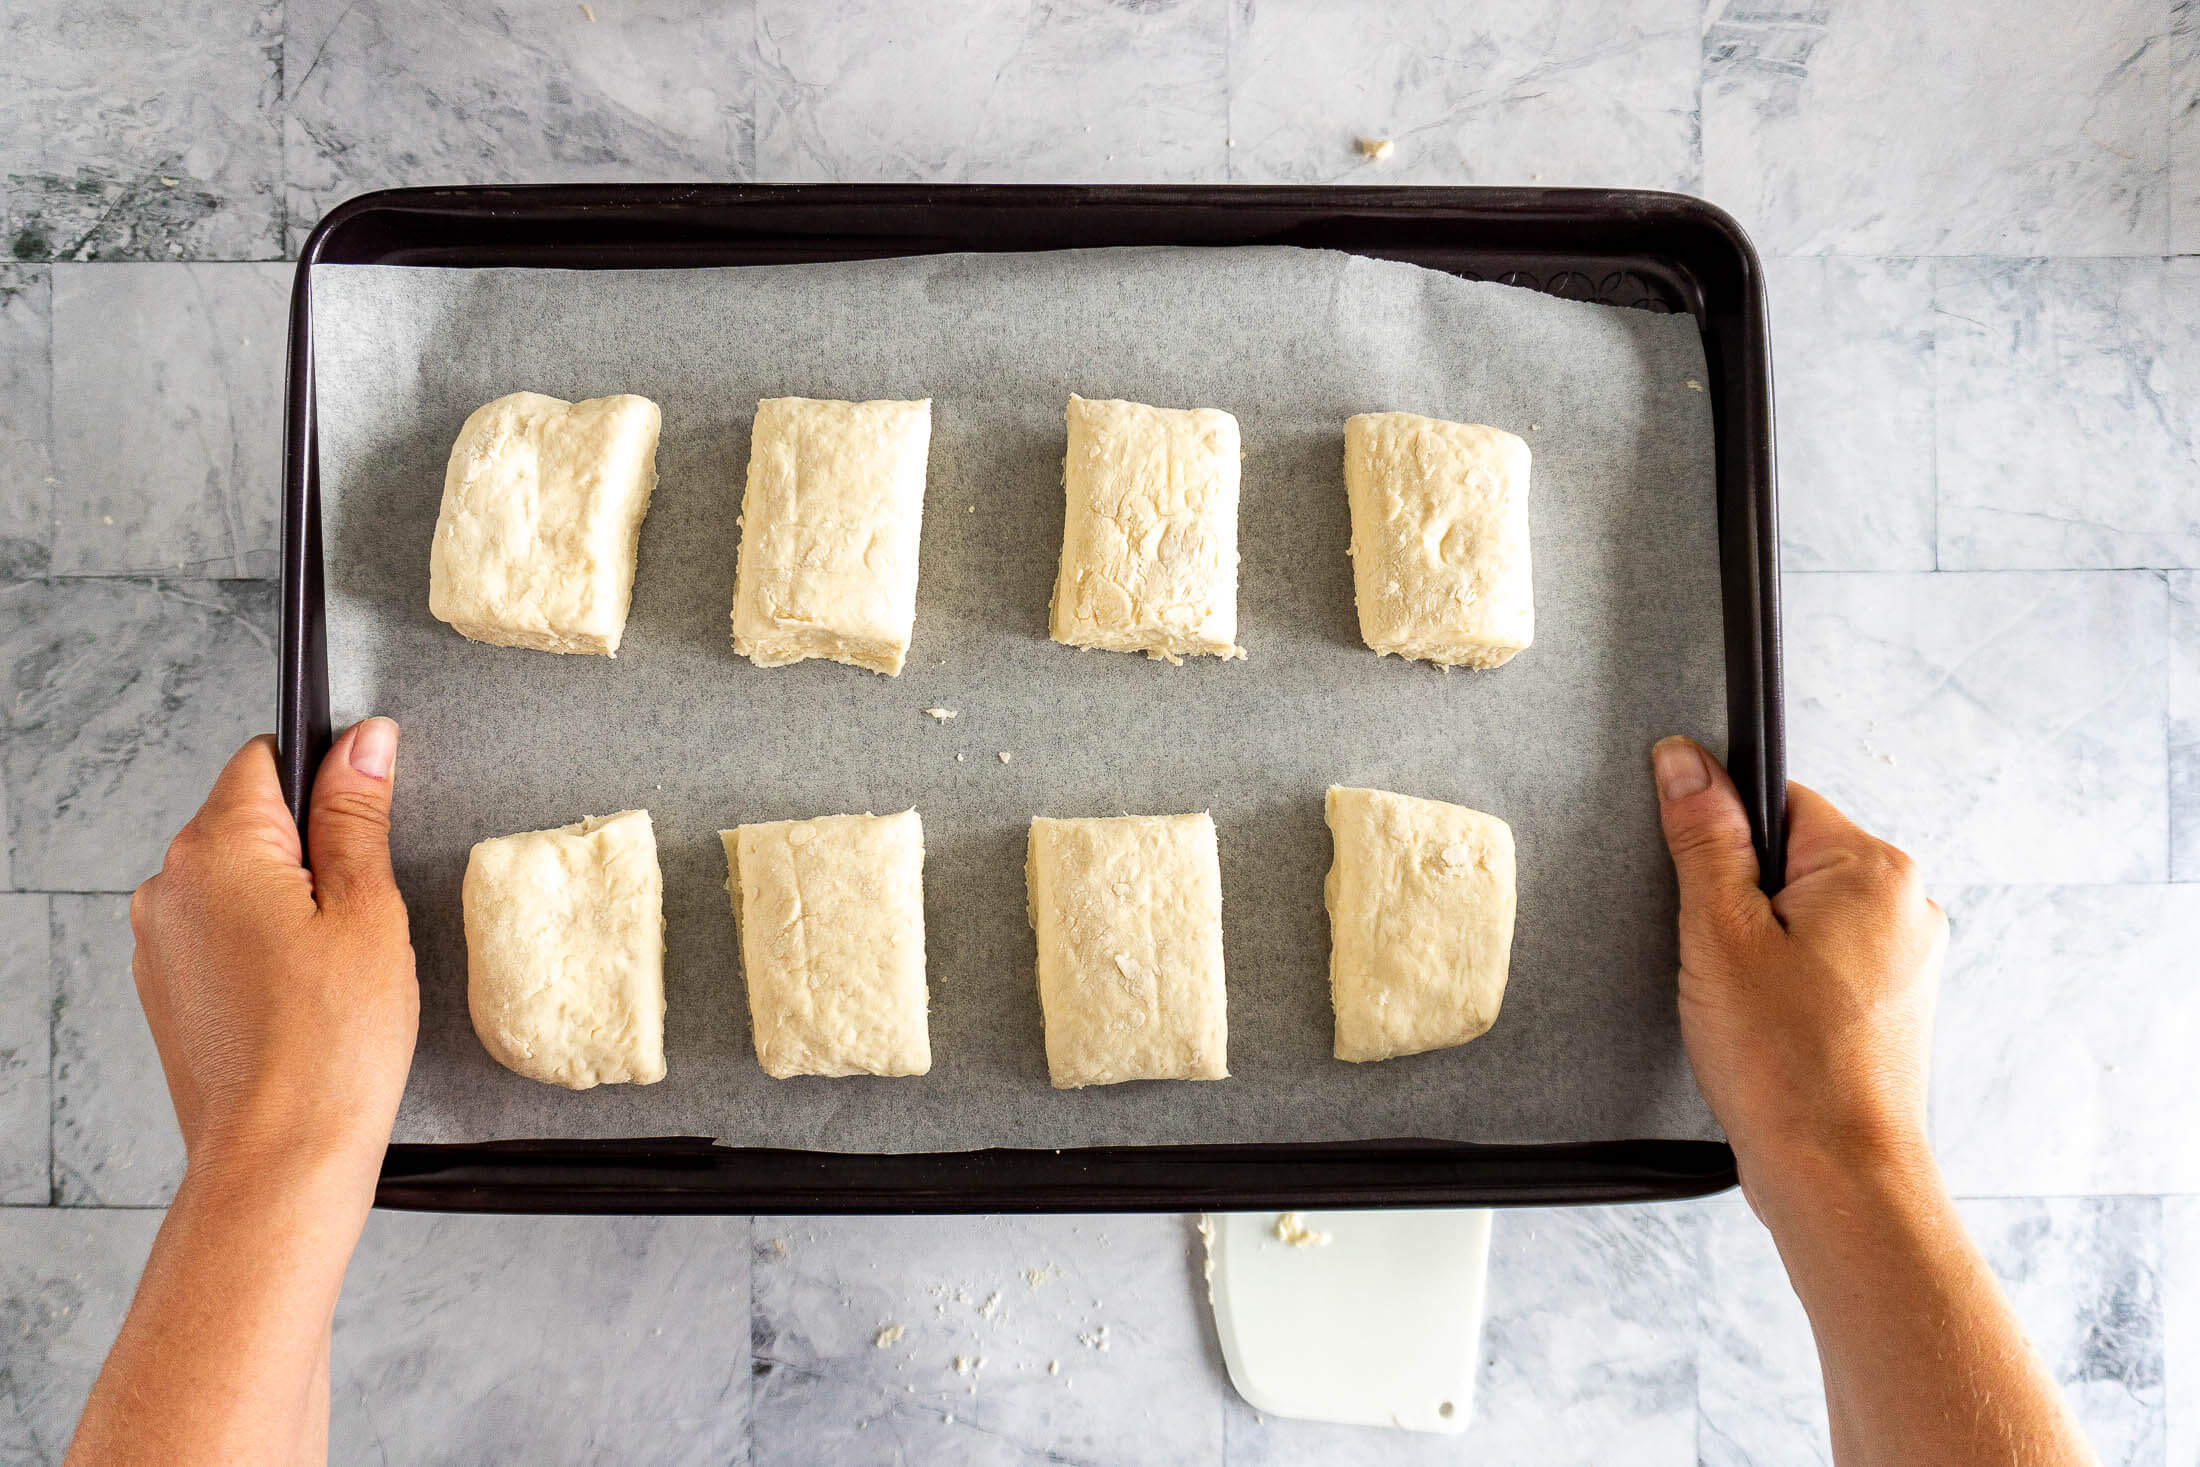
- Step 7: Gently transfer the biscuits to a parchment-lined baking sheet. Pop the biscuits in the fridge for 20-30 minutes while the oven preheats to 425f.
- Step 8: Once the oven has reached the temperature, remove the biscuits and bake them on the second from the top rack at 425f for 15-20 minutes, or until golden. I like to bake mine for 15 minutes, then brush with butter, then bake another 5 or so minutes until the tops are golden brown.
Expert Tips
- Keep your butter cold. It’s the most important part of this process. Cold butter actually steams inside the buns creating that irresistible flaky texture you just can’t beat!
- To help keep the butter nice and cold, we’re using ice cold water. This is important, as handling the dough with warm hands will start to melt the butter, and we can mitigate some of that by using super cold water.
- Flaky layers are the direct result of the pat and fold technique. Avoid using a rolling pin if possible! Pat the biscuit dough into a rectangle, fold the short sides into the center, then repeat.
Homemade Biscuit FAQs
As written this easy recipe makes 8 biscuits. It can be easily doubled or halved. If halving, use 6 tablespoons of ice-cold water!
Biscuits are best enjoyed fresh and warm, but they can be kept in an airtight container at room temperature for up to 2 days.
If you’ve got way too many biscuits (as if that’s possible!), they can be placed in a single layer on a cookie sheet in the freezer for 2-3 hours until completely frozen. Transfer the frozen biscuits to an airtight bag or container for up to 3 months.
This recipe comes together just as beautifully by hand. Use a pastry blender, two knives, or even two forks to cut the cold butter into the flour until the mixture resembles coarse crumbs.
It takes a little more elbow grease, but it’s the classic, old-fashioned way to make biscuits, and many bakers swear the results are just as good, if not better!
Round Or Square?
I’m gonna catch some flack for this from the round biscuit crowd, but I believe in cutting my biscuits square. There are so many reasons to bake square biscuits, and none of them (except the last one) is due to laziness!
- Cutting round biscuits means off-cut dough that must be re-worked before being cut. The more you work biscuit dough, the less likely it is to be flaky and beautifully layered.
- Squared-off biscuits make better sandwiches, and increase real estate for whatever you’re slathering on it; be it whipped honey butter, gravy, or a fried egg and home cooked bacon.
- It’s actually quicker and less work to cut a rectangle into smaller rectangles. Gotta hit the easy button whenever you can!
Make Ahead Biscuits
This recipe is easily adaptable to make ahead biscuits.
Instead of chilling the biscuits in the fridge while the oven preheats, place them in the freezer and allow them to freeze for 2-3 hours, or until solid. Transfer the frozen biscuits to a freezer-friendly airtight container or freezer ziplock bag.
Your frozen biscuit dough should be used within 2-3 months for best results.
To bake the frozen biscuits, remove them from the freezer and allow them to thaw on a parchment-lined baking sheet while the oven preheats. You’ll need to tack on a few extra minutes of bake time.
Try These Fresh Baked Favorites


If you tried this no milk biscuit recipe or any other recipe on my blog, please leave a 🌟 star rating and let me know how it went in the comments below. Thanks for visiting!
📖 Printable Recipe
No Milk Biscuit Recipe
Ingredients
- 2 cups all purpose flour
- 2 teaspoons baking powder
- ½ teaspoon fine sea salt
- ½ cup unsalted butter, cold
- ¾ cup cold water
Instructions
- Combine 2 cups all purpose flour, 2 teaspoons baking powder, and 1/2 teaspoon salt in the bowl of your food processor. Add 1/2 cup cold, cubed butter to the dry ingredients and pulse 5 – 8 times, until the mixture starts to look coarse and crumbly. (See FAQs in article for directions without food processor)
- Add 3/4 cup cold water to the bowl of the food processor and pulse to combine, another 5-8 times, avoid overmixing at this point.
- Turn the dough onto a floured surface and press the dough together. Knead slightly, if required, but the dough should be somewhat dry and crumbly,
- Press the dough into a rectangle, then into thirds, short edges into the middle. Rotate a quarter turn, press the dough into a rectangle and fold again.
- Cut the biscuits as desired.
- Gently transfer the biscuits to a parchment-lined baking sheet. Pop the biscuits in the fridge for 20-30 minutes while the oven preheats!
- Preheat oven to 425f.
- Once the oven has reached the temperature, remove the biscuits and bake them on the second from the top rack at 425f for 15-20 minutes, or until golden.
- Serve warm!
Notes
-
- Keep your butter cold. It’s the most important part of this process. Cold butter actually steams inside the buns creating that irresistible flaky texture you just can’t beat!
- To help keep the butter nice and cold, we’re using ice cold water. This is important, as handling the dough with warm hands will start to melt the butter, and we can mitigate some of that by using super cold water.
- Flaky layers are the direct result of the pat and fold technique. Avoid using a rolling pin if possible! Pat the biscuit dough into a rectangle, fold the short sides into the center, then repeat.


The recipe says there’s notes for making this without a processor and there…. isn’t. I know how to do it, but someone else may not and it’s misleading. “(See notes for directions without food processor).”
For clarity, to do this without a food processor: cube your butter into 1/2″ cubes and add to dry ingredients. Massage with your hands until a sandy crumb forms, refrigerating/freezing the mix to keep the butter butter COLD if needed. Melted butter is not your friend here. Continue the recipe as directed.
Hi Deborah, thanks for pointing that out. I have recently updated the article, and I removed that information from the notes section and placed it into an FAQ to help keep printed pages shorter. I’ll amend the recipe card to reflect that.