
Bread Machine Pizza Dough
Pizza night doesn't get any easier than this! This bread machine pizza dough comes together with minimal effort. Simply toss in the ingredients, press start, and let the machine do all the work for quick, foolproof dough every time.

Craving The Recipe Details?
What it is: A super easy bread machine pizza dough, ready just in time for dinner!
Why you'll love it: Minimal effort with no kneading. This dough gives you elastic, workable crust for two thin or thick crust pizzas with great texture every time.
How to make it: Combine warm water, olive oil, sugar, and salt in your bread machine, layer in bread flour and instant yeast, then run the dough cycle. Once finished, divide, shape, and proof the dough before topping and baking.
I'll be the first to admit: I love a good, slow-fermented sourdough pizza crust that takes days to perfect.
But sometimes, you just need something quick and easy to get dinner on the table. That's where bread machine pizza dough comes in!
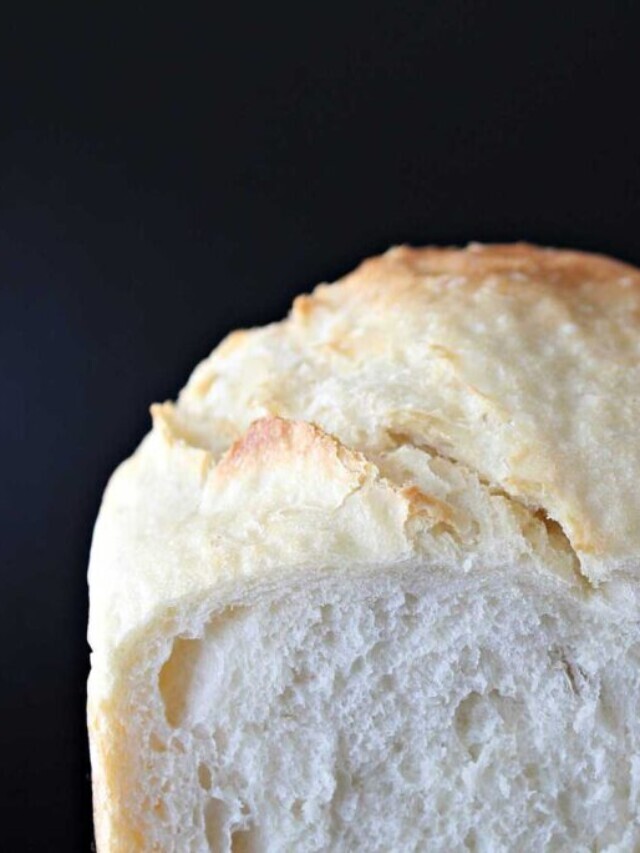
It couldn't be easier, just add your ingredients to the bread machine, press a button, and walk away. No kneading, no babysitting, just soft, workable dough ready to be turned into pizza in a flash. This is the best pizza dough I’ve made without sourdough starter – and that’s saying something!
This bread machine pizza dough recipe is dedicated to hitting the easy button.
Jump to:
Key Ingredients

Bread Flour – This recipe is made with bread flour to keep it easy and accessible to everyone. No need for fancy 00 flour taking up pantry space for this recipe! If you don't have bread flour, all purpose flour will work, though the texture may suffer a bit.
Oil – Adding a little bit of oil helps to improve the tenderness of the crust because we're cooking it in a home oven instead of a wood fired oven, the dough will spend more time cooking and the oil will help to prevent it from drying out too much. That said, this pizza dough will bake beautifully in an outdoor pizza oven too!
Yeast – This recipe calls for instant yeast, or bread machine yeast, but if you don't have any, you can use active dry yeast. Increase the amount to 2 1/2 teaspoons of active dry yeast and add it along with the liquid ingredients instead of on top.
See the recipe card for full information on ingredients and quantities.
Read More: Bread Machine Yeast Substitutes
Variations + Substitutions
- The olive oil in this recipe can be substituted for butter, vegetable oil, margarine, or even bacon grease!
- Make it whole wheat-ish: swap out up to 1/2 cup of bread flour for whole wheat flour.
- Amp up the flavor by seasoning your dough: toss up to 1 1/2 teaspoon of dried Italian seasoning, garlic powder, rosemary, oregano, or basil into the bread machine along with the flour.
How To Make Bread Machine Pizza Dough
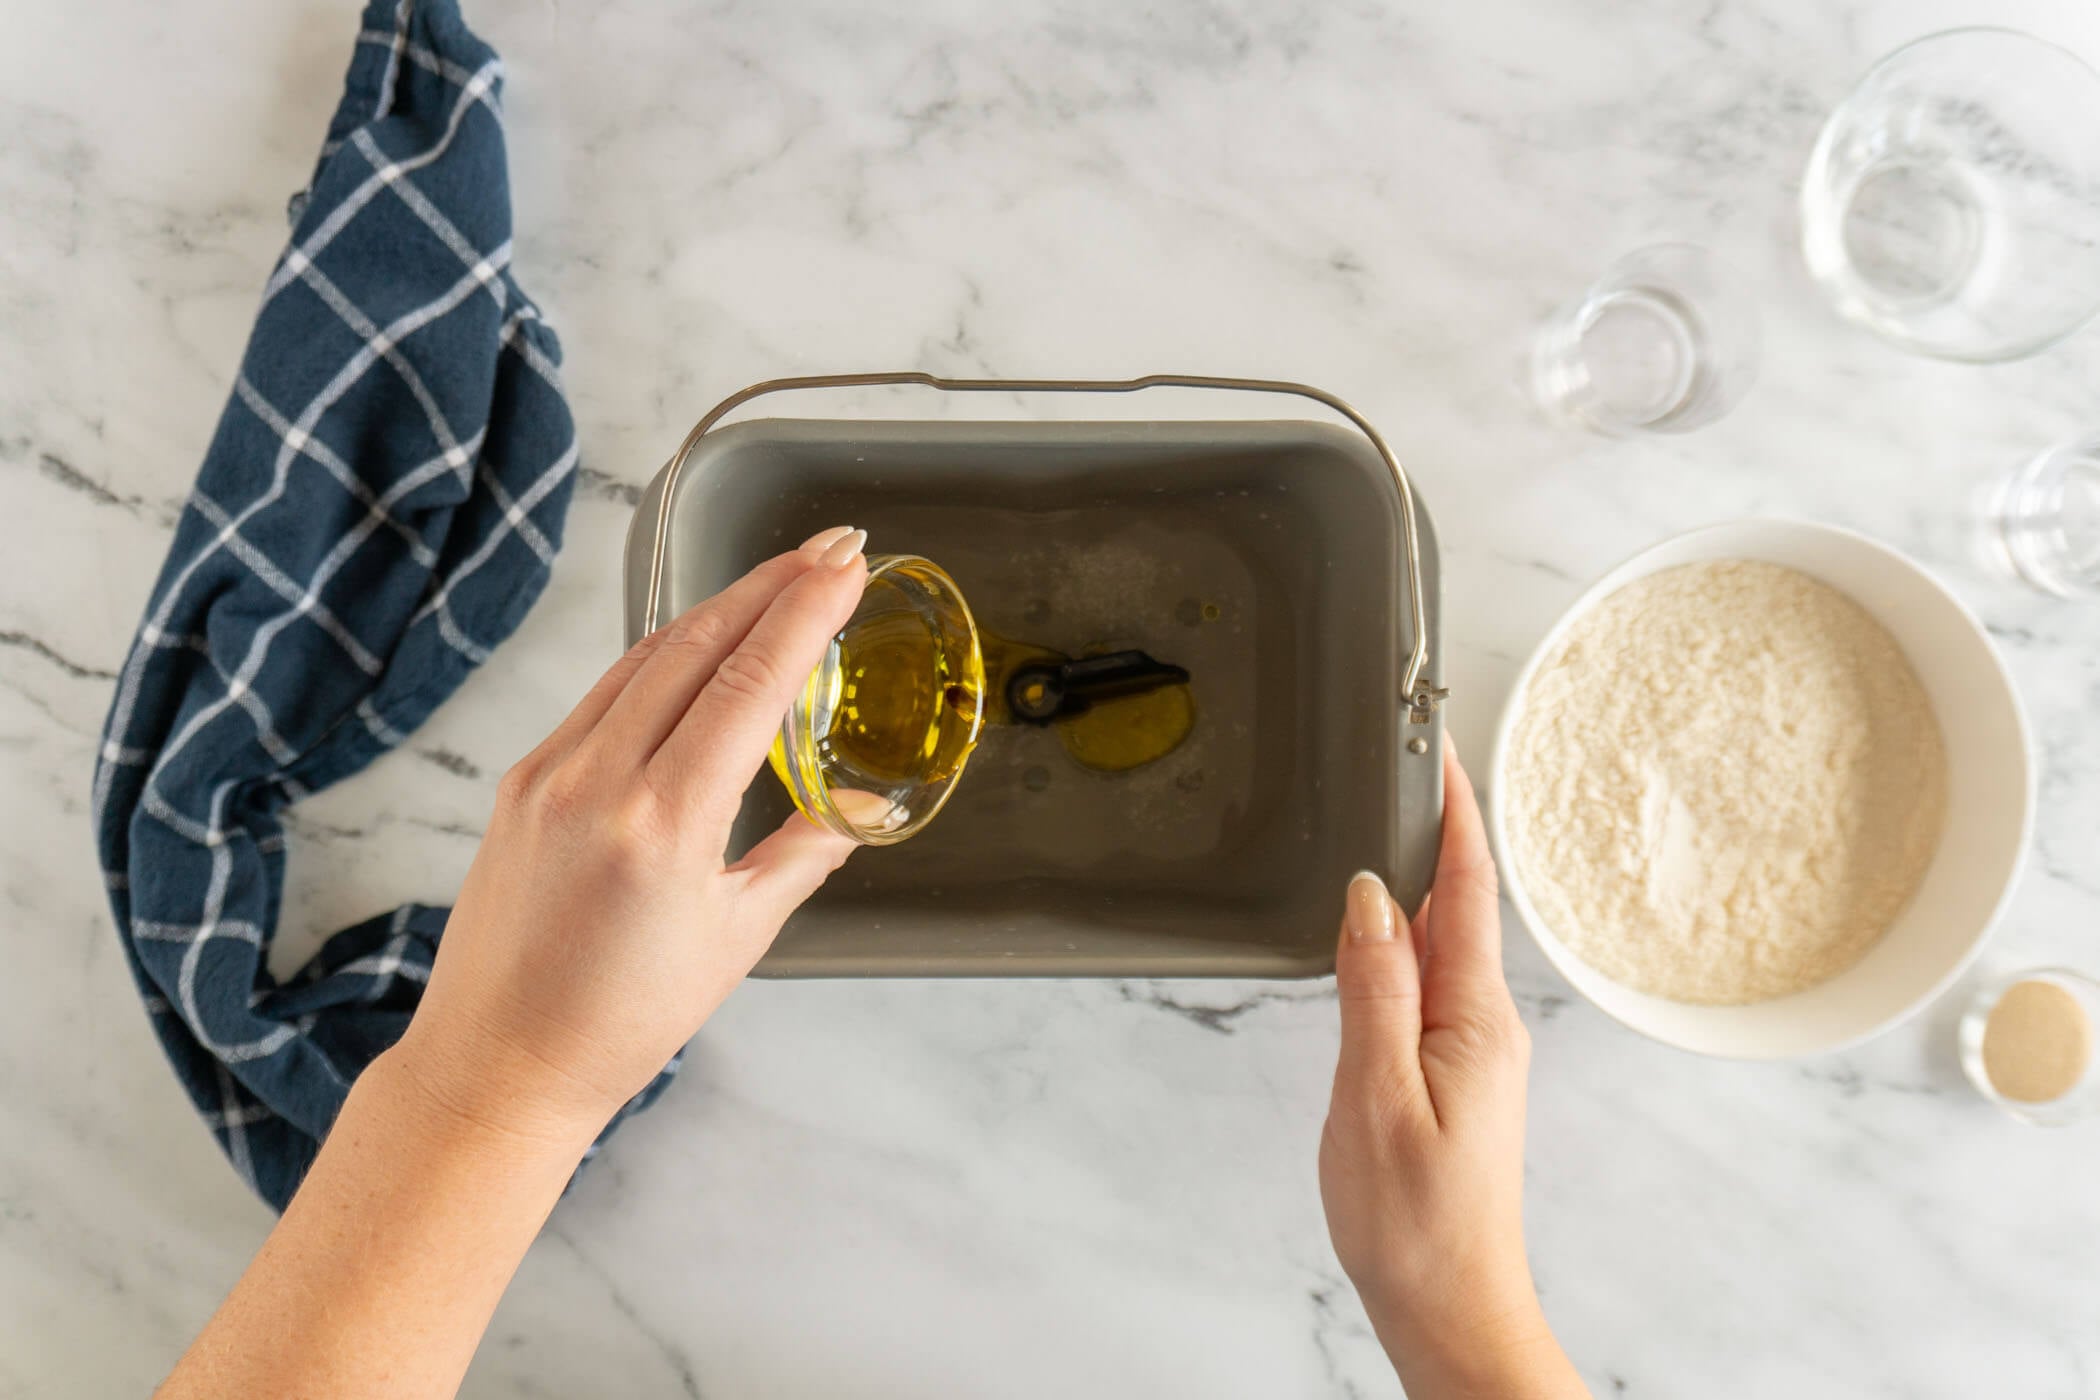
- Step 1: Combine the liquid ingredients: 1 cup + 1/8 cup warm water, 2 tablespoons olive oil, 1 1/2 teaspoons granulated sugar, and 1 teaspoon coarse kosher salt in the baking pan of your bread machine.
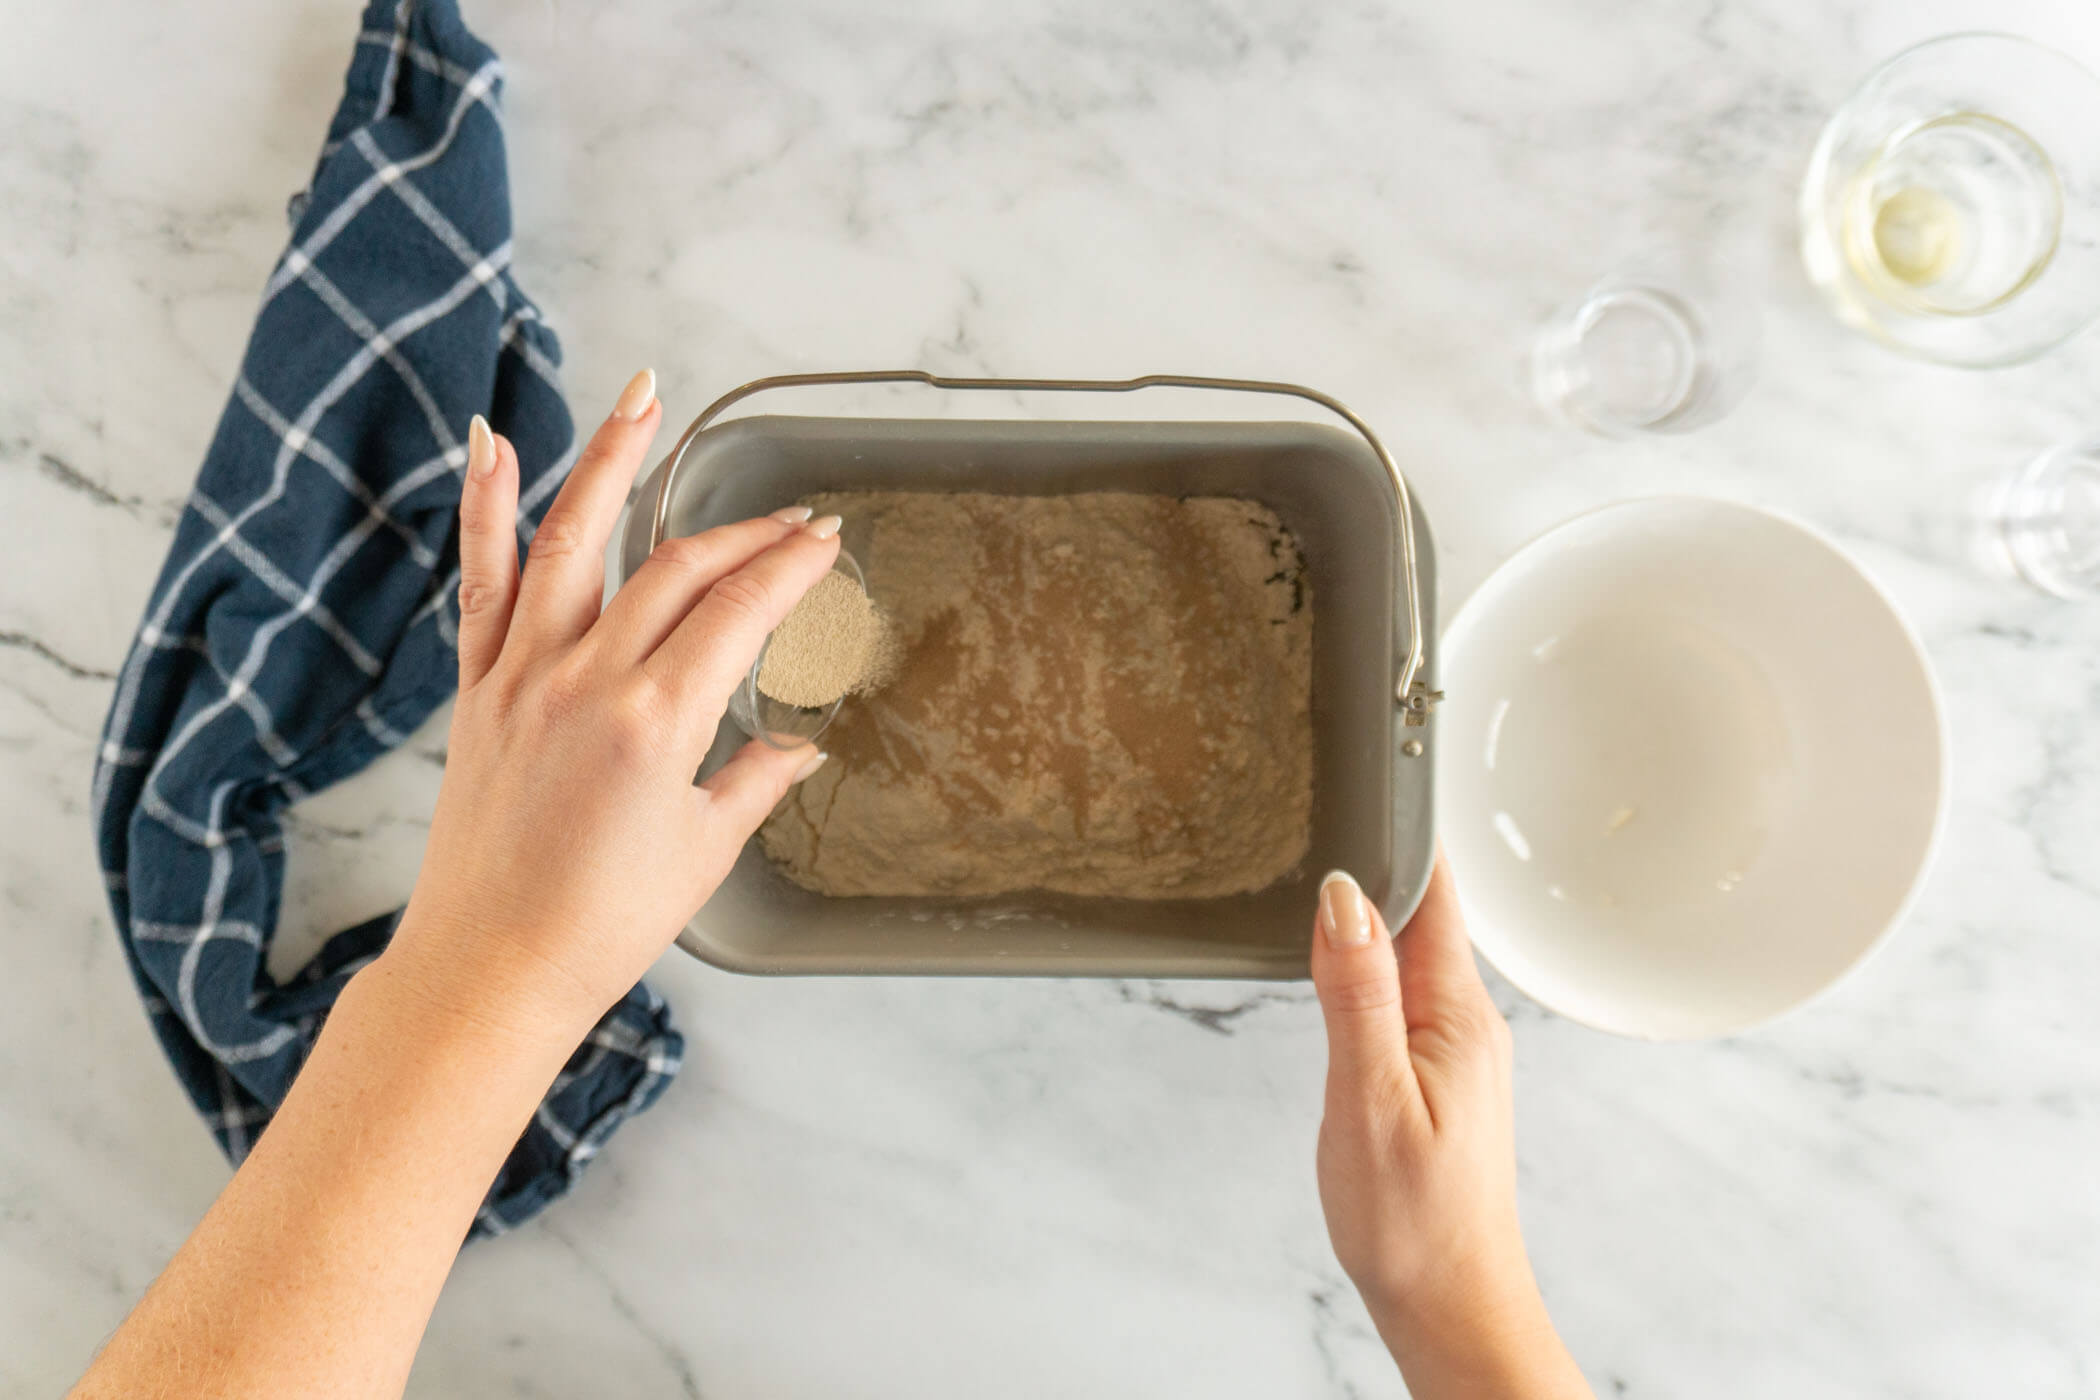
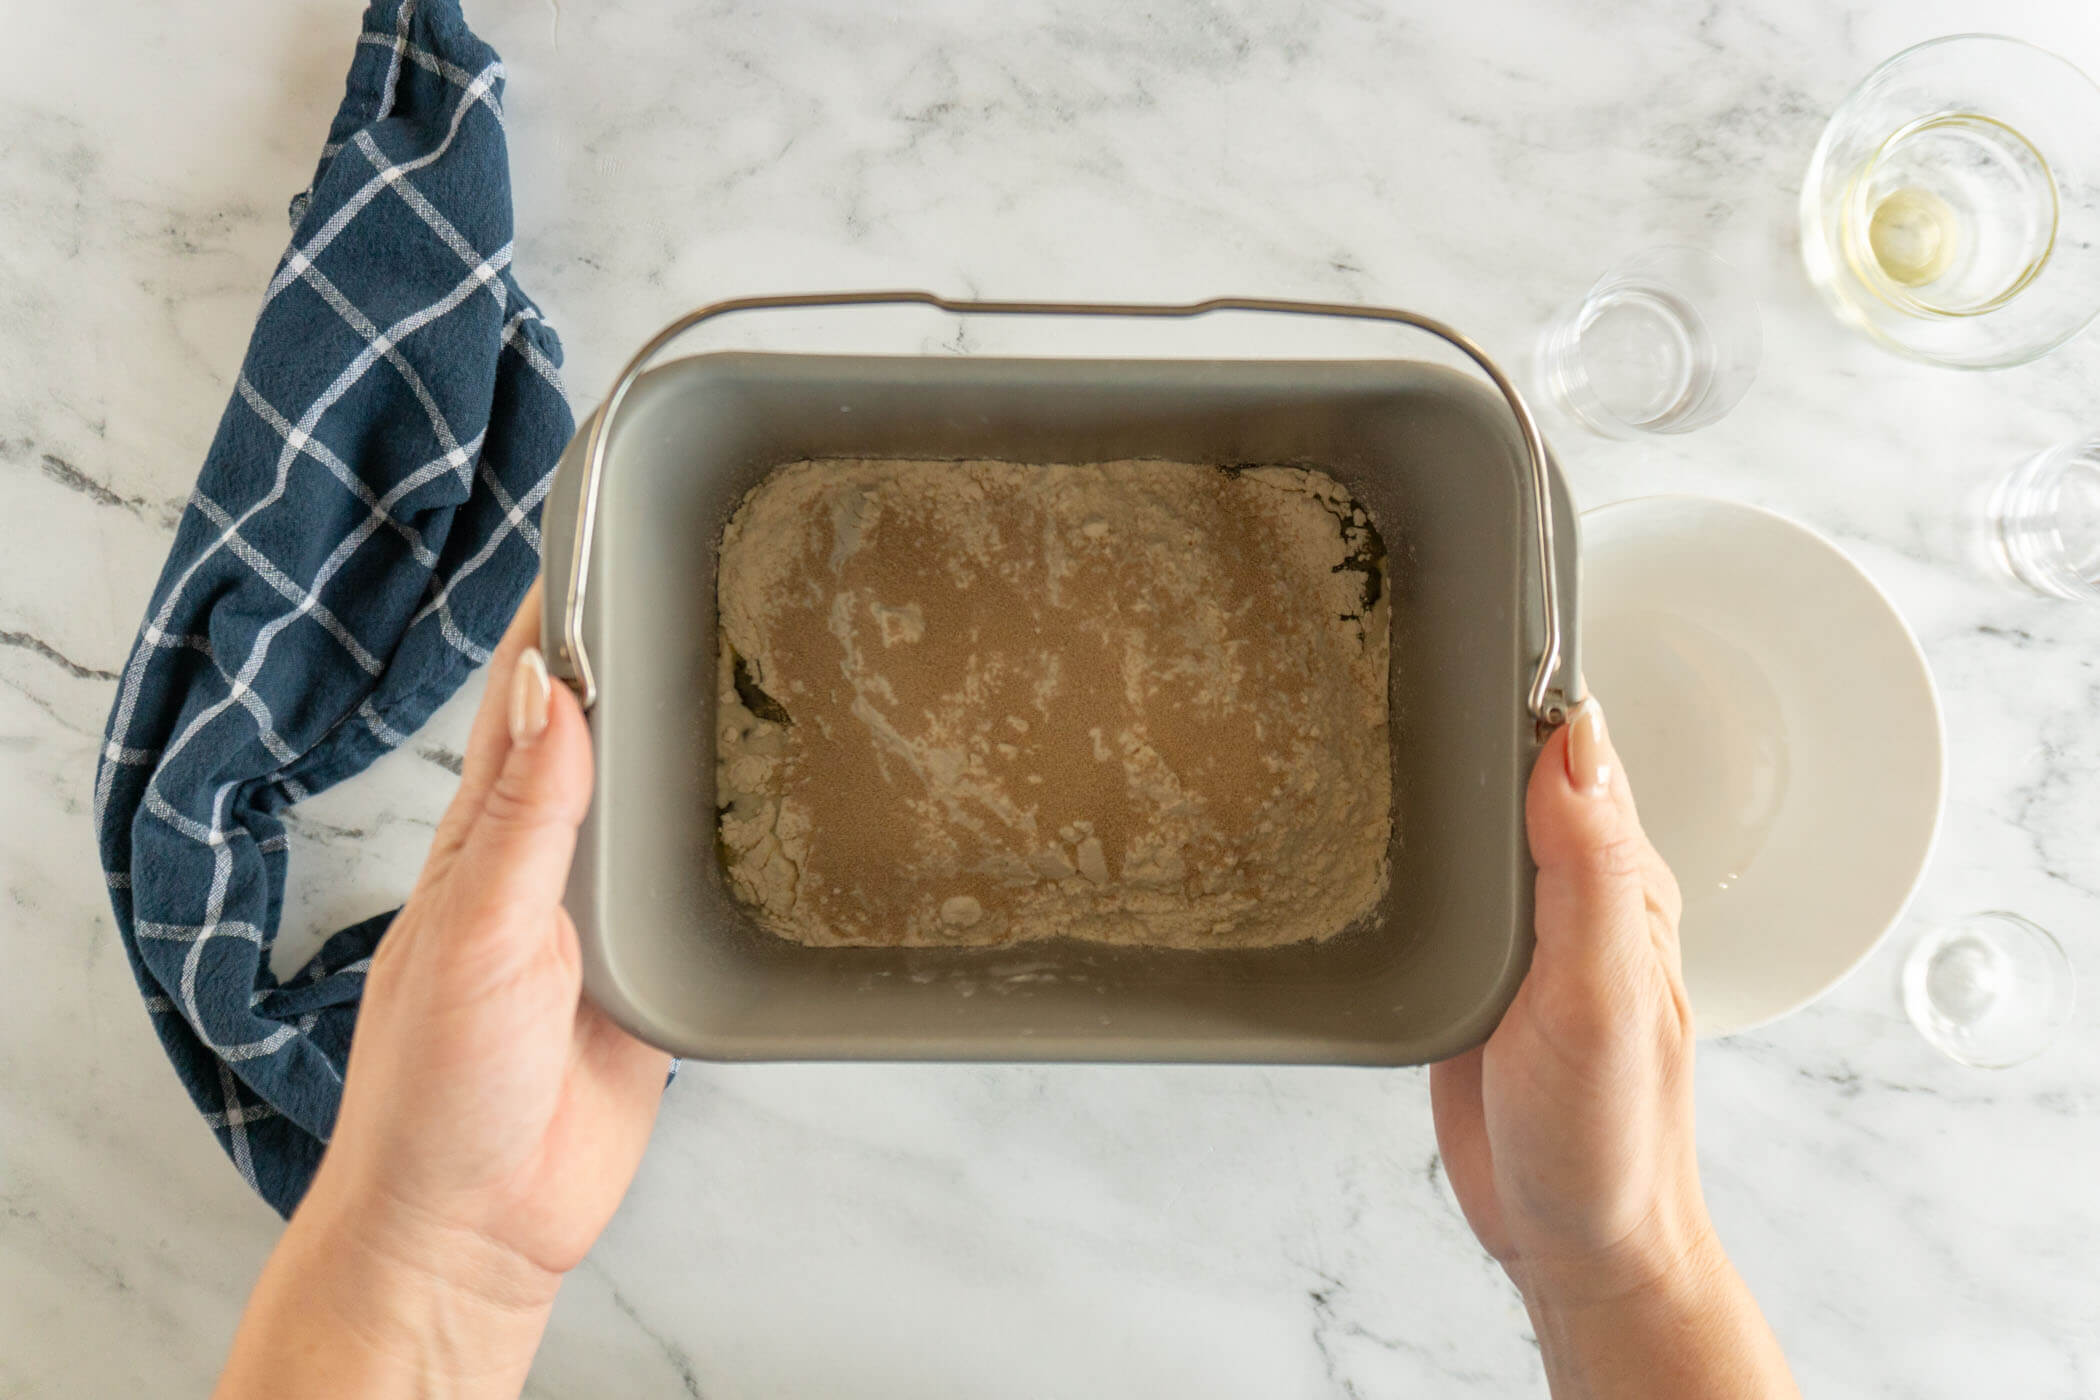
- Step 2: Layer the dry ingredients as follows; 3 cups bread flour and 2 teaspoons instant or bread machine yeast. At this point, I like to shake my flour out and cover the entire surface of this water, alternatively, you could make a well in the flour and pour the yeast there.
- Step 3: Place the bread pan into the bread machine and select the Dough – Pizza setting or Dough/Manual setting.
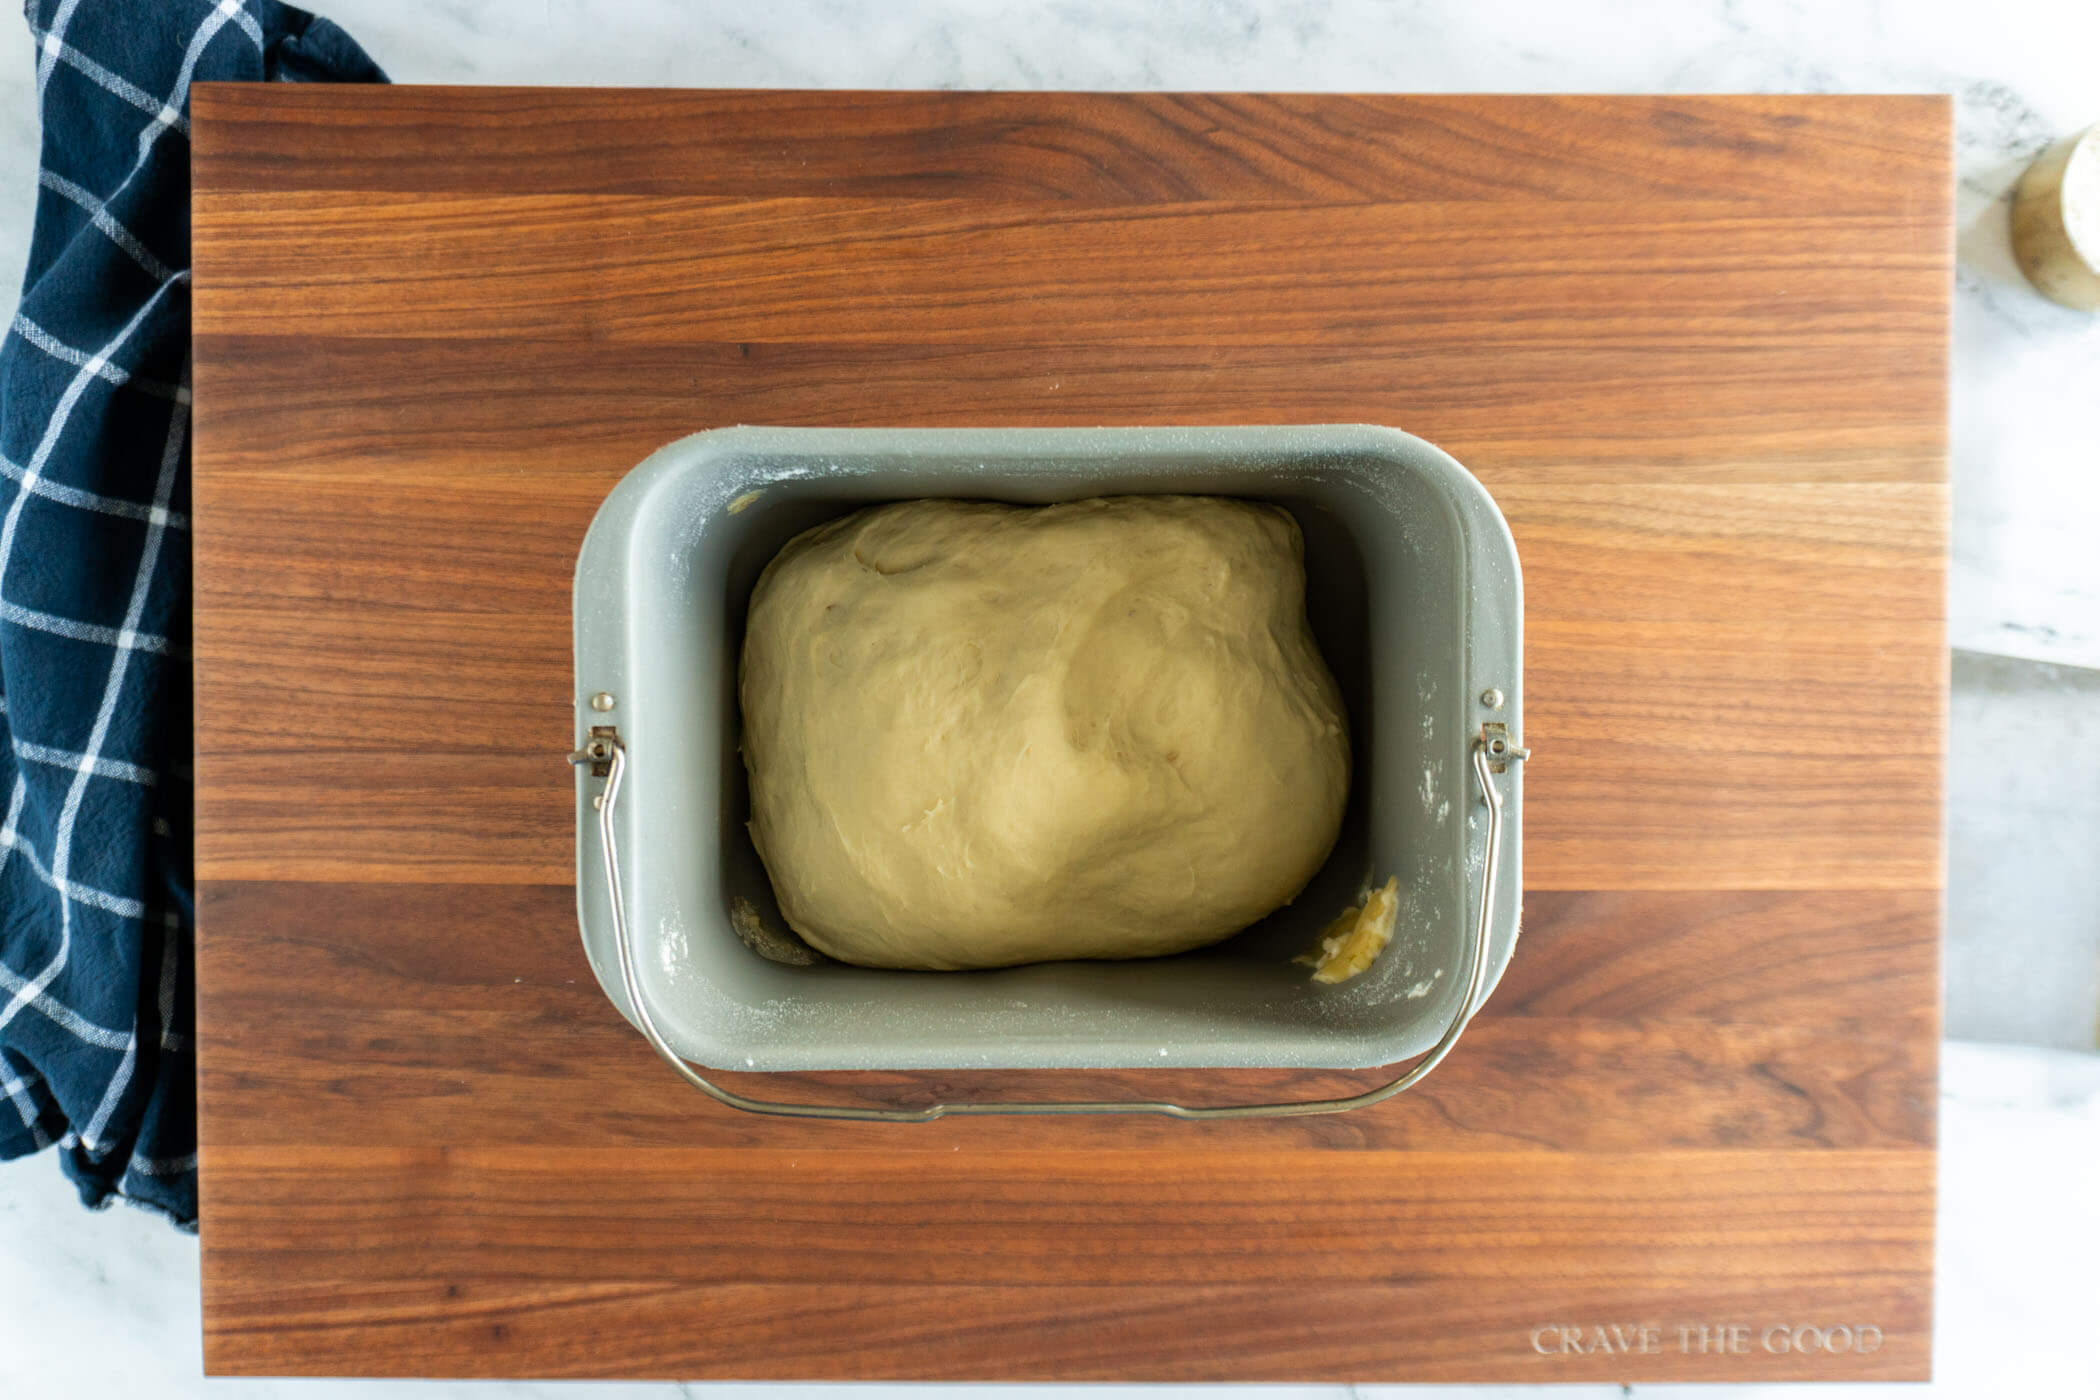
- Step 4: Allow the bread machine to mix, knead and proof your dough.
- Step 5: Once dough cycle has completed, prepare a baking sheet by lining with parchment paper and set aside.
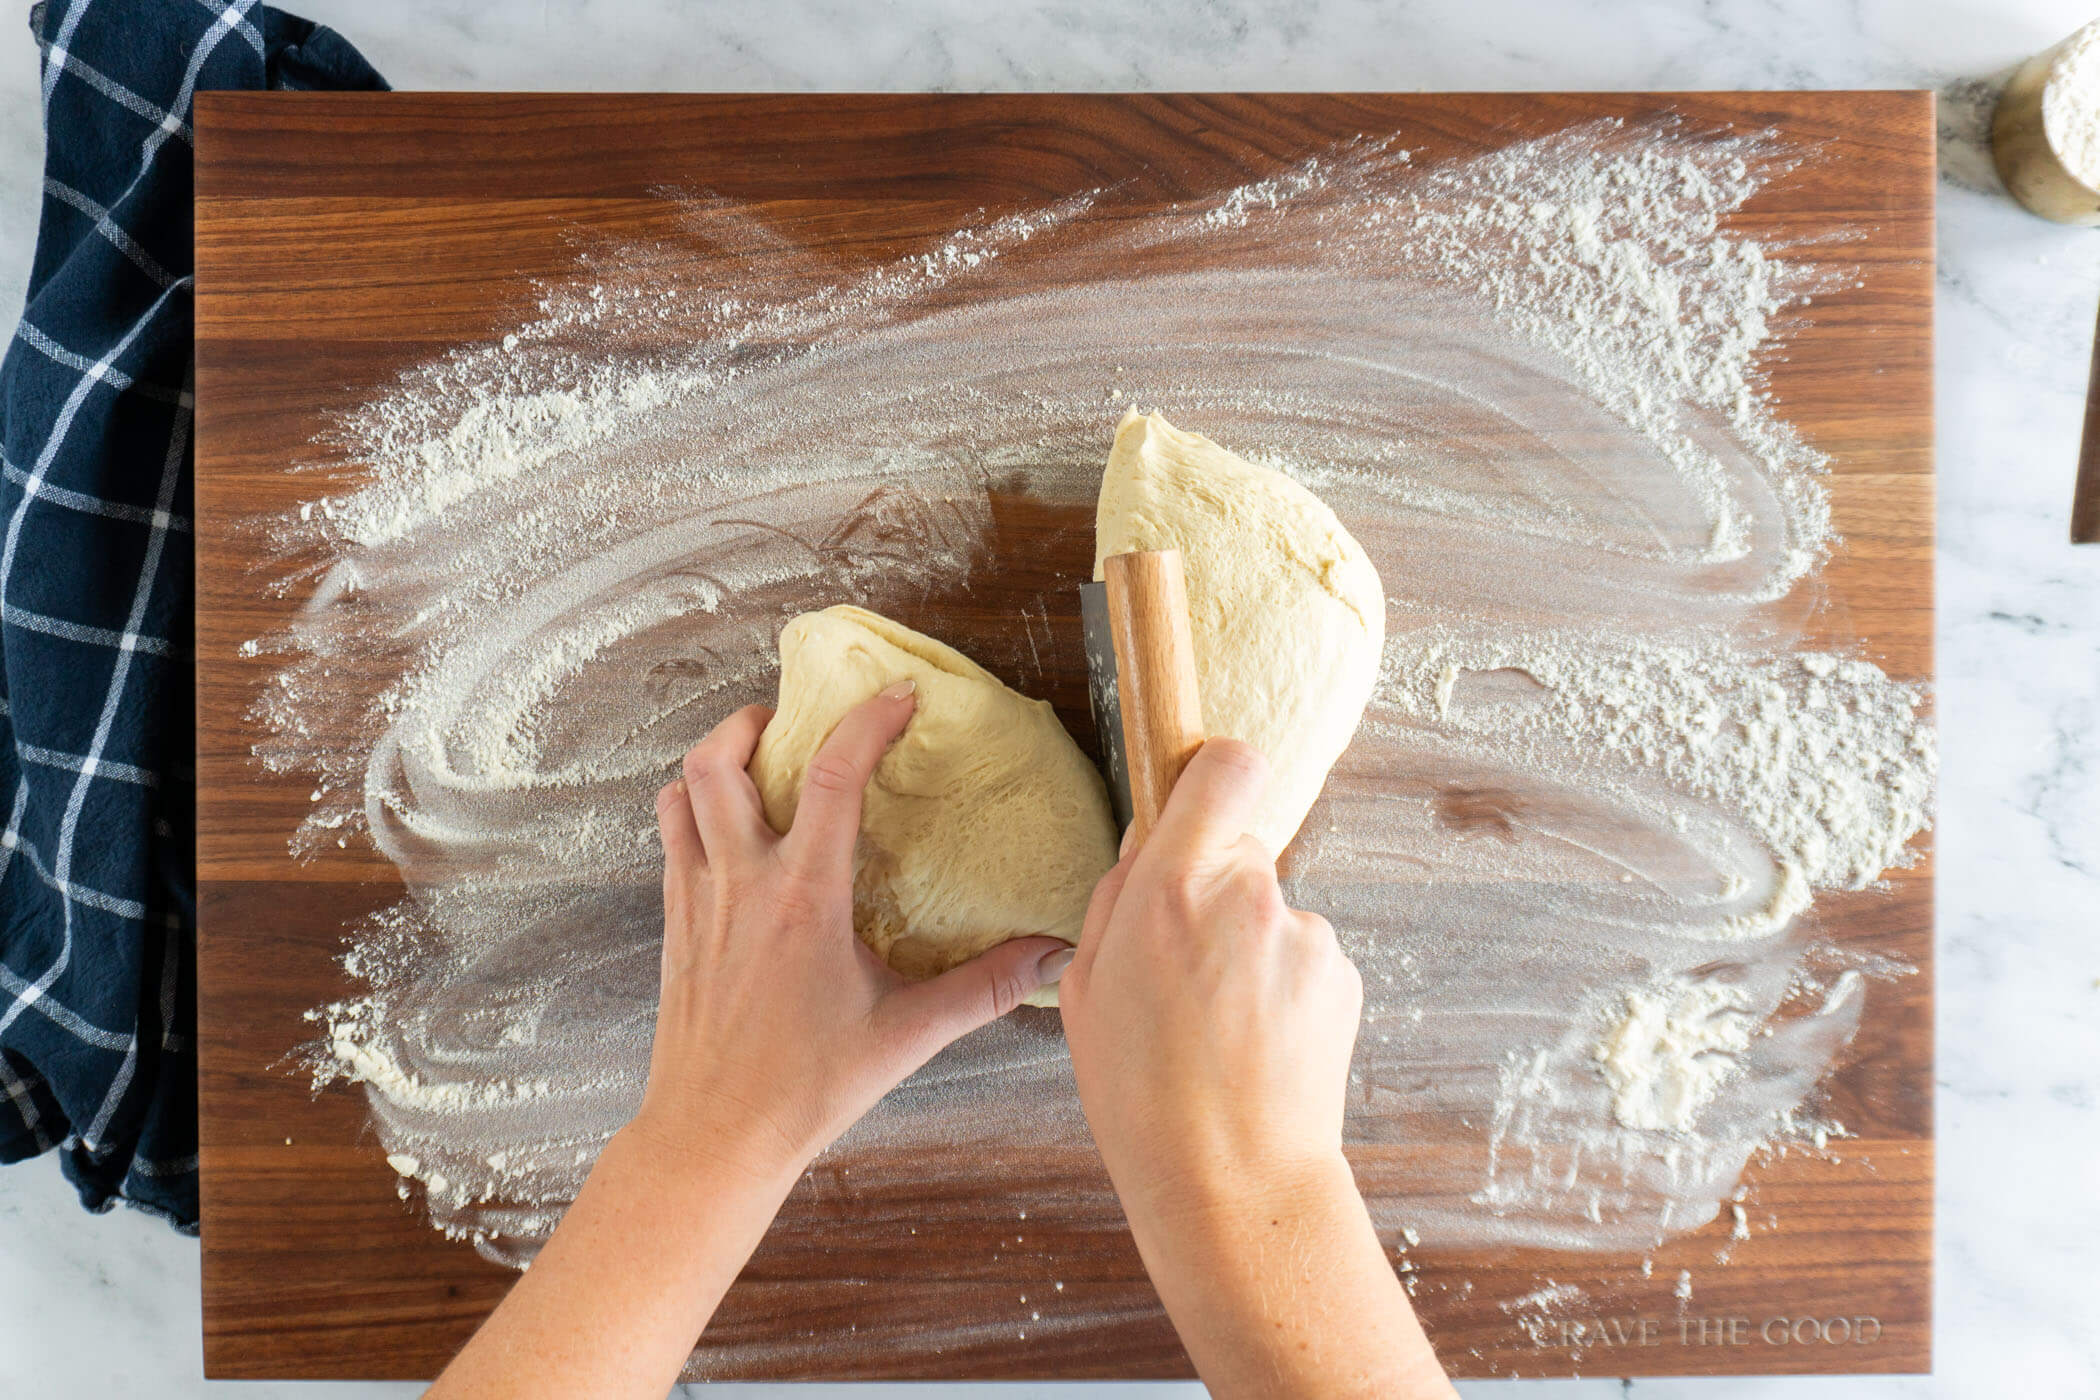
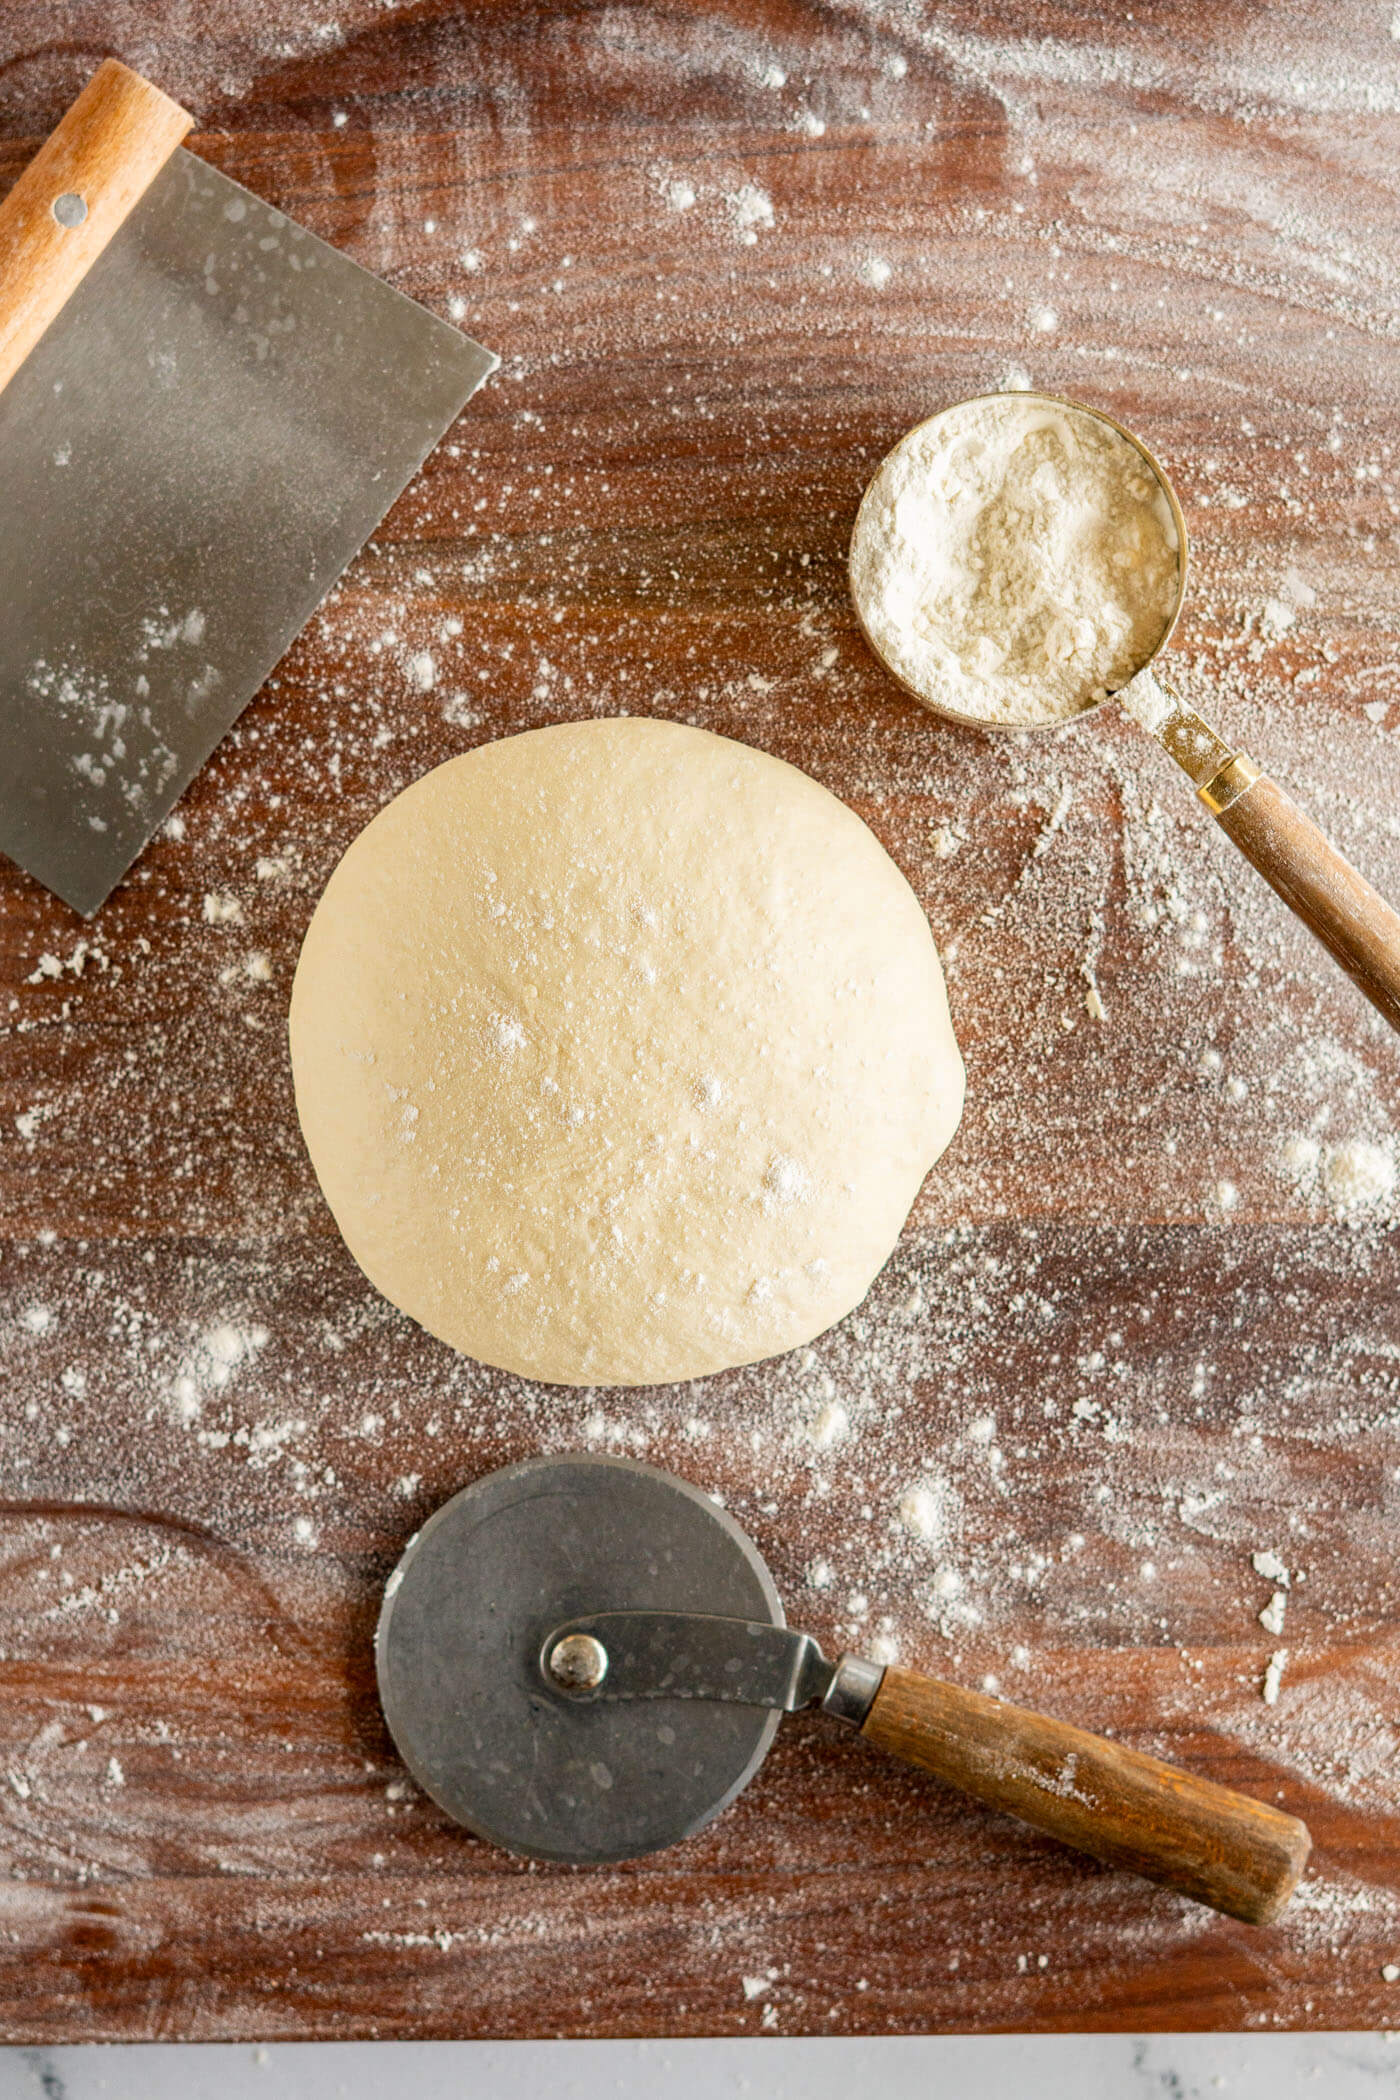
Turn the dough out onto a lightly floured surface and using a dough scraper or serrated knife, portion the dough into 2 pieces.
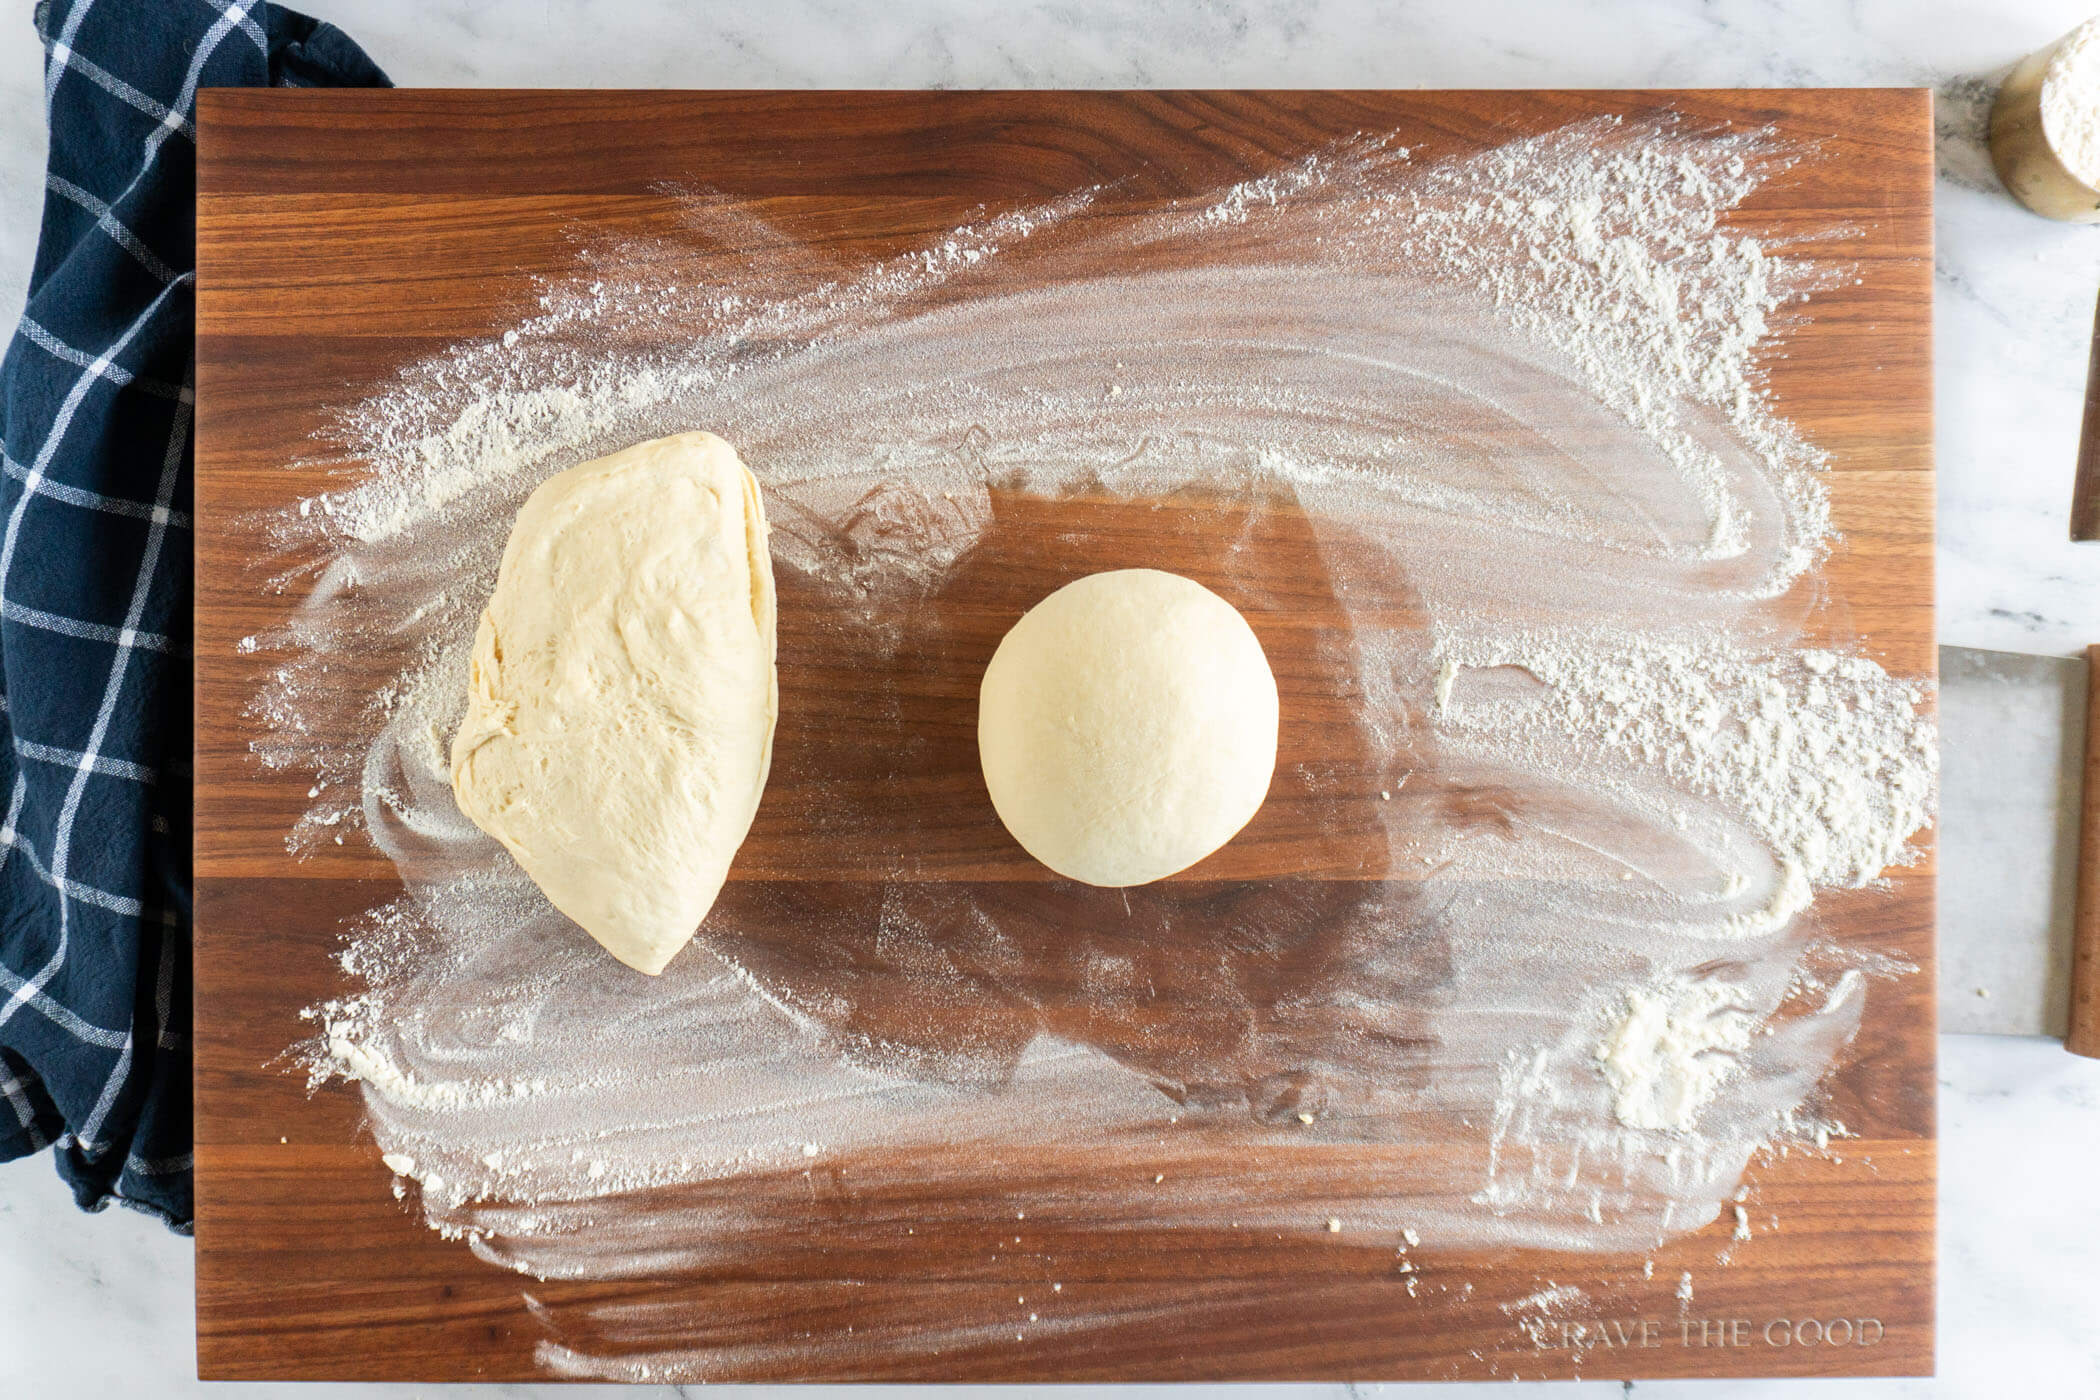
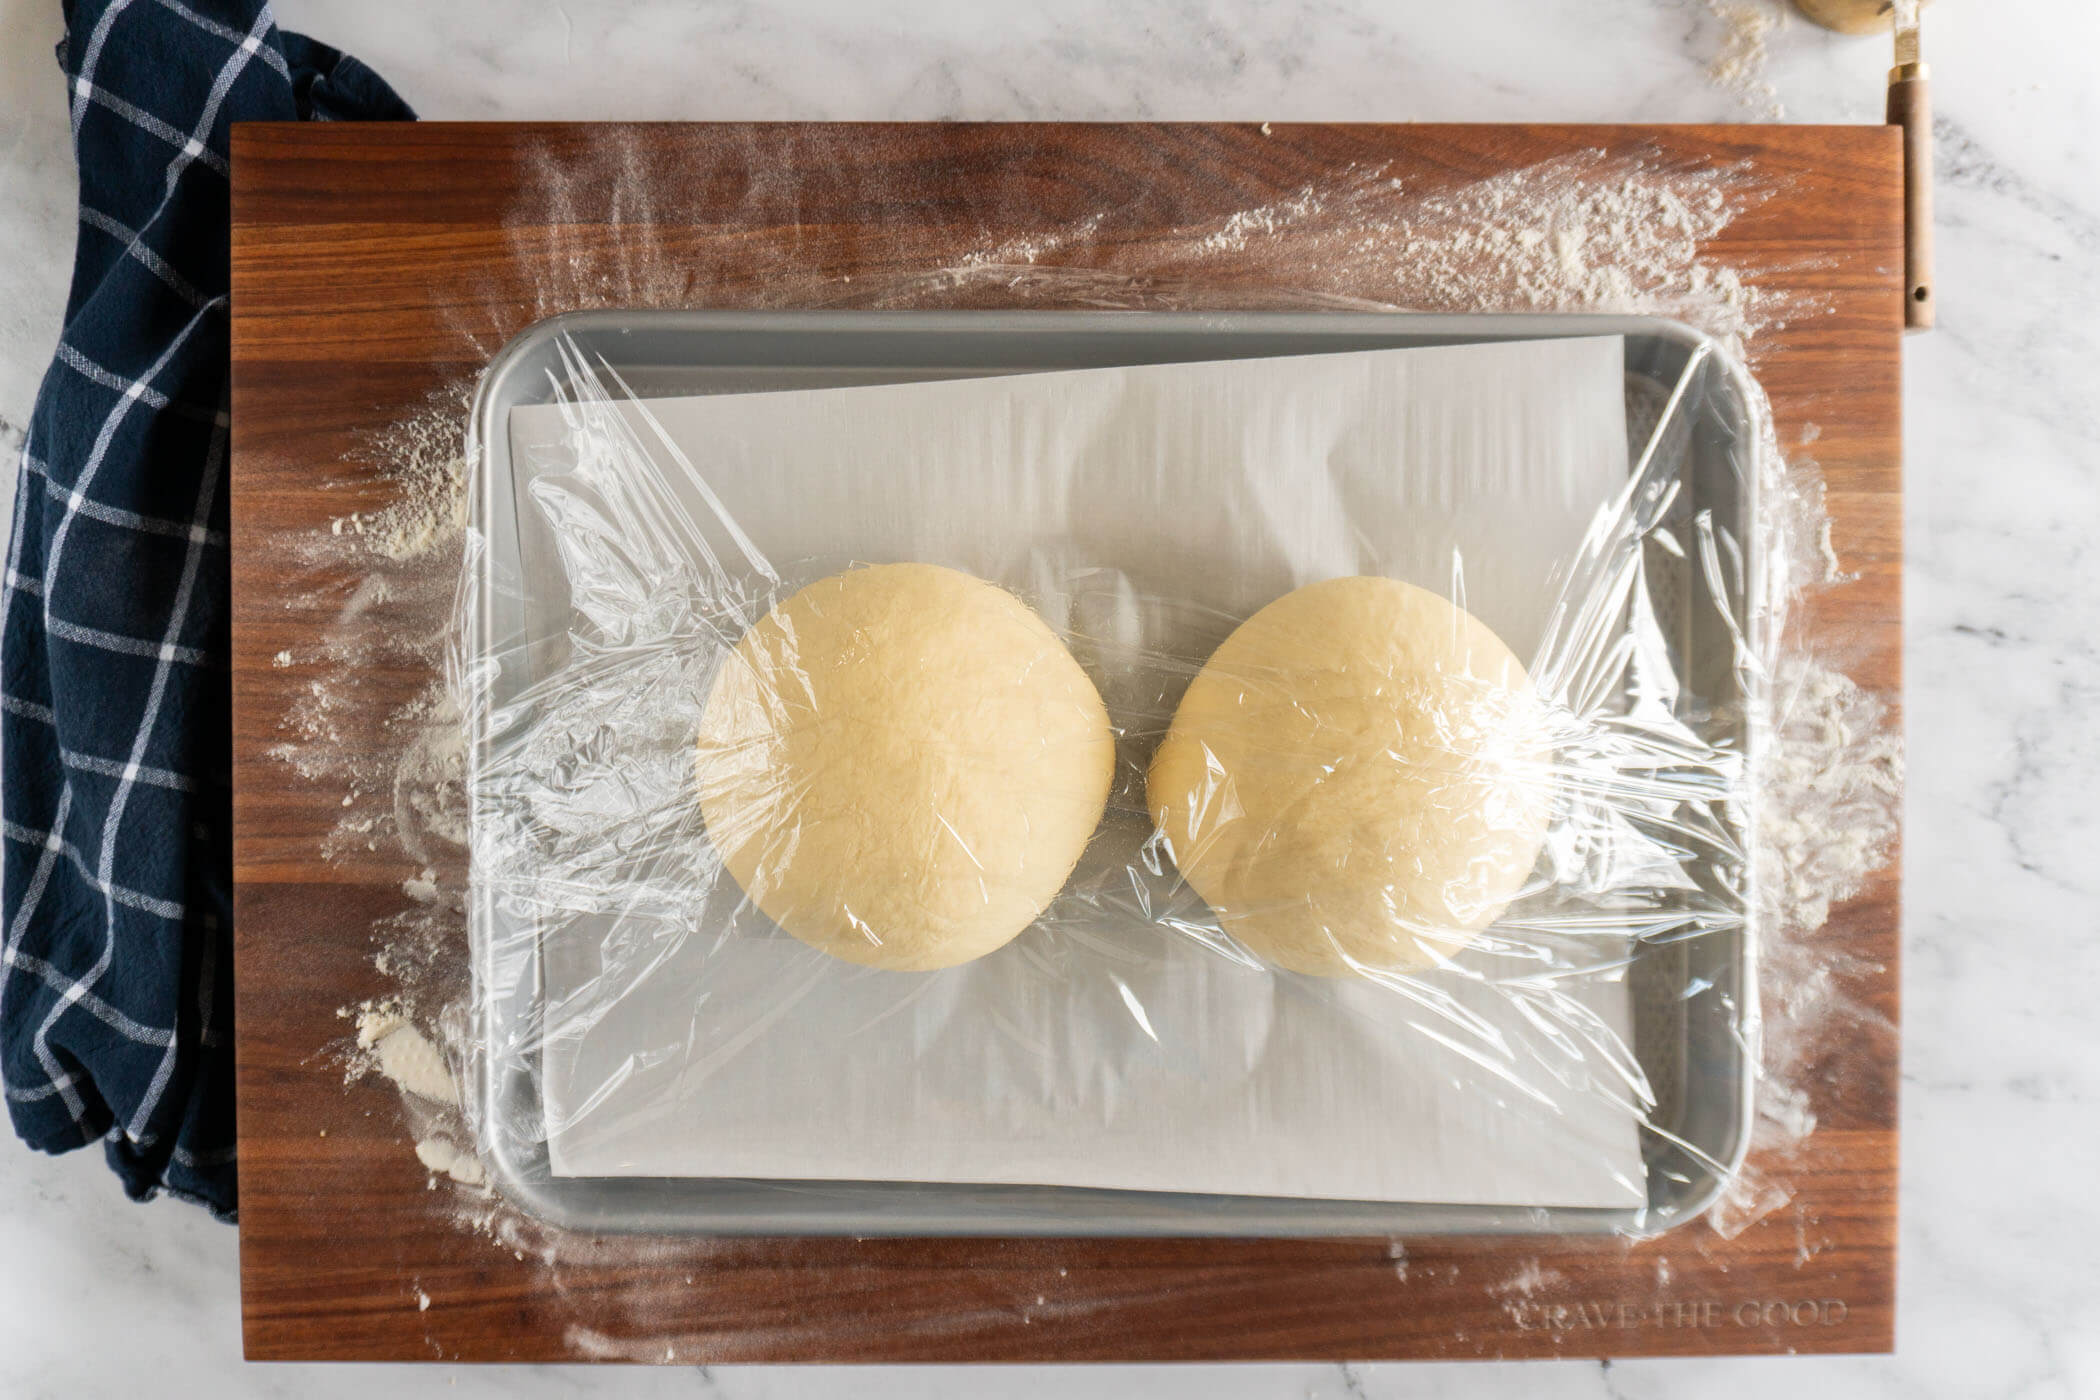
- Step 6: Form each piece into a ball by tucking the ends underneath itself.
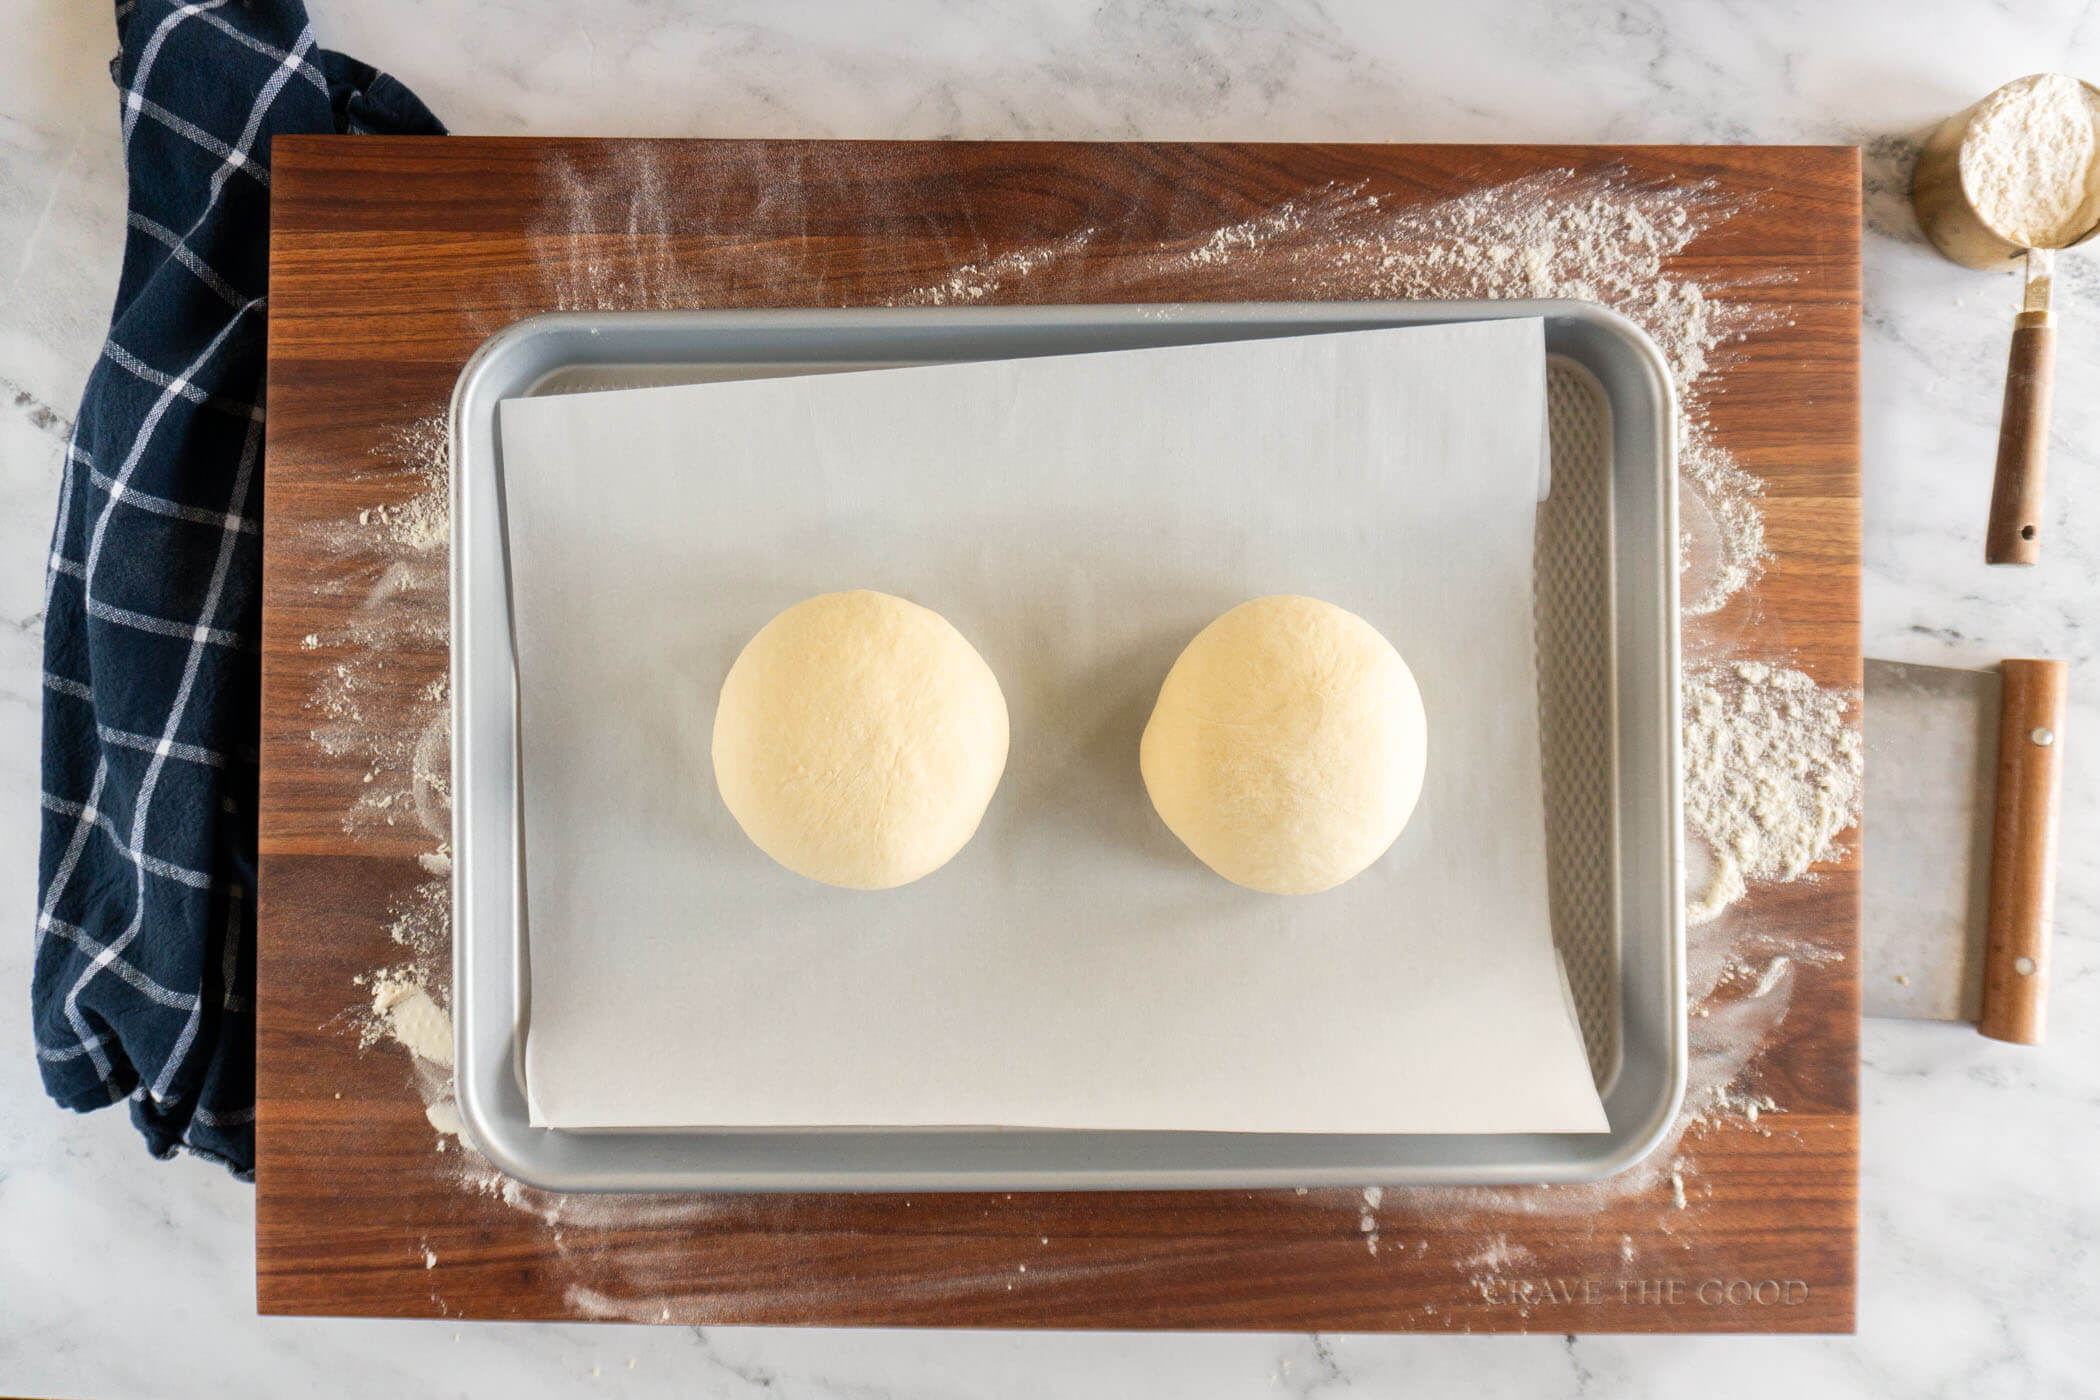
- Step 7: Place the balls on the prepared baking sheet, then lightly flour the surface of each ball. Cover the baking sheet with plastic wrap then set aside to proof for 30-45 minutes or until the dough balls have roughly doubled in size.
- Step 8: Meanwhile, load your baking stone or steel into the oven and preheat oven to 550f (or as high as it will go) while the dough proofs.
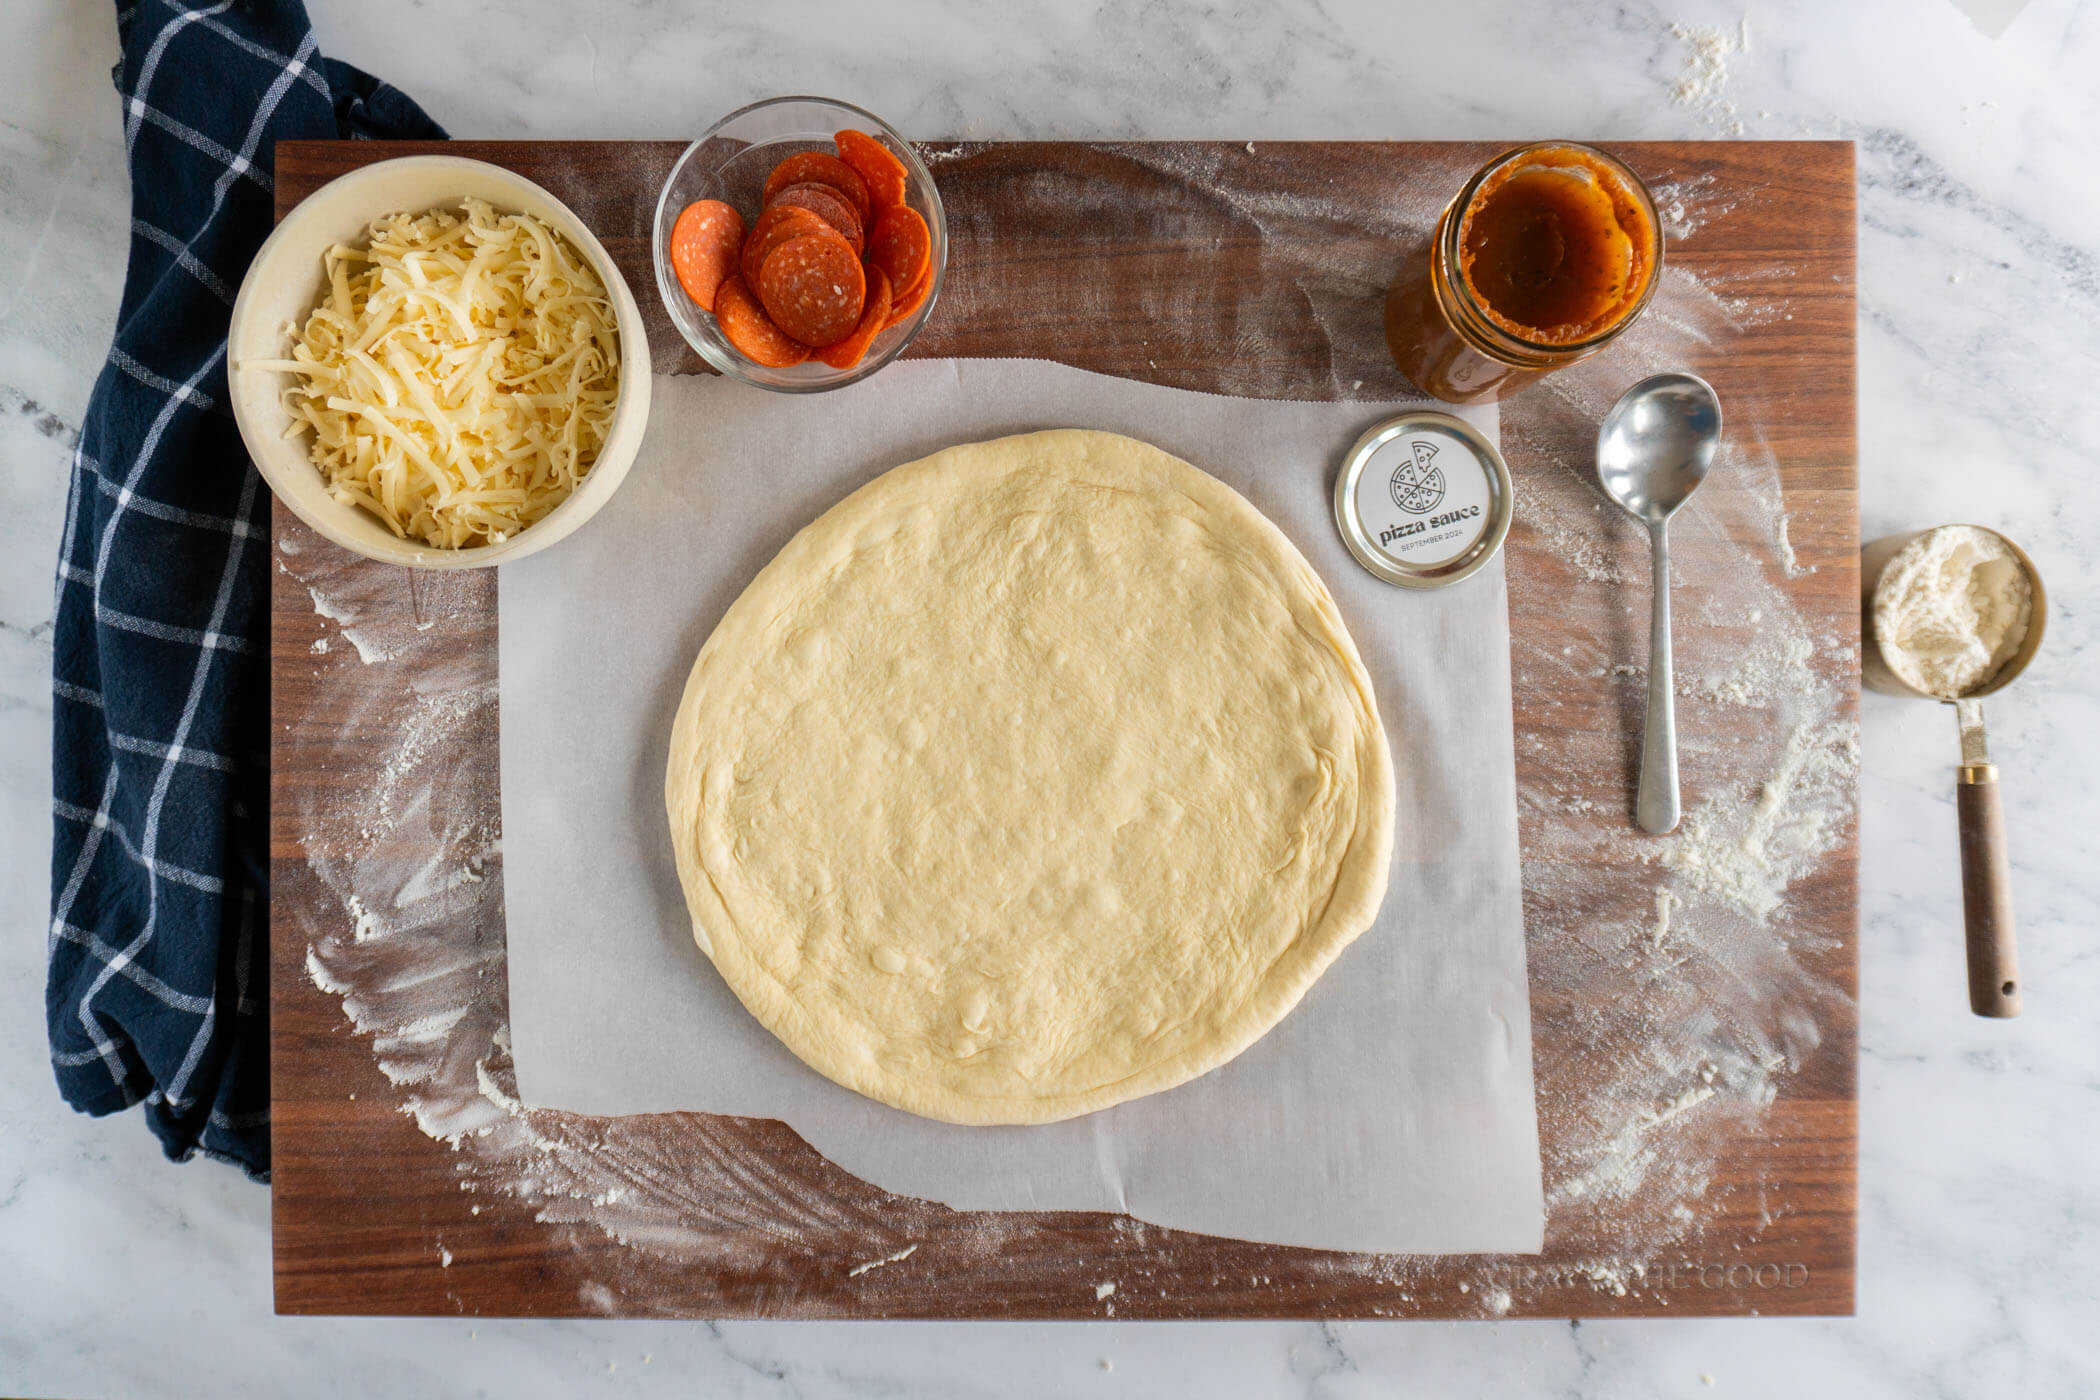
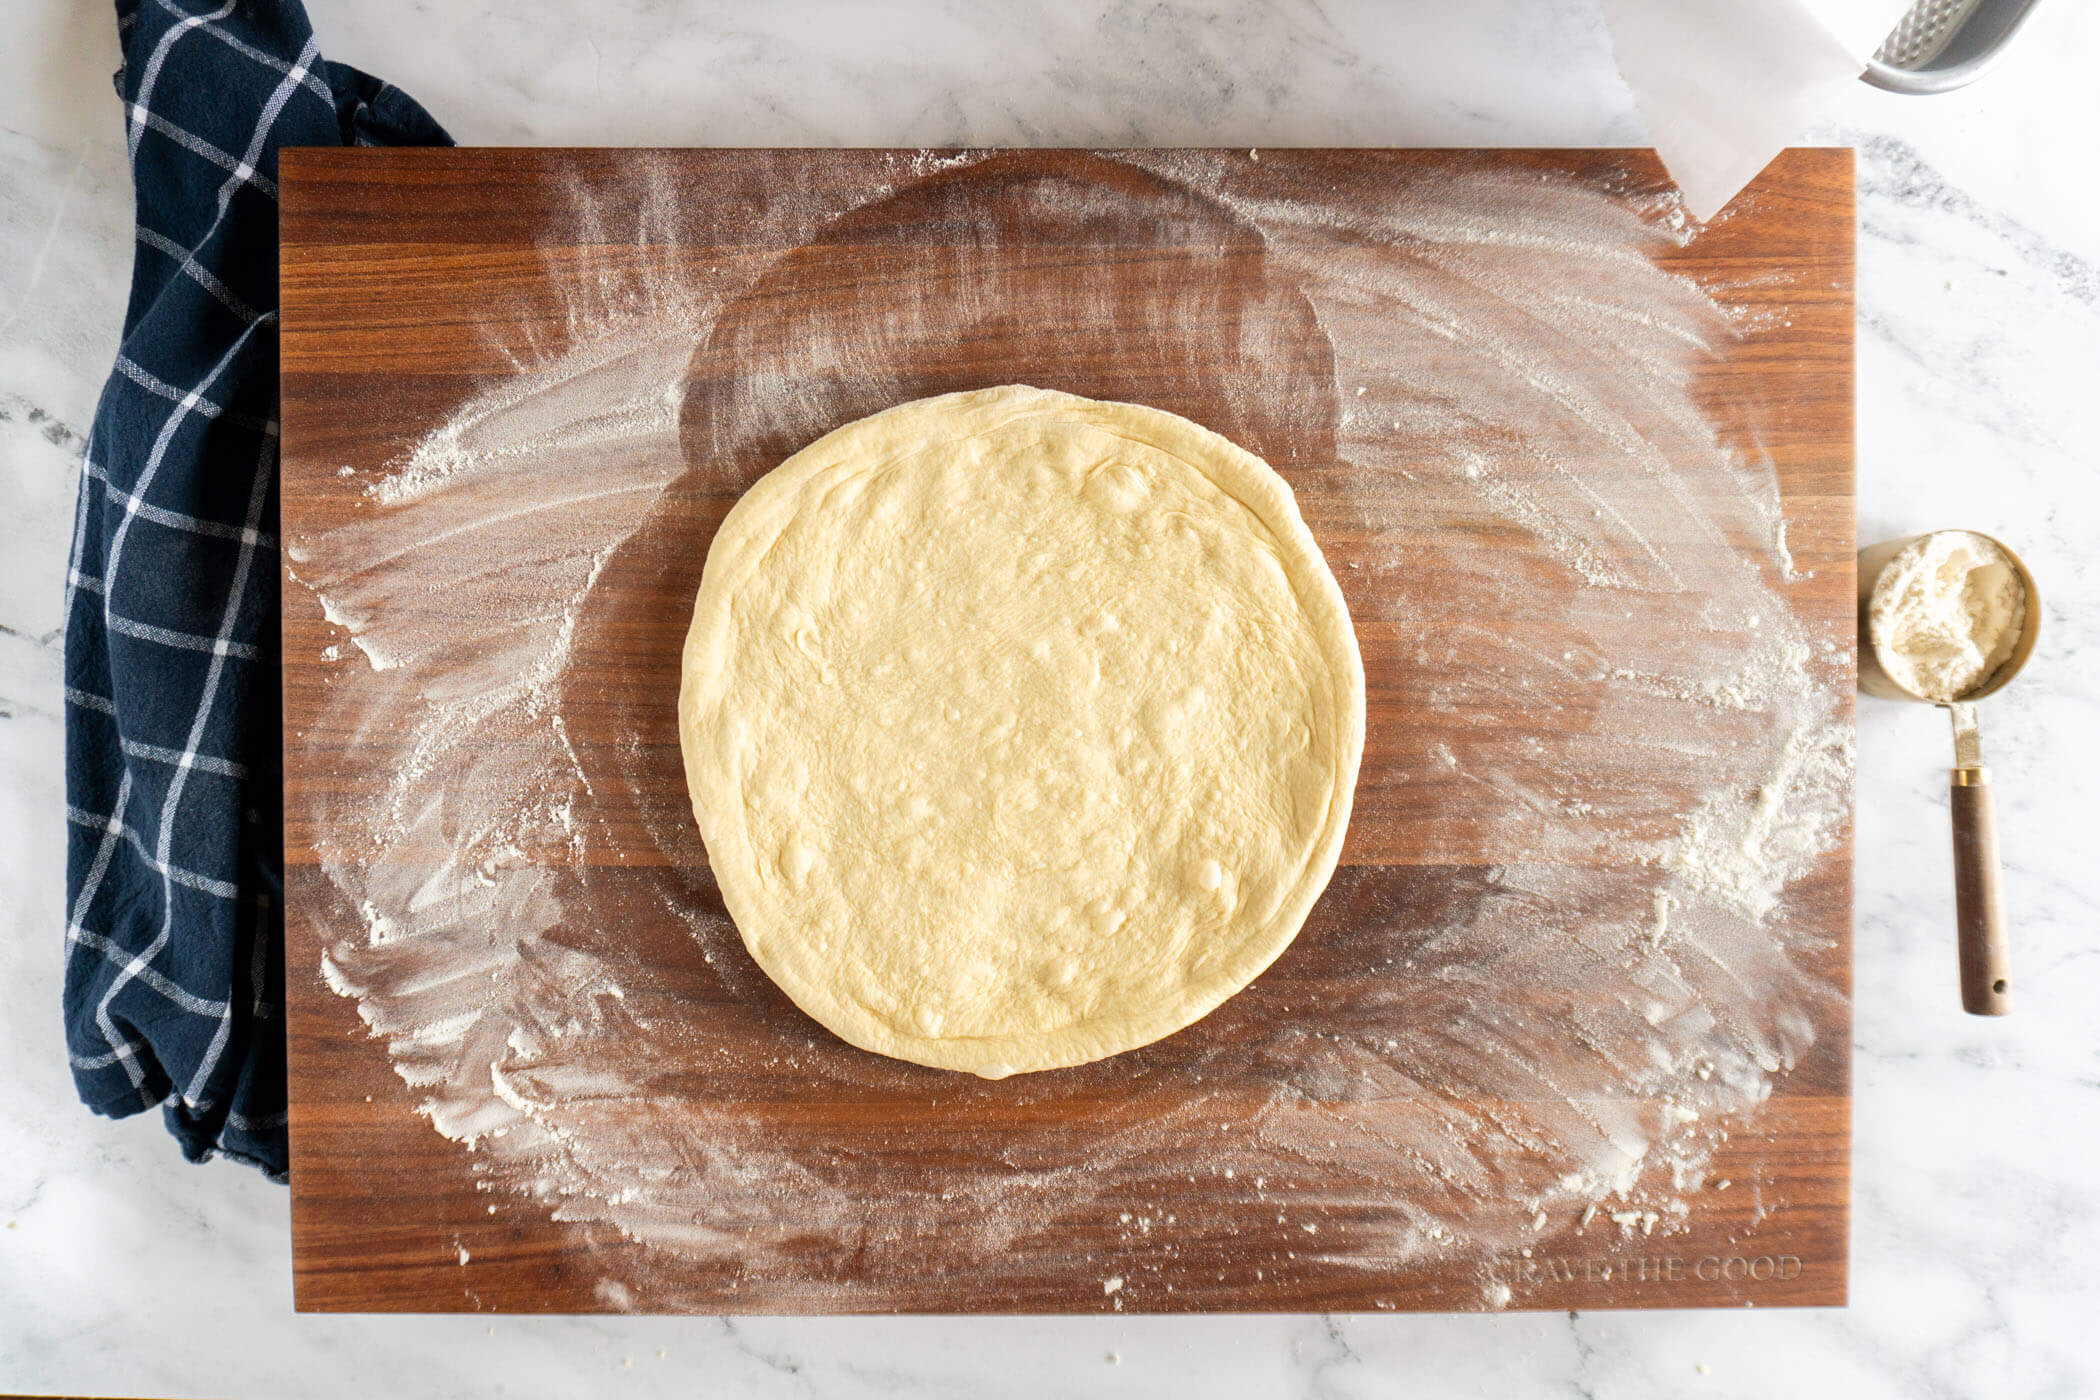
- Step 9: Once the dough finishes proofing, you can shape or press into a pizza pan before assembling your pizza and baking. You can see how I hand stretch my pizzas below.
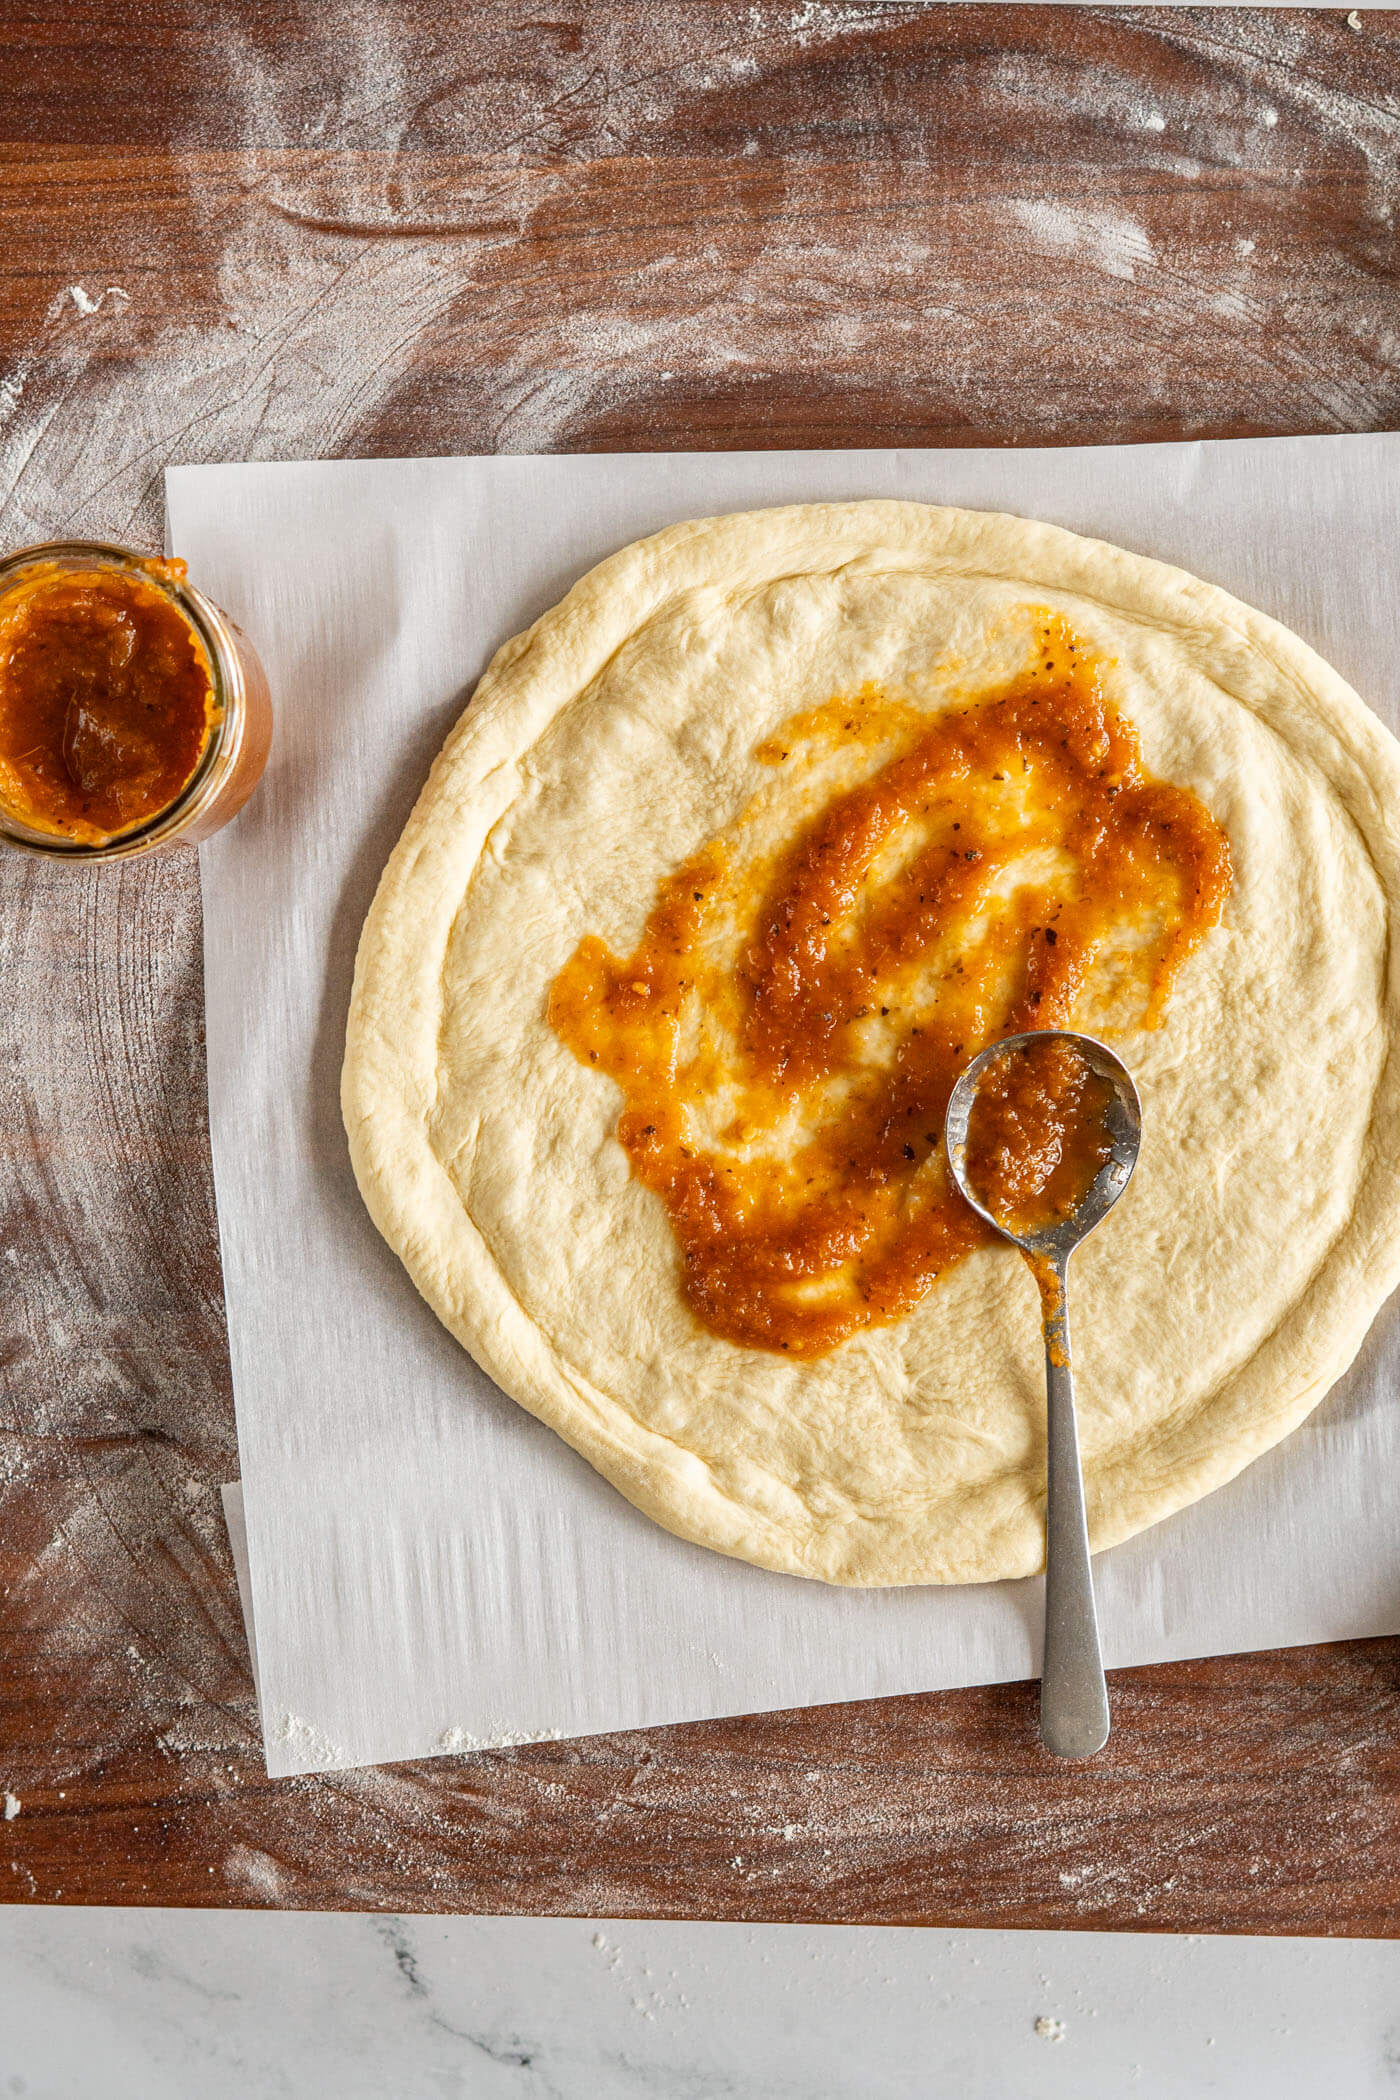
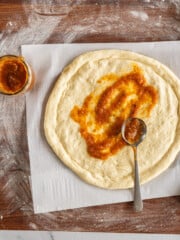
Place the shaped dough on the parchment paper.
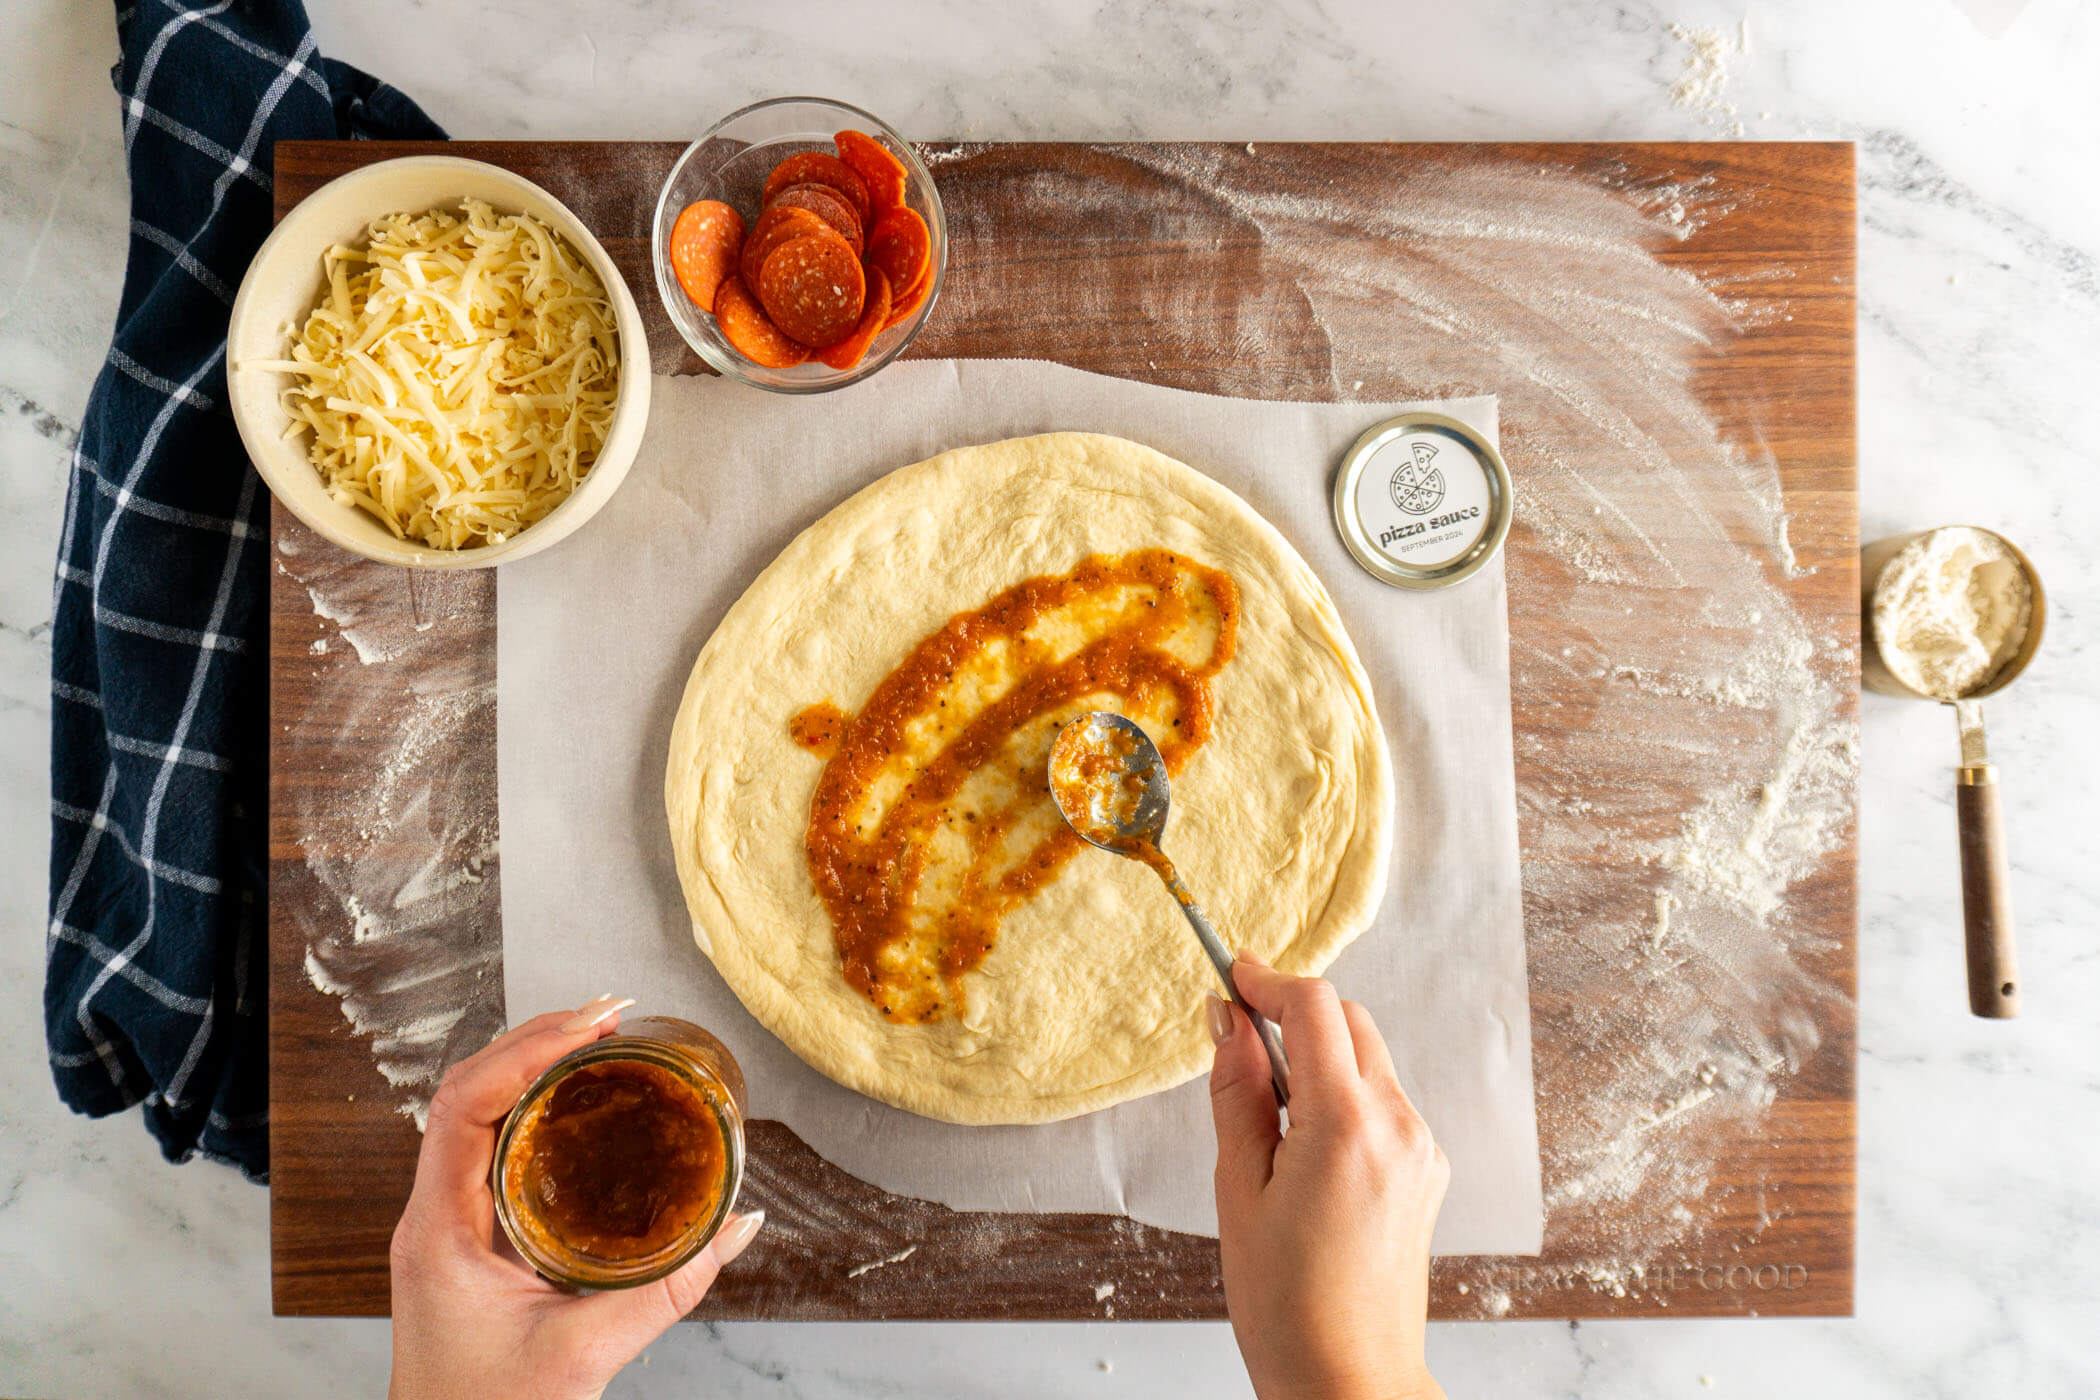
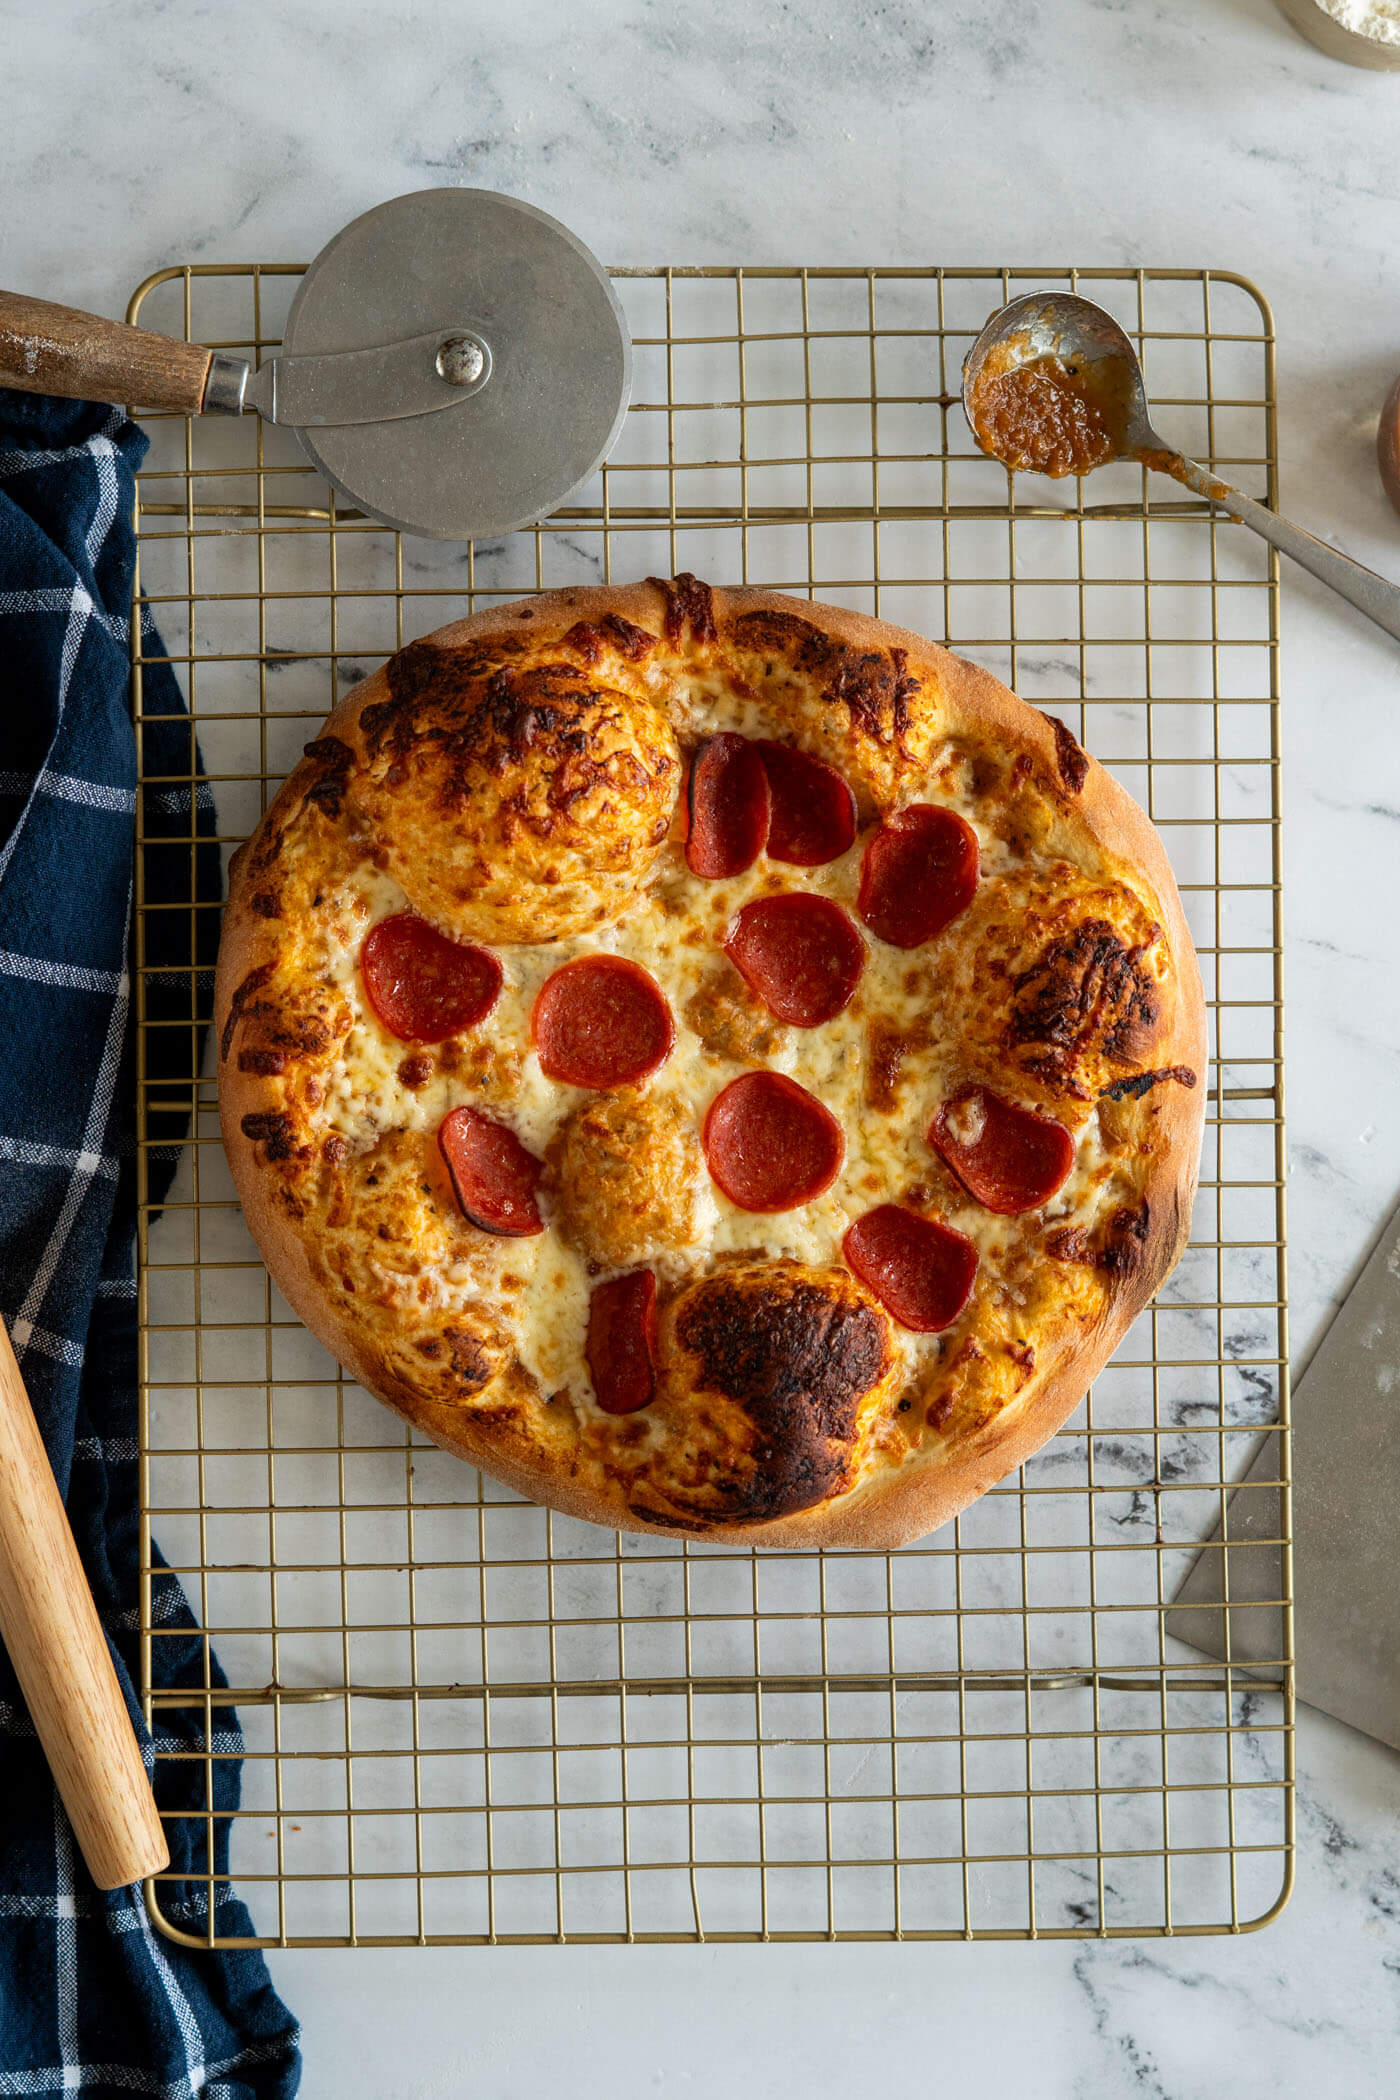
- Step 10: Spread your favorite homemade pizza sauce on the dough, leaving a gap around the edge of the pie where you've defined the crust.
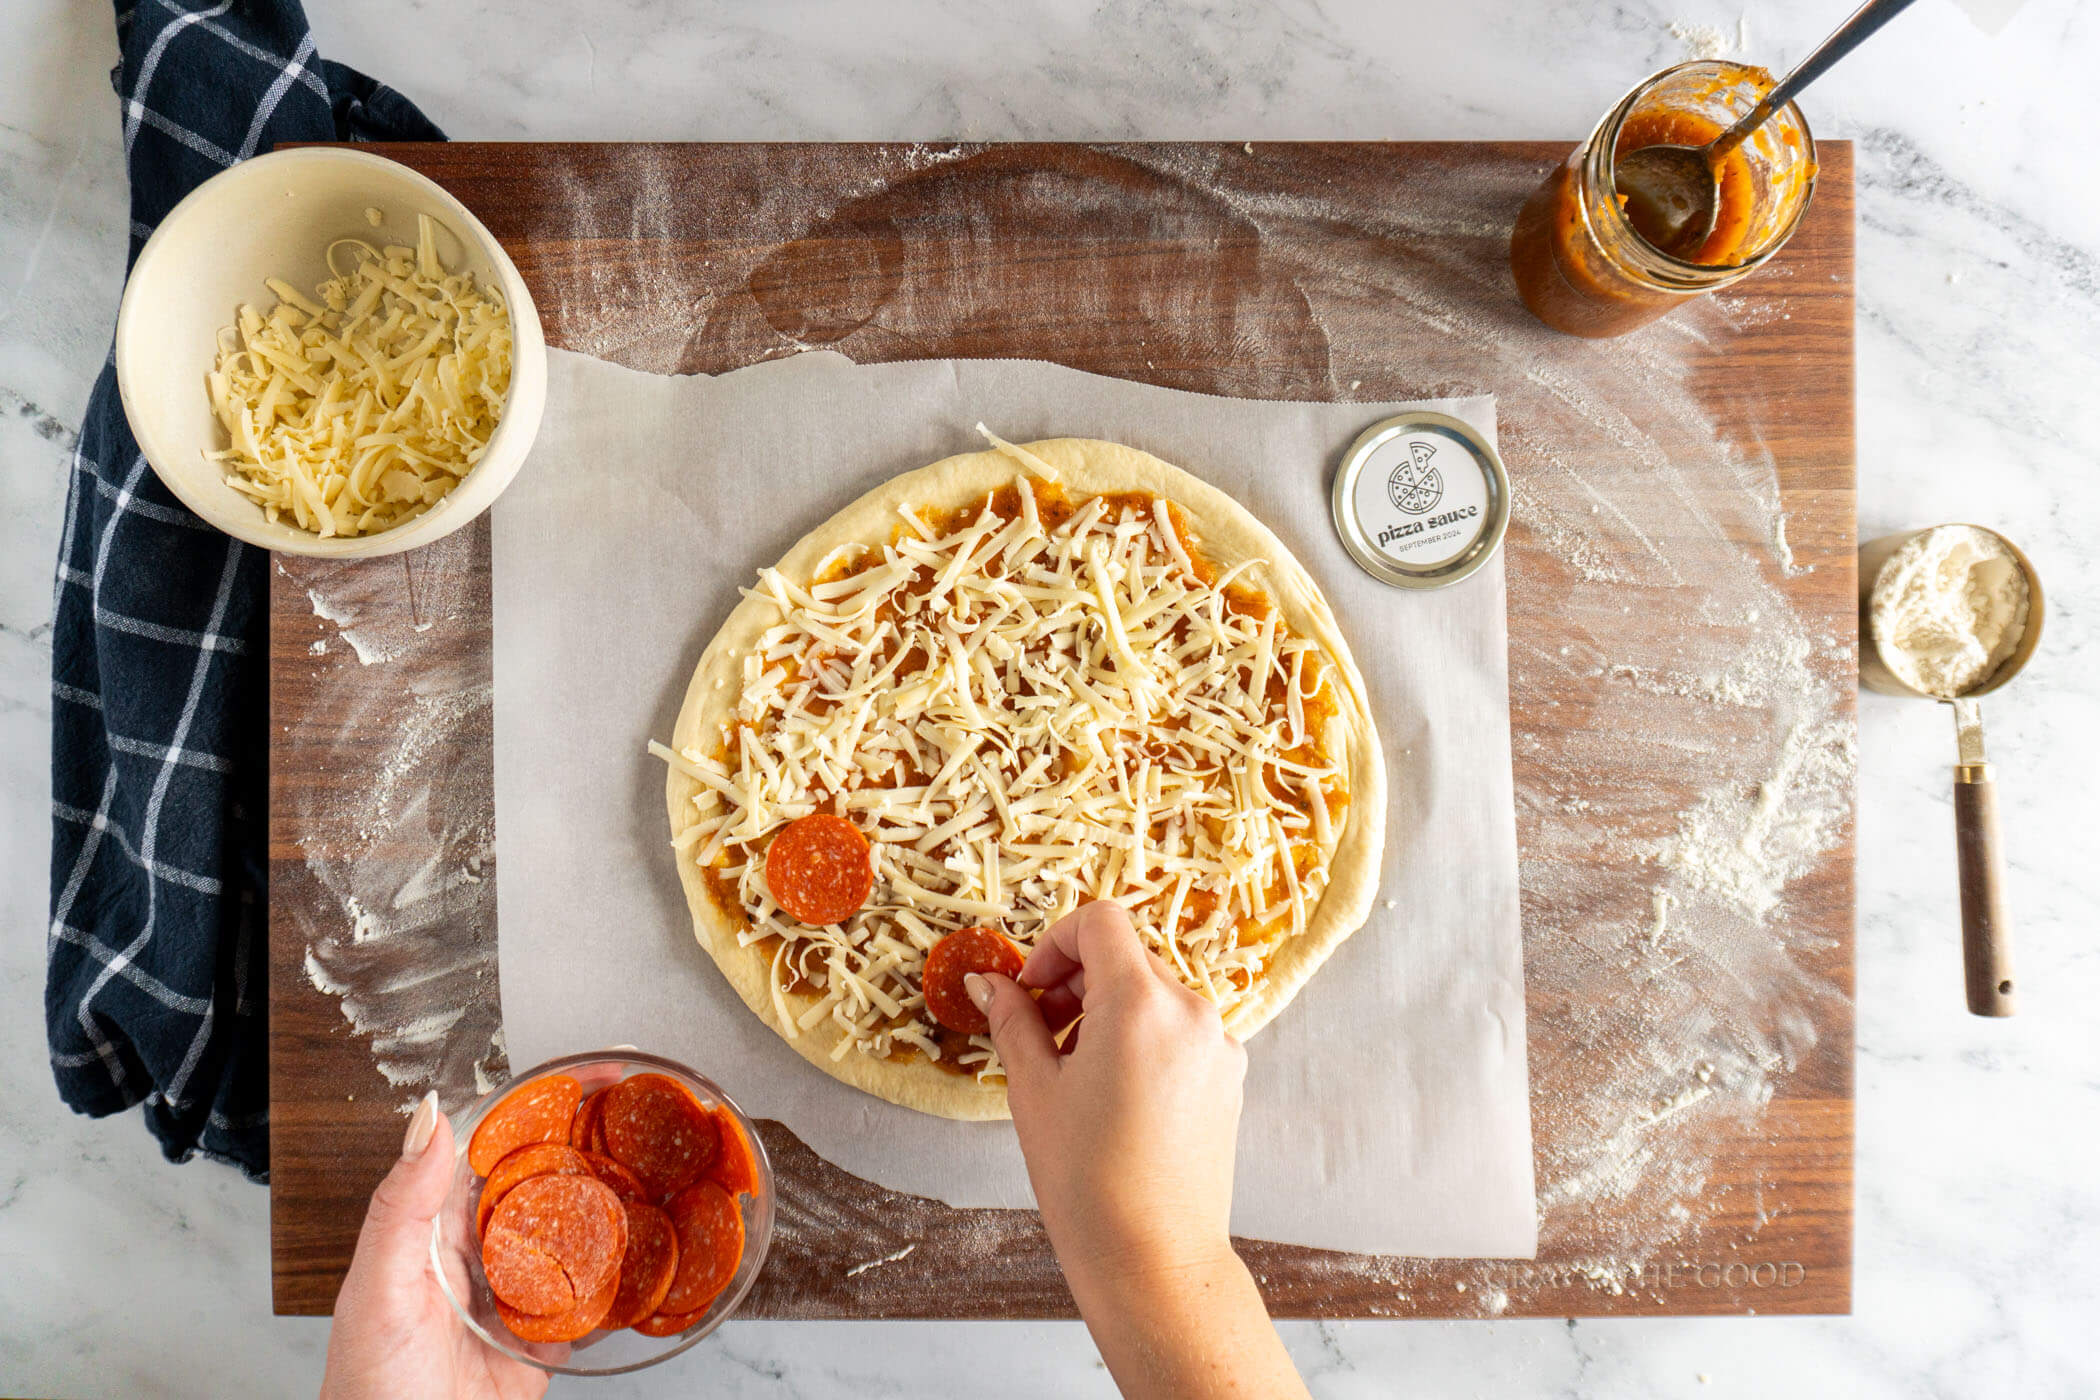
- Step 11: Add fresh mozzarella cheese and toppings before loading the dough onto your pizza peel and baking to perfection in the hot oven.

- Step 12: I bake my 8-9″ pizzas for about 7 minutes at 550f.
Expert Tips
- Baking times will vary depending on the thickness of your dough, the style of pizza you choose and how many toppings you add to your zaa!
- Ensure that your bread machine has a large enough capacity for the dough. If your machine can’t handle 2lbs of dough, you’ll have to halve the recipe.
- Skip the rolling pin when shaping your pizza, the rolling pin will knock out all the air out of your dough making it less fluffy and more dense. I’ll share my favorite shaping steps below if you want to hand stretch your dough.
- If you have a second baking steel or pizza stone, place it on the rack above the baking steel you're baking your pizza on - this will help infuse heat from the top of the pizza which is difficult to do in a regular oven but is characteristic of wood fired baking ovens.
- Got a Traeger? You've gotta see my Traeger pizza oven hack. It's going to change your pizza game. Trust me.
- Please measure your flour using the scoop and level method, this recipe was tested and retested using that technique. While weight measurements are included for convenience, they may not align perfectly with cup measurements due to natural variation in how flour settles in each cup.
Hand Stretched Bread Machine Pizza Dough
Before shaping the dough, preheat your oven with the baking stone or baking steel inside to 550°F and let it heat soak for at least 30 minutes. This ensures it’s fully saturated with heat and ready for a strong bake.
This method is a little more hands-on, but totally worth it! It might take a few tries to get the hang of it, don't stress if you poke a hole in the dough; just fold it over and pinch it closed. I don't have the dexterity for fancy hand-tossing, so this is my tried-and-true, cobbled-together approach that I've been using for years, and it makes amazing pizza.
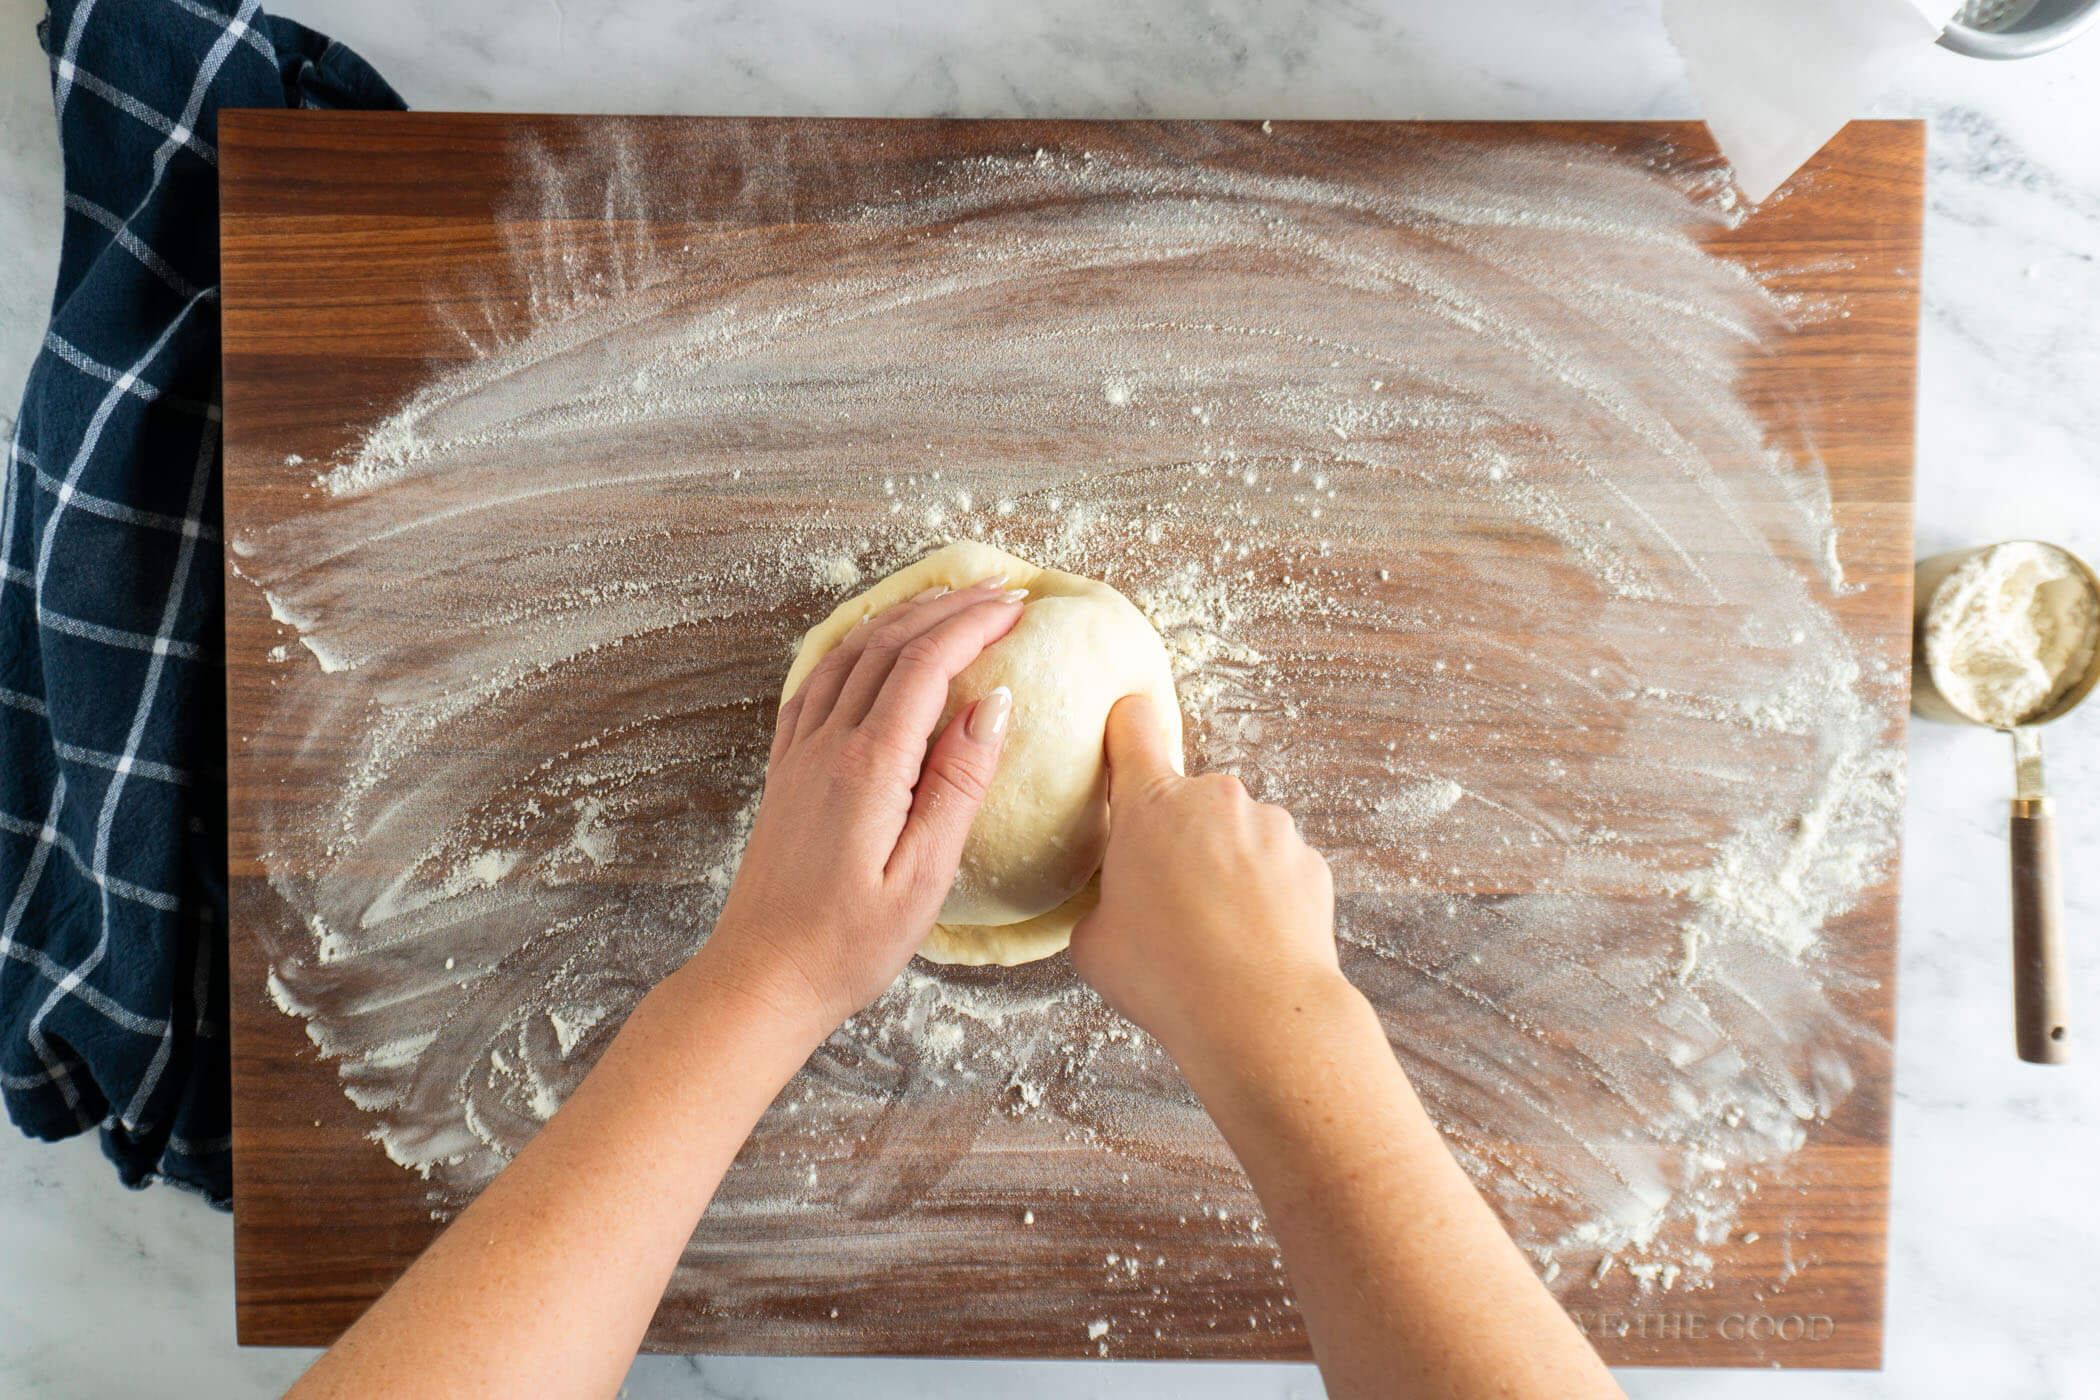
- Step 1: Carefully remove the rested dough from the tray and transfer it to a floured work surface and flour the top of the dough ball before beginning the shaping process.
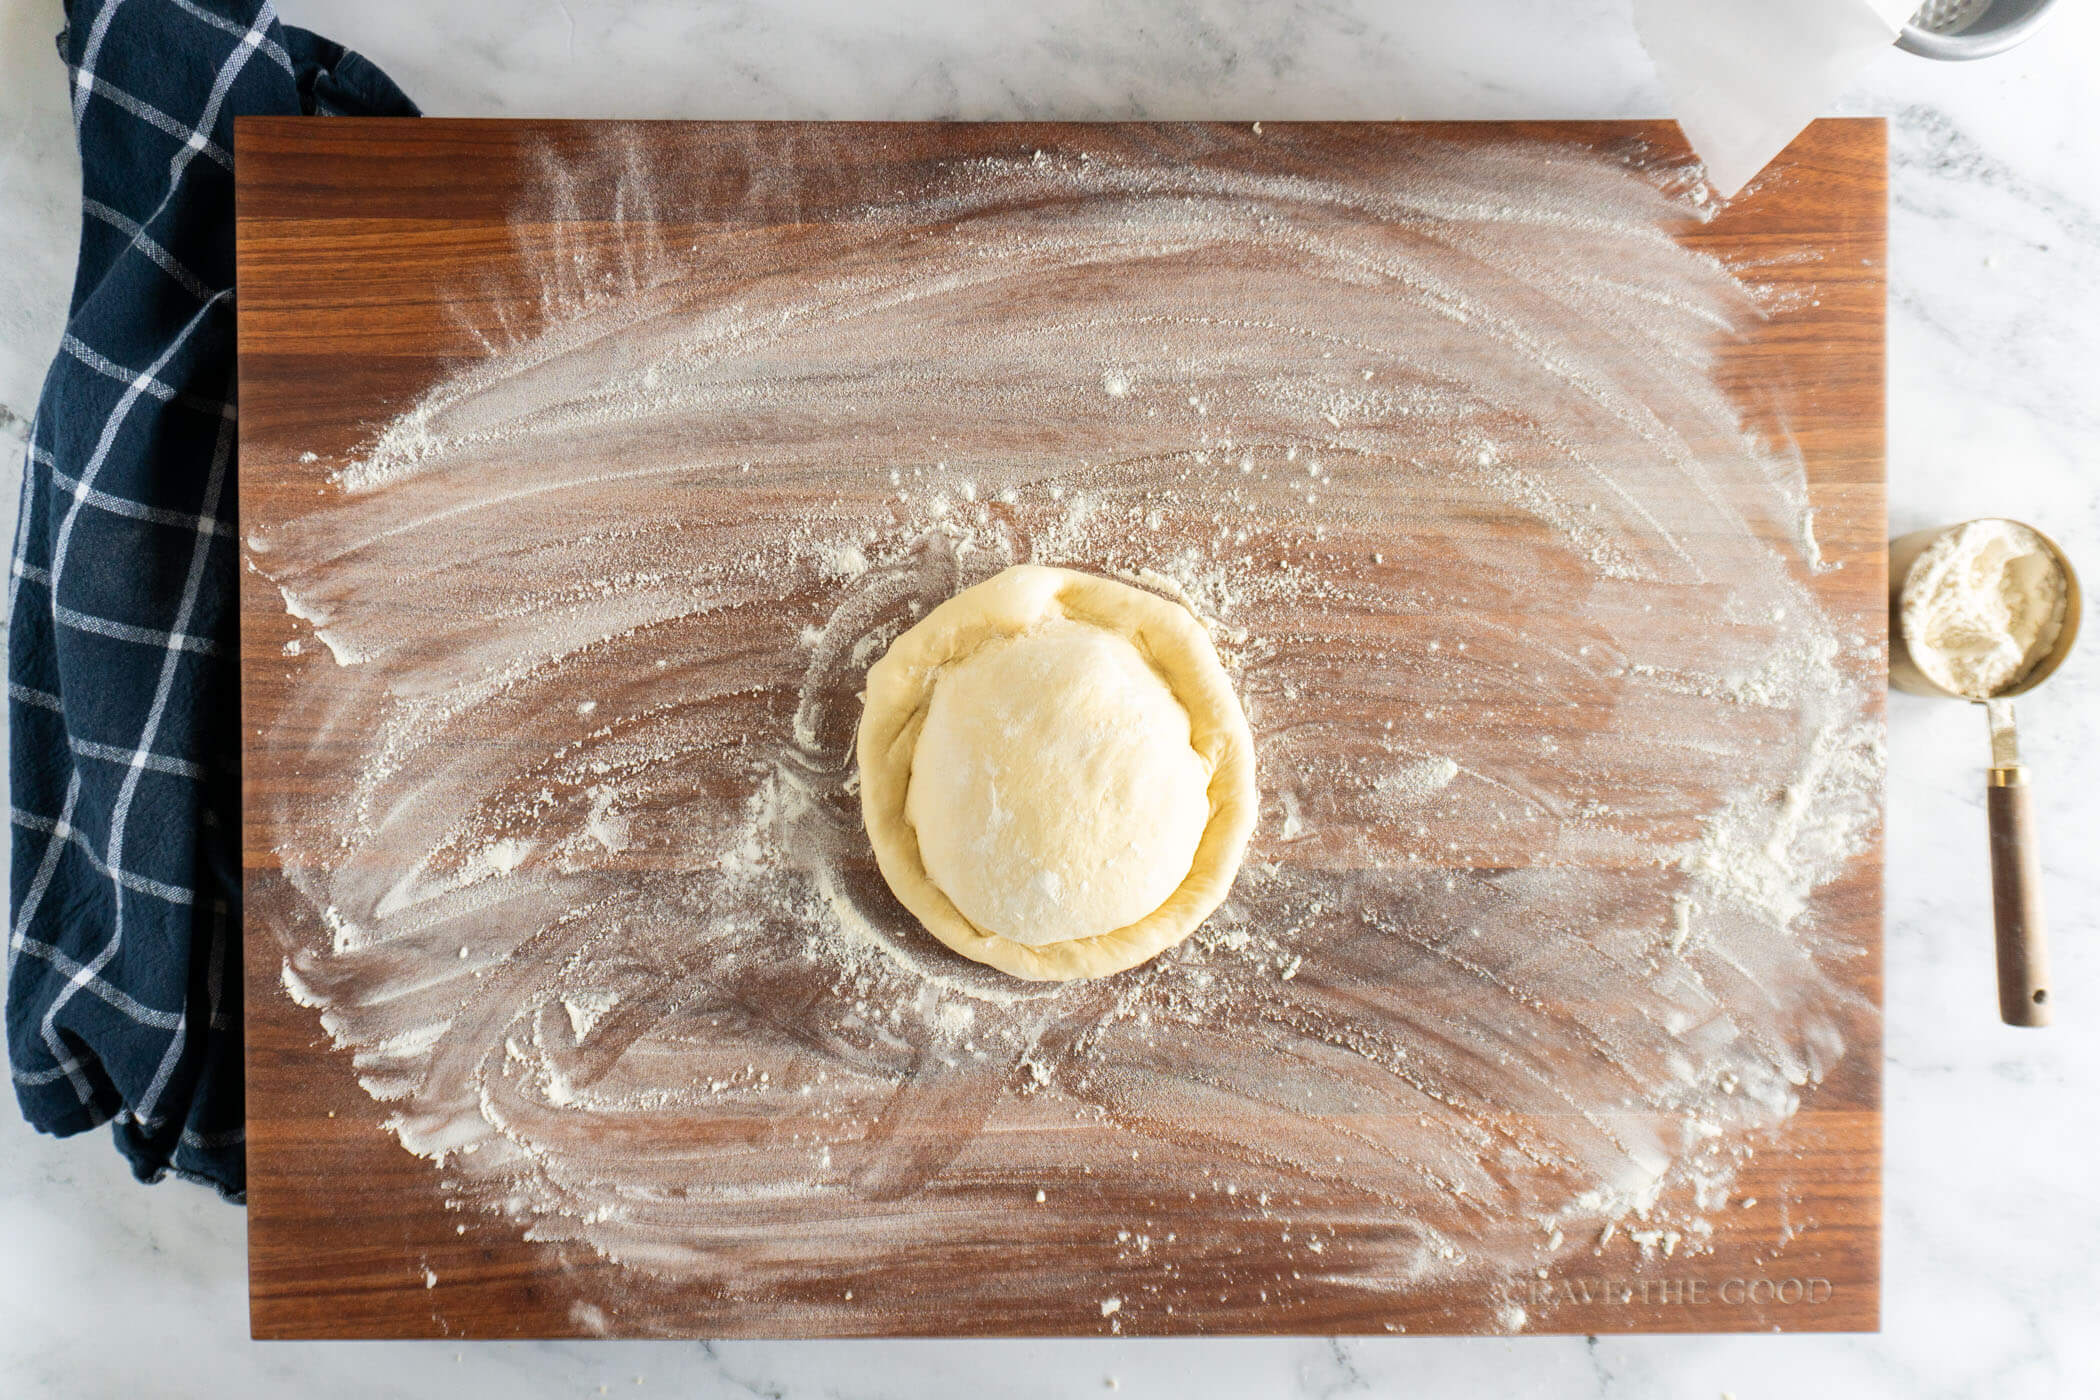
Working about 3/4″ from the edge of the dough ball, press a ditch with your fingertips to define the crust edge. The distance from the edge will determine the crust size - further away will give a larger crust while closer will result in a smaller crust. As a proud member of the no carb left behind club, I'm a big fan of a larger crust.
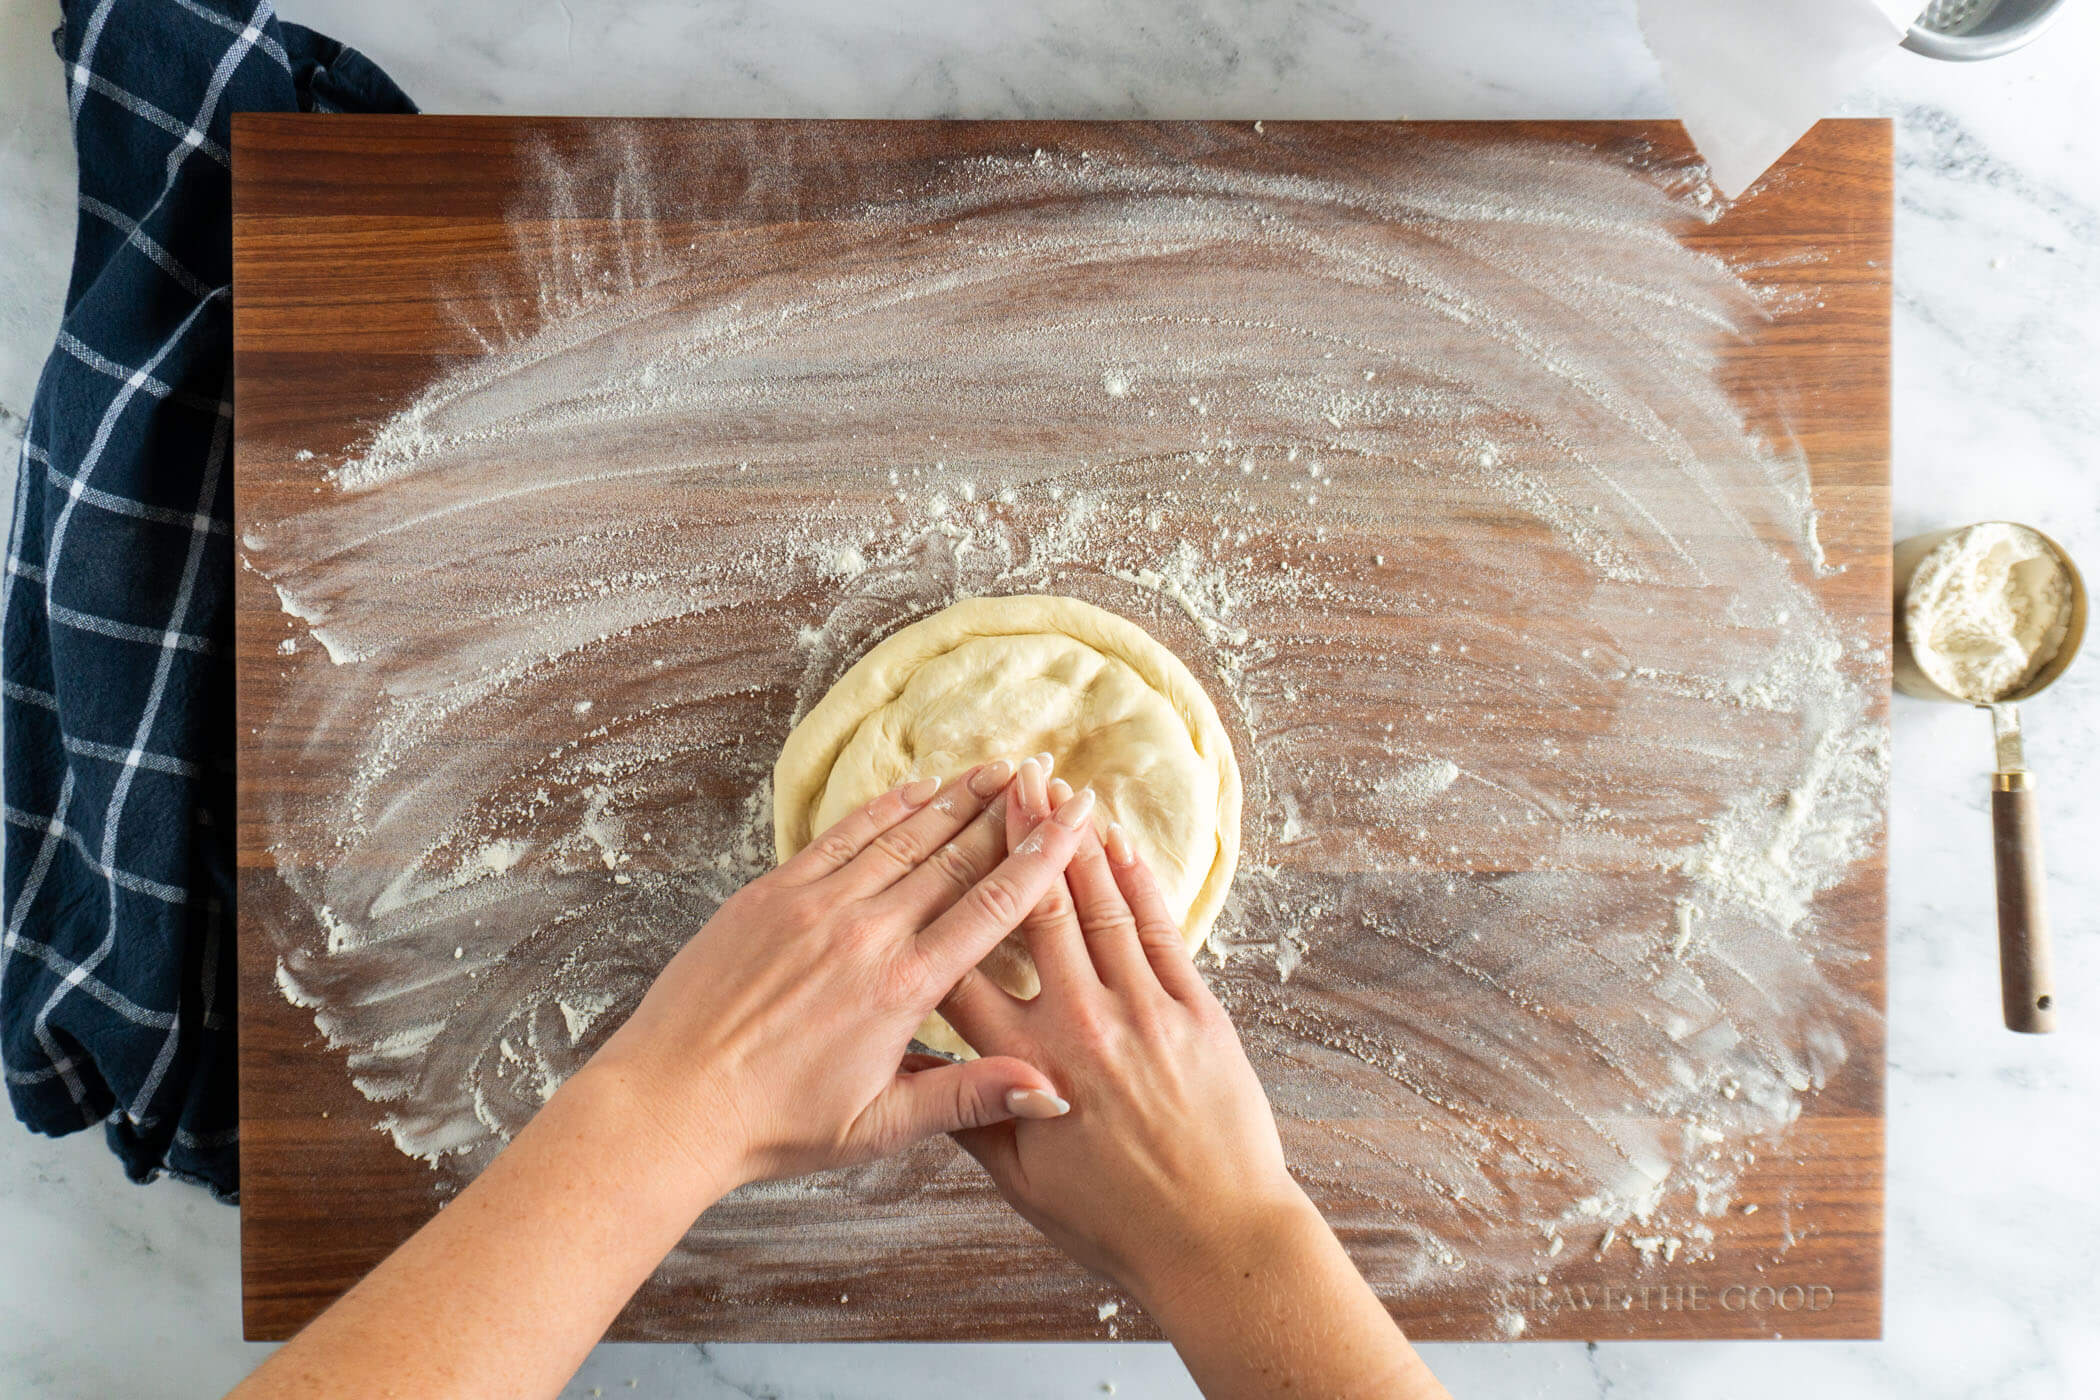
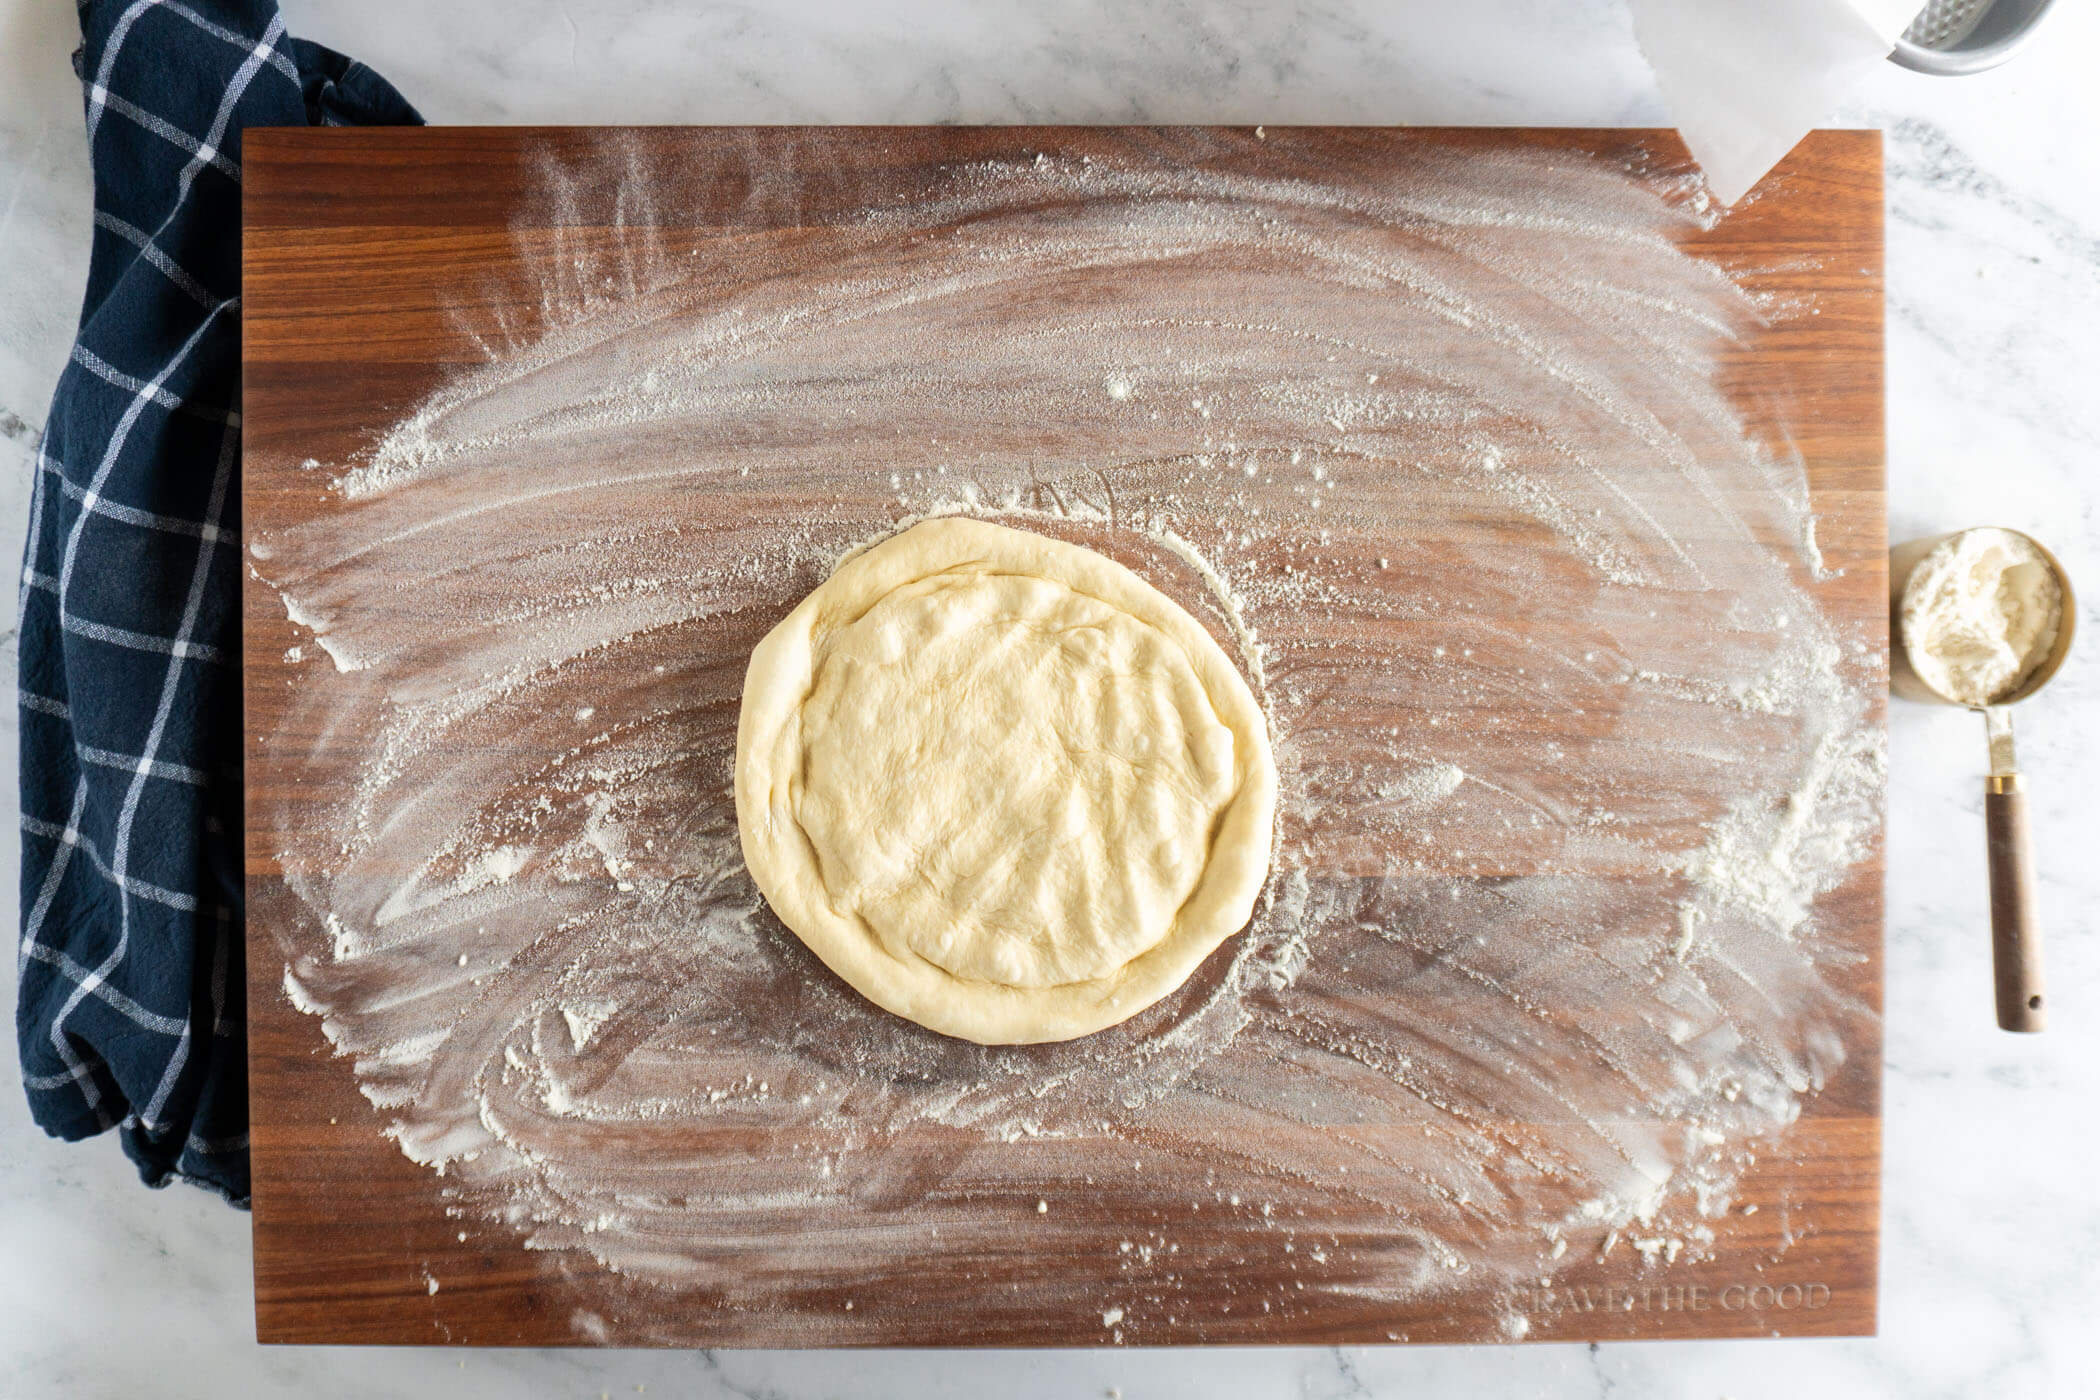
- Step 2: Begin shaping the dough by pressing gently in the center of the dough to flatten the the dough, I like to overlap my index fingers and press my middle fingers together during this stage, it creates a natural curve along my fingertips encouraging the dough into a round shape.
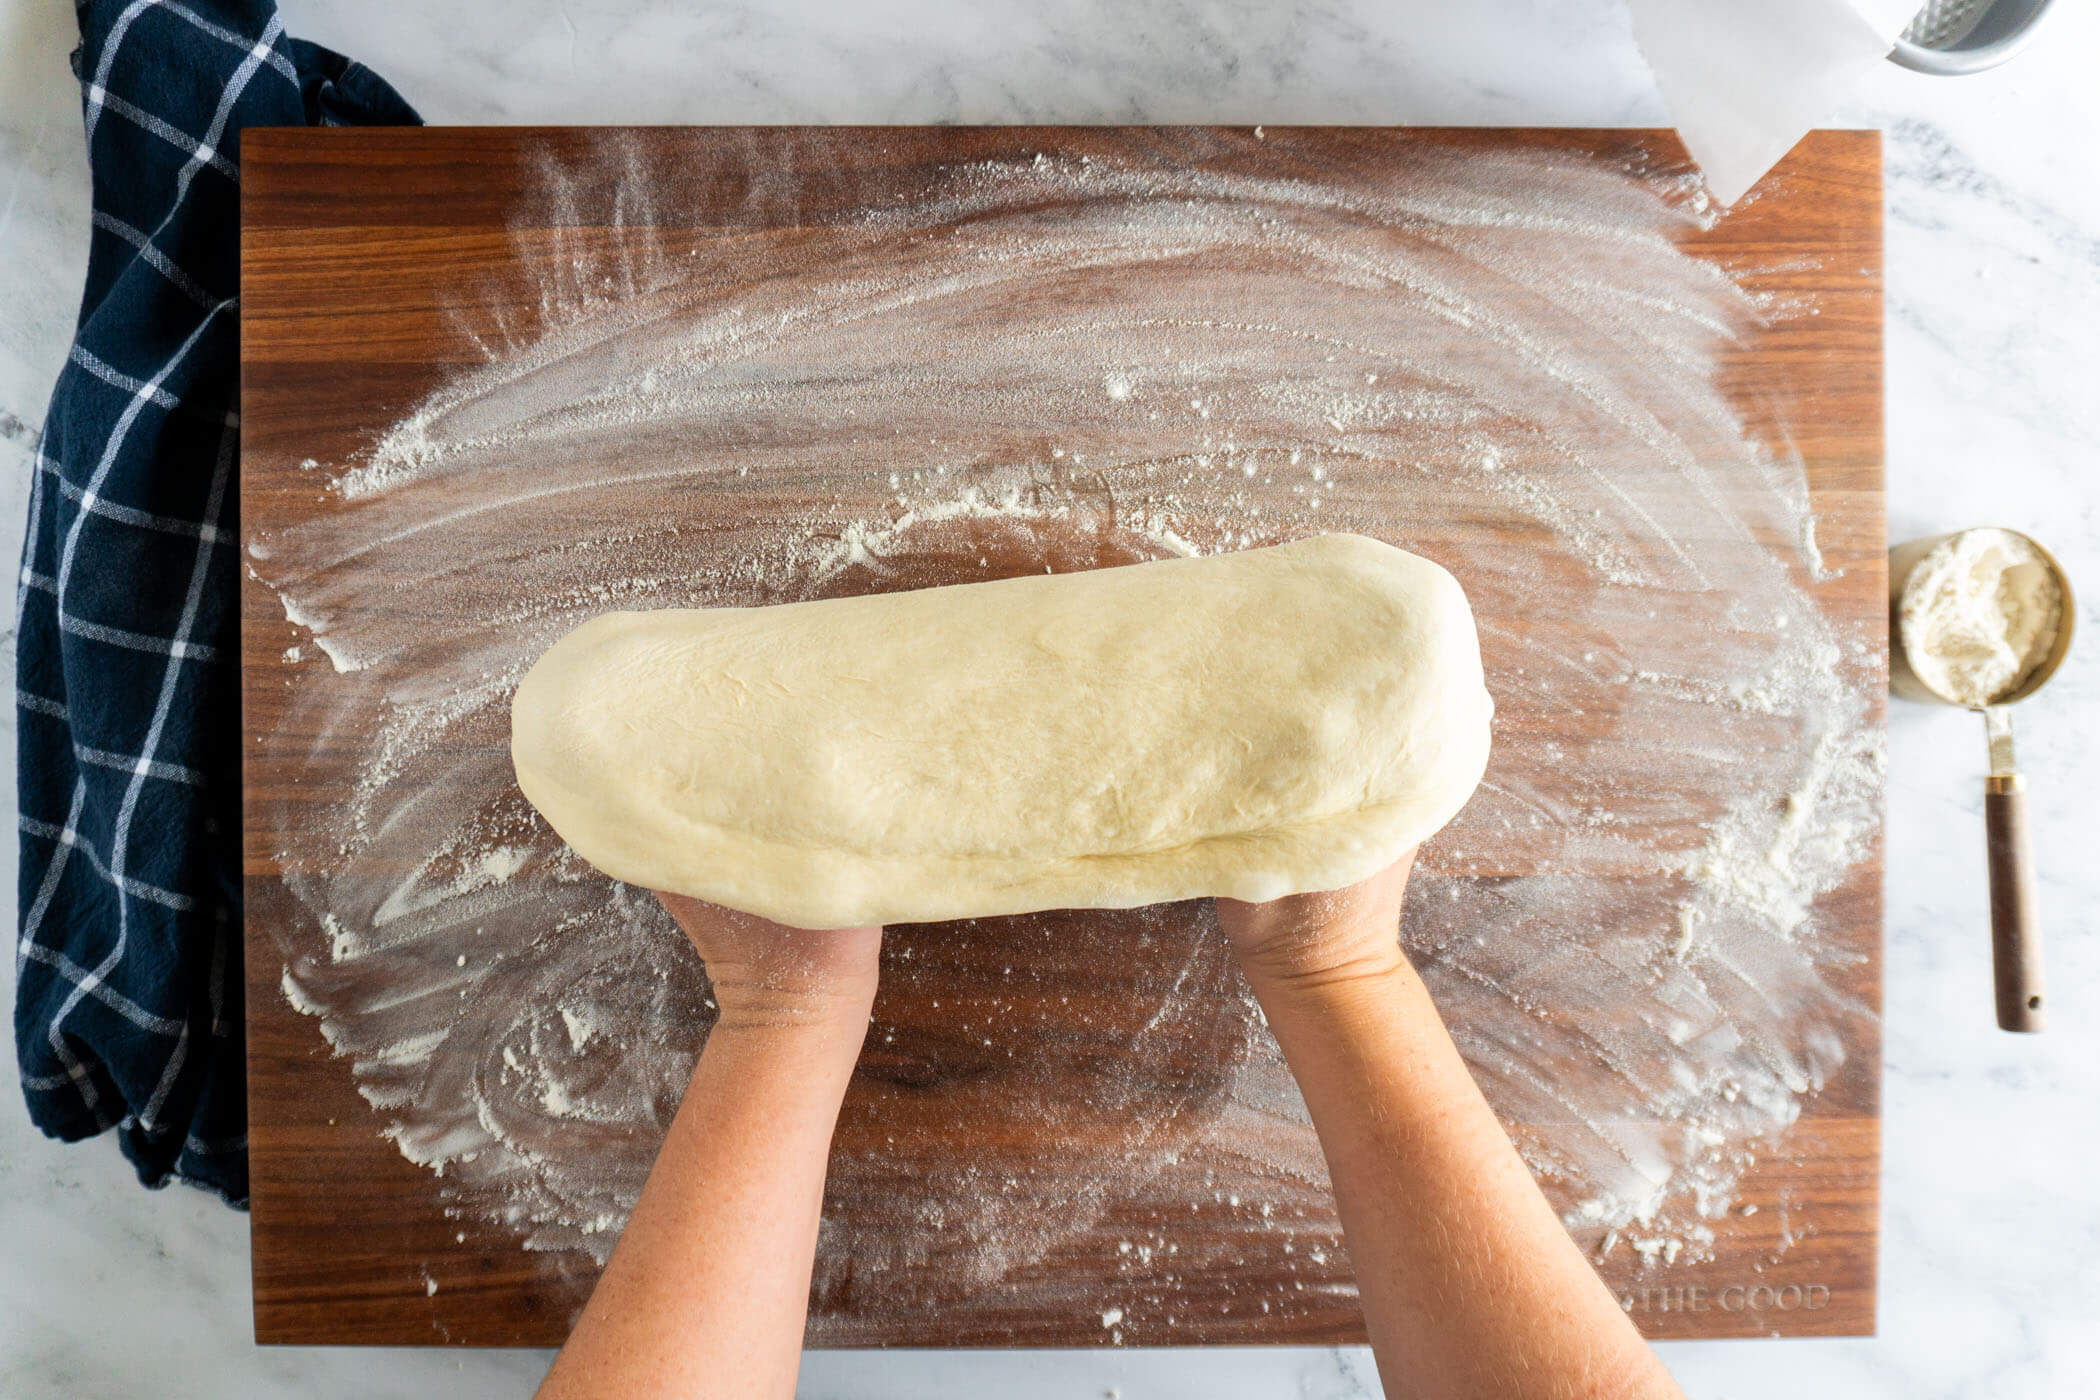
- Step 3: To stretch into shape, you'll be lifting the dough - try to avoid squeezing the crust edge formed in step 2. Make a fist with your left hand, then place the dough right side up onto your fist.
Make a fist with the right hand, and place them together underneath the dough, from there, you'll be gently stretching your hands apart, then rotating the dough a bit, stretching, then rotating to make it around the entire circle.
- Step 4: Pizza is ready to be assembled!
Topping suggestions
- Sliced mozzarella, fresh basil, and a drizzle of olive oil
- Mozzarella, pesto, and diced tomatoes
- Sour cream instead of sauce, lacto-fermented pickles, minced onions, and mozzarella
- Leftover pulled pork, pickled jalapenos, and barbeque sauce
Can You Freeze Pizza Dough?
One of the best things about this pizza dough is that current-you can help out future-you by pre-making the dough and tossing it in the freezer for later! And it couldn’t be easier!
Freezing Pizza Dough
Follow the steps until you get to the portion and proof section then:
- Turn the dough out onto a lightly floured surface and using a dough scraper or serrated knife, portion the dough into 2 pieces. Form each piece into a ball by tucking the ends underneath itself.
- Rub a little olive oil on your hands, then rub the dough balls to coat.
- Wrap each ball tightly in plastic wrap before sliding them into a zip top freezer bag or airtight container. Date and label the bag, then toss it into the freezer for up to 6 weeks.
Thawing Frozen Pizza Dough
It's important to thaw your homemade pizza dough in the fridge to keep the yeast sluggish during the defrosting process. To thaw, transfer the dough to a covered container the fridge and allow it to thaw overnight. Then warm up the dough by resting at room temperature for up to 8 hours before you're ready to work with it!
Basically, you'll be taking the dough out of the freezer the night before you intend to have pizza and in the morning you'll transfer the container the counter so it's ready at dinner time!
Bread Maker Pizza Dough FAQs
If you’re not going to be baking the dough right away, it can be stored in the fridge for up to 2 days. Simply divide the dough, coat with olive oil and add to a non airtight container with at least double the volume of the dough ball. The dough will continue to ferment and expand in the fridge, so the container needs to breathe.
When you’re ready to bake; just pull the dough from the fridge, turn it onto a floured surface and roughly press into a circle, cover it and rest at room temperature while the oven preheats.
Yes, you can substitute all-purpose flour for bread flour in this recipe. The pizza dough will still work well, though the texture may be slightly less chewy. Bread flour contains more protein, which creates a chewier, more structured crust, but all-purpose flour is a perfectly acceptable alternative for homemade pizza.
If your bread machine doesn’t have a dough or pizza setting, you can use the manual or basic dough cycle. Just make sure to remove the dough before the baking cycle begins. Most machines will signal when the kneading and first rise are complete.
Alternatively, you can use my quick and easy pizza dough recipe that’s made in your stand mixer!
For thin crust pizza, stretch your dough to about ⅛ inch thick. For a thicker, chewier crust, aim for ¼ to ½ inch thickness.
More Great Bread Machine Recipes


If you tried this Bread Machine Pizza Dough recipe or any other recipe on my blog, please leave a 🌟 star rating and let me know how it went in the comments below. Thanks for visiting!
📖 Printable Recipe
Bread Machine Pizza Dough
Ingredients
- 1 ⅛ cup warm water, 255g
- 2 tablespoons olive oil, 25g
- 1 ½ teaspoons granulated sugar, 7g
- 1 teaspoon coarse kosher salt, 8g
- 3 cups bread flour, 400g
- 2 teaspoons instant yeast, 8g
Instructions
Add Ingredients To Bread Pan:
- Combine the liquid ingredients: 1 cup + ⅛ cup warm water, 2 tablespoons olive oil, 1 ½ teaspoons granulated sugar, and 1 teaspoon coarse kosher salt in the baking pan of your bread machine.
- Layer the dry ingredients as follows; 3 cups bread flour and 2 teaspoons instant or bread machine yeast.
Start The Bread Machine:
- Place the bread pan into the bread machine and select the Dough - Pizza setting or Dough/Manual setting. Allow the bread machine to mix, knead and proof your dough.
Portion + Proof:
- Once dough cycle has completed, prepare a baking sheet by lining with parchment paper and set aside.
- Turn the dough out onto a lightly floured surface and using a dough scraper or serrated knife, portion the dough into 2 pieces. Form each piece into a ball by tucking the ends underneath itself. Place the balls on the prepared baking sheet, then lightly flour the surface of each ball. Cover the baking sheet with plastic wrap then set aside to proof for 30-45 minutes or until the dough balls have roughly doubled in size.
- Meanwhile, load your baking stone or steel into the oven and preheat oven to 550f (or as high as it will go) while the dough proofs.
Build Your Pizza:
- Once the dough finishes proofing, you can shape or press into a pizza pan before assembling your pizza and baking. Place the shaped dough on the parchment paper.
- Spread your favorite homemade pizza or tomato sauce on the dough, leaving a gap around the edge of the pie where you've defined the crust. Add fresh mozzarella cheese and toppings before loading the dough onto your pizza peel and baking to perfection in the hot oven. I bake my thin crust pizzas for about 7 minutes at 550f.
Notes
Expert tips:
- Baking times will vary depending on the thickness of your dough, the style of pizza you choose and how many toppings you add to your zaa.
- Ensure that your bread machine has a large enough capacity for the dough. If your machine can't handle 2lbs of dough, you'll have to halve the recipe.
- Skip the rolling pin when shaping your pizza, the rolling pin will knock out all the air out of your dough making it less fluffy and more dense. Check the body of the post for hand shaping steps
- If you have a second baking steel or pizza stone, place it on the rack above the baking steel you’re baking your pizza on – this will help infuse heat from the top of the pizza which is difficult to do in a regular oven but is characteristic of wood fired baking ovens.
- Measure your flour using the scoop and level method, this recipe was tested and retested using that technique. While weight measurements are included for convenience, they may not align perfectly with cup measurements due to natural variation in how flour settles in each cup.
- If you're not going to be baking the dough right away, it can be stored in the fridge for up to 2 days. Simply divide the dough, coat with olive oil and add to a non airtight container with at least double the volume of the dough ball. The dough will continue to ferment and expand in the fridge, so the container needs to breathe.
When you're ready to bake; just pull the dough from the fridge, turn it onto a floured surface and roughly press into a circle, cover it and rest at room temperature while the oven preheats.


We love this pizza dough for a quick, from scratch dinner on nights that we have sports! I’ll whip up a batch in the bread machine, portion it into two balls, and stash in the fridge before the final proof for those busy weeknights, then I pull it out of the fridge – allow it to come to room temperature while the oven preheats, toss together a homemade pie, and have dinner on the table in a flash!