
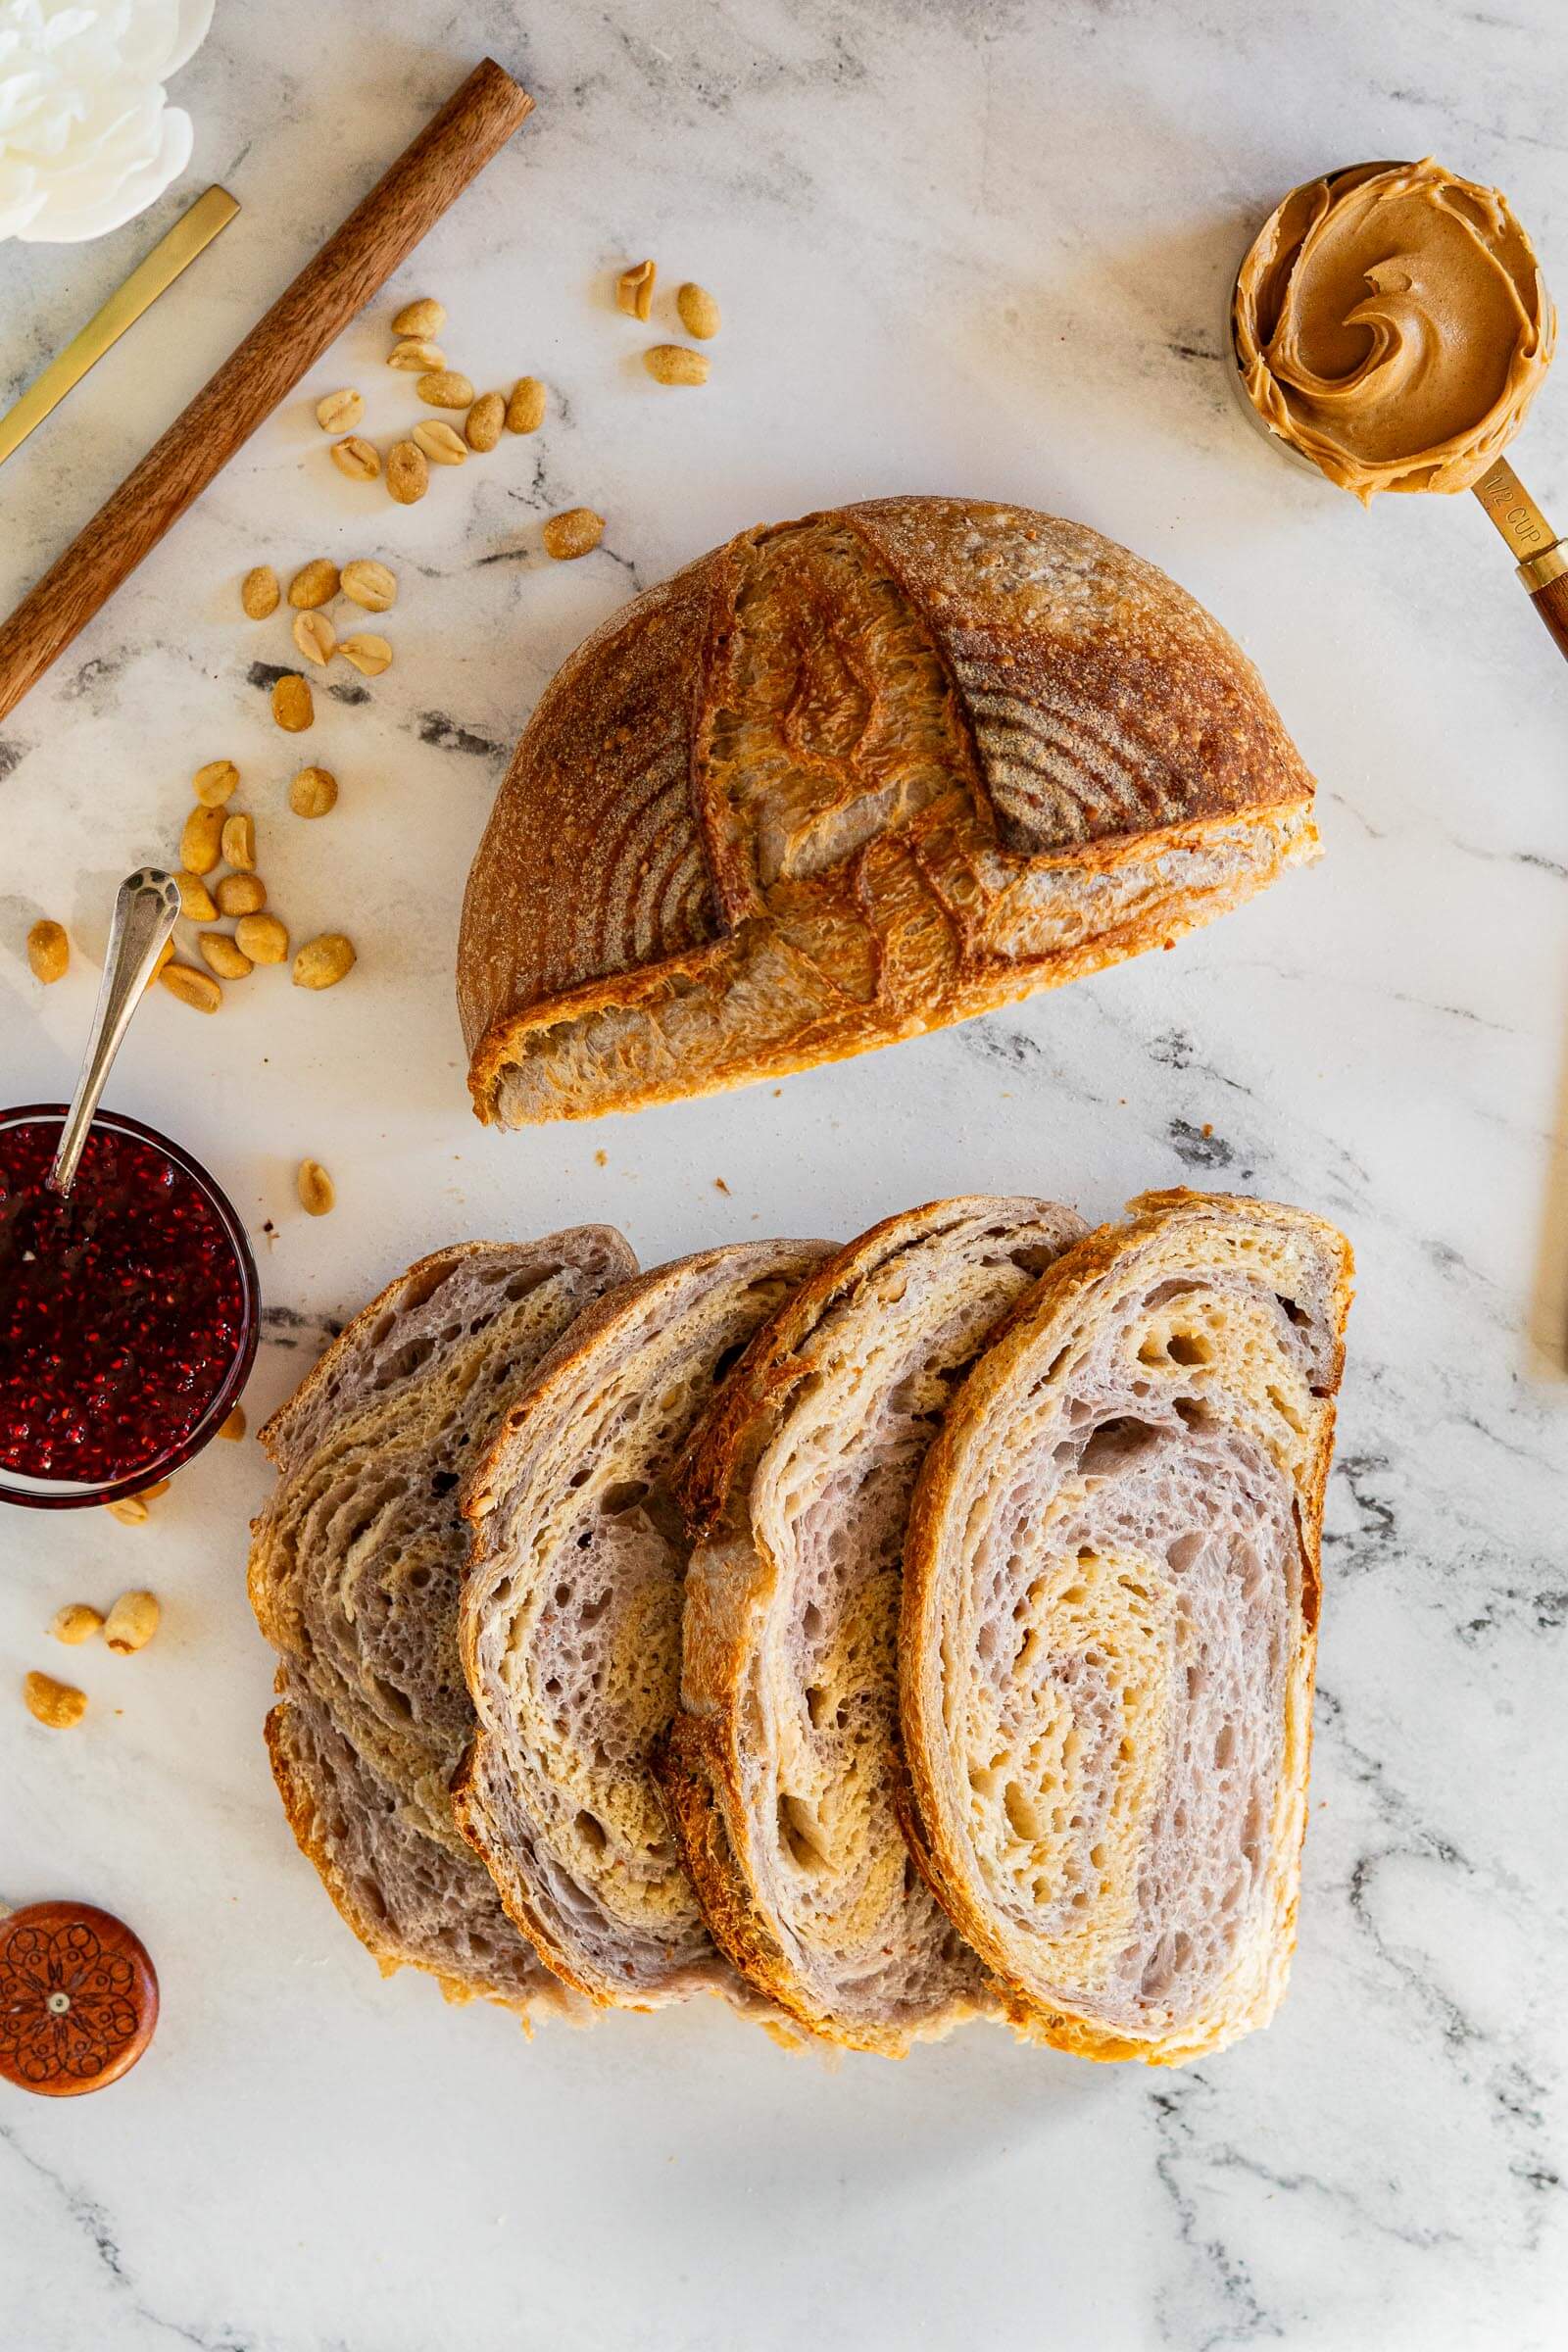
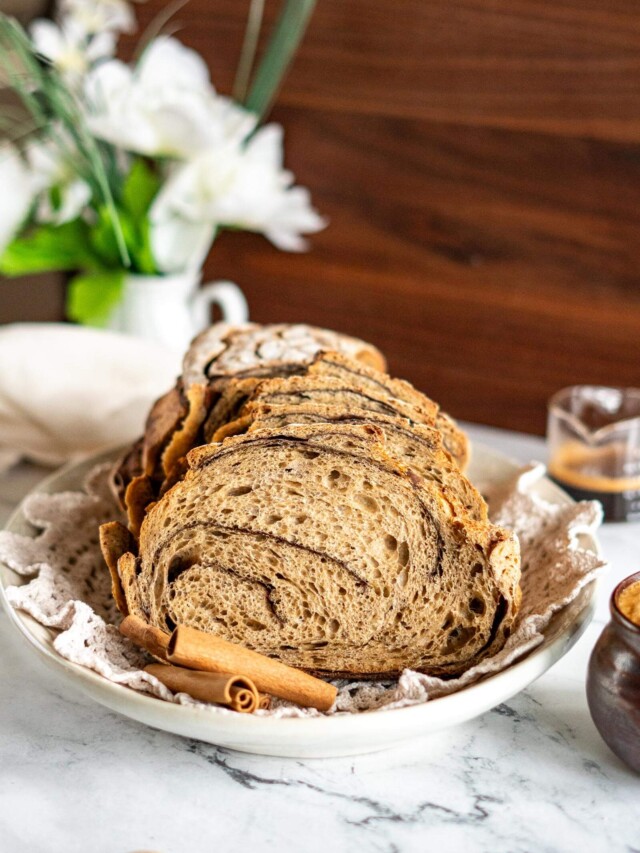
Peanut Butter And Jam Sourdough

Peanut butter and jam sourdough bread. Your childhood favorite, reimagined as an artisan sourdough loaf.
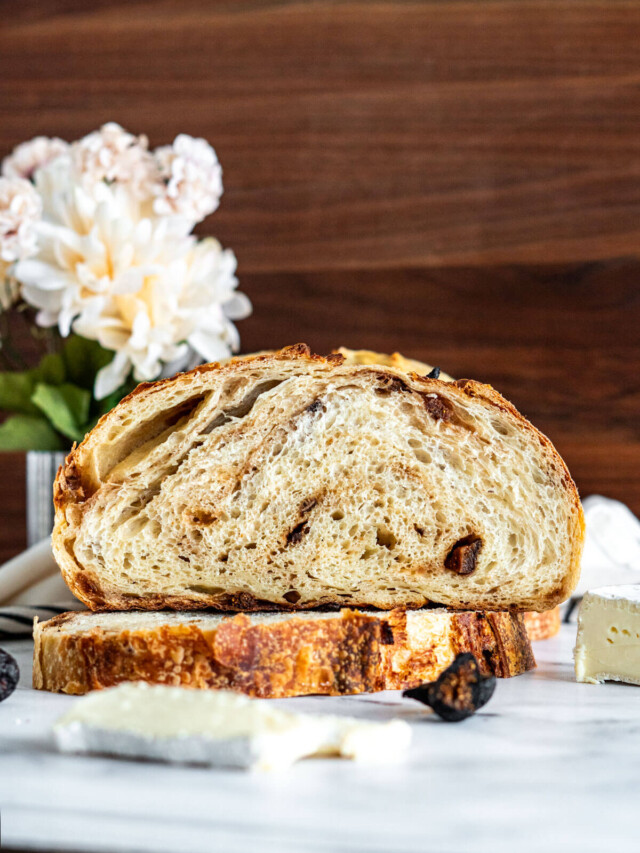
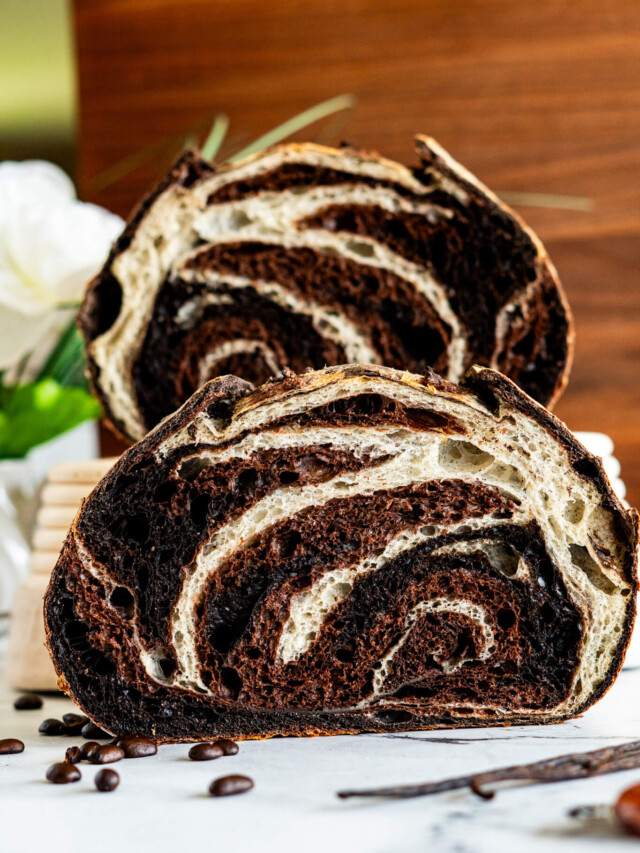
You’ll also love these flavored sourdough recipes: Brie and Fig Sourdough, Chocolate Vanilla Swirl Sourdough, and Chai Latte Sourdough.

Craving The Recipe Details?
What it is: A playful sourdough loaf flavored with creamy peanut butter, peanuts, and sweet raspberry jam.
Why you'll love it: It's a nostalgic PB&J twist on sourdough. Each slice has layers of nutty richness and fruity sweetness, with the irresistible tang of sourdough.
How to make it: Prepare two separate doughs; one enriched with peanut butter and ground peanuts, one infused with jam; develop the dough, then laminate them together before bulk fermenting, shaping, cold retarding, and baking.
This one started with a very simple question my inner kid couldn’t stop asking: what if your morning PB&J toast was the bread? Not spread on top, but actually baked right in. A few test batches later, marbled peanut butter and jam sourdough bread was born, and honestly, it might be my most fun bake yet.
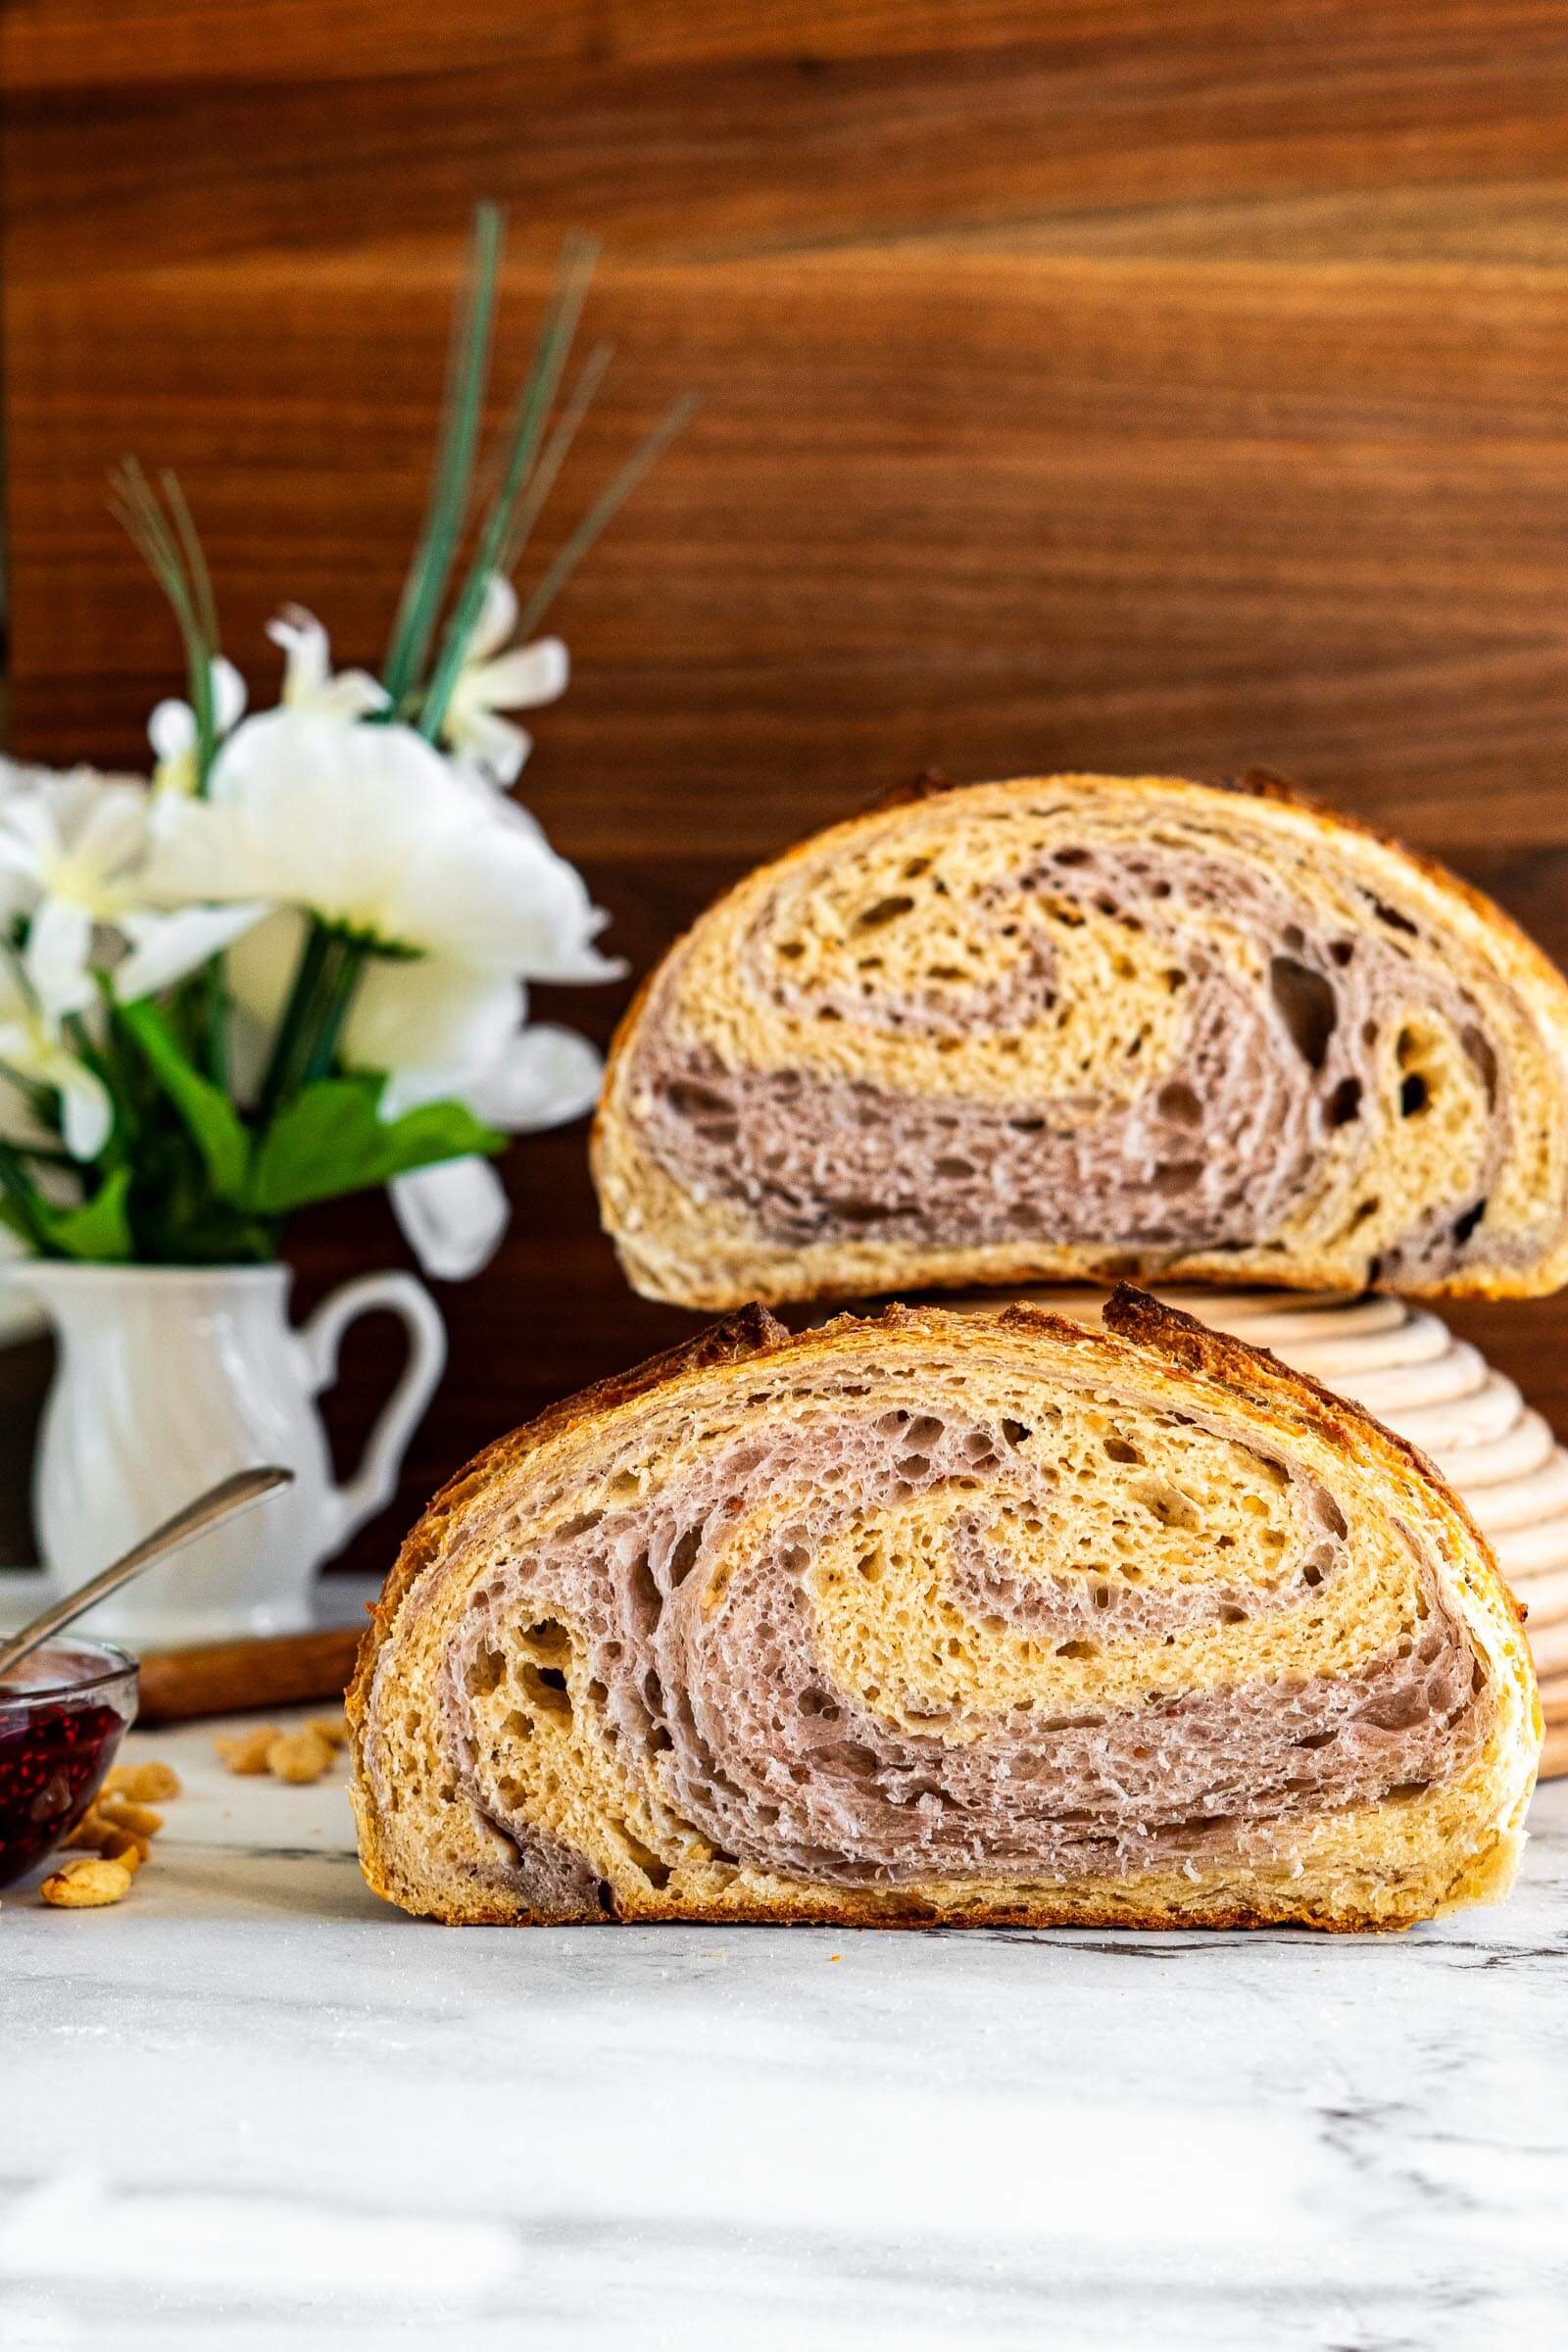
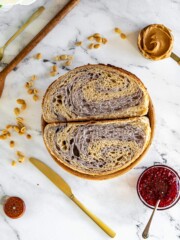
This loaf is made by developing two separate doughs; one rich with peanut butter and ground peanuts, one fruity with jam, then laminating them together before bulk fermentation. The result is a beautifully swirled, tender crumb with pockets of nutty, jammy goodness in every slice. It’s playful, it’s a little nostalgic, and it’s a total showstopper on a cutting board.
Don’t let the two-dough process intimidate you, I’ll walk you through every step with a photo guide below!
This peanut butter and jam sourdough bread is dedicated to your inner kid.

Master Your Sourdough Starter In 5 Days!
From Confused To Confident.
Find success with 5 simple, actionable secrets delivered to you. No more guessing games – just clear, proven steps to a thriving starter.
Jump to:
Key Ingredients
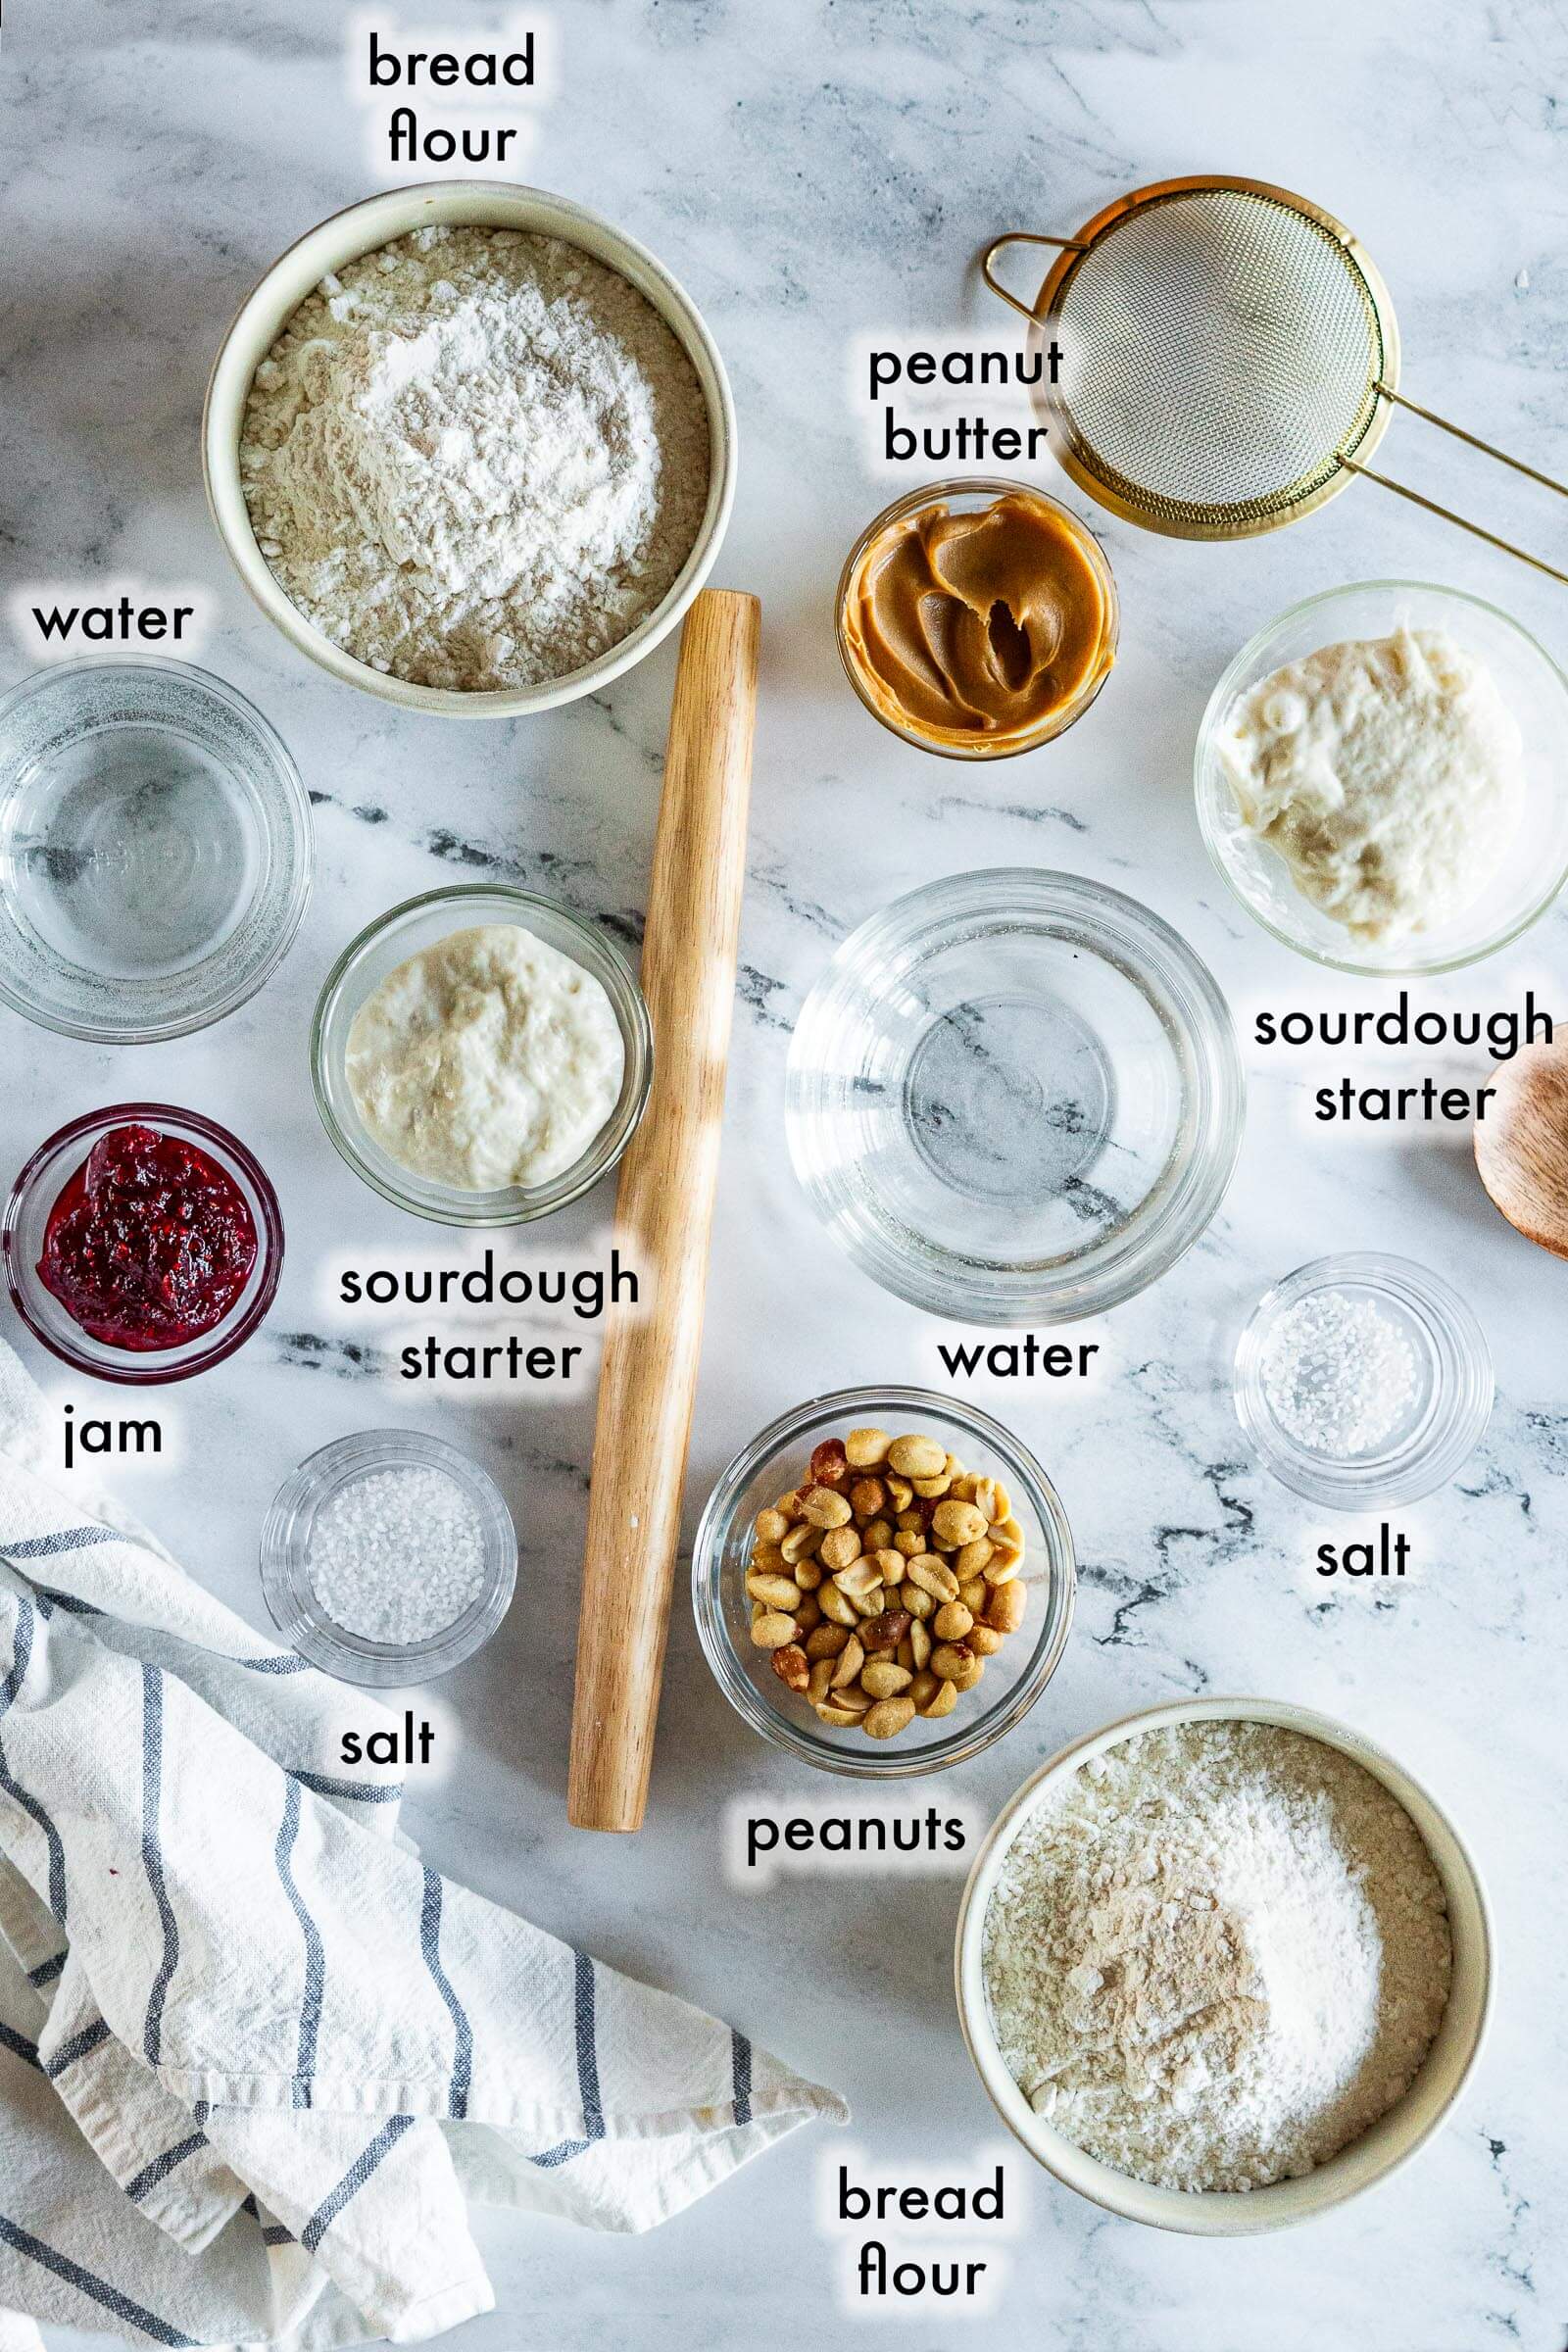
Peanut Butter: We always buy Kraft Creamy peanut butter so that’s what I used for this recipe. Other peanut butters should work but may have slightly different results or flavor profiles.
Peanuts: Peanut butter alone adds fat that can affect the dough’s texture and rise so adding ground peanuts helps to add flavor and texture without the same fat loading.
Jam: I use homemade raspberry jam in this recipe, because it’s my favorite, but feel free to use any jam you have on hand. Dark-colored jams like raspberry, blueberry, or blackberry jam, produce the most visually striking marbling because their pigments survive the bake. Avoid loose fruit syrups or runny preserves, which can affect the hydration level of the dough.
Sourdough Starter: For this recipe, you want to use a fed and active sourdough starter. Your starter should have been fed before beginning and have at least doubled in size.Psst.. Want to know more about feeding your starter, storing sourdough starter, how to use discard, or even which is the best jar for your starter? I've got tons of guides to help you!
Variations + Substitutions
- Peanut Butter And Jelly Sourdough: Sub the jam for jelly! Consider using grape for the classic PBJ combo.
- Natural Peanut Butter: I have not tested this recipe with natural peanut butter, and due to inconsistencies in the texture of natural peanut butter, this is not a substitution I’d make.
How To Make Peanut Butter And Jam Sourdough
Grind The Peanuts:
This dough has both peanut butter and ground peanuts for an extra flavor boost, so before starting you’ll need to grind up the peanuts.
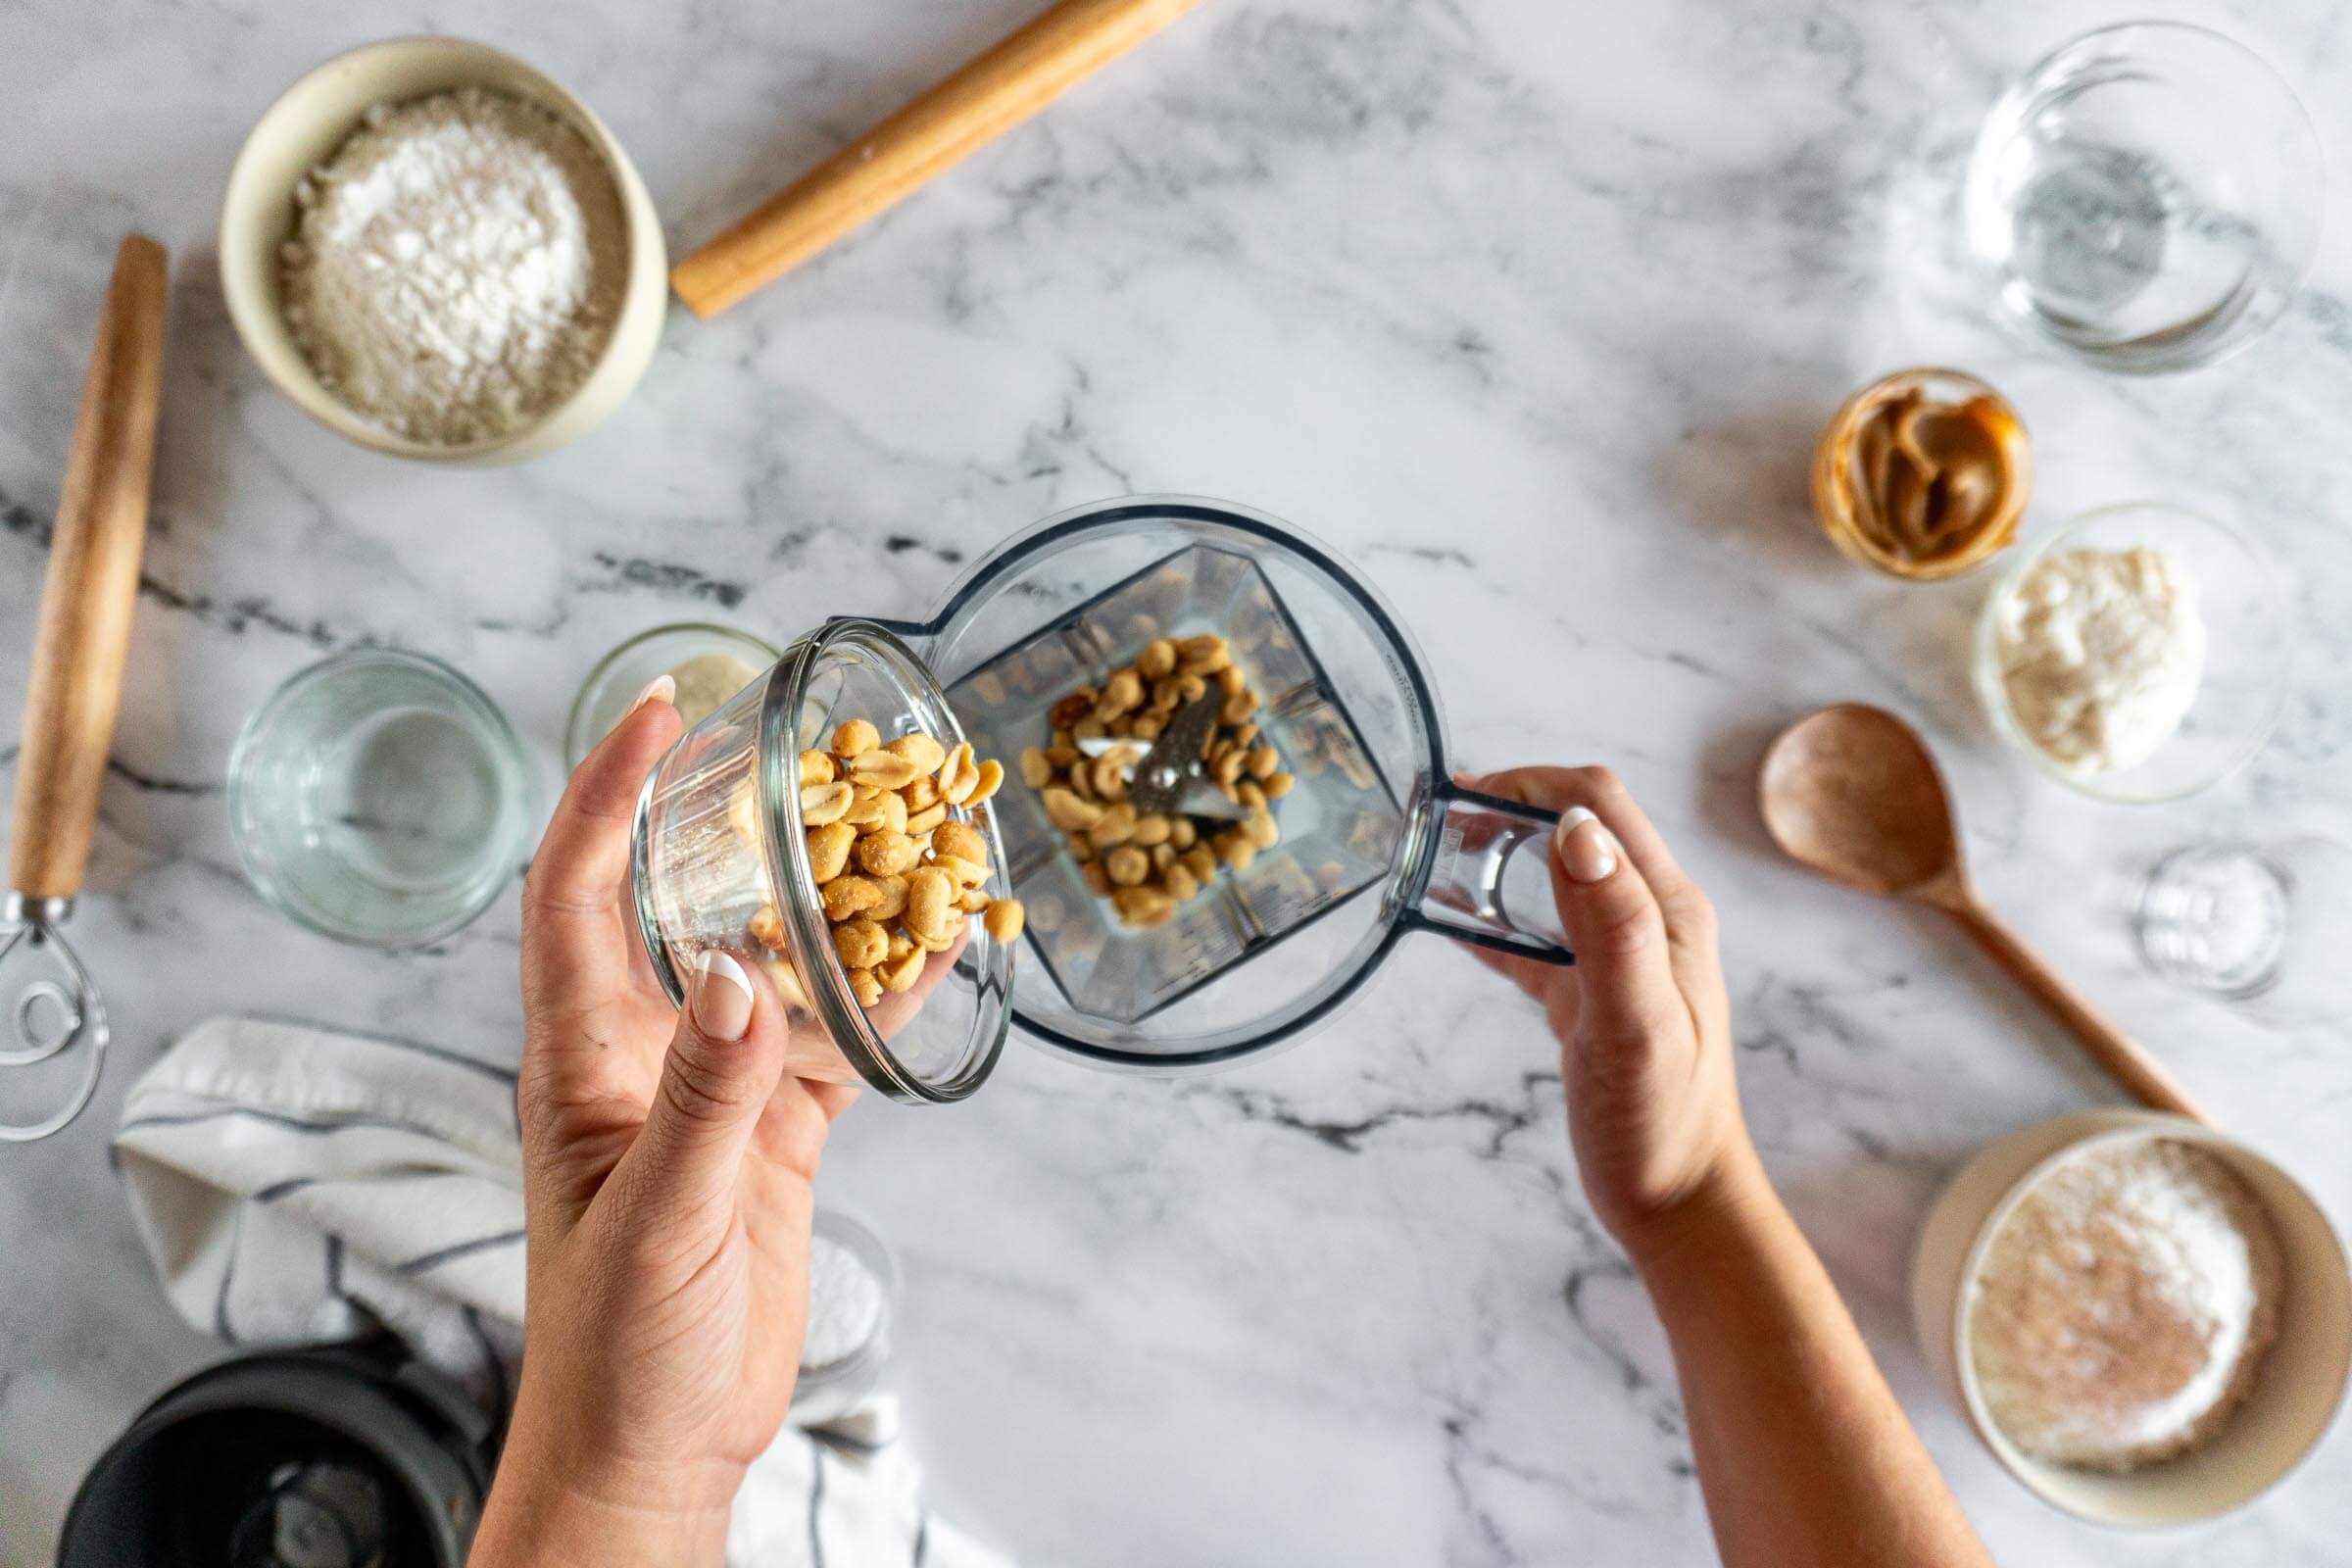
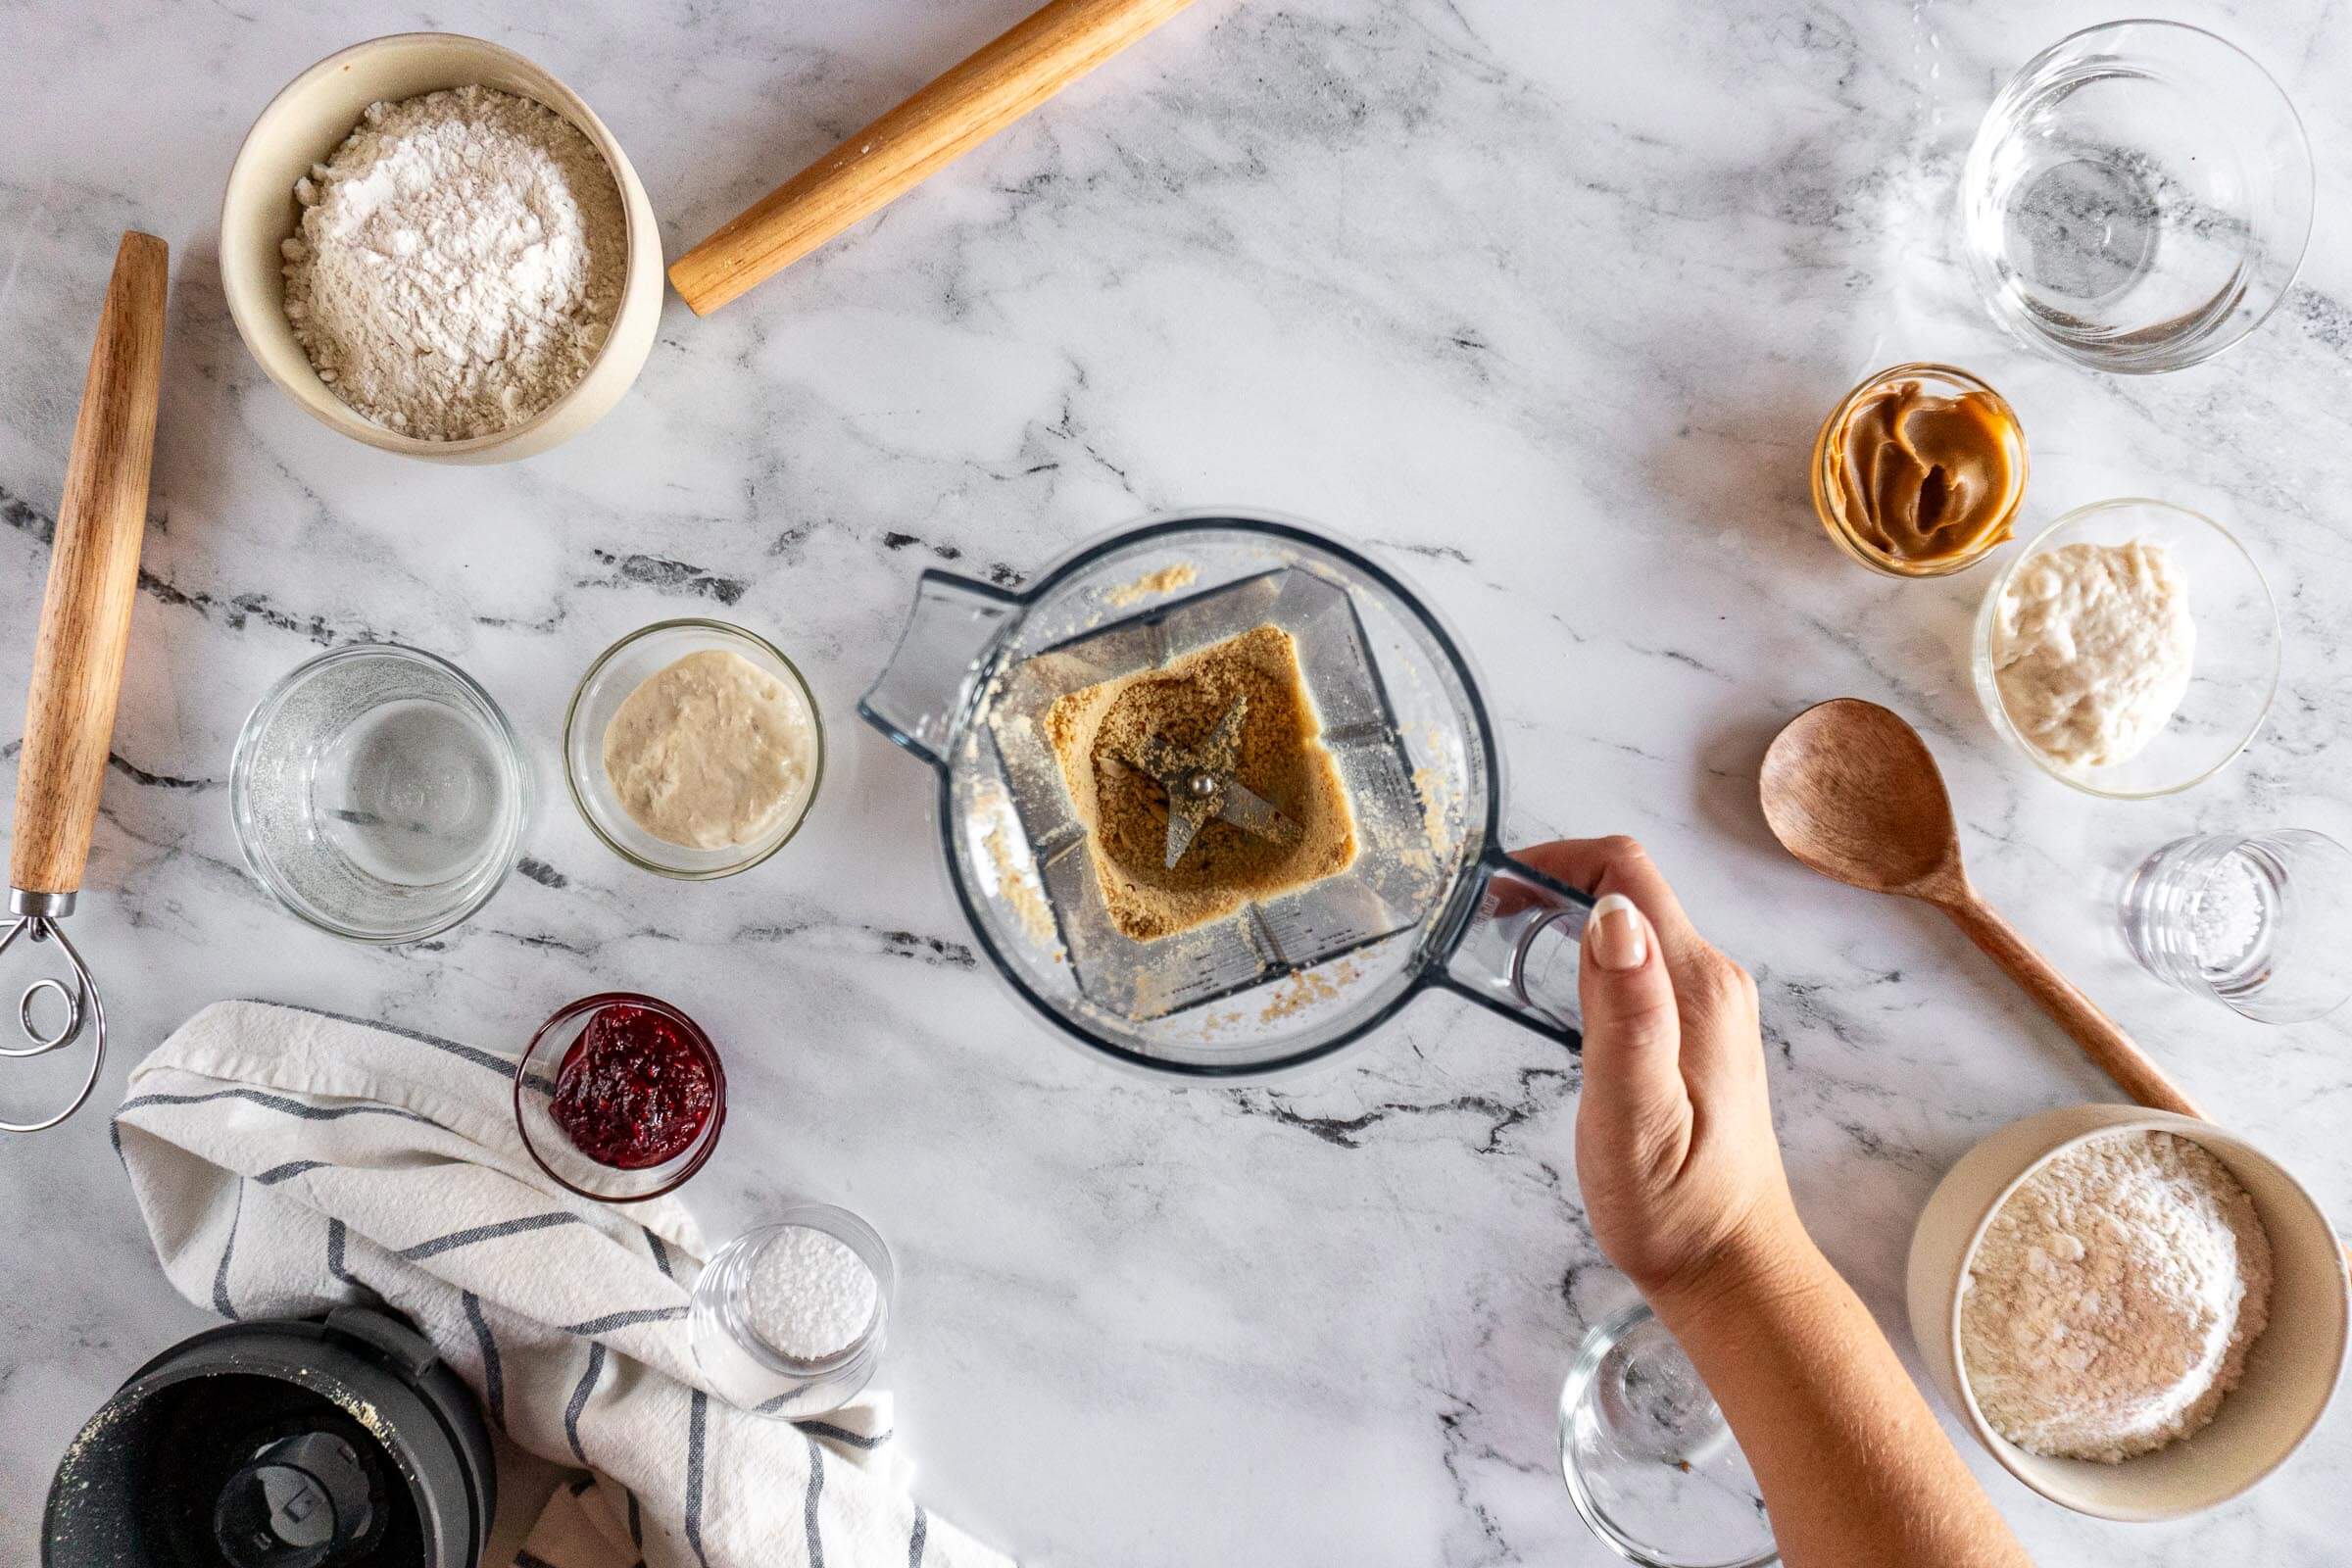
- Step 1: Add 60g roasted, salted peanuts to the jar of your blender or food processor and grind until the peanuts are mostly finely ground. They may stick to each other a bit, and the sizing may not be completely consistent, but that’s ok, we’re just grinding, not trying to make peanut butter! I used my Vitamix dry grains container and it worked perfectly!
Make The Dough:
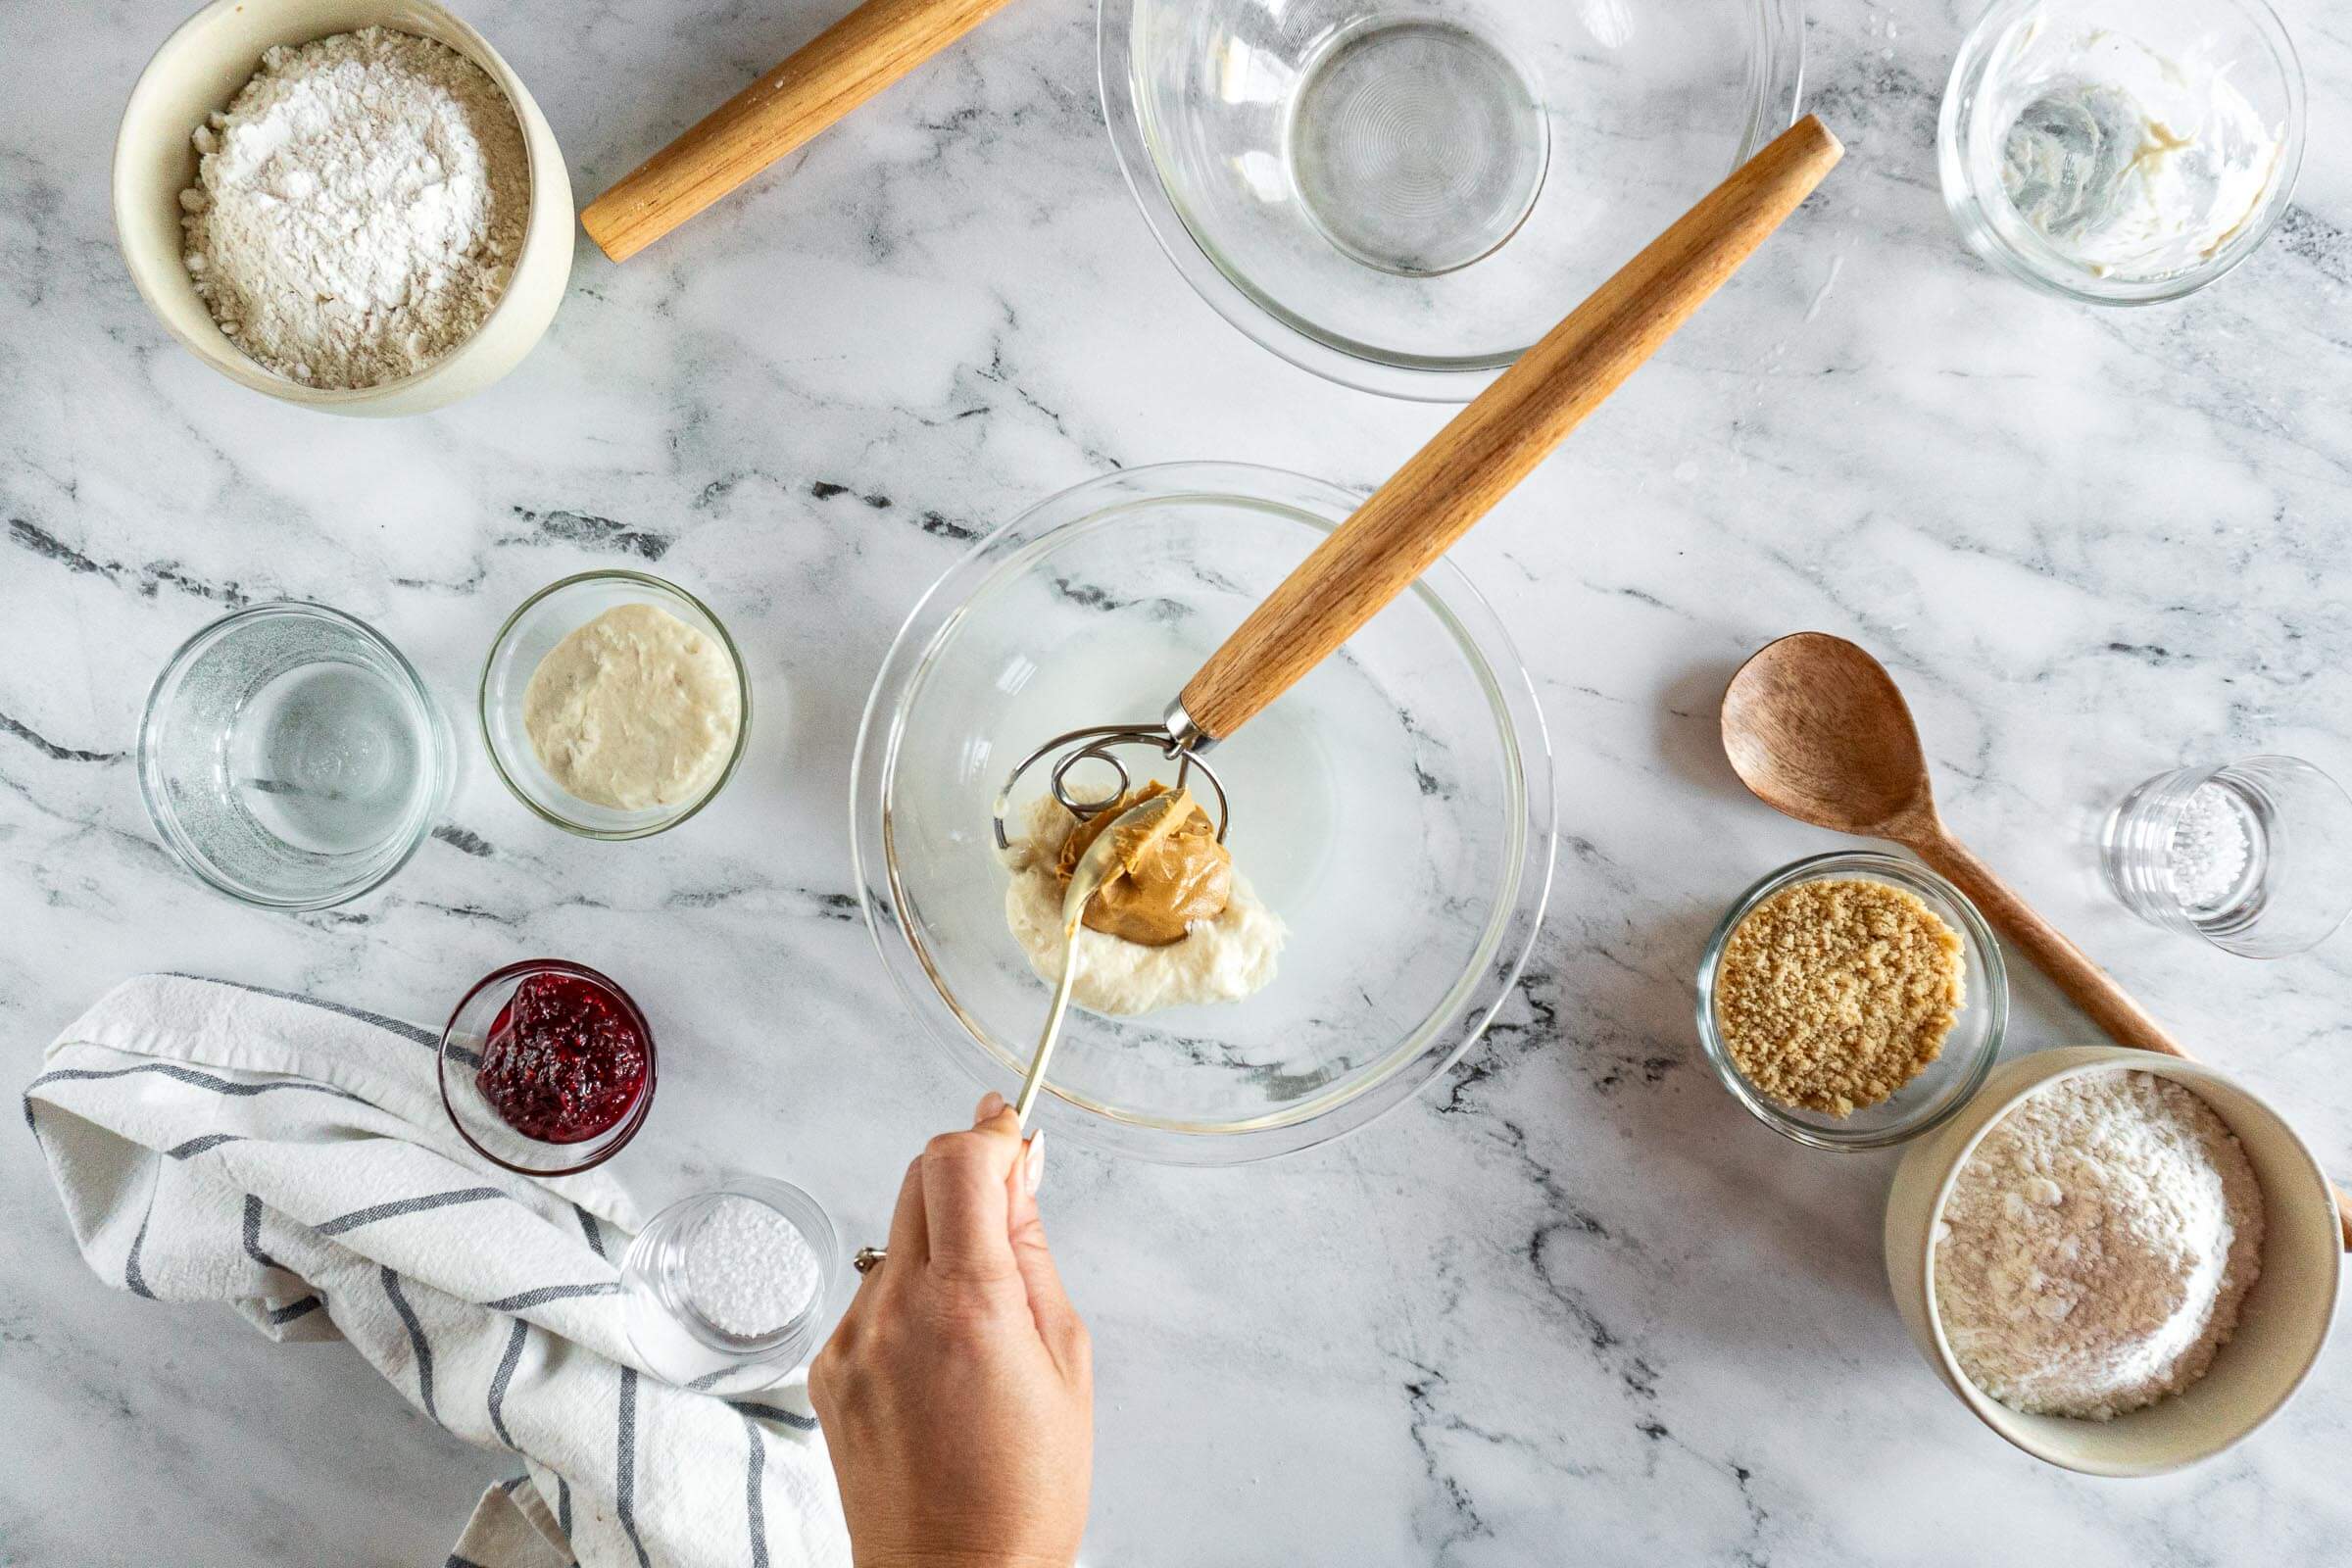
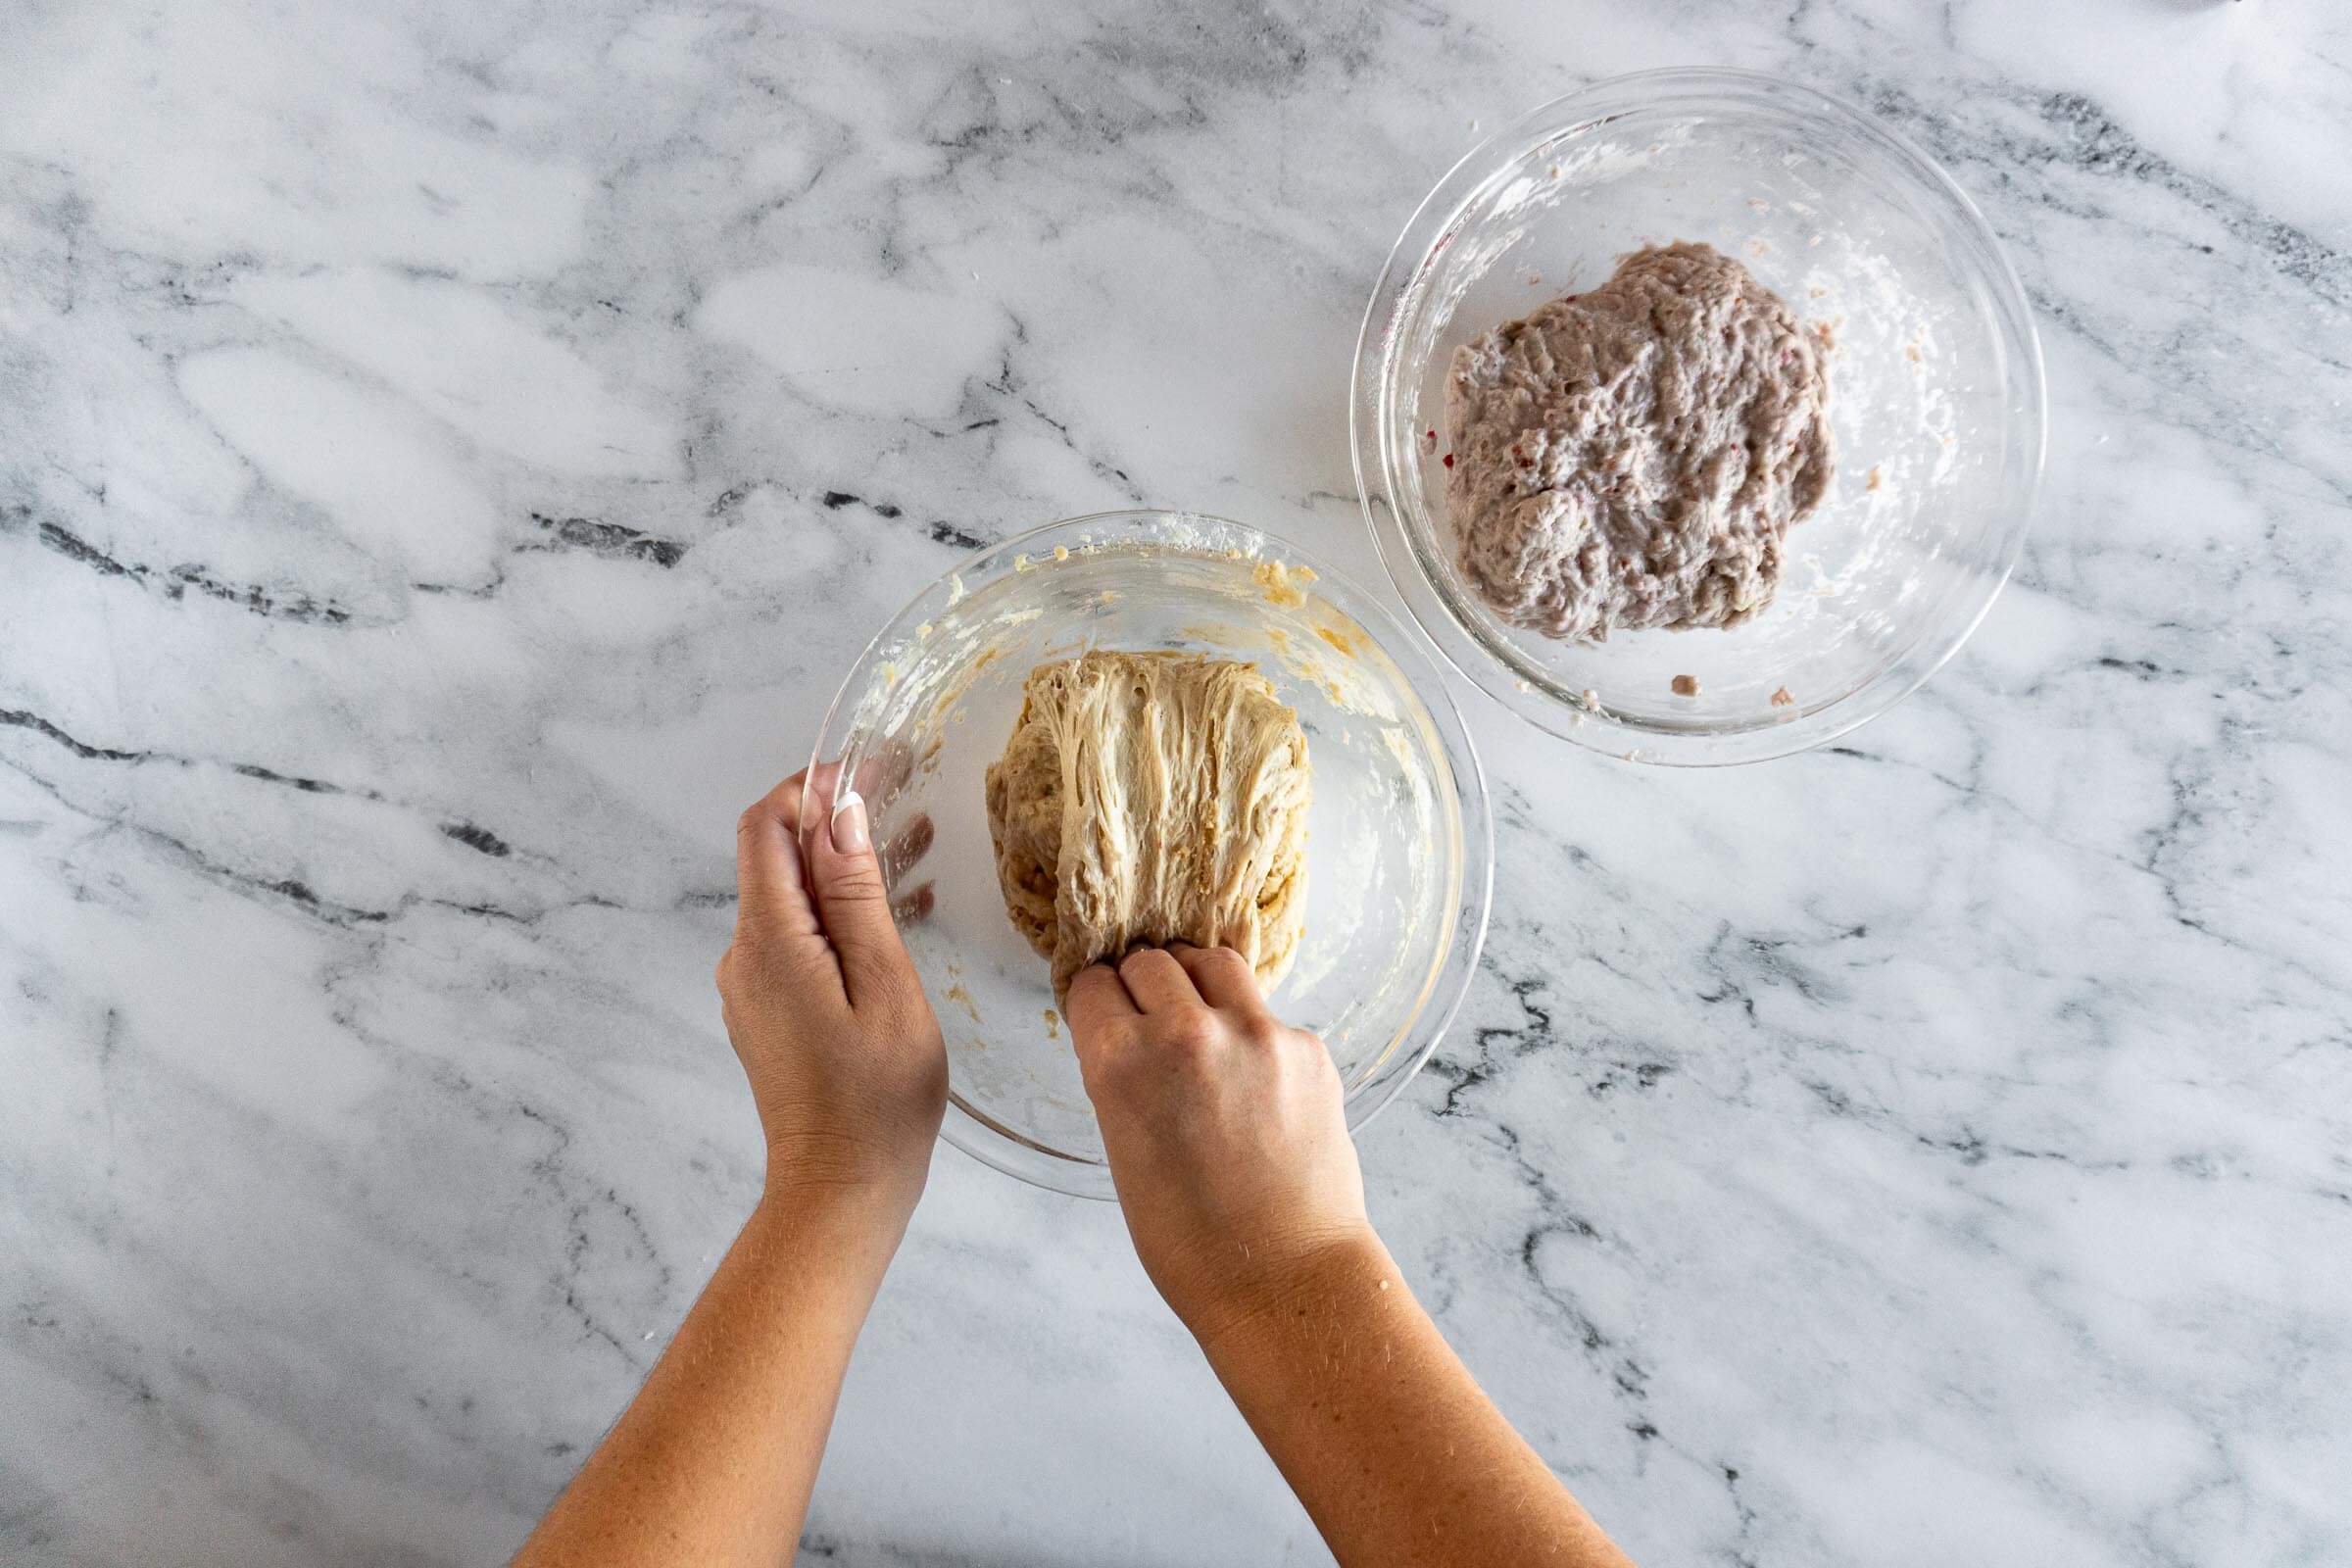
- Step 2: In a medium bowl, combine 180g of room temperature water, 50g of active sourdough starter, and 40g smooth peanut butter, and whisk until mostly combined. I prefer to mix my liquid ingredients with the sourdough starter before adding the flour because it's much easier to ensure that the starter is more evenly distributed in the dough. Set aside.
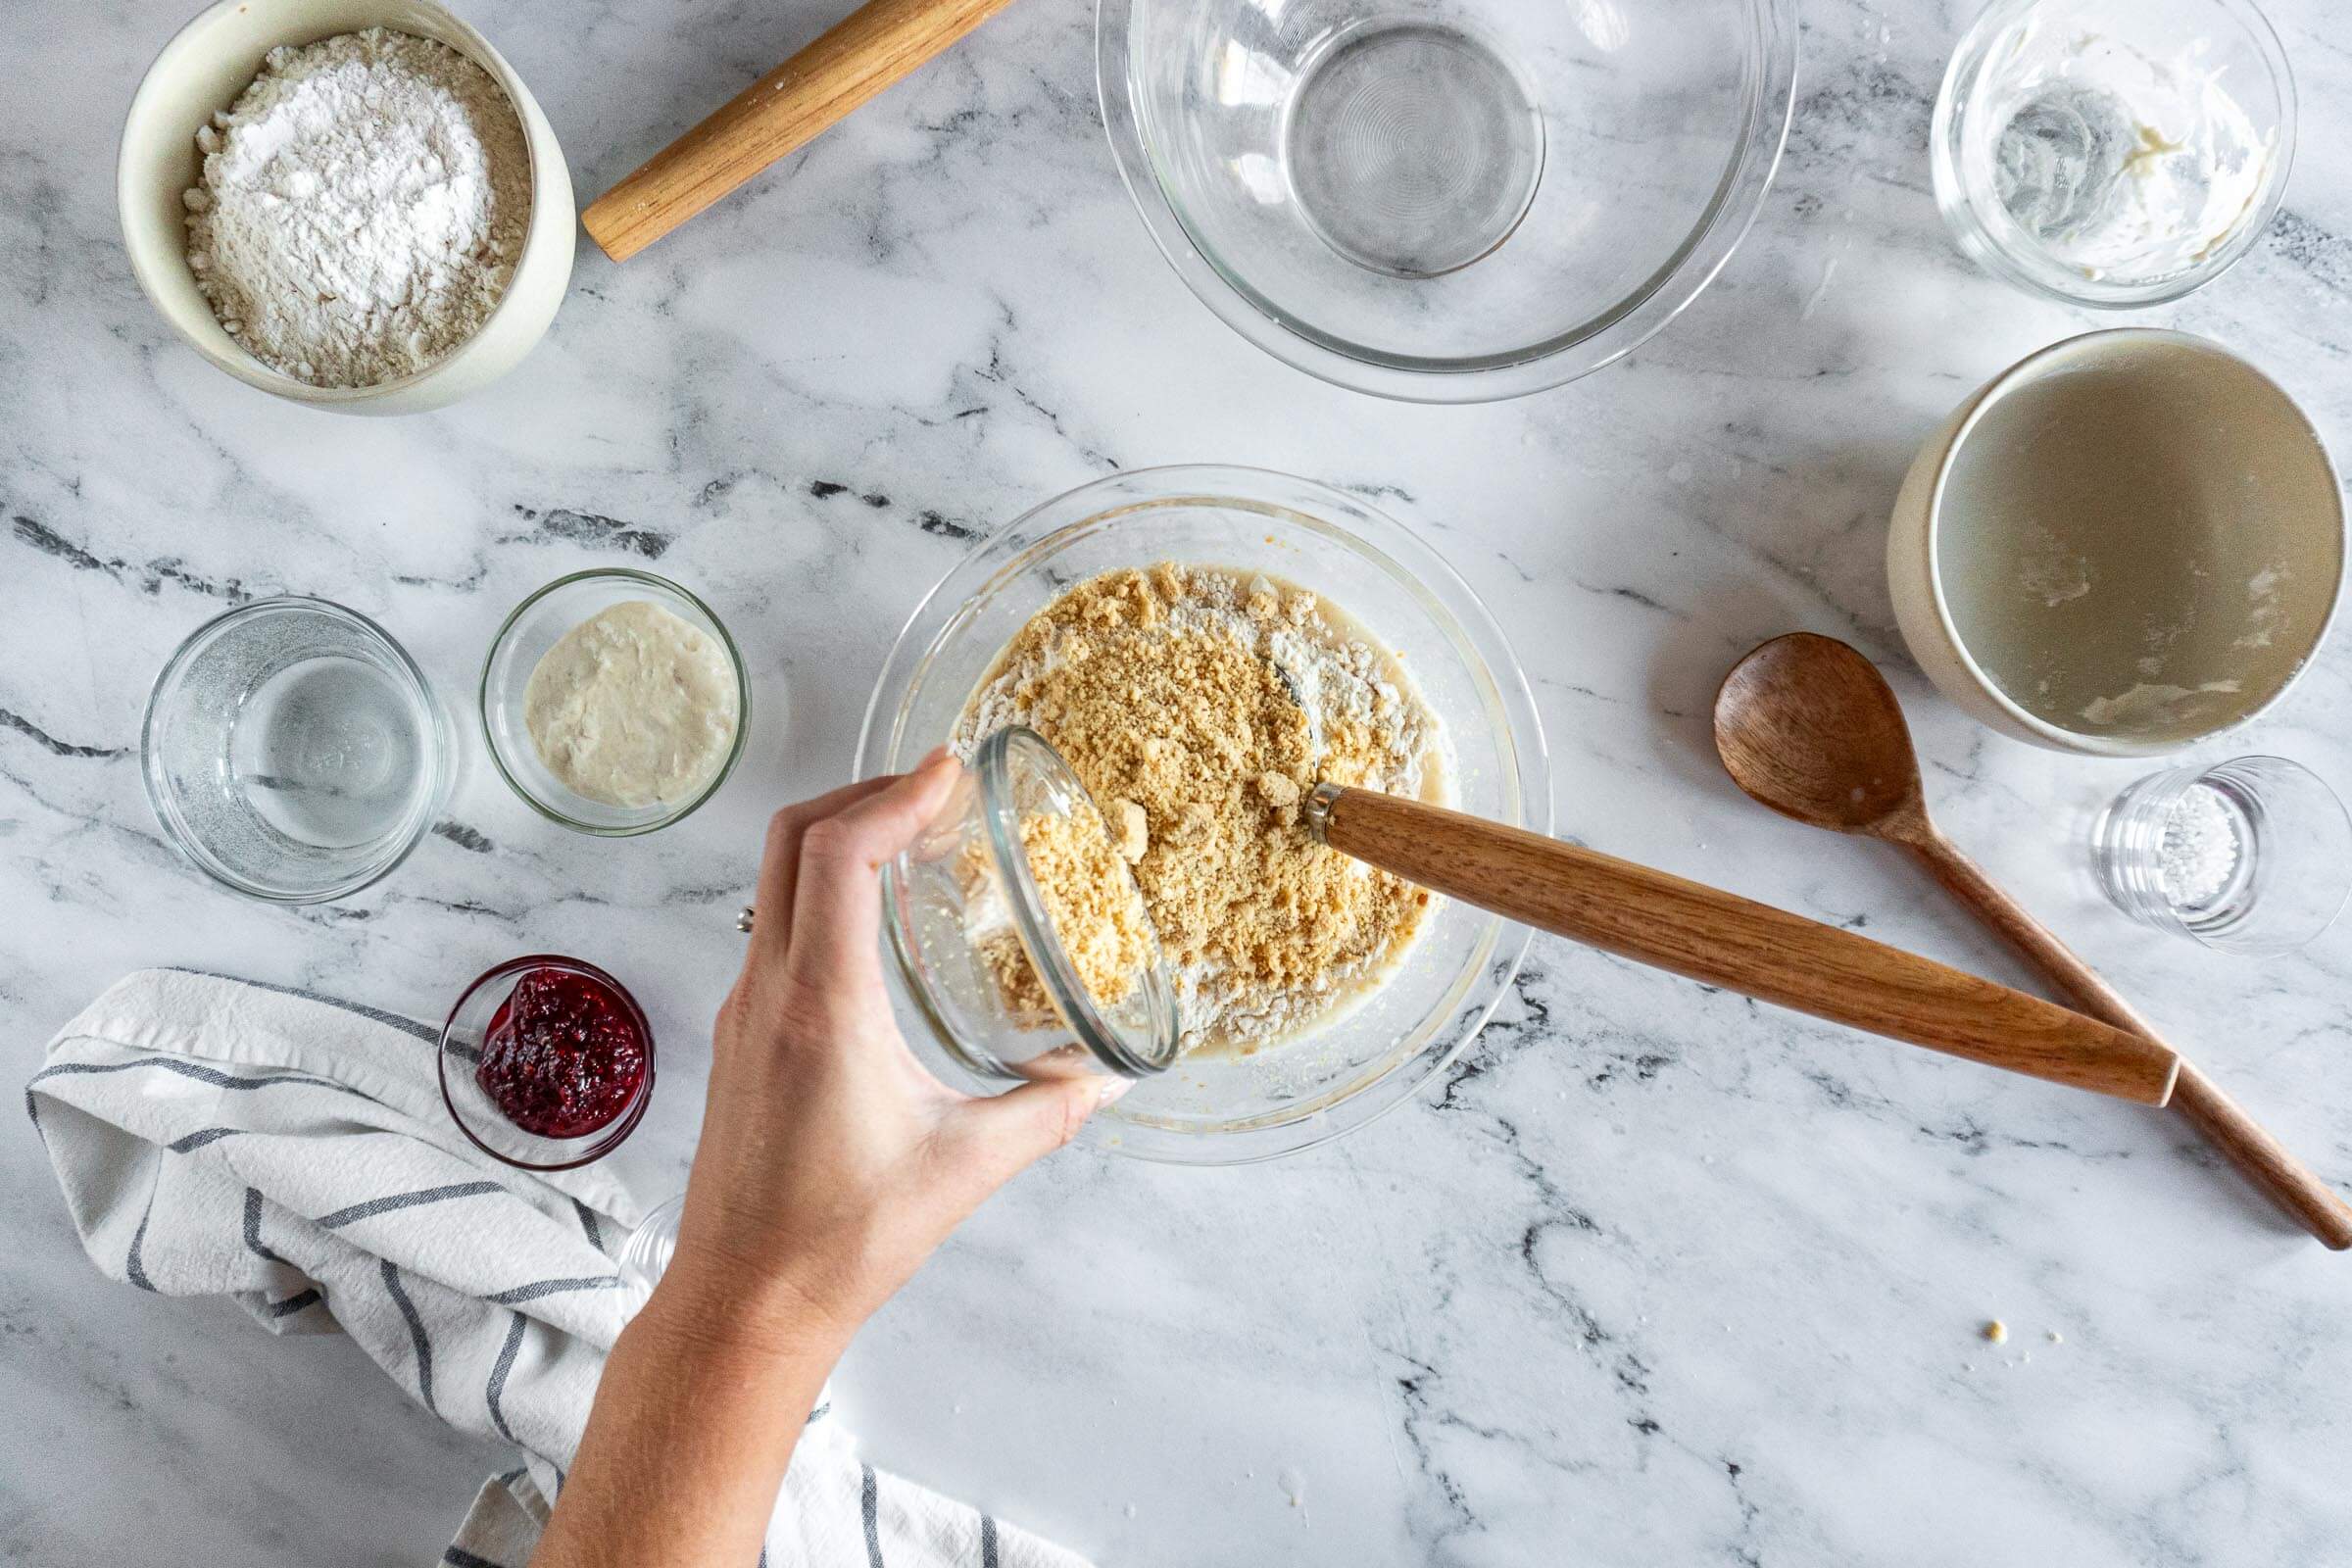
- Step 3: Add 250g bread flour, 60g ground peanuts, and 4g salt to the bowl and using a danish dough whisk, spatula, or spoon mix until a shaggy dough forms. Knead the dough with your hands until all the dry bits are incorporated. Set aside.
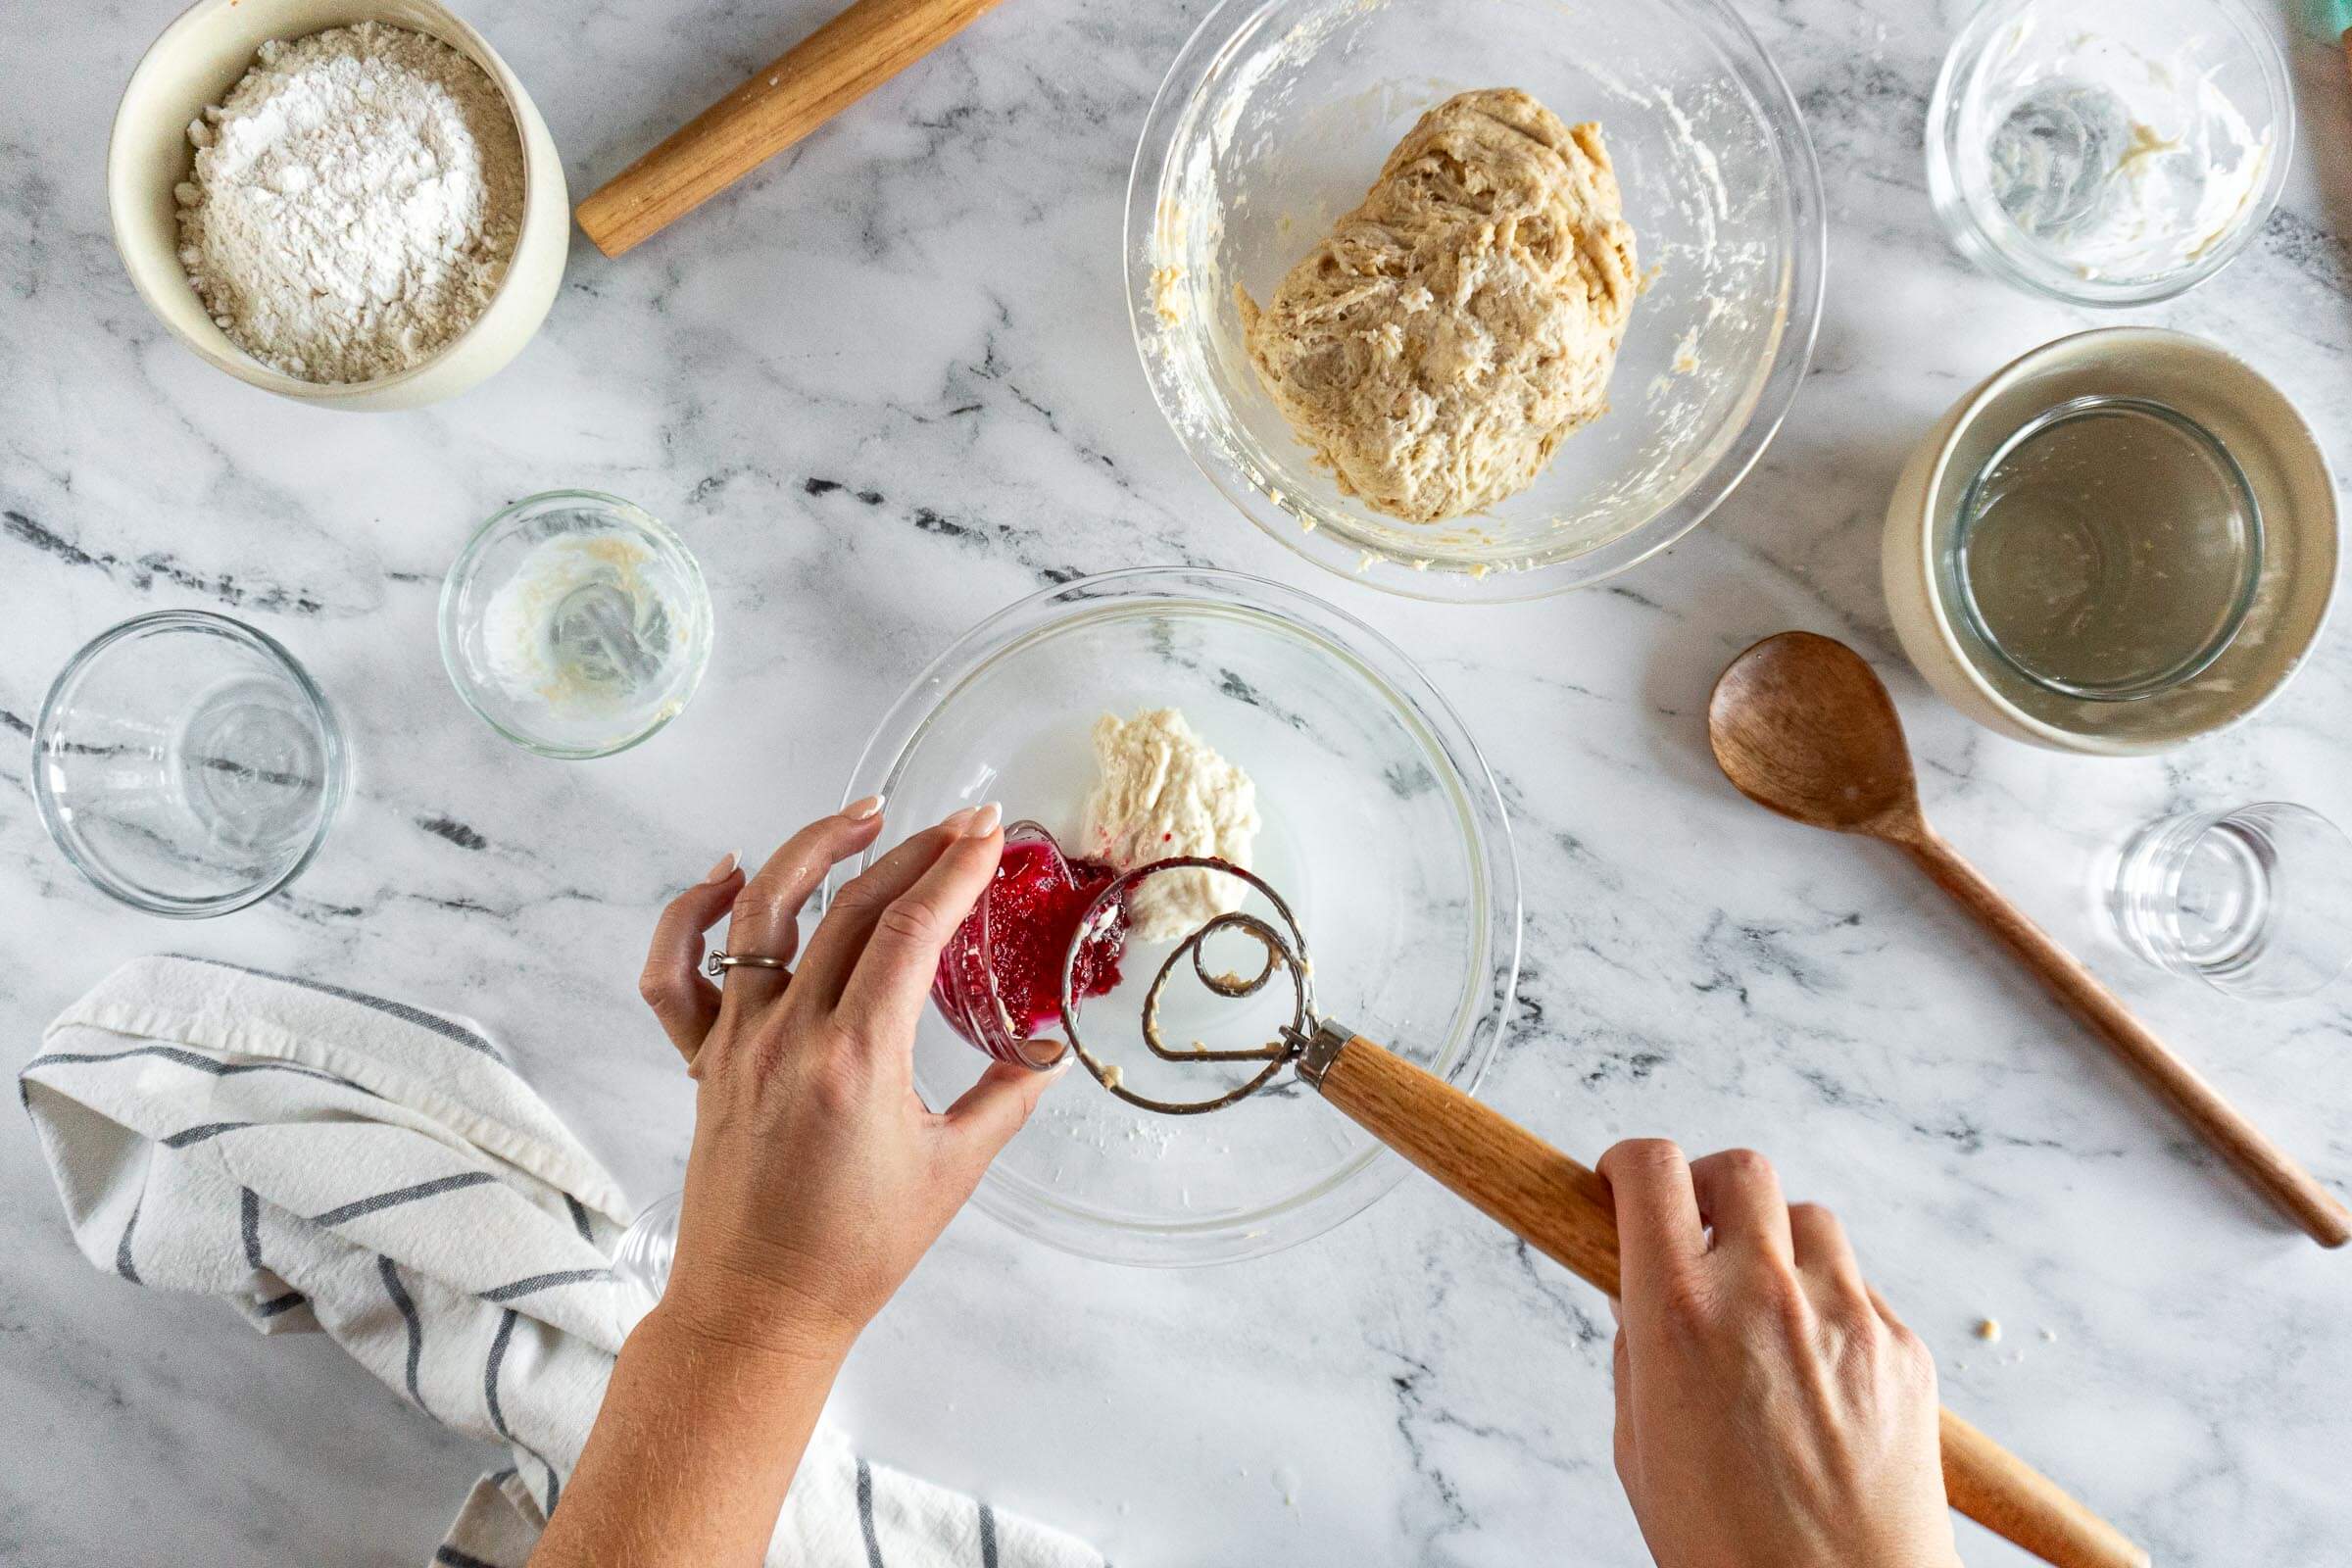
- Step 4: In another medium bowl, combine 140g of room temperature water, 50g of active sourdough starter, and 50g jam, and whisk until mostly combined.
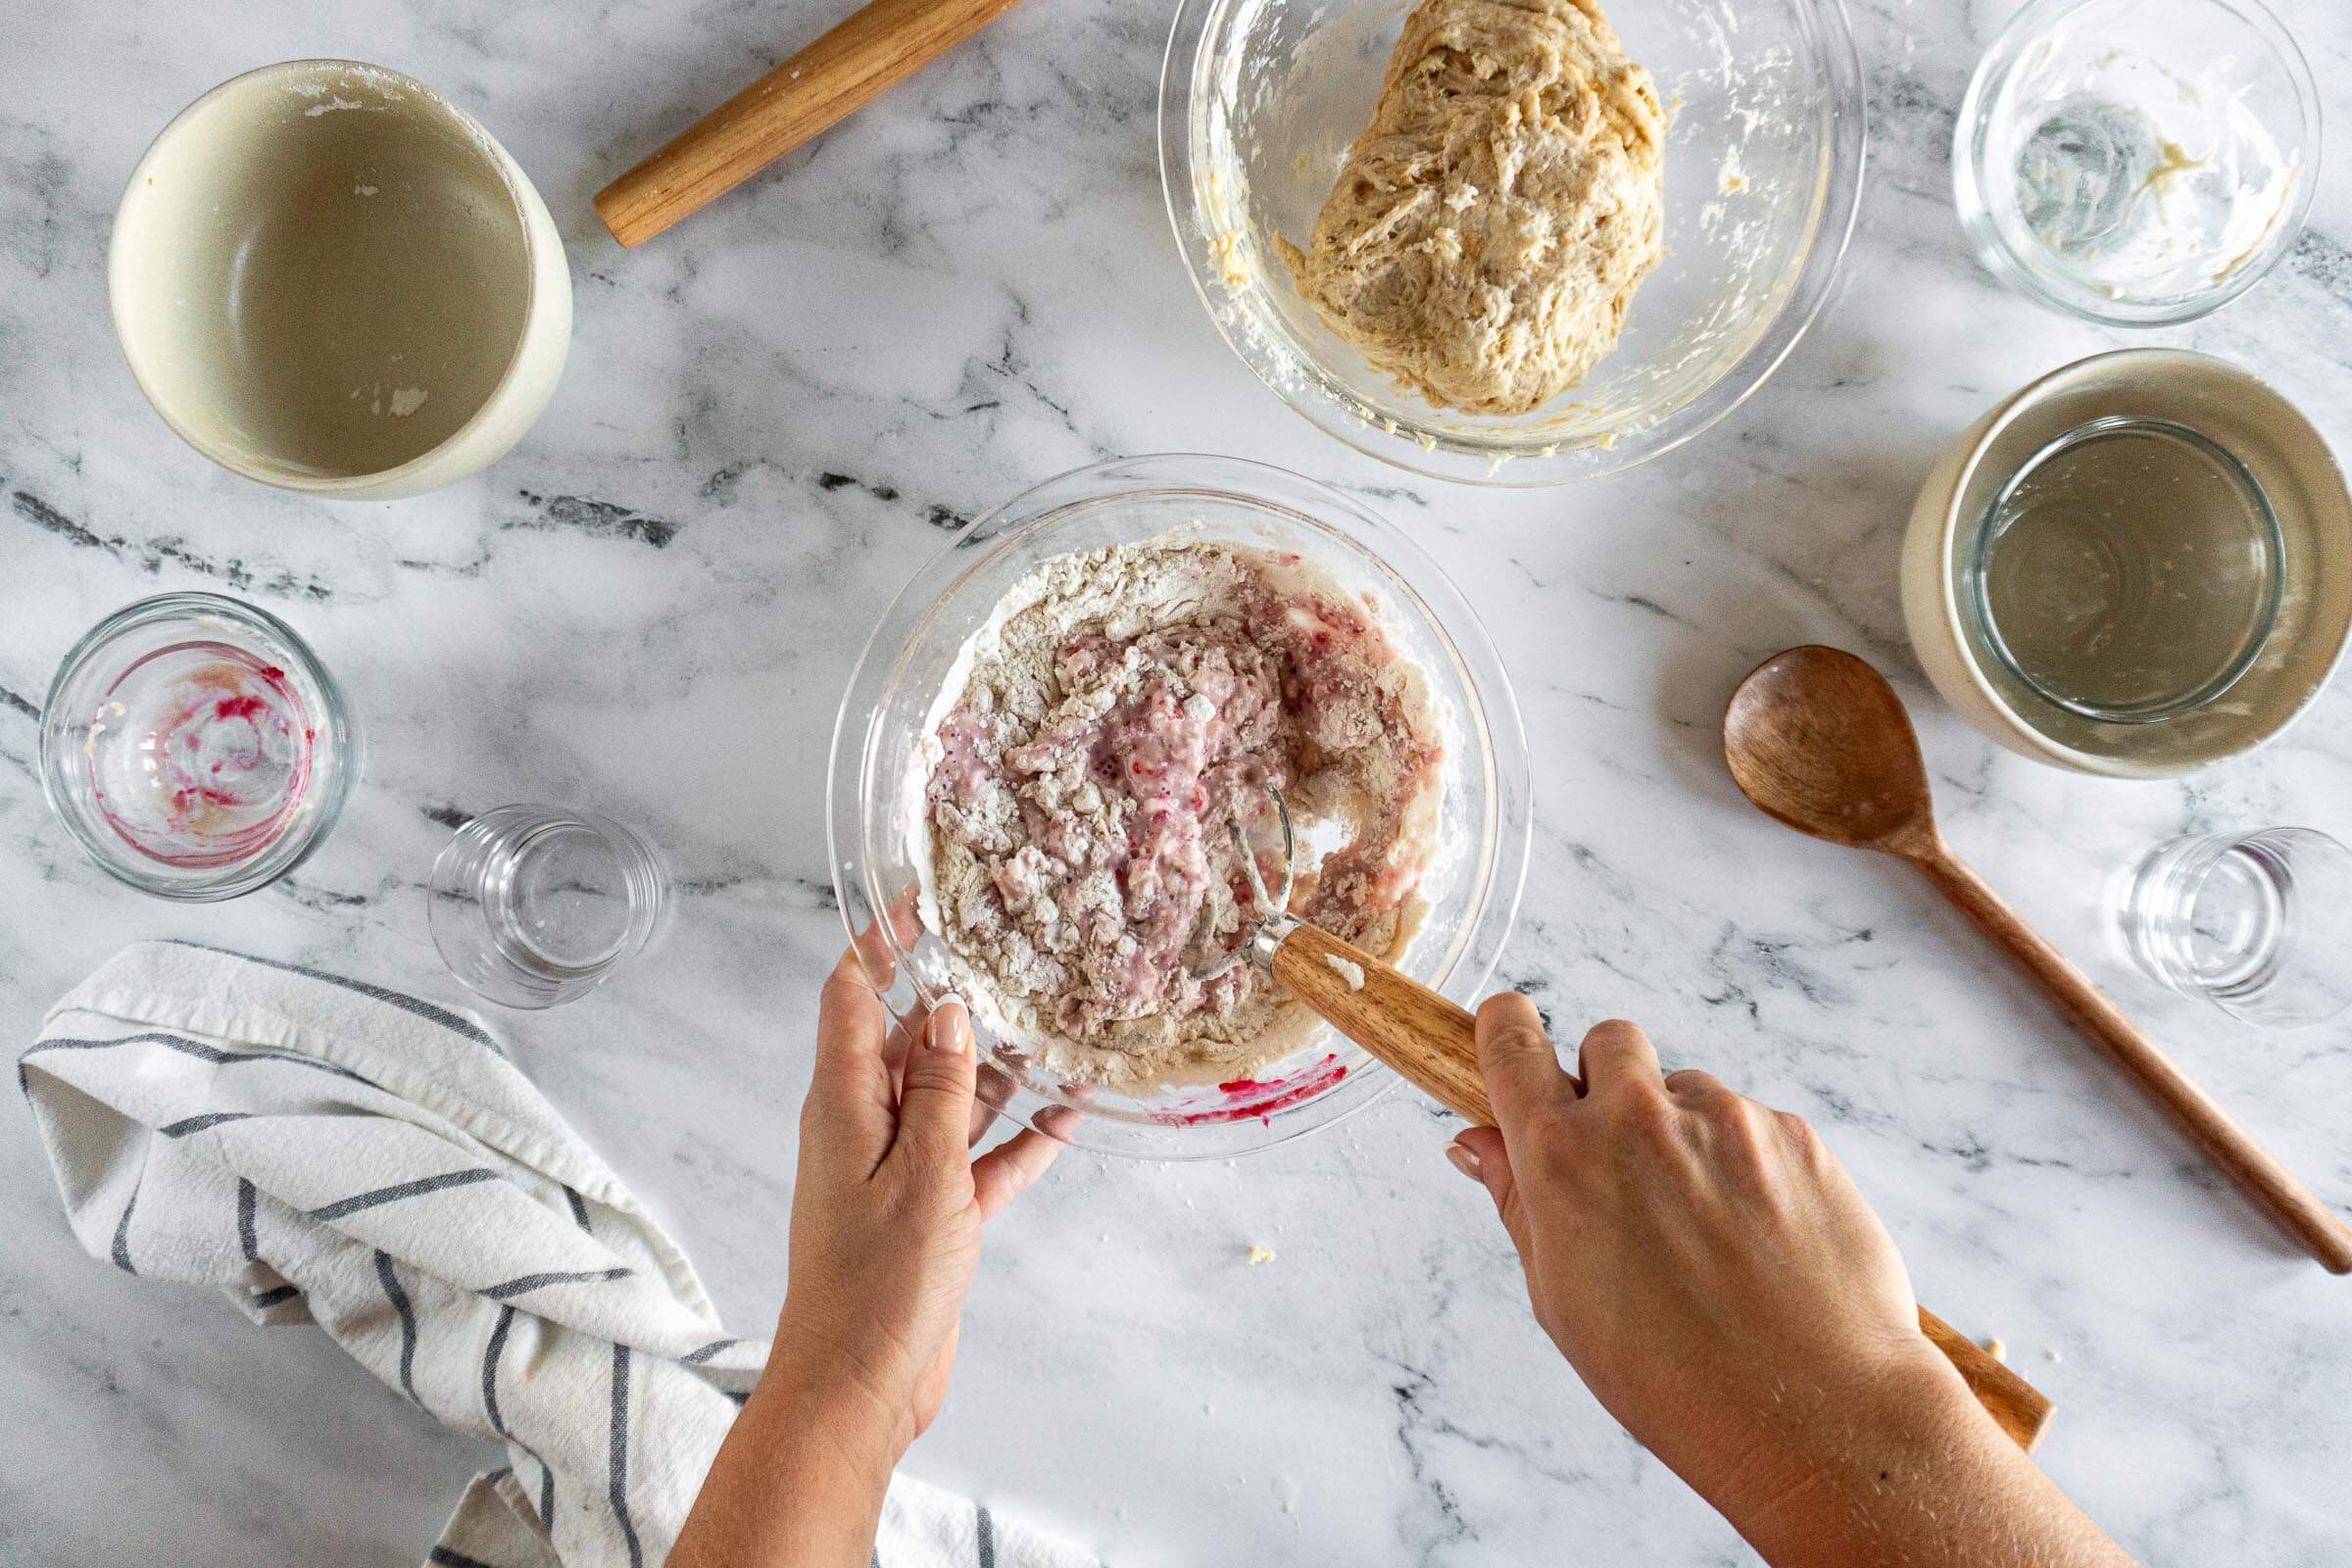
- Step 5: Then add 250g bread flour and 6g salt to the bowl and mix until a shaggy dough forms. Knead the dough with your hands until all the dry bits are incorporated.
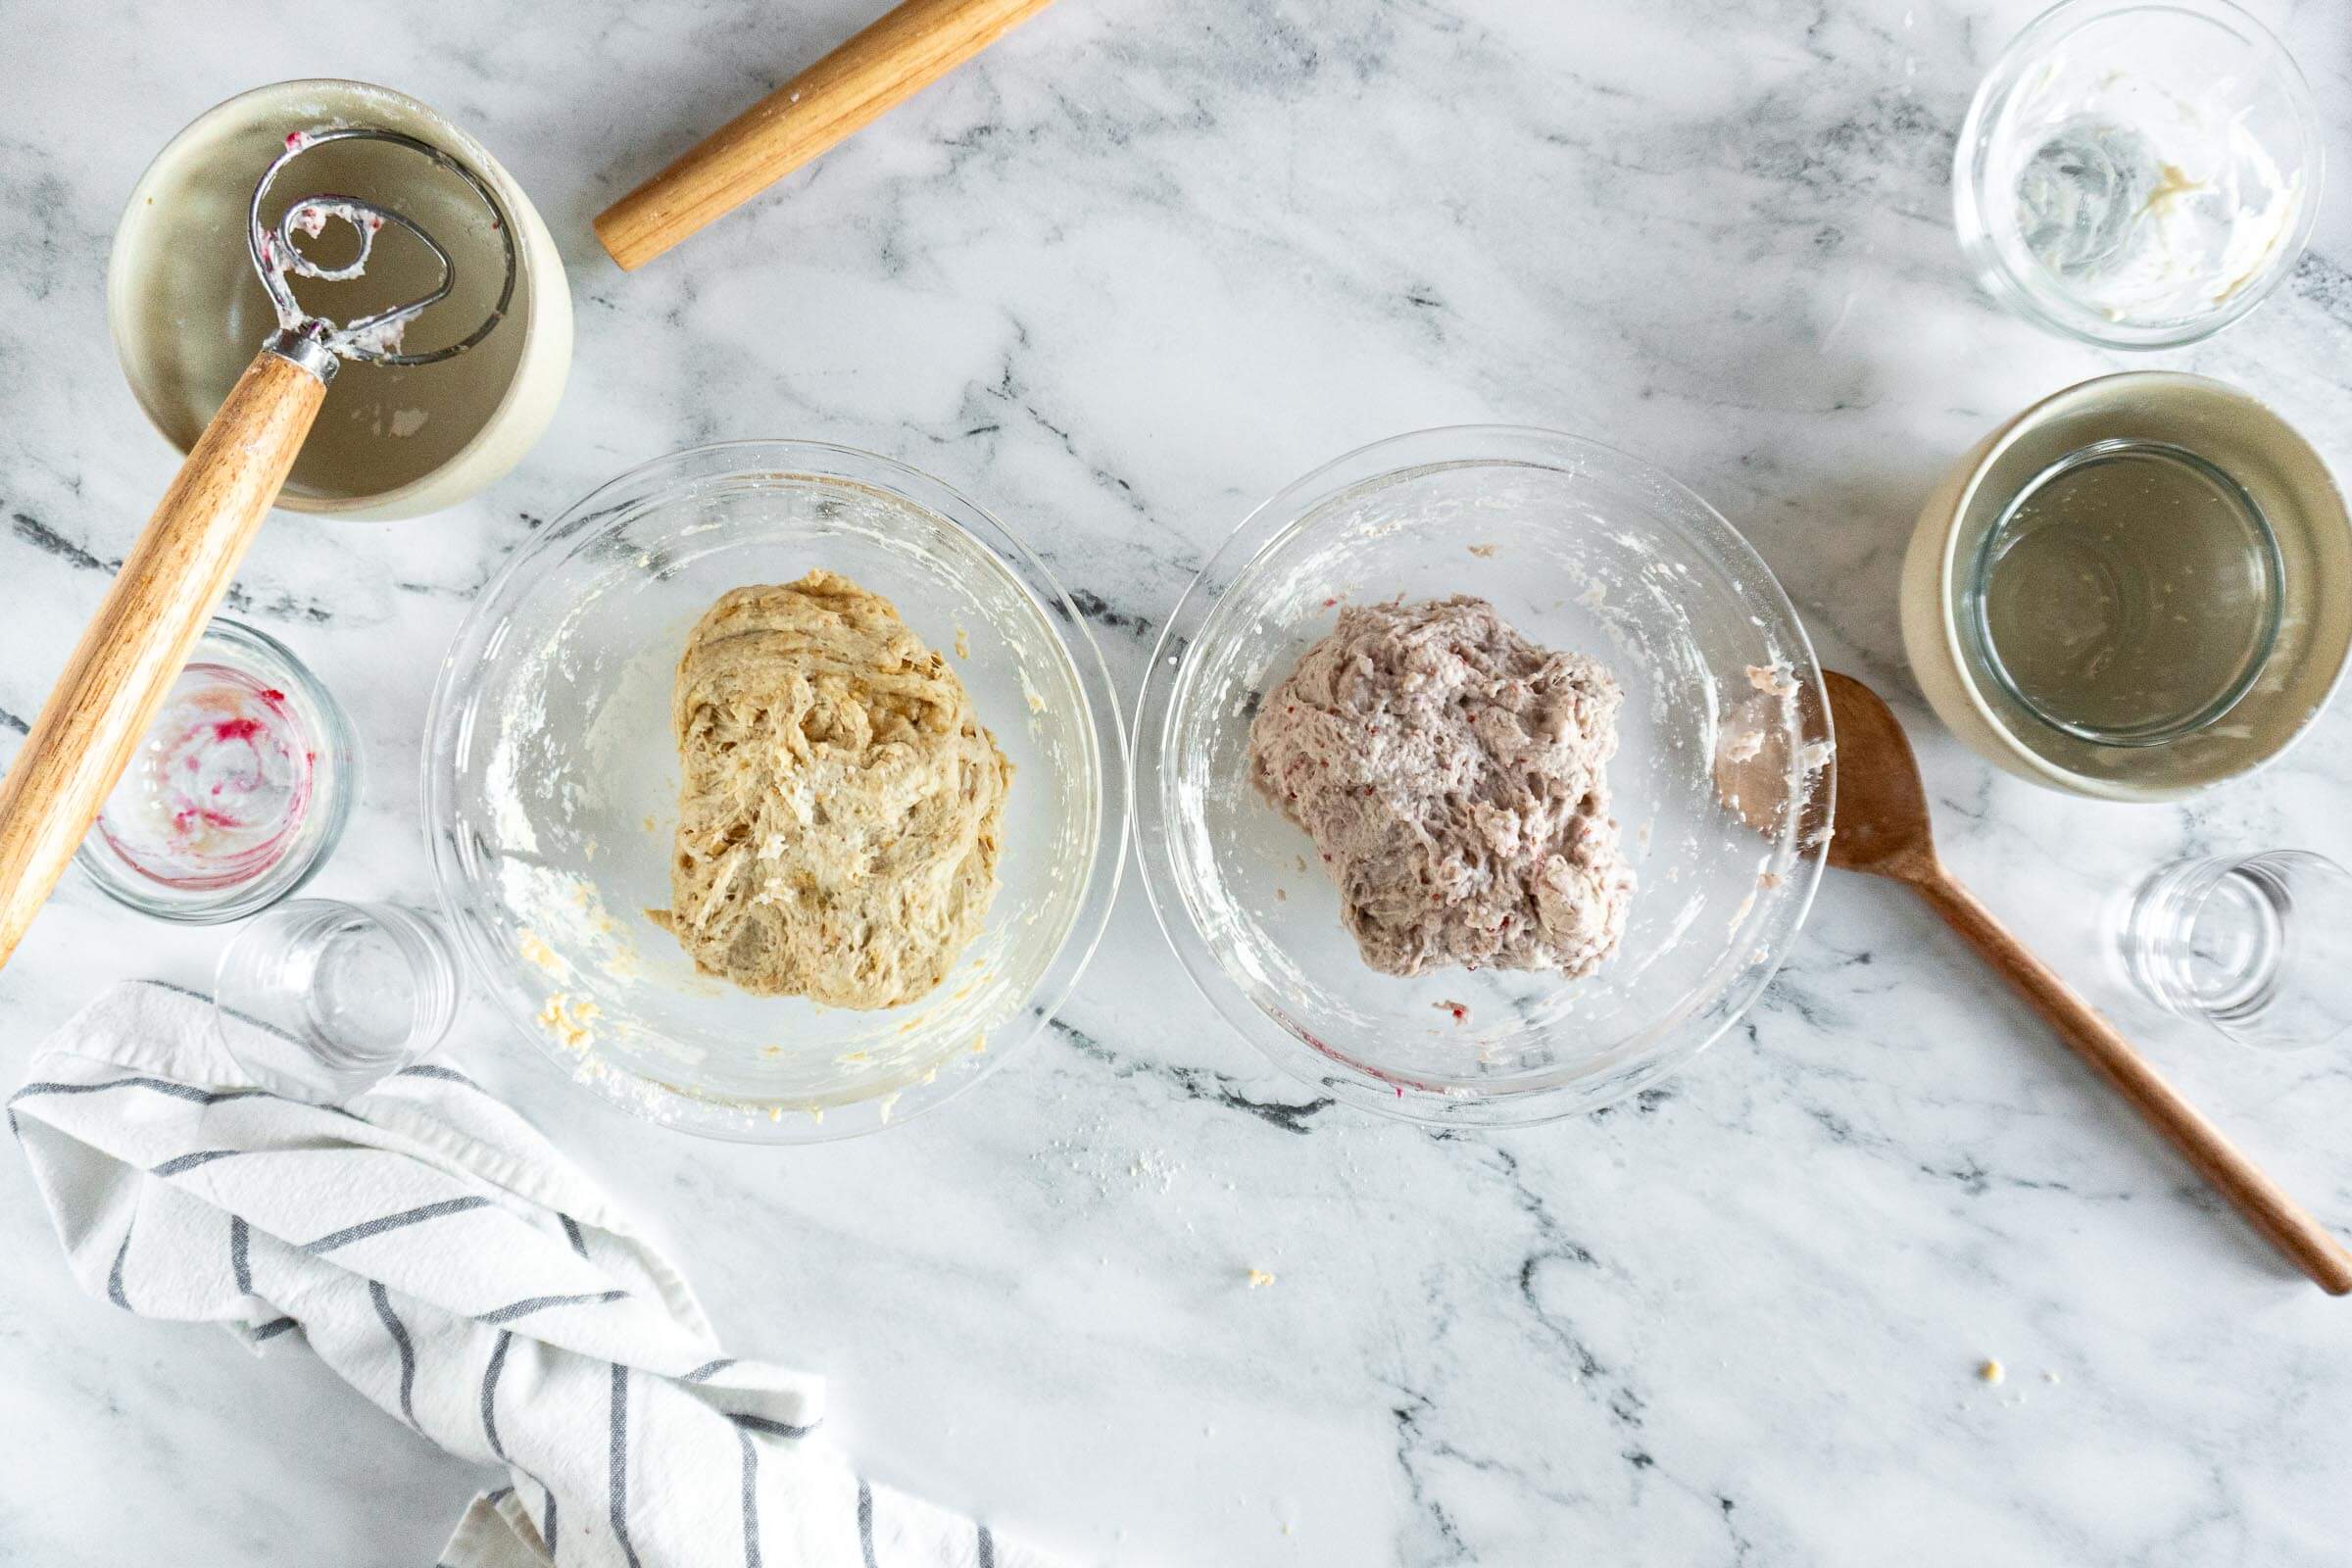
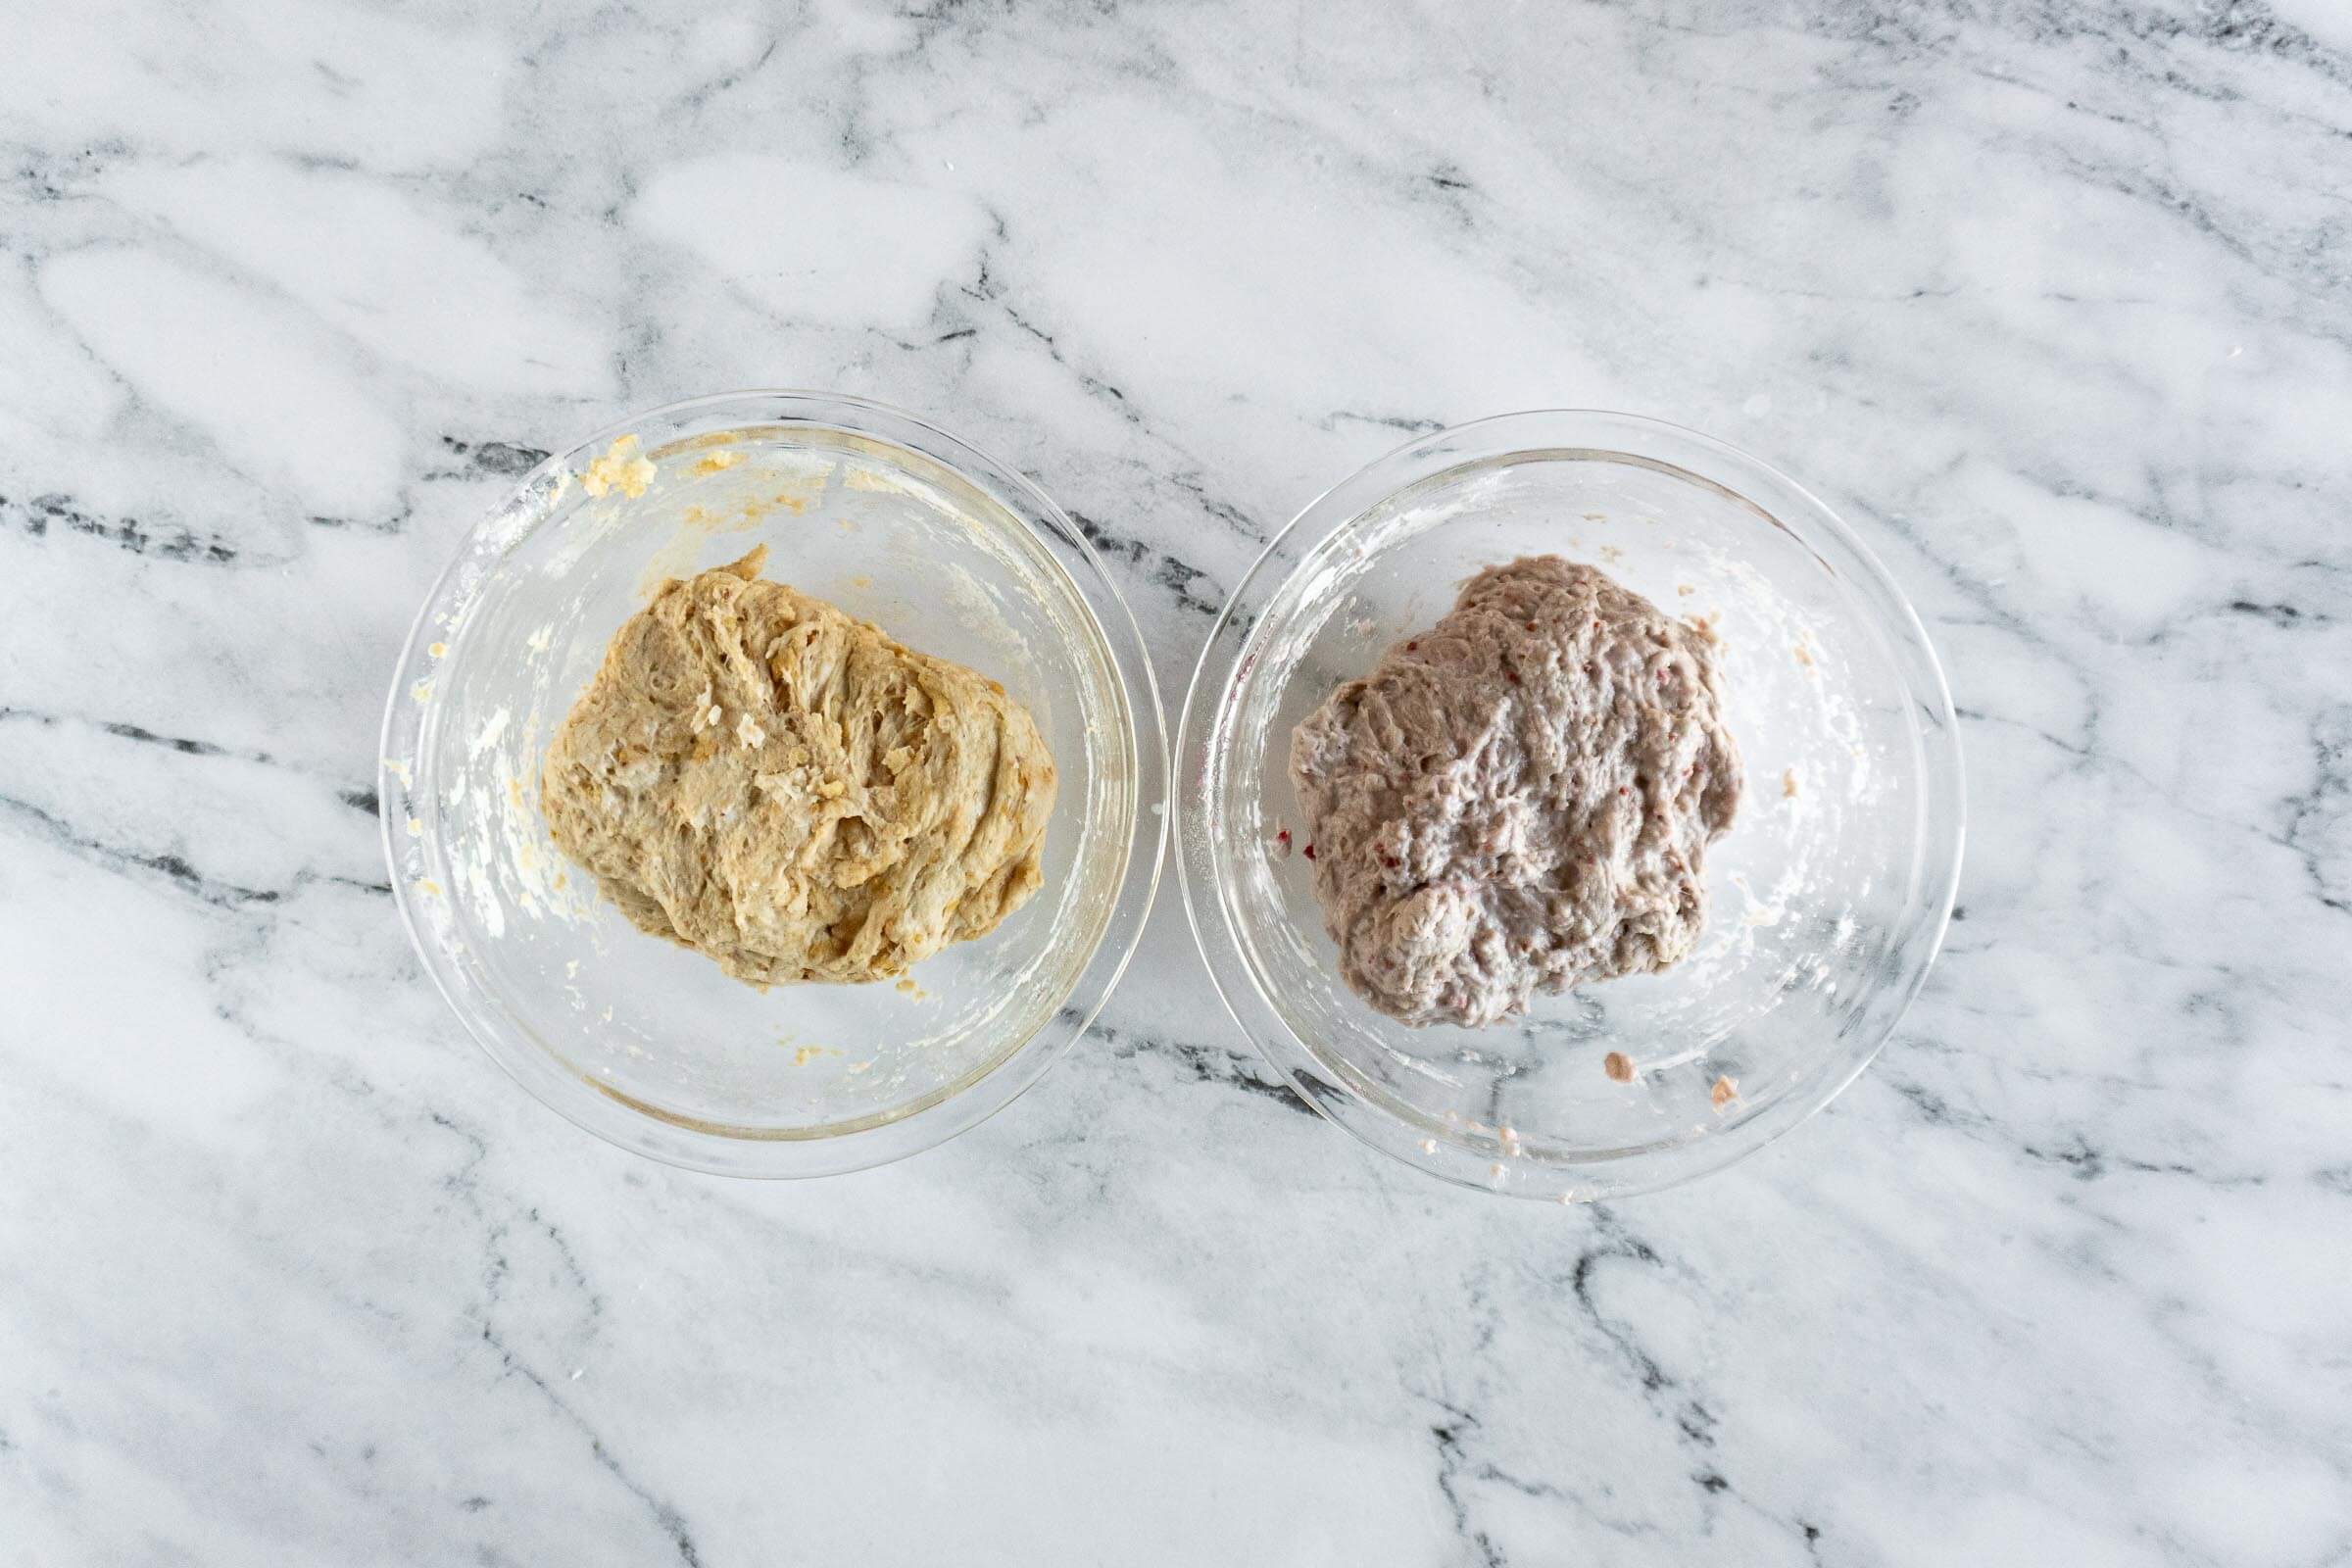
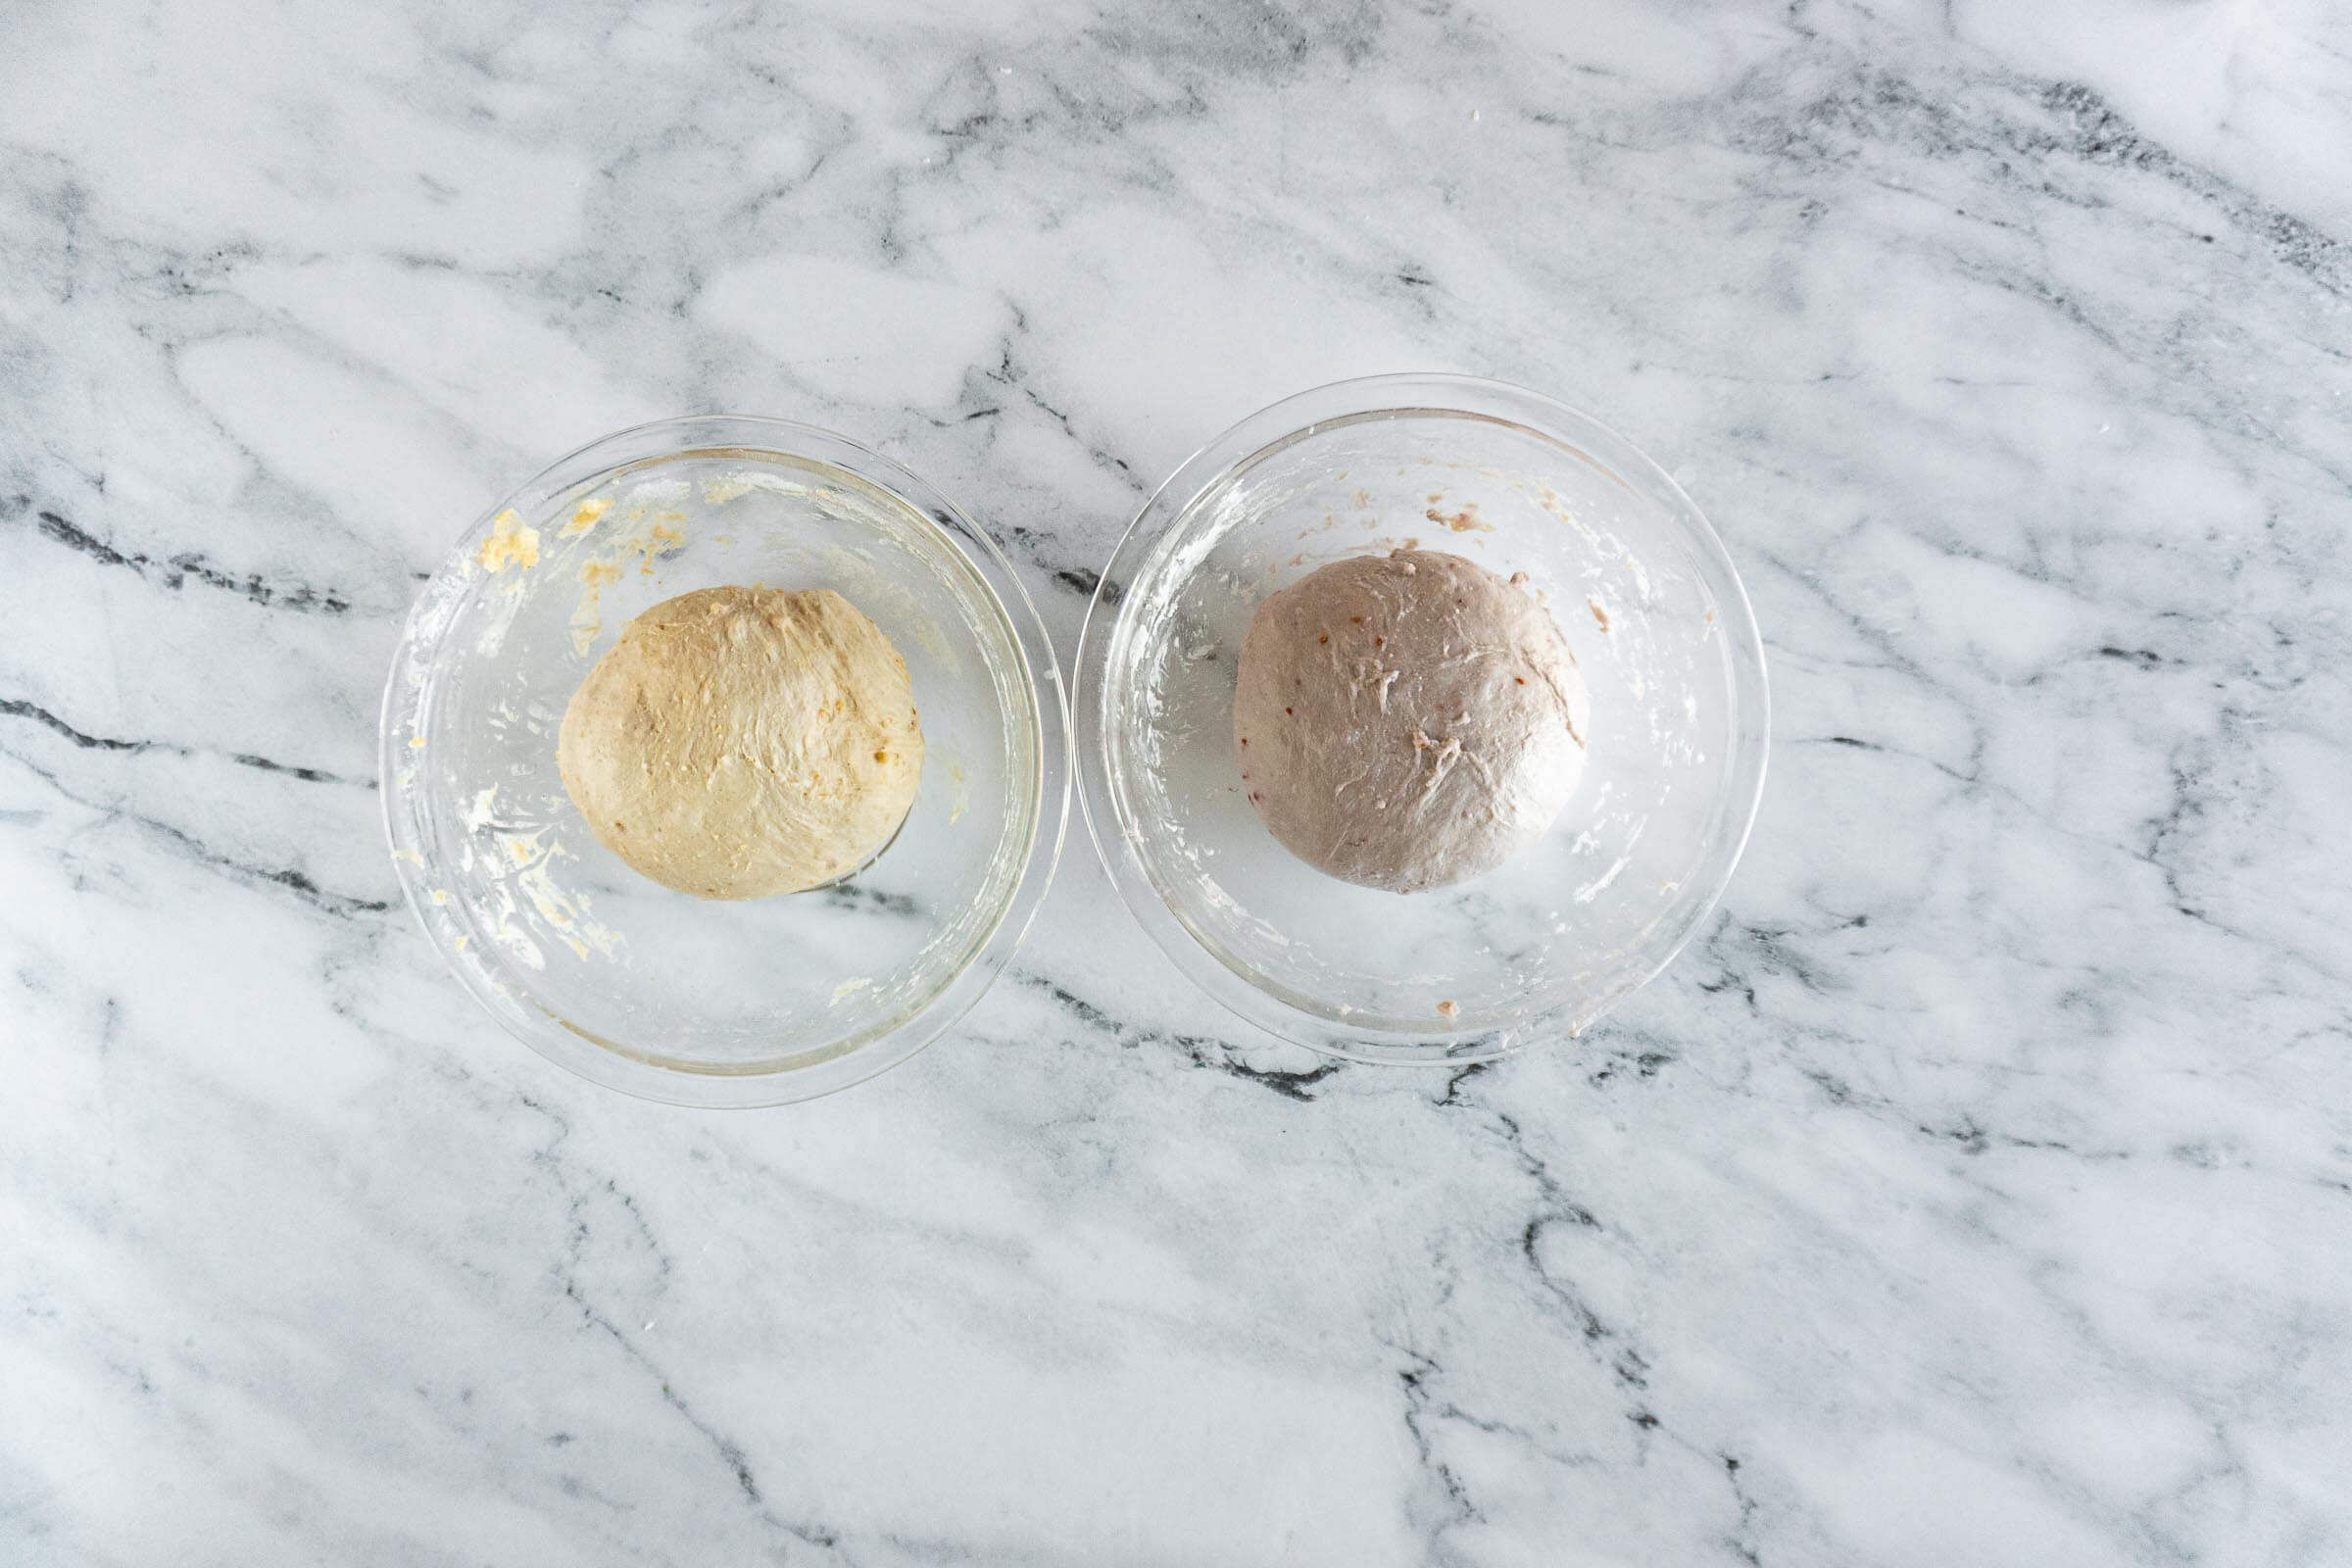
- Step 6: Cover both bowls and set aside for 60 minutes.
Stretch And Fold:
- Step 7: Uncover the bowls.
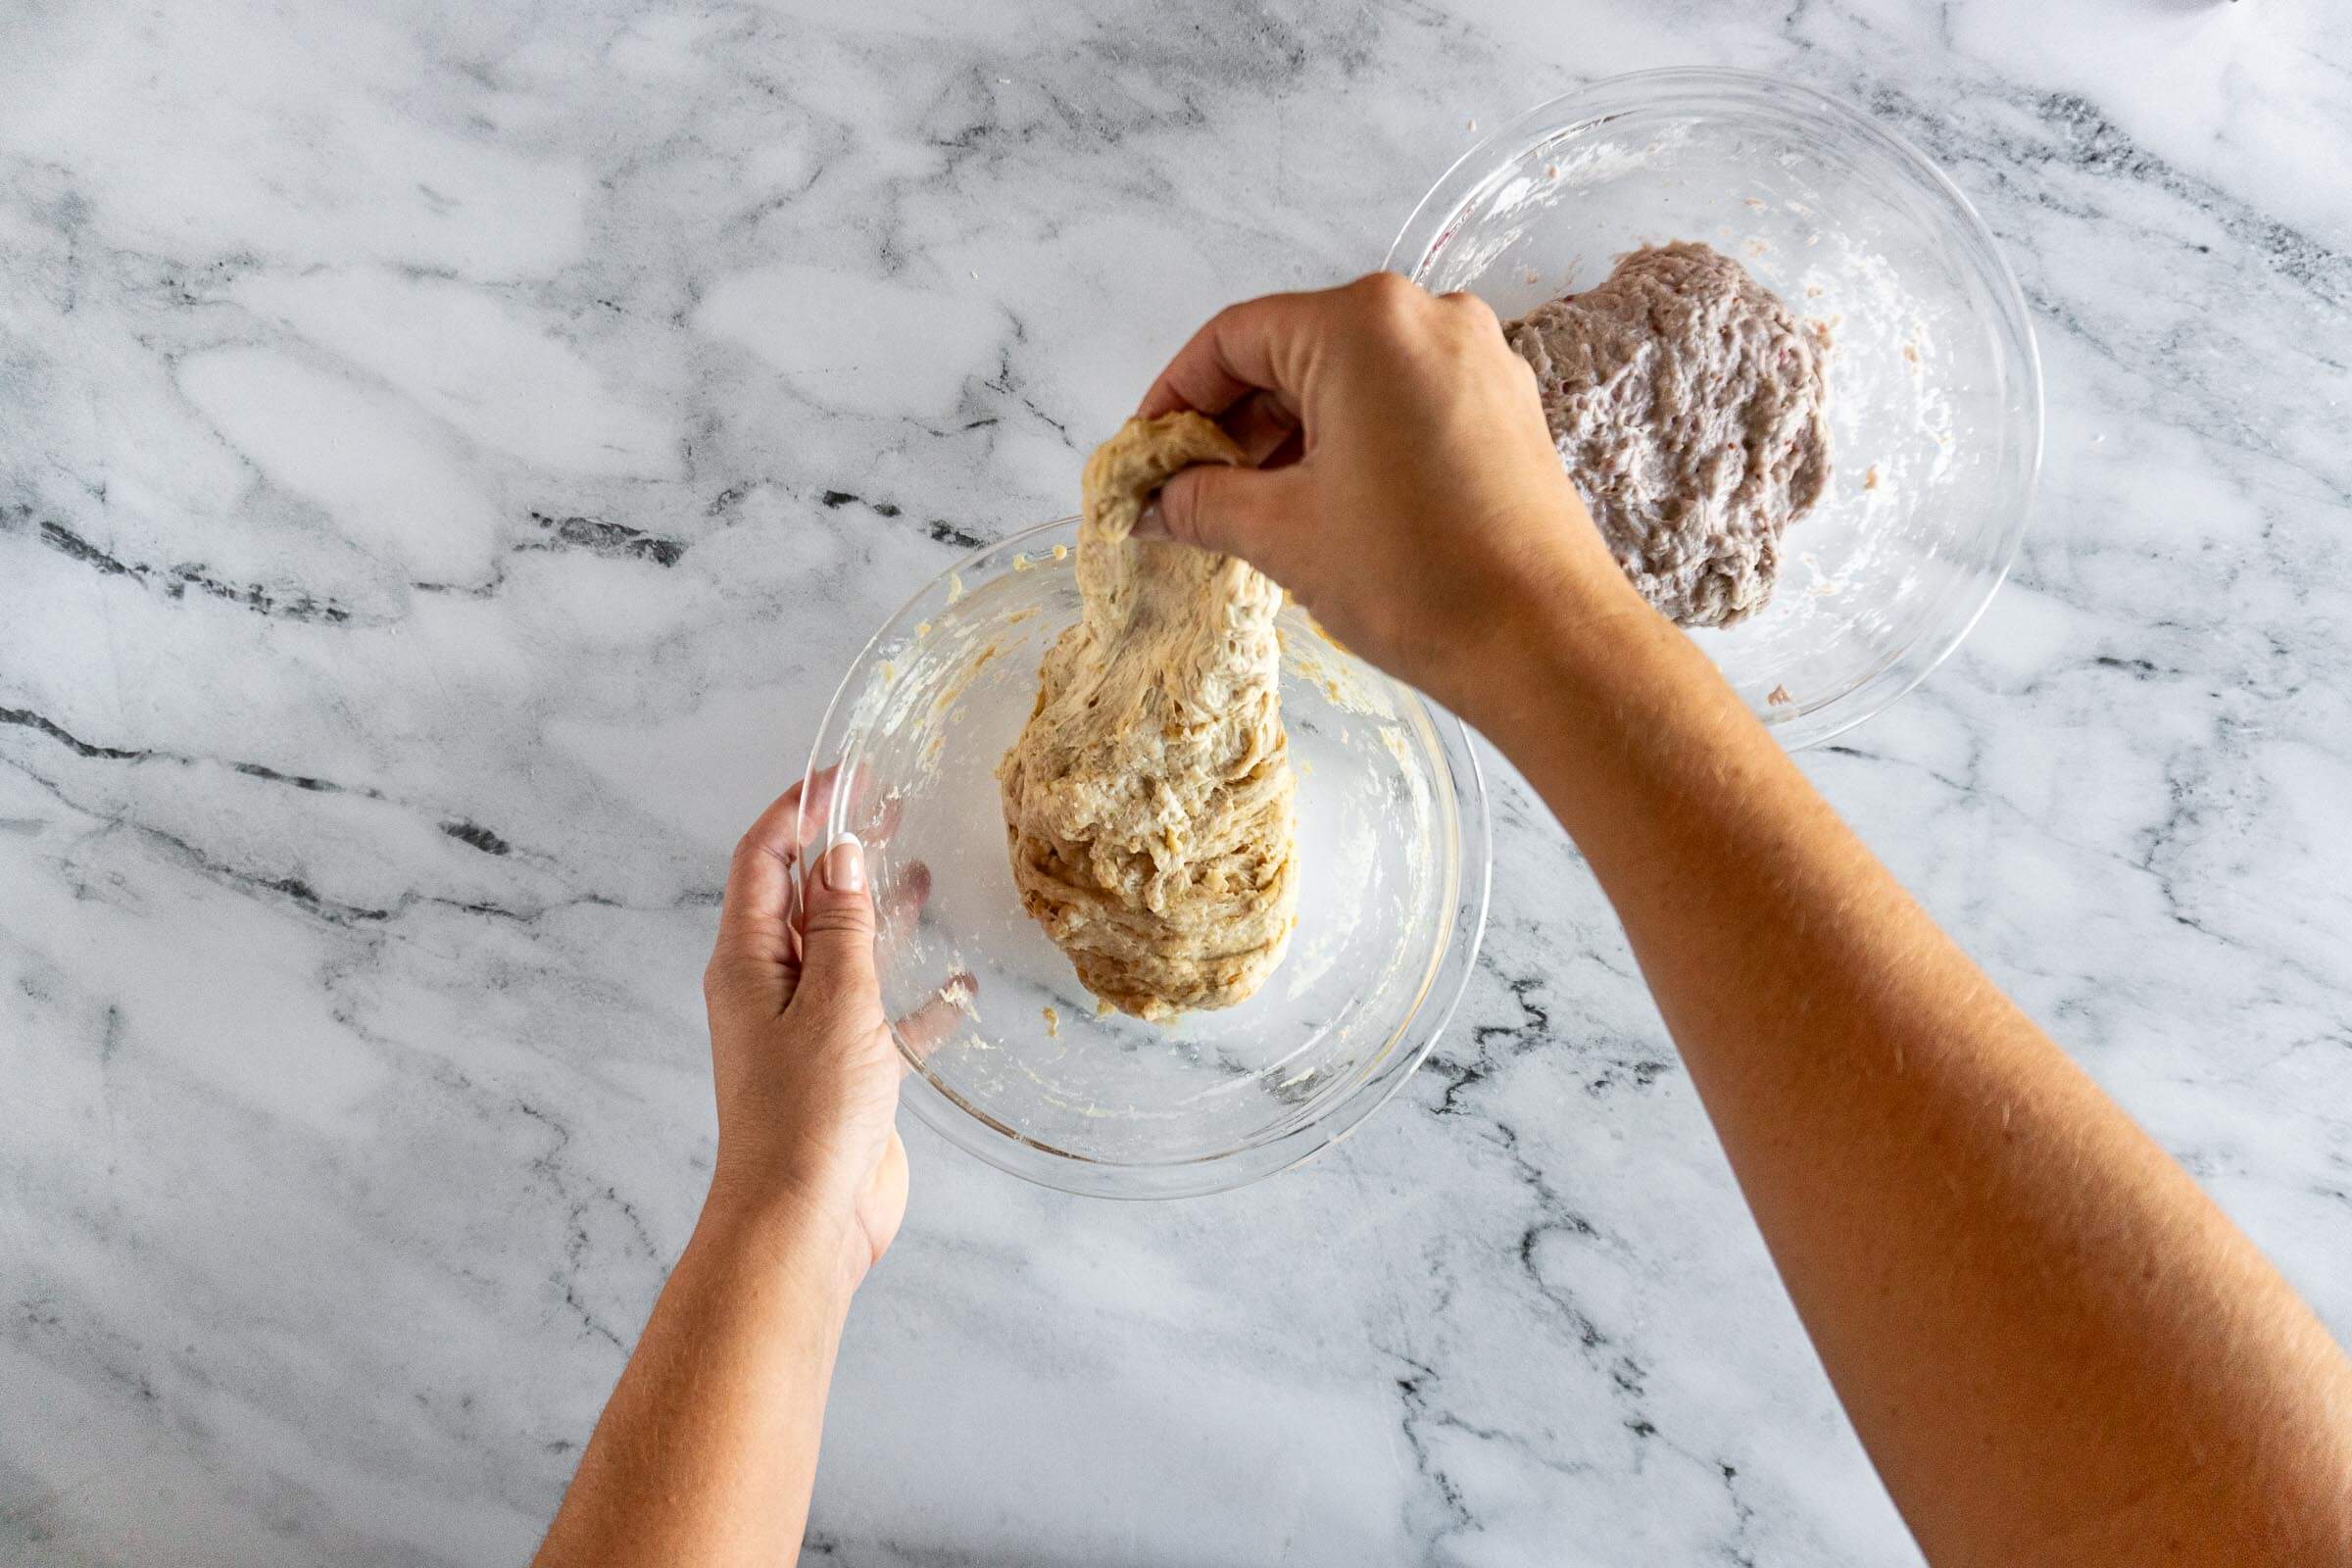
- Step 8: Working one bowl at a time, using damp hands, grab the dough and gently pull it until the flap is long enough to fold over itself, then fold the flap.
- Step 9: Rotate the bowl 90 degrees, and repeat 3 more times, this is considered a set of stretch and folds. Recover the bowl, and set it aside for 60 minutes.
- Step 10: Repeat the stretch and fold process 2 times over 2 hours, for a total of 2 sets of stretch and folds each followed by a 60 minute rest.
Laminate + Bulk Ferment
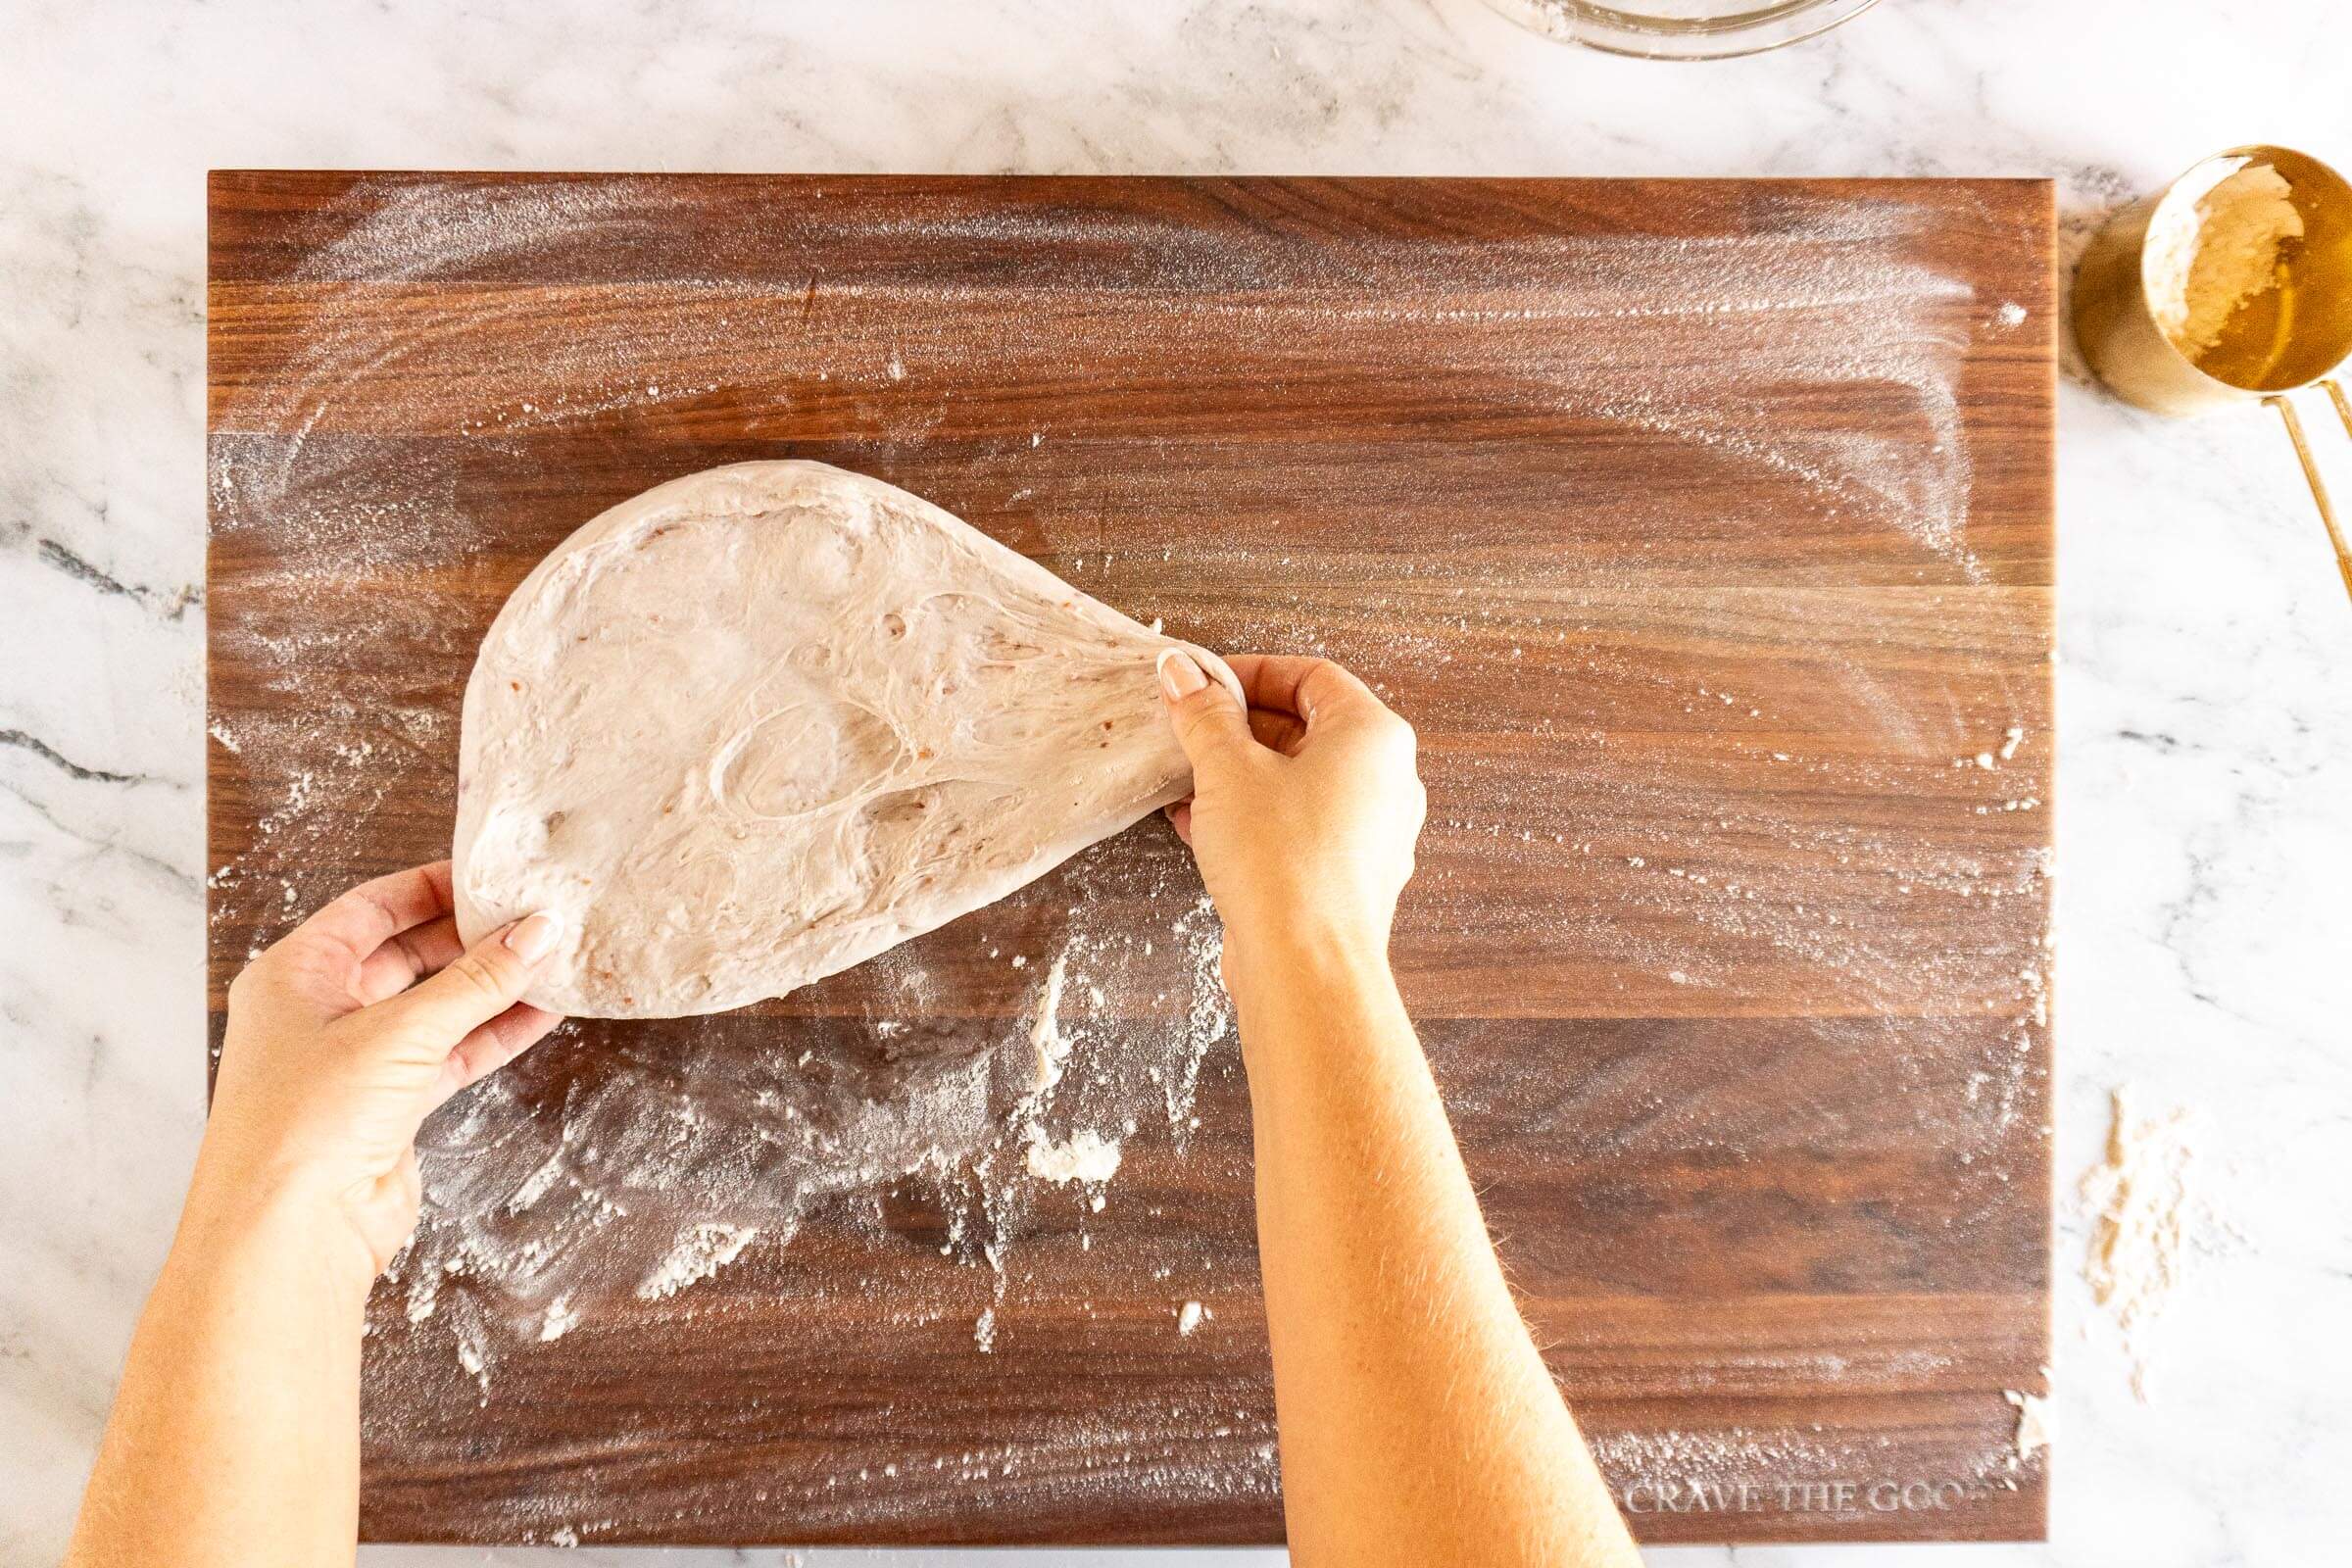
- Step 11: Lightly flour a working surface, then working one flavor at a time, turn the dough out of the bowl and carefully press and stretch into a rectangle. If the dough wants to tear, allow it to rest for a few minutes before trying again.
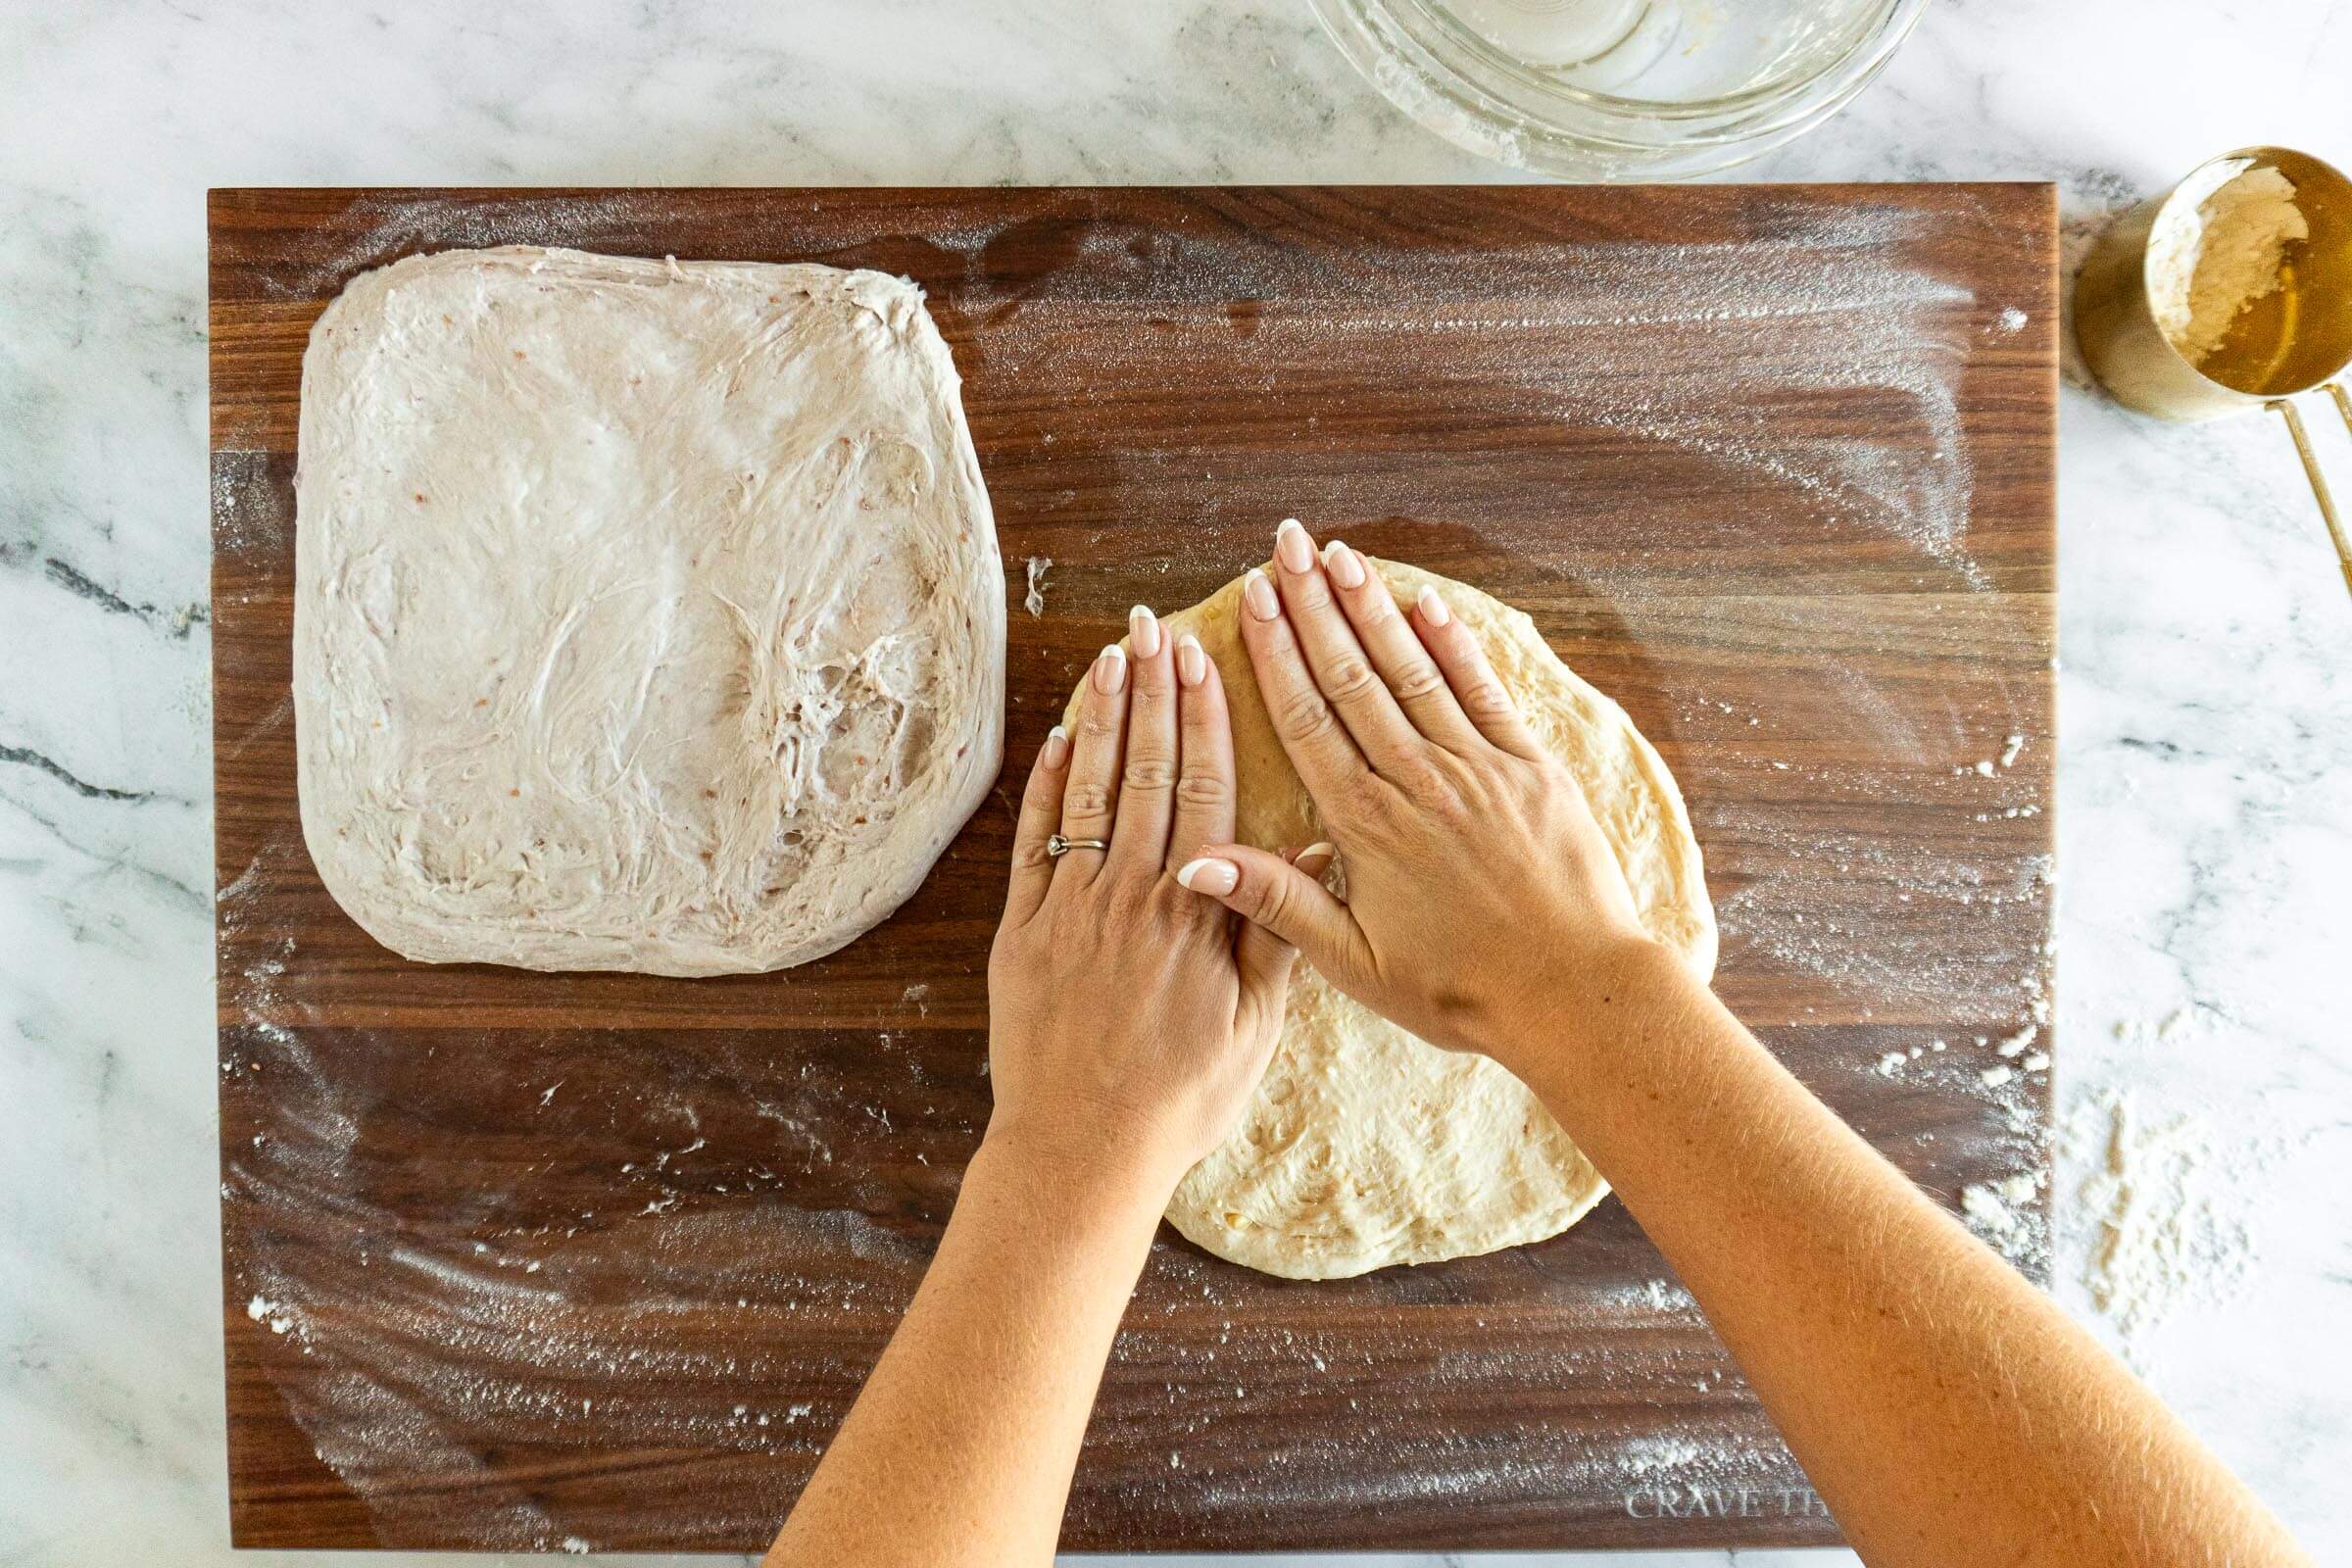
- Step 12: Repeat with the other dough. The jam dough is higher hydration, by design, so it should stretch a little further than the peanut butter, ensure it’s stretched into a larger rectangle than the peanut butter flavor.
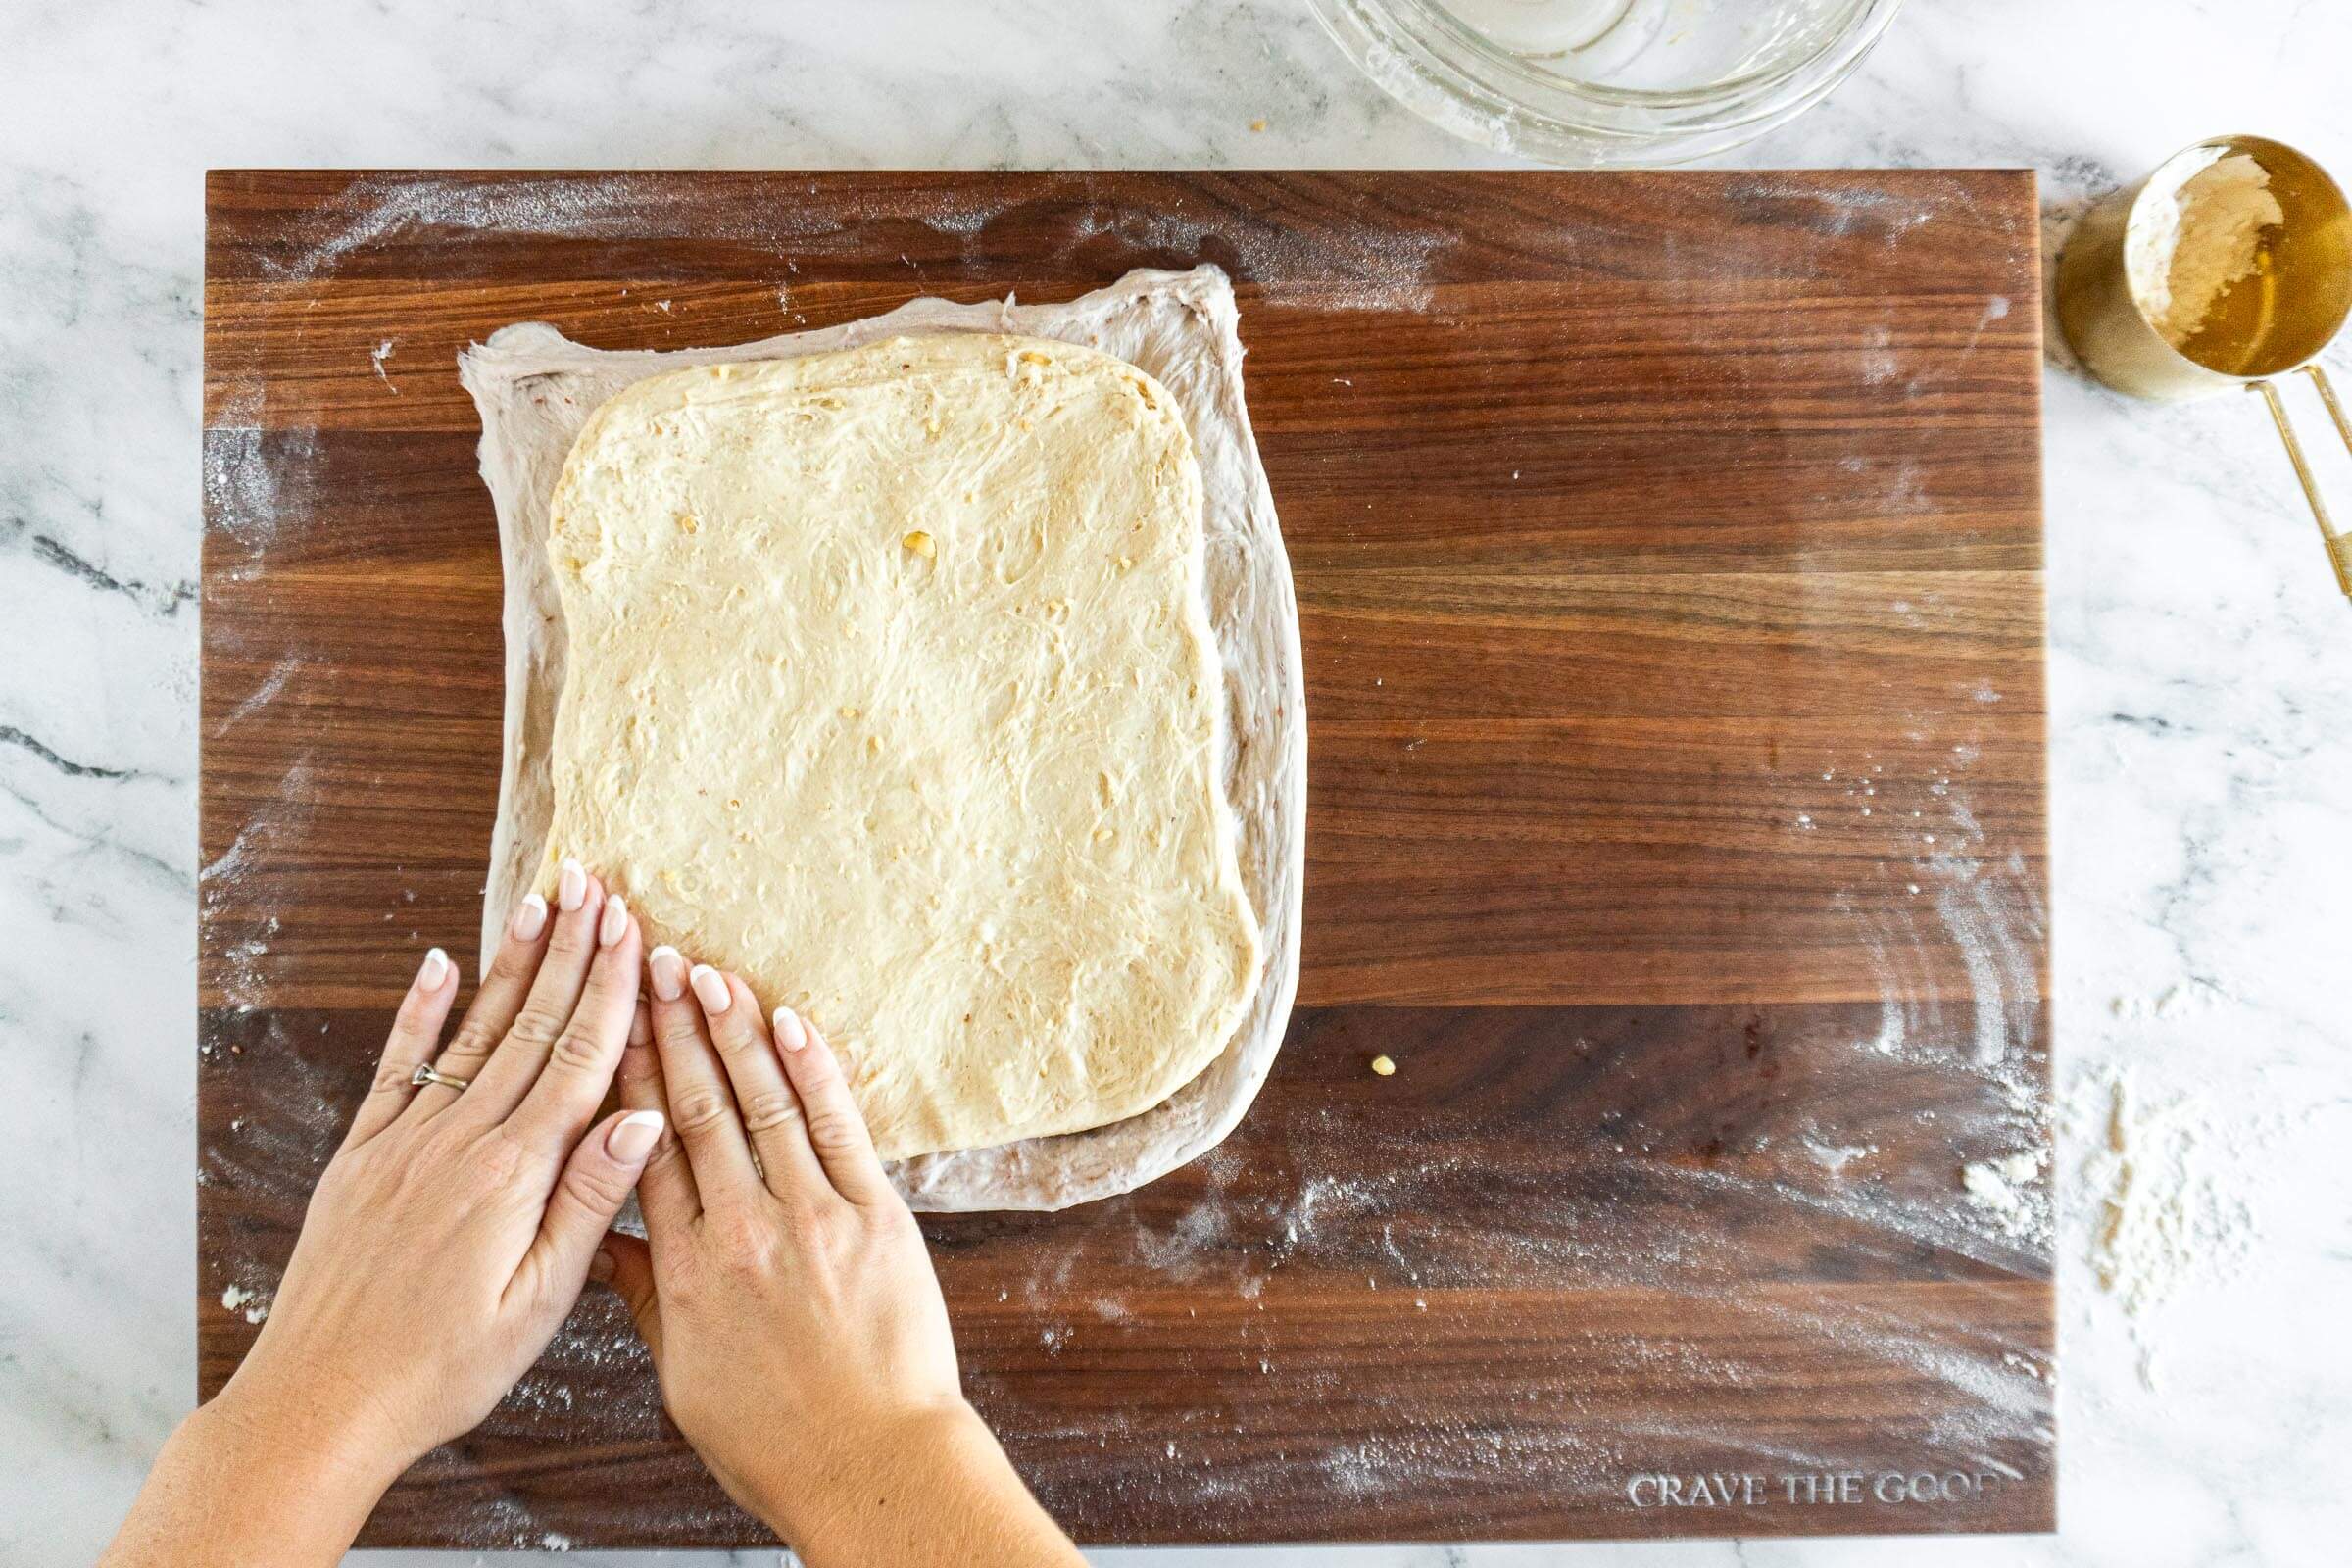
- Step 13: Carefully lift the peanut butter dough and place it on top of the jam dough, aiming for the jam dough to have at least half an inch of overlap all the way around the peanut butter dough.
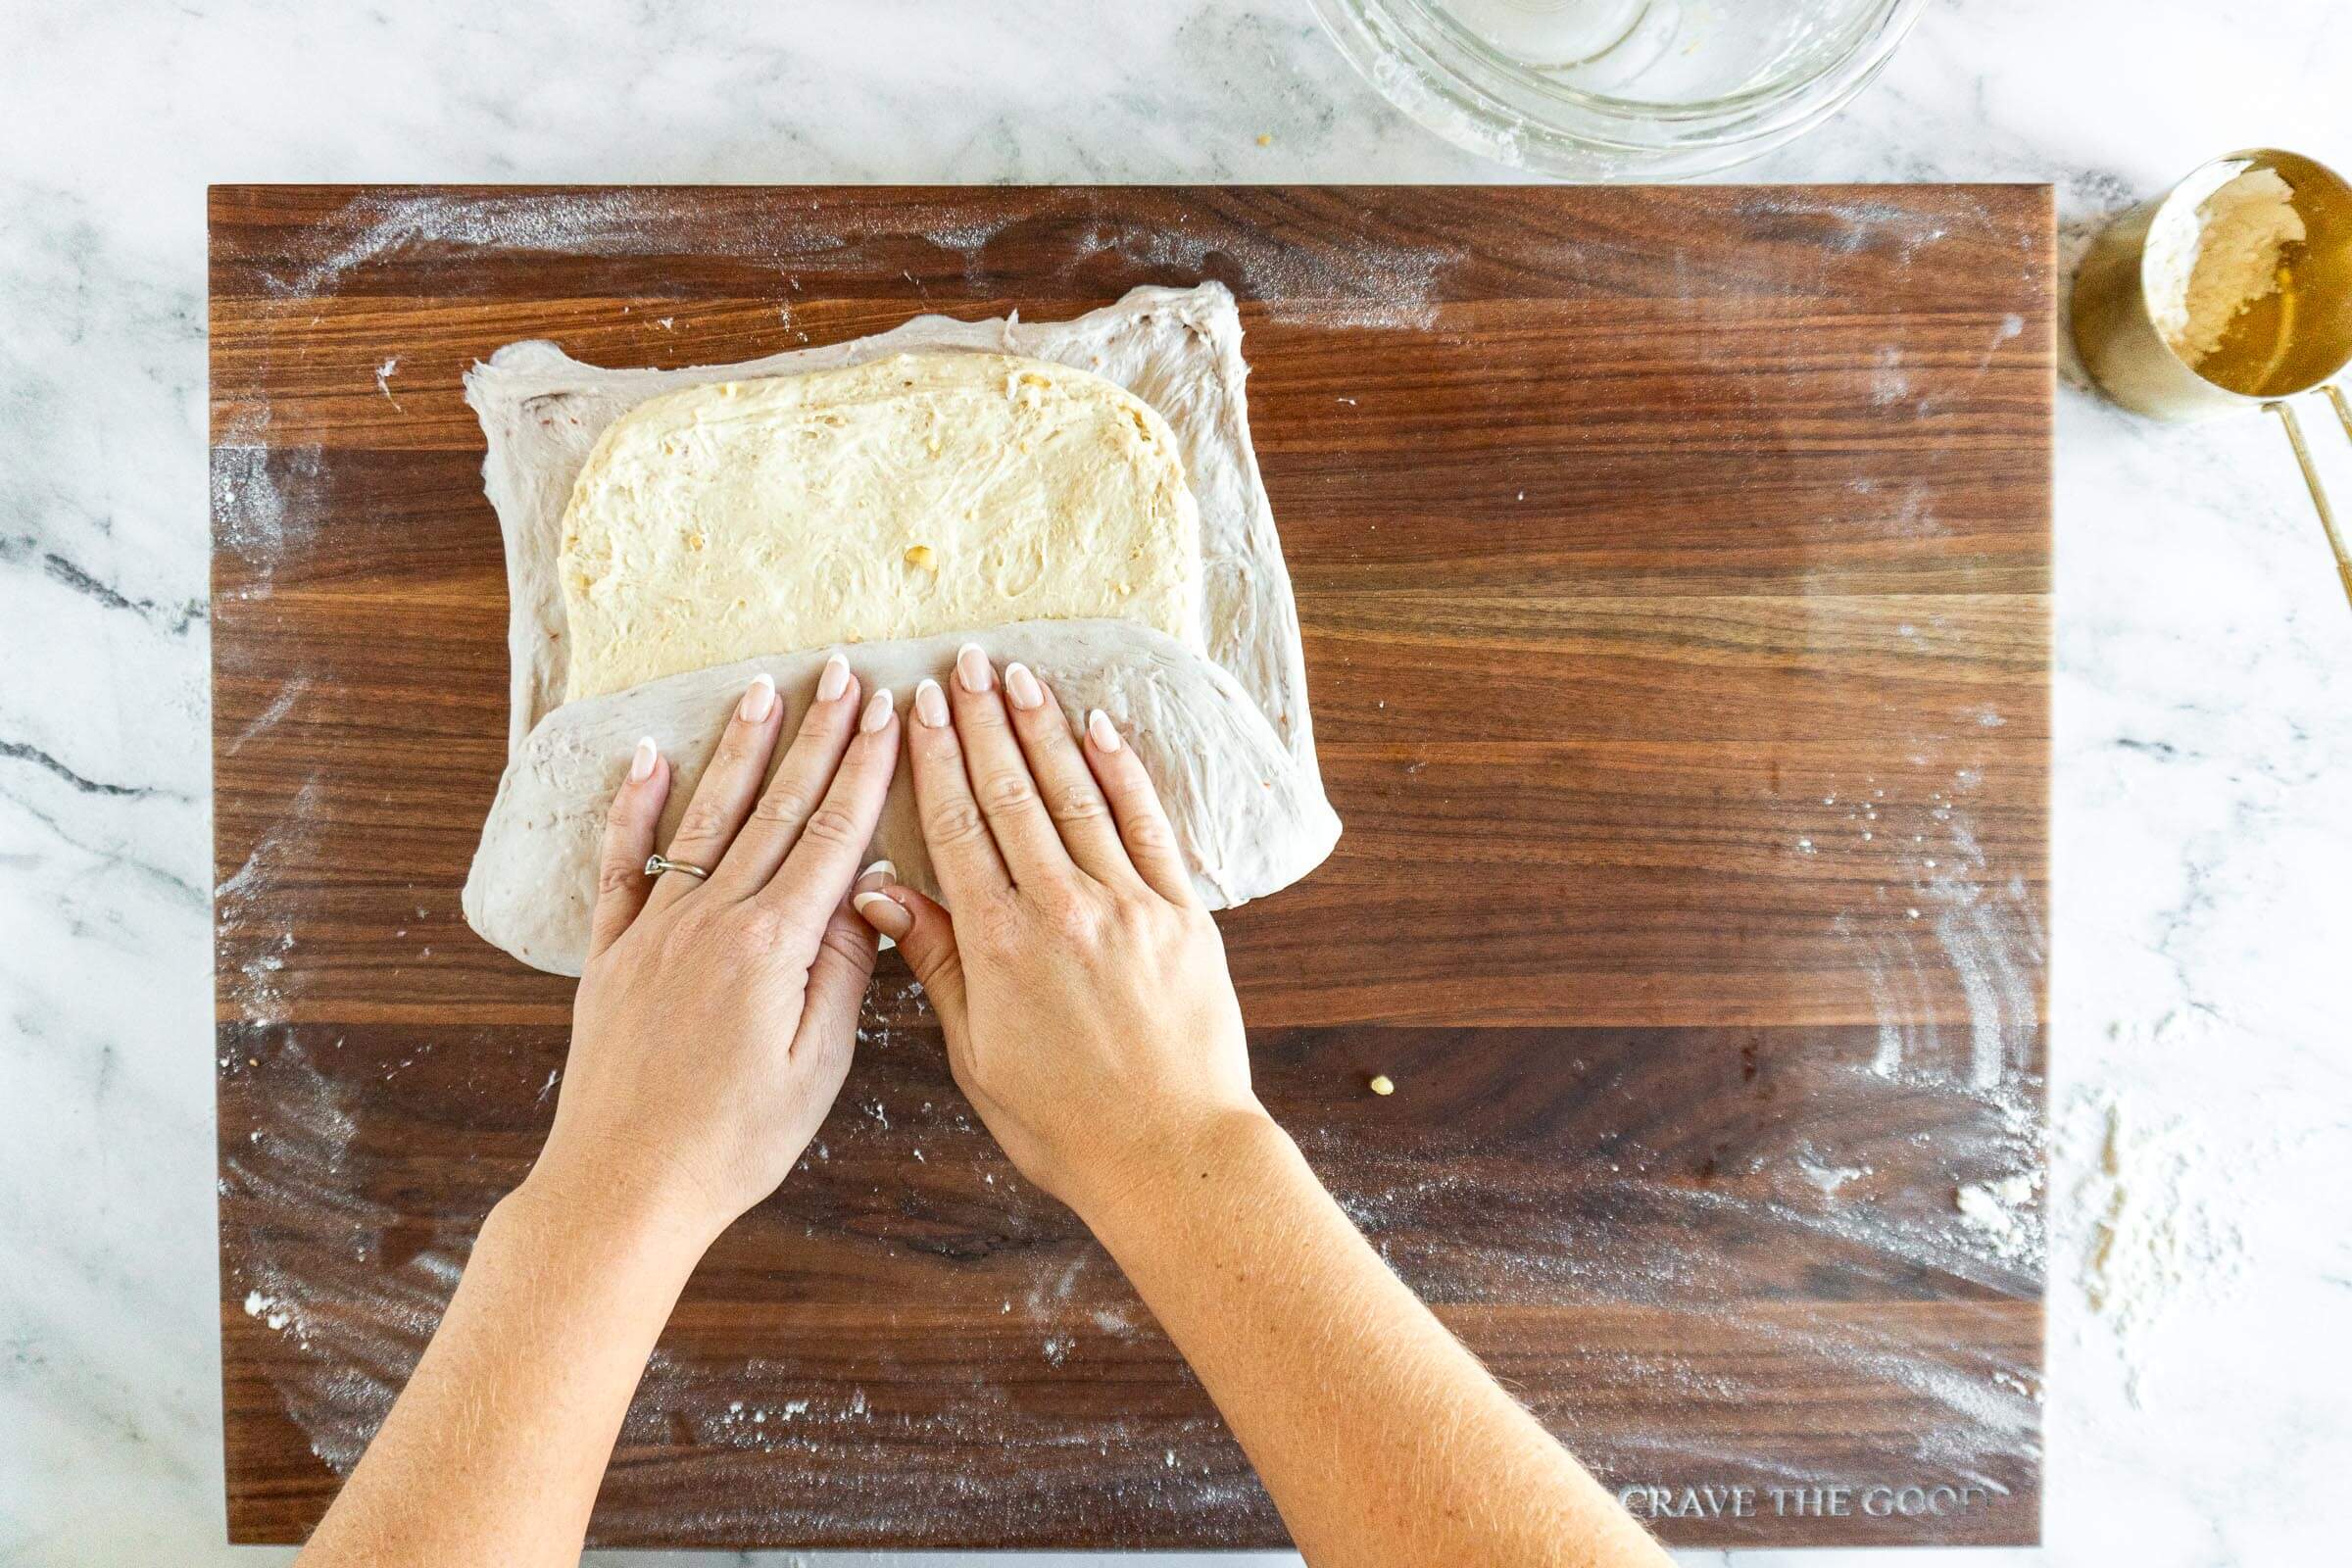
- Step 14: Fold up the bottom third of the dough, then fold the top down, pressing the jam dough together to seal it.
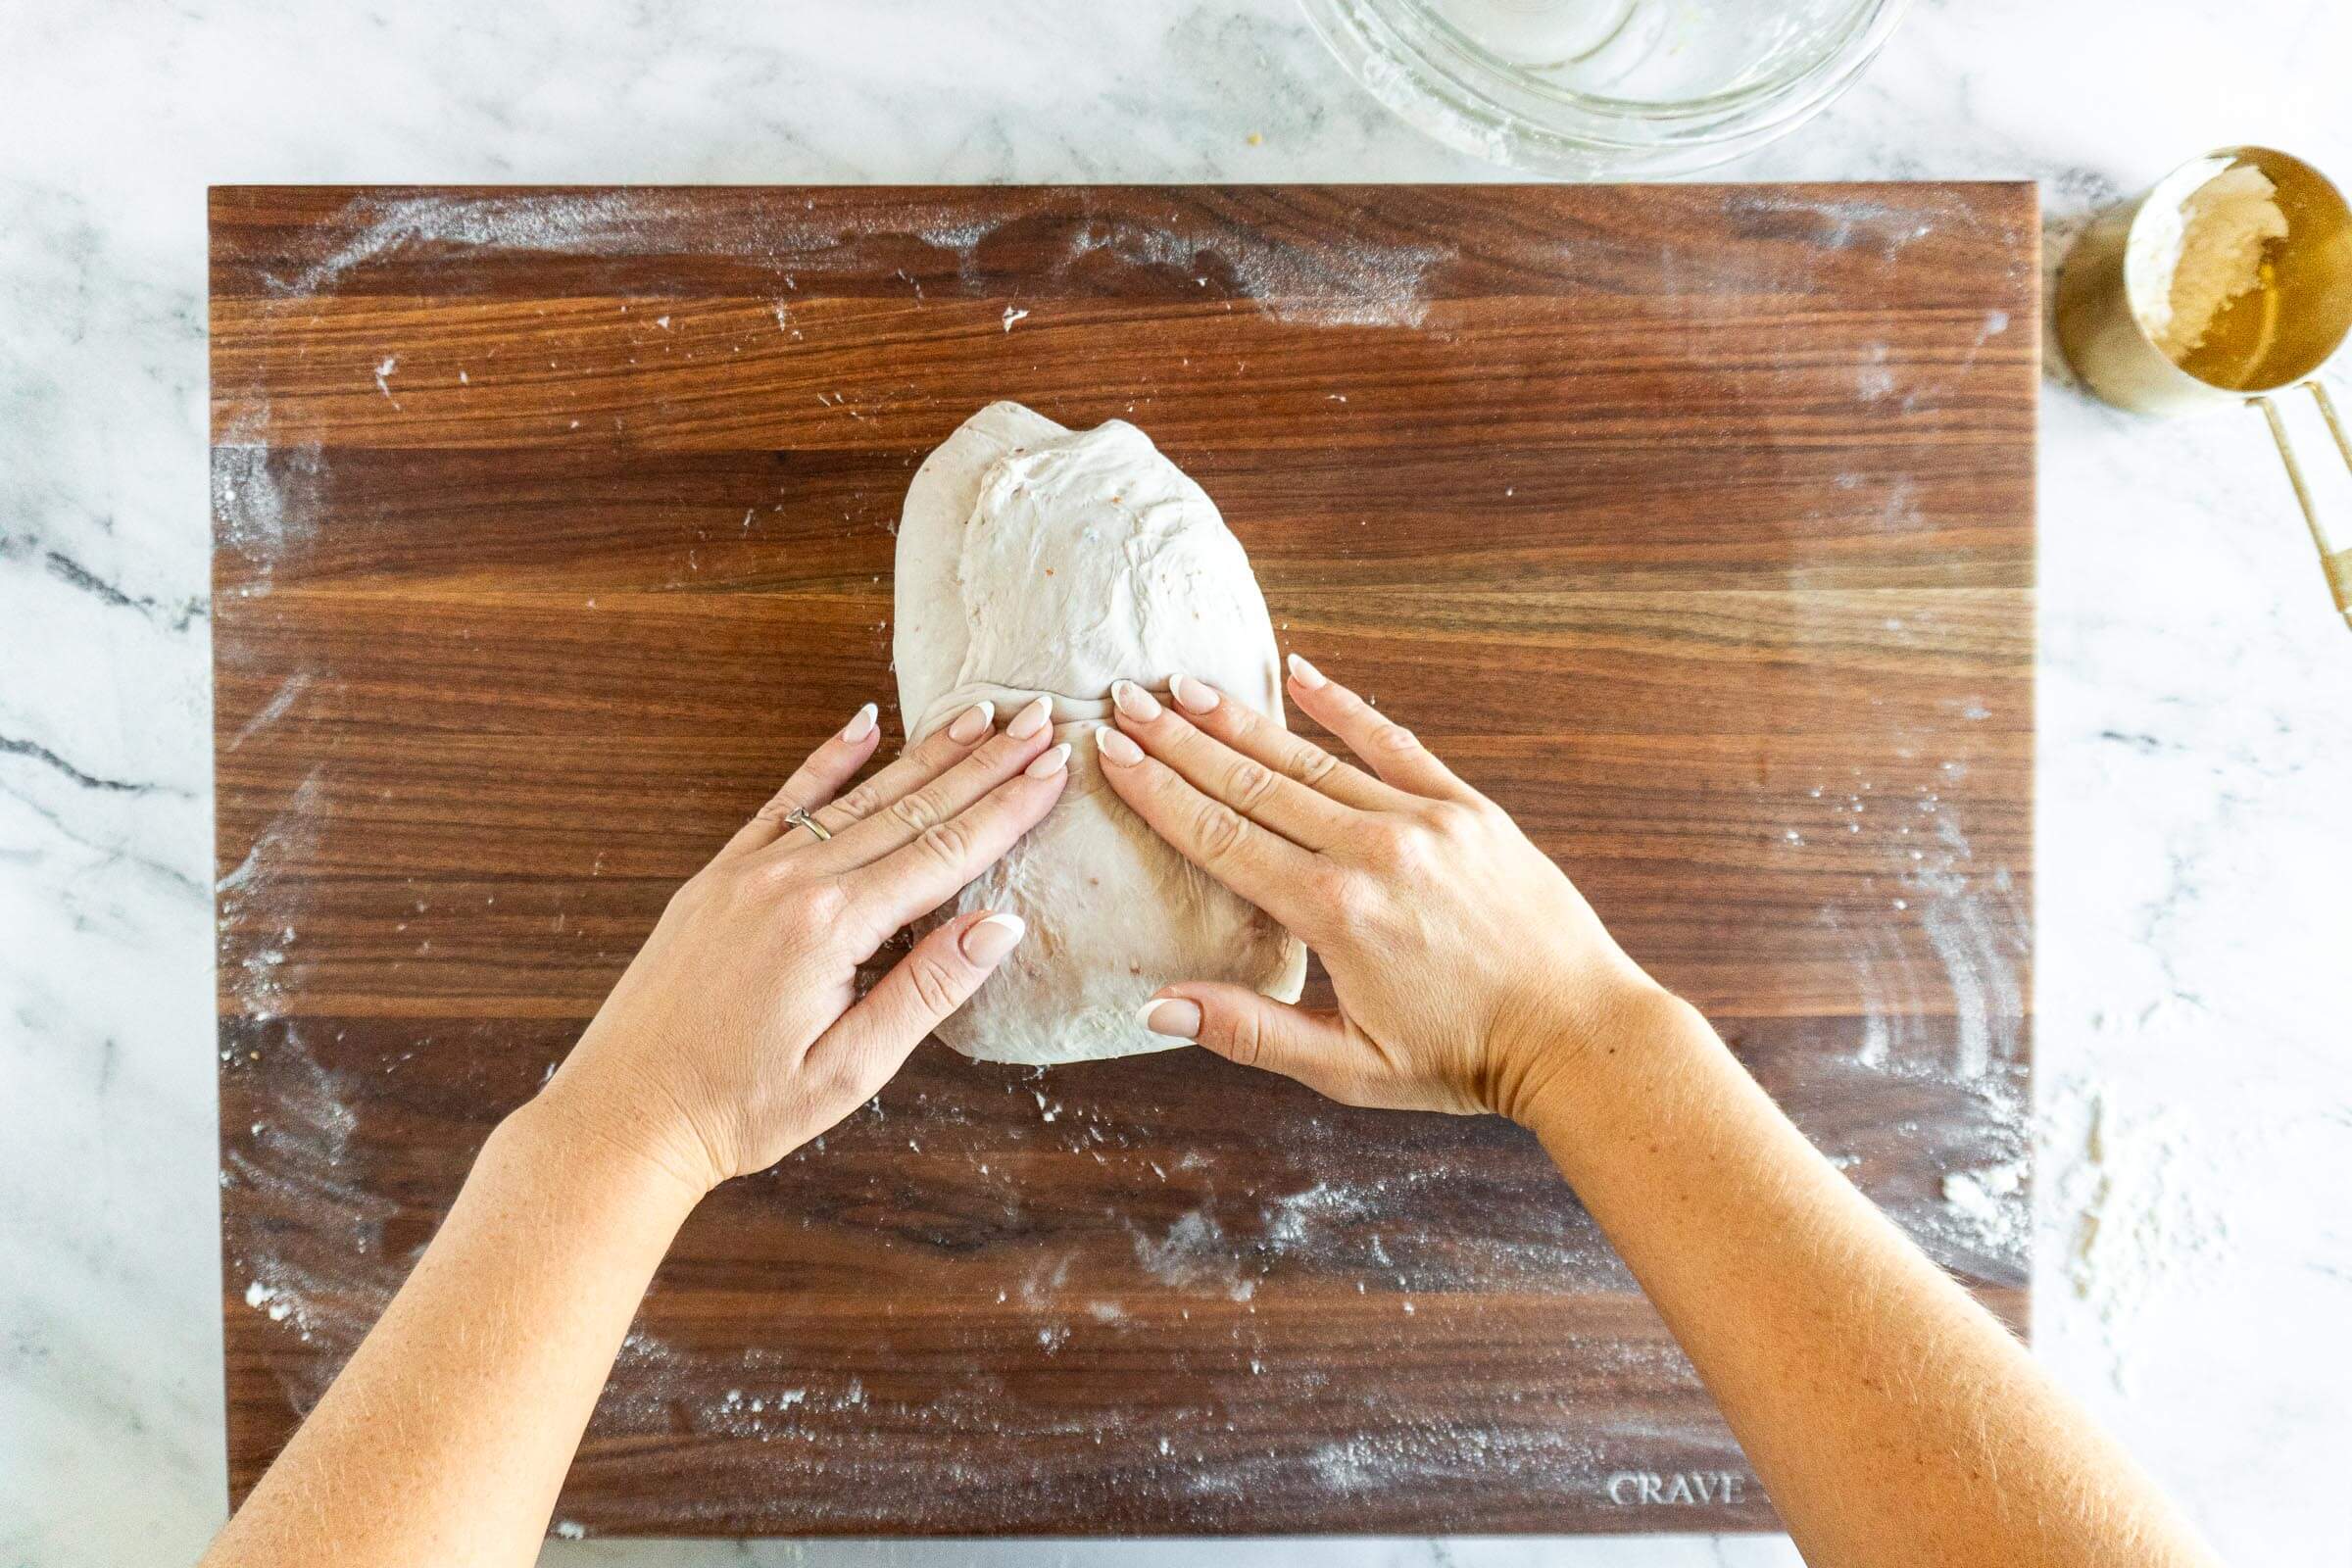
- Step 15: Turn the dough sideways and fold up the bottom third then roll it over itself.
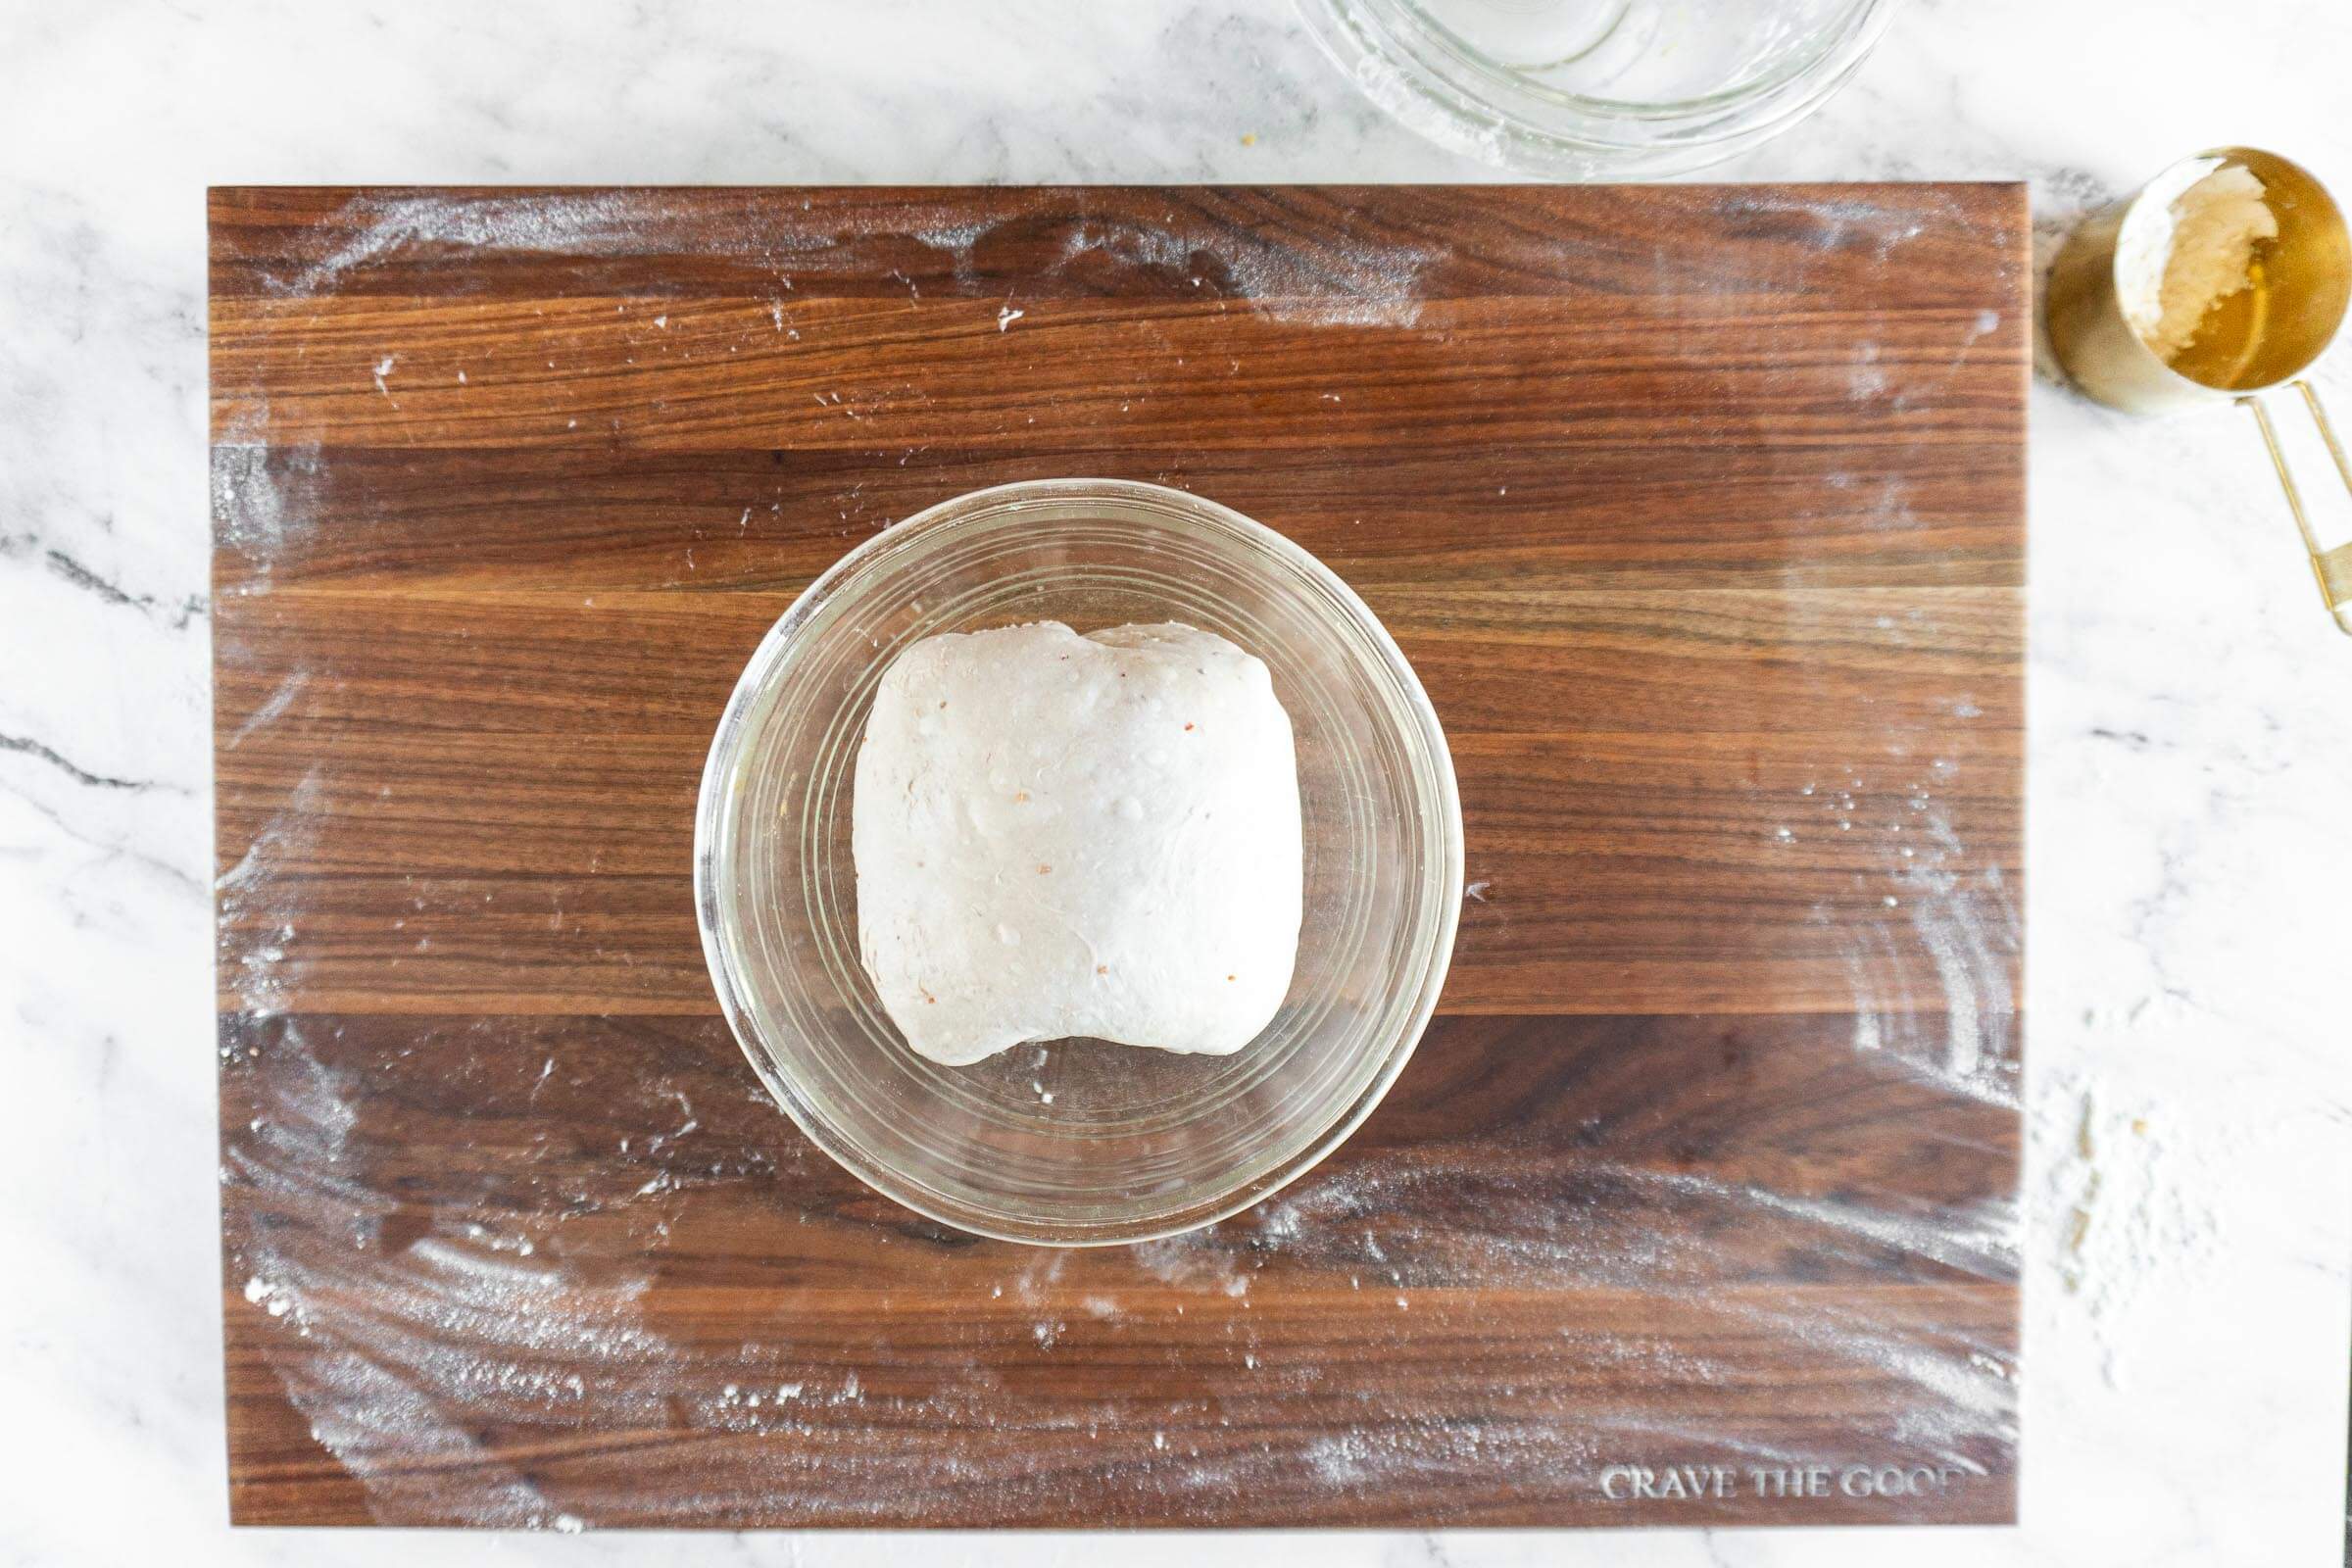
- Step 16: Use a bench scraper to pick up the dough and place it into a large bowl. Cover the dough and bulk ferment for 2-3 hours.
Pre-Shape and Shape:
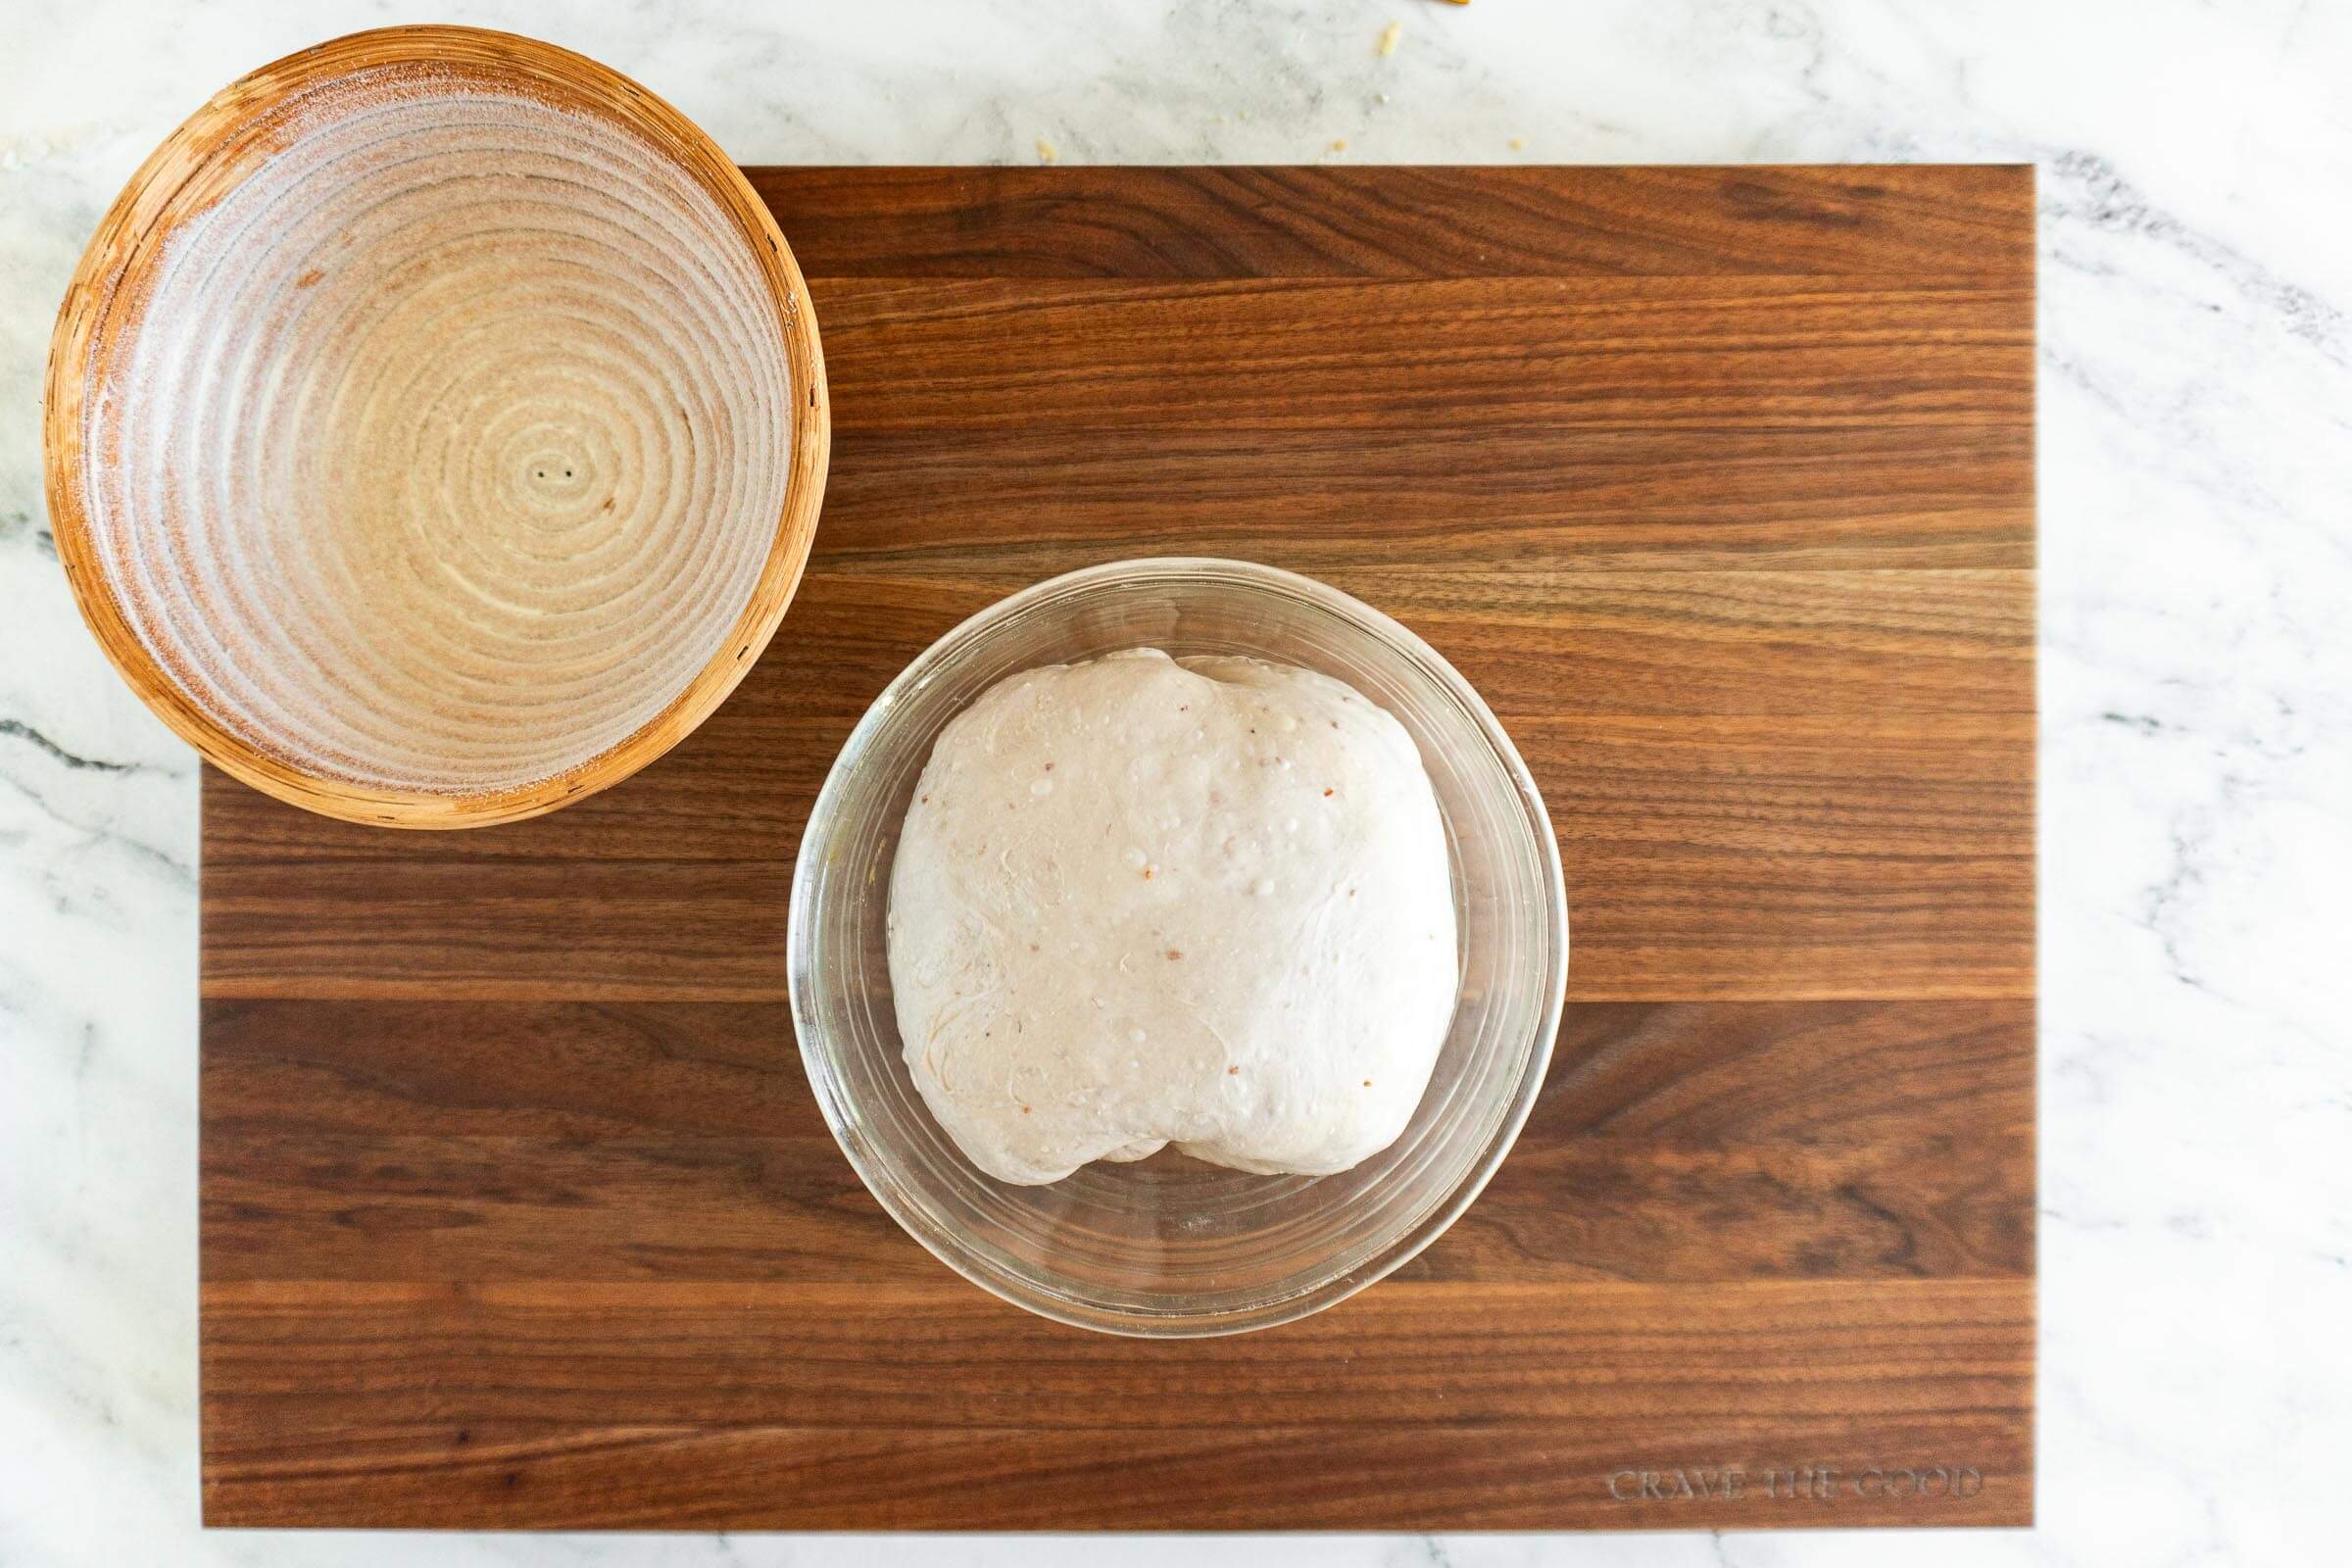
- Step 17: Observe your dough, at this point, the dough should have risen in the bowl, and have a smooth surface with visible bubbles. If the dough is domed in the bowl it is ready to work with, if the dough is flat it may need more time in the bulk ferment.
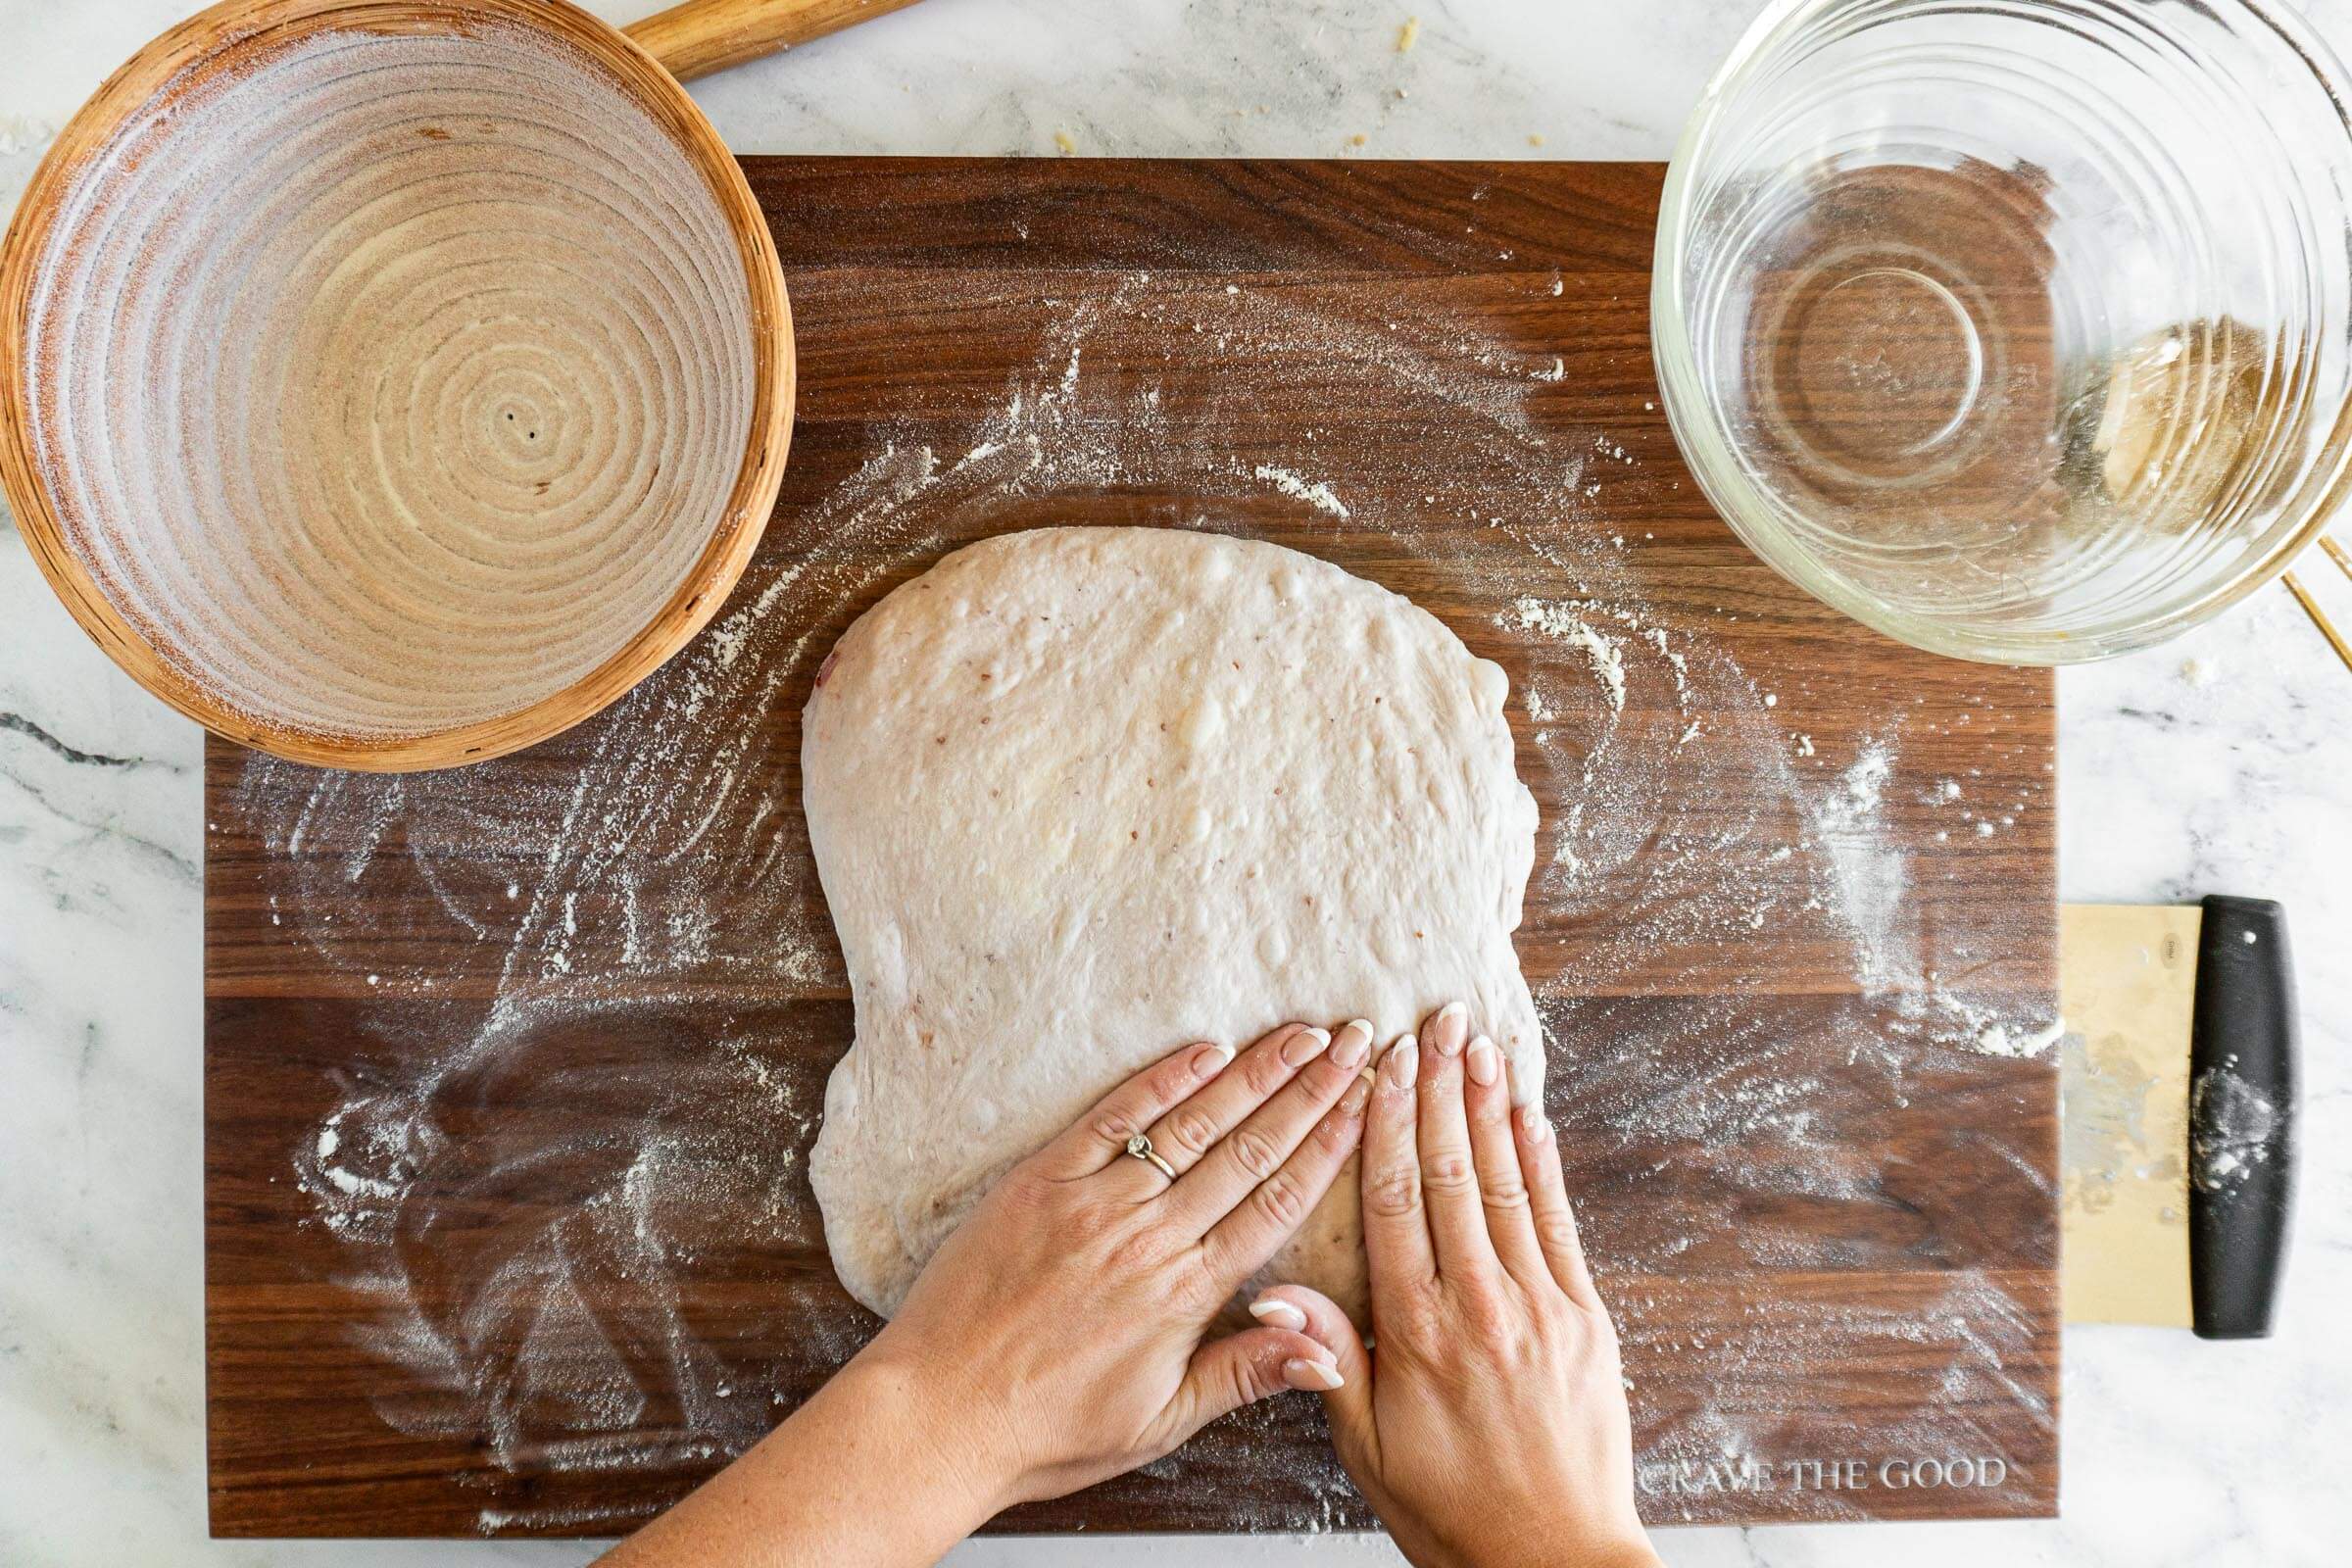
- Step 18: Uncover the dough and transfer to a lightly floured work surface or countertop. Gently press and spread the dough into a large rectangle.
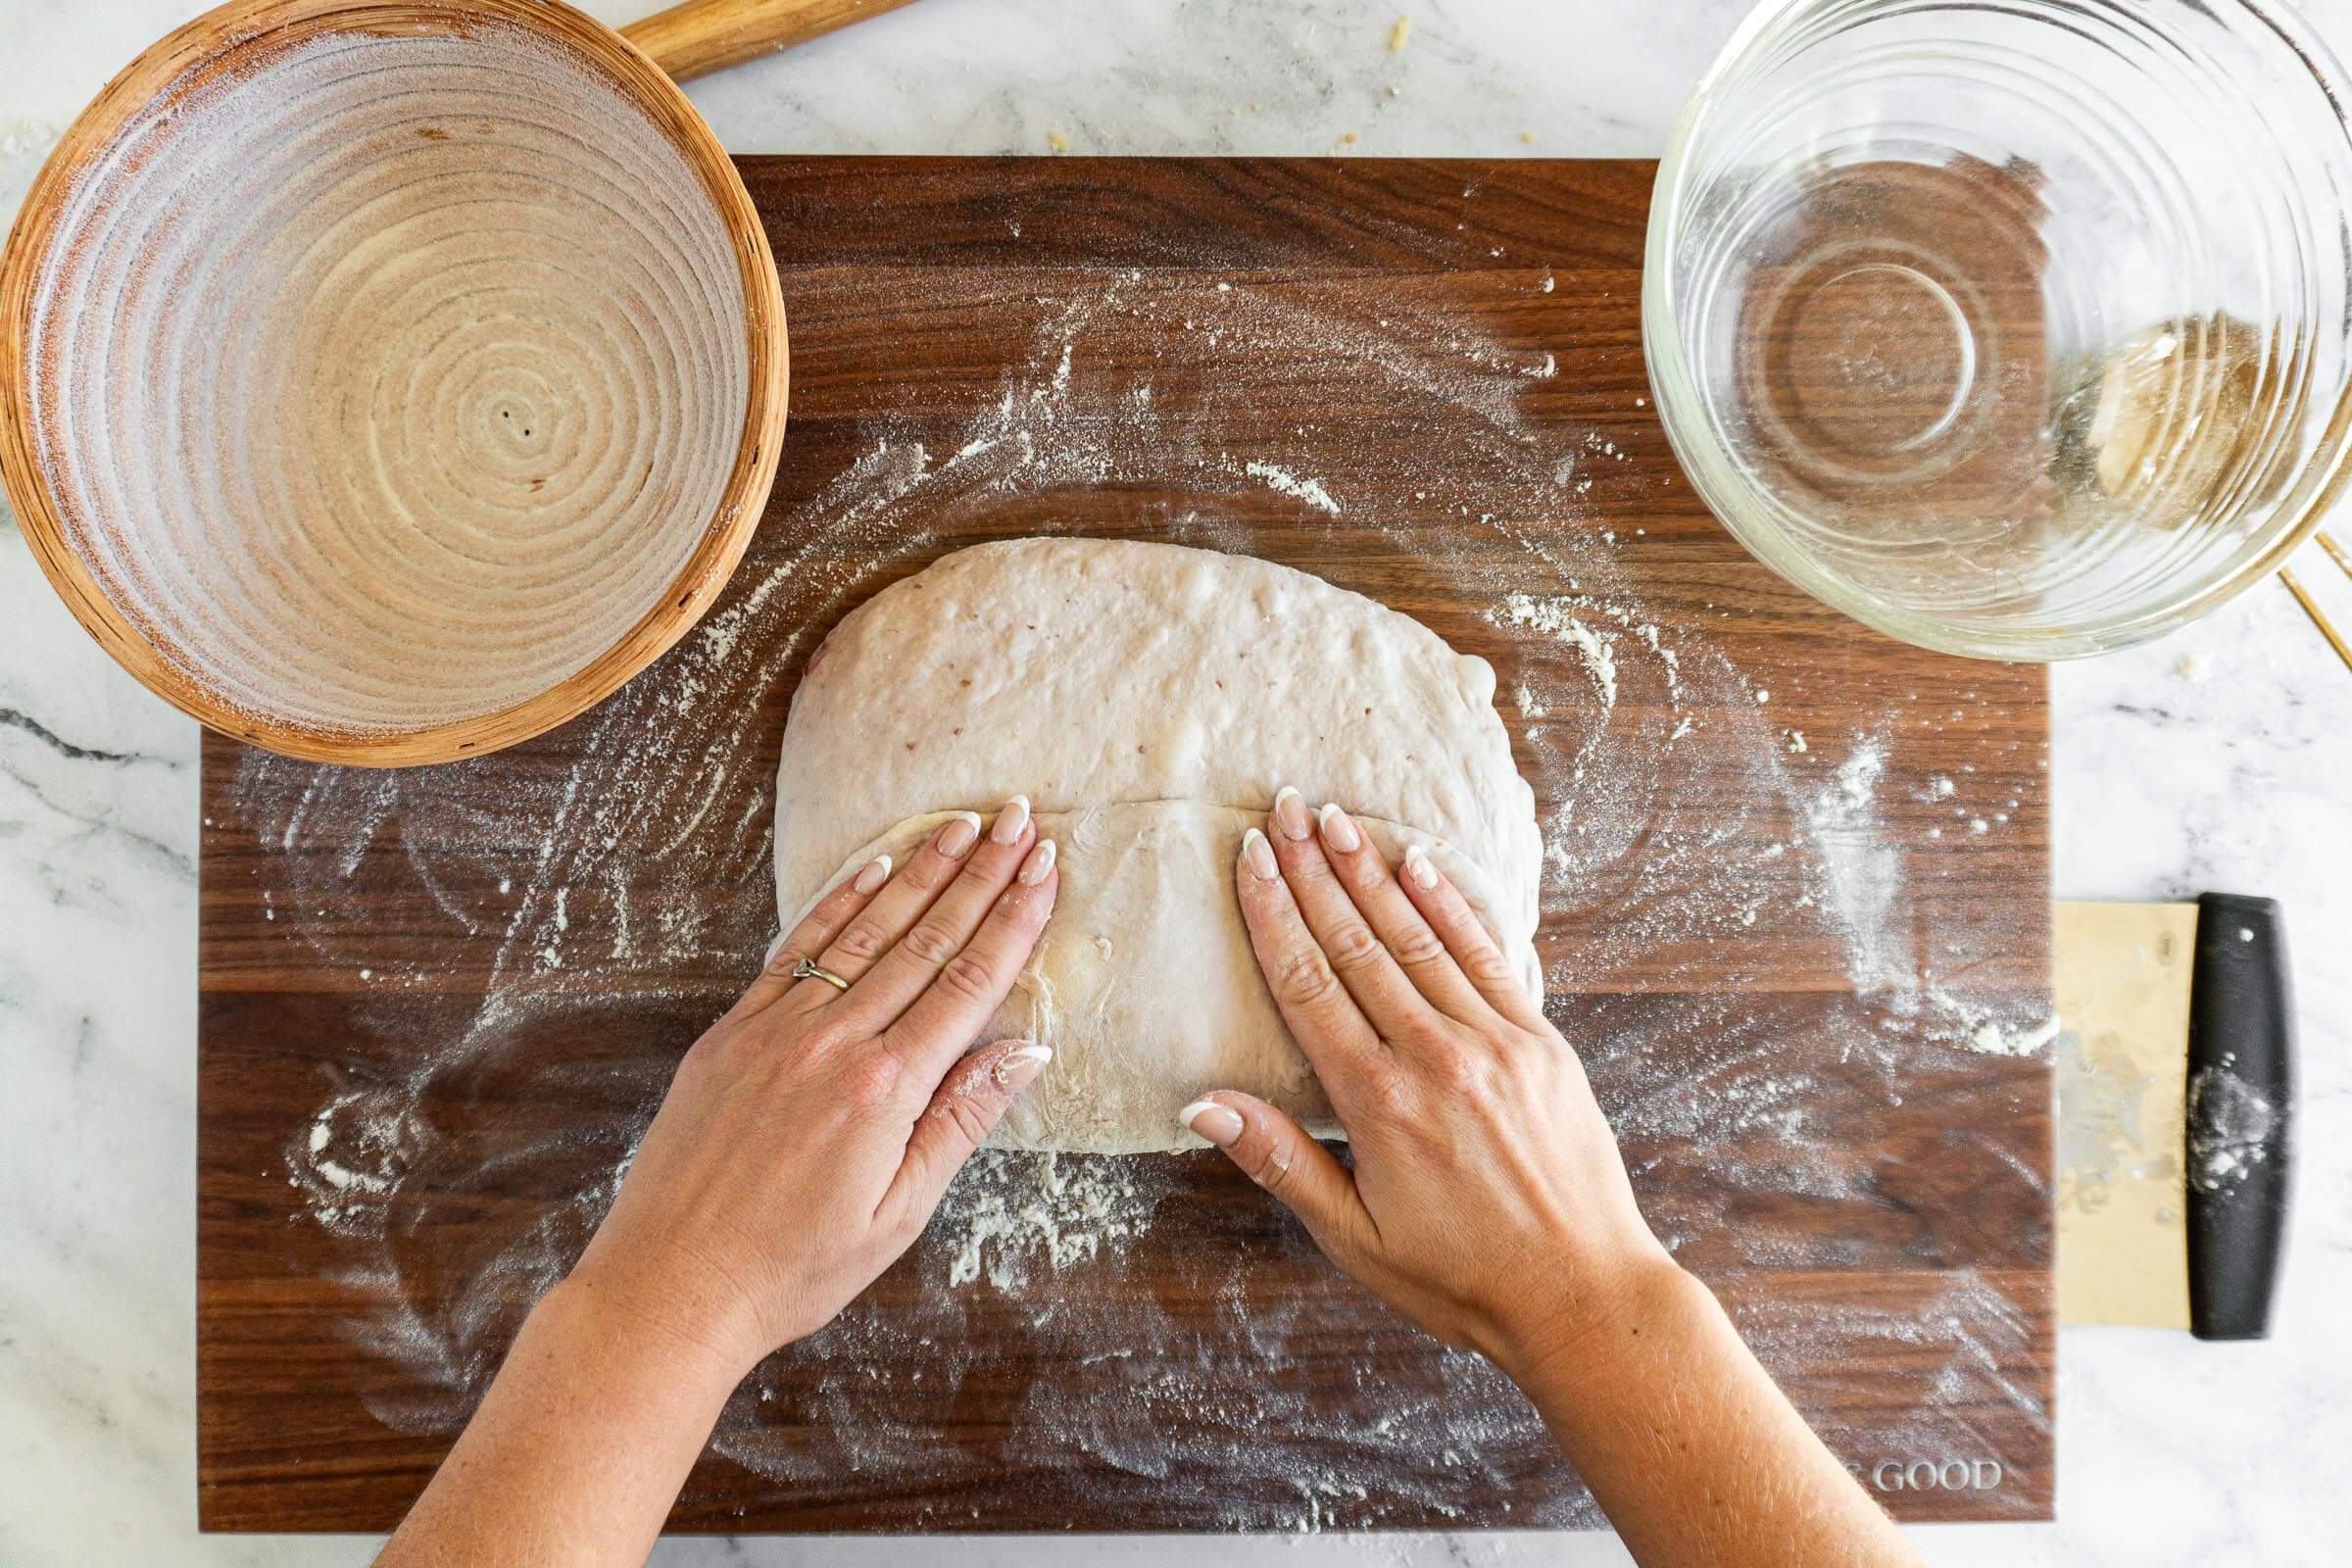
- Step 19: Fold up the bottom third of the dough as though you were folding a letter then fold the top third downward.
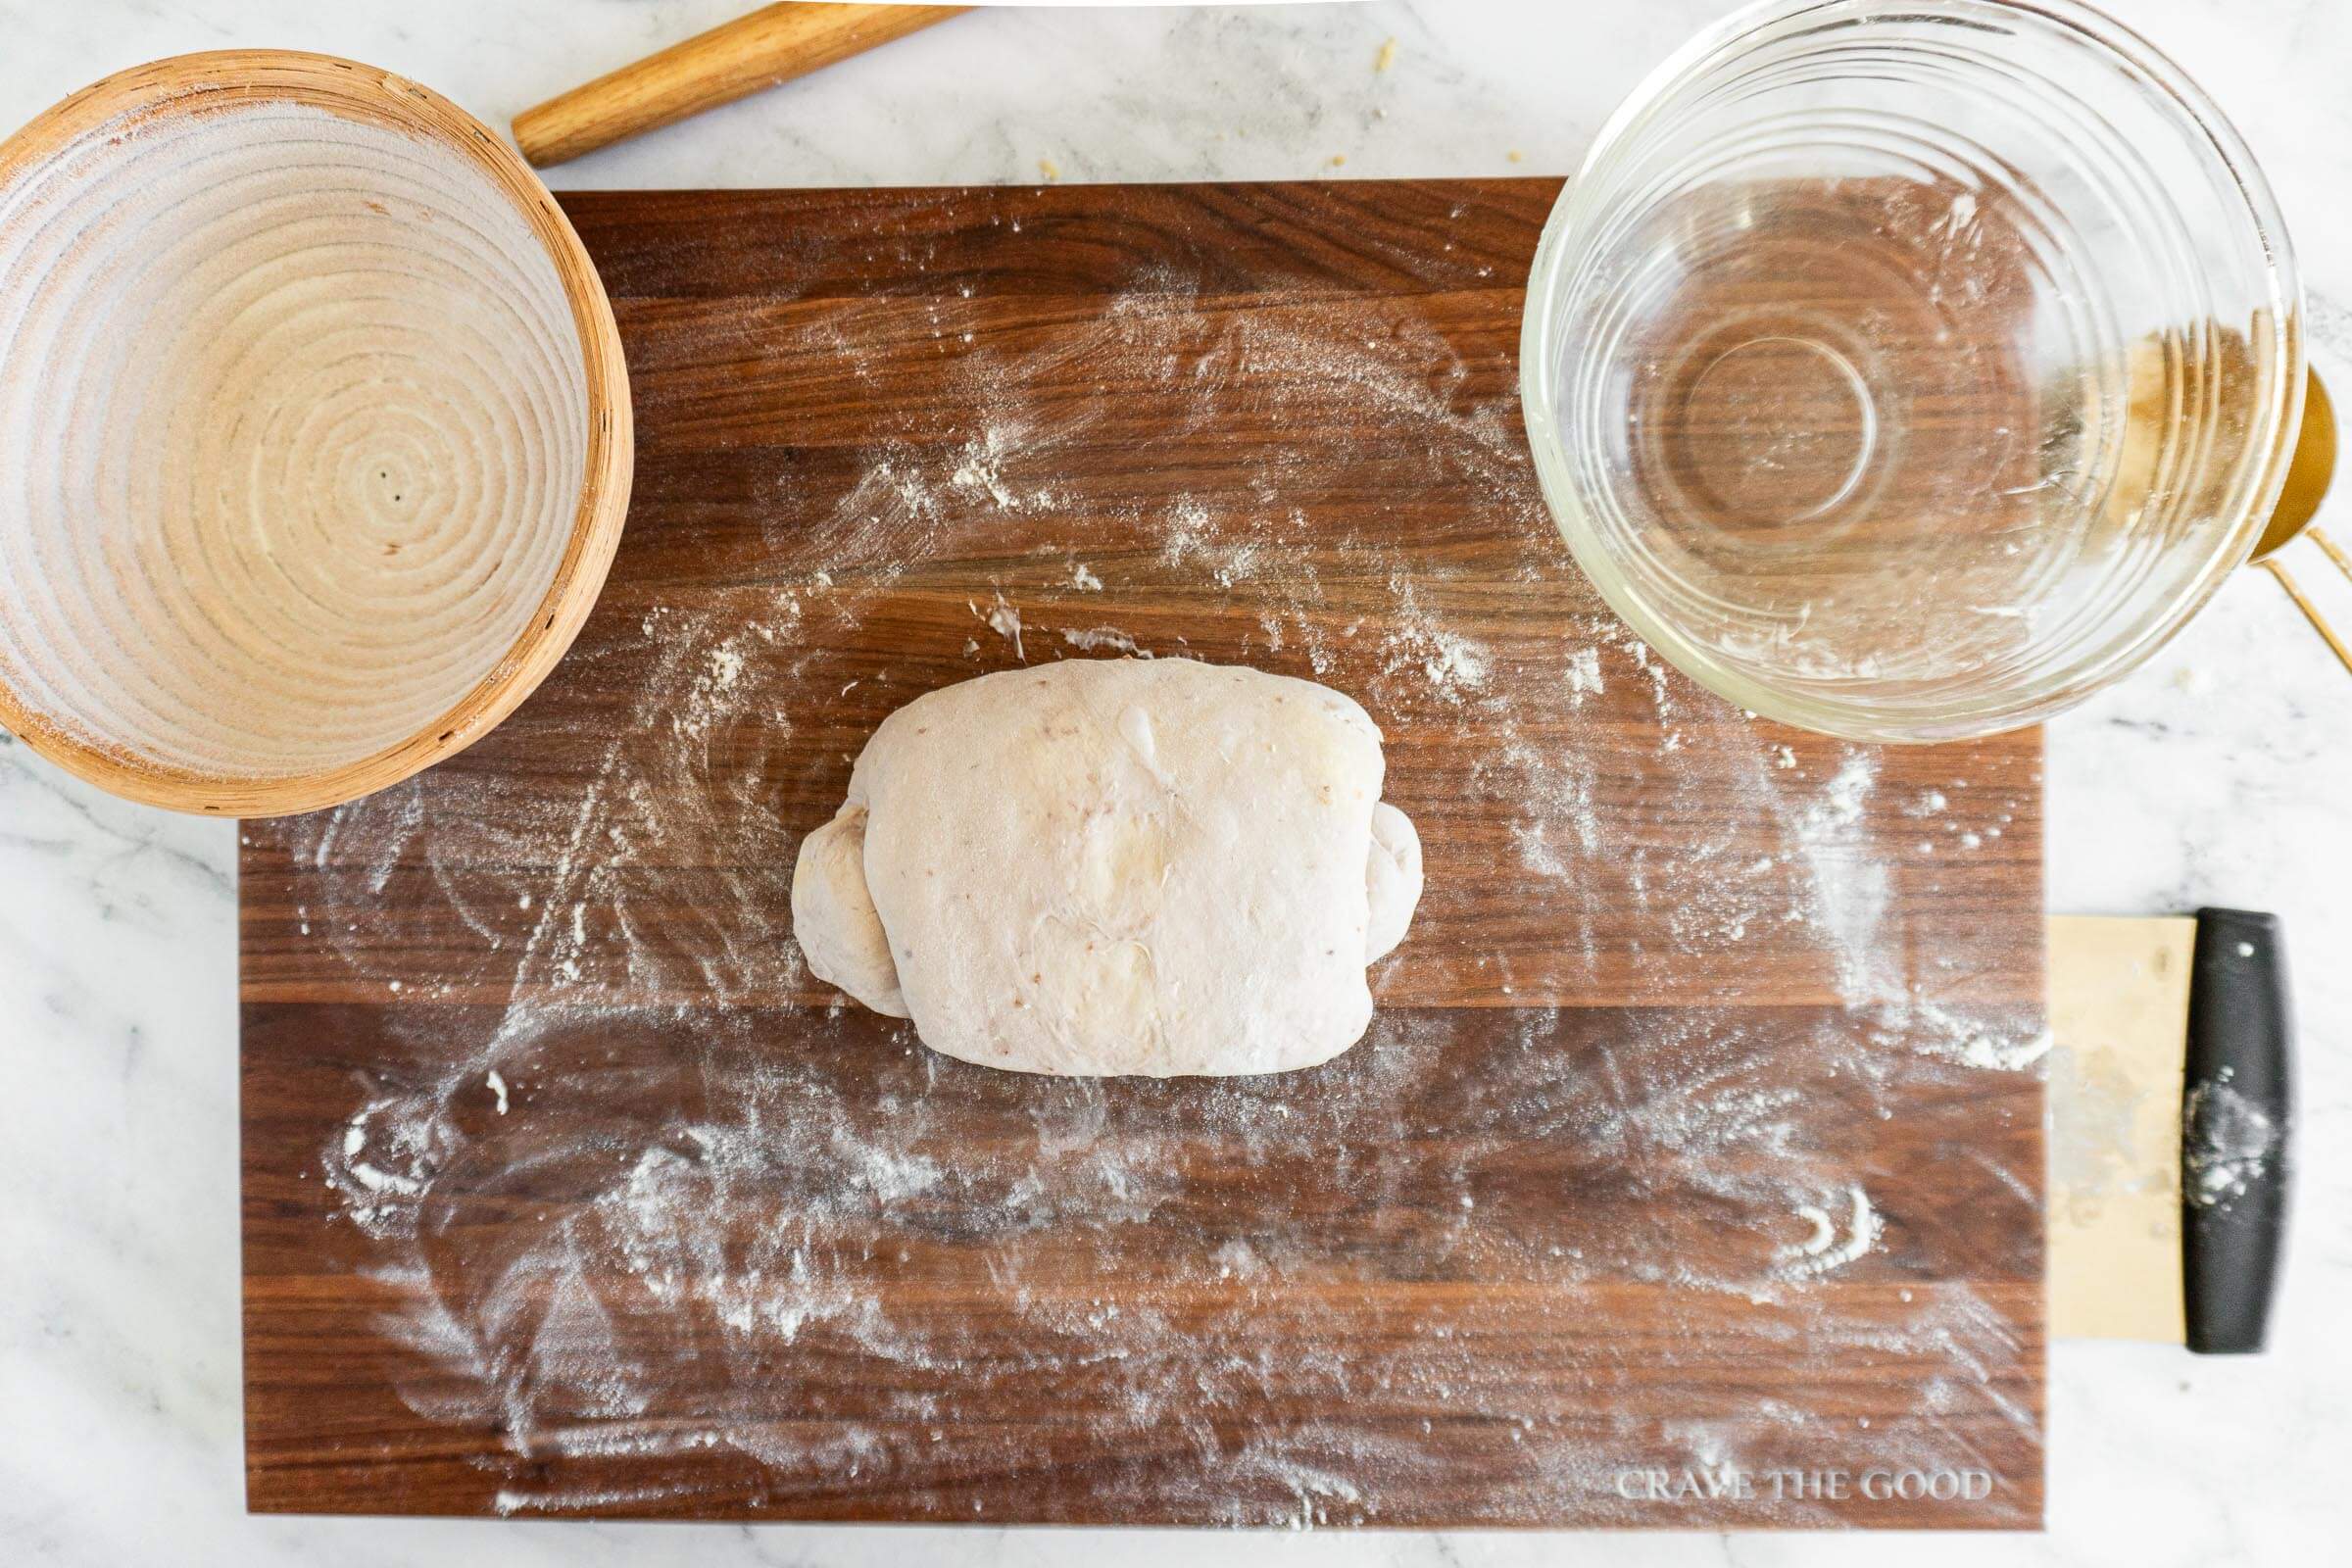
- Step 20: Rotate the dough 90 degrees then roll into a log. Cover with a clean kitchen towel and rest for 30 minutes.
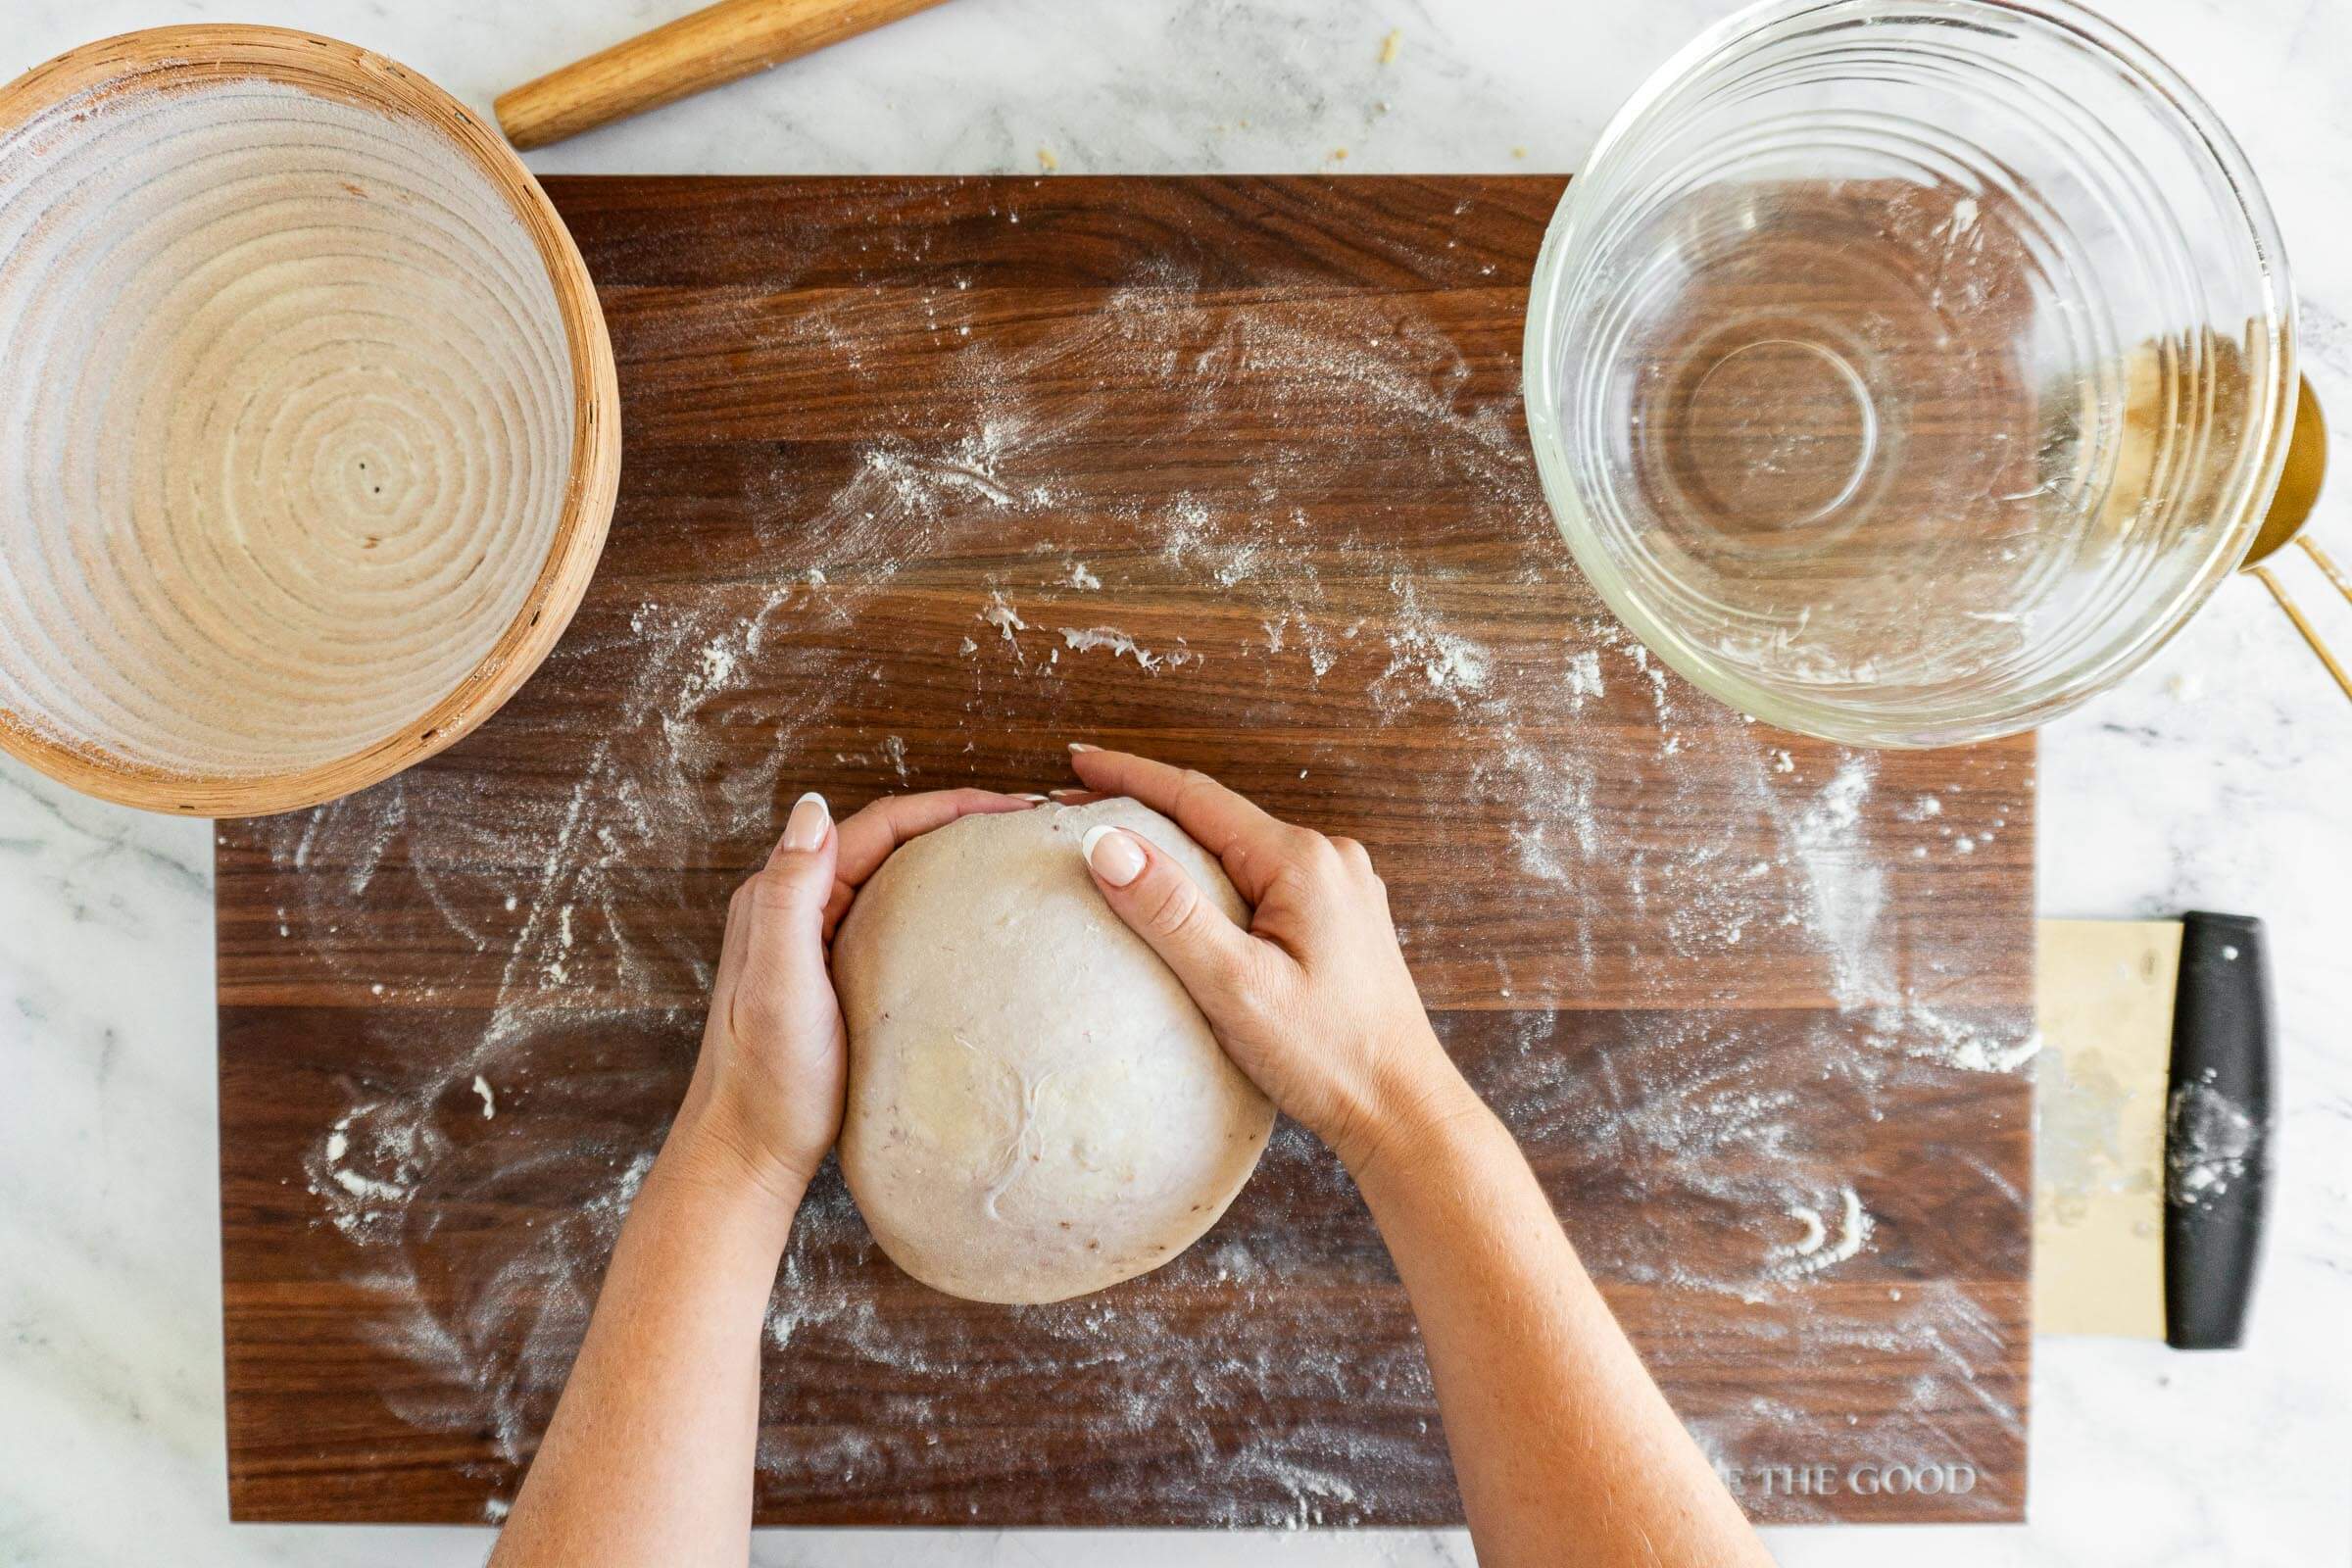
- Step 21: Drag the dough along the work surface using your pinkies under the dough ball to create tension. Continue pulling until a nice round boule forms.
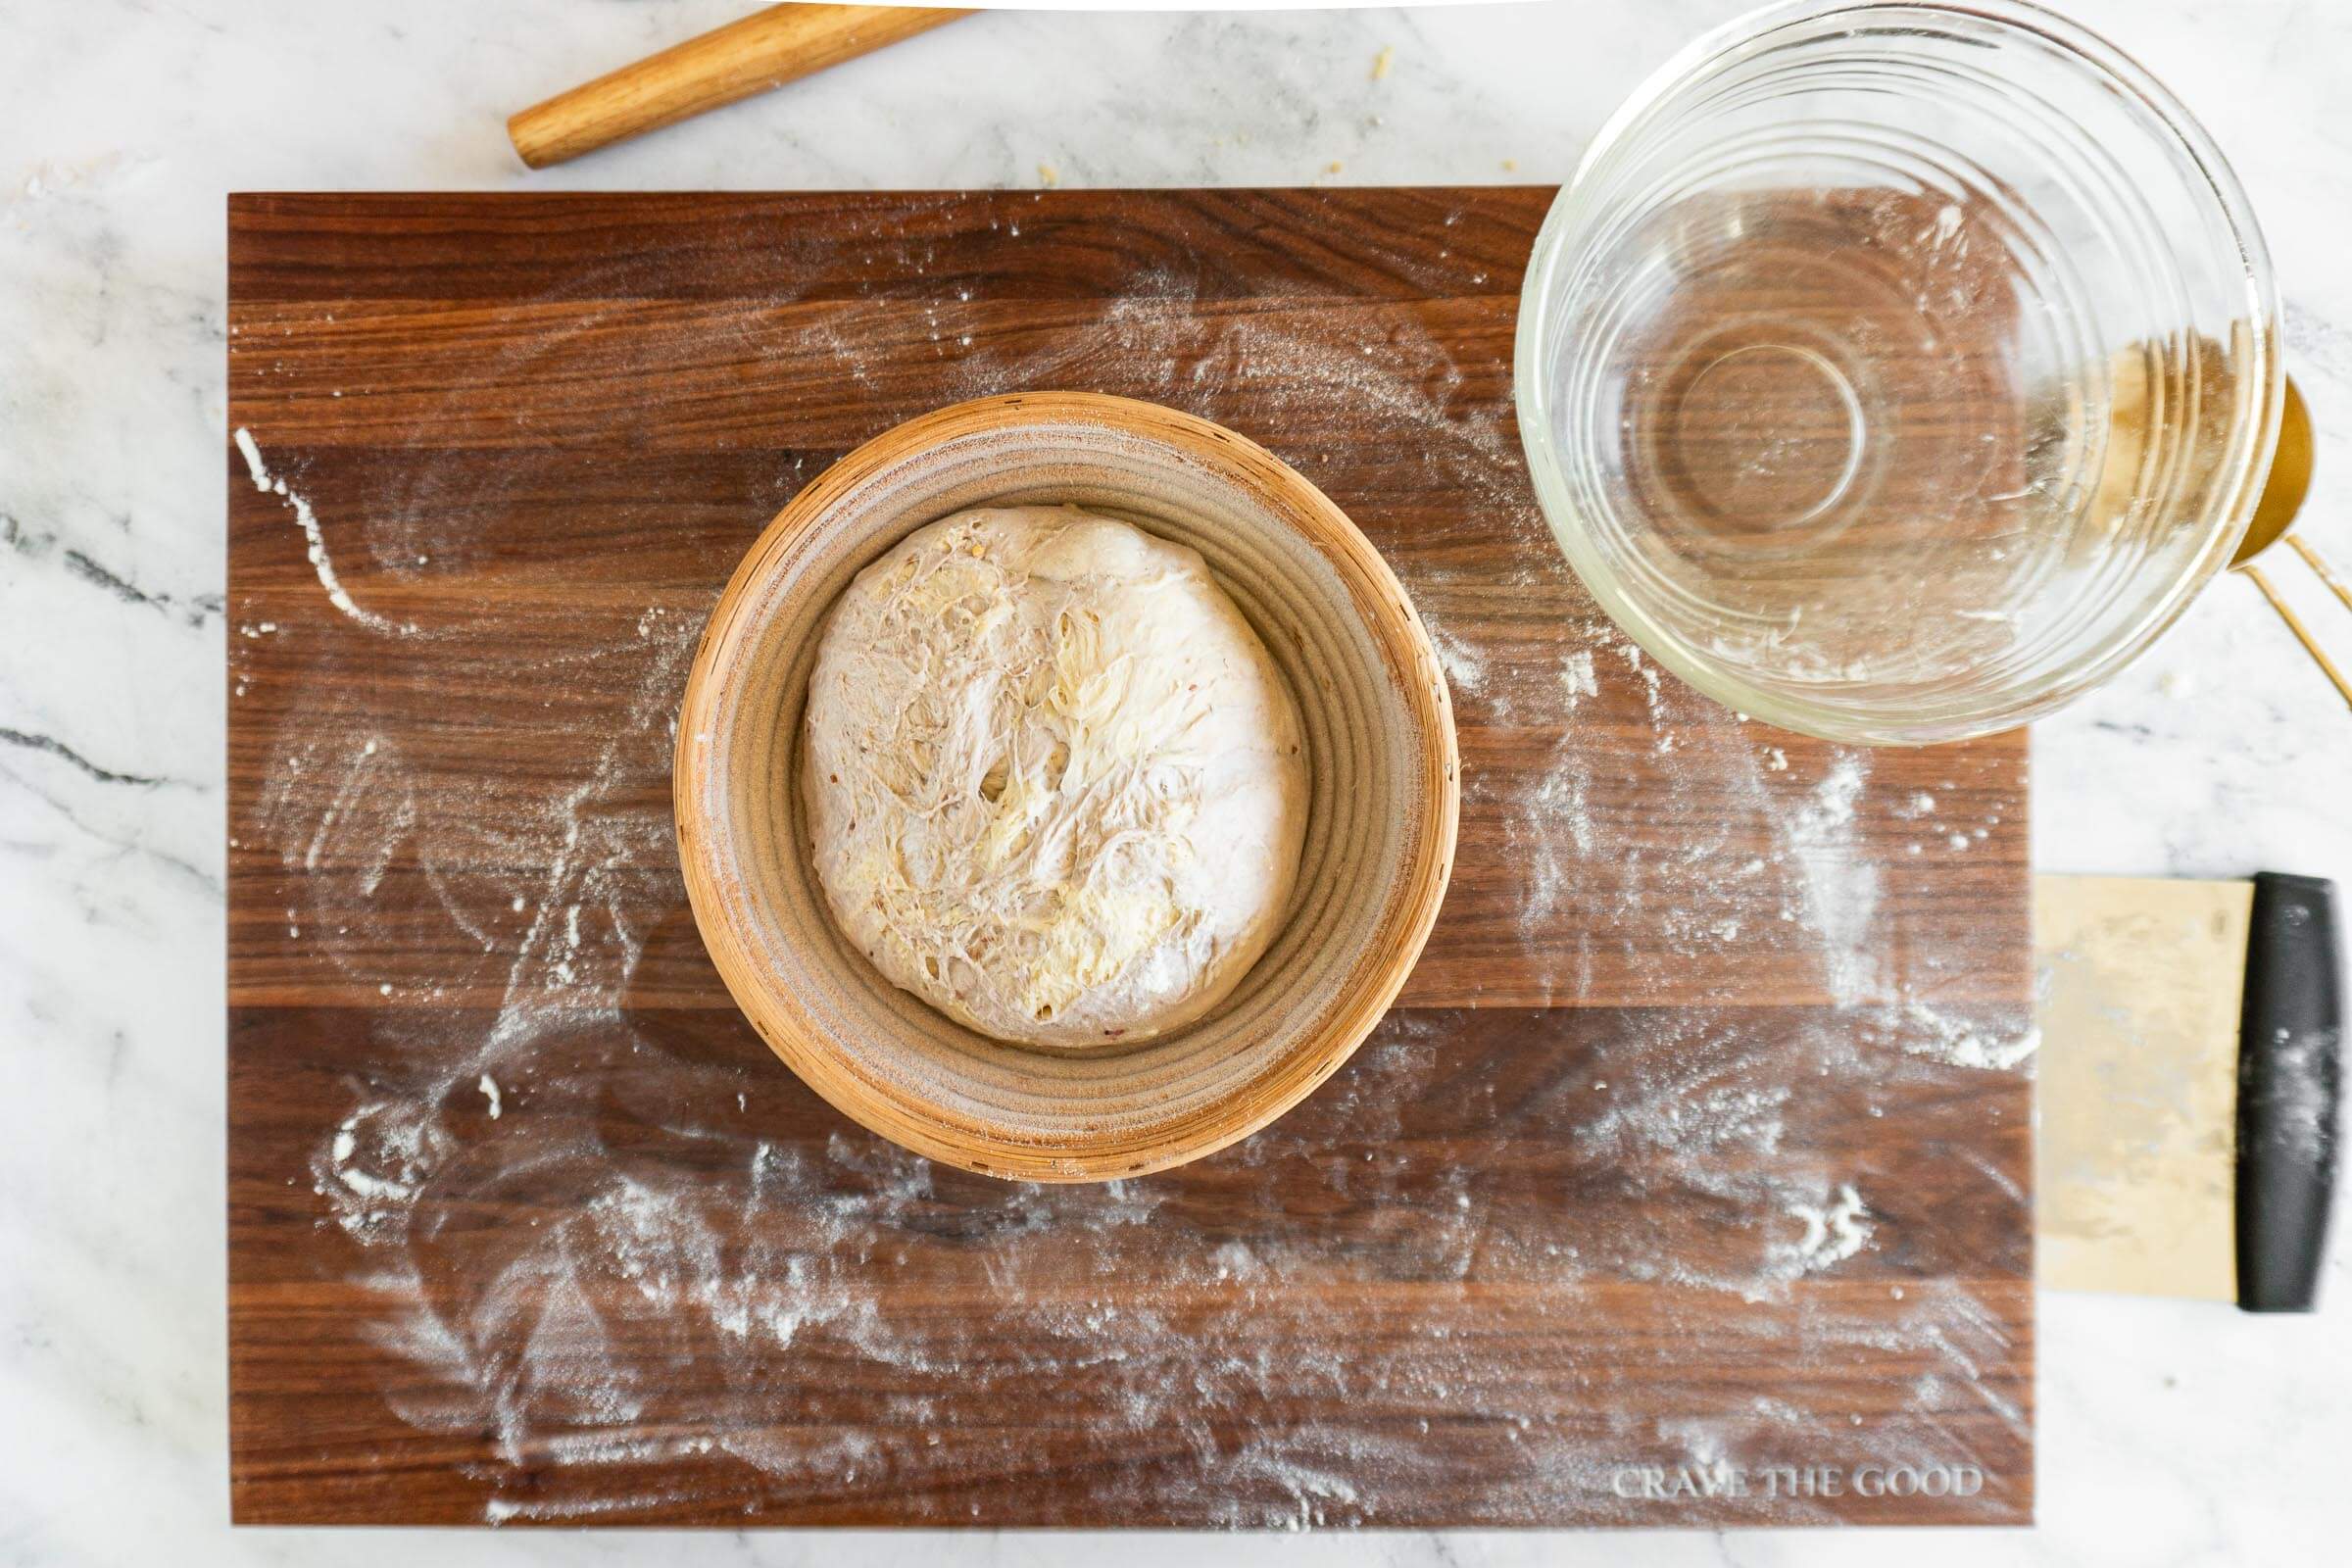
- Step 22: Dust the dough with rice flour then tuck seam side up into a banneton.
Don't have a banneton basket? I have a guide on bannetons and banneton alternatives!
Prove + Cold Retard:
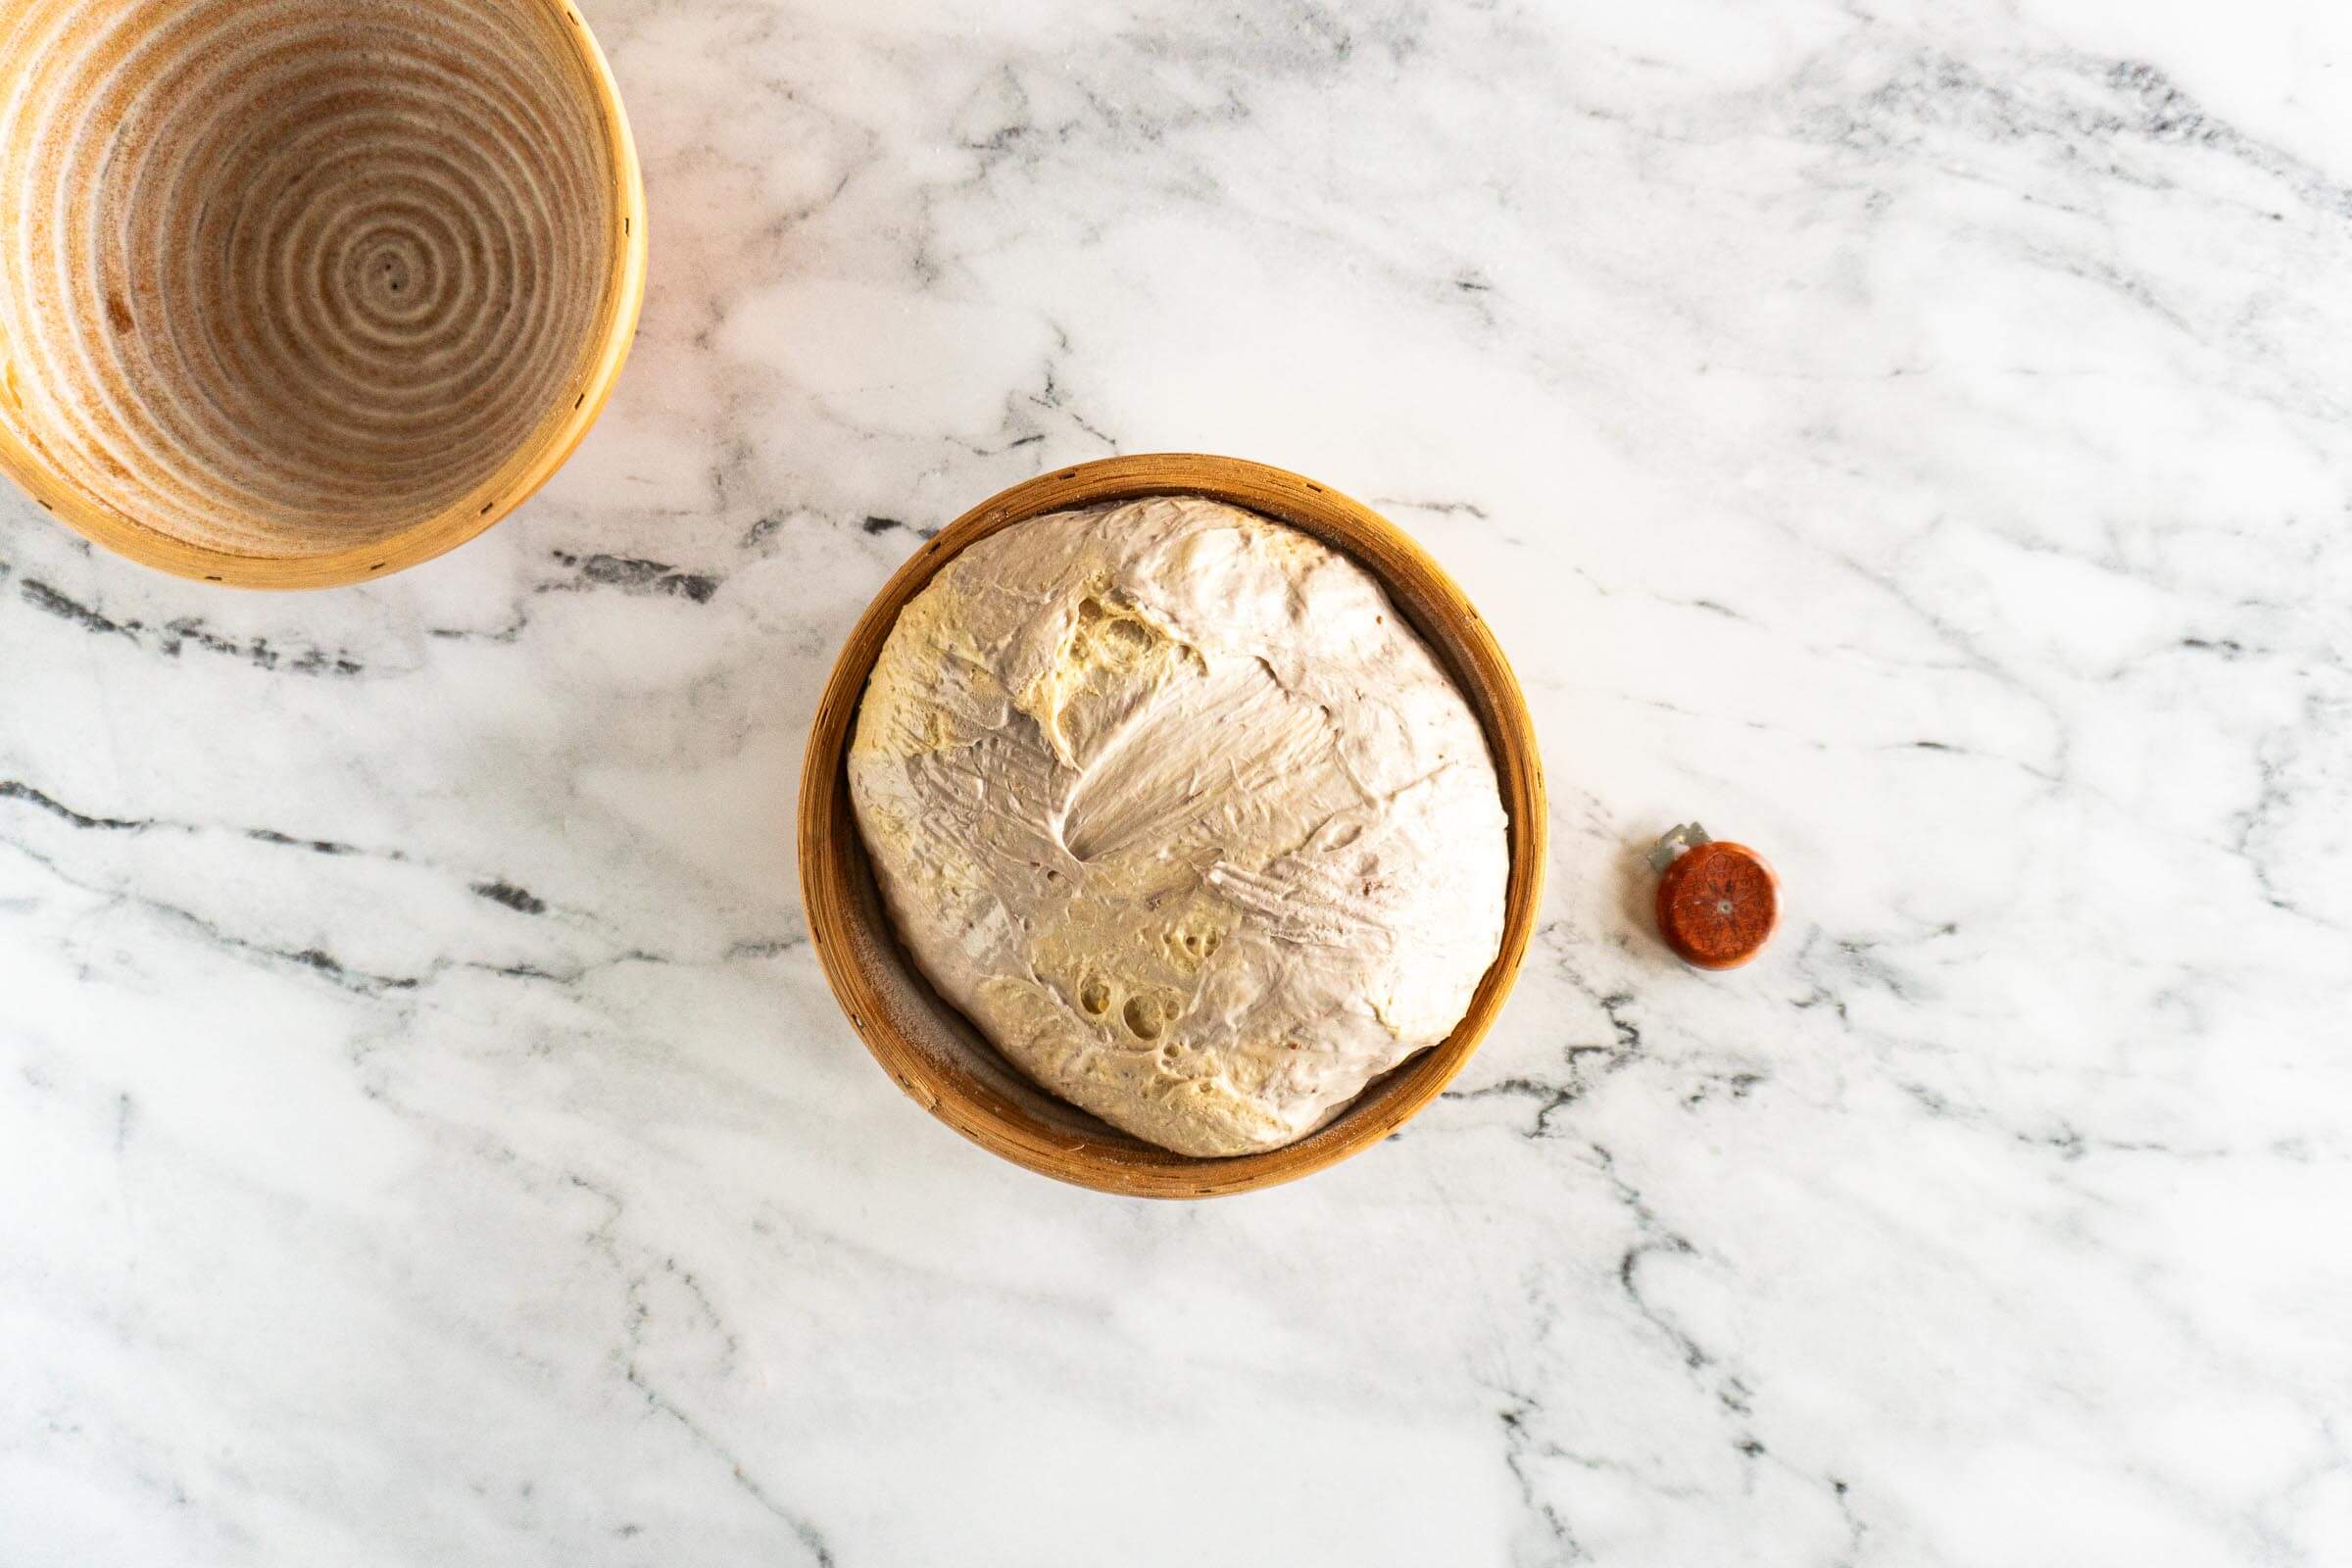
- Step 23: Prove the peanut butter and jam sourdough loaf in the banneton for 2-3 hours in a warm place before covering and placing in fridge to cold retard for up to 3 days. If you want to bake it right after proving, you're welcome to, but the flavor is better after resting in the fridge.
Bake:
- Step 24: Place your dutch oven, cloche, or desired baking dish in the oven and preheat to 450f. If you don't have a dutch oven, I do have a guide on open oven sourdough bread baking.
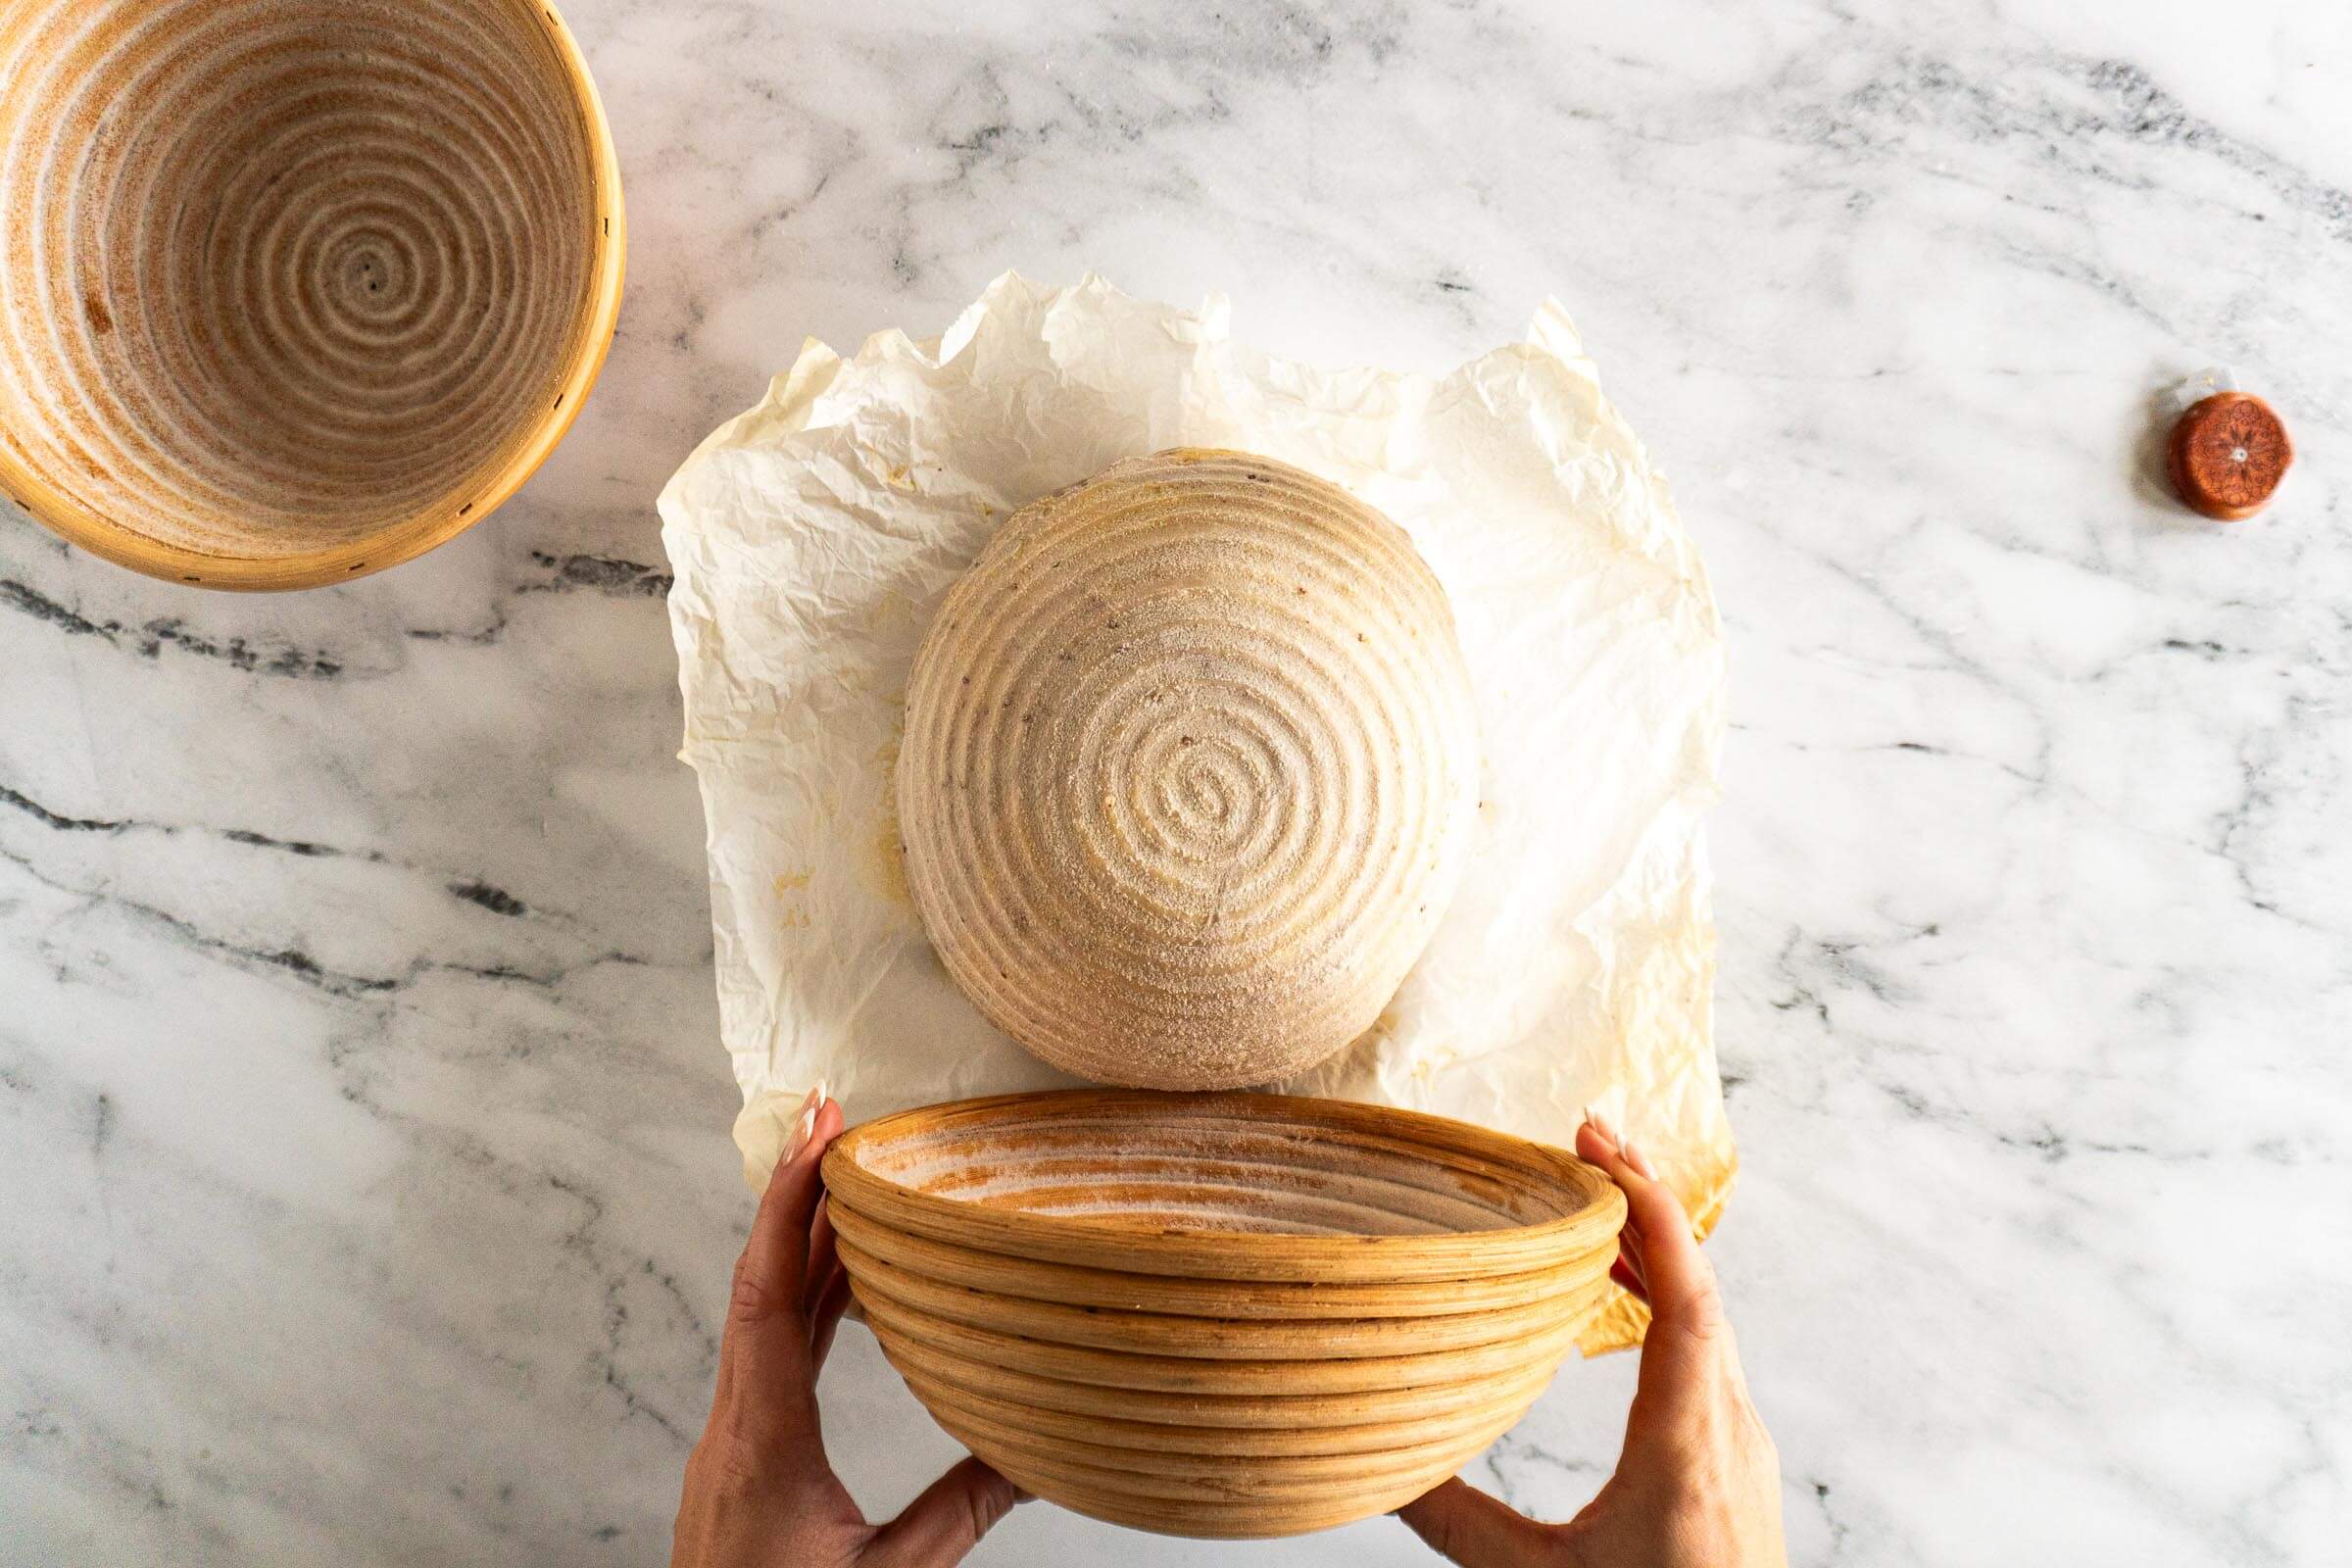
Once the oven is preheated, invert the banneton onto a sheet of parchment paper.
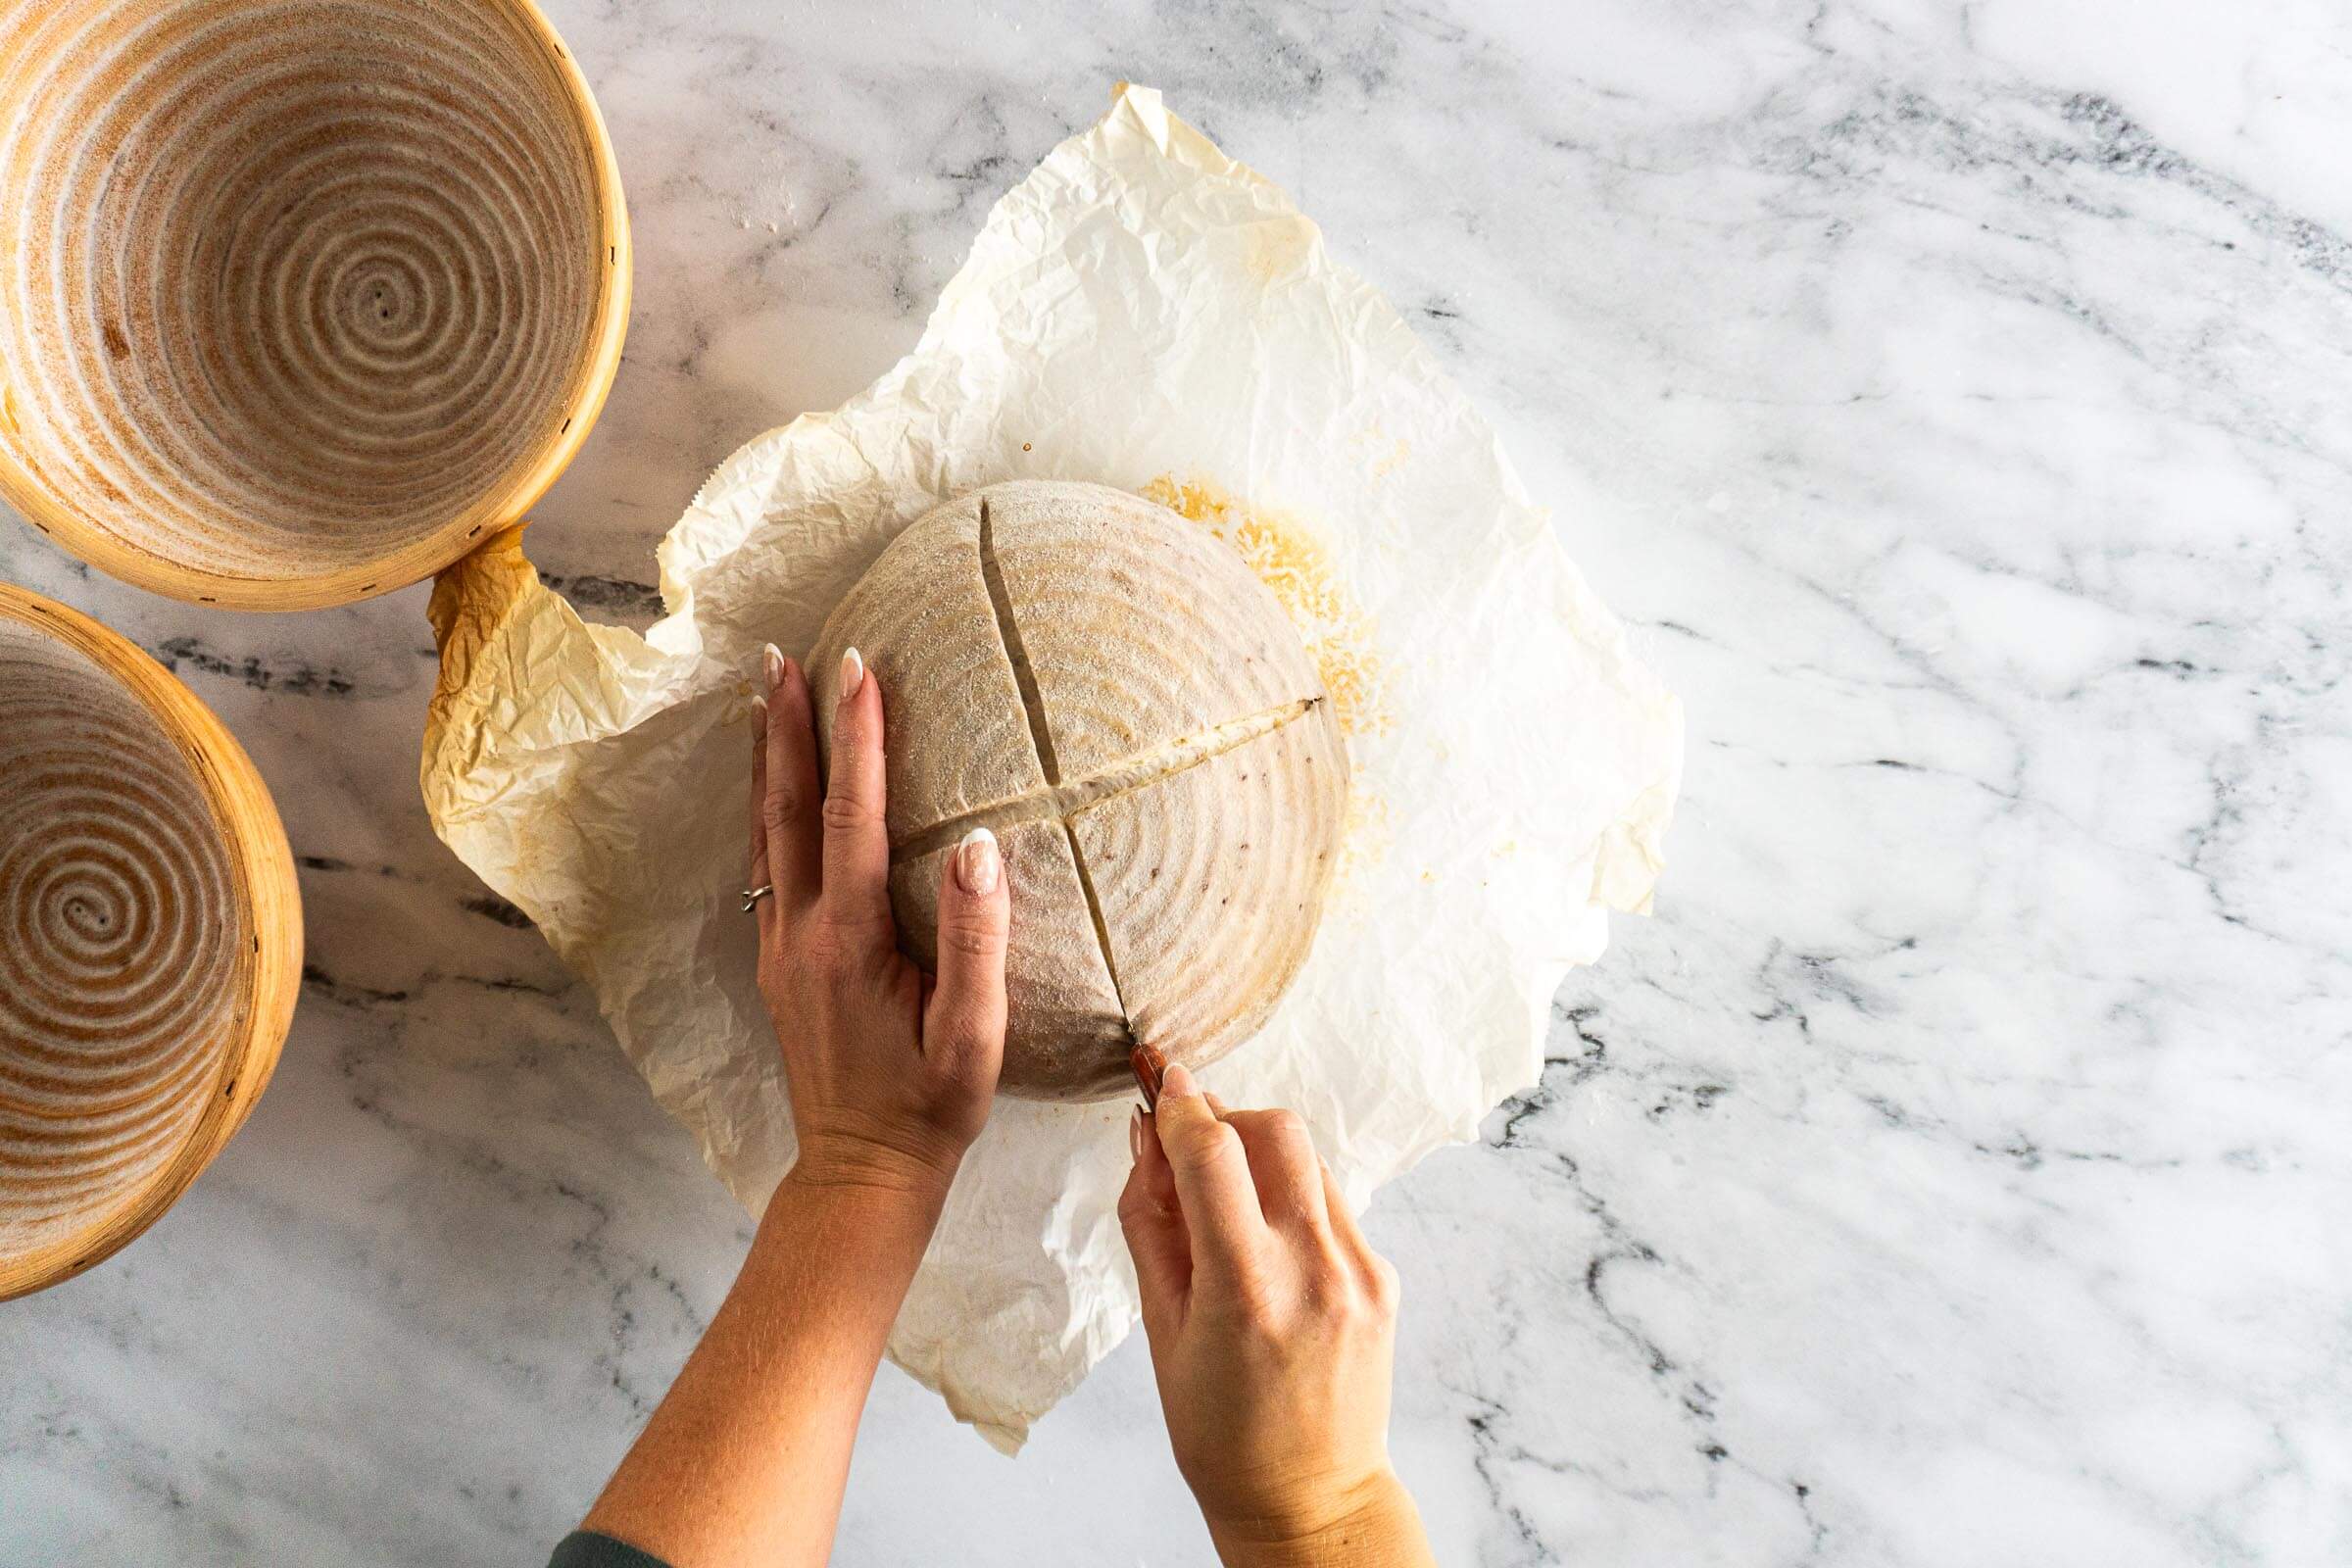
- Step 25: Use a lame, sharp knife, or clean razor blade to score the dough, I like to score my boules in an X, but you can get as fancy as you like!
Carefully remove the dutch oven from the oven, and using the parchment paper as a sling, transfer the sourdough loaf from the counter into the dutch oven.
- Step 26: Bake the dough at 450f covered for 30 minutes and uncovered at 450f for 10-15 minutes, or until the loaf is cooked through and the crust is nicely browned. Bread is cooked once it reaches 205 - 210 degrees Fahrenheit internal temperature.
Cool:
- Step 27: Remove baked bread from the dutch oven and transfer it to a wire mesh cooling rack to cool completely before slicing. I like to leave it for at least 2 hours before slicing, as slicing too soon can affect the crumb and texture of your loaf.
Expert Tips
- Don’t be intimidated by the idea of marbling, it’s really very simple and I’ve shared step-by-step process photos in the body of the post.
- The jam dough is intentionally higher in hydration. The jam dough has smoother ingredients so I wanted to ensure that it would be the outside of the loaf during shaping as it’s less likely to tear. You’ll notice the difference during stretch and fold and lamination, but don’t worry, that’s by design!
- If the peanut butter dough tears during lamination, don’t panic and don’t force it. Cover both doughs with a towel and rest them 5-10 minutes before trying again. The peanut butter dough is naturally tighter due to its fat content and will relax quickly with a short rest.
- Once the two doughs are laminated together, treat them gently. Fold as per the directions. Every extra manipulation blends the layers further and should be avoided if you want distinct layers.
Why This Recipe Works
Hydration is adjusted for the jam dough. Jam contains pectin which can improve leavening volume and density. Increasing hydration in that portion of the dough helps to amplify this effect, enabling us to use the jam flavored dough to wrap around the tighter peanut butter dough.
Layering creates a true marbled crumb. Combining two separate doughs during lamination (rather than adding flavor during stretch and folds or spreading filling) produces distinct, even layers and a marbled appearance rather than a muddy crumb.
Ground peanuts amplify flavor and texture. Adding ground peanuts to the peanut butter dough boosts nutty flavor and creates subtle texture that plain peanut butter alone can't achieve as well as moderates the fat content in the dough.
Peanut Butter Jam Sourdough FAQs
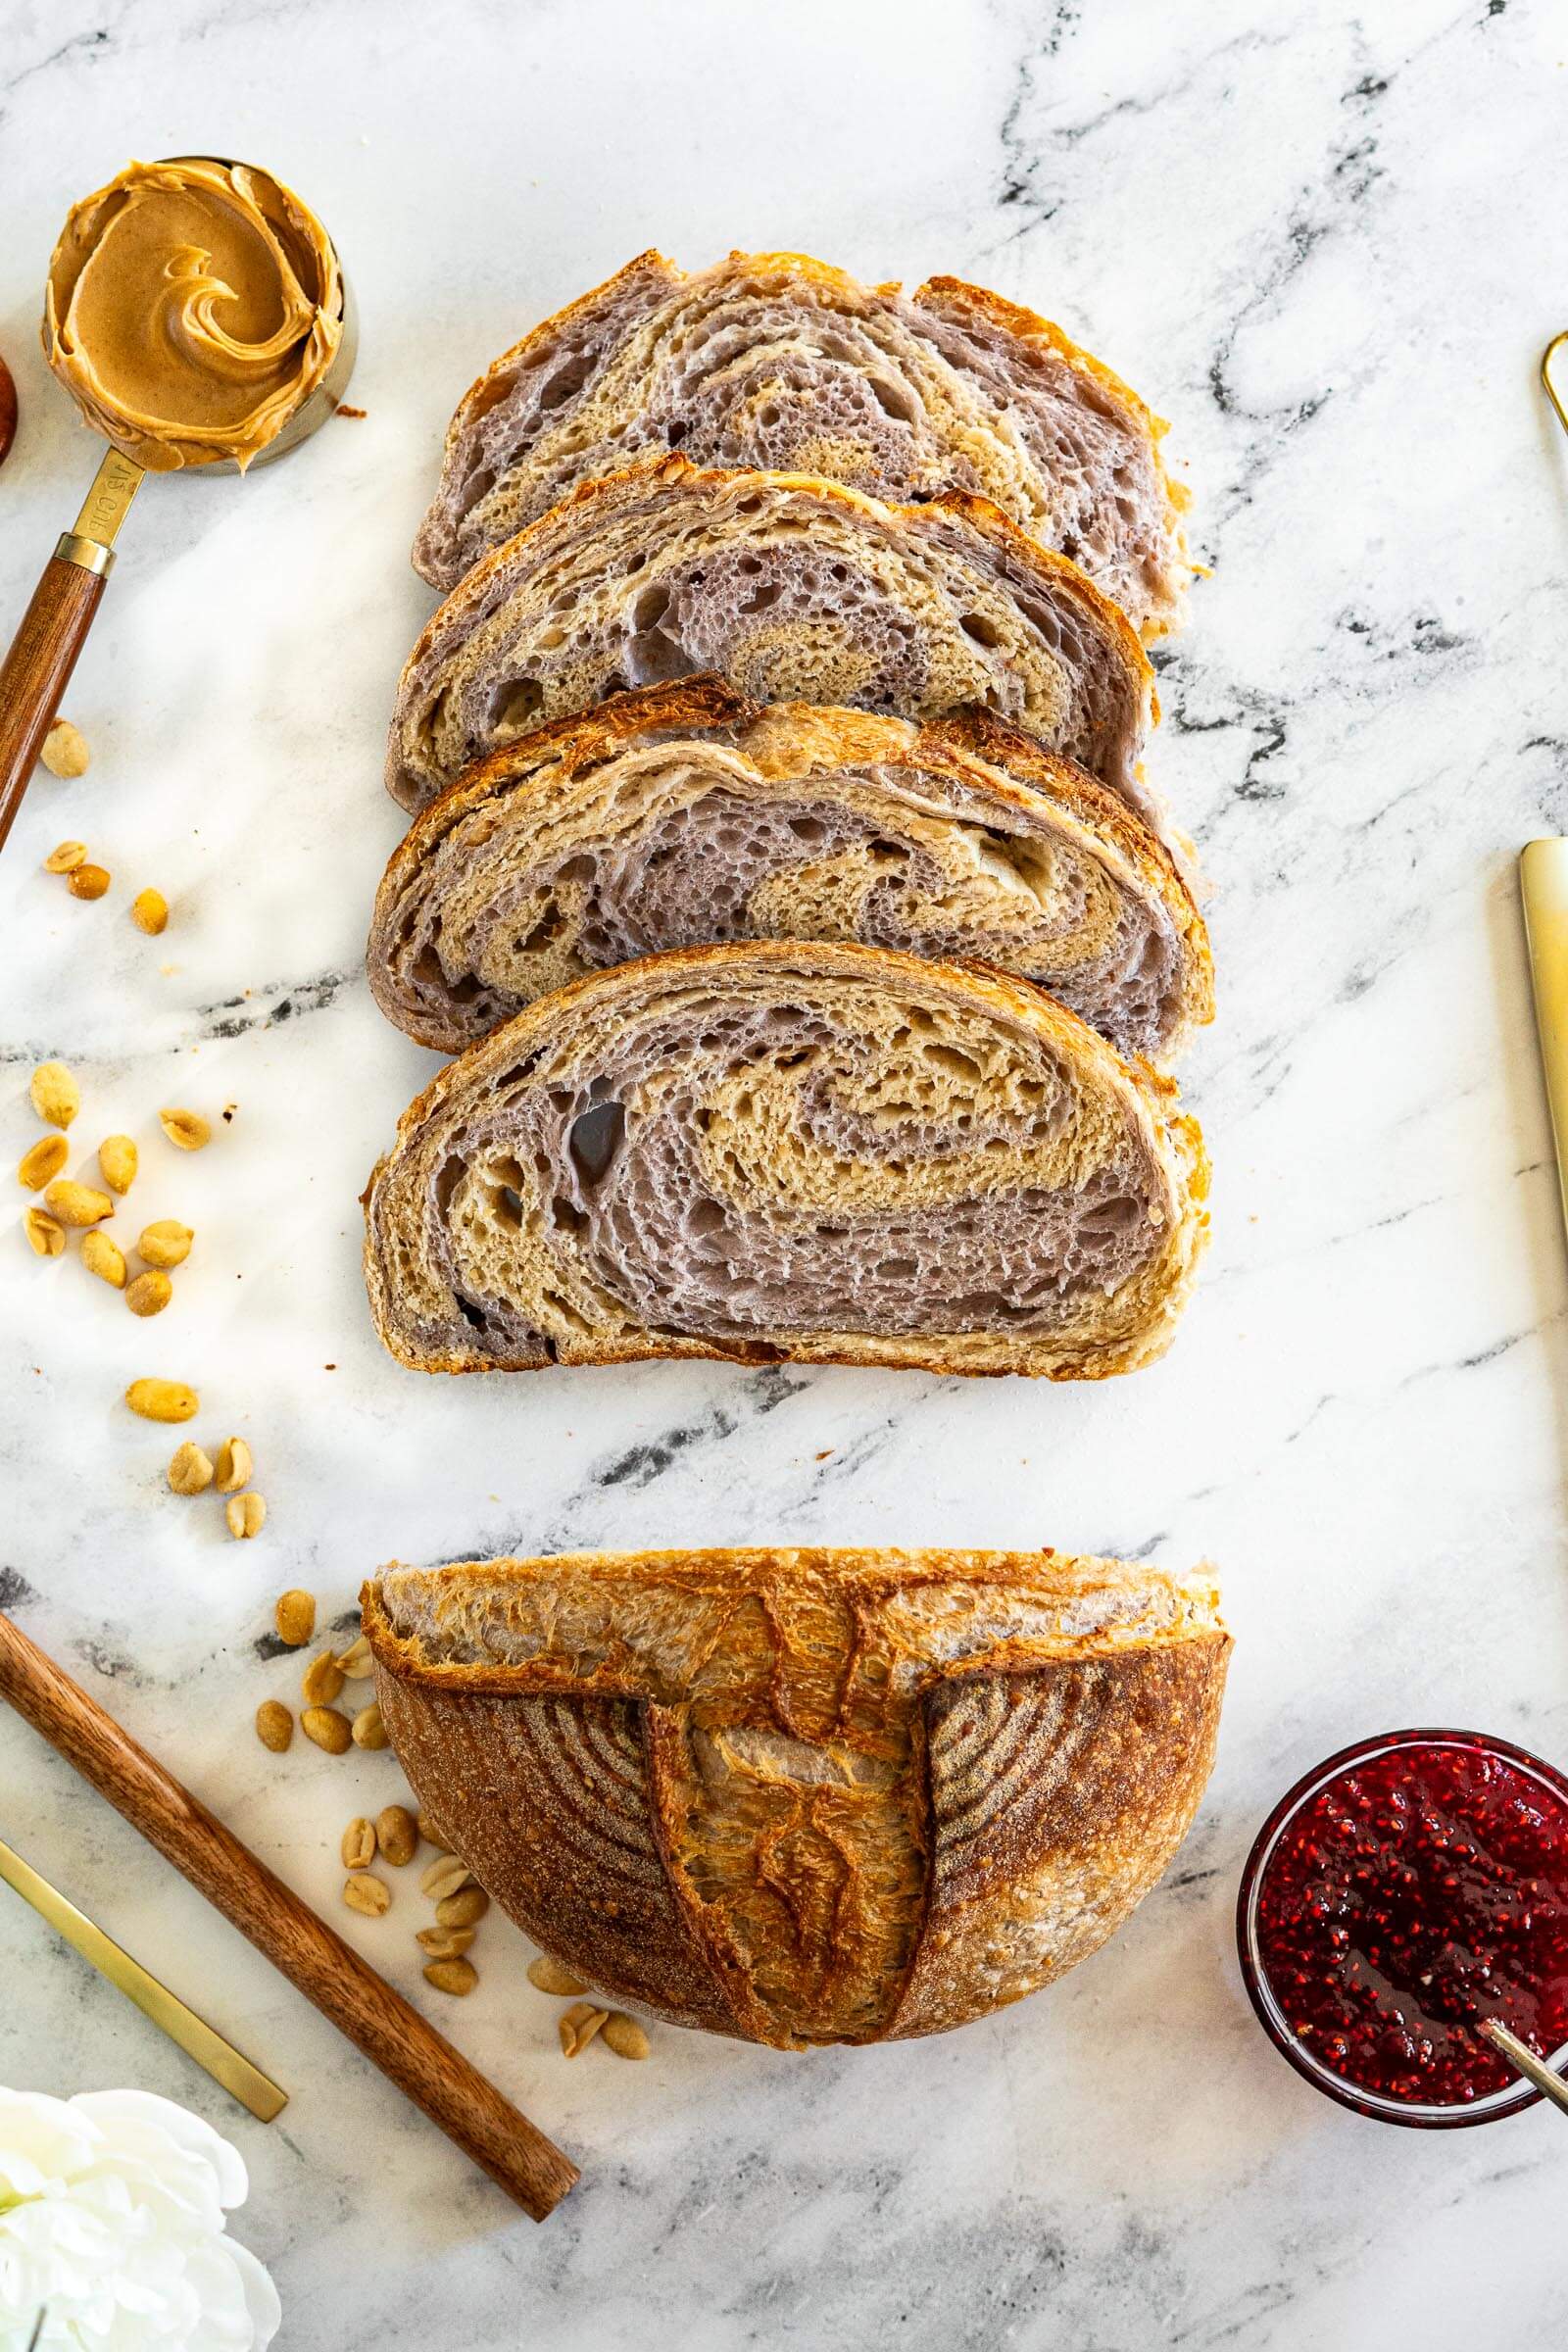
Developing two separate doughs and laminating them together creates genuine color and flavor separation, distinct streaks of peanut butter and jam visible in every slice. Adding both flavors to a single dough, or spreading them as a filling during shaping, blends everything together into a muddy, uniform crumb. The two-dough method is more work but produces a loaf that’s more visually interesting and has clearly defined pockets of flavor rather than an indistinct mix.
Commercial creamy peanut butter (like Kraft or Jif) works best because it has a stable, emulsified consistency. Natural peanut butter with separated oil introduces unpredictable hydration that can make the dough sticky or dense. I have not tried this substitution and wouldn’t recommend it.
Raspberry jam, blackberry jam, or blueberry jam produce the most visually pronounced marbling because their deep pigments survive baking. Blueberry gives a striking purple-blue color. Strawberry produces a soft pink.
Absolutely, just swap the jam for jelly in the same quantities! Opt for a dark colored jelly for more vibrant, visible swirls in the dough. Grape or elderberry jelly will add more color to the dough than say strawberry or peach jelly.
There are a couple of ways to store sourdough bread to help prolong its quality after cutting.
Your loaf can be kept cut side down on a cutting board for up to 12 hours before the crust becomes too crisp. This is our go-to and usually we finish the loaf before the crust gets too crusty! I do recommend transferring it to a bread bag after 16-18 hours though.
Your sourdough loaf can also be frozen. To freeze sourdough bread, cool the loaf to room temperature, then tightly wrap it in plastic wrap, slide it into a bread bag, seal it up, and stick it in the freezer for 1-2 months. To use after freezing, remove the loaf from the freezer, unwrap, and allow it to come to room temperature (1 -2 hours) before slicing and enjoying.
Baker’s Timeline
Day 1:
- 9:00 AM: Combine ingredients to make doughs
- 10:00 AM: First stretch and fold
- 11:00 AM: Second stretch and fold
- 12:00 PM: Laminate, complete bulk ferment
- 3:00 PM: Bulk ferment complete, pre shape
- 3:30 PM: Final shape, place dough into banneton, beginning of the proof
- 6:30 PM: Proofing complete, place banneton in fridge to cold retard
Day 2:
- 9:00 AM: Place dutch oven into oven and preheat oven
- 9:45 AM: Bake PBJ sourdough bread
Serving Suggestions
This bread is just so good, even on it’s own. My teens, aka recipe flavor testers, said “Mom, you served. We ate. No crumbs” which I think is a compliment in the highest order. So you won’t struggle to fit this one in the routine:
- Plain with whipped honey butter
- Toasted with salted butter
- French toast
- Grilled PB &J sandwich
- Toasted with creamed honey
More Flavored Sourdough Recipes

If you tried this Peanut Butter And Jam Sourdough Bread recipe or any other recipe on my blog, please leave a 🌟 star rating and let me know how it went in the comments below. Thanks for visiting!
📖 Printable Recipe
Peanut Butter And Jam Sourdough Bread
Ingredients
Peanut Butter Dough
- 180 g water, room temperature
- 50 g sourdough starter, active
- 40 g peanut butter, smooth
- 60 g roasted salted peanuts
- 250 g bread flour
- 4 g sea salt, coarse
Jam Dough
- 140 g water, room temperature
- 50 g sourdough starter, active
- 50 g raspberry jam
- 250 g bread flour
- 6 g salt
Instructions
Grind The Peanuts:
- Add 60g roasted, salted peanuts to the jar of your blender or food processor and grind until the peanuts are mostly finely ground. They may stick to each other a bit, and the sizing may not be completely consistent, but that's ok, we're just grinding, not trying to make peanut butter!
Make The Dough:
- In a medium bowl, combine 180g of room temperature water, 50g of active sourdough starter, and 40g smooth peanut butter, and whisk until mostly combined. Set aside.
- Add 250g bread flour, 60g ground peanuts, and 4g salt to the bowl and using a danish dough whisk, spatula, or spoon mix until a shaggy dough forms. Knead the dough with your hands until all the dry bits are incorporated.
- Cover the bowl and set aside for 60 minutes.
- Meanwhile, in another medium bowl, combine 140g of room temperature water, 50g of active sourdough starter, and 50g jam, and whisk until mostly combined. Then add 250g bread flour and 6g salt to the bowl and mix until a shaggy dough forms. Knead the dough with your hands until all the dry bits are incorporated.
- Cover the bowl and set aside for 60 minutes.
Stretch And Fold:
- Working one bowl at a time, using damp hands, grab the dough and gently pull it until the flap is long enough to fold over itself, then fold the flap, rotate the bowl 90 degrees, and repeat 3 more times, this is considered a set of stretch and folds. Recover the bowl, and set it aside for 60 minutes.
- Repeat the stretch and fold process 2 times over 2 hours, for a total of 2 sets of stretch and folds each followed by a 60 minute rest.
Laminate + Bulk Ferment:
- Lightly flour a working surface, then working one flavor at a time, turn the dough out of the bowl and carefully press and stretch into a rectangle. If the dough wants to tear, allow it to rest for a few minutes before trying again. Repeat with the other dough. The jam dough is higher hydration, by design, so it should stretch a little further than the peanut butter, ensure it's stretched into a larger rectangle than the peanut butter flavor.
- Carefully lift the peanut butter dough and place it on top of the jam dough, aiming for the jam dough to have at least half an inch of overlap all the way around the peanut butter dough.
- Fold up the bottom third of the dough, then fold the top down, pressing the jam dough together to seal it. Turn the dough sideways and fold up the bottom third then roll it over itself.
- Use a bench scraper to pick up the dough and place it into a large bowl. Cover the dough and bulk ferment for 3 hours.
Pre-Shape and Shape:
- Observe your dough, at this point, the dough should have risen in the bowl, and have a smooth surface with visible bubbles. If the dough is domed in the bowl it is ready to work with, if the dough is flat it may need more time in the bulk ferment.
- Uncover the dough and transfer to a lightly floured work surface or countertop. Gently press and spread the dough into a large rectangle.
- Fold up the bottom third of the dough as though you were folding a letter then fold the top third downward. Rotate the dough 90 degrees then roll into a log. Cover with a clean kitchen towel and rest for 30 minutes.
- Drag the dough along the work surface using your pinkies under the dough ball to create tension. Continue pulling until a nice round boule forms.
- Dust the dough with rice flour then tuck seam side up into a banneton.
Prove + Cold Retard:
- Prove the peanut butter and jam sourdough loaf in the banneton for 2-3 hours in a warm place before covering and placing in fridge to cold retard for up to 3 days. If you want to bake it right after proving, you're welcome to, but the flavor is better after resting in the fridge.
Bake:
- Place your dutch oven, cloche, or desired baking dish in the oven and preheat to 450f.
- Once the oven is preheated, invert the banneton onto a sheet of parchment paper. Use a lame, sharp knife, or clean razor blade to score the dough.
- Carefully remove the dutch oven from the oven, and using the parchment paper as a sling, transfer the sourdough loaf from the counter into the dutch oven.
- Bake the dough at 450f covered for 30 minutes and uncovered at 450f for 10-15 minutes, or until the loaf is cooked through and the crust is nicely browned. You can test the doneness of the loaf with an instant-read thermometer. Bread is cooked once it reaches 205 - 210 degrees Fahrenheit internal temperature.
Cool:
- Remove baked bread from the dutch oven and transfer it to a wire mesh cooling rack to cool completely before slicing. I like to leave it for at least 2 hours before slicing, as slicing too soon can affect the crumb and texture of your loaf.
Notes
Expert Tips
- Don't be intimidated by the idea of marbling, it's really very simple and I've shared step-by-step process photos in the body of the post.
- The jam dough is intentionally higher in hydration. The jam dough has smoother ingredients so I wanted to ensure that it would be the outside of the loaf during shaping as it's less likely to tear. You'll notice the difference during stretch and fold and lamination, but don't worry, that's by design!
- If the peanut butter dough tears during lamination, don't panic and don't force it. Cover both doughs with a towel and rest them 5-10 minutes before trying again. The peanut butter dough is naturally tighter due to its fat content and will relax quickly with a short rest.
- Once the two doughs are laminated together, treat them gently. Fold as per the directions. Every extra manipulation blends the layers further and should be avoided if you want distinct layers.


I just made this loaf and it is super moist and tasty. I can definitely taste the peanut butter, the jam adds a very light touch of sweetness. I used Saskatoon jam ,similar to blueberry jam, I did not get a nice swirl like yours. Basically all the same color on the finished baked loaf. There is a slight error in your recipe, the ingredients state 160 grams water for the jam dough portion, but the written portion says 140 grams. I used the 140 grams. Overall, I am pleased with this flavour combination, but next time I may add some dried fruit to the jam portion.
Ahh! Good catch, I am going to fix that right now!
Happy you enjoyed the recipe though!
My kids love this bread for morning peanut butter and jam toast! I personally love it thick sliced and smeared with creamed honey!
I’m hoping to try making this today. I’m curious why you don’t bulk ferment and then laminate/shape and fold to go into the fridge for cold ferment?
Also have you ever added peanuts during the lamination?
Hey Beth, I feel like the marbling is more clearly defined with lamination before bulk fermentation. You could try it the other way around, but that’s just how I like to do it 🙂 I haven’t added more peanuts during the lamination but you definitely could!
Hi! I’m making this right now and am waiting to do the second stretch and fold. Am I supposed to let it sit for another hour before laminating or do that right after this stretch and fold ? Thank you so much !
Hi! You’ll want to let it rest after the scratch and fold for 60 minutes then laminate 🙂
Can I do this without the crushed peanuts? Should I add more pb if so?
Hey Kelly, I haven’t tested this but if you try it, please let me know how it turns out!
Is there a total of 3 sets of stretch and folds (repeated 2 more times after the initial) or 2 sets (repeated only once after the initial)?
Can’t wait to try it!
Hey Derek, it’s twice total. We’re doing a lot of dough manipulation during the lamination stage so this dough doesn’t require a 3rd set! Hope you enjoy!