
No Milk Biscuits

Tender, flaky, and made without milk or buttermilk, these no milk biscuits come together easily and are on the table in under an hour. The secret to their golden, tender layers? Cold butter and a light touch with the dough.
These biscuits are irresistible when smothered with homemade raspberry jam, creamed honey, or served alongside a cross rib roast and gravy.

Craving The Recipe Details?
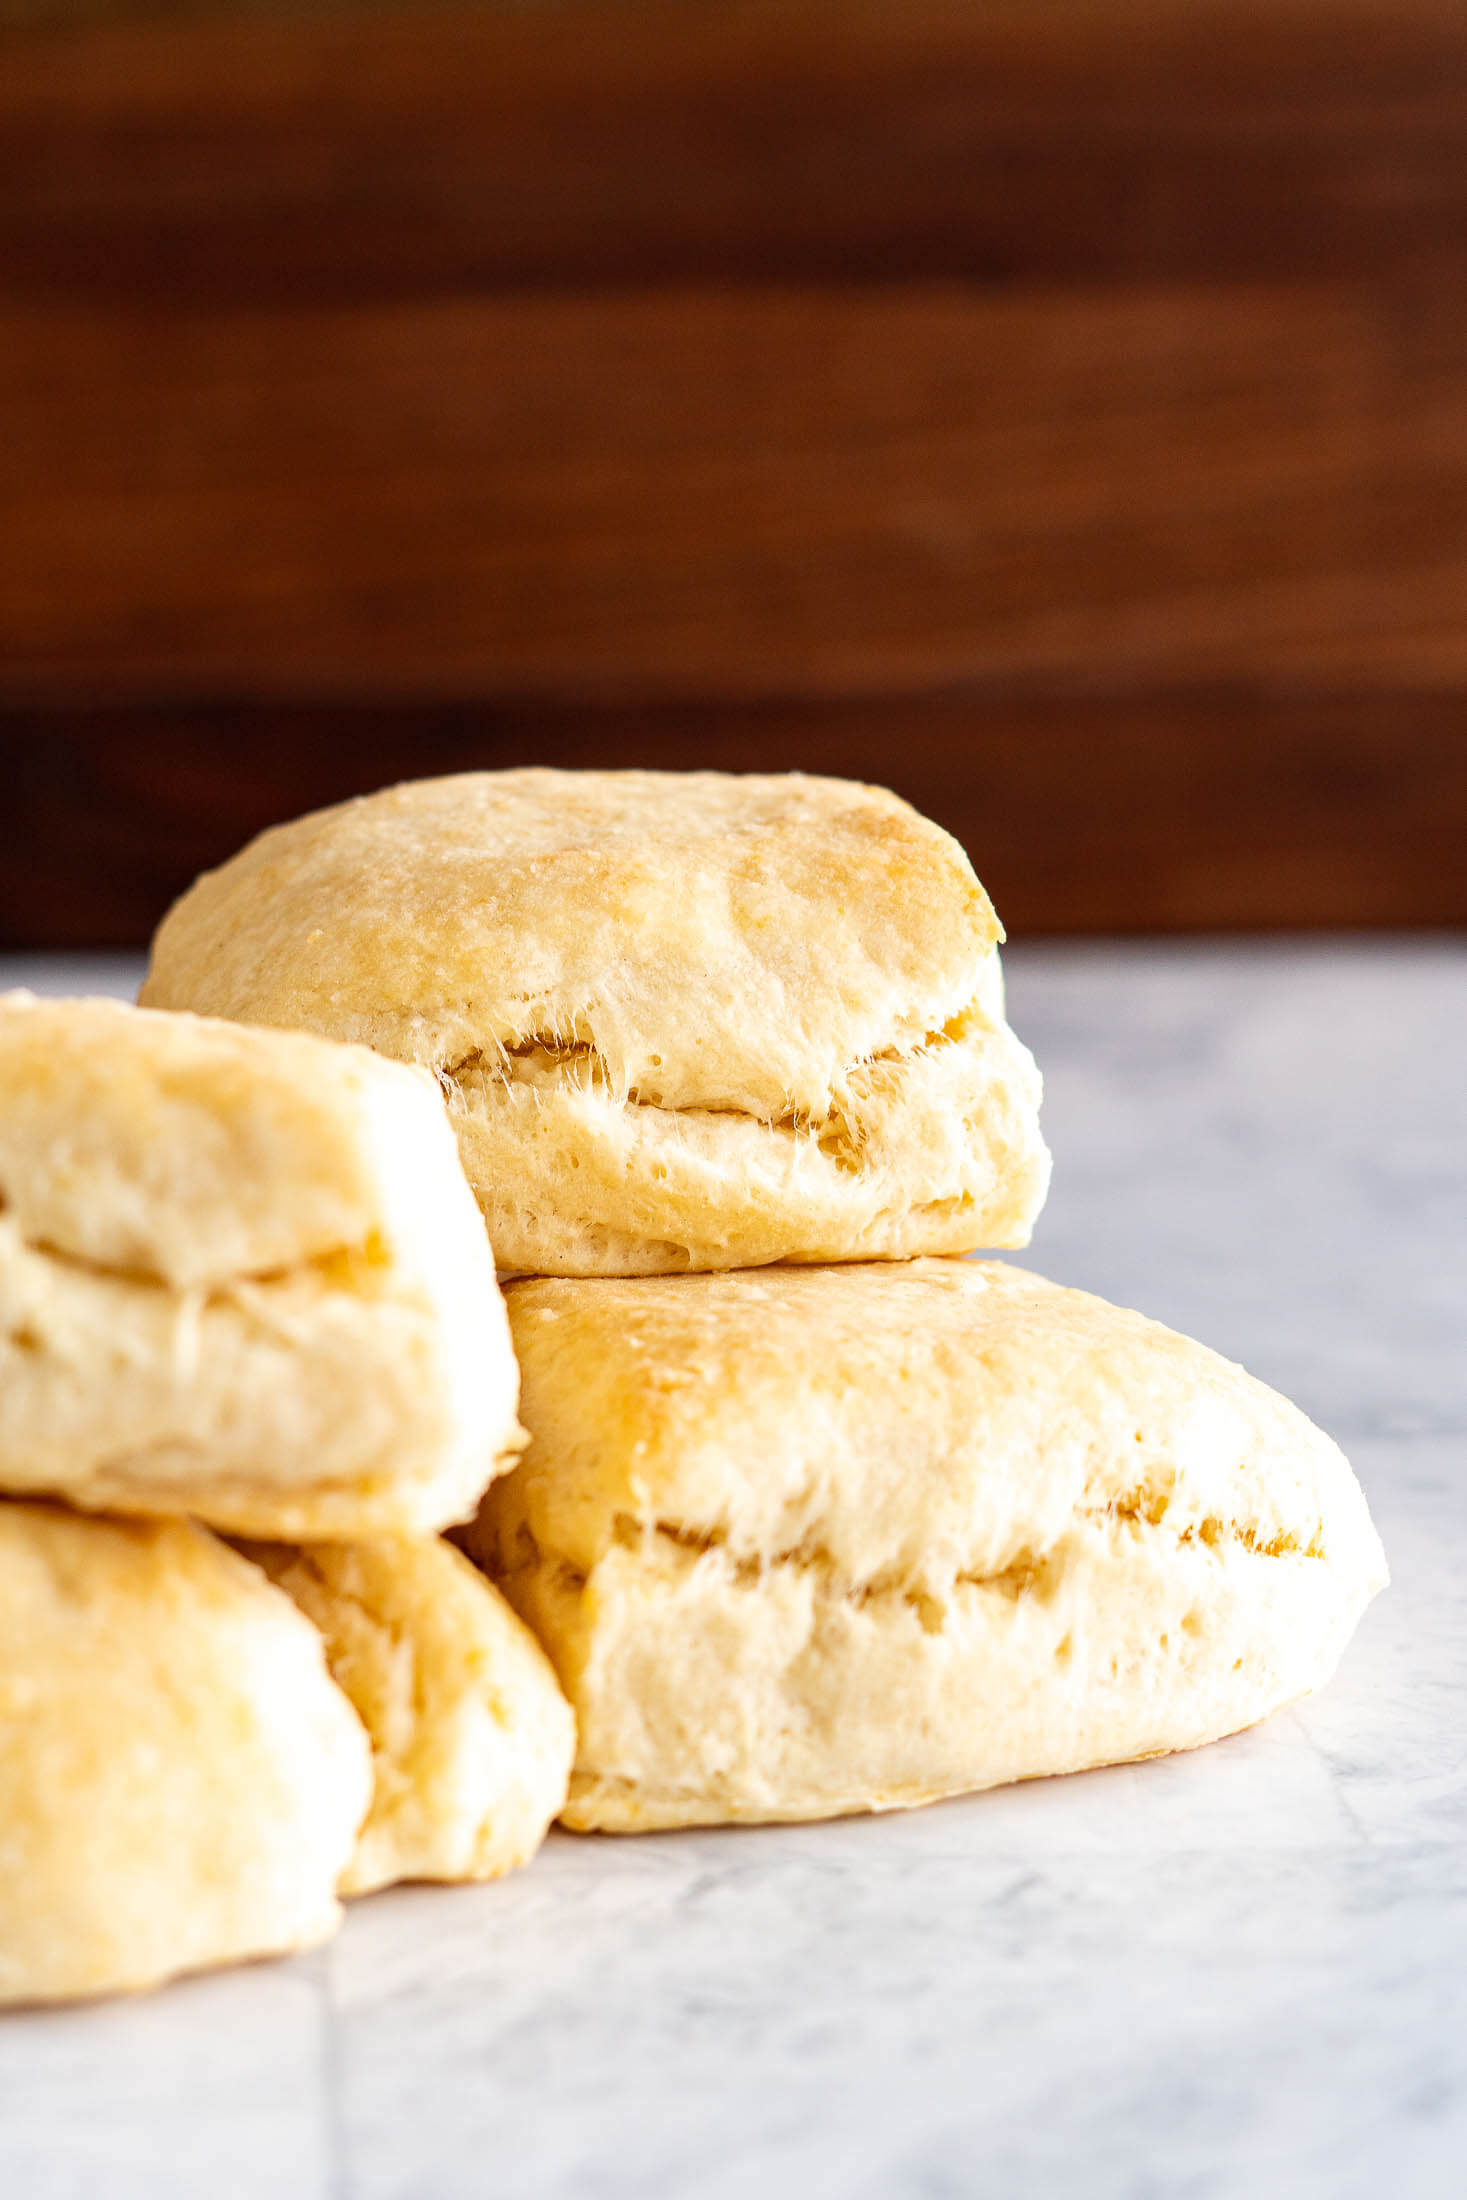
What it is: Fluffy, golden homemade biscuits made without milk or buttermilk. This recipe uses cold butter for tender, flaky layers.
Why you’ll love it: They’re buttery, soft, and tender with crisp golden edges – and you can have them on the table in under an hour!
How to make it: Cut cold butter into flour, baking powder, and salt, then add cold water and mix until the dough just comes together. Shape, fold, chill, and bake till golden.
Love biscuits but don’t have any milk? I’ve got you! This recipe started with a classic buttermilk biscuit, then I tweaked it for people like me – whose kids have a remarkable talent for drinking all the milk!
Serve them warm alongside scrambled eggs and home-smoked bacon for a hearty breakfast spread, or split them open and slather with no pectin peach jam, homemade blackberry jam, or whipped sweet butter. And when dinner calls for something hearty? They’re perfect for soaking up creamy potato bacon soup, topping a chicken pot pie, or serving alongside smoked brisket chili for a stick to your ribs kind of dinner.
This milk free biscuit recipe is dedicated to tweaking.
Jump to:
Key Ingredients
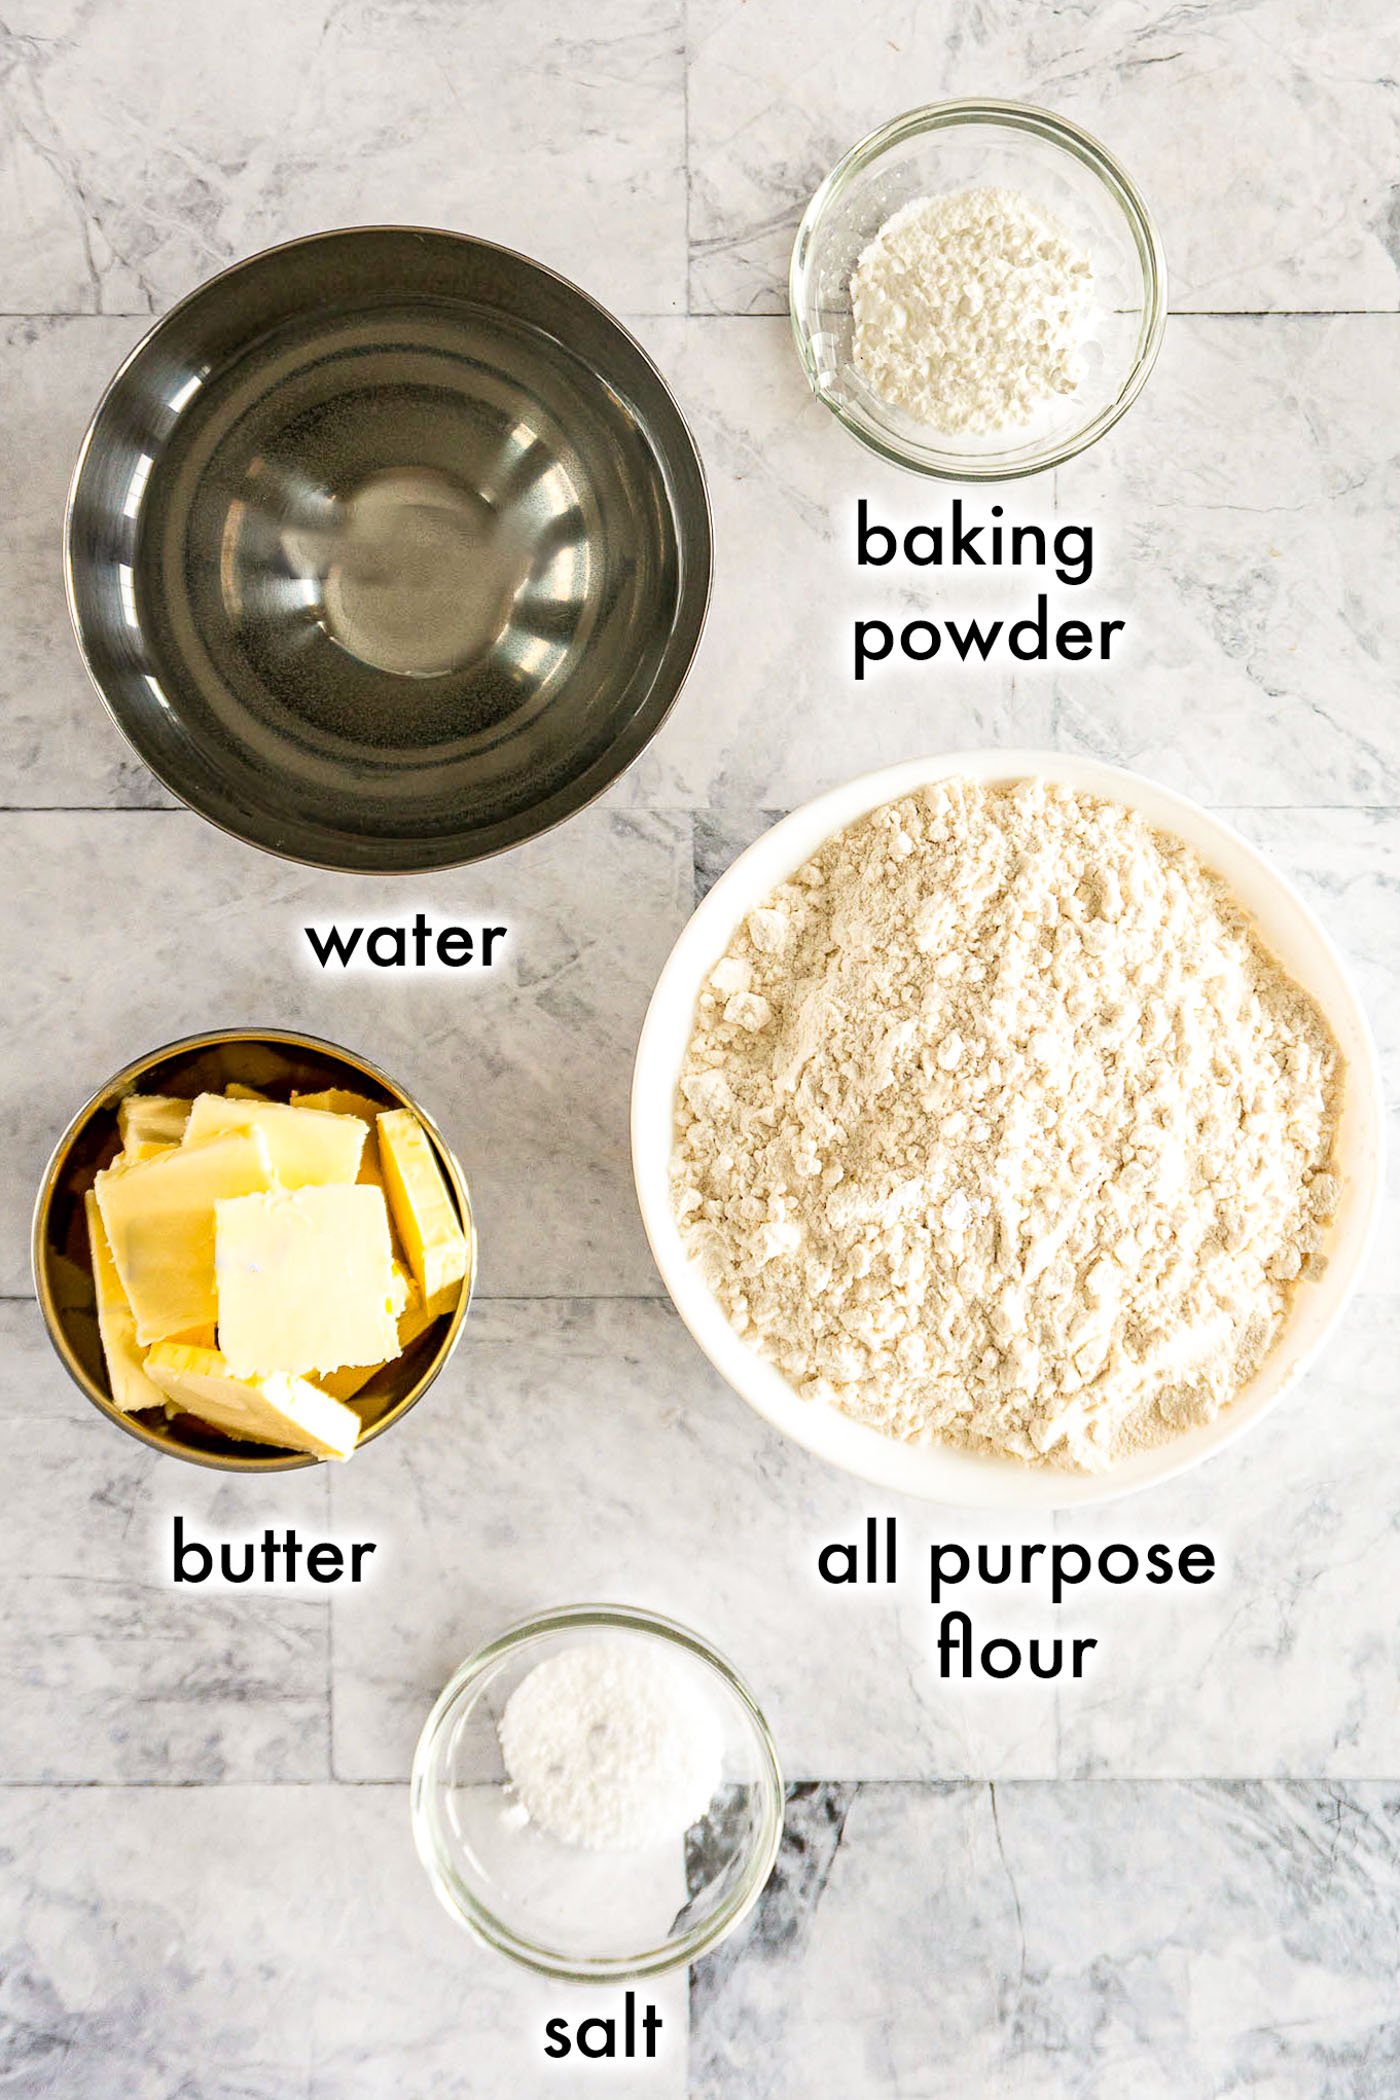
All purpose flour: The moderate protein content of all purpose flour gives these biscuits enough structure to rise while keeping the crumb tender and soft. Higher-protein bread flour can make biscuits tougher.
Butter: Cold butter creates pockets of fat throughout the dough to give the biscuits their tender flaky layers and rich flavor.
Baking Powder: The leavening agent that gives these biscuits their lift, helping them to bake up light and fluffy without milk or buttermilk.
Water: The no-milk swap. Cold water provides the hydration the flour needs without the need for milk.
No milk doesn’t mean no butter. This recipe replaces milk with cold water, but keeps butter for richness and flavor. So these are biscuits without milk, but they’re not dairy free.
Variations + Substitutions
- Sweet Biscuits: Add a tablespoon of granulated sugar to the dry ingredients.
- Savory Biscuits: Add 2 tablespoons fresh chopped herbs or spices to your dough before blending in the butter.
- Whole wheat biscuits: substitute up to 1 cup of all-purpose flour with whole wheat flour.
How To Make Biscuits Without Milk

- Step 1: Combine 2 cups flour, 2 teaspoons baking powder, and 1/2 teaspoon salt in the bowl of your food processor. Add 1/2 cup cold, cubed butter and pulse 5 – 8 times, until the mixture starts to look coarse and crumbly.
See FAQ below for manual directions.
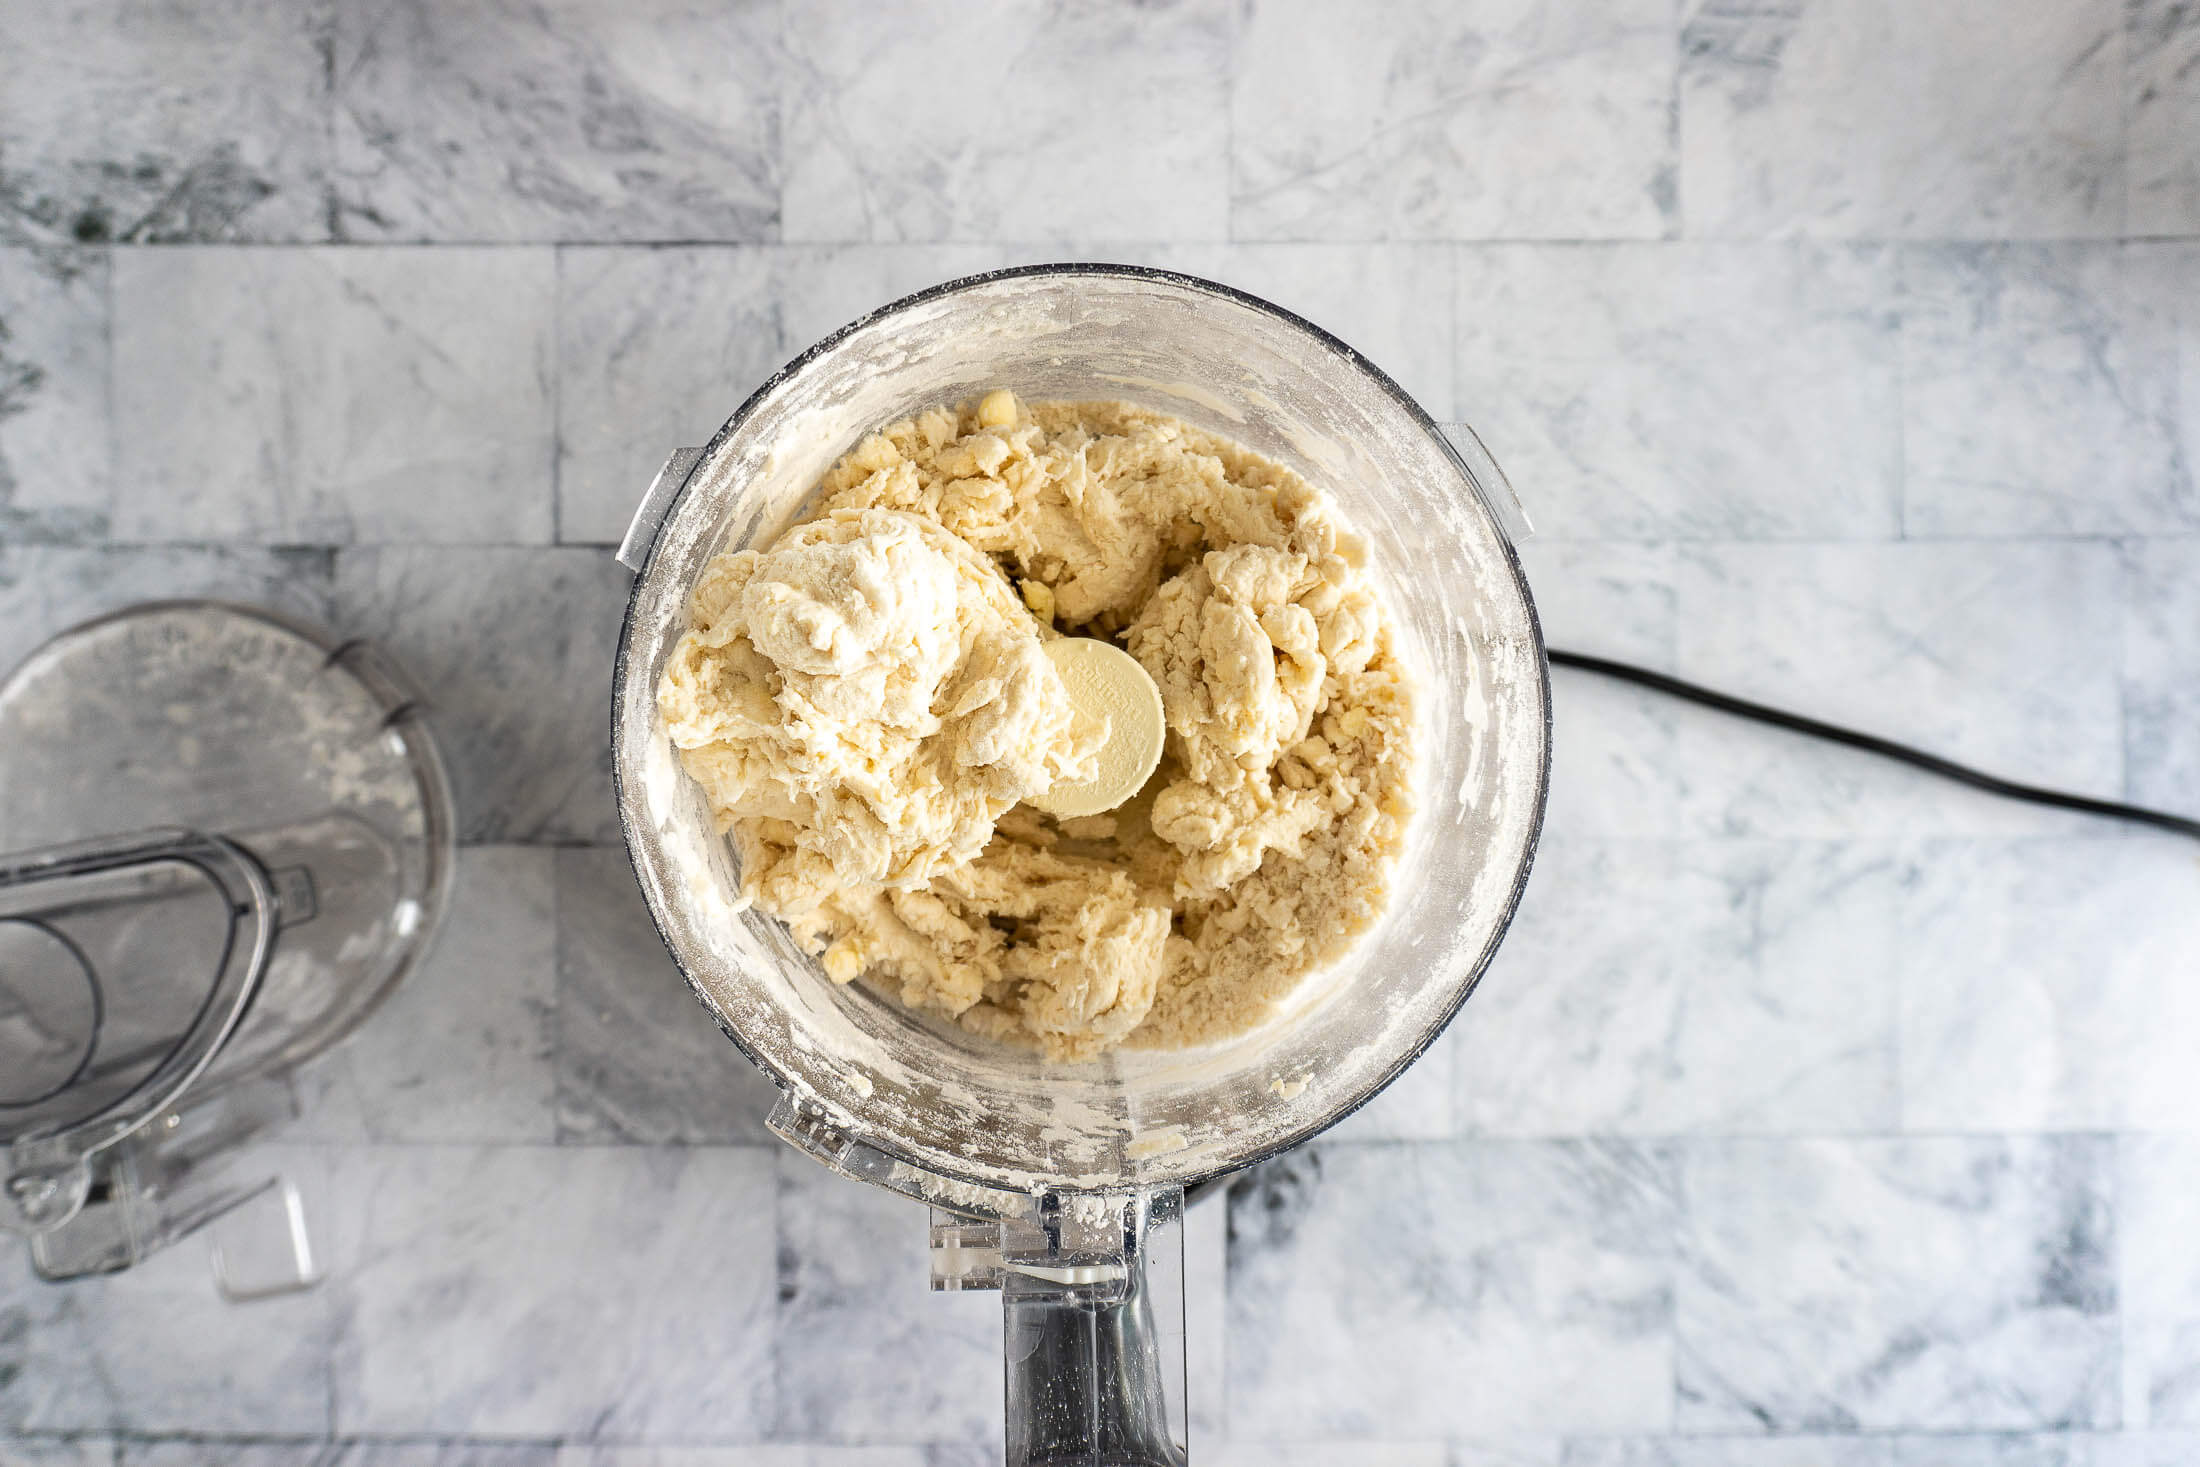
- Step 2: Add 3/4 cup cold water and pulse another 5-8 times – avoid over-mixing here!
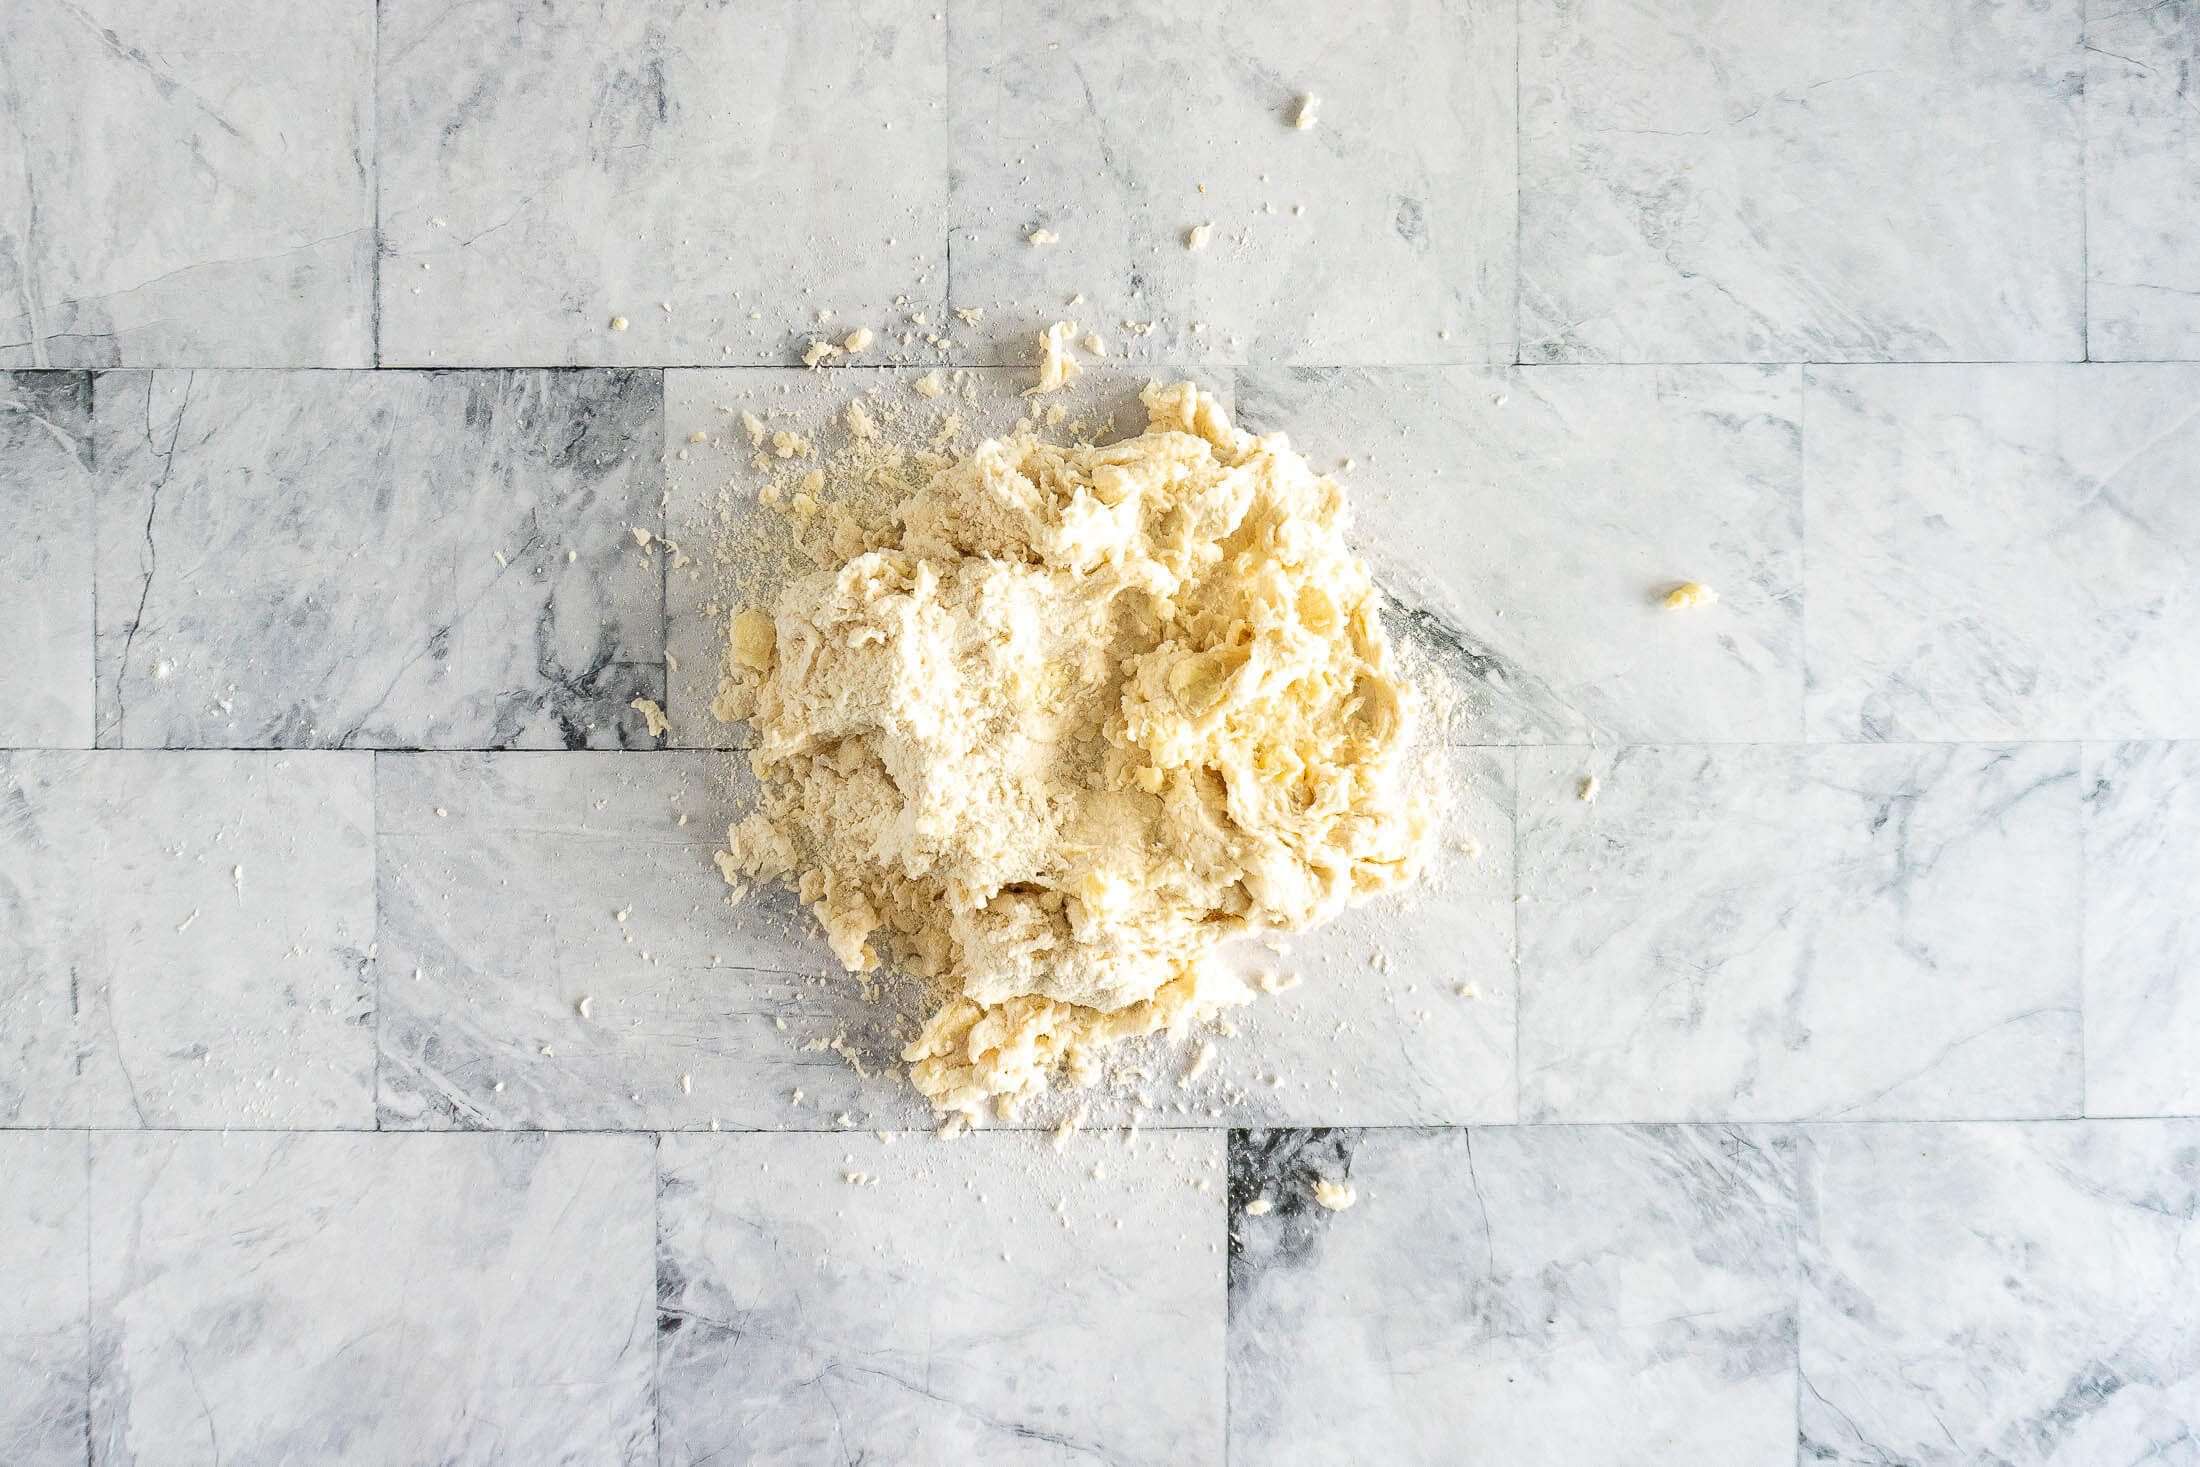
- Step 3: Turn the dough onto a floured surface and gently press the dough together. If there are still dry, crumbly bits, fold the dough over itself a few times until it mostly comes together. Don’t knead to smooth.
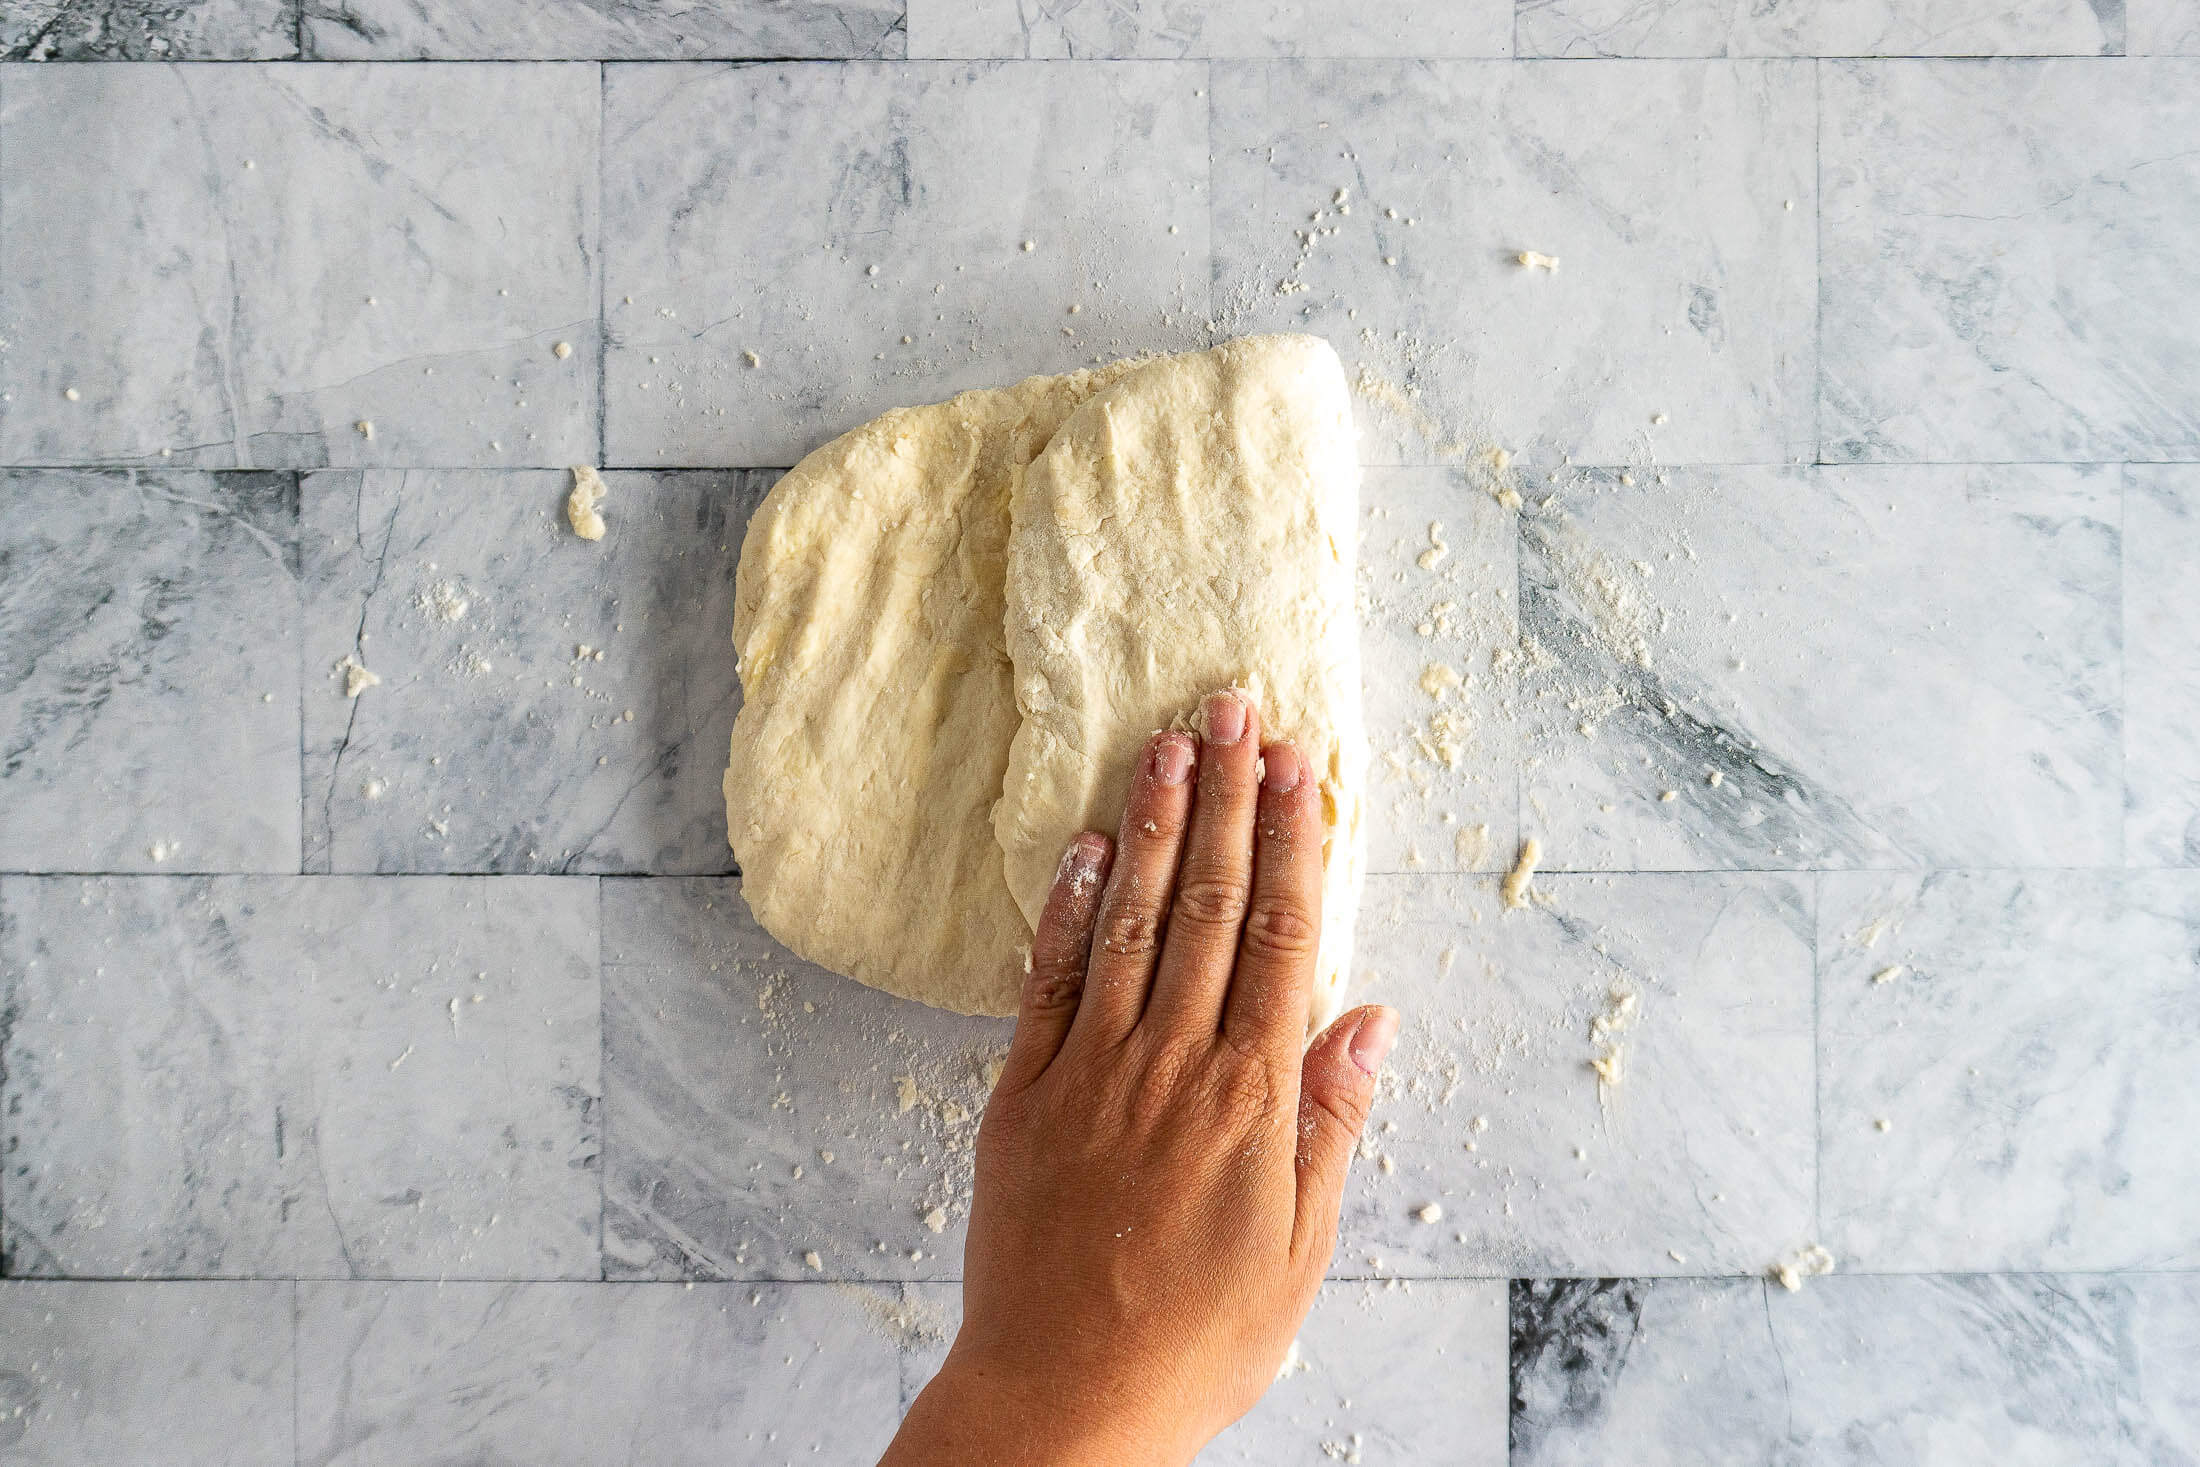
- Step 4: Press the dough into a rectangle about 1 inch thick. Fold the dough into thirds, short edges into the middle.
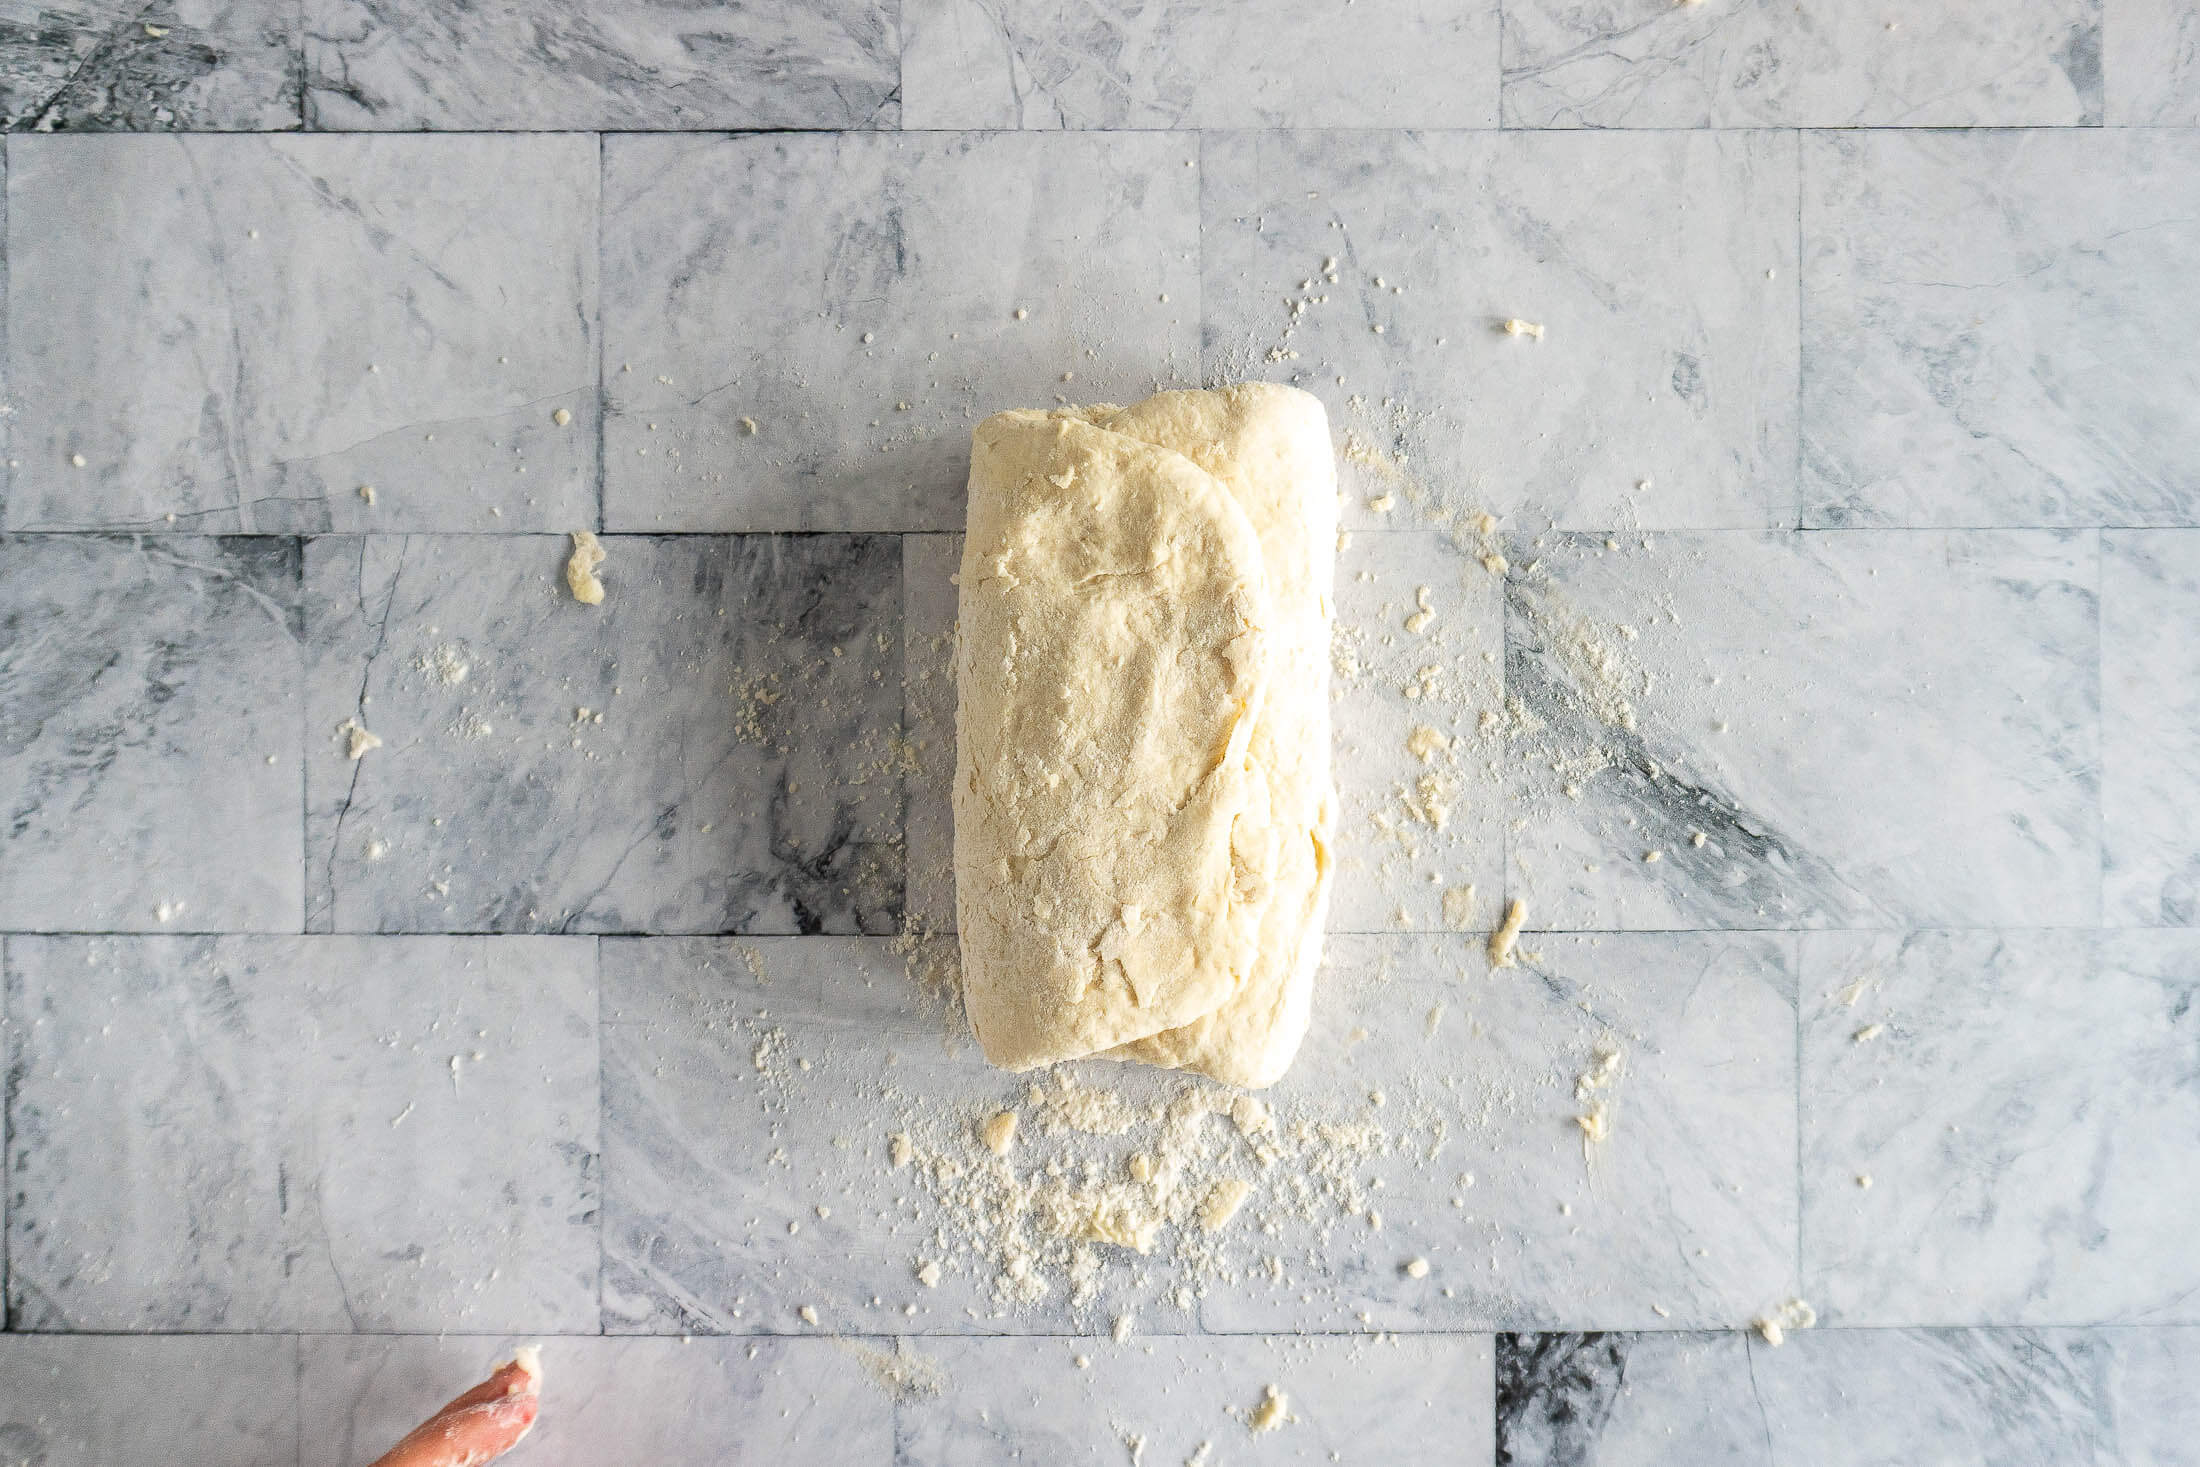
- Step 5: Rotate a quarter turn, press the dough into a rectangle and fold again.
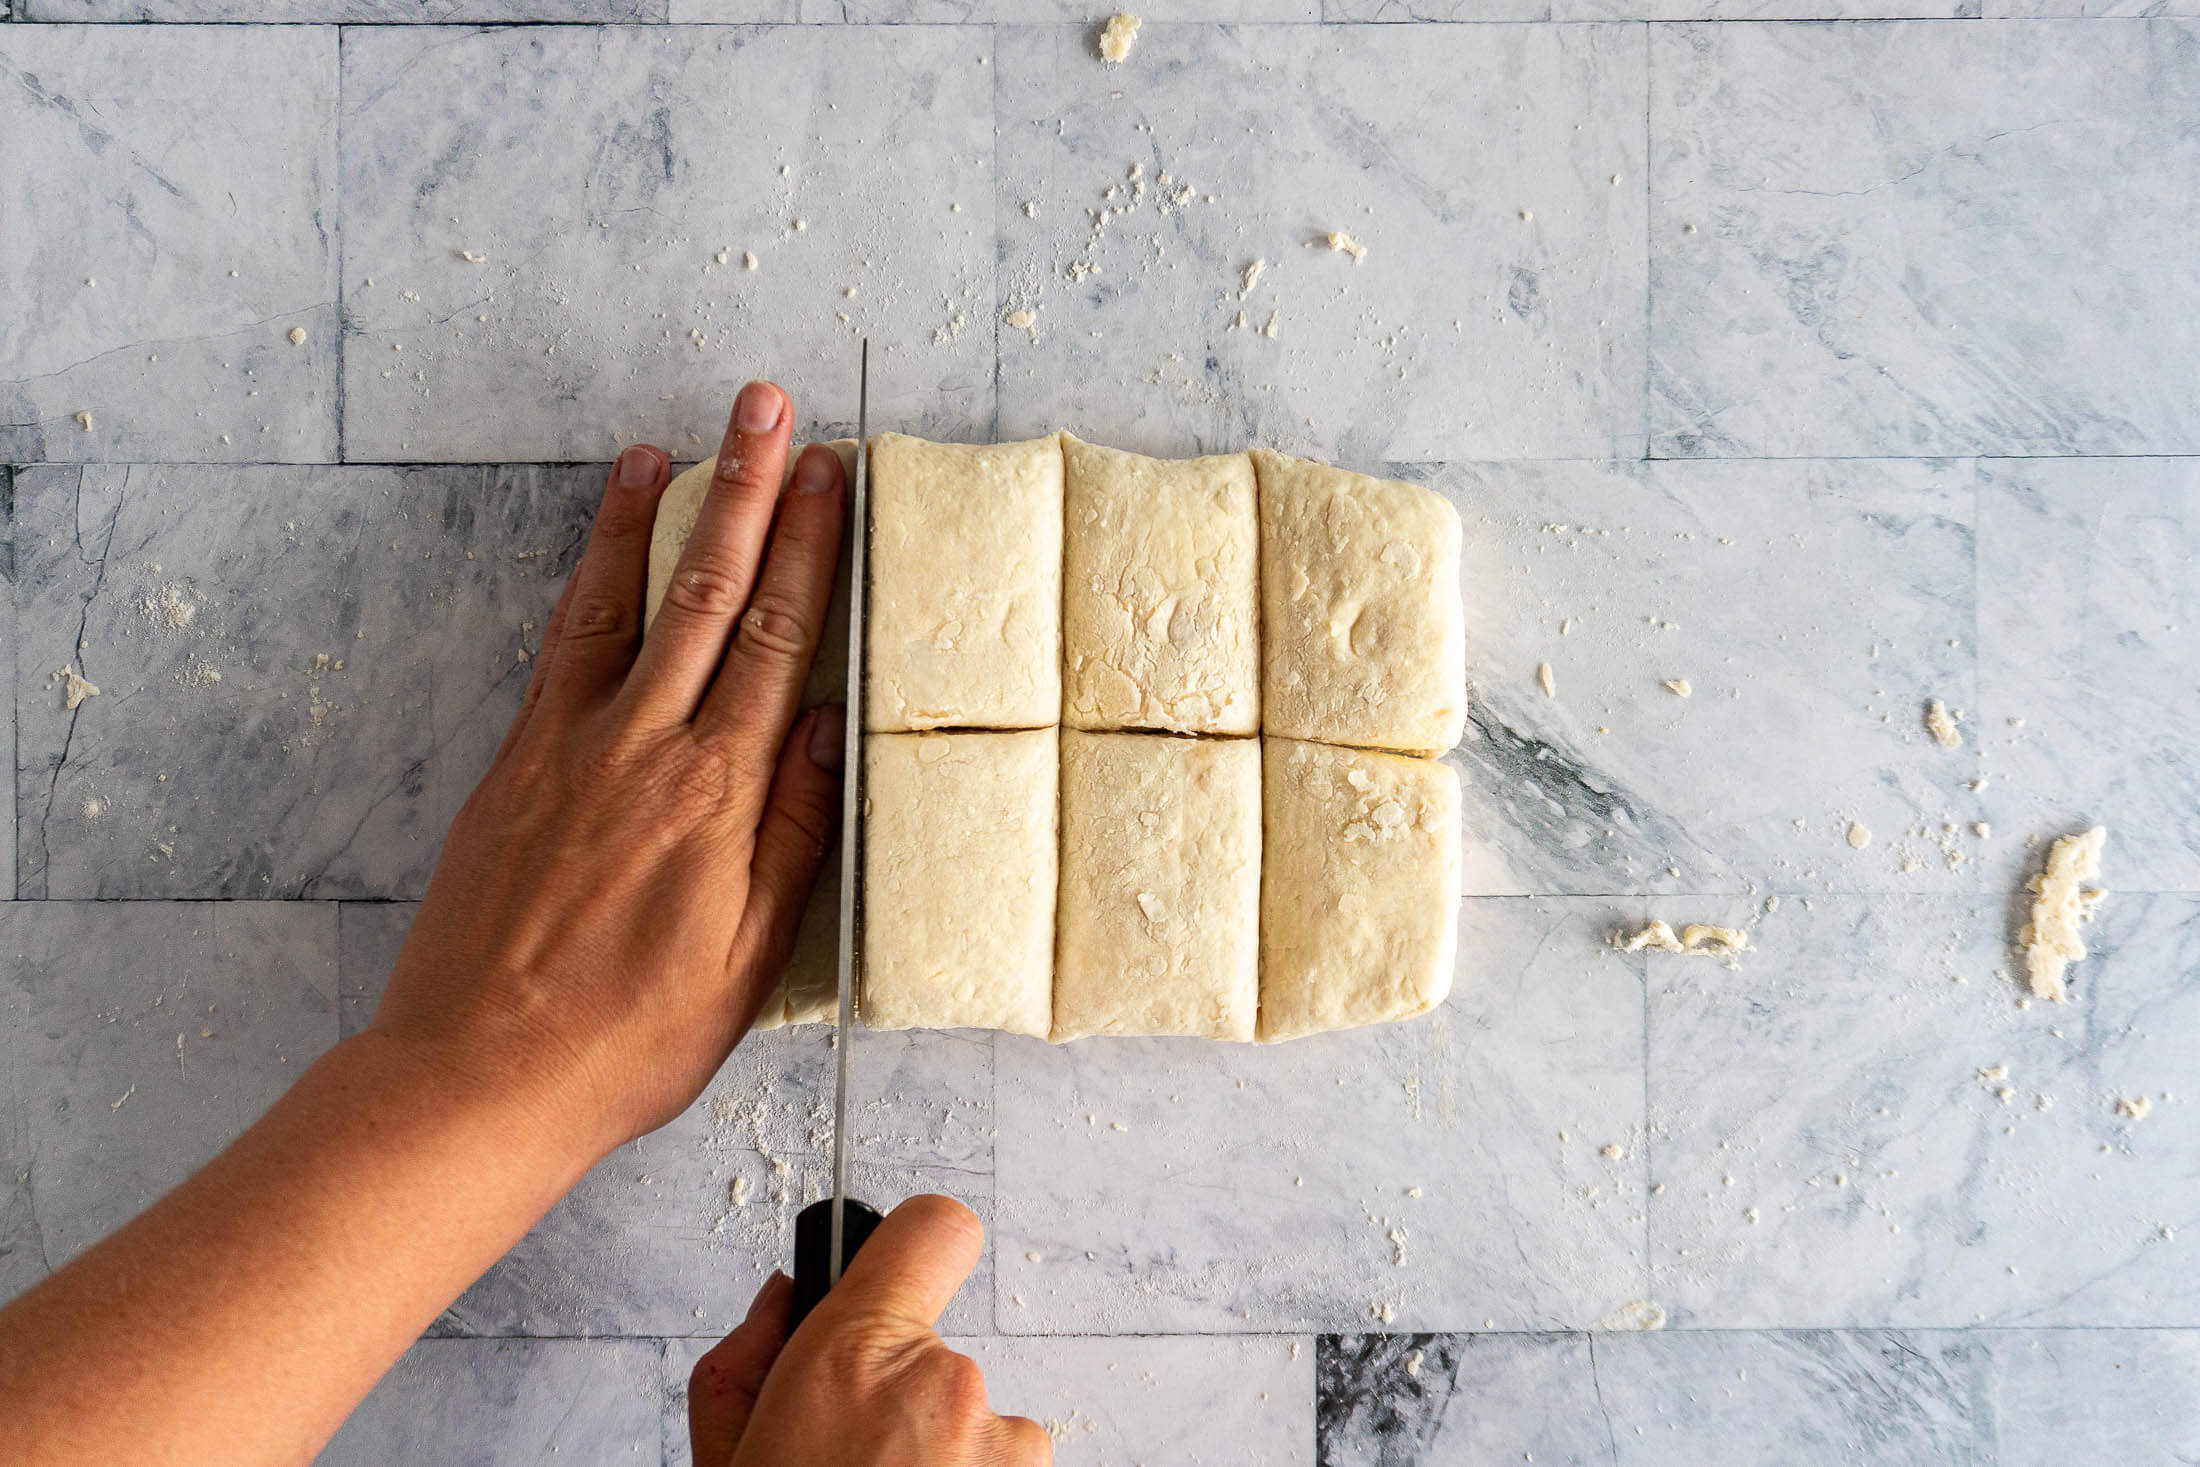
- Step 6: Cut the biscuits as desired. I prefer square but you may prefer round.
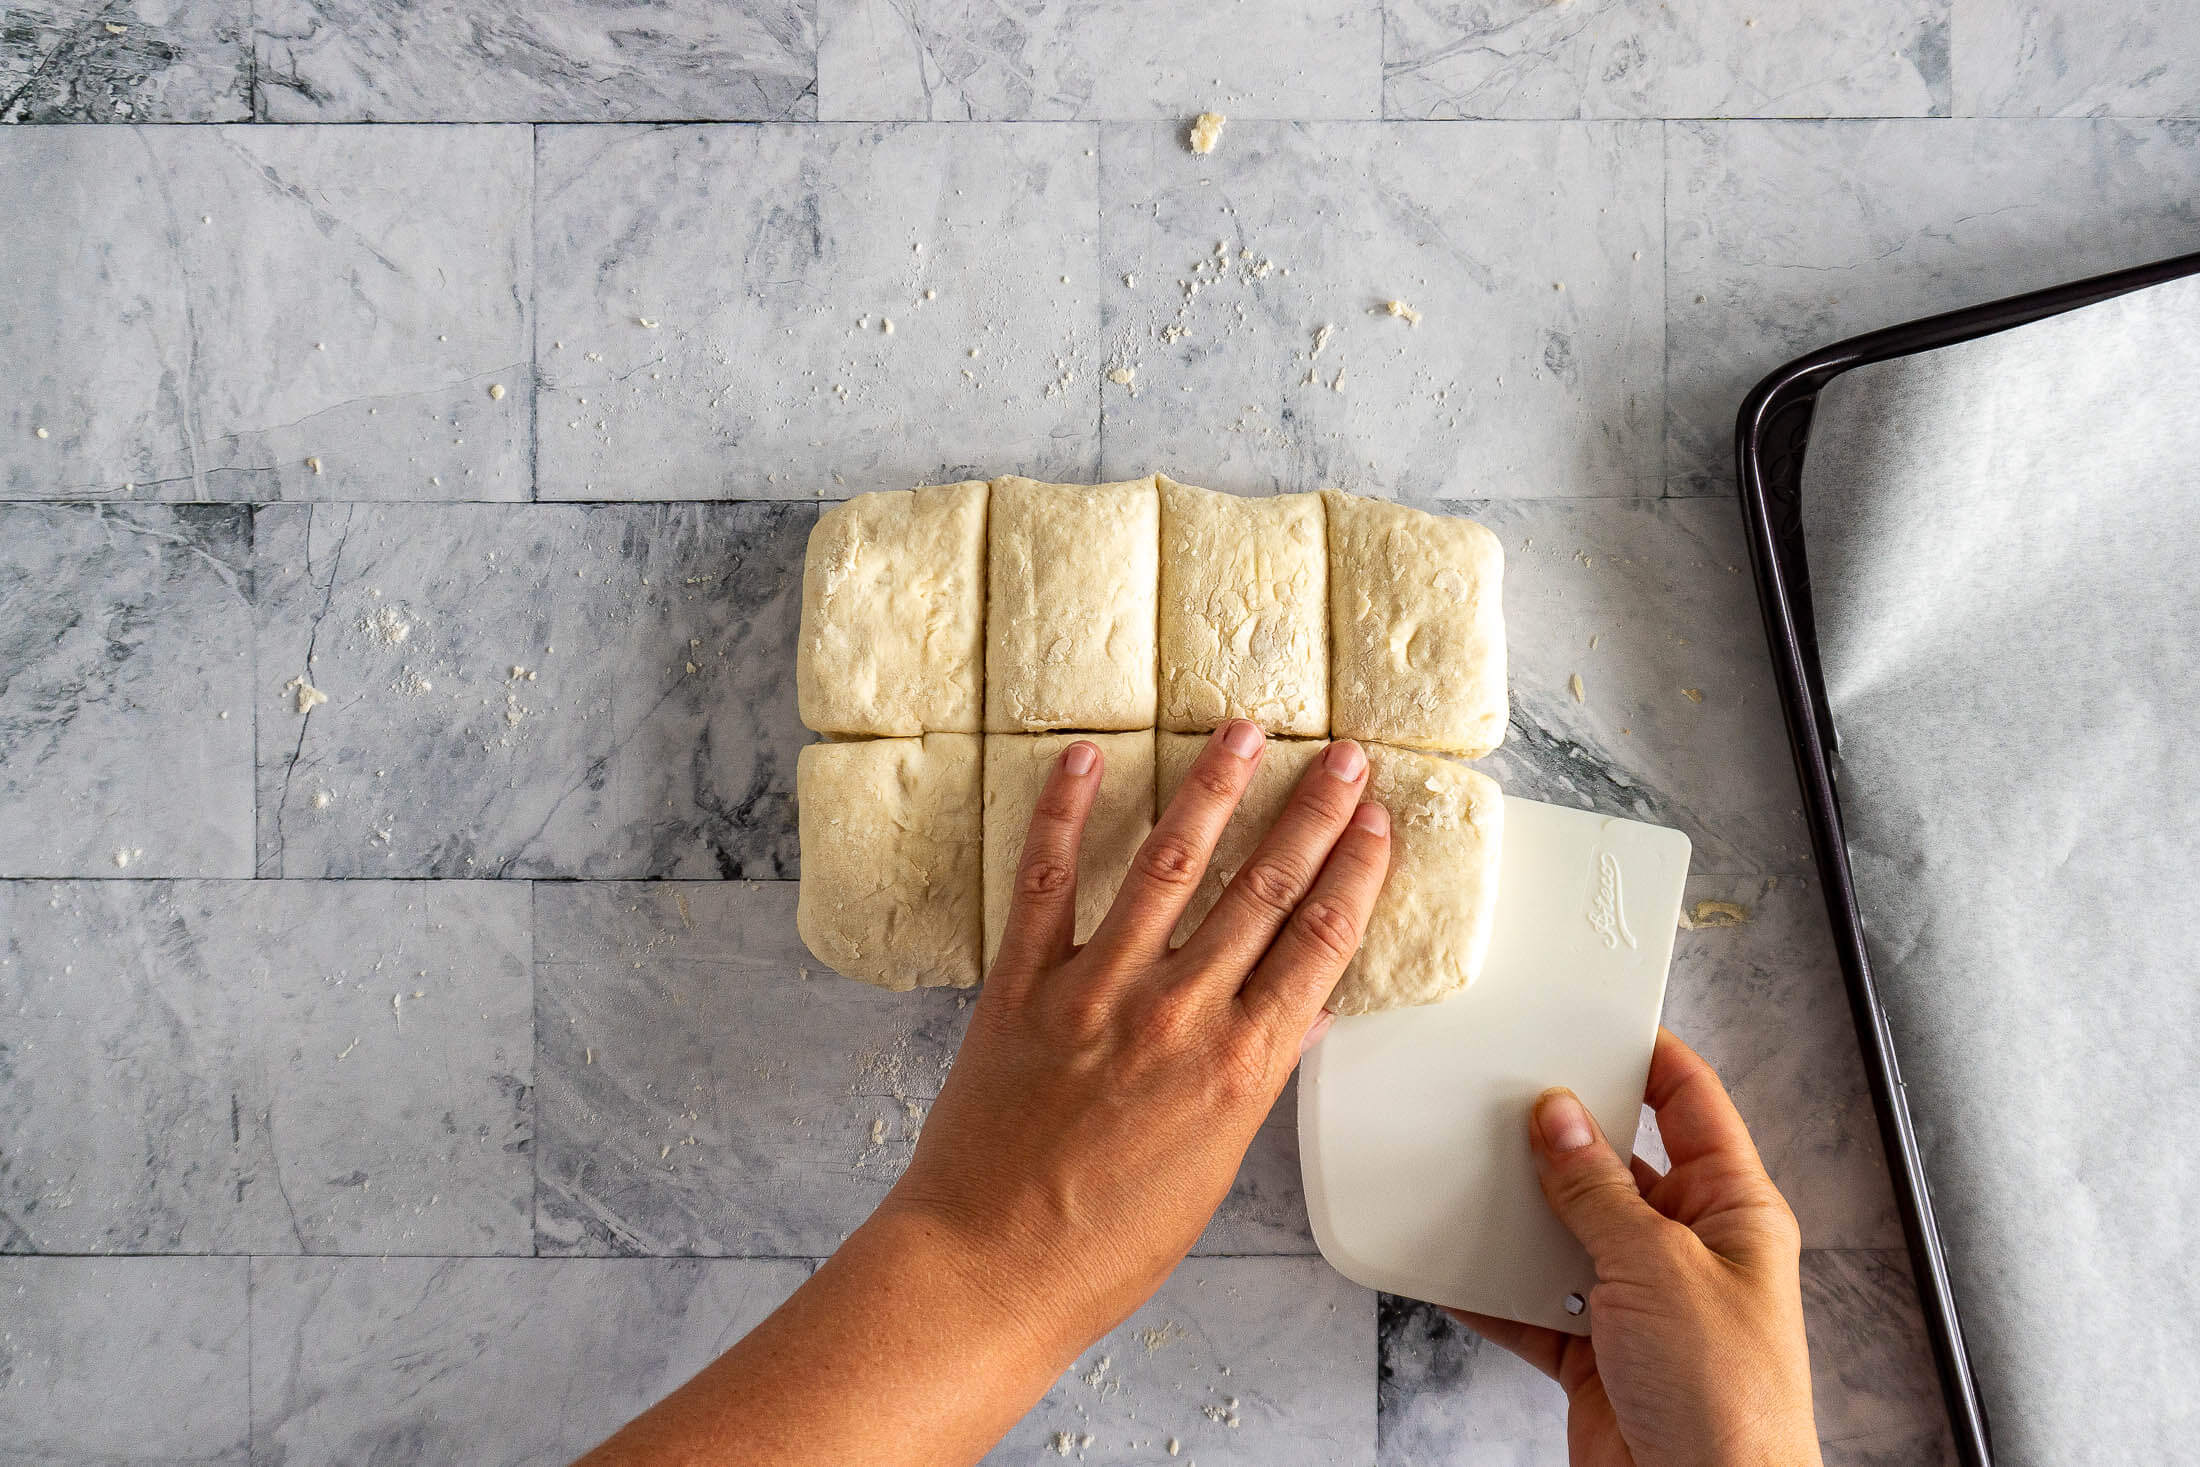
- Step 7: Gently transfer the biscuits to a parchment-lined baking sheet. Pop the biscuits in the fridge for 20-30 minutes while the oven preheats to 425°F.
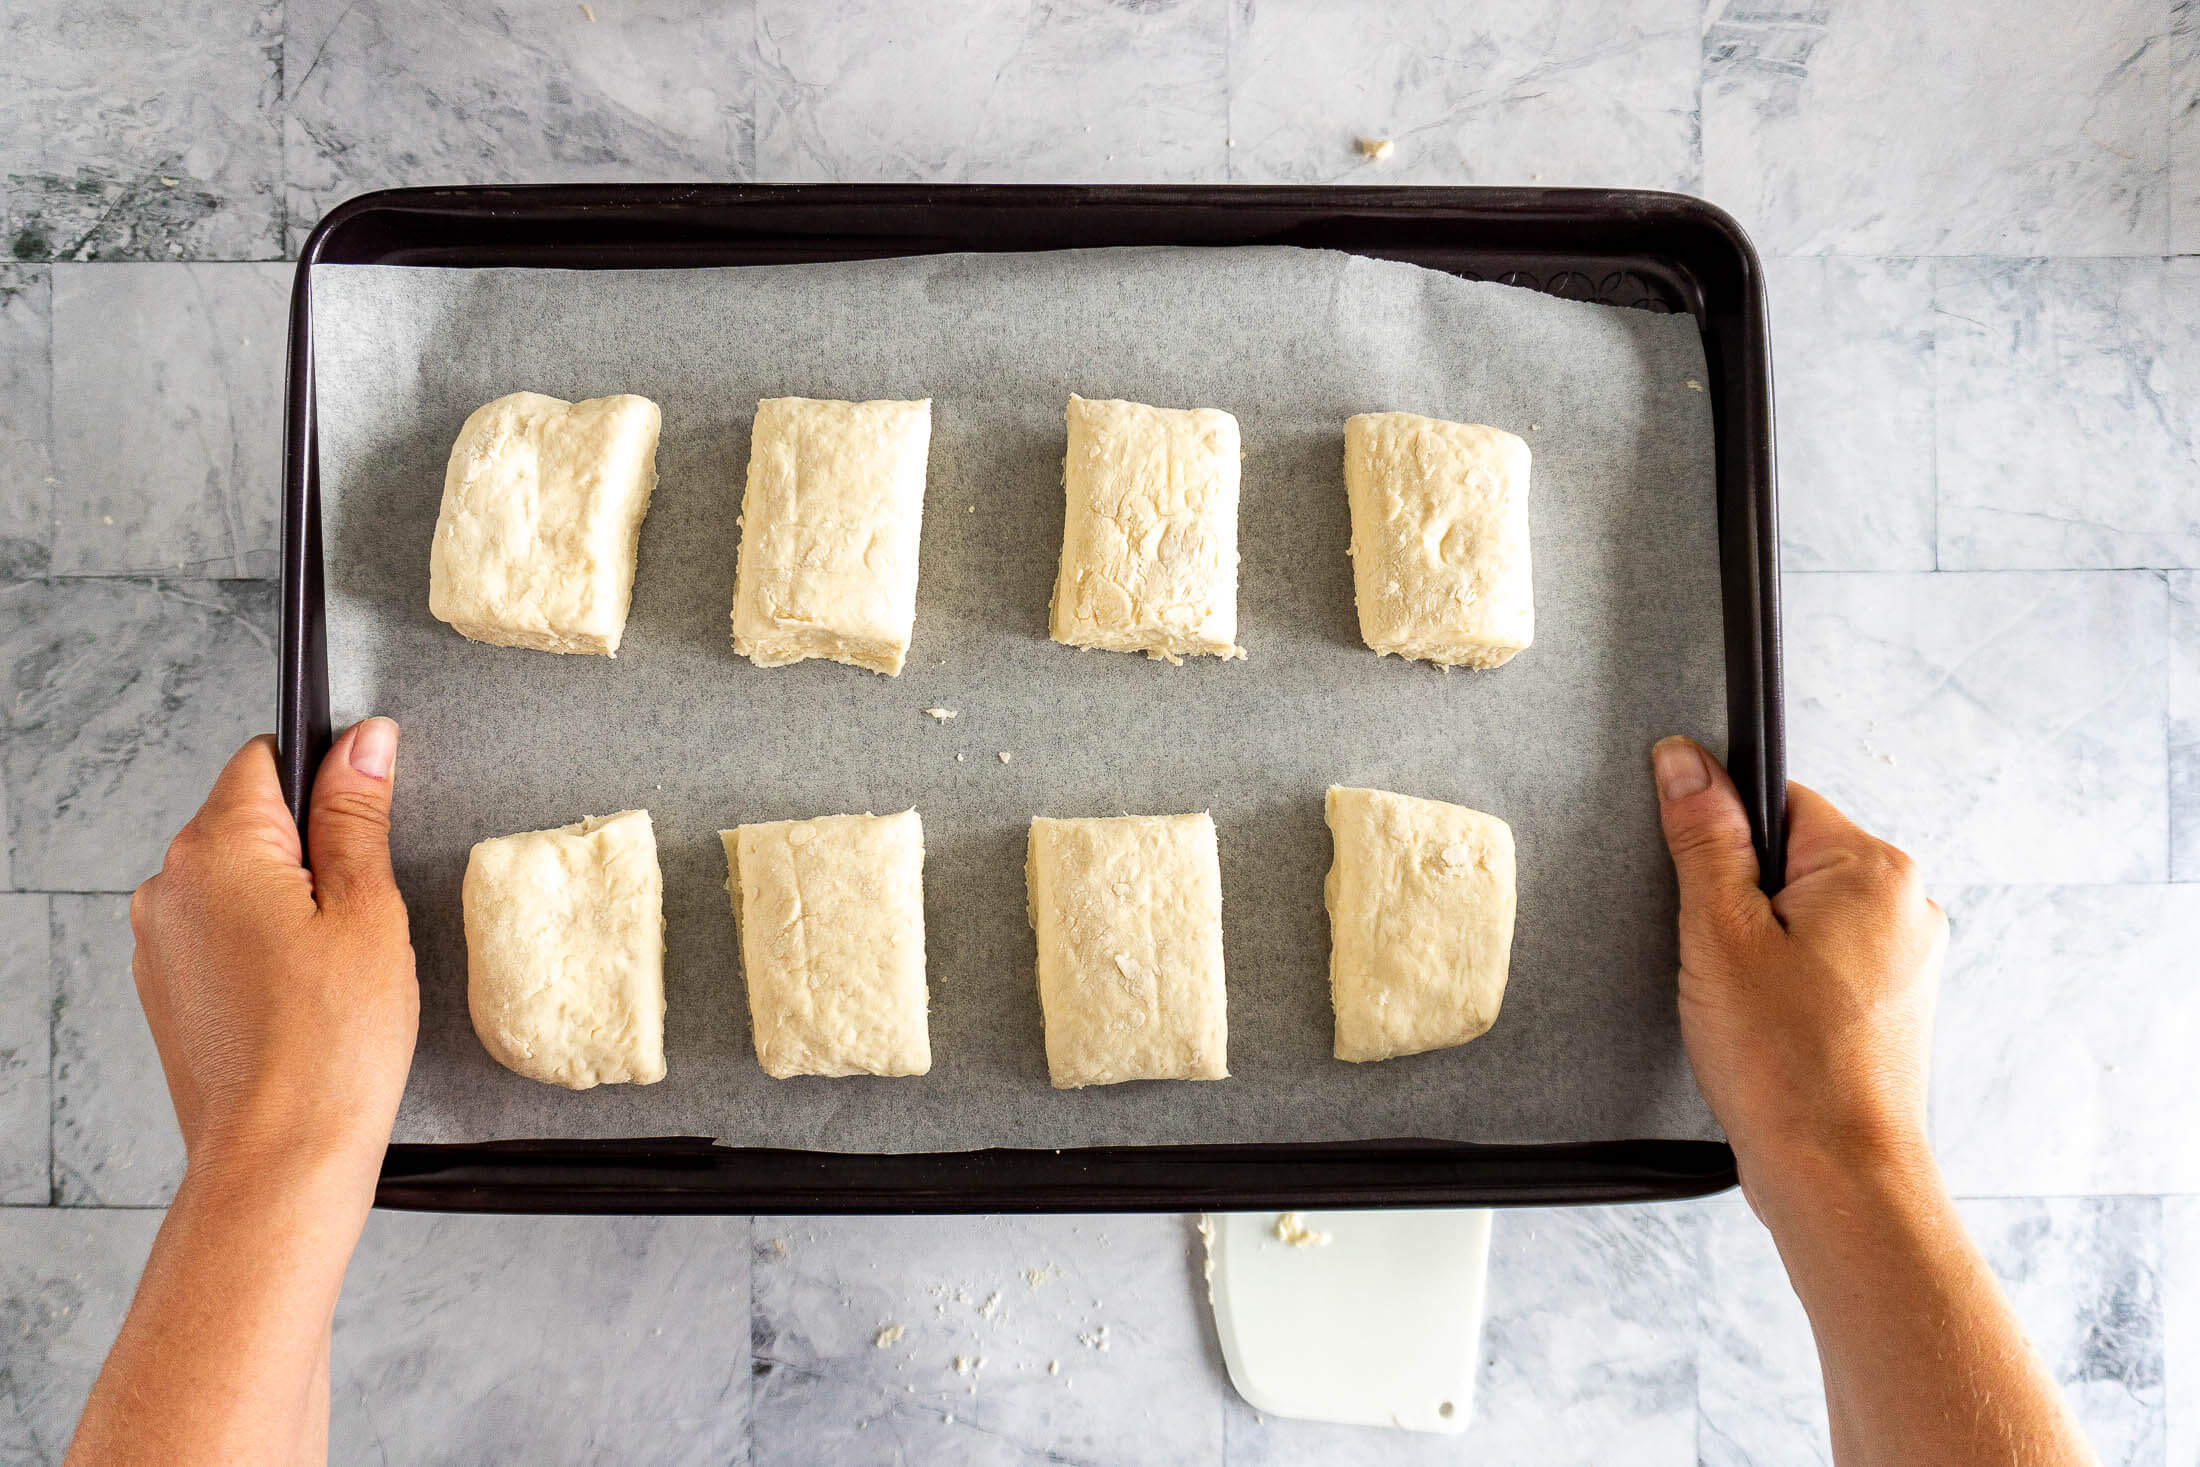
- Step 8: Once the oven has reached the temperature, remove the biscuits and bake them on the second from the top rack at 425°F for 15-20 minutes, or until golden. I like to bake mine for 15 minutes, then brush with butter, then bake another 5 or so minutes until the tops are golden brown.
Expert Tips
- Keep it cold. Cold butter is the name of the game in this recipe. As the biscuits bake, the water in the butter turns into steam and helps separate the layers formed in the folding step giving you those little flaky pockets of goodness.
- Ice, ice, baby. We’re taking keeping it cool a step further here and using ice cold water to help prevent our warm hands and room temperature tools and counter from melting the butter before the biscuits even make it to the oven. Be cool, give your butter a chance to work its magic.
- Stop, drop, and don’t roll. Put the rolling pin down! Pat the dough into a rectangle, fold the short sides toward the center, then repeat. These simple folds help build layers without overworking the dough – they’re the secret to biscuits that pull apart instead of crumble.
Why This Recipe Works
Milk isn’t what makes a biscuit a biscuit. In this recipe, cold water provides the dough hydration needed to bring it together, while butter supplies the fat and flavor you’d normally get. The real trick is keeping the butter cold and using the pat-and-fold method.
Butter brings the richness. Since we’re skipping milk, butter carries the flavor and richness you’d normally get from dairy in a traditional biscuit.
Baking powder provides the lift. It gives the biscuits enough leavening to puff up in the oven, creating a light, tender interior.
Homemade Biscuit FAQs
Not as written – there’s no milk in this recipe but the butter is still dairy. If you need a full dairy-free biscuit, swap the butter for a cold, plant based butter, though the texture may vary depending on the brand and variety.
Cold water is the easiest, most reliable swap. It’s exactly what this recipe uses. Cold water hydrates the dough without any of milk’s fat or protein, so the butter is responsible for all the richness.
As written this no milk biscuit recipe makes 8 biscuits. It can be easily doubled or halved. If halving, use 6 tablespoons of ice-cold water!
Biscuits are best enjoyed fresh and warm, but they can be kept in an airtight container at room temperature for up to 2 days.
If you’ve got way too many biscuits (as if that’s possible!), they can be placed in a single layer on a cookie sheet in the freezer for 2-3 hours until completely frozen. Transfer the frozen biscuits to an airtight bag or container for up to 3 months.
This recipe comes together just as beautifully by hand. Use a pastry blender, two knives, or even two forks to cut the cold butter into the flour until the mixture resembles coarse crumbs.
It takes a little more elbow grease, but it’s the classic, old-fashioned way to make biscuits, and many bakers swear the results are just as good, if not better!
Round Or Square?
I’m gonna catch some flack for this from the round biscuit crowd, but I believe in cutting my biscuits square. There are so many reasons to bake square biscuits, and none of them (except the last one) is due to laziness!
- Cutting round biscuits means off-cut dough that must be re-worked before being cut. The more you work biscuit dough, the less likely it is to be flaky and beautifully layered.
- Squared-off biscuits make better sandwiches, and increase real estate for whatever you’re slathering on it.
- It’s actually quicker and less work to cut a rectangle into smaller rectangles. Gotta hit the easy button whenever you can!
Make Ahead Biscuits
This recipe is easily adaptable to make ahead biscuits.
Instead of chilling the biscuits in the fridge while the oven preheats, place them in the freezer and allow them to freeze for 2-3 hours, or until solid. Transfer the frozen biscuits to a freezer-friendly airtight container or freezer ziplock bag.
Your frozen biscuit dough should be used within 2-3 months for best results.
To bake the frozen biscuits, remove them from the freezer and allow them to thaw on a parchment-lined baking sheet while the oven preheats. You’ll need to tack on a few extra minutes of bake time.
Try These Fresh Baked Favorites




If you tried this no milk biscuit recipe or any other recipe on my blog, please leave a 🌟 star rating and let me know how it went in the comments below. Thanks for visiting!
📖 Printable Recipe
No Milk Biscuit Recipe
Ingredients
- 2 cups all purpose flour
- 2 teaspoons baking powder
- ½ teaspoon fine sea salt
- ½ cup unsalted butter, cold
- ¾ cup cold water
Instructions
- Combine 2 cups all purpose flour, 2 teaspoons baking powder, and 1/2 teaspoon salt in the bowl of your food processor. Add 1/2 cup cold, cubed butter to the dry ingredients and pulse 5 – 8 times, until the mixture starts to look coarse and crumbly. (See FAQs in article for directions without food processor)
- Add 3/4 cup cold water to the bowl of the food processor and pulse to combine, another 5-8 times, avoid overmixing at this point.
- Turn the dough onto a floured surface and gently press the dough together. If there are still dry, crumbly bits, fold the dough over itself a few times until it mostly comes together. Don't knead to smooth.
- Press the dough into a rectangle, then into thirds, short edges into the middle.
- Rotate a quarter turn, press the dough into a rectangle and fold again.
- Cut the biscuits as desired.
- Gently transfer the biscuits to a parchment-lined baking sheet. Pop the biscuits in the fridge for 20-30 minutes while you preheat the oven to 425°F.
- Once the oven has reached the temperature, remove the biscuits and bake them on the second from the top rack at 425°F for 15-20 minutes, or until golden.Note: I like to bake my biscuits for 15 minutes, then brush with more butter, then bake another 5 or so minutes until the tops are golden brown.
- Serve warm!
Notes
Expert Tips
- Keep it cold. Cold butter is the name of the game in this recipe. As the biscuits bake, the water in the butter turns into steam and helps separate the layers formed in the folding step giving you those little flaky pockets of goodness.
- Ice, ice, baby. We’re taking keeping it cool a step further here and using ice cold water to help prevent our warm hands and room temperature tools and counter from melting the butter before the biscuits even make it to the oven. Be cool, give your butter a chance to work its magic.
- Stop, drop, and don’t roll. Put the rolling pin down! Pat the dough into a rectangle, fold the short sides toward the center, then repeat. These simple folds help build layers without overworking the dough – they’re the secret to biscuits that pull apart instead of crumble.


These are exactly as advertised. I’ve now made these biscuits about six times over the last few weeks as a half-batch (with and without milk) and I can attest that hey are simple to make and absolutely flaky and delicious. My kitchen is small and I only have a medium sized food processor which a half-batch fits perfectly in. Thank you.
So happy to hear you are enjoying these, Sarah! <3
These biscuits are so easy to make and everyone loves them!!!
Happy to hear this Betty!
Turned out perfectly!
Happy to hear that, Maxine!
Excellent recipe, I’ve used butter and olive oil. Came out great both times.
Yes! Happy to hear this Sylvia!
Can I add chedd
I don’t see why not!
Ok well I’m just trying this recipe for the first time ever so it sounds and mixes very well by hand and the mixer did everything in the recipe wish me luck
How did they turn out in the mixer, Kenneth?
Looks great to me!
Can you make this dough the night before?
That’s a good question! I bet they could be rested covered in the fridge overnight. The butter will solidify, so they might take a bit longer to cook – like if you were to freeze them.
y do you make it so difficult.i simply asking for the ingredients for biscuits with ap flour an water an how to do it an I have to go through all this BS just to get the simple recipe so stupid
I’m sorry you feel that way. I put a lot of effort into ensuring people who are using my recipes have success each time they make it, including the first time. We’re not all champion biscuit makers, brisket smokers, or sourdough bakers and I try to include as much information as one could need in a friendly, approachable post for those home cooks.
There are 2 prominent locations on the page where you can skip all of the content and go straight to the recipe card; 1. right at the top of the screen where it says “JUMP TO RECIPE” , and 2. in the table of contents where it says “PRINTABLE RECIPE”.
@Justin, I’ve made this recipe and other biscuit recipes many times and I still love reading baker’s tips and tricks, key ingredient suggestions etc. I also use the jump to recipe button now that I’ve made the recipe a few times. It’s wrong to assume other people (myself included) don’t appreciate the extra information. You may be a pro baker but you are one of few.
It’s unfortunate that you couldn’t find the jump to recipe button (it is pretty much always found at the top of any recipe on any blog and is standard practice.)
If you are able to make edible biscuits with ap flour and water only, you must have magical unicorn dust or a very bland palate.
Delicious! We used to make “cinnamon roll” biscuits too and they turned out great.
That sounds really yummy, do you slather with cinnamon sugar before folding? Love to hear more!
I love this biscuit recipe! I’ve made it at least a dozen times in the past year and it has never once failed me. I add 1 tablespoon of sugar but other than that it’s perfect! Sooo flakey and delicious. My husband says he doesn’t like biscuits and he tried them and has actually requested them. This recipe is a keeper!
This is awesome to hear! Glad you love the recipe Serena <3
This is my go to biscuit recipe. I can’t count how many times I’ve made it since discovering it last year. It works up so quickly and is easy and flakey and perfect. I add 1 Tablespoon of sugar to the recipe (when I remember) to suit my family’s taste. But other than that make no adjustments. It’s just so easy and good. Thankful to have a recipe that doesn’t need milk. We are always out 😂
My family did not like these at all. Said they would rather have store bought biscuits
That’s a bummer, sorry to hear that.
I have never made biscuits before without milk but I have to tell you these was the perfect biscuits an so fluffy an flackies I will be making more of these biscuits
So glad you enjoyed them!
Can you use margarine in place of butter?
I haven’t tried. It’s possible, but margarine and butter do have different properties, so I can’t really guarantee any results
@Ally,
instead of margarine (hydrogenated oils) i suggest a lard (rendered animal fat) (vegans can use vegetable shortening) (but WARNING also hydrogenated)
and use an imitation butter flavoring to replace lost flavor.
(the butter flavoring likely will be water based so reduce water by like quantity)
That’s a great point, but the reason I didn’t recommend tallow or lard, which I use and love, is that lard tends to behave A LOT differently than butter in recipes. Recipes that aren’t specifically written for rendered animal fats can flop costing cooks time and money.
I haven’t tested this one with lard or tallow, so I don’t feel confident in advising it, but generally, you can swap butter and margarine 1:1 without ill effects.