
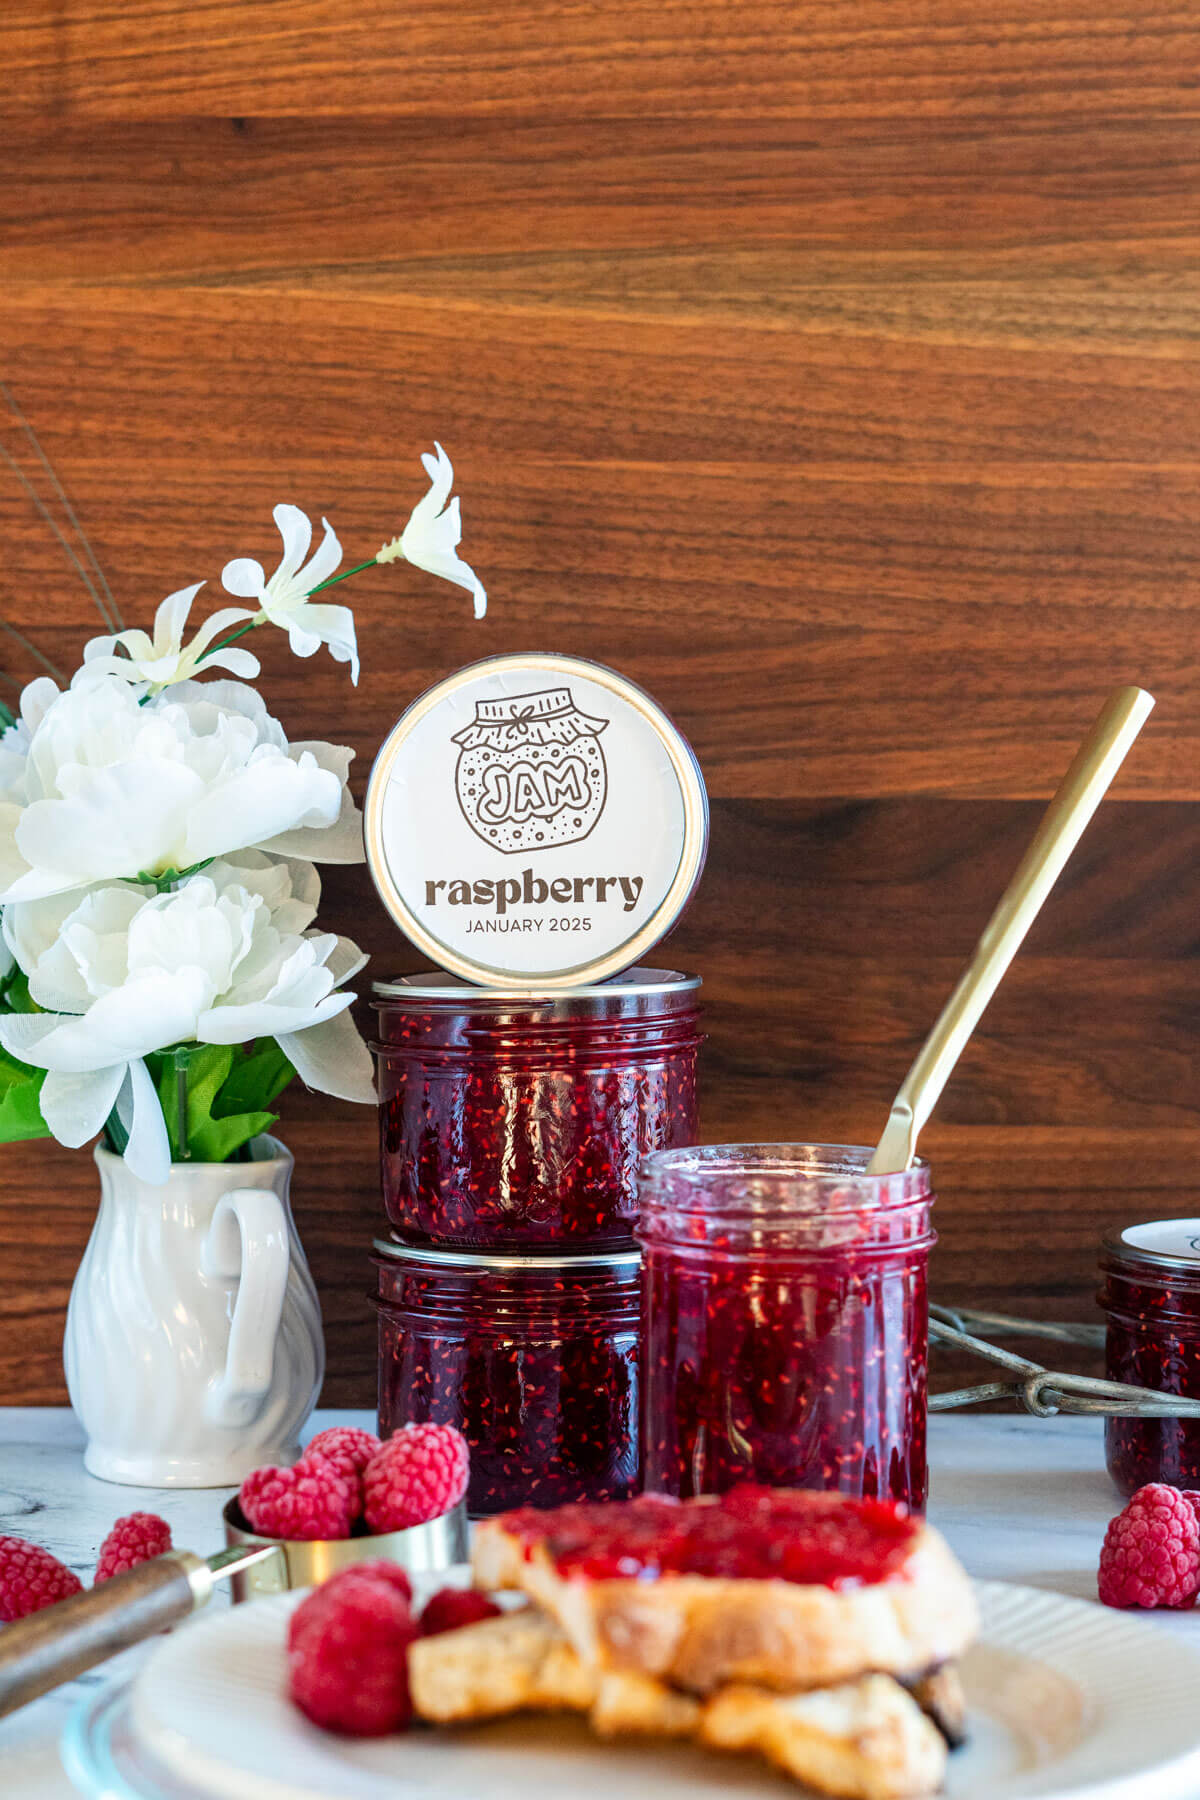
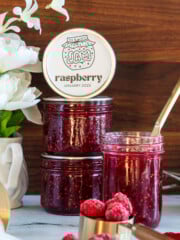
Raspberry Jam
This 3-ingredient raspberry jam recipe is so easy, you’ll wonder why you haven’t been making it all along! With no jar sterilization needed and a quick 10-minute processing time, you’ll have gorgeous, ruby-red jam that captures the essence of summer berries in under an hour.

Craving The Recipe Details?
What it is: Classic homemade raspberry jam made with just 3 ingredients, fresh or frozen raspberries, sugar, and powdered pectin, designed for water bath canning and long-term pantry storage.
Why you’ll love it: From start to sealed jars in under an hour! Beginner-friendly directions and a 12-month shelf life make preserving easy.
How to make it: Crush fresh or frozen raspberries, combine with pectin and sugar, bring to a rolling boil, then process in a water bath canner for long-lasting homemade jam.
I can’t tell you how many summer mornings I’ve spent in our food forests with my kids, picking fresh raspberries and trying (sometimes failing!) to get more in our baskets than in our mouths. Those berries that do make it inside? They wait in the freezer until we’re ready to transform them into the most incredible homemade raspberry jam.
It’s become such a favorite in our household that the kids now guard our jam supplies carefully, making sure we always have enough to last until the next berry season.
This homemade raspberry jam recipe is dedicated to guarding our supply.
Jump to:
Canning Safety
Sterilizing Jars:
Everyone and their dog has their own way of cleaning jars, but make sure that you do it. National Center For Food Preservation has clear guidelines about sterilizing jars. The TL;DR is that if you're processing for at least 10 minutes, sterilization is not required - this is why I do not sterilize my jam jars (and process for at least 10 minutes!)
Processing Time:
When water bath canning, you must know your elevation due to the different temperatures at which water boils based on elevation and the length of time food must be held at a certain temperature before it is considered pasteurized. A higher altitude equals lower boiling temperature and longer processing time.
An easy way to find your altitude is to search your town or city on Wikipedia!
| Elevation | Processing Time |
|---|---|
| 0-1,000 feet | 10 minutes |
| 1,001 - 6,000 feet | 10 minutes |
| 6,001 feet + | 15 minutes |
Key Ingredients
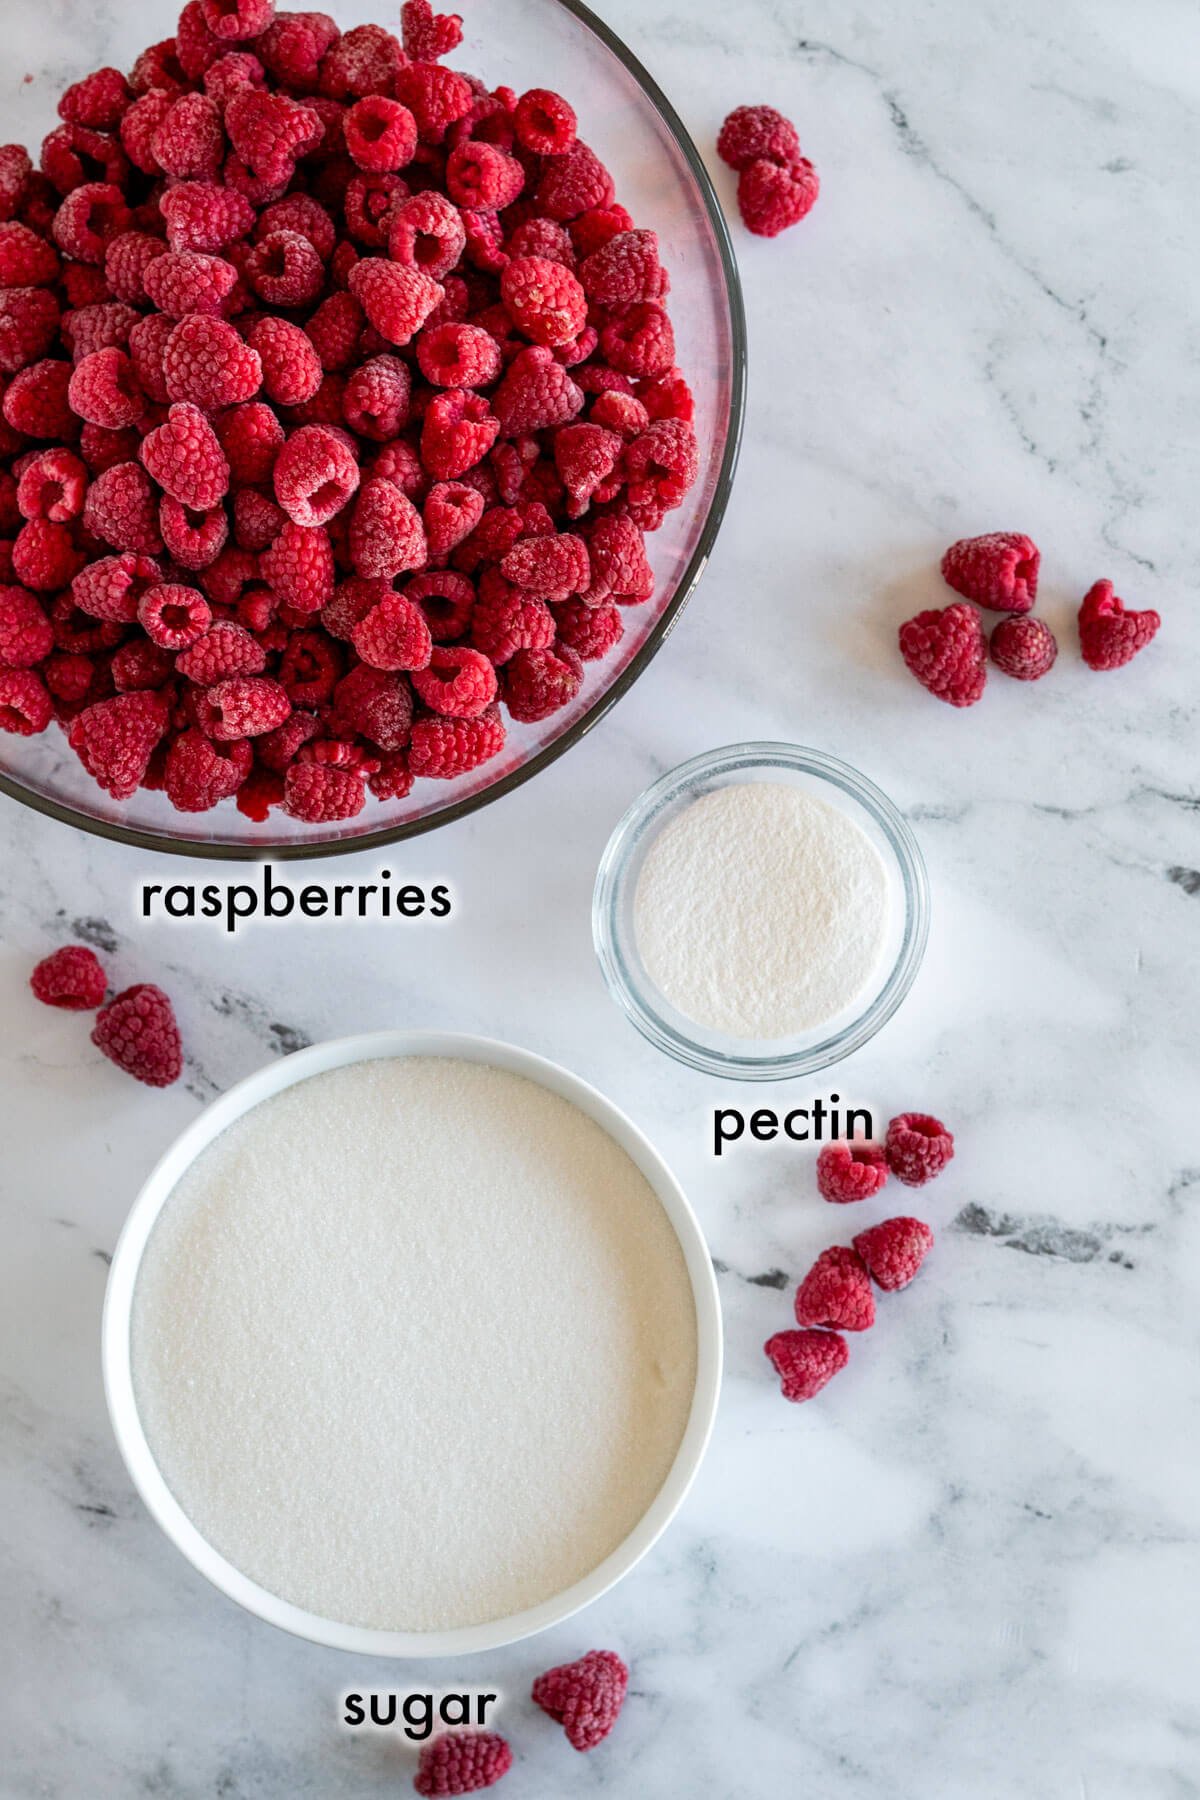
Raspberries: Always choose high quality, ripe berries. Look for berries that are flavorful, fragrant, and deeply colored. Pick through them to remove any molded, bruised, or damaged fruit, then wash well before use. You can use fresh or frozen berries for this recipe.
Sugar: Granulated sugar imparts sweetness without impacting flavor, so I prefer it for jam recipes where I want my fruit flavor to shine through. It also dissolves easily in the heated jam and helps to preserve the flavor, color, and texture of the jam while also making it shelf-stable!
See the recipe card for full information on ingredients and quantities.
How To Make Raspberry Jam With Pectin
Prepare Your Canning Jars:
- Step 1: This recipe makes 8 half pint (250 ml) jars and does not require sterilization due to the processing time. Prepare your jars, flats, and rings by washing in hot soapy water and rinsing well before setting aside on a clean kitchen towel until you're ready to use them.
- Step 2: Fill a water bath canner, and set to boil over medium high heat.
Prepare The Berries:
- Step 3: Gather approximately 3 pounds (12 or so cups) of raspberries.
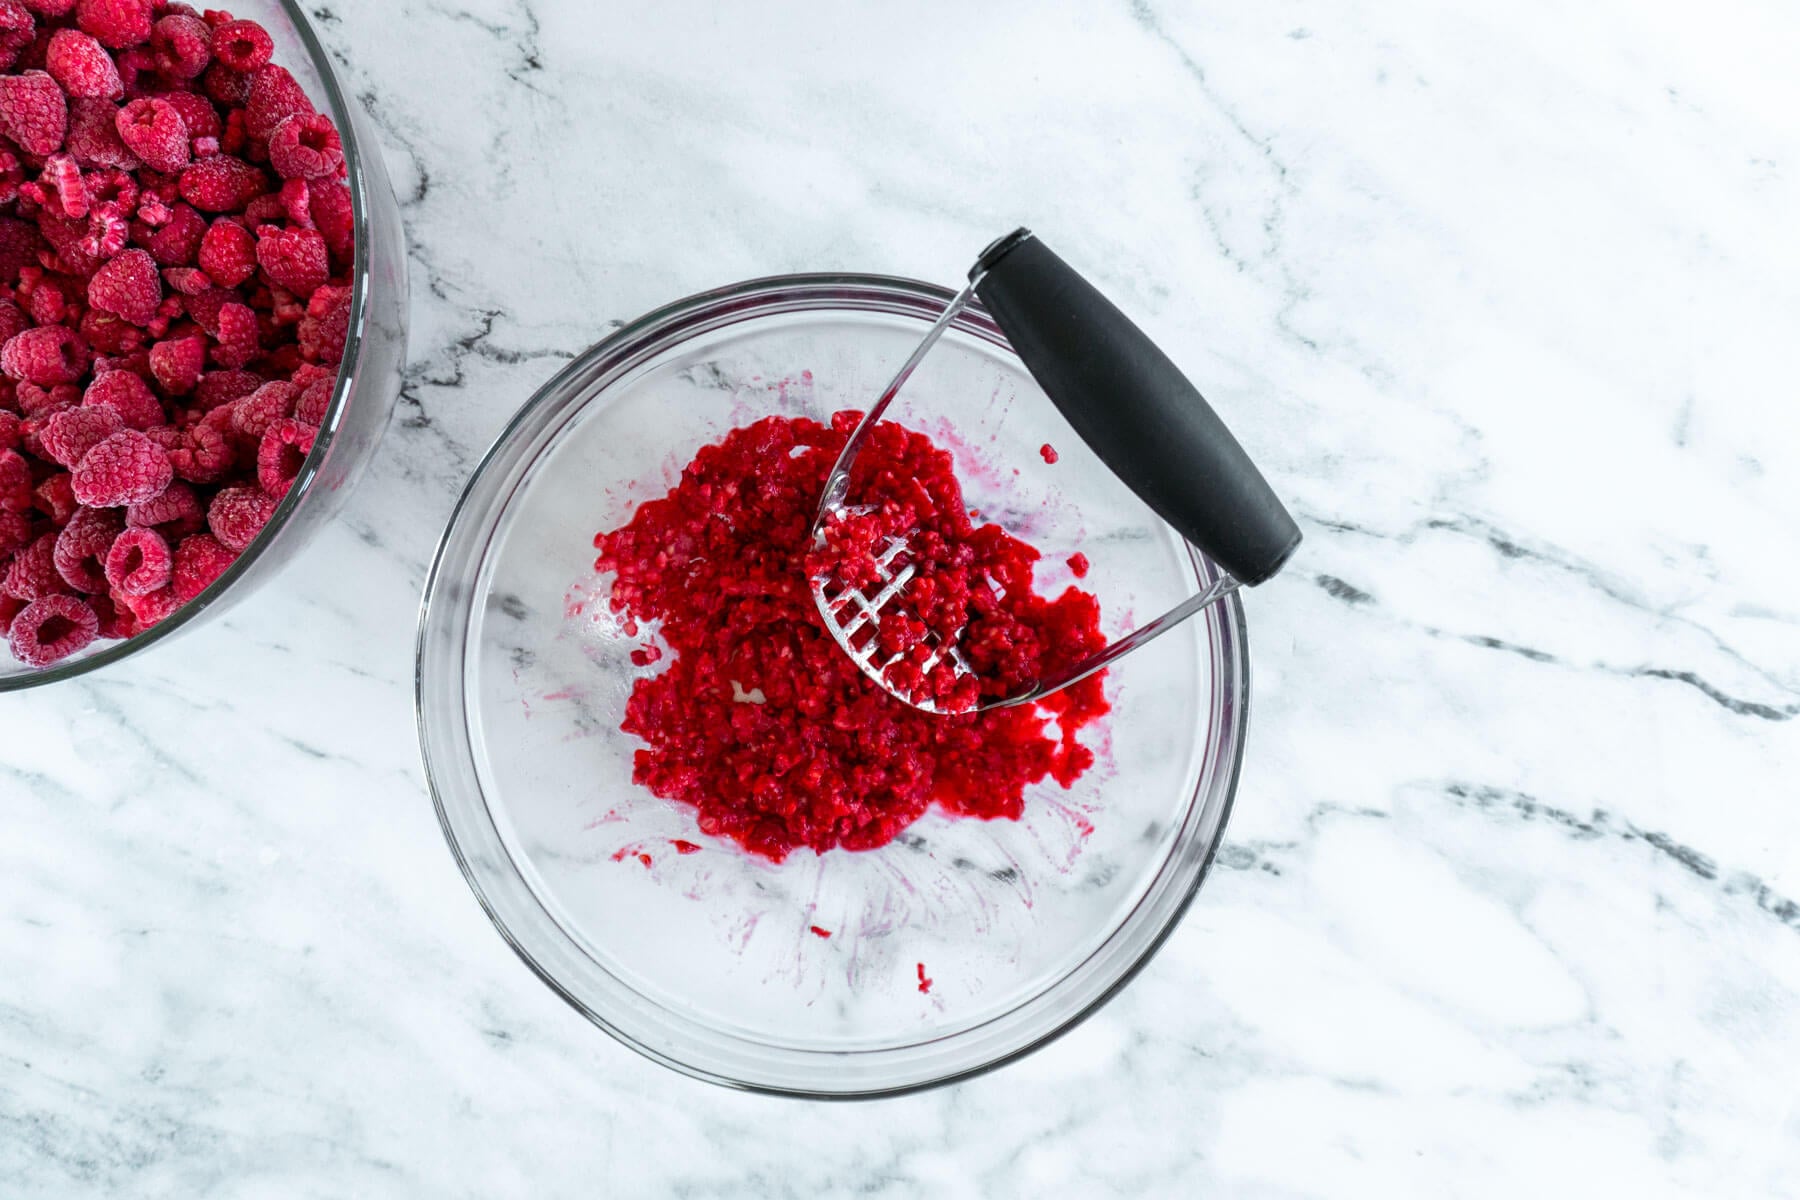
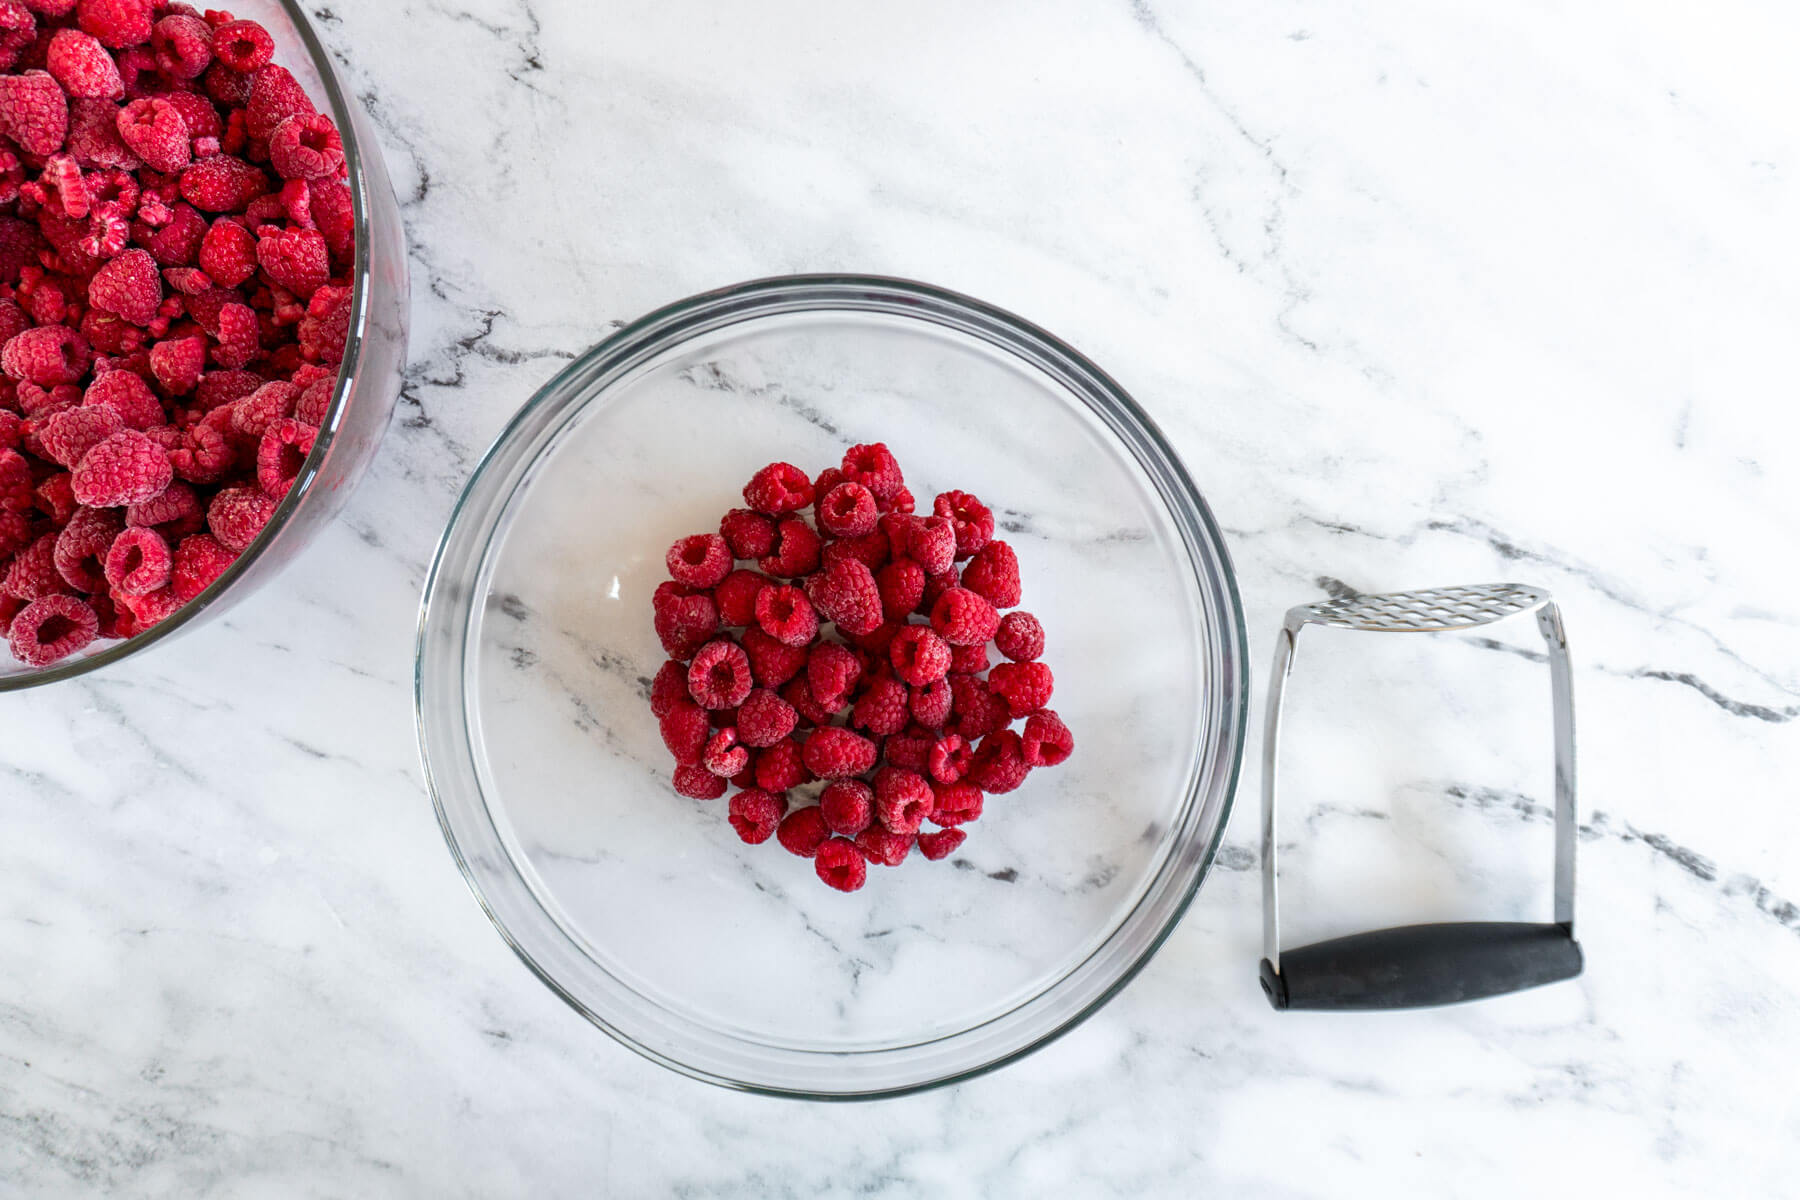
- Step 4: If using frozen berries, thaw them first. Place fresh or thawed berries in a single layer in a large bowl. Mash well with a potato masher. Repeat; adding layers and mashing until all berries are crushed
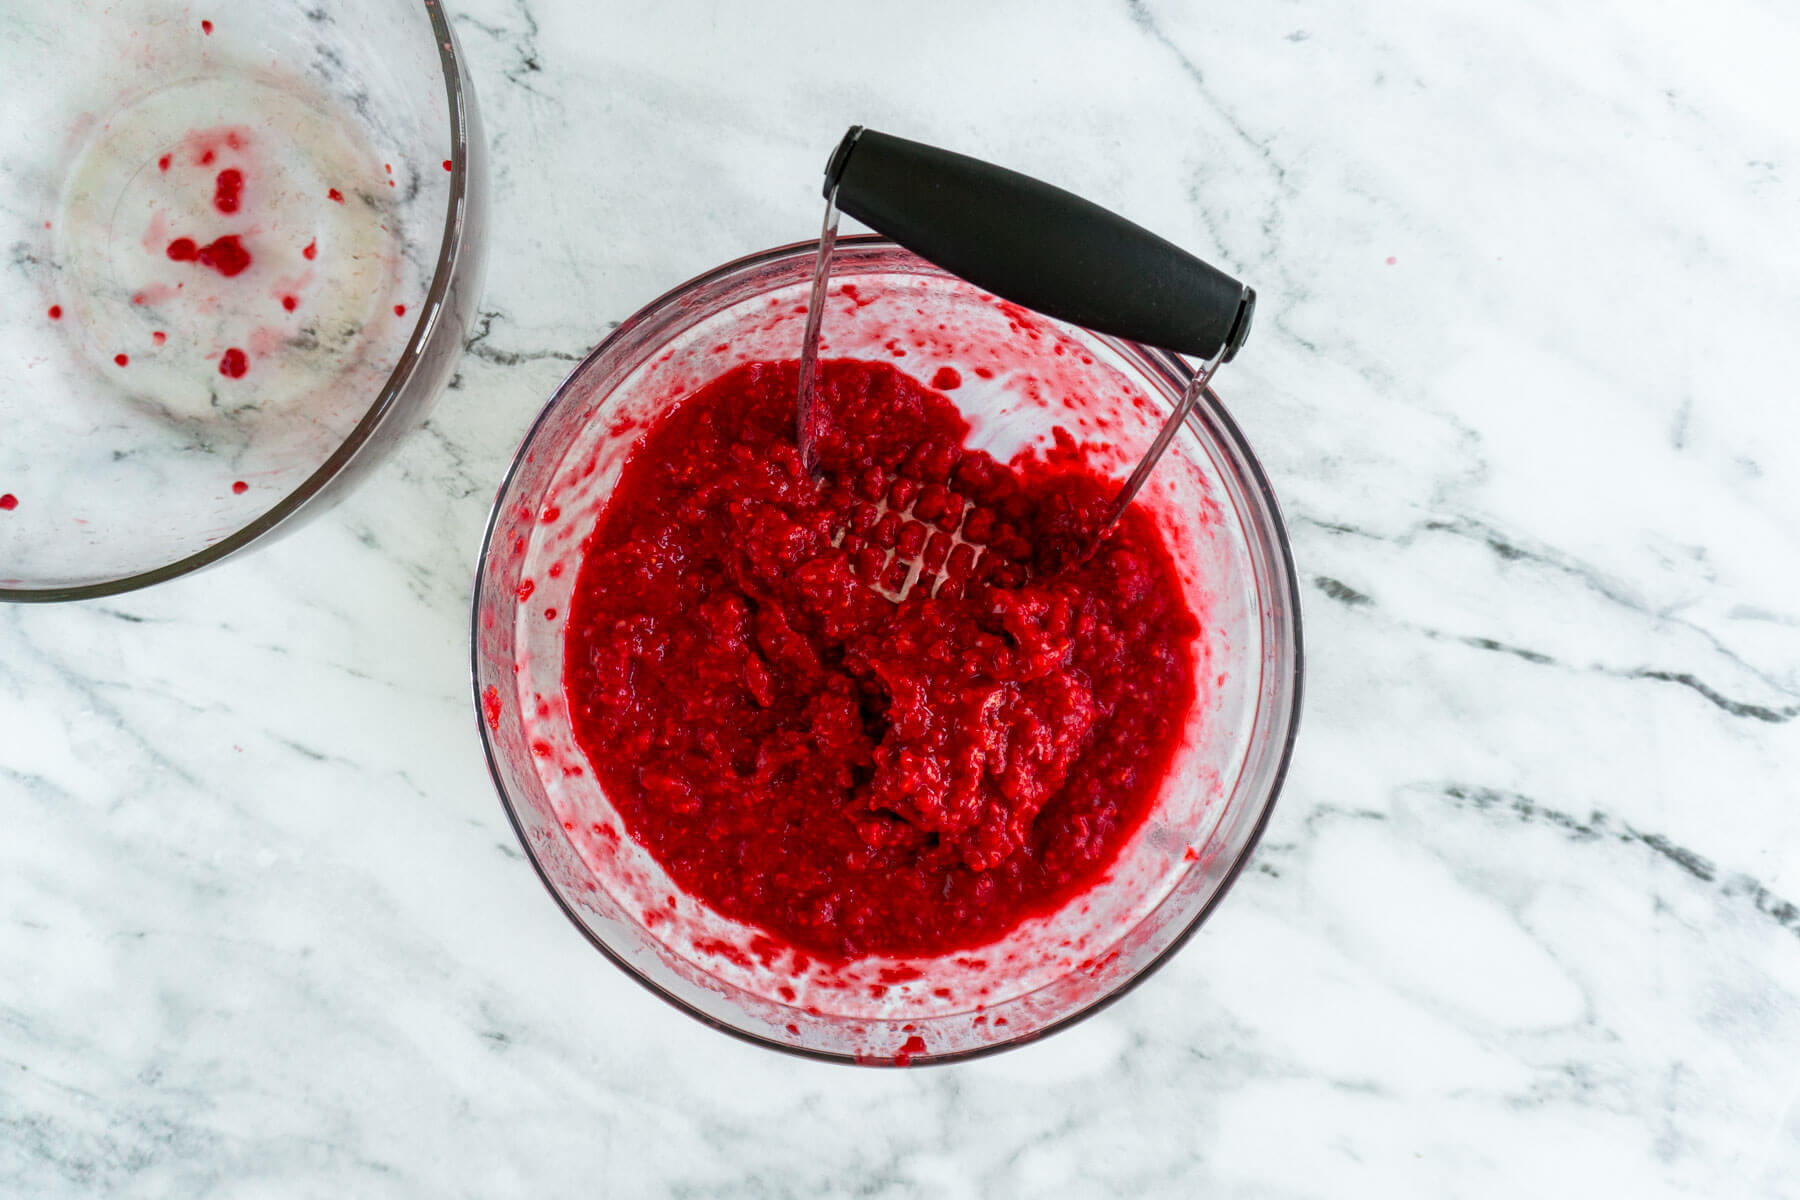
- Step 5: Measure berries and their juice, ensuring you have 5 cups of crushed berries.
Make The Jam:

- Step 6: Place 5 cups of prepared raspberries in a large, heavy bottomed saucepan. Stir in one 57g package of powdered pectin, and 1/2 teaspoon of butter, optional - but can help reduce foaming.
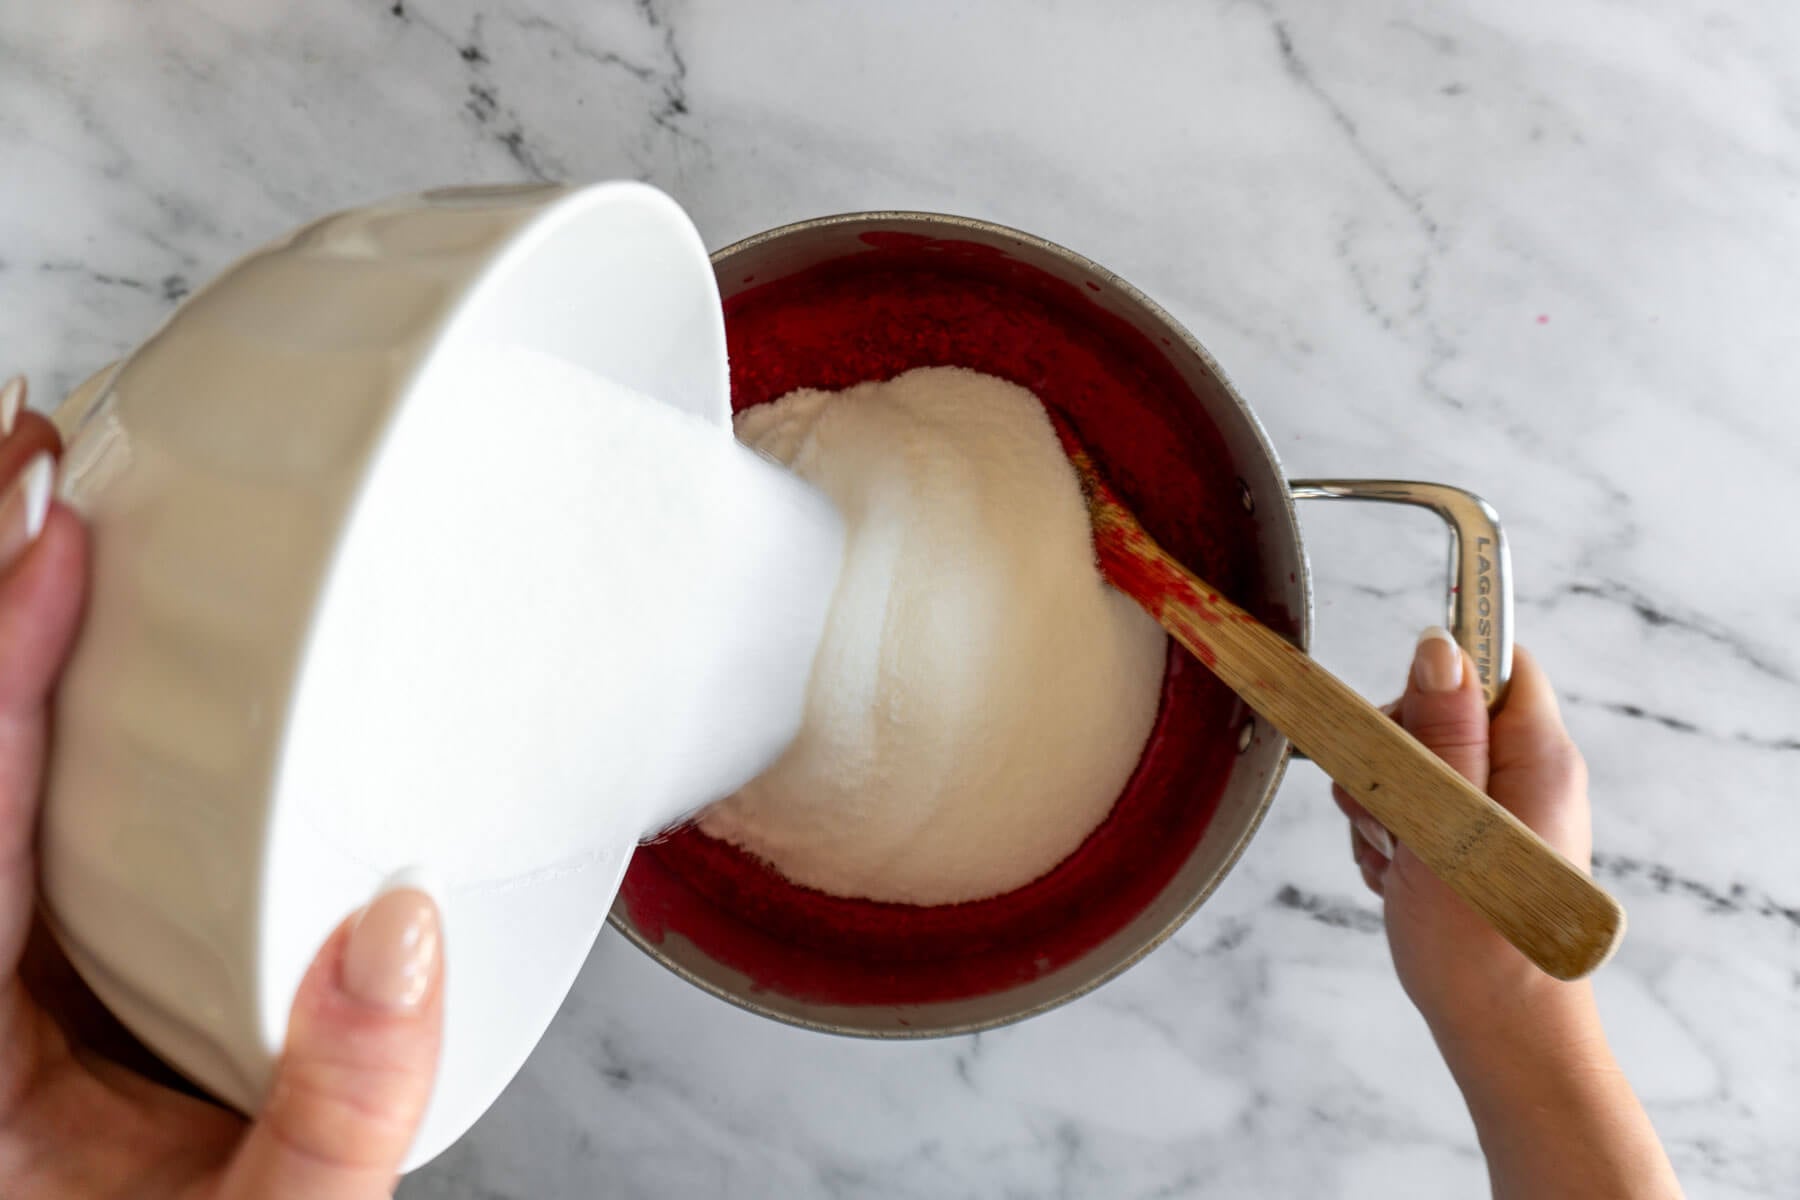
- Step 7: Bring the berry mixture to a full rolling boil over medium-high heat, then stir in 7 cups of granulated sugar.

- Step 8: Stir the jam mixture constantly while it comes back to a full rolling boil - this is a boil you cannot stir down. Boil hard for 1 minute.
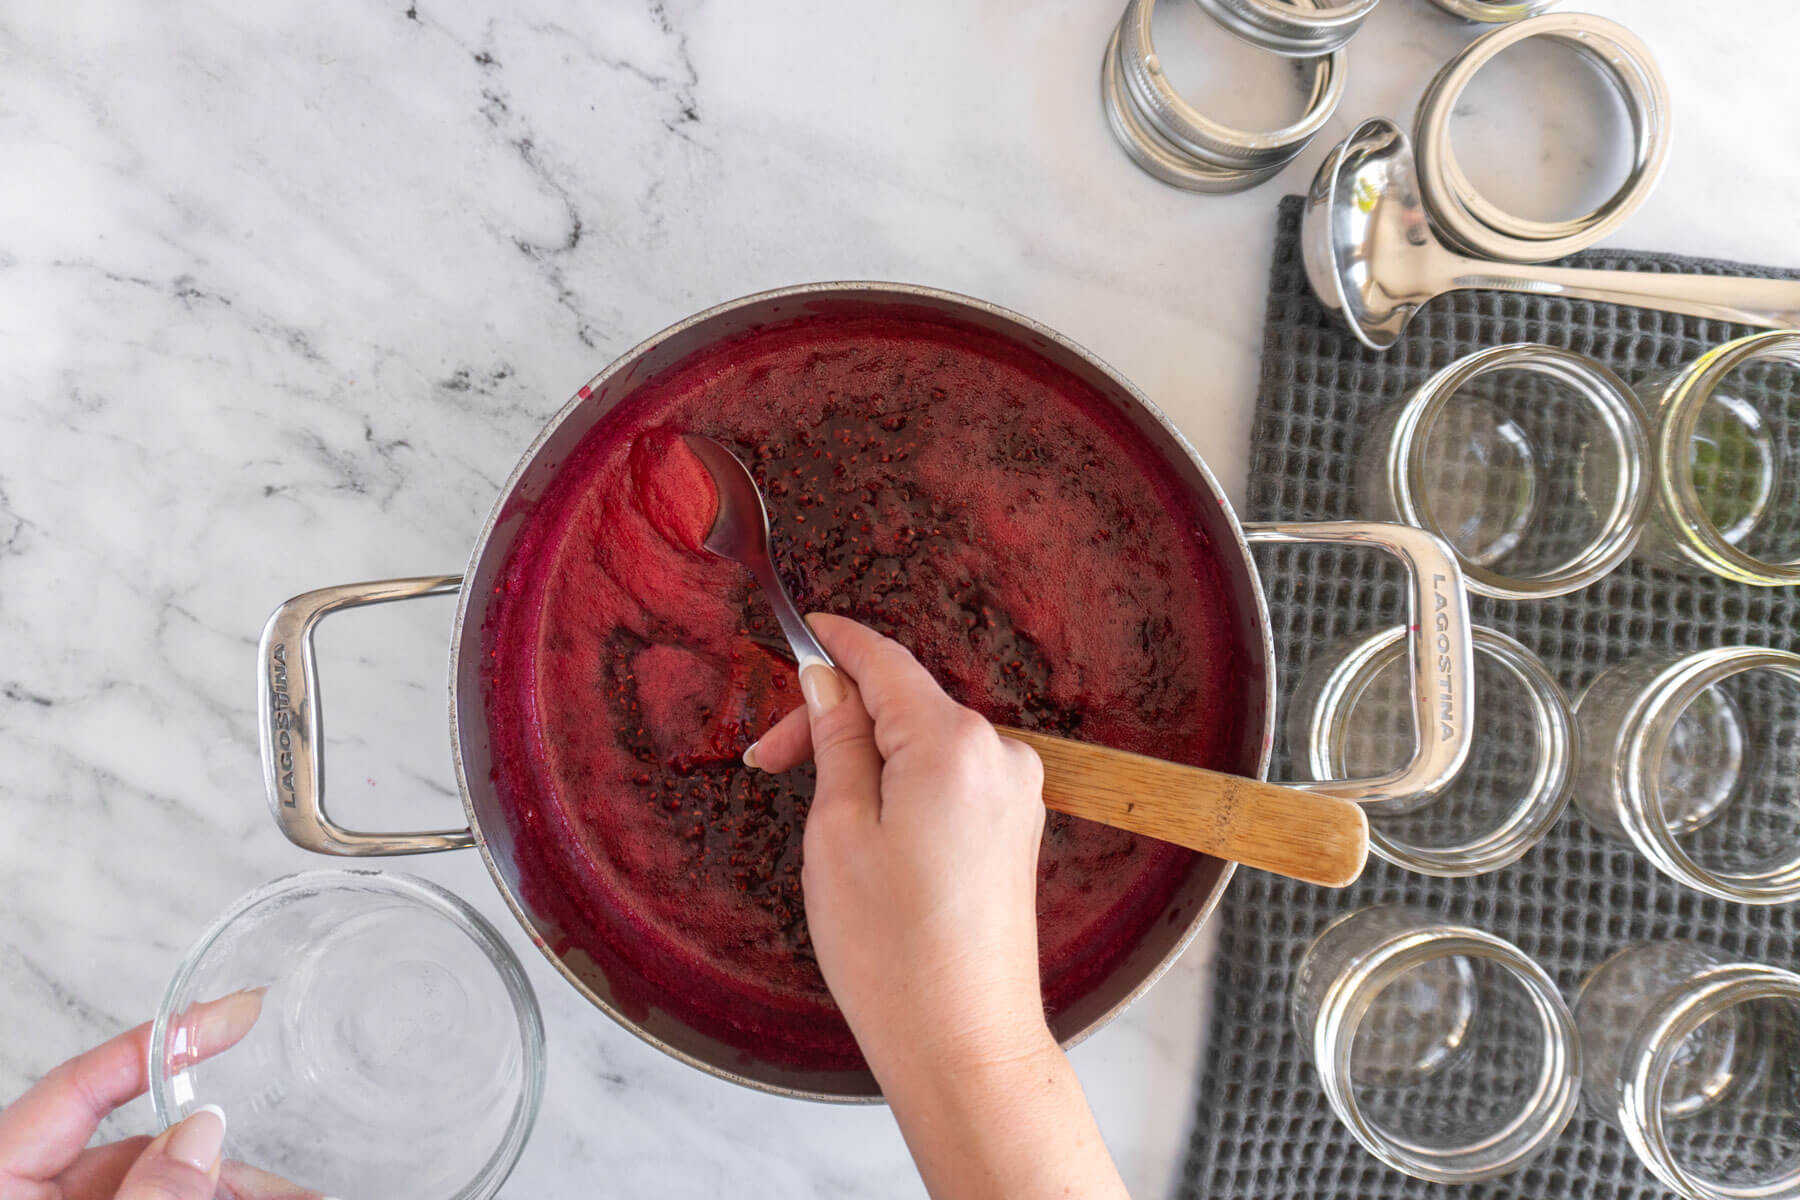
- Step 9: Remove the sauce pan from heat, scoop off any foam if necessary.
Process The Jam:
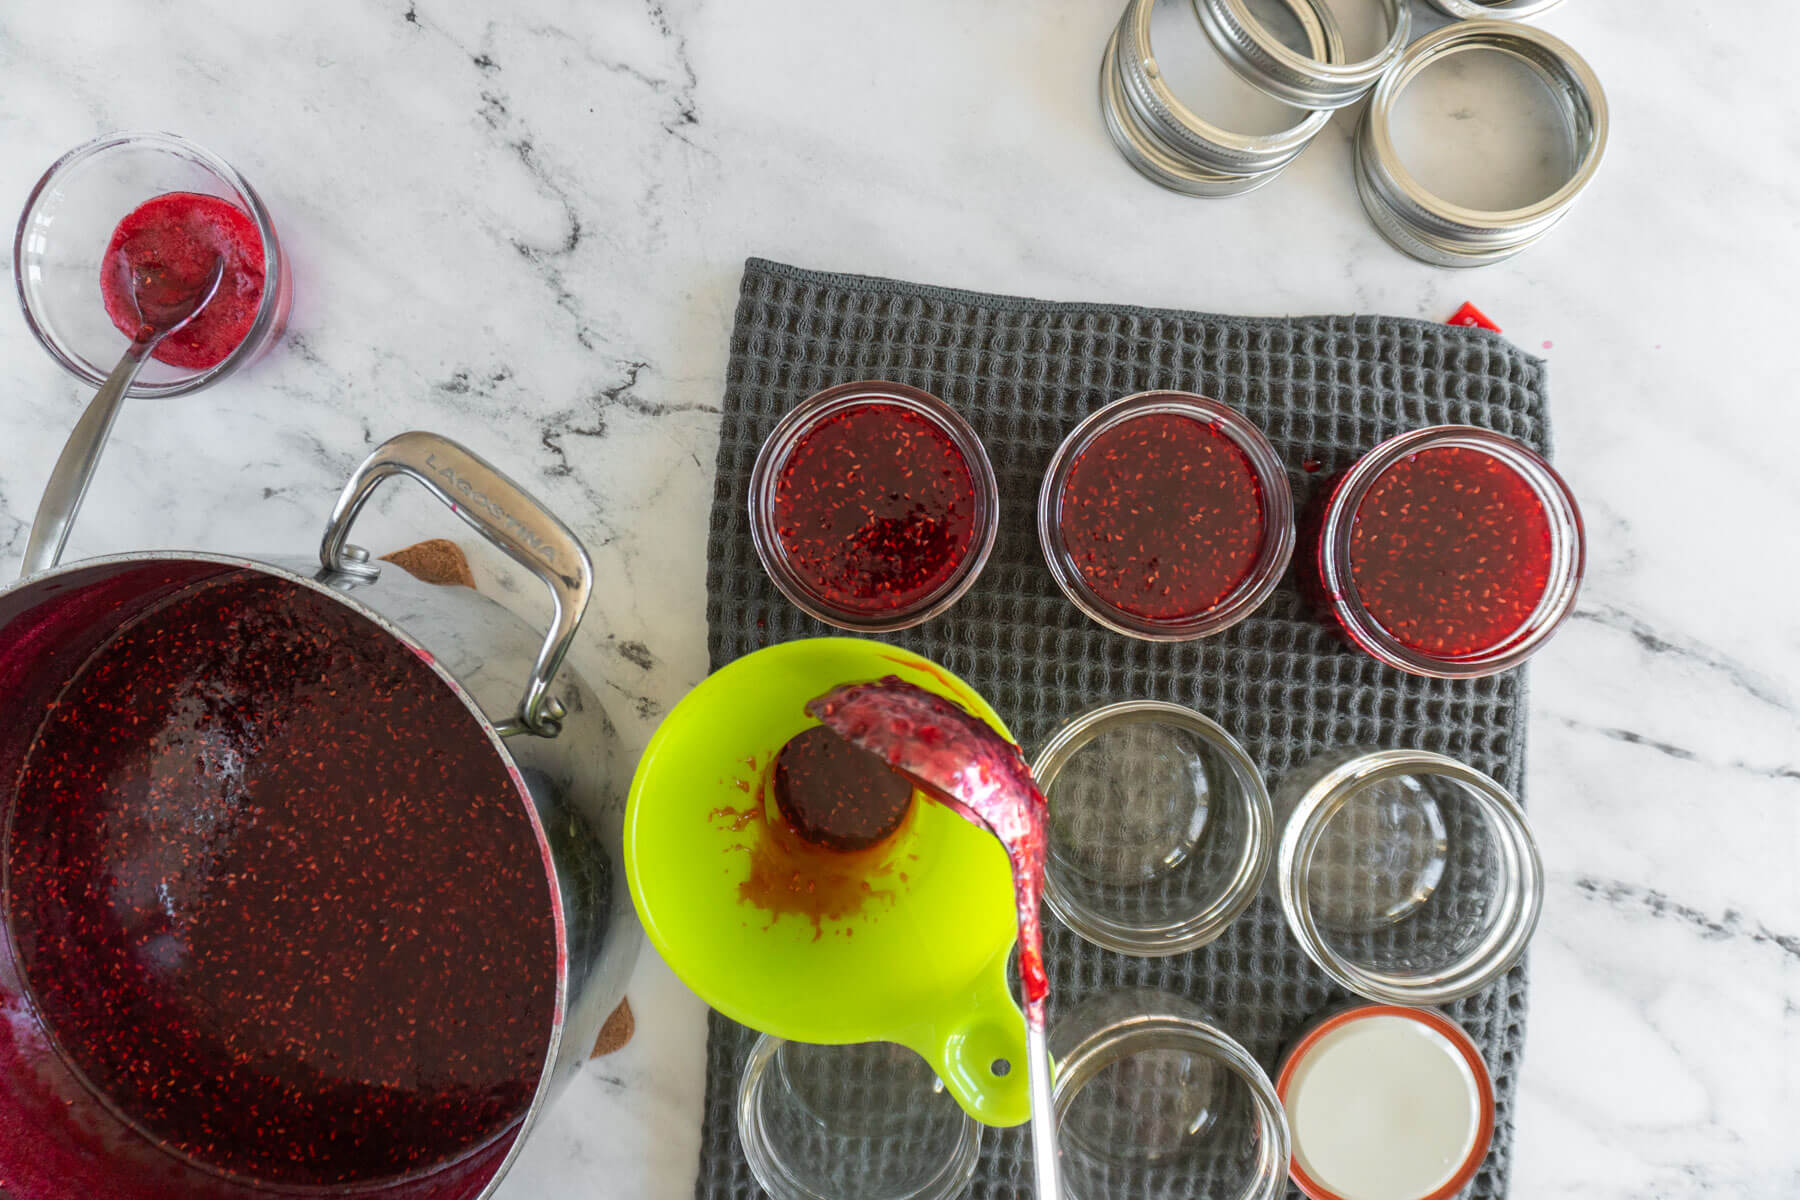
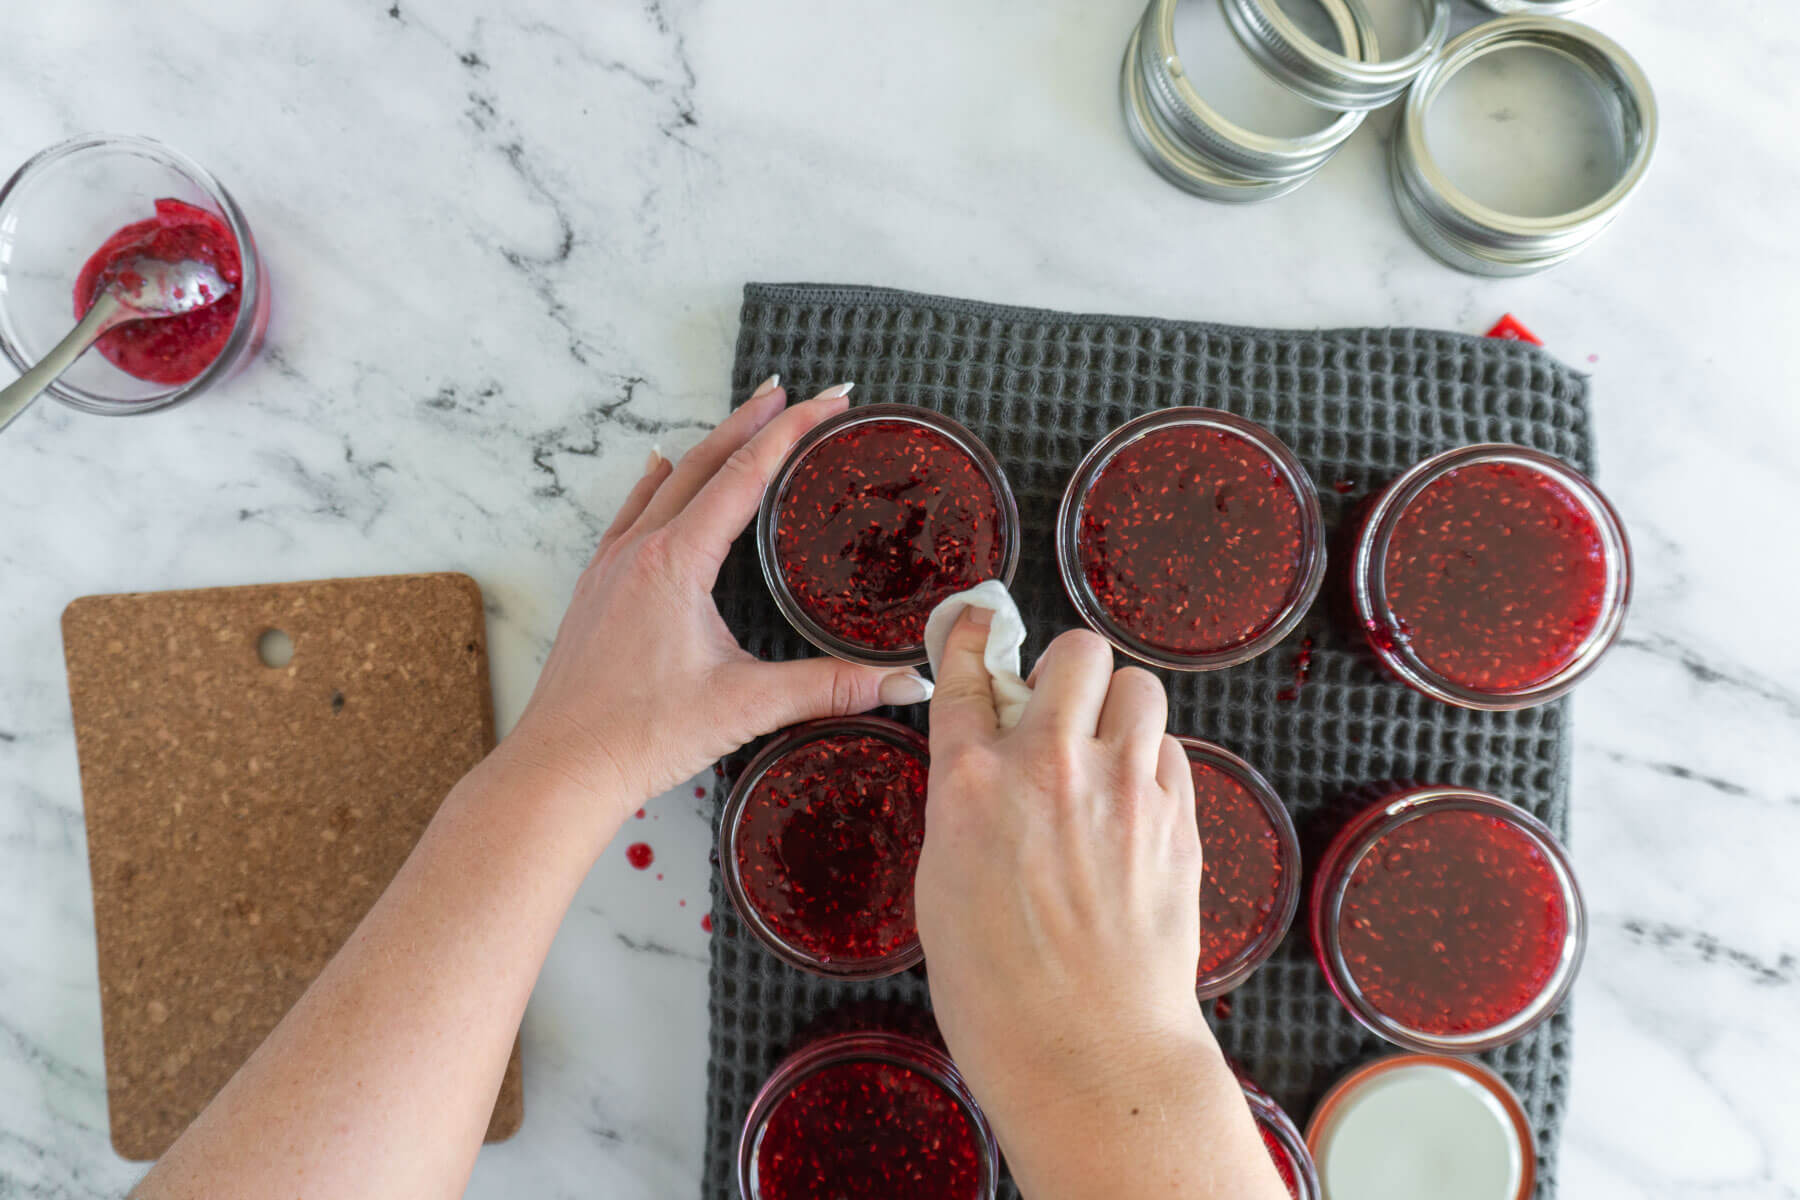
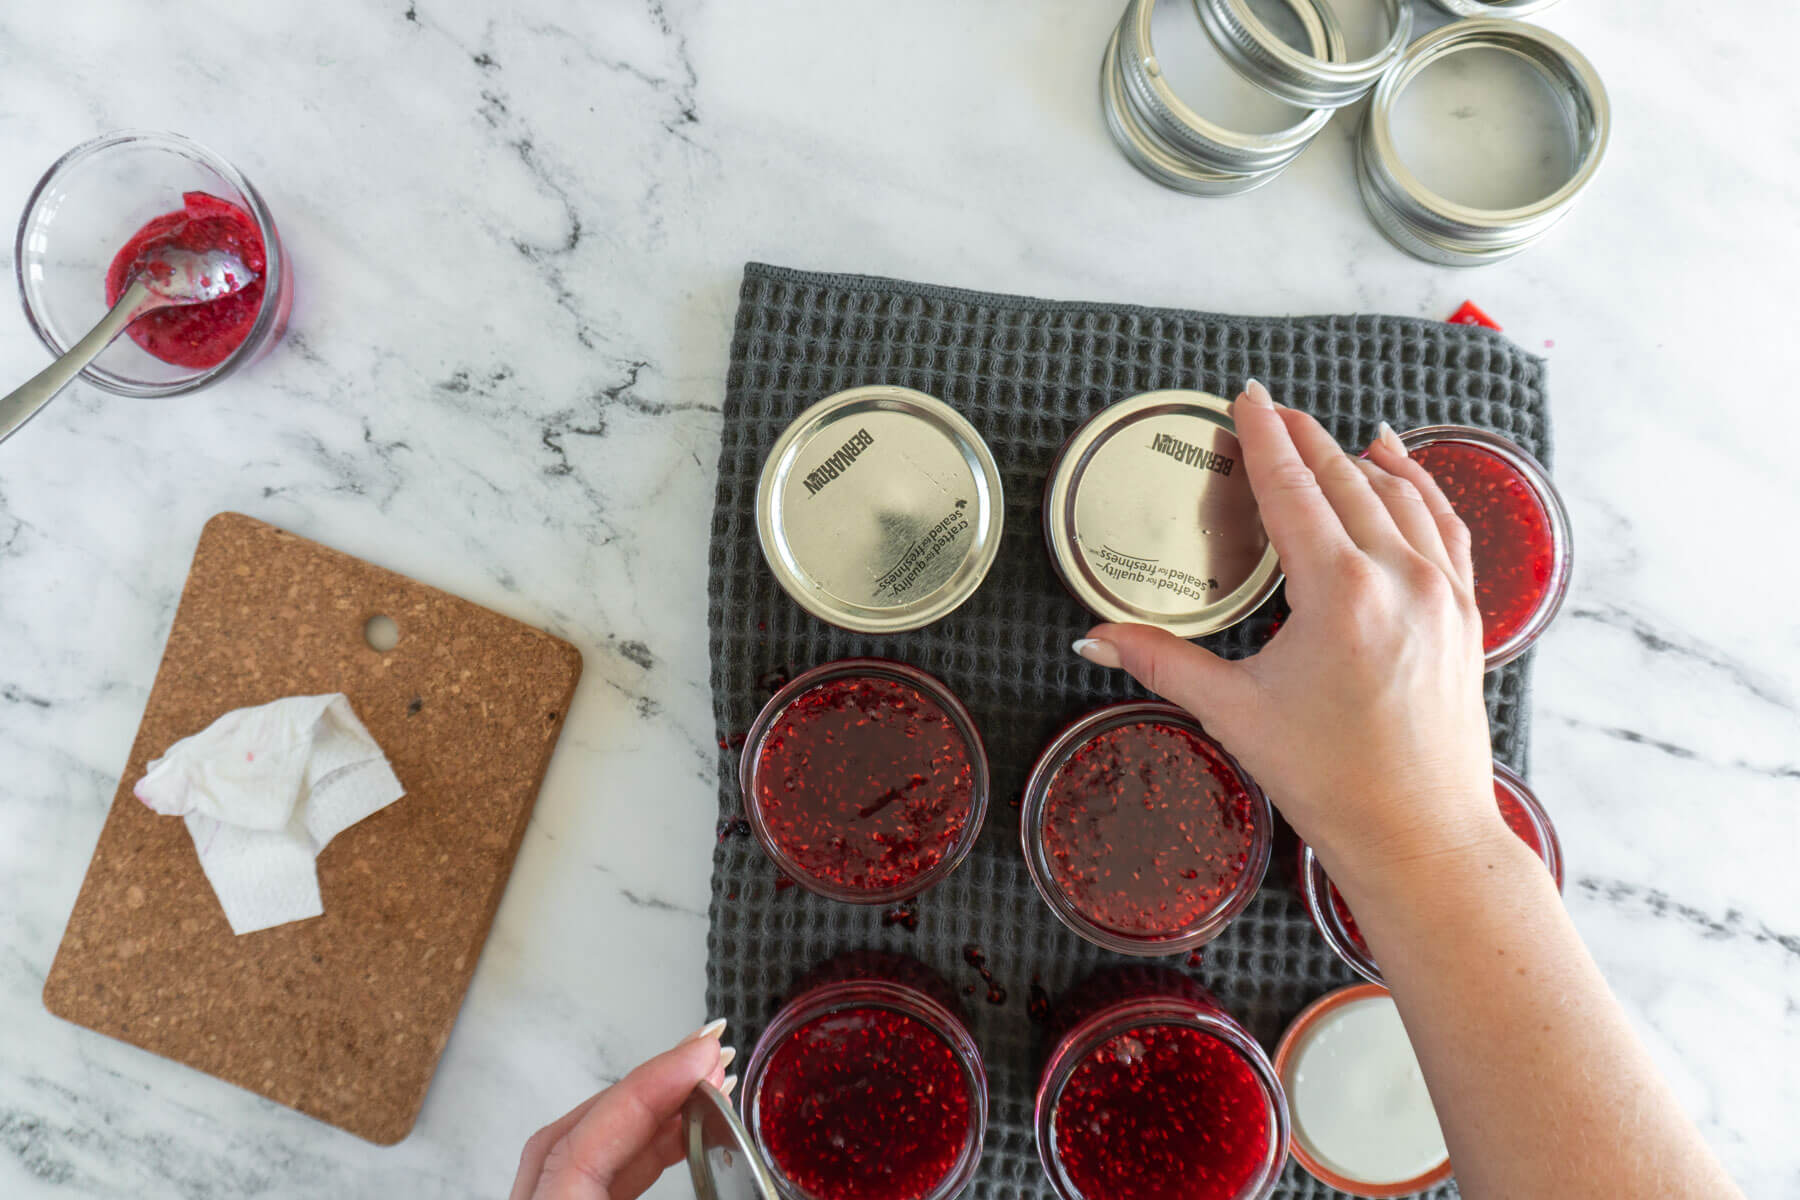
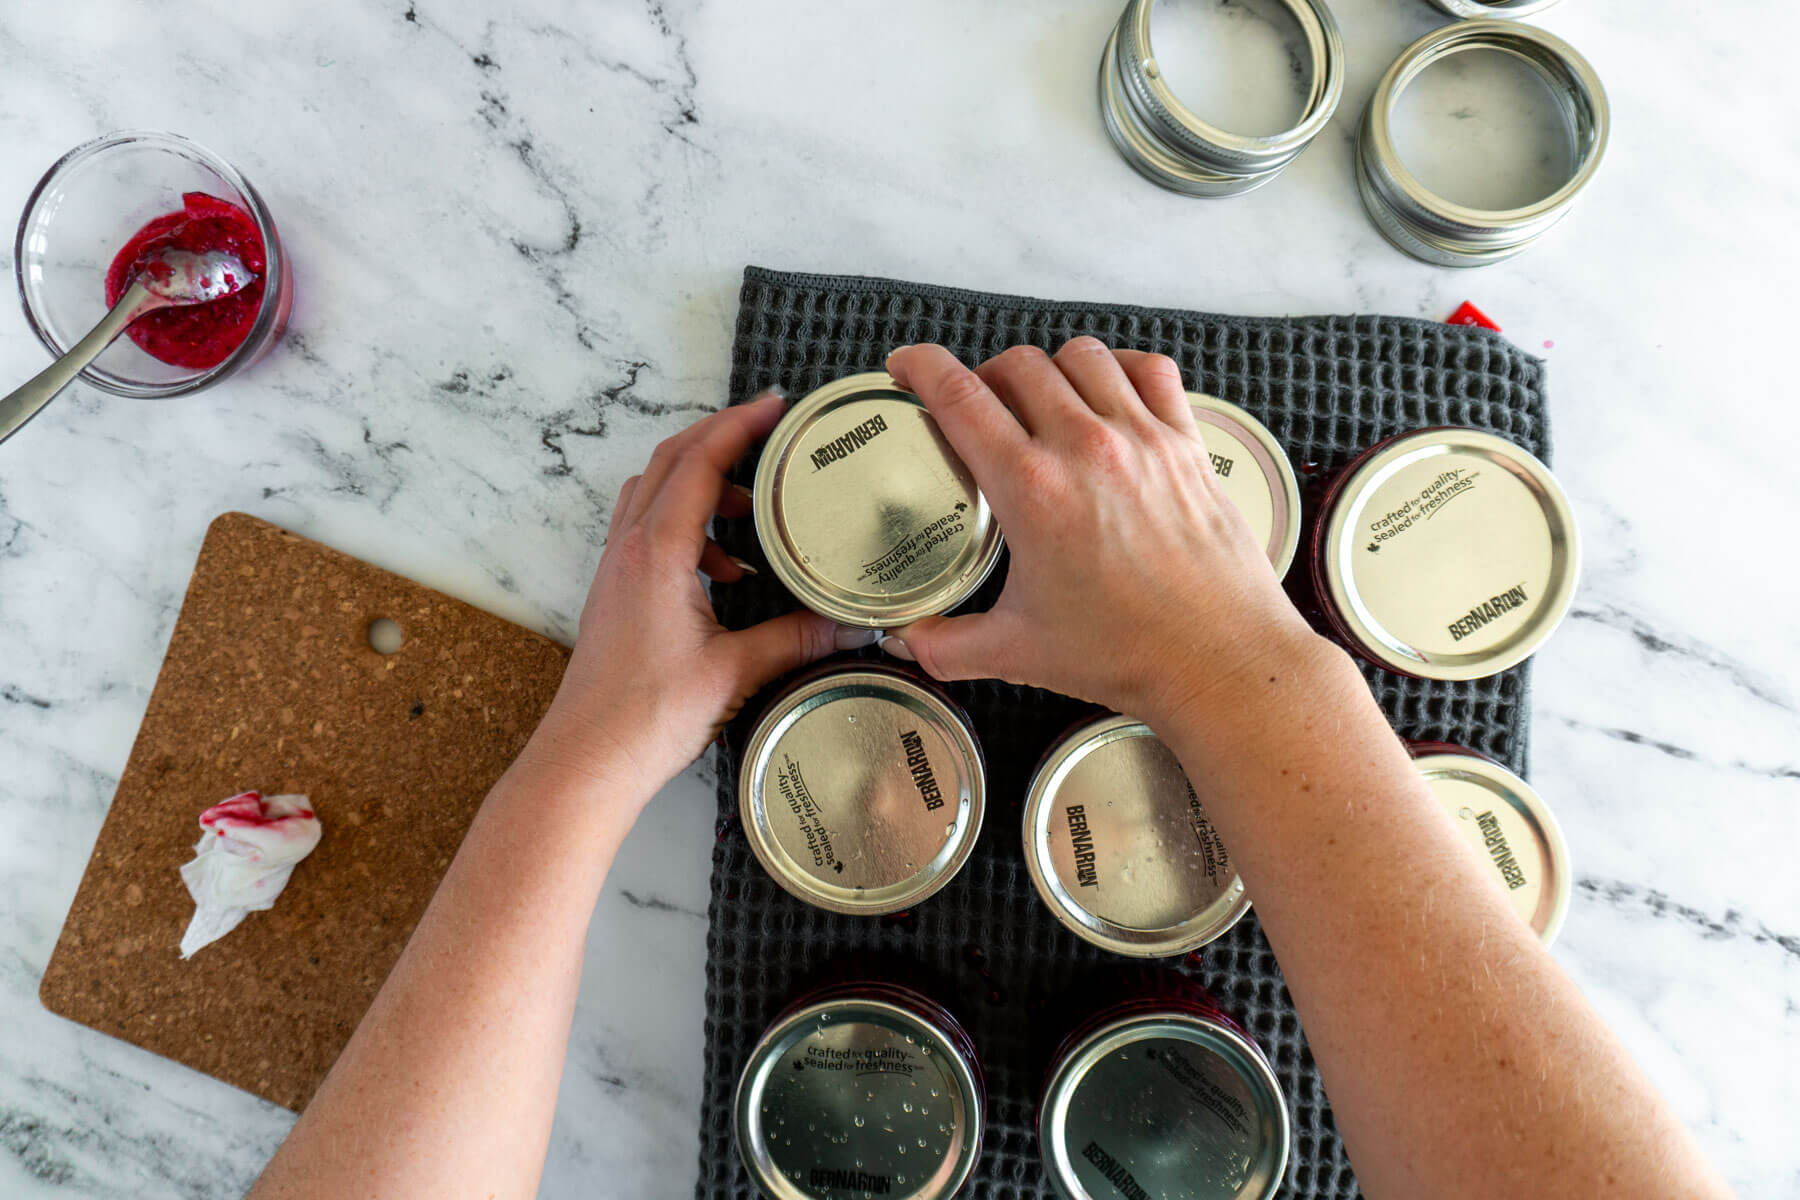
- Step 10: Ladle hot jam into prepared canning jars leaving 1/4 inch headspace. Wipe jar rims, center a new snap lid on each jar, and tighten bands finger tight.
- Step 11: Transfer filled jars to the prepared boiling water bath canner using a jar lifter, ensure the jars are covered by 1-2 inches of water, cover the canner and return to a full boil.
- Step 12: Once the water bath returns to a boil, begin to process for 10 minutes (at 0- 1,000 feet above sea level, see section above for canning at other altitudes).
- Step 13: When processing is complete, turn off the heat, remove the lid from the water bath canner, and rest for 5 minutes before removing the hot jars and transferring them to a heat-proof surface to cool untouched for 24 hours.
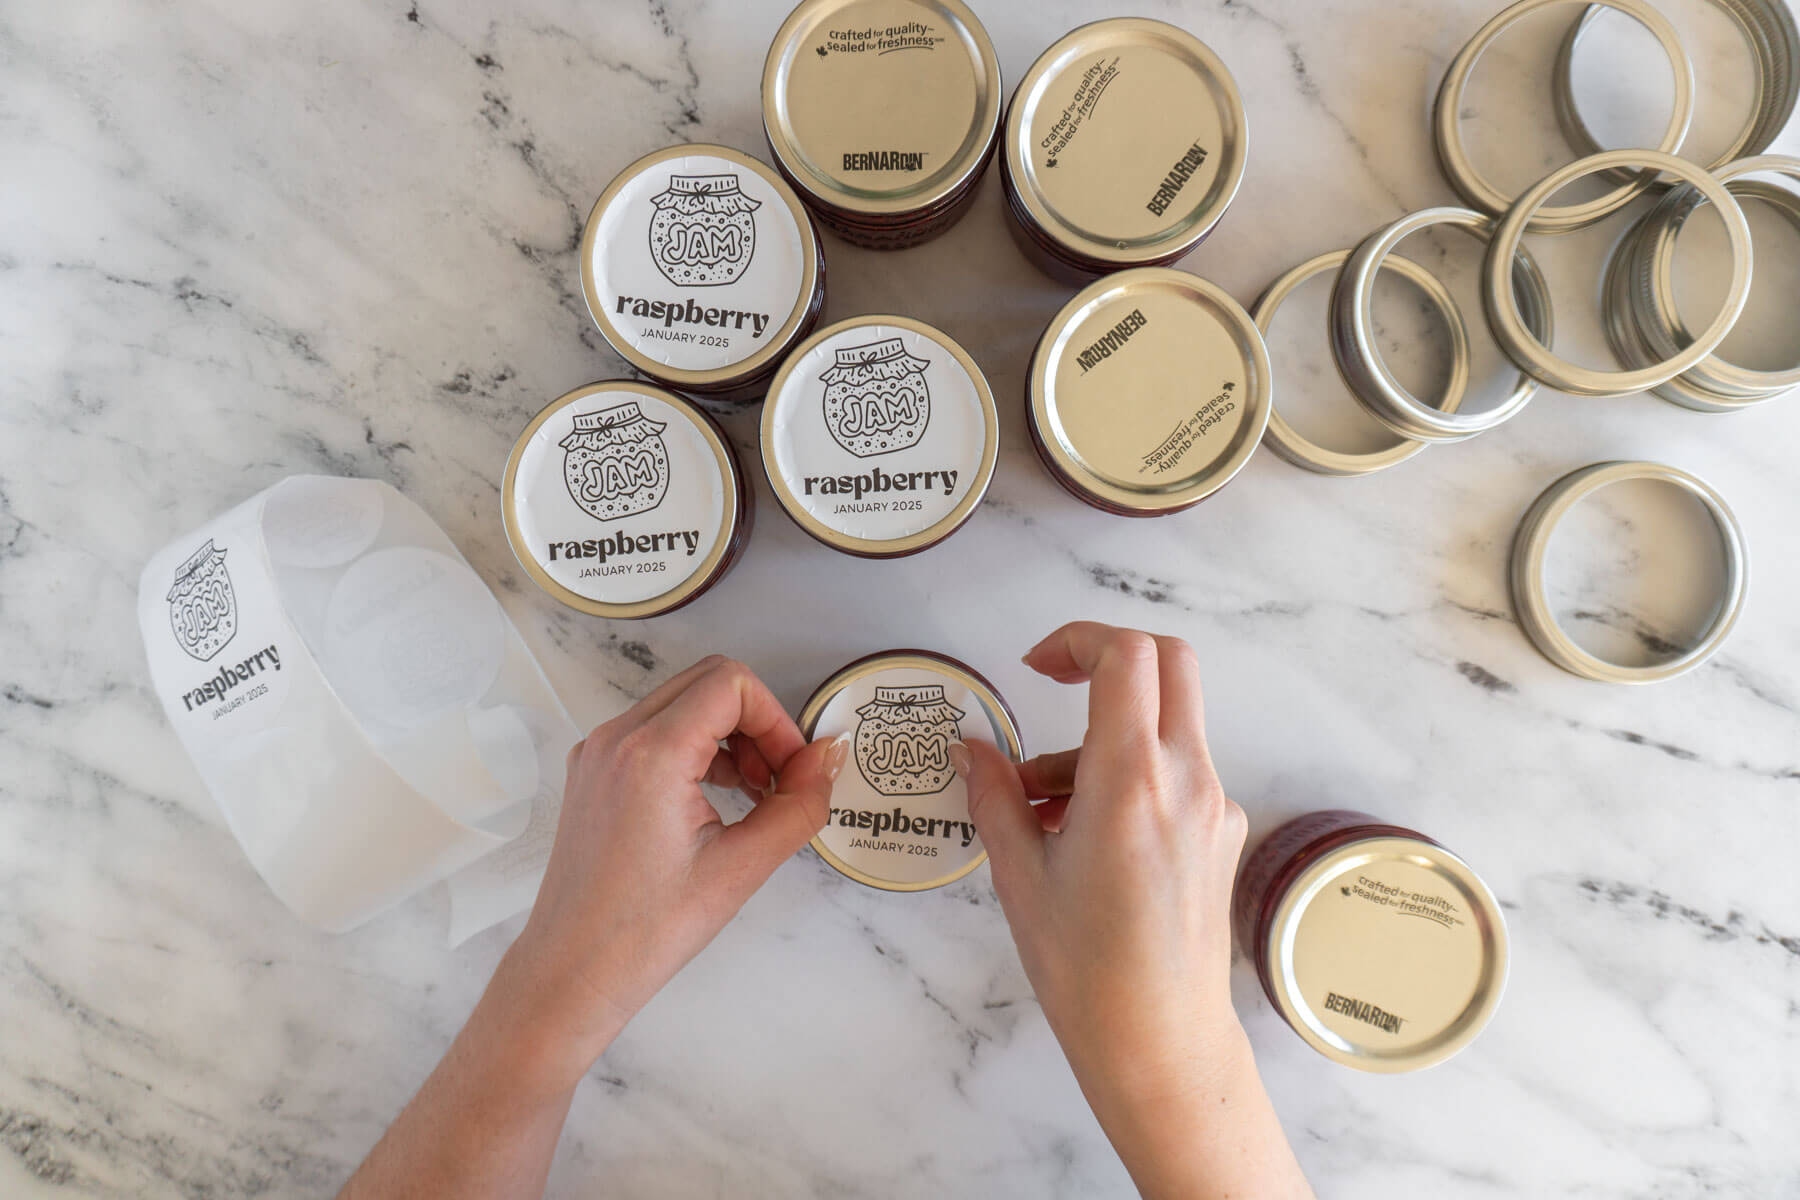
- Step 14: After 24 hours, remove the screw bands, wipe down the jars, and place them in long-term storage location.
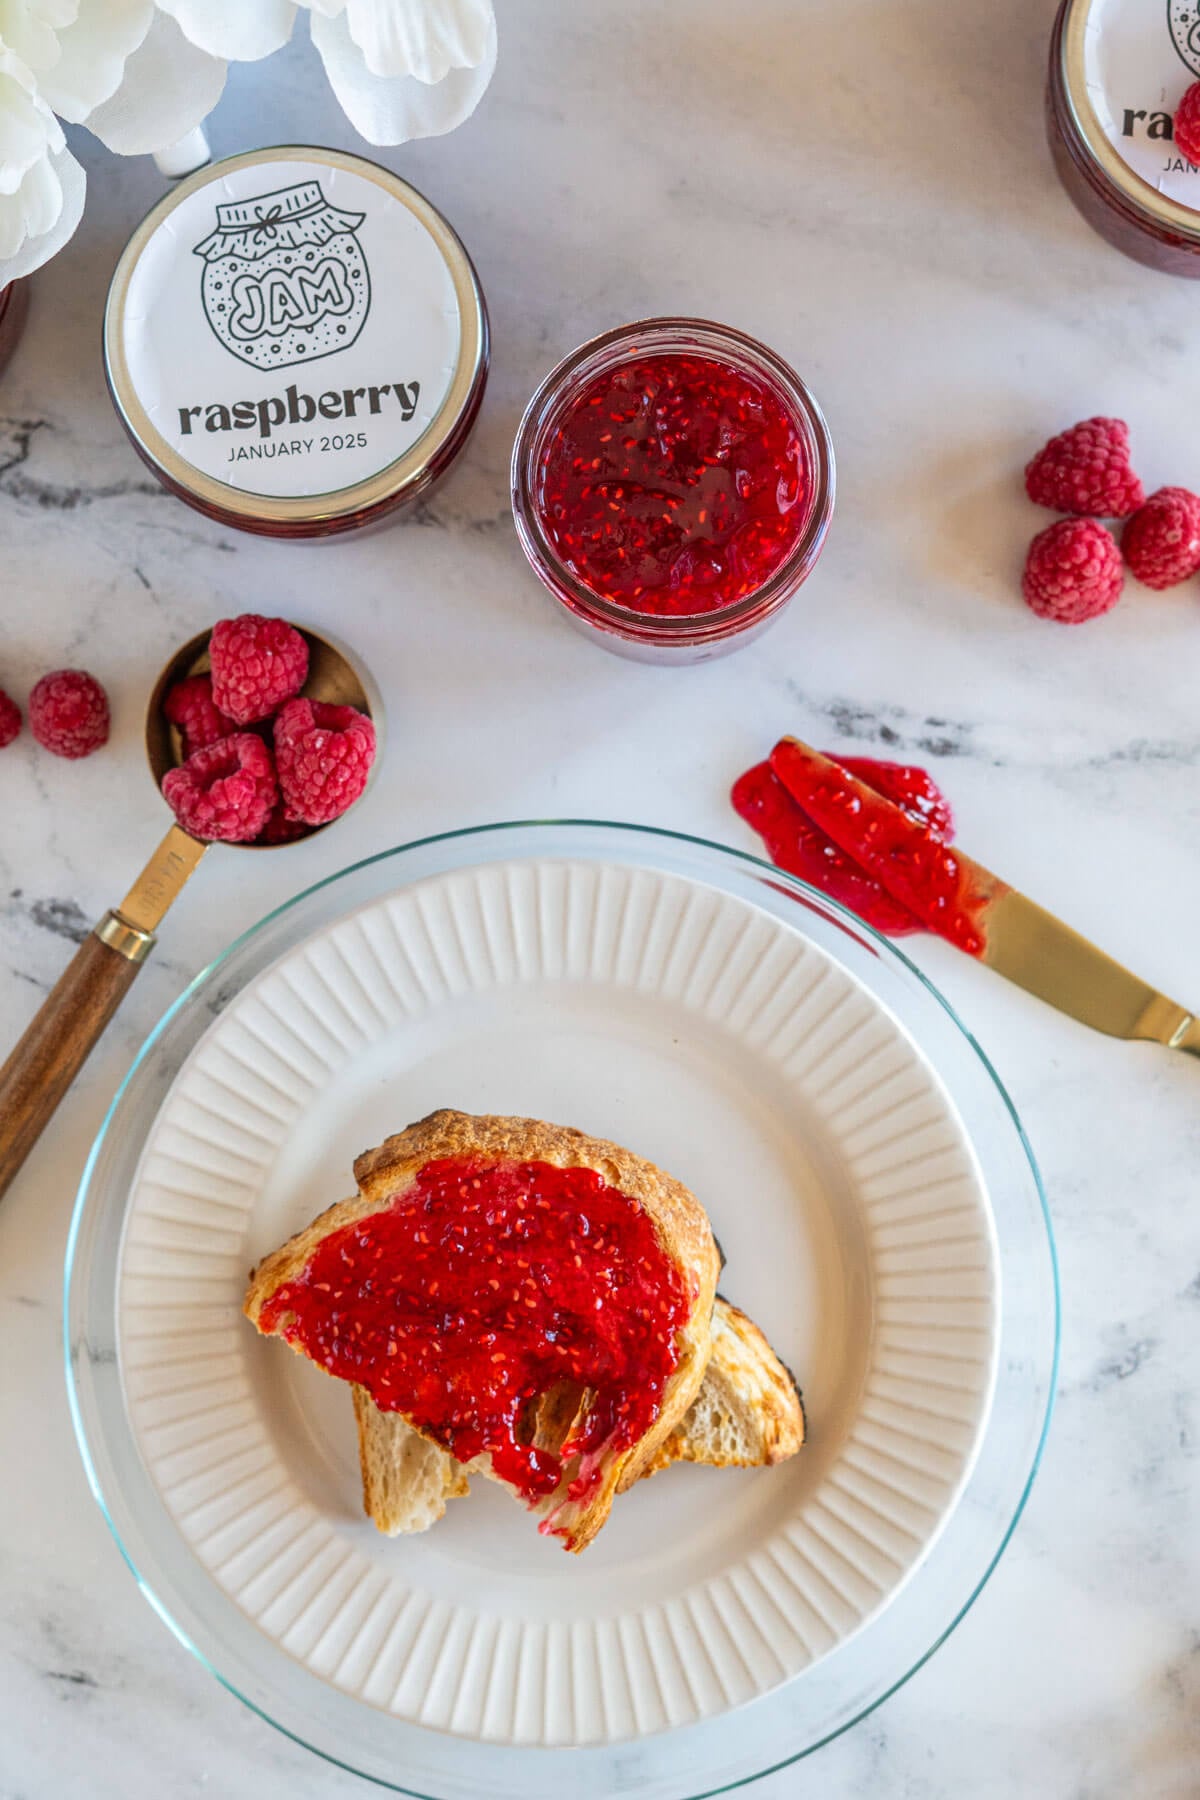
Label Your Jam:
I love to label my handcrafted goodies. I used my Munbyn thermal printer and 2″ round labels for this project. I created the labels in Canva.
Expert Tips
- I always prepare an extra quarter pint jar when I'm making jam. Just in case I have a smidge less than I expected I have a jar that's ready to go when I can't fill a half pint jar.
- I eliminate jar sterilization by ensuring the jam jars are in the water bath canner for at least 10 minutes, I prefer to process my jam a bit longer than sterilize jars.
- Finger-tight is such a vague term, here's how I tighten my jars: Place the filled jar on the counter without holding it. Screw the band on until the jar starts to rotate on the counter, then back off about 1/8 of a turn.
- Frozen berries? Allow them to thaw at room temperature before crushing, it's much easier than smashing frozen berries! Make sure you mash the berries well - this is the key to smooth jams.
- Raspberry juice stains! So don't wear white, and avoid using wooden spoons that may never recover from the dye.
Raspberry Jam FAQs
This recipe makes between 8-9 half pints of delicious homemade raspberry jam. I don't recommend doubling jam recipes, I find things can go wonky, I recommend just making concurrent batches of jams.
Properly water-bathed jam can be kept in a cool, dark place, for a shelf life of up to 12 months. While the lids may seal for longer, flavor, texture, and color can change in an undesirable way. Even properly processed and stored foods can lose their quality over time, so it's important to cycle the stock of your canned goods. Degradation occurs more quickly in temperatures above 70f or 21c.
The NCHFP recommends that once you open a jar, refrigerate it and use within 1 month for best quality and flavor. The jam is still safe beyond that, but texture and taste may decline.
No, this raspberry jam is made with regular pectin and requires the right ratio of fruit to sugar to set. If you’re looking to make a lower sugar option, you’ll have to choose a sugar free pectin recipe or a low sugar pectin recipe.
Troubleshooting
Jam Didn’t Set?
This happens from time to time when making jams and jellies. Don’t fret, all your work isn’t for naught!
Solutions:
First things first – give your jam another 24-48 hours to set, sometimes it needs a little more time. If that doesn’t work, try these easy solutions:
- Syrup: You can strain the seeds from the “runny” jam and treat it like a delicious raspberry syrup – pour it over your sous vide ice cream, pancakes, or add a splash to your homemade hard seltzers.
- Chill: Place a jar in the fridge for 24 hours. If the jam sets firm, remove it and let it rest at room temperature. If it stays firm, you can simply refrigerate the remaining jars as you use them. If it doesn’t hold, proceed to reprocessing.
- Reprocess: For each 1 cup of jam you want to reprocess, you’ll need:
- 2 tablespoons granulated sugar
- 1 tablespoon water
- 1½ teaspoons powdered pectin
In a large saucepan over medium heat, whisk together the water and pectin constantly until boiling. Add the jam and sugar, increase heat to high, and bring to a hard rolling boil. Boil hard for 30 seconds. Ladle into clean jars and reprocess in a water bath canner for 10 minutes (adjust for elevation as needed)
Jam Separated
If your mixture gelled but the fruit solids and jelly separated into layers, this is known as separation. This also happens from time to time with jam, though in my experience, it happens more often with strawberry jam than raspberry.
First things first – don’t panic! This happens occasionally and your jam is still perfectly safe to eat. Here’s what to do:
The Simple Fix: Give the jar a good stir before using. The jam will recombine and you’ll never know it separated. This is what I do – it’s the quickest, safest, and easiest option!
Right After Processing: If the separation is obvious immediately after removing from the water bath, you can carefully tilt the jars back and forth for 30 seconds to help redistribute the fruit throughout the jar then return to the upright position to continue cooling.
Preventative Measures For Next Time:
- Always choose ripe fruit, whether fresh or frozen. Sometimes imported fruit can be picked before it’s fully ripe to ensure it withstands transport leading to firmly textured berries that may float in jam.
- Ensure that you’re measuring carefully and cooking at a full rolling boil for the time indicated to ensure the jam sets properly.
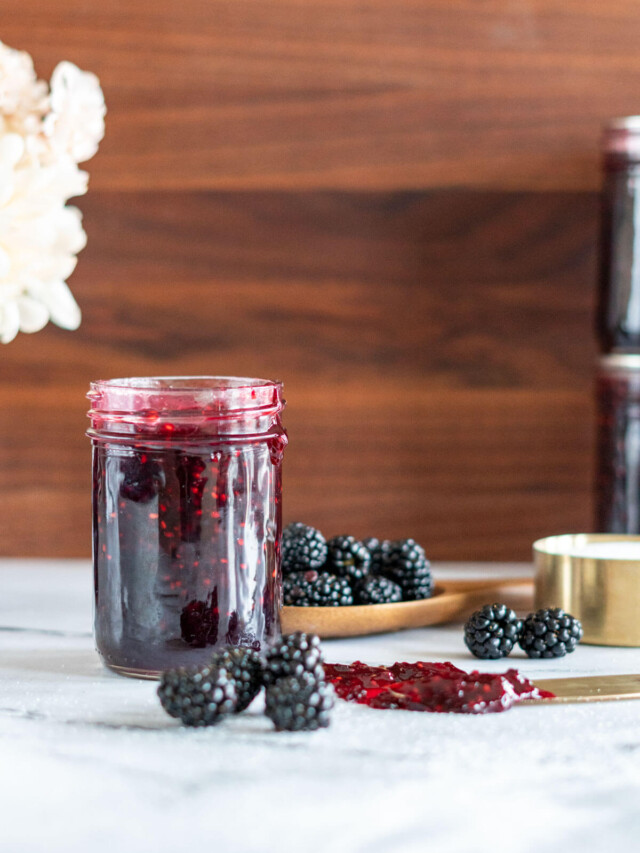
Pectin Jam vs Pectin Free Jam
When making berry jams, I usually opt to make raspberry jam with pectin.
Pectin free jams require twice as much fruit and usually only a cup or so less sugar for the same amount of jam. This means you're concentrating the flavor and sweetness in the jam and while that sounds great it can be cloying, or excessively sweet and cause the loss of the natural tartness and flavor profile of the berry.
The other downside is that pectin free jams require more cooking to render out the liquid from the berries - they are cooked down by pretty much half. This can result in a less fresh, more "cooked" flavor that lacks the depth and nuance of fresh berries.
Serving Suggestions
Here are some of my favorite ways to enjoy my homemade jam!
- swirled into oatmeal or sous vide yogurt
- smeared on rustic sourdough toast, sourdough discard scones, or no milk biscuits
- spread on pancakes or waffles
- poured over homemade vanilla ice cream
- in delicious pb&j sandwiches
- swirled in my peanut butter and jam sourdough bread
See What Else I’m Canning


If you tried this Raspberry Jam recipe or any other recipe on my blog, please leave a 🌟 star rating and let me know how it went in the comments below. Thanks for visiting!
📖 Printable Recipe
Raspberry Jam Recipe
Ingredients
- 3 pounds raspberries, approximately 12 cups
- 1 package powdered pectin, 57g
- ½ teaspoon unsalted butter, optional
- 7 cups granulated sugar
Instructions
Prepare Canning Jars:
- This recipe makes 8-9 half pint (250 ml) jars and does not require sterilization due to the processing time. Prepare your jars, flats, and rings by washing in hot soapy water and rinsing well before setting aside on a clean kitchen towel until you're ready to use them.
- Fill a water bath canner, and set to boil over medium high heat.
Prepare The Berries:
- Gather 3 lbs of raspberries. If using frozen berries, thaw them before beginning.
- Place fresh or thawed berries in a single layer in a large bowl. Mash well with a potato masher. Repeat adding layers and mashing until all berries are crushed.
- Measure berries and their juice, ensuring you have 5 cups of crushed berries.
Make The Jam:
- Place 5 cups of prepared raspberries in a large, heavy bottomed sauce pan. Stir in one 57g package of powdered pectin, and 1/2 teaspoon of butter, optional - but can help reduce foaming.
- Bring the berry mixture to a full rolling boil over medium high heat, then stir in 7 cups of granulated sugar.
- Stir the jam mixture constantly while it comes back to a full rolling boil - this is a boil you cannot stir down. Boil hard for 1 minute.
- Remove the sauce pan from heat, scoop off any foam if necessary.
Process The Jam:
- Ladle hot jam into prepared canning jars leaving 1/4 inch headspace. Wipe jar rims, center a new snap lid on each jar, and tighten bands finger tight.
- Transfer filled jars to the prepared boiling water canner using a jar lifter, ensure the jars are covered by 1-2 inches of water, cover the canner and return to a full boil.
- Once the water bath returns to a boil, begin to process for 10 minutes (at 0- 1,000 feet above sea level, see notes for canning at other altitudes).
- When processing is complete, turn off the heat, remove the lid from the water bath canner, and rest for 5 minutes before removing the hot jars and transferring them to a heat-proof surface to cool untouched for 24 hours.
- After 24 hours, remove the screw bands, wipe down the jars, label, and place them in long-term storage location.
Notes
- I always prepare an extra quarter pint jar when I’m making jam. Just in case I have a smidge less than I expected I have a jar that’s ready to go when I can’t fill a half pint jar.
- I eliminate jar sterilization by ensuring the jam jars are in the water bath canner for at least 10 minutes, I prefer to process my jam a bit longer than sterilize jars.
- Finger-tight is such a vague term, here’s how I tighten my jars: Place the filled jar on the counter without holding it. Screw the band on until the jar starts to rotate on the counter, then back off about 1/8 of a turn.
- Frozen berries? Allow them to thaw at room temperature before crushing, it’s much easier than smashing frozen berries! Make sure you mash the berries well – this is the key to smooth jams.
- Raspberry juice stains! So don’t wear white, and avoid using wooden spoons that may never recover from the dye.
- Processing times:
- 0-1000 ft = 10 minutes
- 1001 – 6000 ft = 10 minutes
- 6001 + ft = 15 minutes


This is my daughter’s favorite jam – she looks forward to my fall jam-a-palooza each year because she knows I’ll be restocking the pantry with fresh raspberry jam. I love that it’s super easy to make, and saves so much money compared to store bought jams.