
Best Bread Machine Recipe

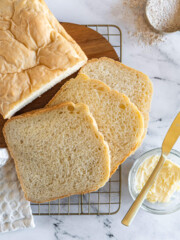
If you’re looking for the best bread machine recipe, you’ve found it! This one is made with simple ingredients creating a soft, flavorful loaf that's perfect for sandwiches and toast.

Jump to:
There’s no arguing it, my Mom is 100% the best at baking homemade bread.
Me, on the other hand? It’s not one of my skills, I prefer sourdough baking! She’s handed down her recipe to me, tried to teach me, gave up teaching me, then taught my husband instead.
We’ve all decided that mom's bread will live on with Kevy!
But my mom gave me this white bread recipe so that I could bake my own light, fluffy sandwich bread on my own and I’ve been using it for over 10 years!!
This easy bread machine recipe is dedicated to mom.
This article was updated April 2025 to add new photos and weights in the recipe card, the recipe itself is unchanged!

High Hydration
This is a high hydration recipe, about 72%.
It will look and behave differently than doughs you might be used to, but there’s a method to the madness. High hydration doughs:
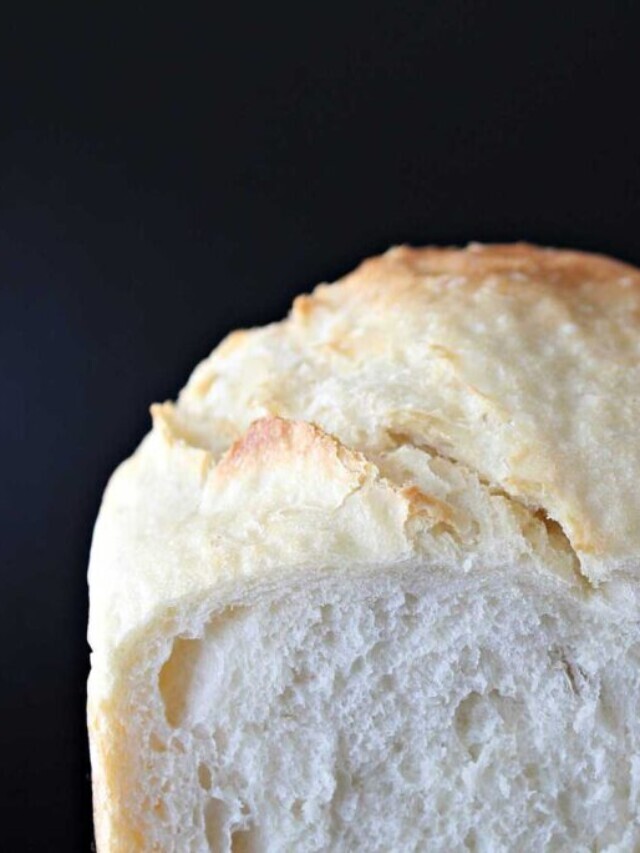
- have thinner, crispier crusts but more tender crumbs
- ferment more quickly
- are more stretchy and sticky
All of these qualities add up to the perfect bread machine recipe, resulting in light, airy loaves that are full of flavor, with a beautiful rise and an irresistibly soft interior.
Key Ingredients

Flour: Use a high protein flour in this recipe, something like unbleached bread flour or all purpose flour with at least 12% protein.
Calculate protein content as follows:
Grams of Protein / Grams per Serving = _________ X 100 = ______%.
ex: 4g protein /30g per serving =.1333 x 100= 13.3% protein
Yeast: This recipe calls for instant yeast, or bread machine yeast, but if you don’t have any, you can use active dry yeast. Increase the amount to 2 1/2 teaspoons of active dry yeast and add it along with the liquid ingredients instead of on top.
Read More: Bread machine yeast substitutes
Variations + Substitutions
- Vegetable oil in this recipe can be substituted for butter, olive oil, margarine, I’ve even used rendered lard from own home-grown pork!
- Granulated can be substituted for brown sugar, maple syrup or honey. Though I prefer granulated sugar as it doesn’t bring affect the flavor profile of the bread.
- You can use all purpose flour if the protein content is around 13%. Determine the protein content with this formula: Grams Of Protein /Grams Per Serving = ___ -> ___X 100 = ___ %
- If you want to add some whole wheat flour, you can swap out up to 1/2 cup of bread flour for whole wheat, but I do have a bread machine recipe for honey whole wheat bread!
How To Make Bread Machine White Bread

- Step 1: Combine the liquid ingredients: 1 3/4 cup warm water, 2 tablespoons vegetable oil, 1 1/2 teaspoons granulated sugar, and 1 teaspoon coarse kosher salt in the baking pan of your bread machine.

- Step 2: Layer the dry ingredients as follows; 4 cups bread flour followed by 2 teaspoons rapid rise or bread machine yeast. Either sprinkle the yeast on top of the flour, where it’s not touching the water or create a well in the flour, then add the yeast there.
Pro Tip: To test your water, use my extremely scientific method: dab some on the inside of your wrist like you would with a baby bottle. If it feels too warm, use cooler water.

- Step 3: Place the baking pan into the bread machine. Select Basic, Light Crust, and 2 lb Loaf options. If your machine does not have all these settings, simply select the Basic or White setting.

- Step 4: Allow the bread machine to bake.
This is the hard part! Walk away! You’ll be tempted to check on your bread and then start panicking cause the texture looks weird, the dough looks too wet, or the corners still have dry flour. Don’t worry, I did all the peeking for you through the process – pics are below.


- Step 5: Remove the bread pan from the bread machine. Overturn the baked loaf onto a wire mesh cooling rack. It’s important to get to your machine as soon as possible once it beeps complete to avoid it kicking into keep warm mode, this will dry out your bread and make it less than pleasant.
Allow the bread to cool completely (if possible, I know it’s hard!) before cutting.

Expert Tips
- This bread maker recipe gives a 2 lb loaf. Please double check that your machine has 2lb capacity – or you’ll likely have a heck of a mess!
- Use the scoop and level method for your flour: stir the flour well in the bag, then scoop the flour into your measuring cup and level the cup by scraping a knife across the top. This will result in more consistent scooping!
- After the last punch down or prior to the final rise, I like to open the bread machine and remove the kneading paddle. This helps to prevent a large cavity in the bottom of the loaf. Because this dough is pretty sticky, my hands do get a little dirty haha

Batch + Storage
Batch:
This easy bread machine recipe makes 1x 2 lb loaf. Be sure to check that your bread machine can handle a 2-pound loaf before you begin baking!
Storage:
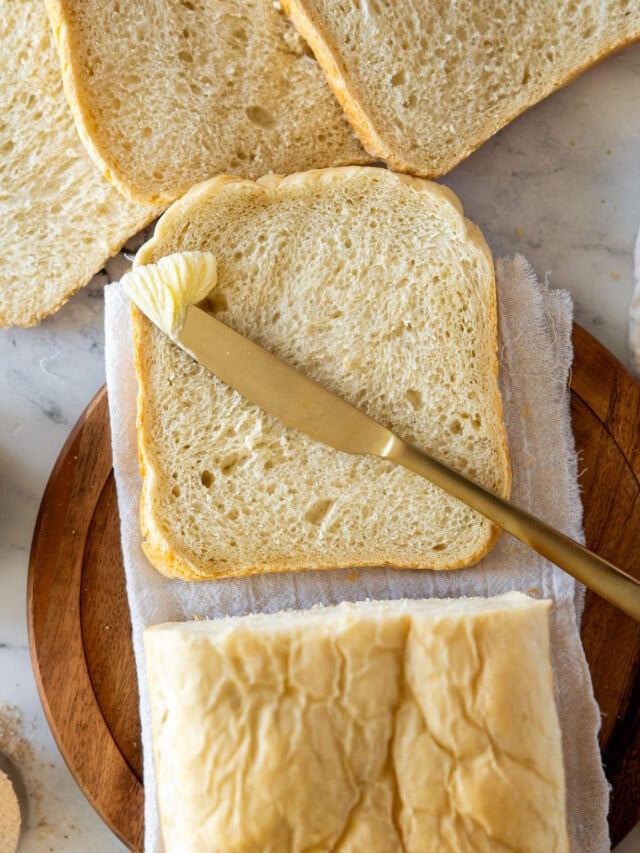
Once your loaf is fully cooled, place it in a sealed plastic bag and store it at room temperature. It'll stay fresh for 2-3 days, perfect for sandwiches, toast, or enjoying as-is!
Homemade bread doesn’t keep long. It doesn’t keep any better in the fridge either, so we often eat half fresh and freeze the other half.
Freezing a Whole Loaf:
To freeze, wrap the cooled loaf tightly in plastic wrap, then wrap it again in aluminum foil to protect it from freezer burn. You can freeze it for up to 3 months. When you’re ready to enjoy, let it thaw at room temperature (no need to unwrap until it's fully defrosted!).
Freezing Slices:
For easy, grab-and-go portions, slice the cooled loaf and place the slices in a single layer on a baking sheet. Freeze until solid, then transfer the slices to a freezer-safe bag or container. This way, you can pull out just what you need! Simply toast or let the slices thaw at room temperature-either way, you're ready to enjoy fresh bread in no time.
Bread Machine Recipe Troubleshooting
I have a complete guide to bread machine recipe troubleshooting but here are some quick suggestions:
Bread Too Dense:
- Type of flour: As mentioned above, if you’re using a flour that doesn’t have a high enough protein content, you can expect a dense loaf of bread. Protein is necessary for the bread to produce gluten, and as we know, gluten is the amazing thing that gives bread it’s stretch and elasticity, and the ability to trap air and create bubbles in bread.
- Quantity of flour: I never weigh my ingredients for this recipe, nor do I sift my flour. Here’s how I scoop my flour for this recipe – stir the flour in the bag or container well, then use a 1/2 cup measuring cup to scoop the stirred flour into my 1 cup measuring cup. Give it a quick shake, then level with a knife. It’s quick and easy, keep it simple!
- Yeast – Add this at the very end of the ingredient layering. I toss all the flour into the baking pan, then sprinkle the yeast on top of the flour away from the water and liquid ingredients.
Bread Collapsed During Baking:
- Too much liquid: ensure that you’re measuring with a liquid measuring cup.
- Not enough salt: If you’re using coarse ground salt in this recipe, you may not be using enough salt! Try adding a bit more next time.
- Yeast: Too much or too old yeast can cause your bread to collapse. To avoid this in the future, proof a small amount of your yeast to confirm it’s still active, and if so, decrease the quantity in your next loaf by 1/4 – 1/2 teaspoons.
Other Problems:
If this is your first time using this recipe, I highly recommend checking in on the recipe while it’s 10 or so minutes into the first kneading cycle. At this point, you’ll be able to tell if your dough is forming a nice ball and pulling away from the edges.
If the dough is too wet at this time, and not holding a ball, add a couple tablespoons of flour.
Serving Suggestions
- Smoked ham and Swiss sandwich
- Toasted with creamed honey, or homemade raspberry jam
- BLT with homemade bacon
- Topped with a fried farm fresh egg
More Bread Machine Recipes To Love


If you tried this Bread Machine Bread recipe or any other recipe on my blog, please leave a 🌟 star rating and let me know how it went in the comments below. Thanks for visiting!
📖 Printable Recipe
The Best Bread Machine Bread Recipe
Ingredients
- 1 ¾ cups warm water, 415g
- 2 tablespoon oil , 25g
- 1 ½ teaspoons granulated sugar, 7g
- 1 teaspoon salt, 8g
- 4 cups bread flour, 570g
- 2 teaspoons bread machine yeast, 8g
Instructions
Add Ingredients To Bread Pan:
- Combine the liquid ingredients: 1 ¾ cup warm water, 2 tablespoons neutral cooking oil, 1 ½ teaspoons granulated sugar, and 1 teaspoon coarse kosher salt in the baking pan of your bread machine.
- Layer the dry ingredients as follows; 4 cups bread flour followed by 2 teaspoons rapid rise or bread machine yeast. Either sprinkle the yeast on top of the flour, where it's not touching the water or create a well in the flour, then add the yeast there.
Bake:
- Place the baking pan into the bread machine. Select Basic, Light Crust, and 2 lb Loaf options. If your machine does not have all these settings, simply select the Basic or White setting.
- Allow the bread machine to bake.
Cool:
- Remove the bread pan from the bread machine. Overturn the baked loaf onto a wire mesh cooling rack. It's important to get to your machine as soon as possible once it beeps complete to avoid it kicking into keep warm mode, this will dry out your bread and make it less than pleasant.
- Allow the bread to cool completely (if possible, I know it's hard!) before cutting.
Notes
Recommended Equipment + Ingredients
Nutrition
Flour Protein Content
As a Canadian, I use purpose flour for literally all purposes. Here’s why it matters to you and the results for your recipe:
- Canadian flour is different than American flour!
- The protein content of the flour greatly affects the bread’s ability to absorb water, produce gluten, and, therefore, your final results.
- IF you are using American flour, please use Bread flour specifically – OR ensure that your flour passes the protein content test 12-13%
How To Determine Protein Content In Flour:
Simply do a little math – make your teachers proud!

Grams Of Protein /
Grams Per Serving = __
__X 100 = __ %
4/30=.1333
.1333 x 100= 13.3%


ThiS is by far my favourite bread machine recipe.
I have make it several times and my familY love it.
I fOllowed the instructions to a T and it has turned out perfect every time.
I like that it calls for all purpose flour instead of bread flour because I always have all purpose on hand.
It makes great sandwiches and toast if there is any left after the meal.
Ally, Thank you for this awesome recipe.
OK. I was skeptical. I’ve tried lots of “BEST RECIPES”… and none are what I call BEST!
I’ve made this one now three times. I added 1 tsp baking powder as I only had “normal” yeast. Results… 🙂 AMAZING!
Simple, great output! This is the best recipe I’ve tried.
As a variation, I am just now putting 1 cup whole wheat flour and 3 cups of white ALL PURPOSE CANADIAN flour.
Well, I thought my mine was 2lb but nope, it’s 1.5. To late cause it’s in the machine already so hope it don’t bake right out the top 🤦
Oh no! Did it blow up?
Thanks so much for the recipe. I used a bread maker for the first time today using your recipe. I used bread flour, 1 3/4 c water and 3 tbs olive oIl and it turned out great! I just fond your site, so not sure if you ended up making a 1.5 lb recipe id proba use it tOo.
Hi Melody!
Awesome news! I haven’t taken the time to cut this down to a 1.5lb. I plan on doing that soon!
I love this recipe.Ithas not failed for me yet and I have Made it several times.
SO glad to hear it!
🙂 hello to all. First time doing this recipe. I have strayed from breadmachine recipes. Lol. My question is why would this recipe not call for dry milk?.. i noticed all my other breadmachine recipes call for dry milk. However, i love those recipes but wonder if this recipe will be more of a softer consistency of the bread. Curious as to the outcome of this. Hoping for a great turnout. 🙂
I can’t tell you, cause I’ve never made bread with dry milk powder? hopefully one of my readers can chime in!
I made this bread exactly like the recipe said. It didn’t rise. My yeast is brand new too. Just opened it today. I’m sad because it smells so good in my house but it’s like a brick. Once it cools off a bit I’ll cut into it, but I have a feeling it’ll be really dense.
Hello, I am unsure why it wouldn’t have risen for you. The one thing that comes to mind is maybe the water was too hot and killed the yeast?
Yes – water is too hot! I let the yeast sugar and water sit for 10 minutes prior to adding and mixing rest of ingredients as well. This gives the yeast a few minutes to mellow and start to eat at the sugars….
I put the water, sugar and yeast in the breadmaker. Then I go get all the other ingredients. By the time I’m ready, the yeast is too!
Did you ever test the gluten free option? I’m interested in that too.
Hi Daryll,
I have not tried a gluten-free version. GF bread takes a number of ingredients as well as some serious alchemy to get just right. I have not mastered it yet.
I’m a little confused. My bread machine has a “bake” cycle, but it doesn’t knead or mix. What cycle should I use instead?
What bread machine do you have? Maybe I can help figure out the cycle!
Thank you for the calculation and the information about Canadian all-purpose flour. This info was available 45 years ago when I moved to the US. I use my Canadian Purity cookbook and this explains why some of the recipes turn out so different. I just verified that King Arthur bread flour is 13.33%.
Hi I am looking for a first time bread machine recipe and I’d like to try yours but in a bit confused. This may be a silly question but do you mix the ingredients in a bowl and dump it into the bread machine and then sprinkle the yeast on top? Thanks
Hi Sarah, not a silly question at all!
I add the wet ingredients in the order listed to the bread machine “bowl” and then the dry, I try to spread the flour as much as I can while pouring it in to cover the wet ingredients, then I sprinkle the yeast right on top the flour. My new and old machines both have a yeast dispenser, but I prefer to just sprinkle it! Hope that helps!
Wow!! This is absolutely the best recipe I have ever made in my bread machine.
Hi Ally I found your recipe and tried it out using bread flour but it turned out a bit wet and it sunk slightly so I had another crack at it and made 2 minor adjustments the 1st one was to cut the water by 1 tbs and on the first mix sprinkle a tsp of flour on top of the dough as it felt very sticky. The final outcome was a great loaf of bread. Thank you for your info and contact.
Warren from down under .
Hey Warren, glad you liked it!
Using 2 cups plain old unbleached American flour, 3/4 cup plus 2 tsp of warm water, 3/4 tsp sugar, 1/2 tsp salt, 1 tbls canola oil and 1 tsp plain old regular yeast I made a perfect 1 lb loaf. Put in the breadmaker in the order the author suggested and used the scoop and level flour method. I have the mini Zojirushi 1lb bread machine. Just use what you have, don’t buy anything special…and voila! Adorable loaf of delish bread!
JEN! Thank you for following up with that! You’re the best!
Hello, Ally:
Just a few tips that may help some readers.
A long-time misconception is that flour is greatly affected by lower or higher humidity. However, effect of humidity on flour accounts for less than 1%, which is quite negligable.
All types of flours grow from grains, so they tend to differ from region to region and even season to season where grown – one reason flour mfgs do not list specific protein content on a bag’s label.
As such, a favorite brand of flour may slightly perform differently from a previous bag.
General protein percentages do have slight ranges from one type of flour to the next.
Canadian brands, however, are a bit heartier and may be able to withstand a higher percentage of liquid. This may be where some people are finding the mixture too wet.
While 100% hydration doughs do exist, a sandwich loaf’s hydration point should be in the 70% – 80% range, which is still a high-hydration dough.
Next, the following tips are likely to be considered heresy to some bakers, but it produces consistent results.
1) Scoop and level places far more flour in a cup (volume measuring) than one imagines and results in an inconsistent method of measuring.
2) Three best practices in baking (which is chemistry), and especially for breads, are:
a) Use an accurate food scale for measuring
b) Measure by weight, not volume
c) Use metric measurements, which are more precise especially for dry ingredients, and allows for ingredients to be easily scaled up or down, using baker’s percentages (which is not difficult
Knowing baker’s percentages enables one to change the hydration to suit one’s preference for a softer or less softer texture. If flour and liquid are adjusted, each remaining ingredients is adjustef by dividing its smount in grams by flour’s amount in grams.
Note mfg’s brand flour weight on side of flour bag; e.g., some U.S. brands state 1/4 C = 30g, so 1 C = 120g.
BTW, for 1.5 LB loaf, maximum flour amount is ~3 C or 360g, based on flour weight of 1/4 C = 120g.
Note a dough’s hydration – ratio of flour to milk/water. Breads are softer and stay fresher longer with a high hydration.
So, based on a mfg’s brand where 1/4 C flour = 30g; 1 C = 120g or 4 C = 480g
Water/milk – 1 U.S customary cup (8 fl OZ) = 236.59g; 3/4 C (6 fl OZ) = 177.44g
To get hydration of dough, divide liquid amount by flour amount.
473g water /480g flour = 99% hydration (extremely wet and may be a challenge for some folks to work with; trick is to autolyse flour and liquid only until gluten forms)
414g (1-3/4 C water) /480g flour= 86% hydration
360g (~1.5 C + 1/2 TBSP) water /480g flour = 75% hydration
All other ingredients are converted to grams and then divided by grams of flour for their percentage.
Many reputable sites on the ‘net for using converters for using formulas from around the world.
A good reference on legal, customary, and imperial weights for different countries is https://en.m.wikipedia.org/wiki/Cup_(unit).
Hope this helps someone else,
That is so interesting! Thank you for sharing that with me – I had no idea that Canadian flour could be more able to handle more liquid! That explains SO much – because I tell you, everyone I’ve given my recipe to in real life has LOVED it!
I am going to measure out my weights next time and add it to the post. Thanks again for such a great information filled comment!!
@JuJu, this is very helpful information and of great interest to me.