
No Knead Bread
Try this incredibly easy no knead bread recipe. This recipe takes the normal rise time from 18 hours to a mere 2. Use your oven, sous vide, Instant Pot, or dehydrator to speed up the proofing process.
Check-in on your Canadian friends, ya’ll.
We are not ok. We are COLD!
After months of reasonable temperatures, the thermometer plummeted this week. Even though we knew it was coming, it feels like a blindside.
It’s ok, though, I’m happily carb loading.
This recipe is dedicated to staying warm in cold weather.
Jump to:
Tips + tricks
No. 1 –> Grease the proofing bowl. This will ensure your bread slides out easier and keeps the air bubbles intact.
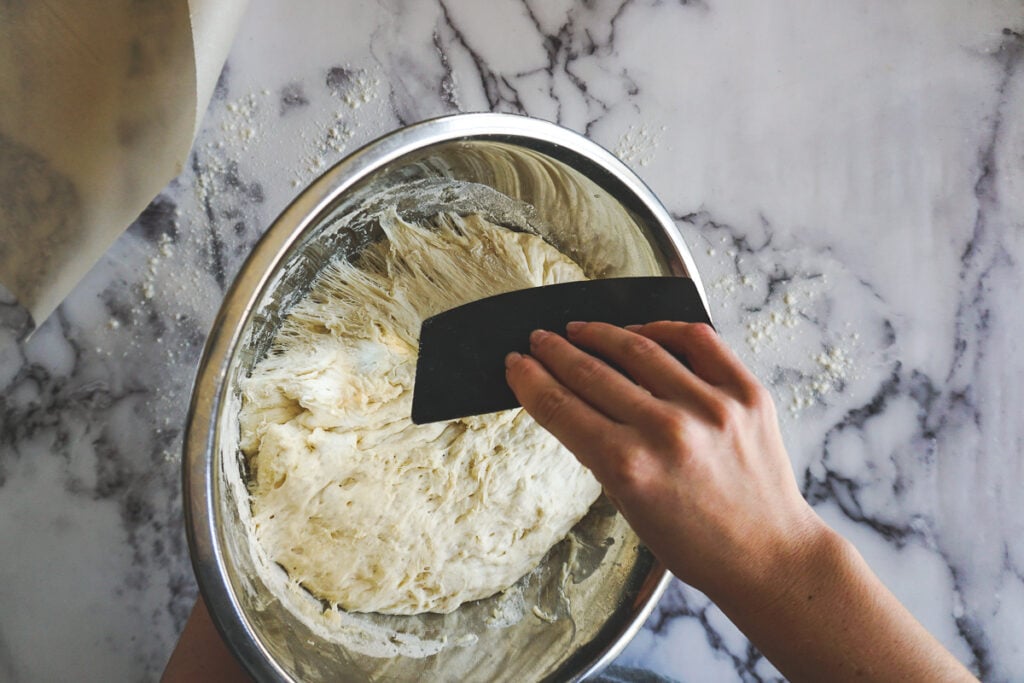
No. 2 –> Don’t knead it! Just don’t! Stir it, until its well mixed. And later on, gently shape into a boule – JUST for the love of all things holy, don’t knead it!
No. 3 –> Use a *small* cast iron dutch oven for this recipe. This is a small batch, and I always cook mine in my 3 quart dutch oven.
What can I use to proof my bread?
I love using my kitchen tools for various, and often out of the box uses. So here’s a couple ideas!
Oven. If you’re one of the lucky ones with a proof setting on your oven, I’m jelly. Pop that bowl in there and get your rise on!
Sous Vide. When you think about it, using the sous vide is the perfect way to proof your bread, it will keep the water bath at the perfect temperature to rise your bread in a jif!
Dehydrator. If you’ve got a dehydrator, you’re ready to go! Set the dial at the desired temperature, and wait for the magic!
Instant Pot. The yogurt “less” setting on your Instant Pot is the perfect temperature for proofing bread.
Ingredients
- flour
- salt
- sugar
- warm water
- yeast

How to make
- Combine the yeast and warm water in a bowl, and set aside for yeast to bloom.
- Whisk the dry ingredients together in a large bowl.
- Combine the water with the dry ingredients. I find it best to get your hands in there, give the bread a good mix until the flour is incorporated and the dough will be shaggy – that’s ok.
- Place the dough into a greased heatproof bowl. Cover with a damp dishtowel or plastic wrap.
- Place your bowl to rise for 90 minutes, either in your oven, dehydrator, over the Instant Pot, or over a sous vide water bath.
- After 90 minutes, place your dutch oven into the oven and preheat to 450f. At this time, turn your dough onto a floured surface and carefully form a boule. Using gentle motions, and fold the dough into a ball shape.
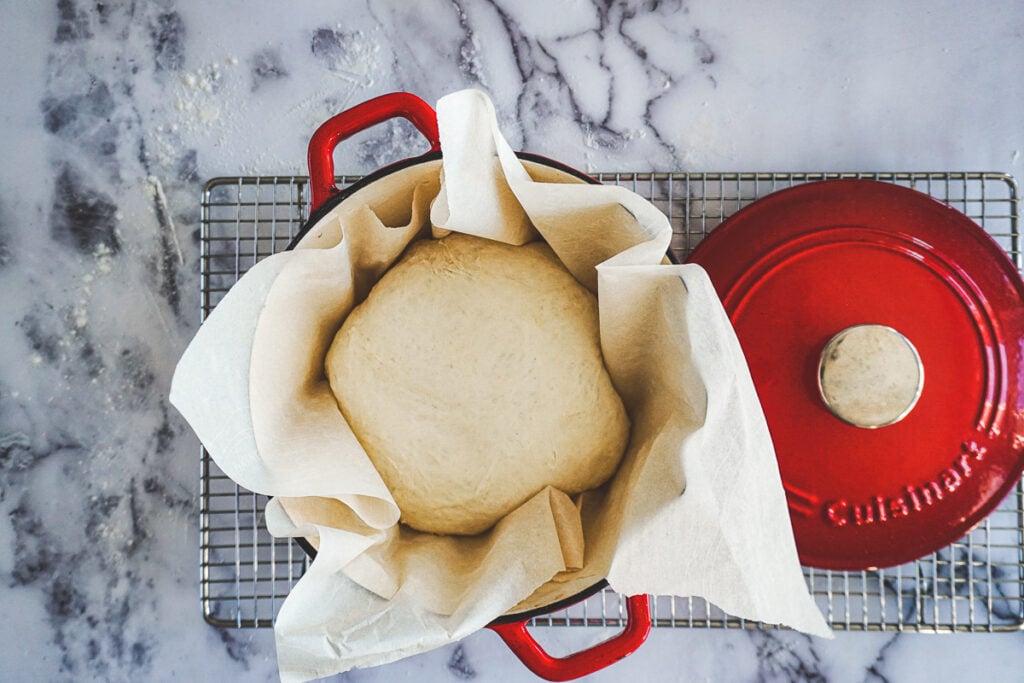
- Place the boule seam side down on a piece of parchment paper, and set aside for 30 more minutes while the dutch oven heats in the oven.
- Pick up the boule using the corners of the parchment paper and lower it into your preheated dutch oven. Recover the dutch oven.
- Bake the bread covered at 450f for 30 minutes, then remove the lid and bake uncovered for 10-15 more minutes, until perfectly golden brown.
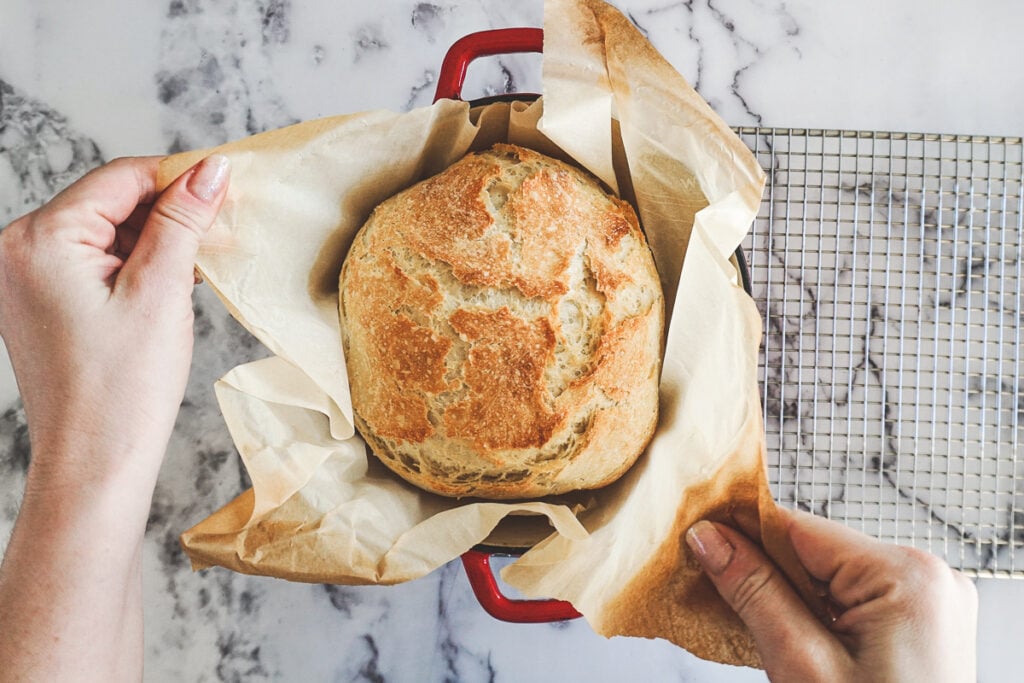
- Remove the bread from the dutch oven by picking up the parchment paper corners and place it on a wire mesh rack to cool.
- Devour your perfect crusty bread.


Recommended tools
3 qt Cast Iron Dutch Oven
Much of the success of this bread depends on having a heavy ass cast iron dutch oven. It’s one of those things you should already have, and if you don’t have one, fix that! The little red one in these photos was my first piece of cast iron and something that started somewhat of a cooking revolution for us a handful of years ago.
A 3 quart cast iron dutch oven is a workhorse in the kitchen, and you’ll find yourself reaching for it often.
Accompanying dishes
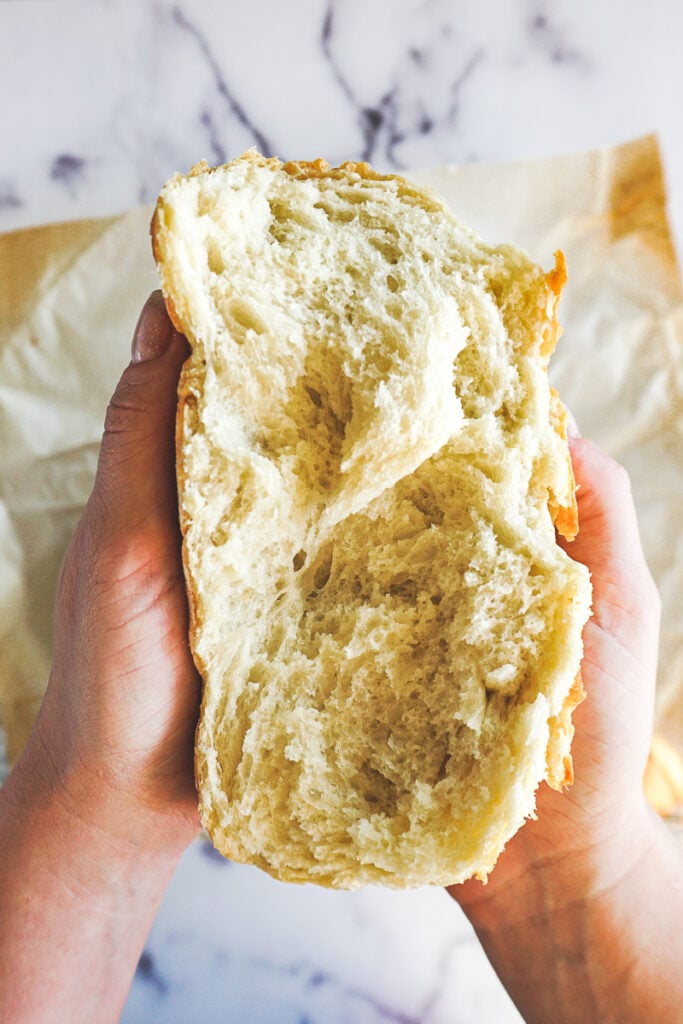
This artisan bread is what carby dreams are made of. Nothing like a warm hunk of crusty bread on a cold day. Here are some great ideas of things to serve with your golden loaf!


Other Bread Recipes You May Like:
📖 Printable Recipe
No Knead Bread Recipe
Ingredients
- 1 ½ cup warm water
- ½ teaspoon instant yeast
- 3 cups flour
- 1 teaspoon salt
- ½ teaspoon sugar, optional
Instructions
- Prepare sous vide water bath, oven, Instant Pot or dehydrator for proofing. And grease the inside of a stainless steel or other heatproof bowl.
- Sprinkle ½ teaspoon instant yeast into 1 ½ cup warm water and set aside to bloom.
- Whisk 3 cups flour, 1 teaspoon salt, and ½ teaspoon sugar in a large bowl.
- Stir together the water and flour mixture. I find it best to get your hands in there, give the bread a good mix until the flour is incorporated and the dough is shaggy.
- Place the dough into the greased bowl, and cover with a damp tea towel or plastic wrap.
- Set the bowl on the water bath, place it in the oven, or dehydrator – wherever you want to rise.
- Allow the dough to rise for 90 minutes, then place your dutch oven into the cold oven and preheat to 450f.
- After 90 minutes, turn the bread loaf out onto a floured surface and carefully form a boule. Using gentle motions, and fold the dough into a ball shape.
- Place the boule in the centre of a piece of parchment paper, seam side down.
- Remove the dutch oven from your oven. Be very careful, it’s extremely hot.
- Pick up bread boule with the corners of your parchment paper, and lower the boule into the dutch oven.
- Replace the lid.
- Bake the bread at 450f for 30 minutes covered.
- Remove the lid, and bake another 10-15 minutes uncovered – until the crust is a perfect golden brown.
- Remove the dutch oven from the oven, and pick up the bread using the corners of the parchment paper again.
- Place the bread on a wire cooling rack until cool to the touch before serving.


Did anyone ever figure out if the bread works in high altitude ?
Very good question Janet, I’m going to publish it and hopefully a fellow high altitude dweller can chime in for you!
Yep, works great at 8500′. It does flatten out a bit, tho.
Thank you!! I can mimic quite a few situations in my kitchen but altitude is not one LOL
Hi! I don’t have an insta pot, a dehydrator, or a proof setting on my oven, what would be an alternative method for success with this recipe. I’d really love to try it. It’s snowing today, so, perfect day for bread baking!
Hey Krystal! Here’s a couple alternatives, pop it in the oven with the light on, put it on top of the fridge, or my personal favorite, prop open the microwave door with a piece of paper towel so the light comes on but the door is actually shut.
Stay warm during the winter storm – we’re on the tail end of the polar vortex and we saw temperatures as low as -65f (-54c) windchills!
Once the boule is shaped and placed on parchment, doesn’t it need some rise time before being placed in the hot pot??
Hey Donna, the boule gets a quick second rise while the dutch oven is heating for about 30 minutes, though you could stretch it a bit longer if you wanted!
Made yesterday and so pleased making again today for a friend. I didn’t have yogurt setting on my instapot so I just put in oven with light on for about 4 hours. It rose well.
Great to hear! Thanks for sharing, Shirley!
The recipe worked just as described and tasted delicious!
Can active yeast be used instead by proofing it first and then adding to dry ingredients and letting dough rise?
That shouldn’t be a problem!
I made this I weighed the flour 370g 3 cups out and used instant yeast as per recipe, it was a very soft sticky dough it rose but flatten out and hard to work into mound, it stayed flat during baking ☹️
Interesting, this is kind of a sticky dough, but that shouldn’t have happened. What kind of flour did you use? How was your yeast?
Any way this will work at high altitude.
That is a great question. I am not an experienced high-altitude baker so I can’t help you but hopefully, someone here can chime in! What is your elevation?
We live at 8500′ and this recipe works wonderfully. My loaf does flatten some in my too large dutch oven, so I plan to try the stainless steel bowl method next time. I’m making another loaf today!
Love this bread. I make it often now. Never fails. I use leftovers for roast in the mornings.
So glad to hear that! It really is easy and delicious!
It turned out great ! I let it rest in front of the fireplace, follow directions, easy and delicious!
Great to hear! I hope you took a moment to “proof” by the fireplace too !
Made this today. It was delicious! Creamy texture and crispy crust. Thanks for the recipe
In my experience, using parchment paper to transfer the risen dough into the dutch oven from the proofing bowl is no better than sliding it in. It loses some of its rise and my too-large dutch oven further encourages it to spread out and flatten. Instead, I came up with the idea to proof in an oiled stainless steel bowl that is the size I want the bread to be (and fits inside the dutch oven with enough room for risen bread on top). When the dough is ready to bake and the dutch oven is hot, I place the entire stainless steel bowl in the dutch oven. As a bonus, cleanup is easier, since only the smaller bowl really needs cleaning. It just occurred to me that I could make more steam by putting some hot water inside the dutch oven when I preheat it – not enough to make the bowl of bread float, but the steam would encourage even more crustiness. I’ll try that next time.
That’s a really good workaround! Almost all my stainless steel bowls are actually rubber bottomed so I can’t use them under heat, unfortunately, but so glad to hear it’s working for you!
@Lois,
My SS bowls are smaller at the bottom so bread will come out looking like a bowl shape loaf. Might need to find a deep, flat bottomed SS bowl/pan?
How did your loafcome out?
@Lois, what a great idea! I’m making this today for my first time, my Dutch oven is bigger as well. I guess you could always double the recipe too!
Making the bread now as a gift for Some FRIENDS.
Easy, tasty first time making artisan bread!
Awesome! So glad to hear <3