
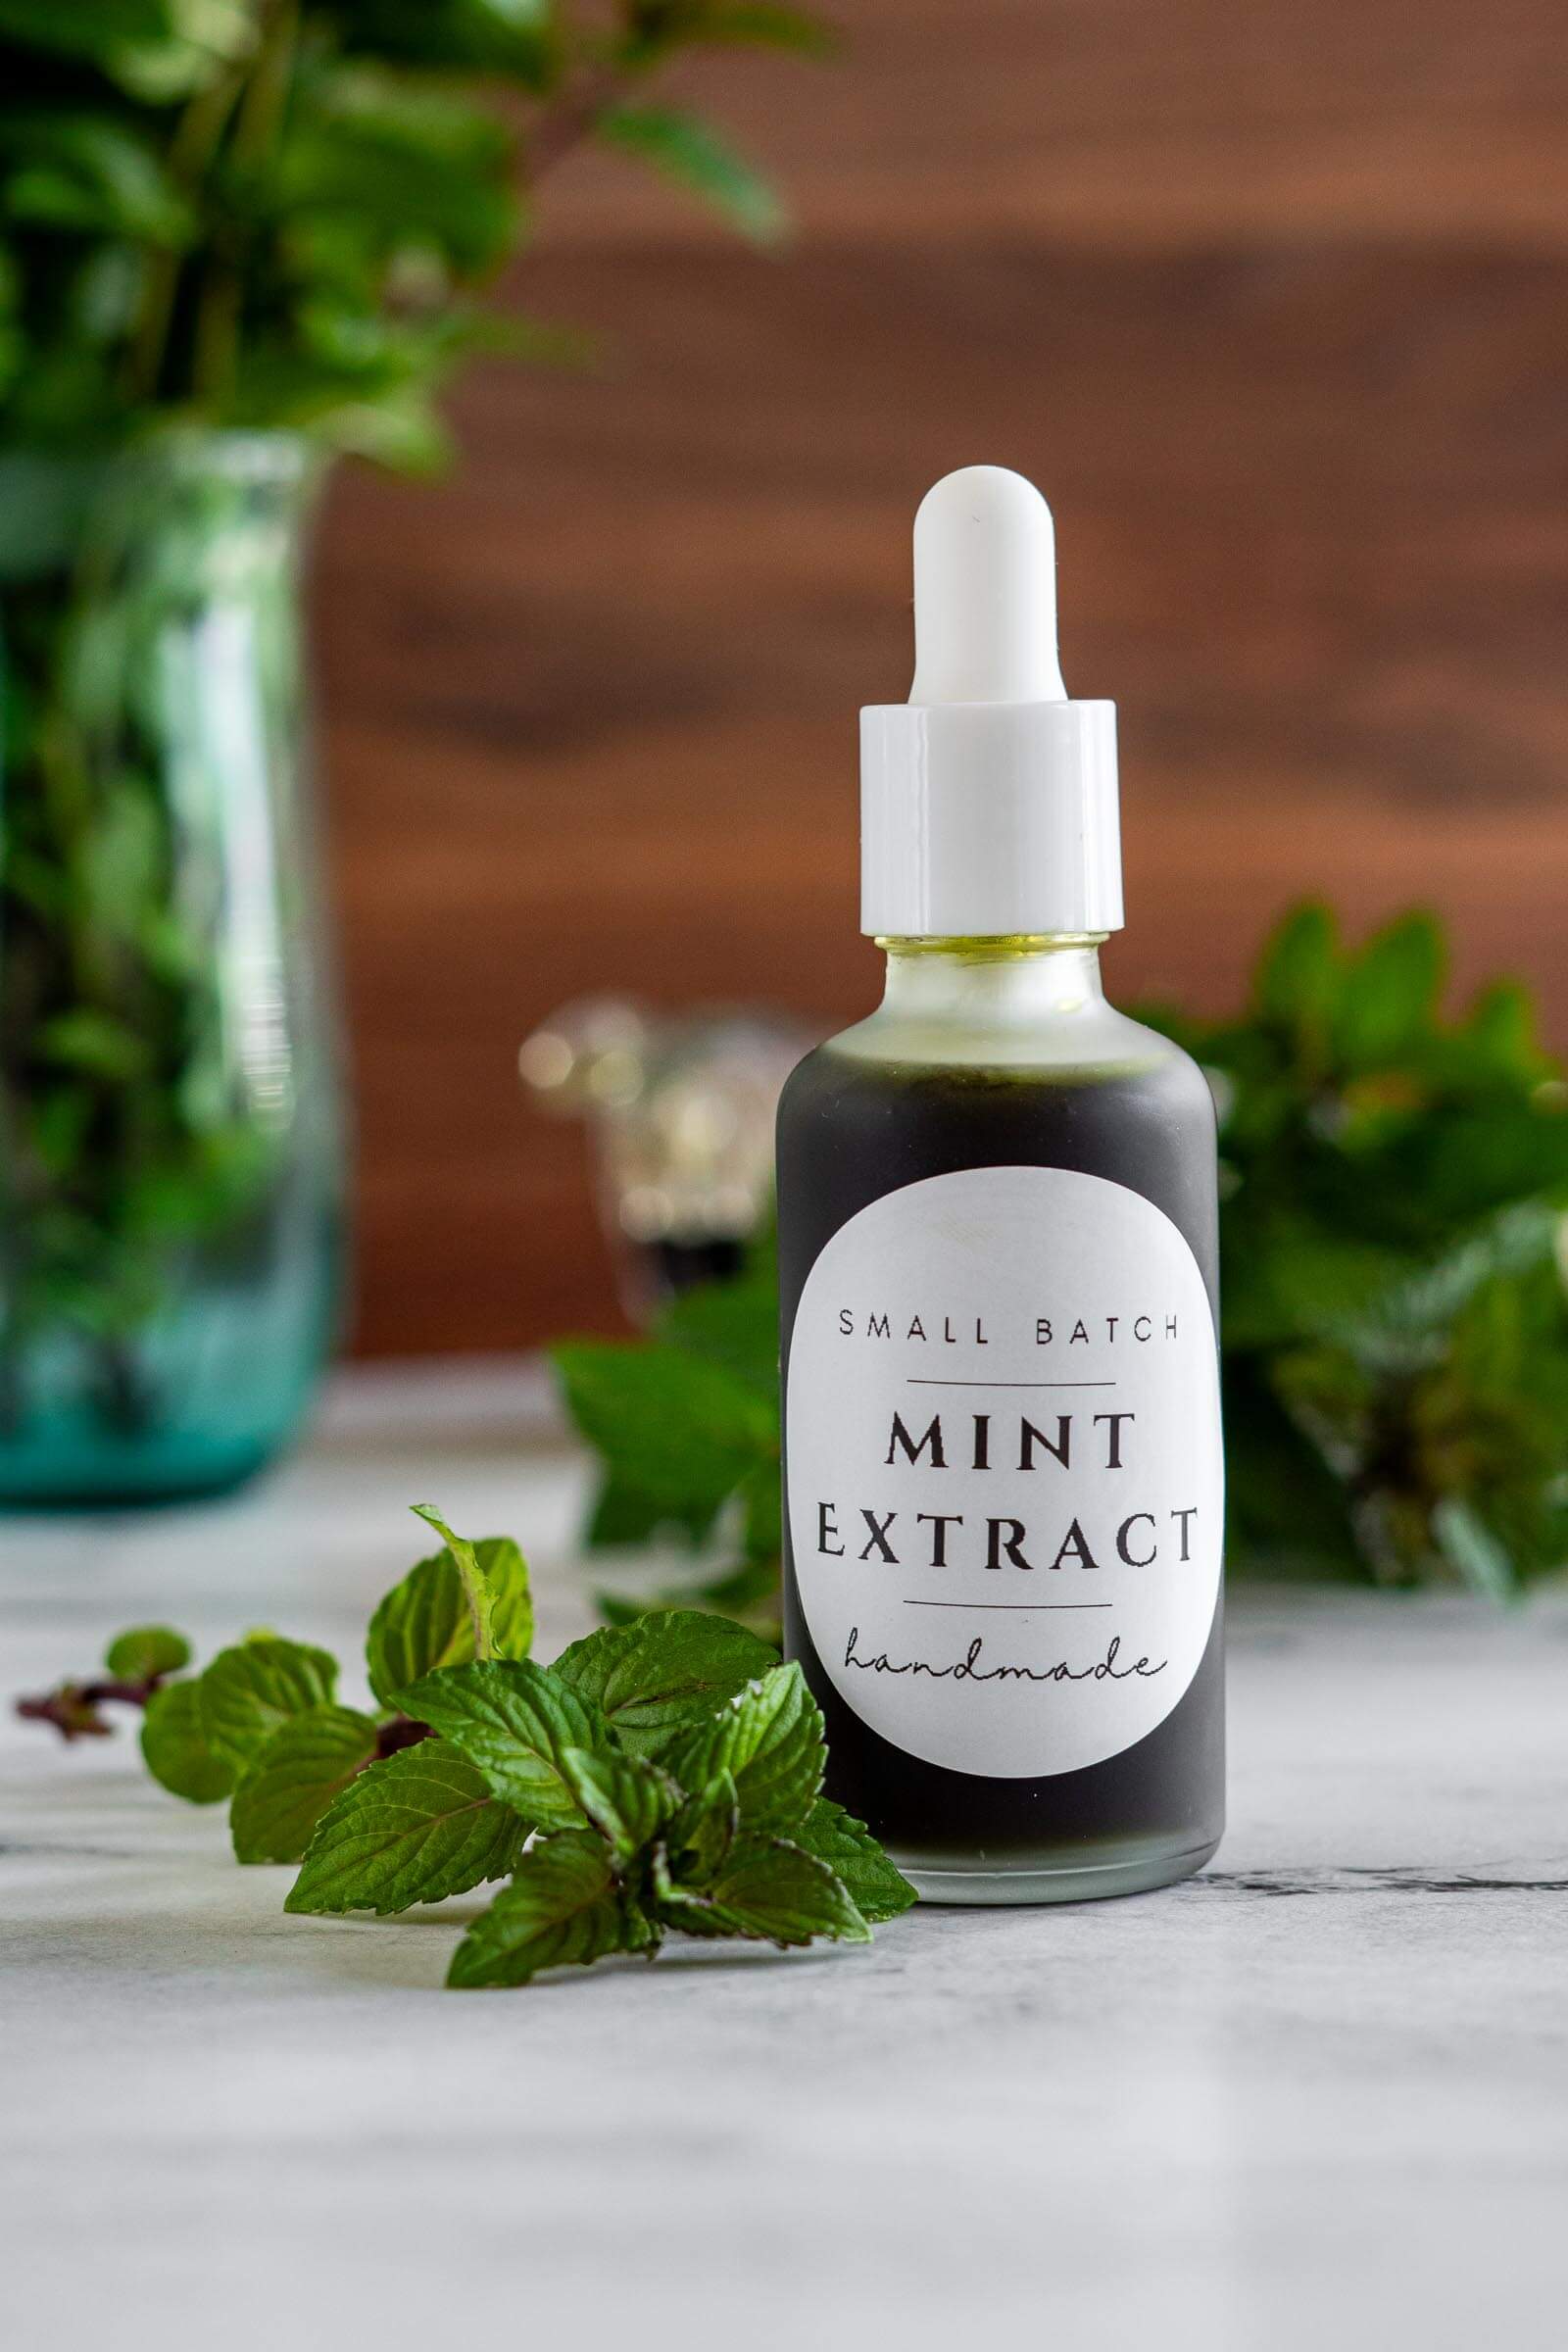
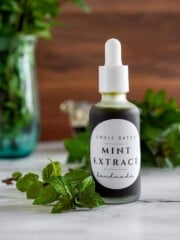
Mint Extract

Make homemade mint extract in just days, not months, using fresh mint and high-proof alcohol.
Craving The Recipe Details?
What it is: A simple homemade mint extract made with fresh mint leaves and high-proof alcohol for a clean, natural mint flavor.
Why you'll love it: Just two ingredients and a few minutes of prep, this DIY mint extract is a great way to use up an abundance of mint and incorporate it’s flavor into your favorite recipes.
How to make it: Lightly bruise fresh mint leaves, cover with high-proof alcohol, and infuse in short 2-3 day cycles, replacing the leaves each time to build strong flavor while keeping the extract bright and fresh.
You’re going to love this homemade mint extract recipe. It’s a quick and easy process that results in BIG flavor! If you've ever tried making mint extract before and ended up with a dark, murky bottle that smelled a little… off? You're not alone.
I’ve got a few tips and tricks to help keep your extract looking and tasting fresh and bright. PLUS I’ll include a free printable label to keep your cupboard looking great and gifted extracts feeling extra luxurious.
Instead of a long vodka steep that can lead to browning and dull flavor, this recipe uses short infusion cycles and fresh leaf rotation to create a bright green, clean-tasting extract packed with real mint flavor.
This mint extract recipe is dedicated to fresh and bright.
Jump to:
- Craving The Recipe Details?
- Why Does Homemade Mint Extract Turn Brown? (And How To Prevent It)
- Key Ingredients
- How To Make Mint Extract
- Expert Tips
- Why This Recipe Works
- Homemade Mint Extract FAQs
- Harvesting Fresh Mint
- Types Of Mint
- Using Homemade Mint Extract
- Printable Labels
- See What Else I’m Making!
- 📖 Printable Recipe
Why Does Homemade Mint Extract Turn Brown? (And How To Prevent It)
Homemade mint extract often turns dark brown and develops an off, swampy smell after a few weeks, and it's one of the most common frustrations with DIY extracts.
The problem is chlorophyll oxidation.
When fresh mint leaves sit in low-proof alcohol (like standard 80-proof vodka) for weeks or months, the plant material slowly breaks down. As it degrades, chlorophyll oxidizes, the same process that turns cut herbs brown in the fridge, and the extract loses its fresh flavor and vibrant color.
This method avoids that entirely by changing three key variables:
- High-proof alcohol (Everclear) extracts flavor quickly and limits water dilution from fresh leaves
- Short infusion cycles (2-3 days) prevent the leaves from breaking down
- Keeping leaves fully submerged (using a fermentation weight) reduces oxygen exposure
Instead of one long steep, you'll strain and replace the mint multiple times, building strong flavor while keeping the extract bright green and clean-tasting.
Unlike traditional vodka methods that take 4-6 weeks and often turn brown, this process produces a usable extract in under a week!
What alcohol is best for mint extract?
The best alcohol for mint extract is high-proof neutral alcohol.
While some recipes recommend vodka or rum, these lower-proof options extract flavor more slowly and increase the risk of chlorophyll breakdown, which leads to brown, muddy-tasting extract.
High-proof alcohol extracts more flavor, faster, resulting in a cleaner, brighter mint extract. The alcohol taste is negligible once used in baking or cooking.
In some regions, including parts of Canada, very high-proof alcohol like Everclear may be harder to find. Look for 151 proof rum or high proof vodka. The higher the proof, the better your results.
Key Ingredients
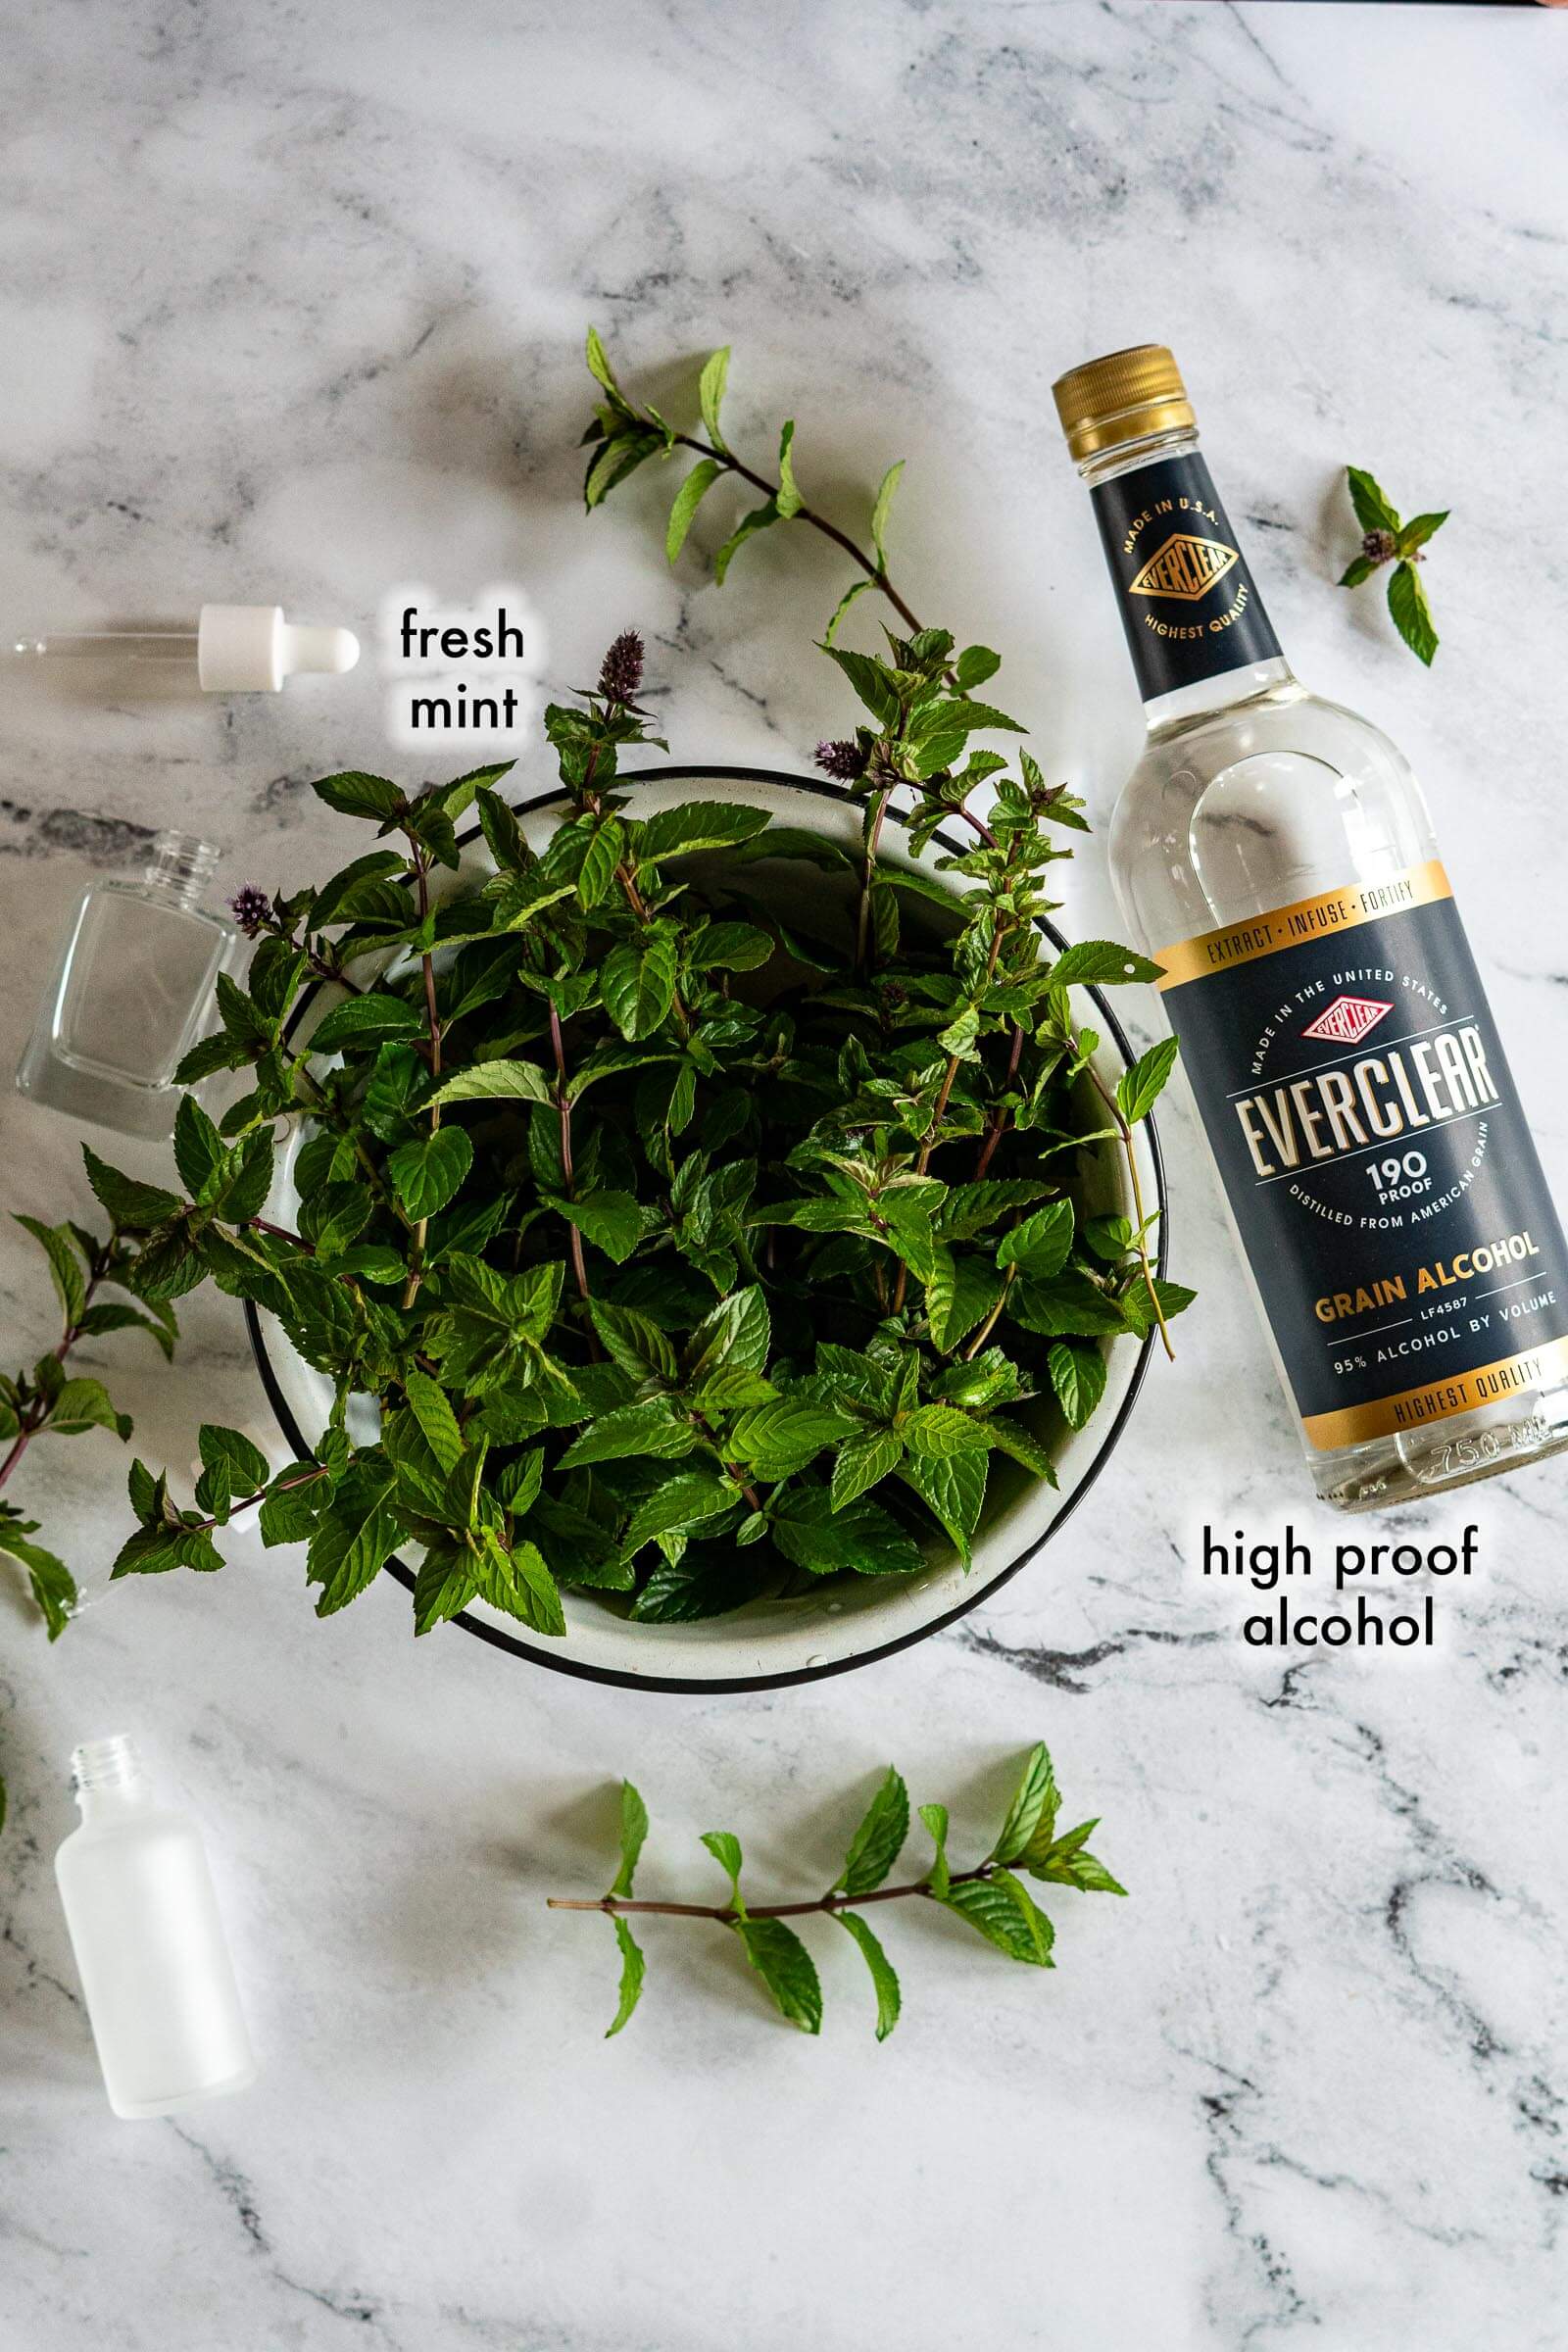
Fresh Mint Leaves: If you don’t have fresh mint growing in the backyard, you can check the farmers market for the freshest possible version. If all else fails, you can use a bundle of mint from your grocery store. The fresher the better as the volatile oils in the mint leaves responsible for flavor do evaporate during storage.
Alcohol: I recommend high-proof grain alcohol for this recipe because we are using fresh leaves. I use Everclear with 90% ABV (180 proof) because I find it doesn’t have any overpowering tastes (beyond the alcohol burn!!). High proof alcohols work better with leafy herbs with lots of moisture in them, like mint – starting with a higher ABV keeps the alcohol concentration high enough, even after dilution from the fresh mint, to extract flavor quickly and prevent spoilage or browning.
If you don’t have access to Everclear, you can use high proof vodka or rum. Be sure to choose a quality brand, to ensure that off flavors don’t present in your extract. Many people recommend the cheapest bottle you can find, and I disagree. Quality inputs equals quality outputs!
How To Make Mint Extract
Prepare Mint:
- Step 1: Rinse mint stems under cool running water, then transfer to a salad spinner and spin dry.
Remove mint from the salad spinner and place on a clean kitchen towel to dry while you prepare your jars. Removing as much moisture as possible before we place the mint into the alcohol is an important step.
- Step 2: Wash your infusion jars, lids, and weights (if using) in hot soapy water, rinse well and dry. I like to work with half pint jars – not only do they make a ton of extract, they also store well and aren’t too large that we can’t use it all within a reasonable time.
Muddle:
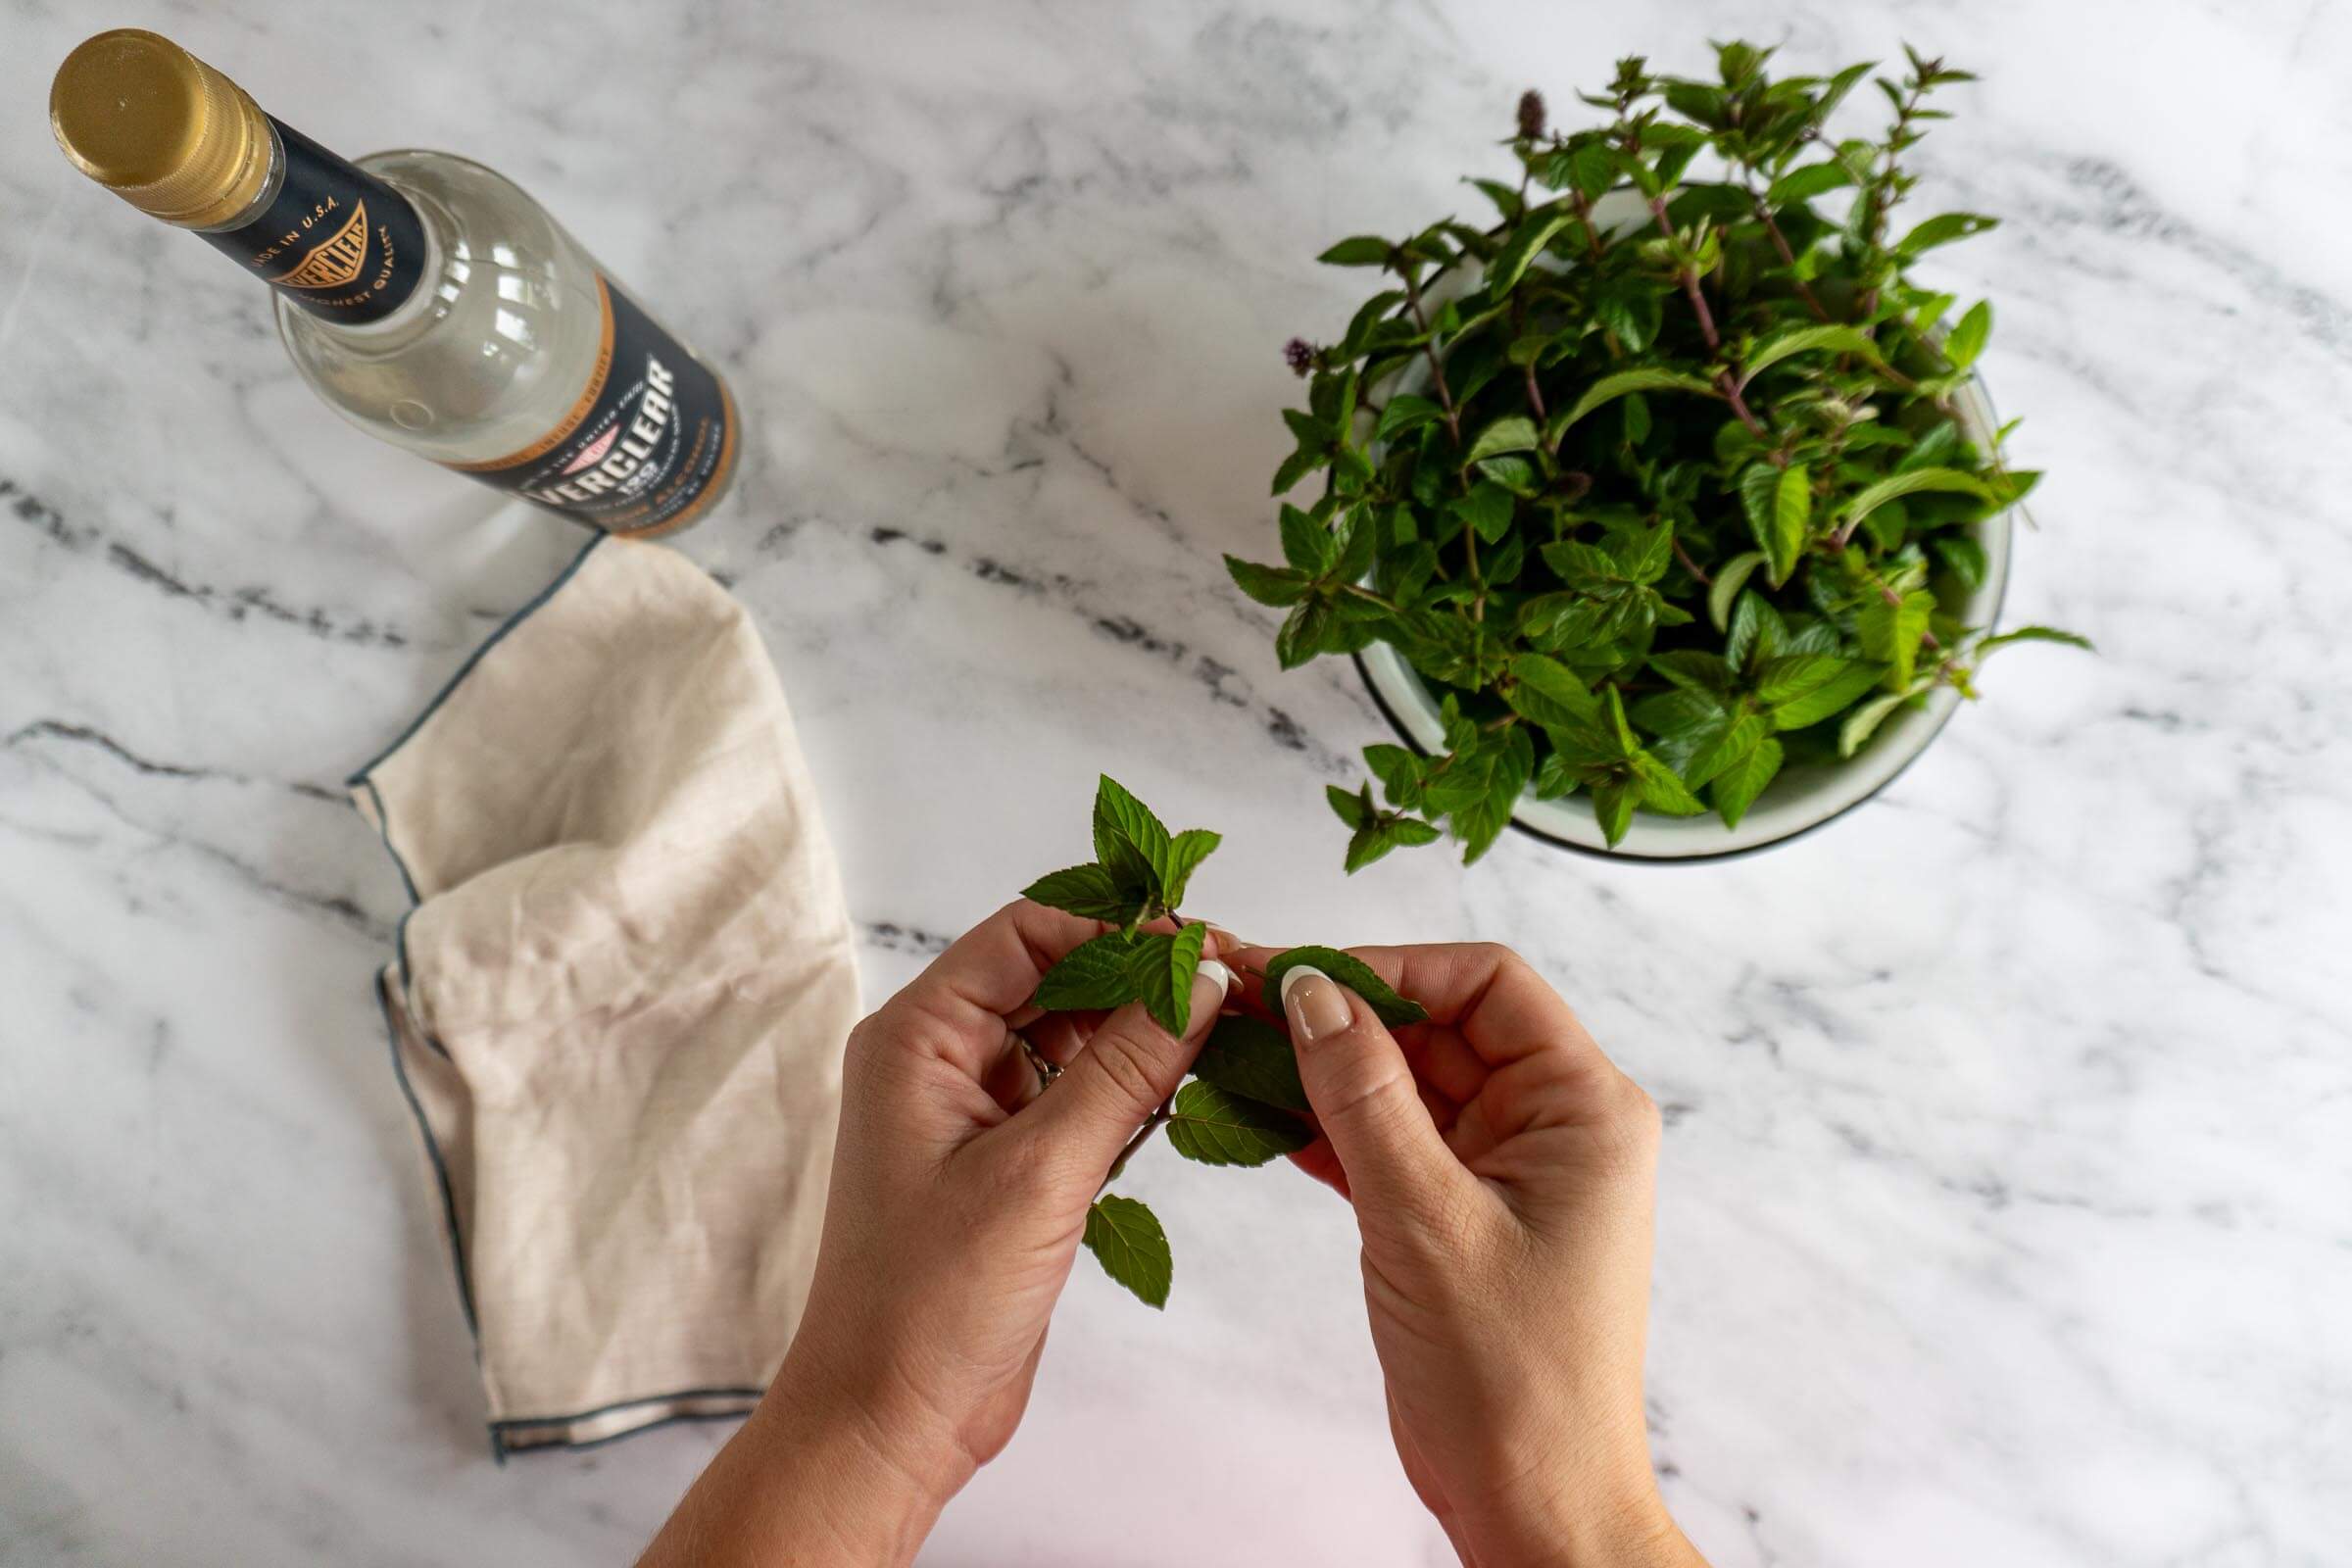
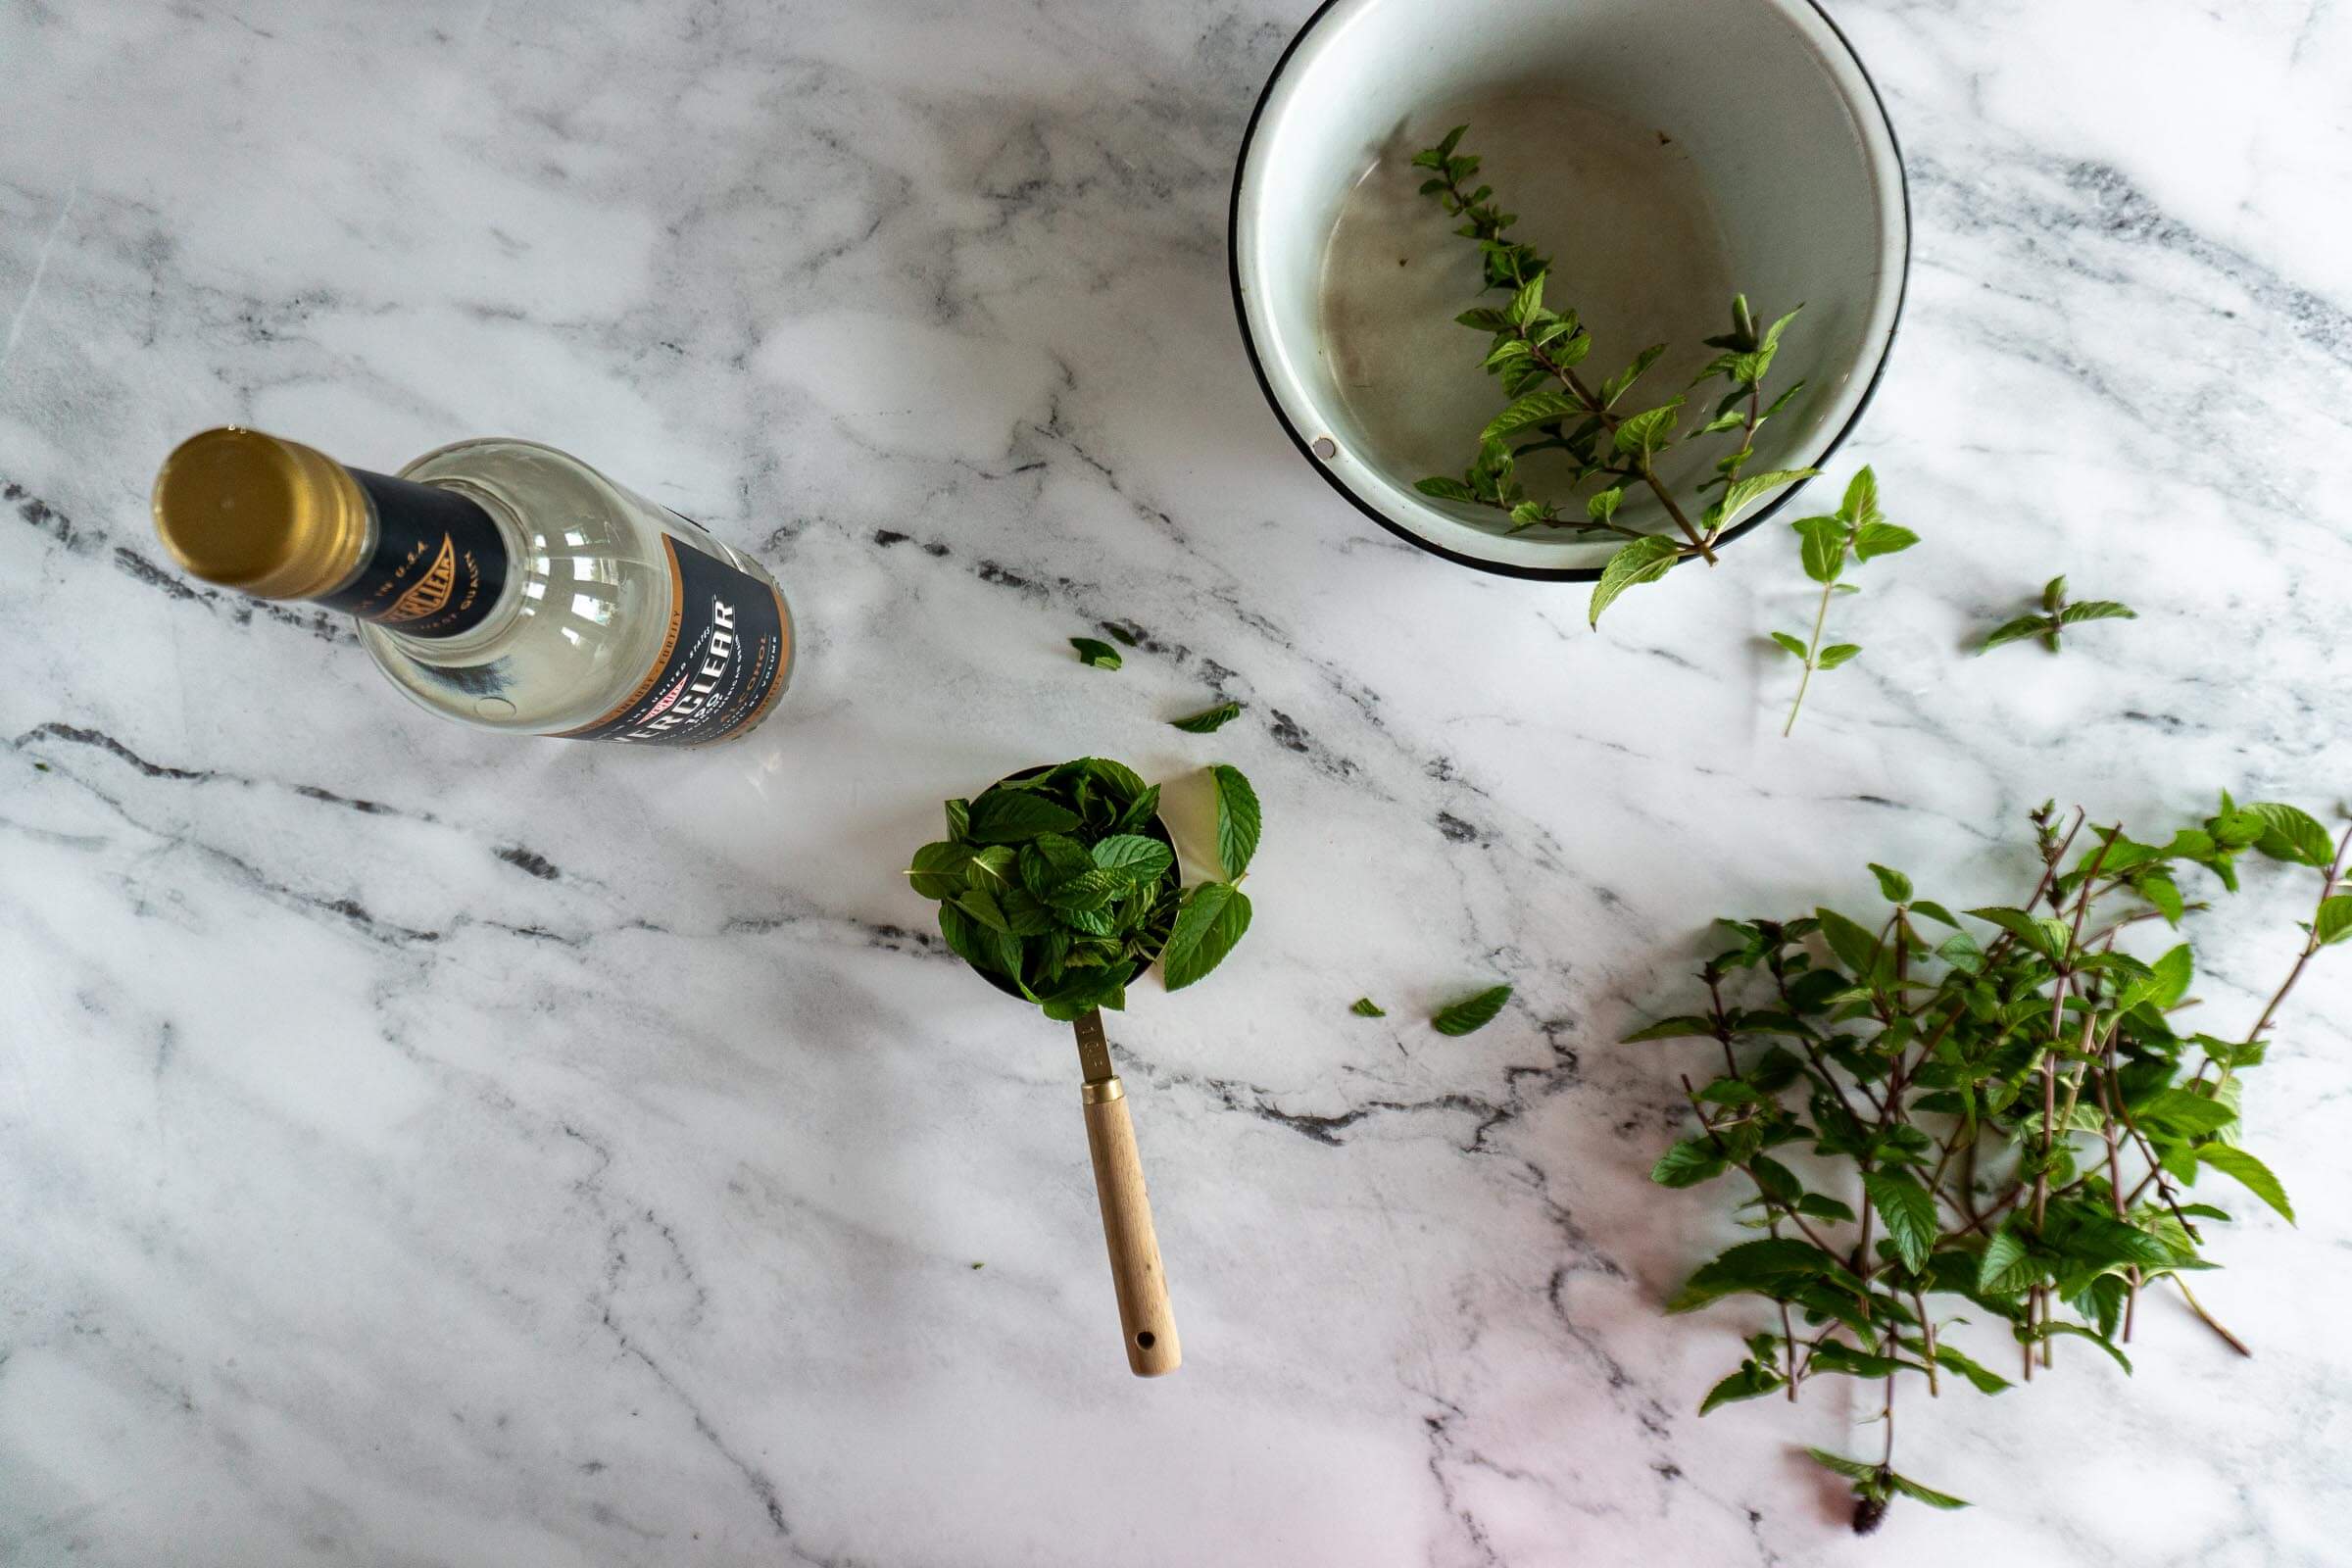
- Step 3: Pick all the leaves from the stems. Collecting about 1 packed cup of leaves.
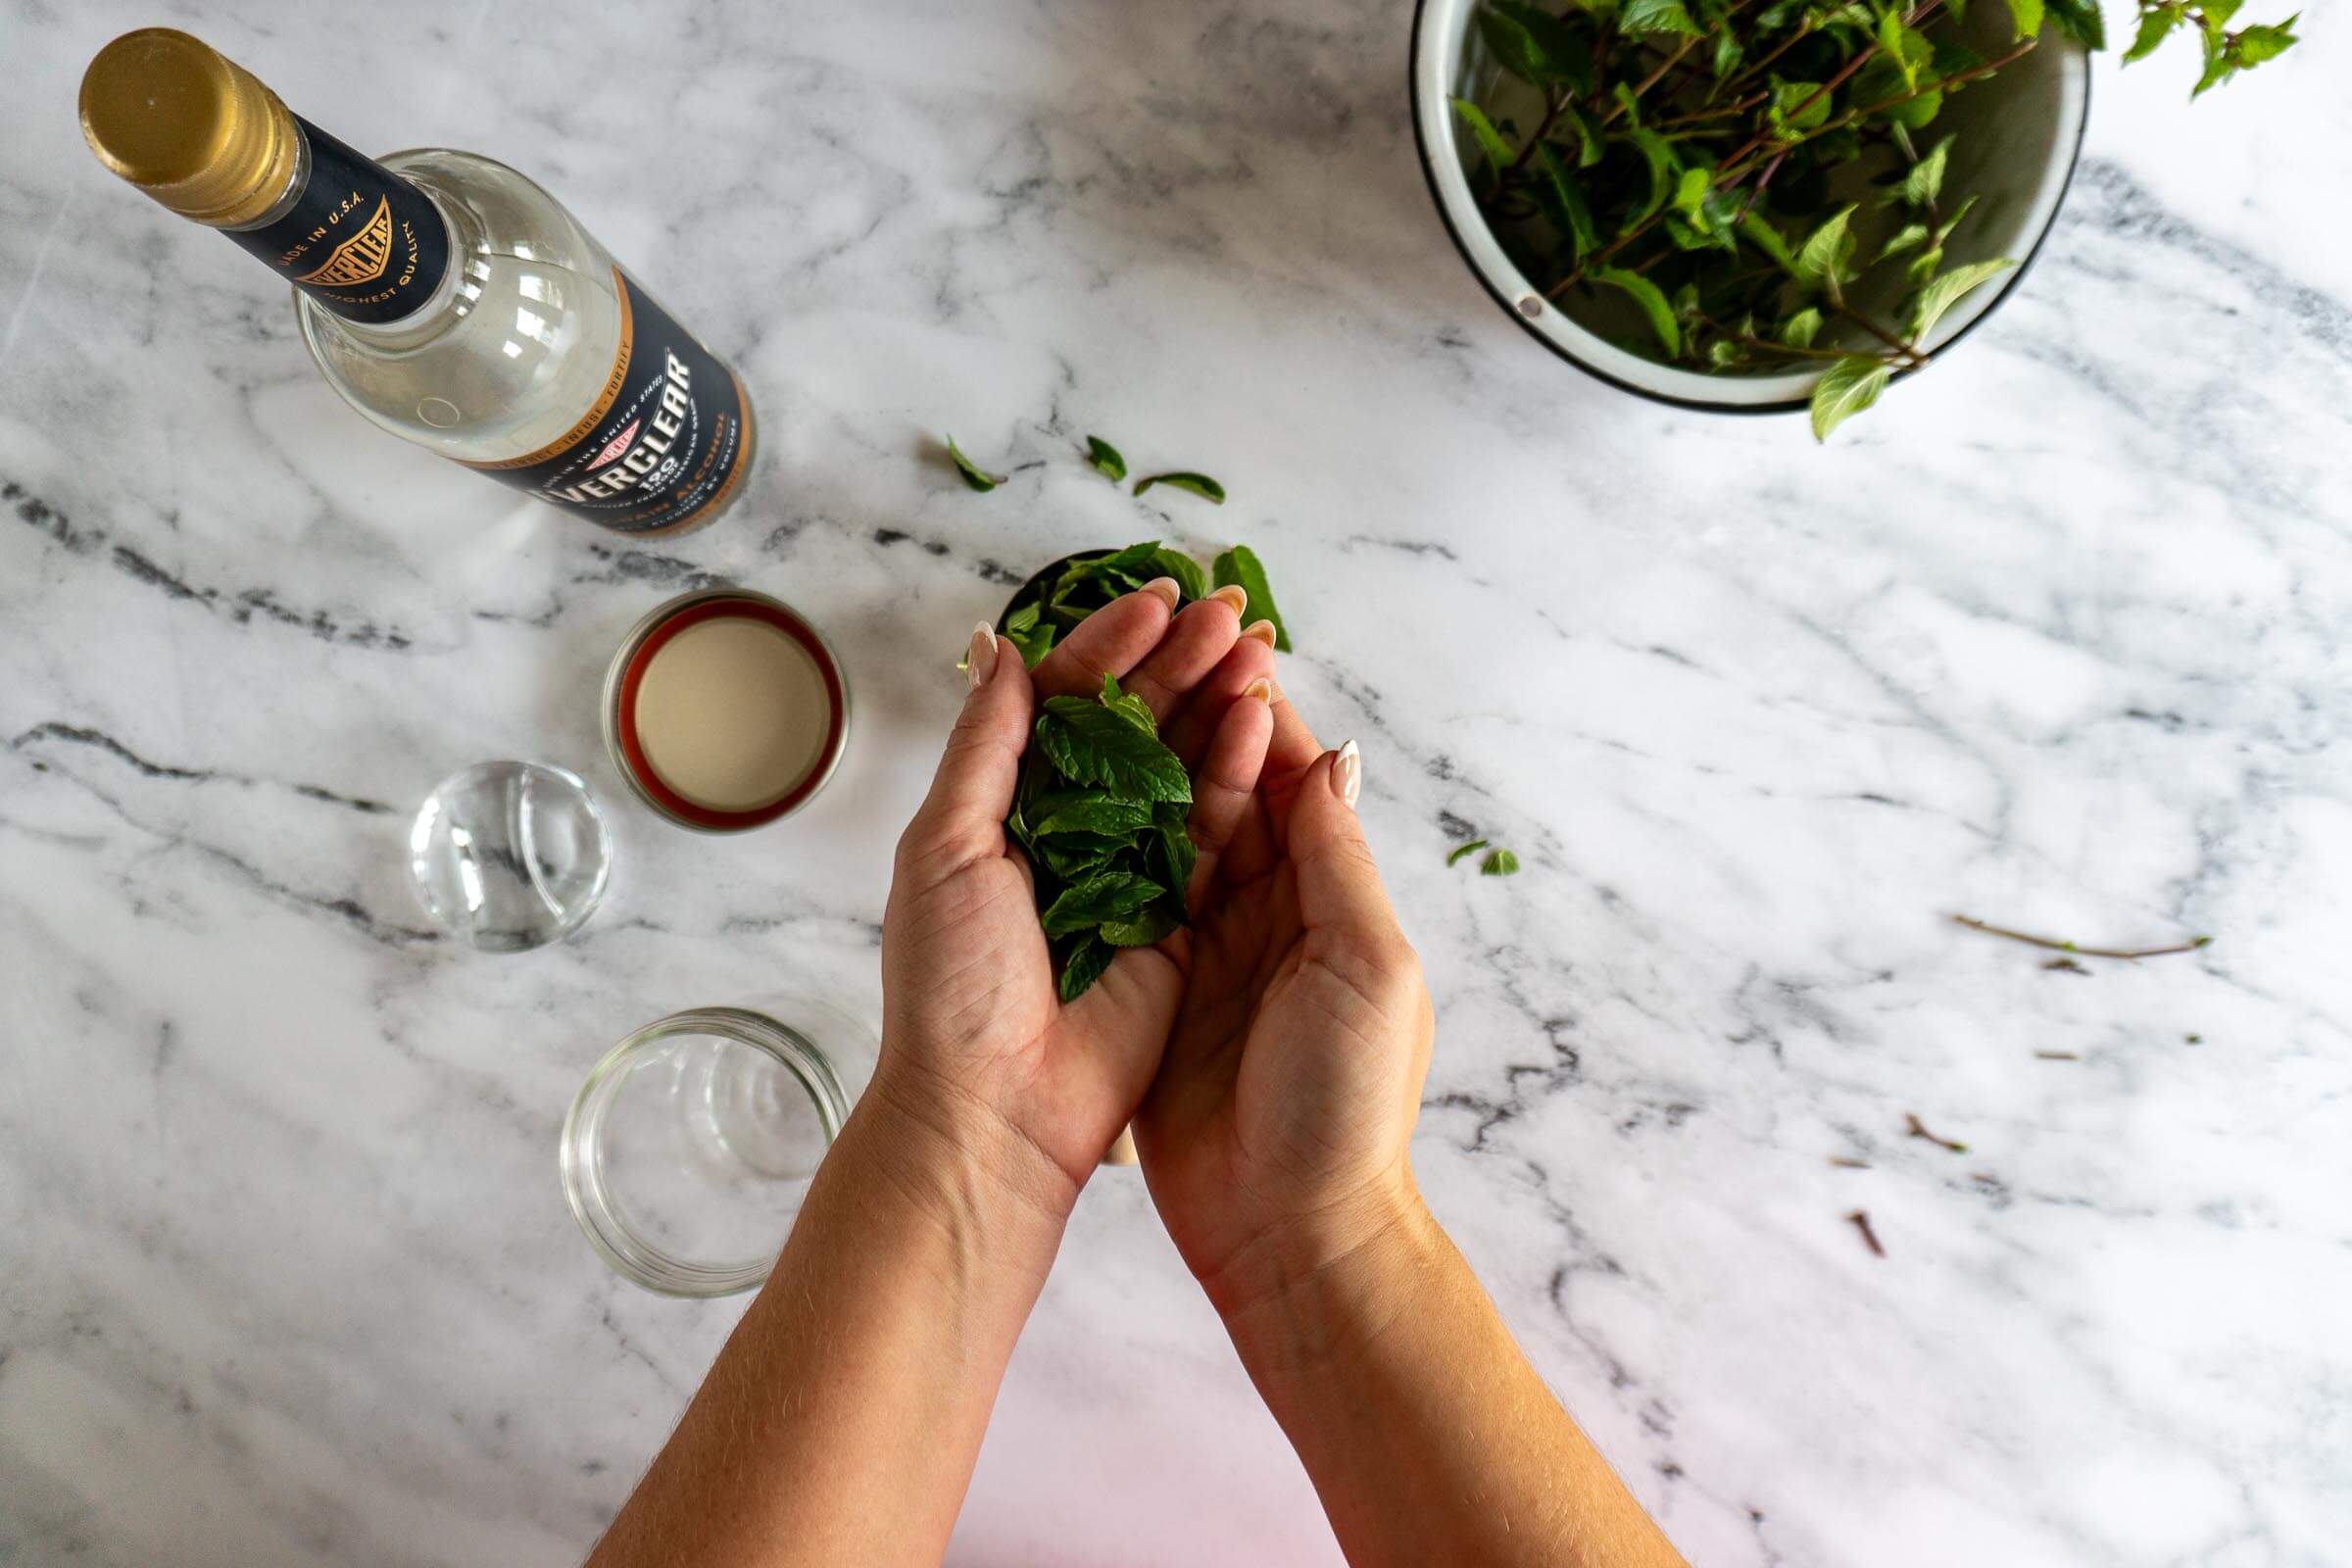
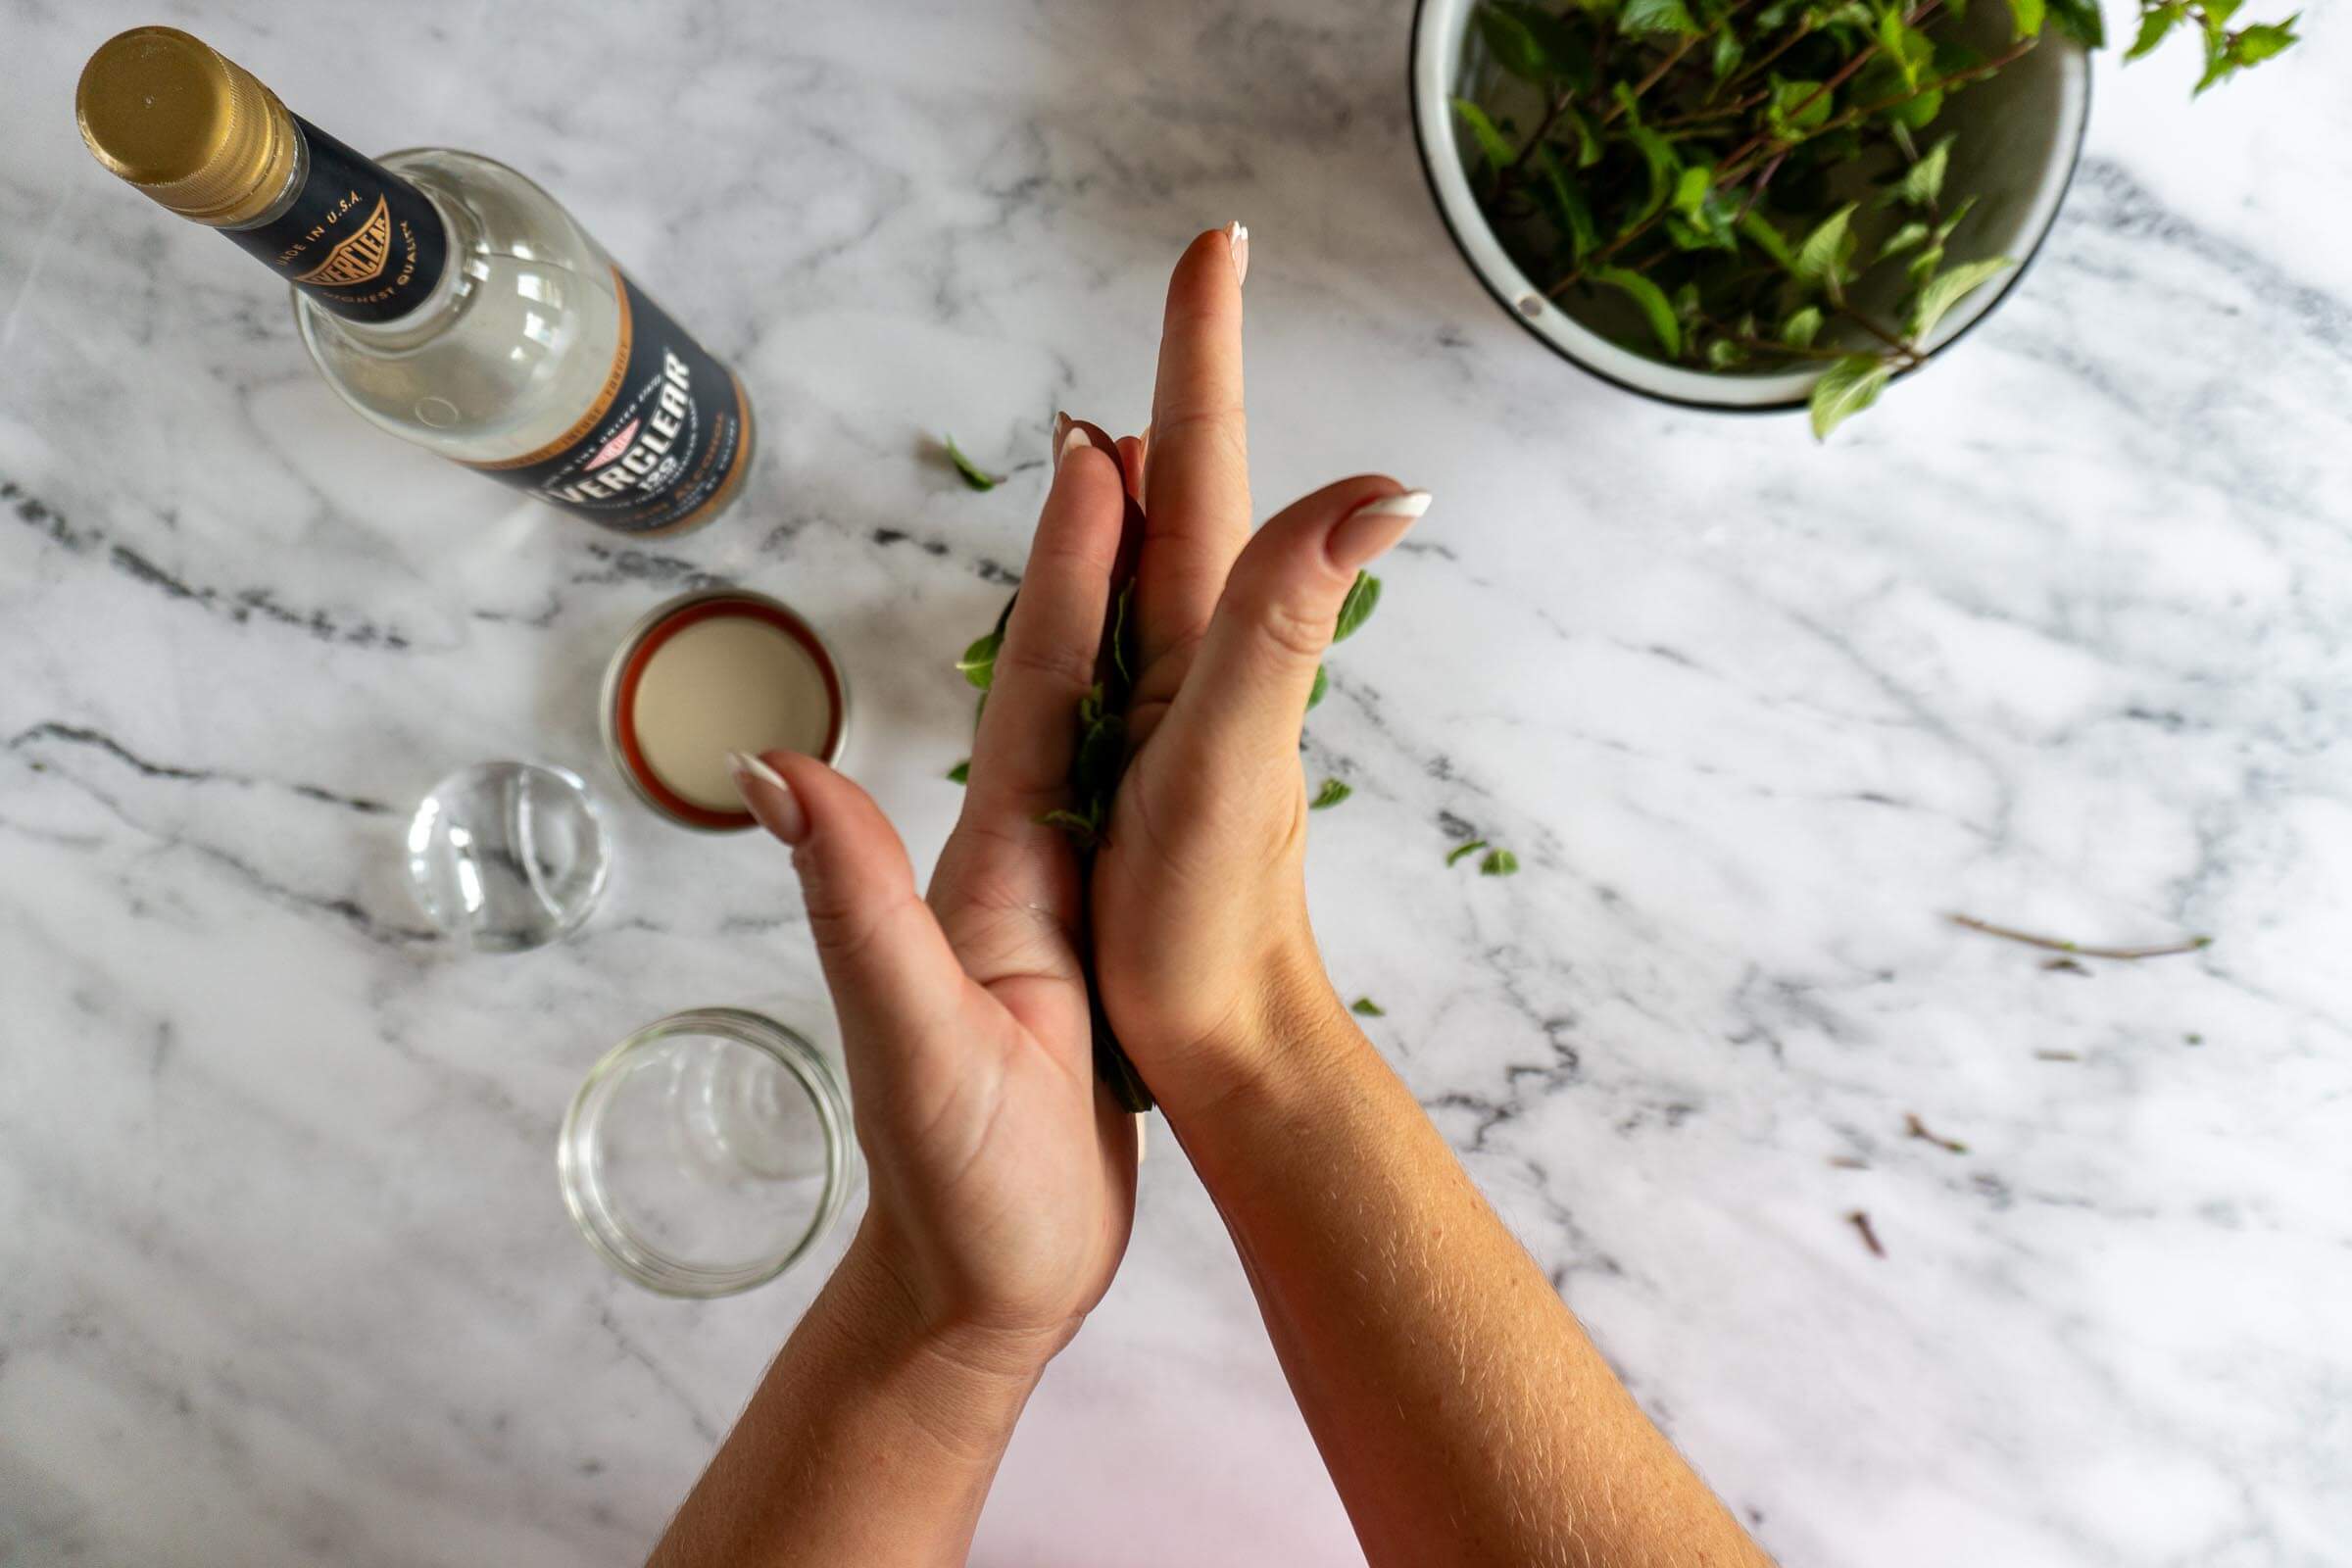
- Step 4: In order to release as many of the volatile oils as possible, we need to muddle the leaves and bruise the cells. Some people chop their mint leaves, others crush in their hand, I personally like to give rub them back and forth between my hands. However you choose to do it will work!
Fill Jars:
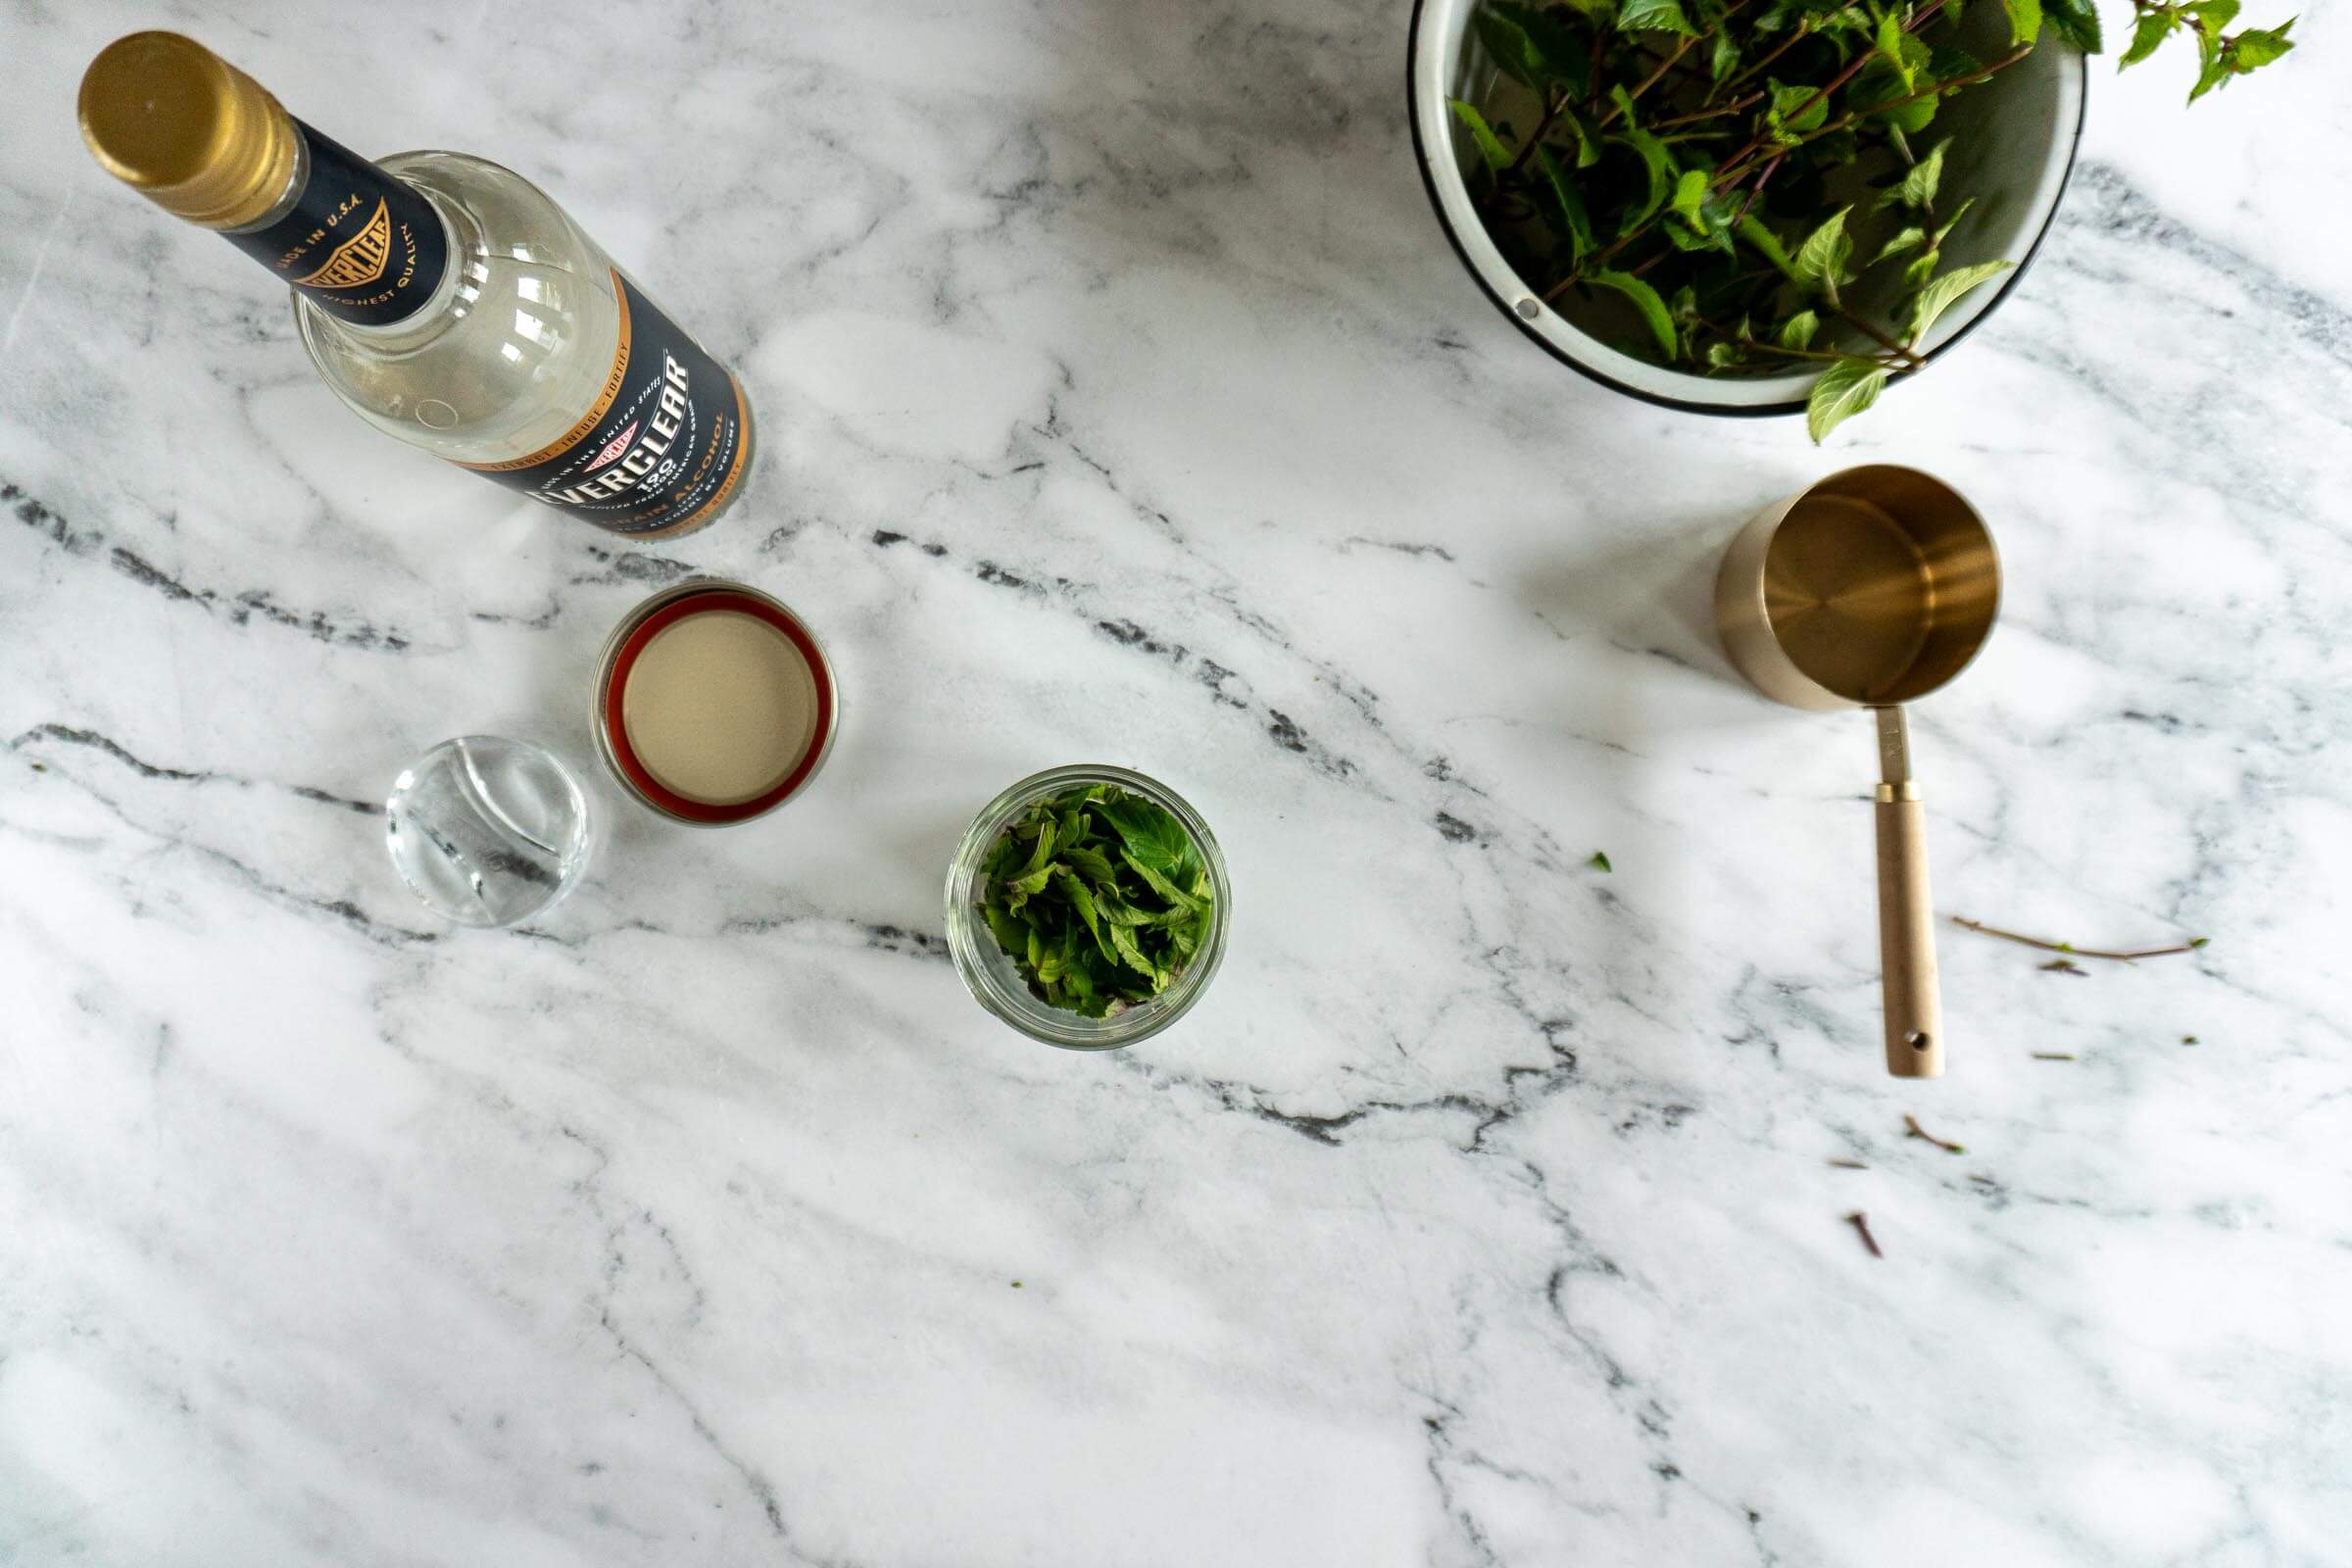
- Step 5: Transfer the muddled mint leaves to the prepared canning jars.
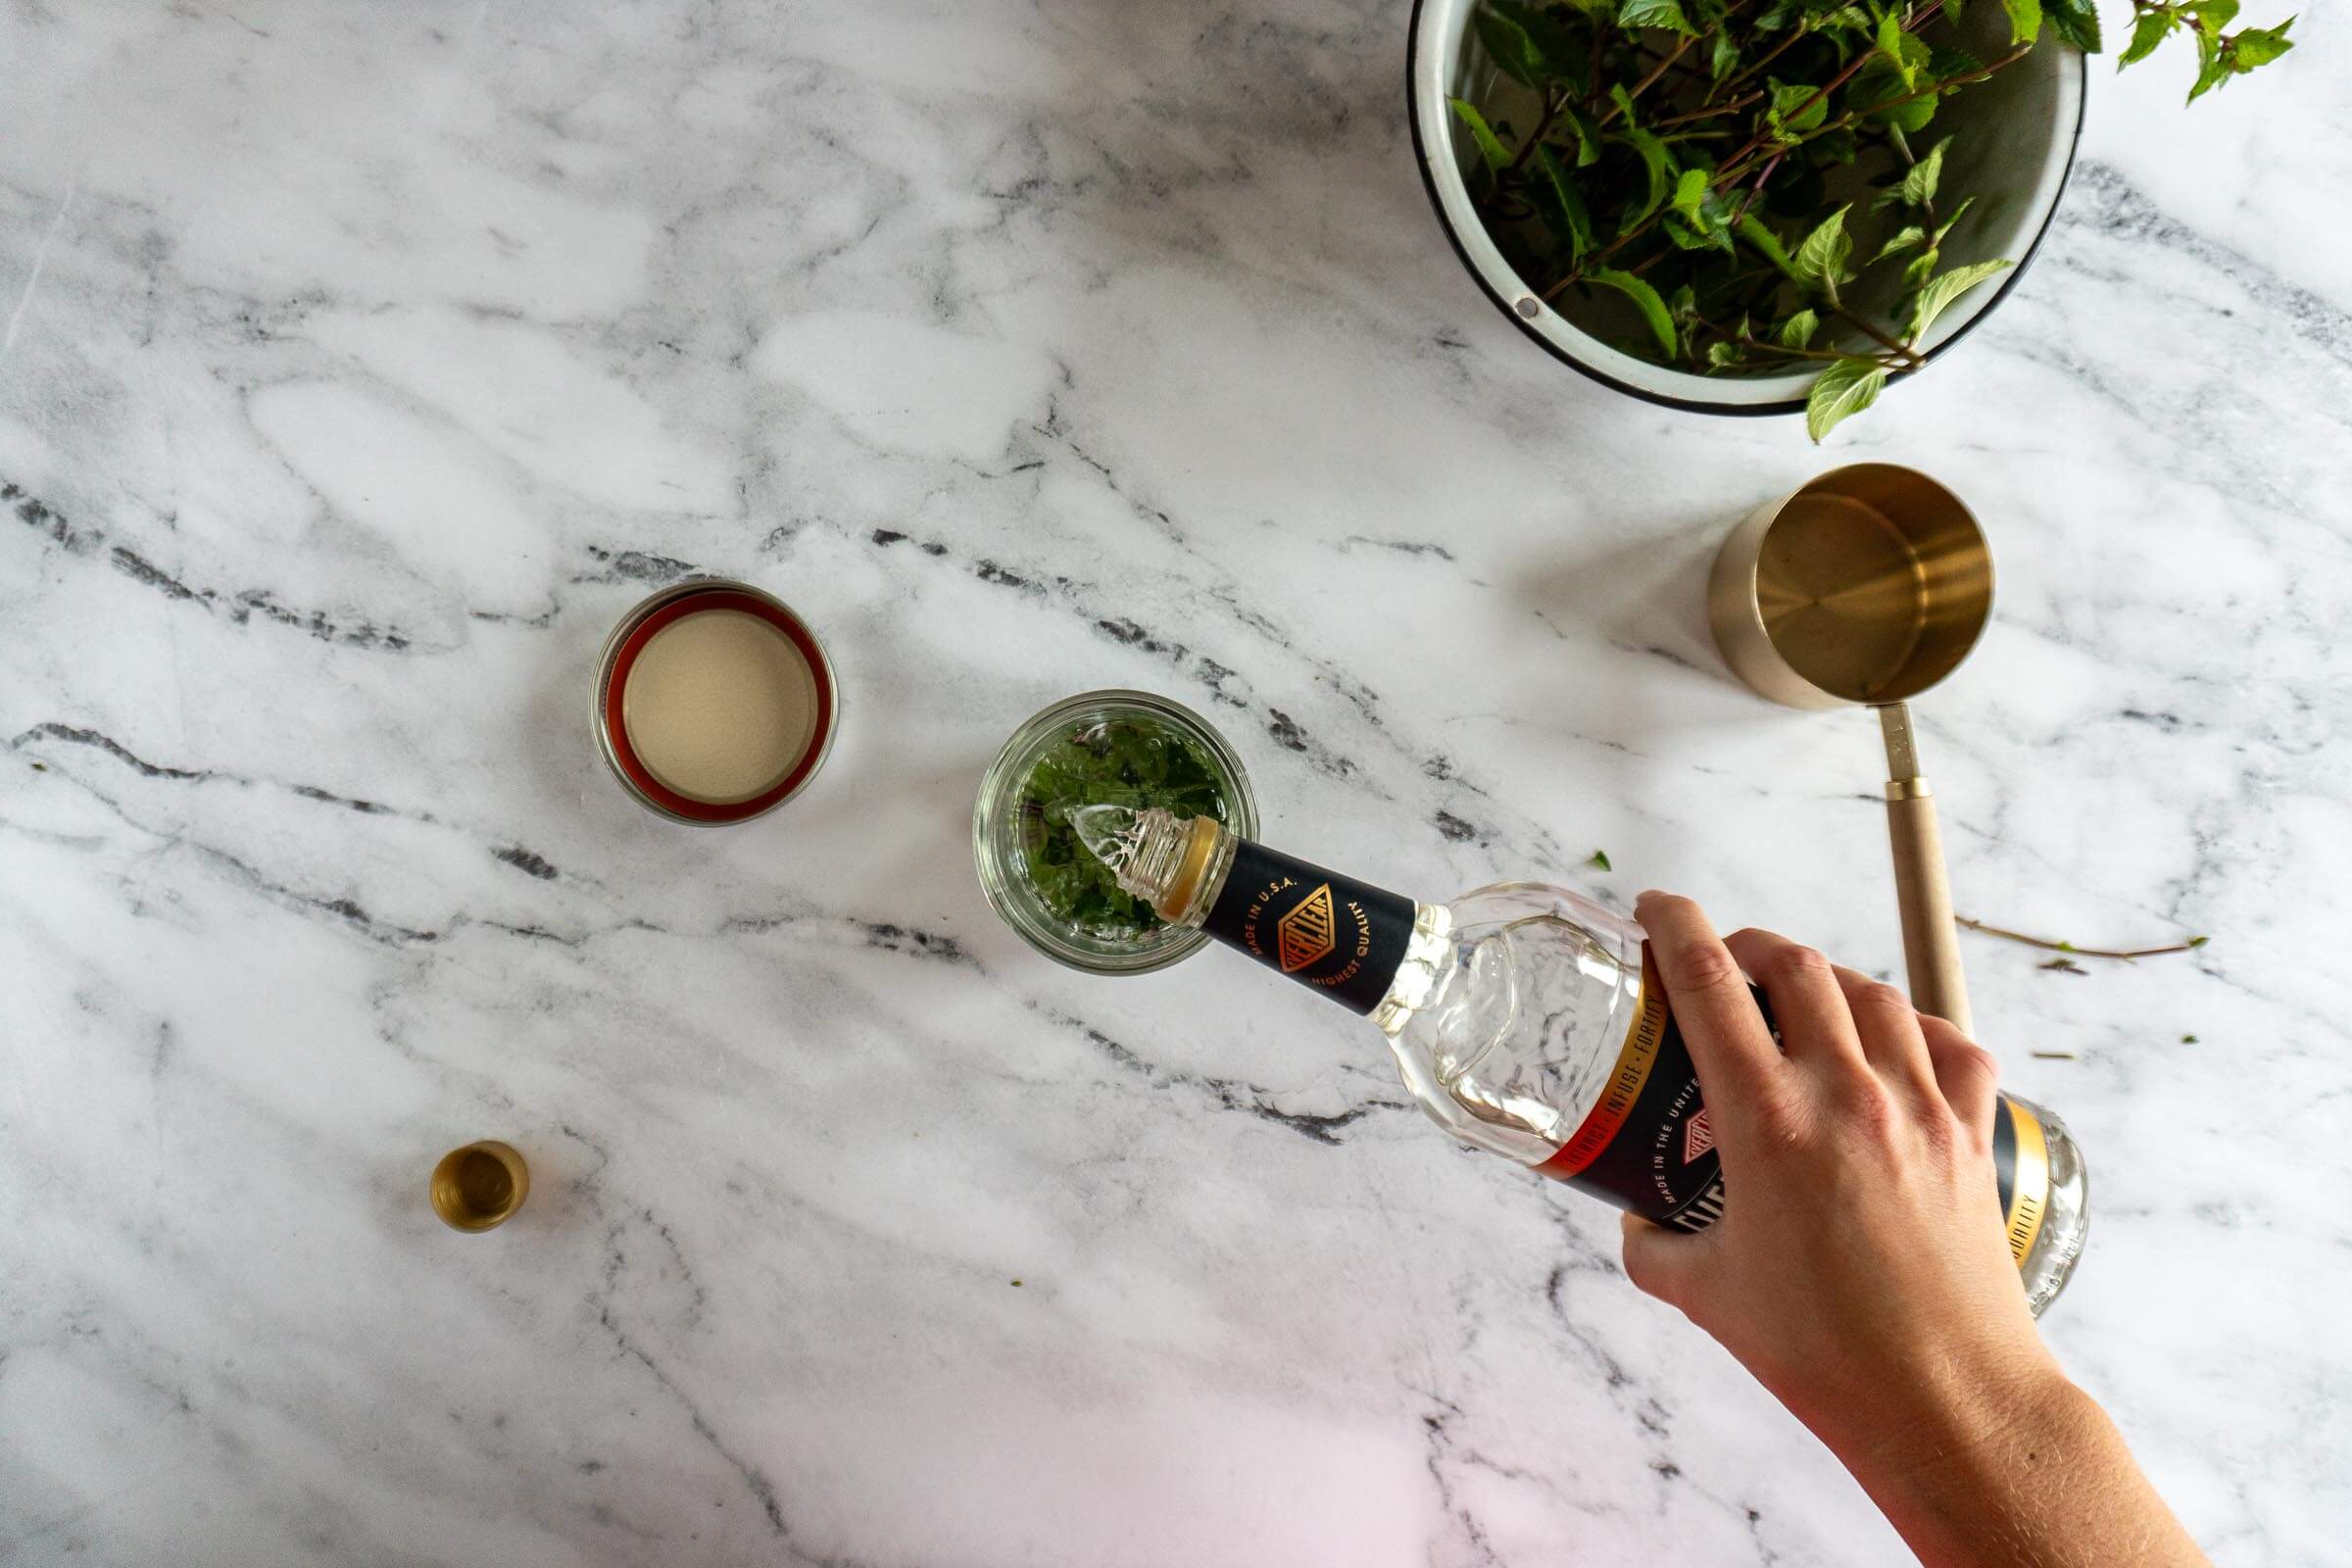
- Step 6: Pour Everclear over the mint leaves, ensuring they are covered.
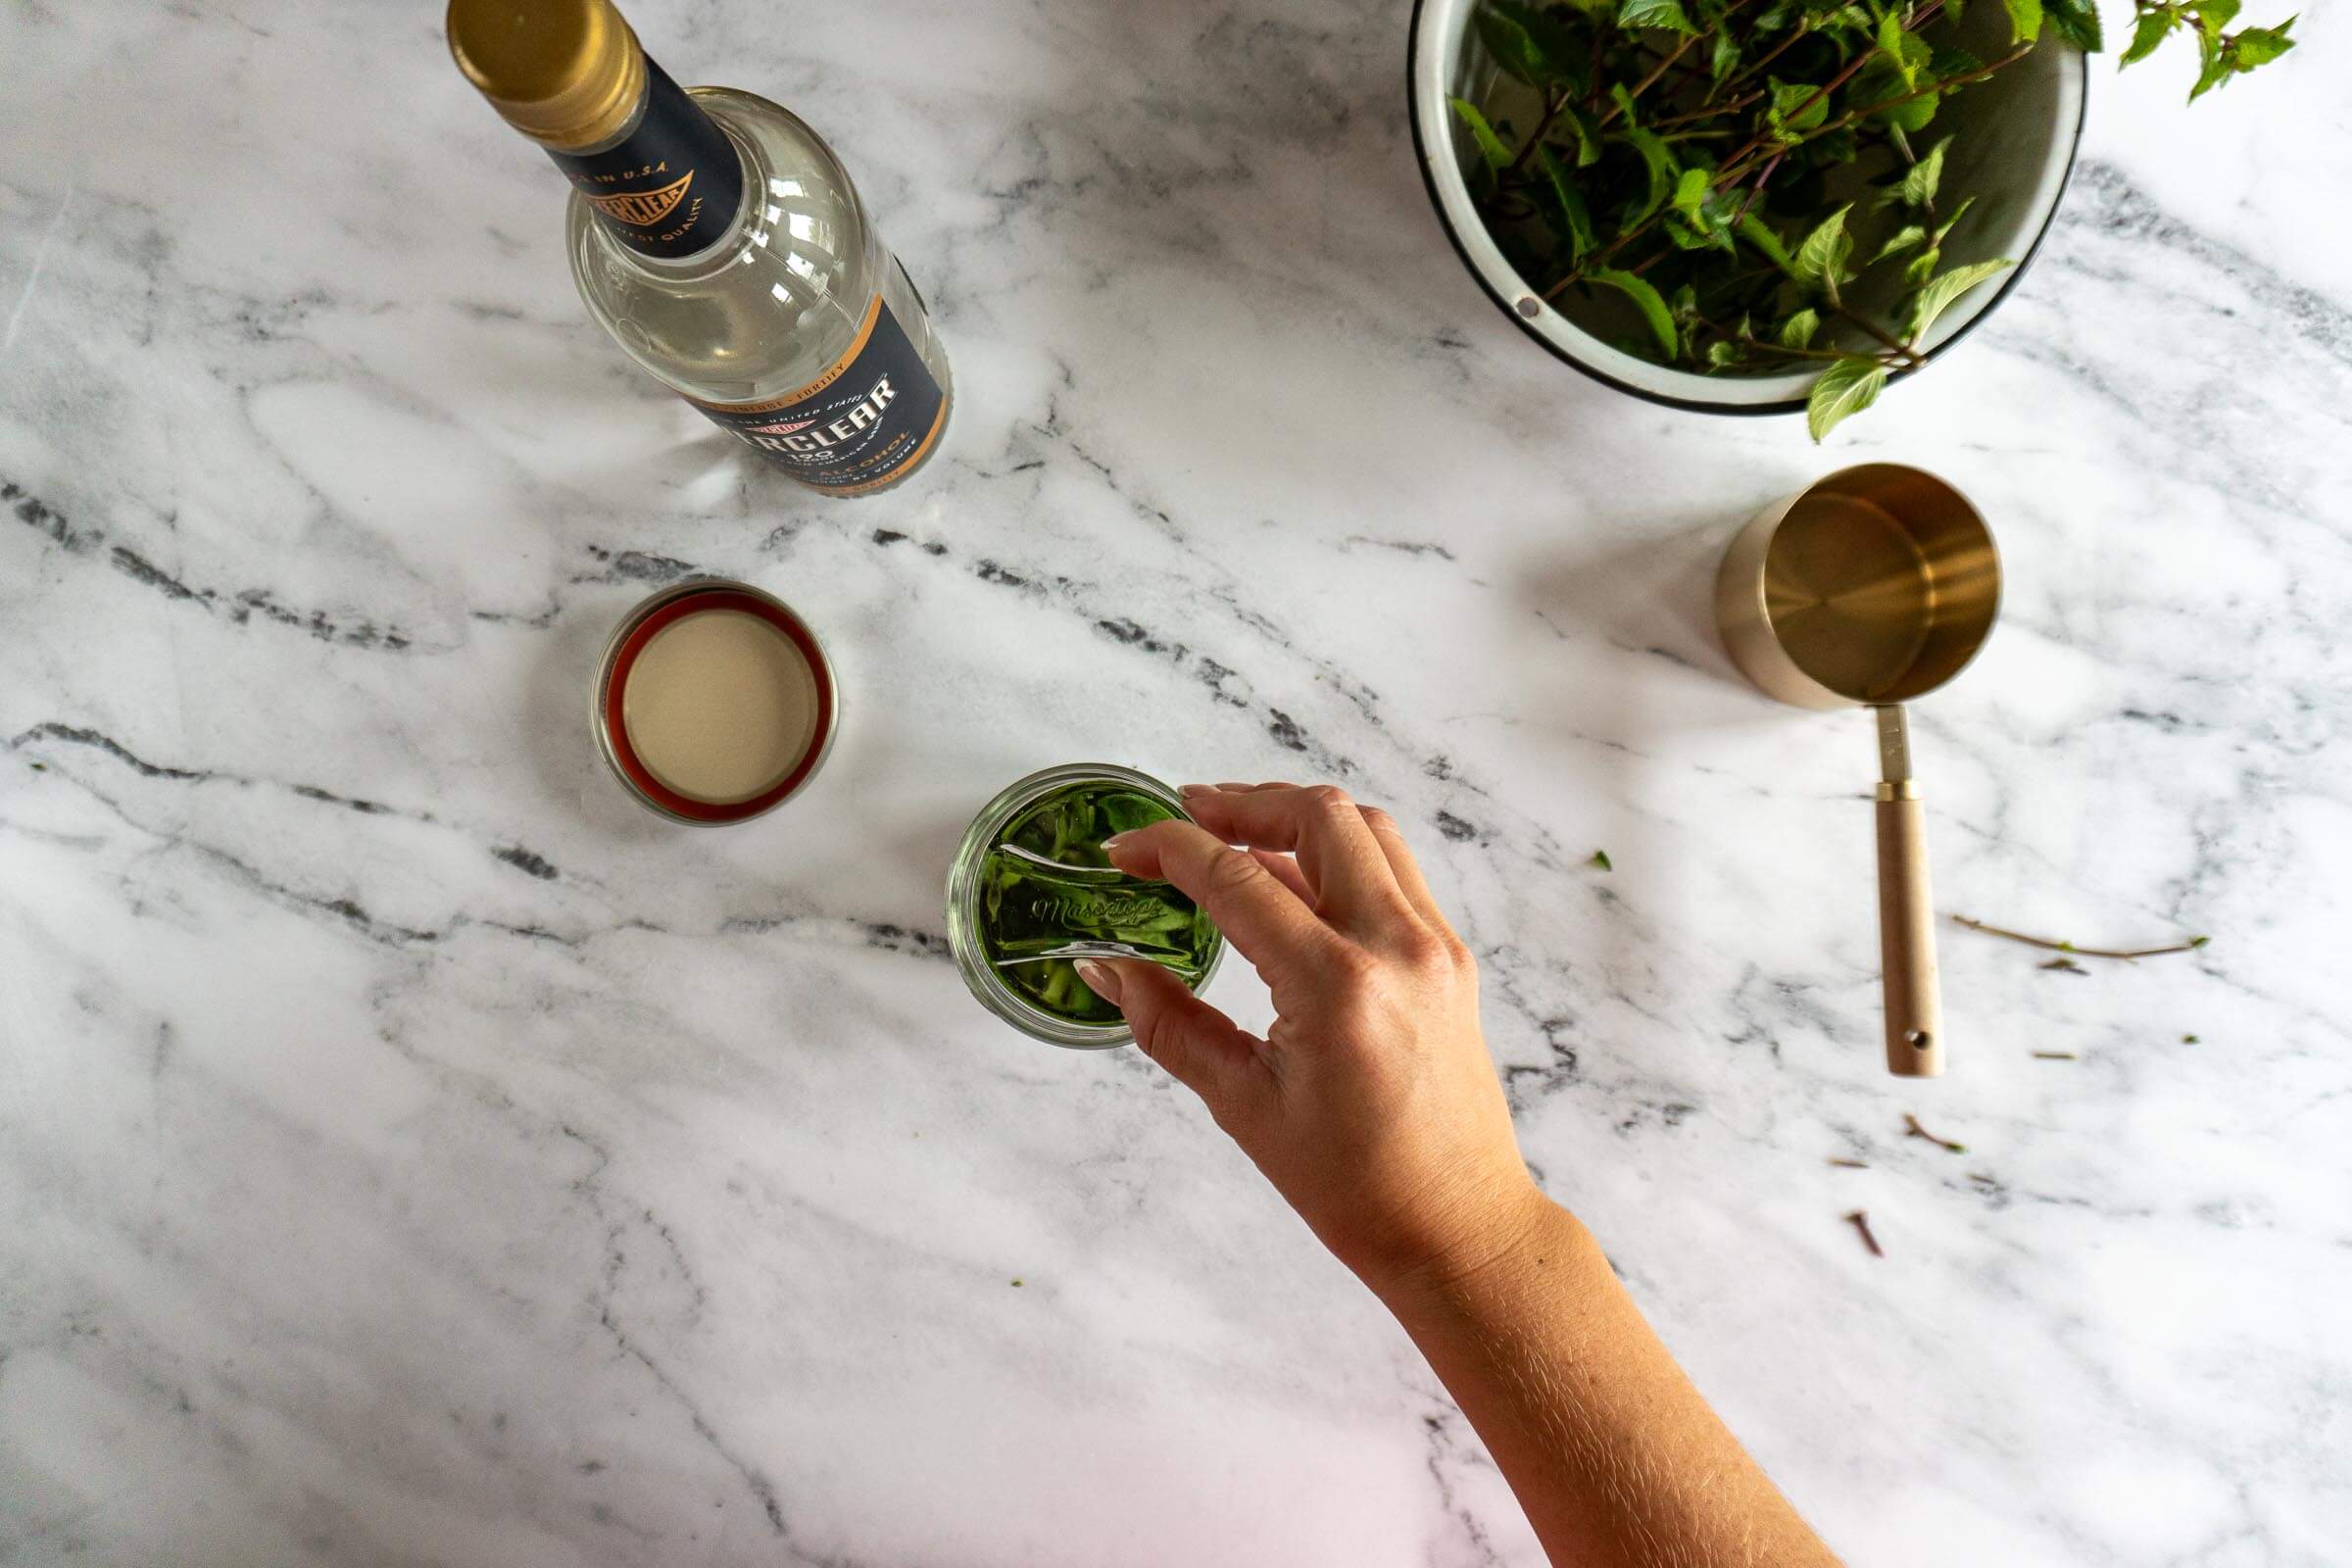
- Step 7: I like to toss a Pickle Pebble over my leaves to make sure they stay down in the liquid. This helps to stop oxidization of the organic matter, which in turn helps to prevent murky brown extracts!
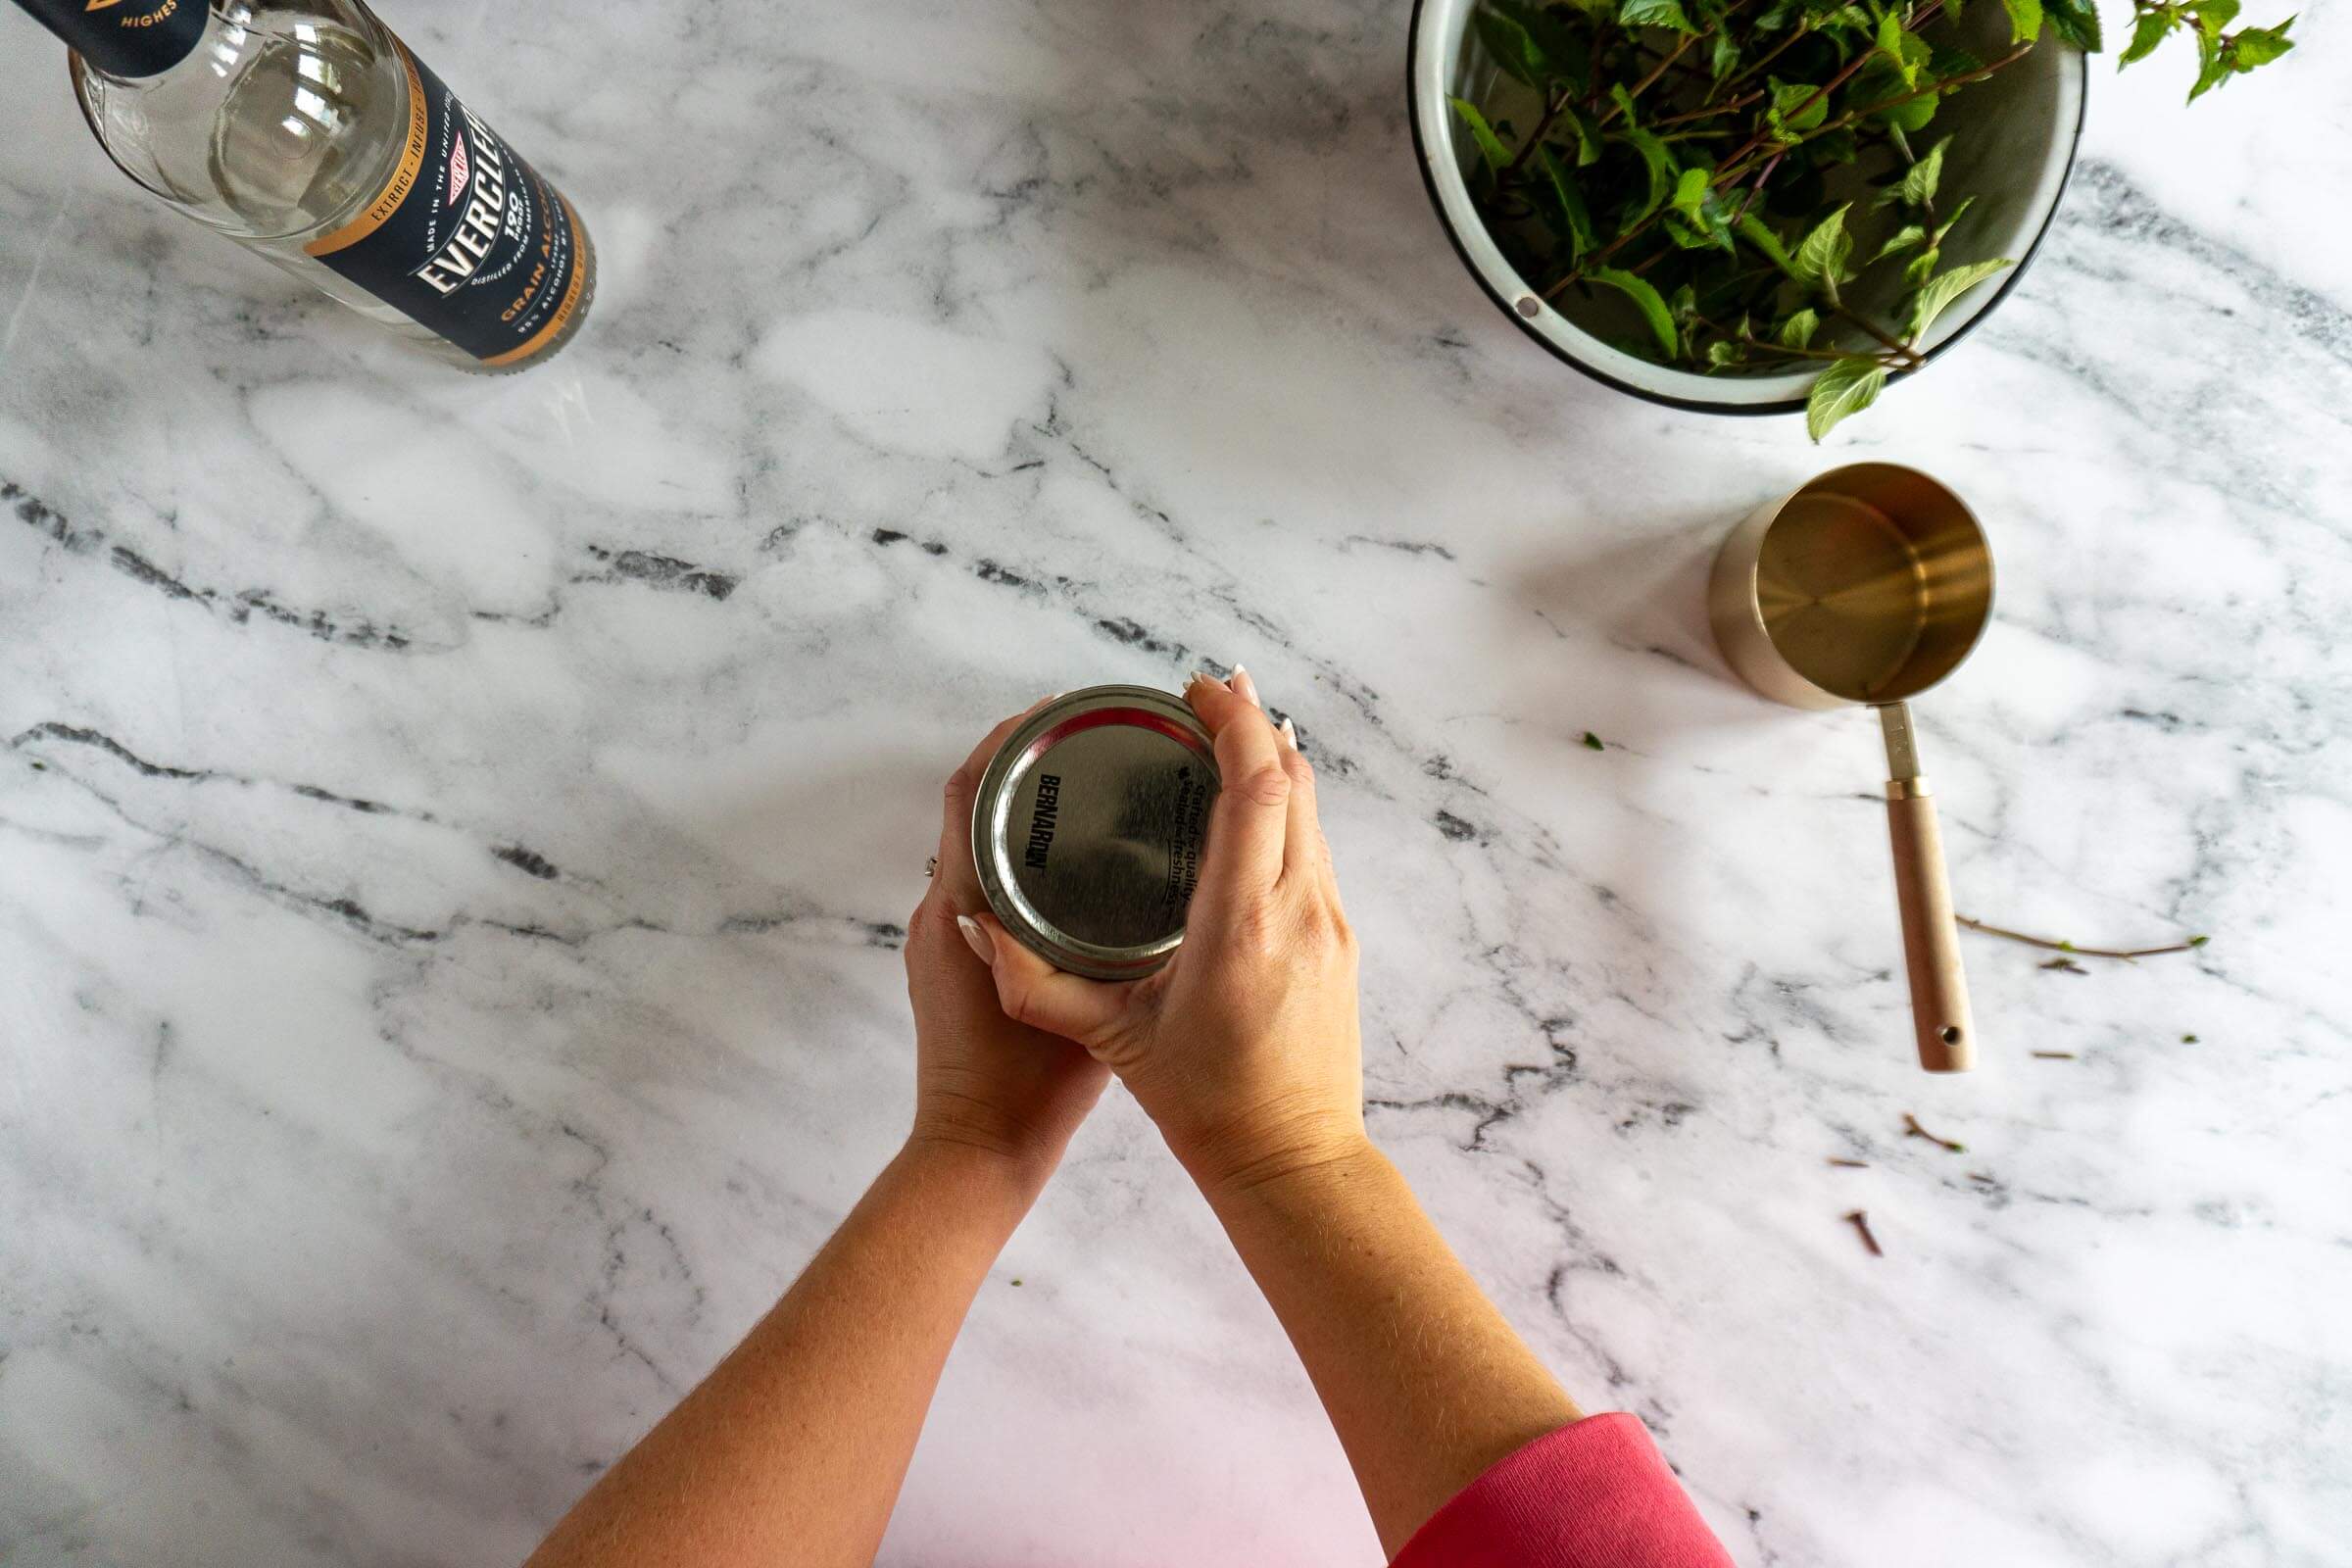
- Step 8: Cover the jar with the lid and set somewhere that you’ll see at least daily – I keep mine by the coffee pot – so you can give it a swirl a couple of times a day for the next 2-3 days.
Strain And Replace:
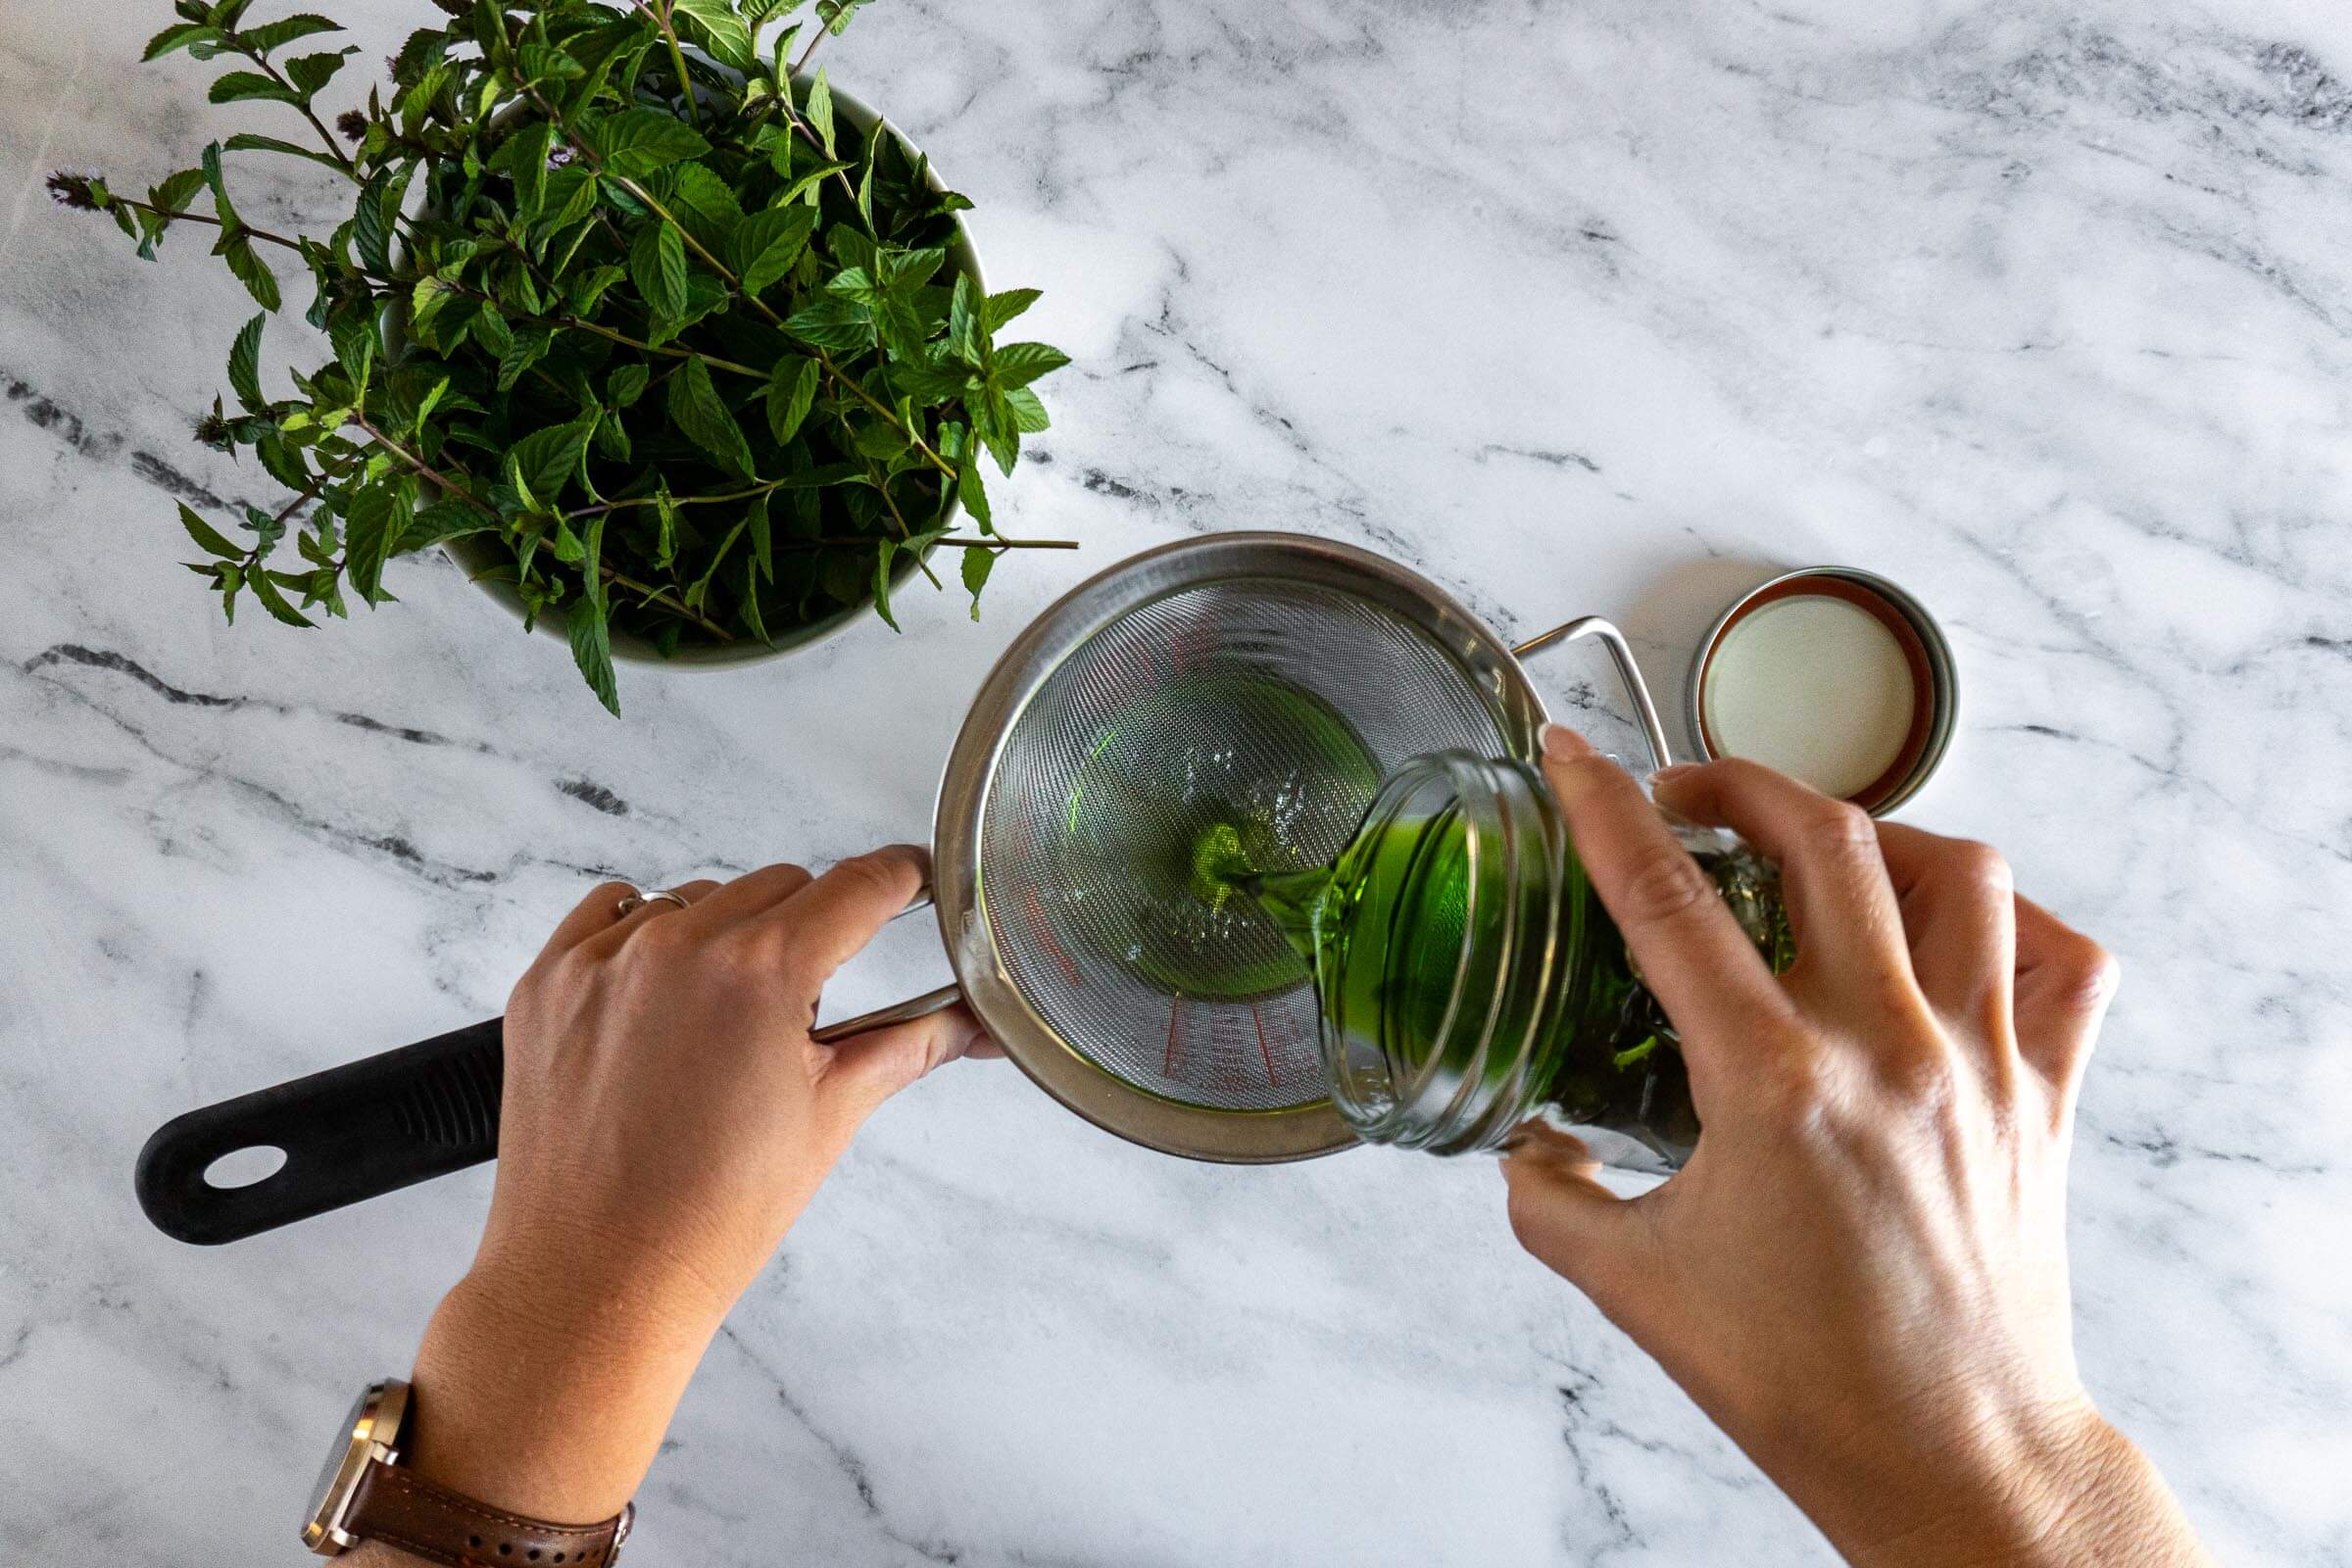
- Step 9: After 2-3 days, strain the mint leaves out of the alcohol using a cheesecloth or fine mesh sieve.

- Step 10: Repeat the process of picking and muddling 1 cup of packed mint leaves.
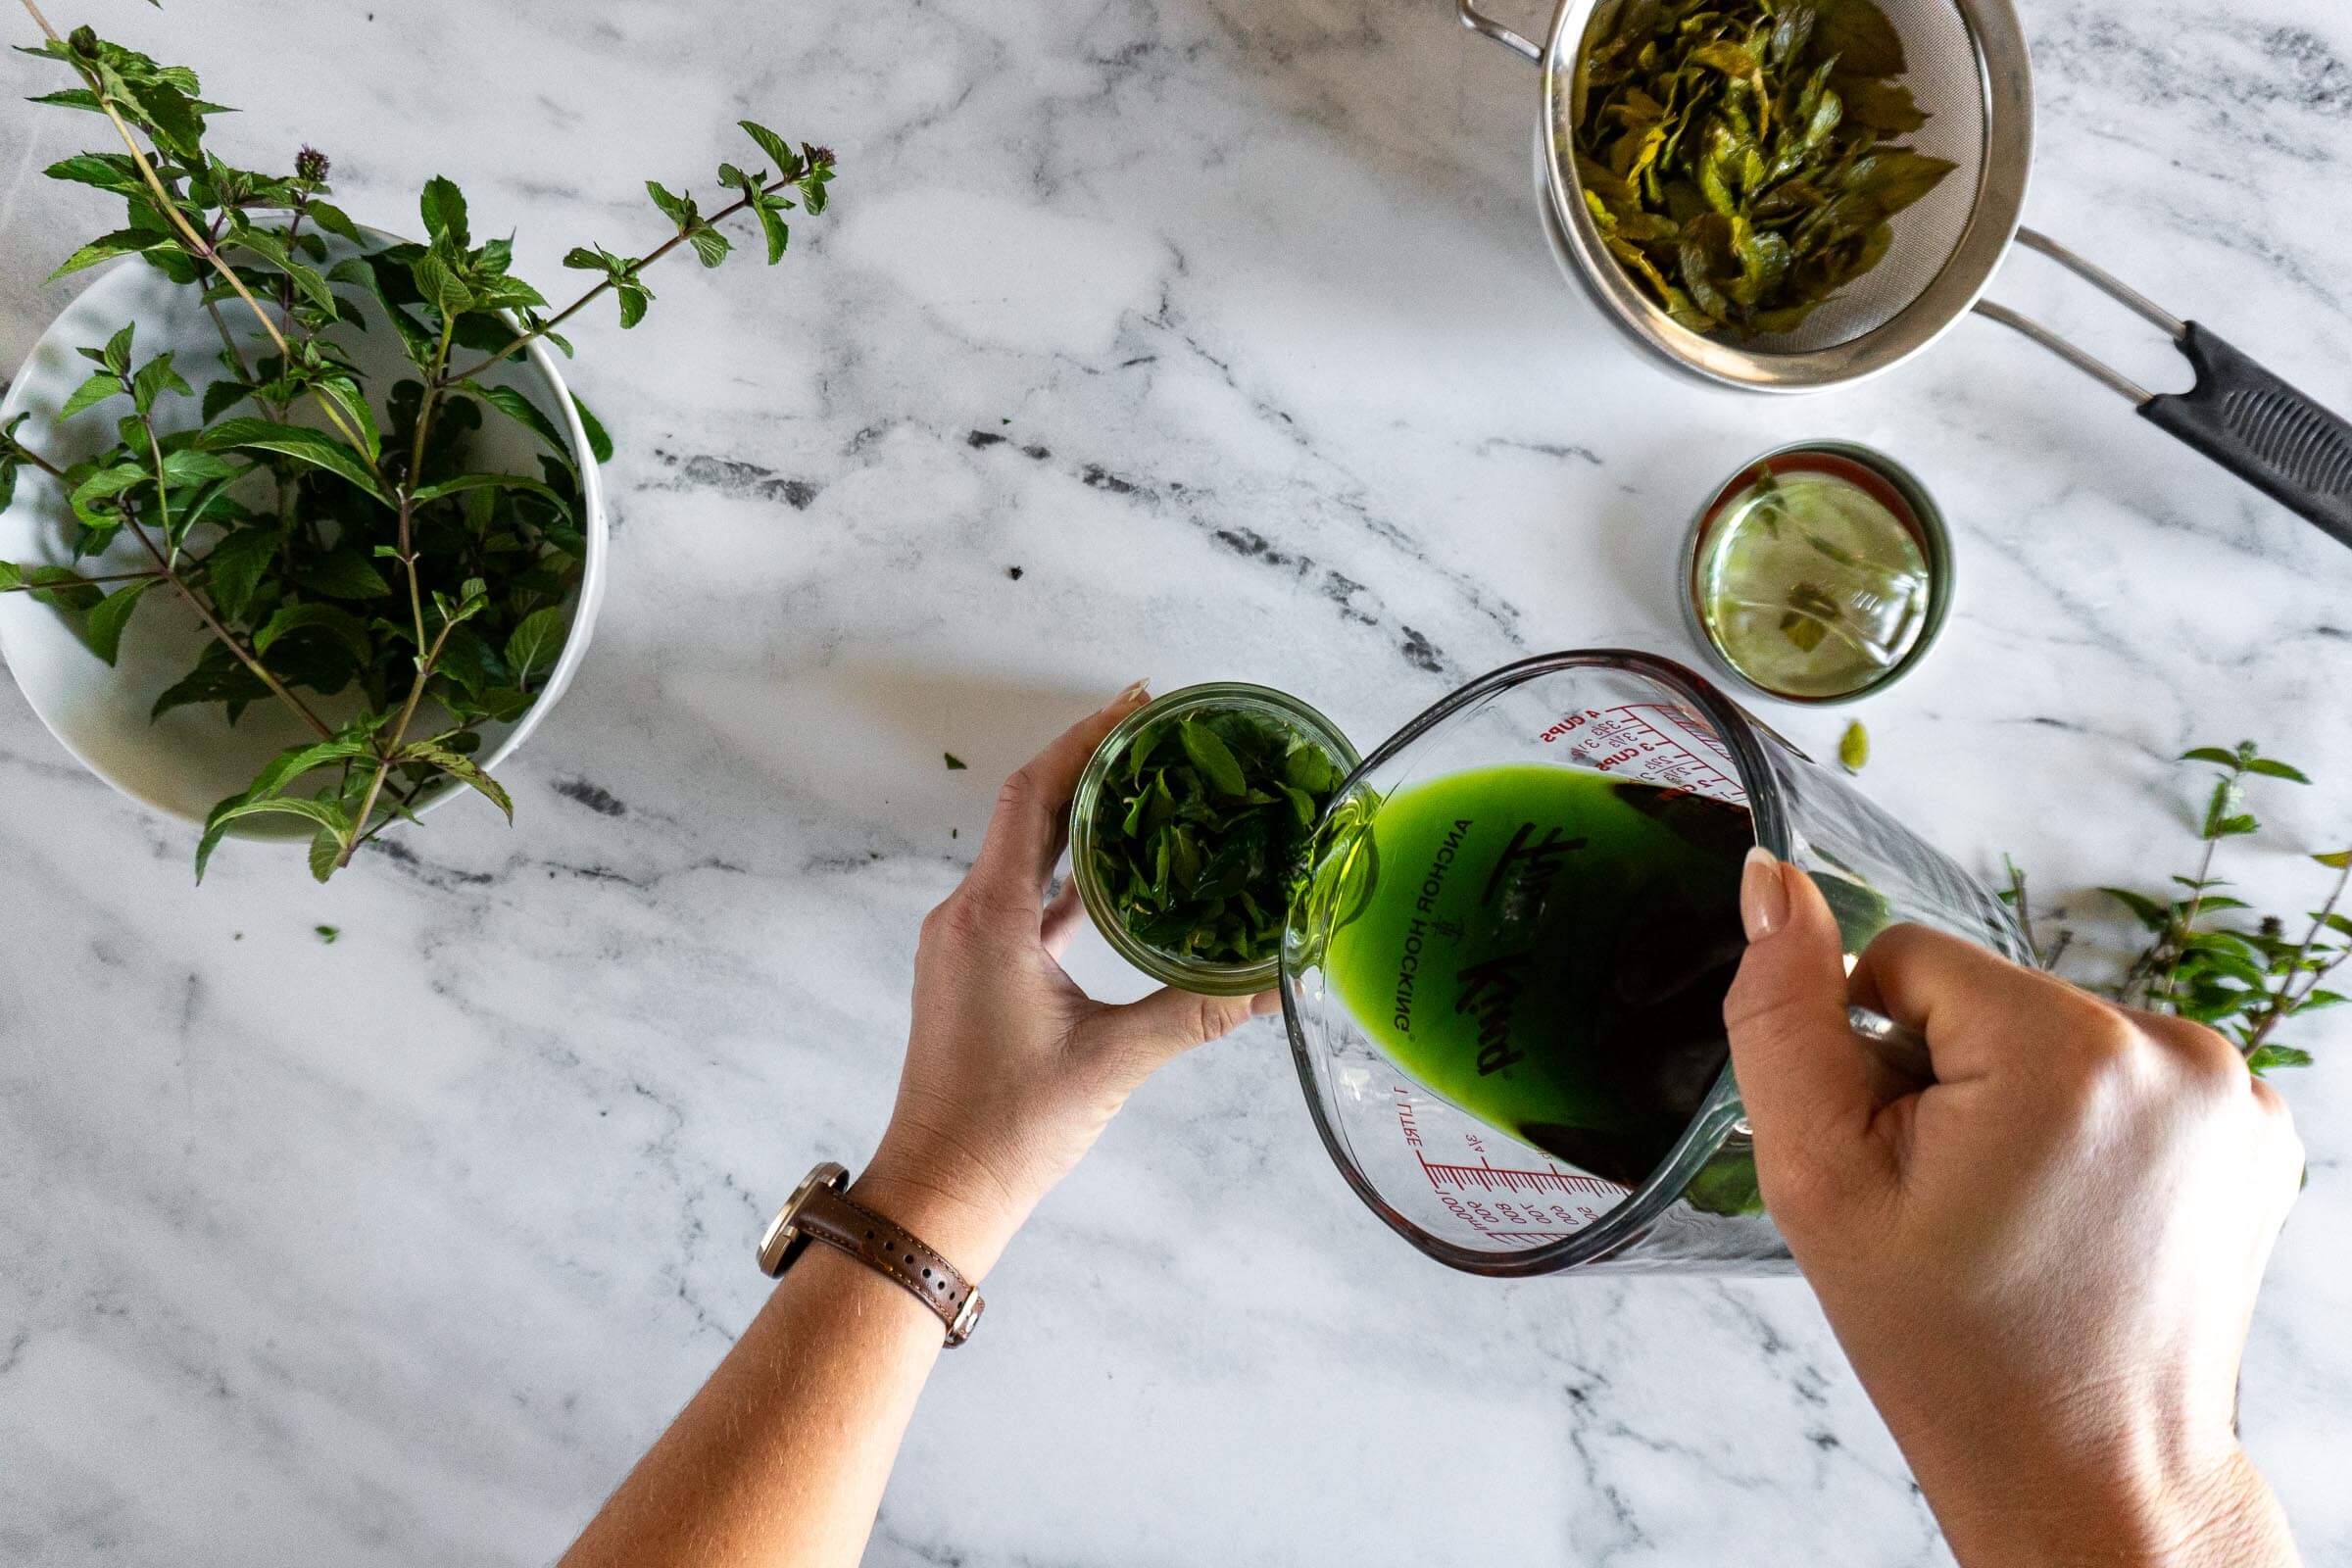
- Step 11: Add the fresh, muddled leaves to the jar, then add back the strained alcohol and top with your fermentation weight.
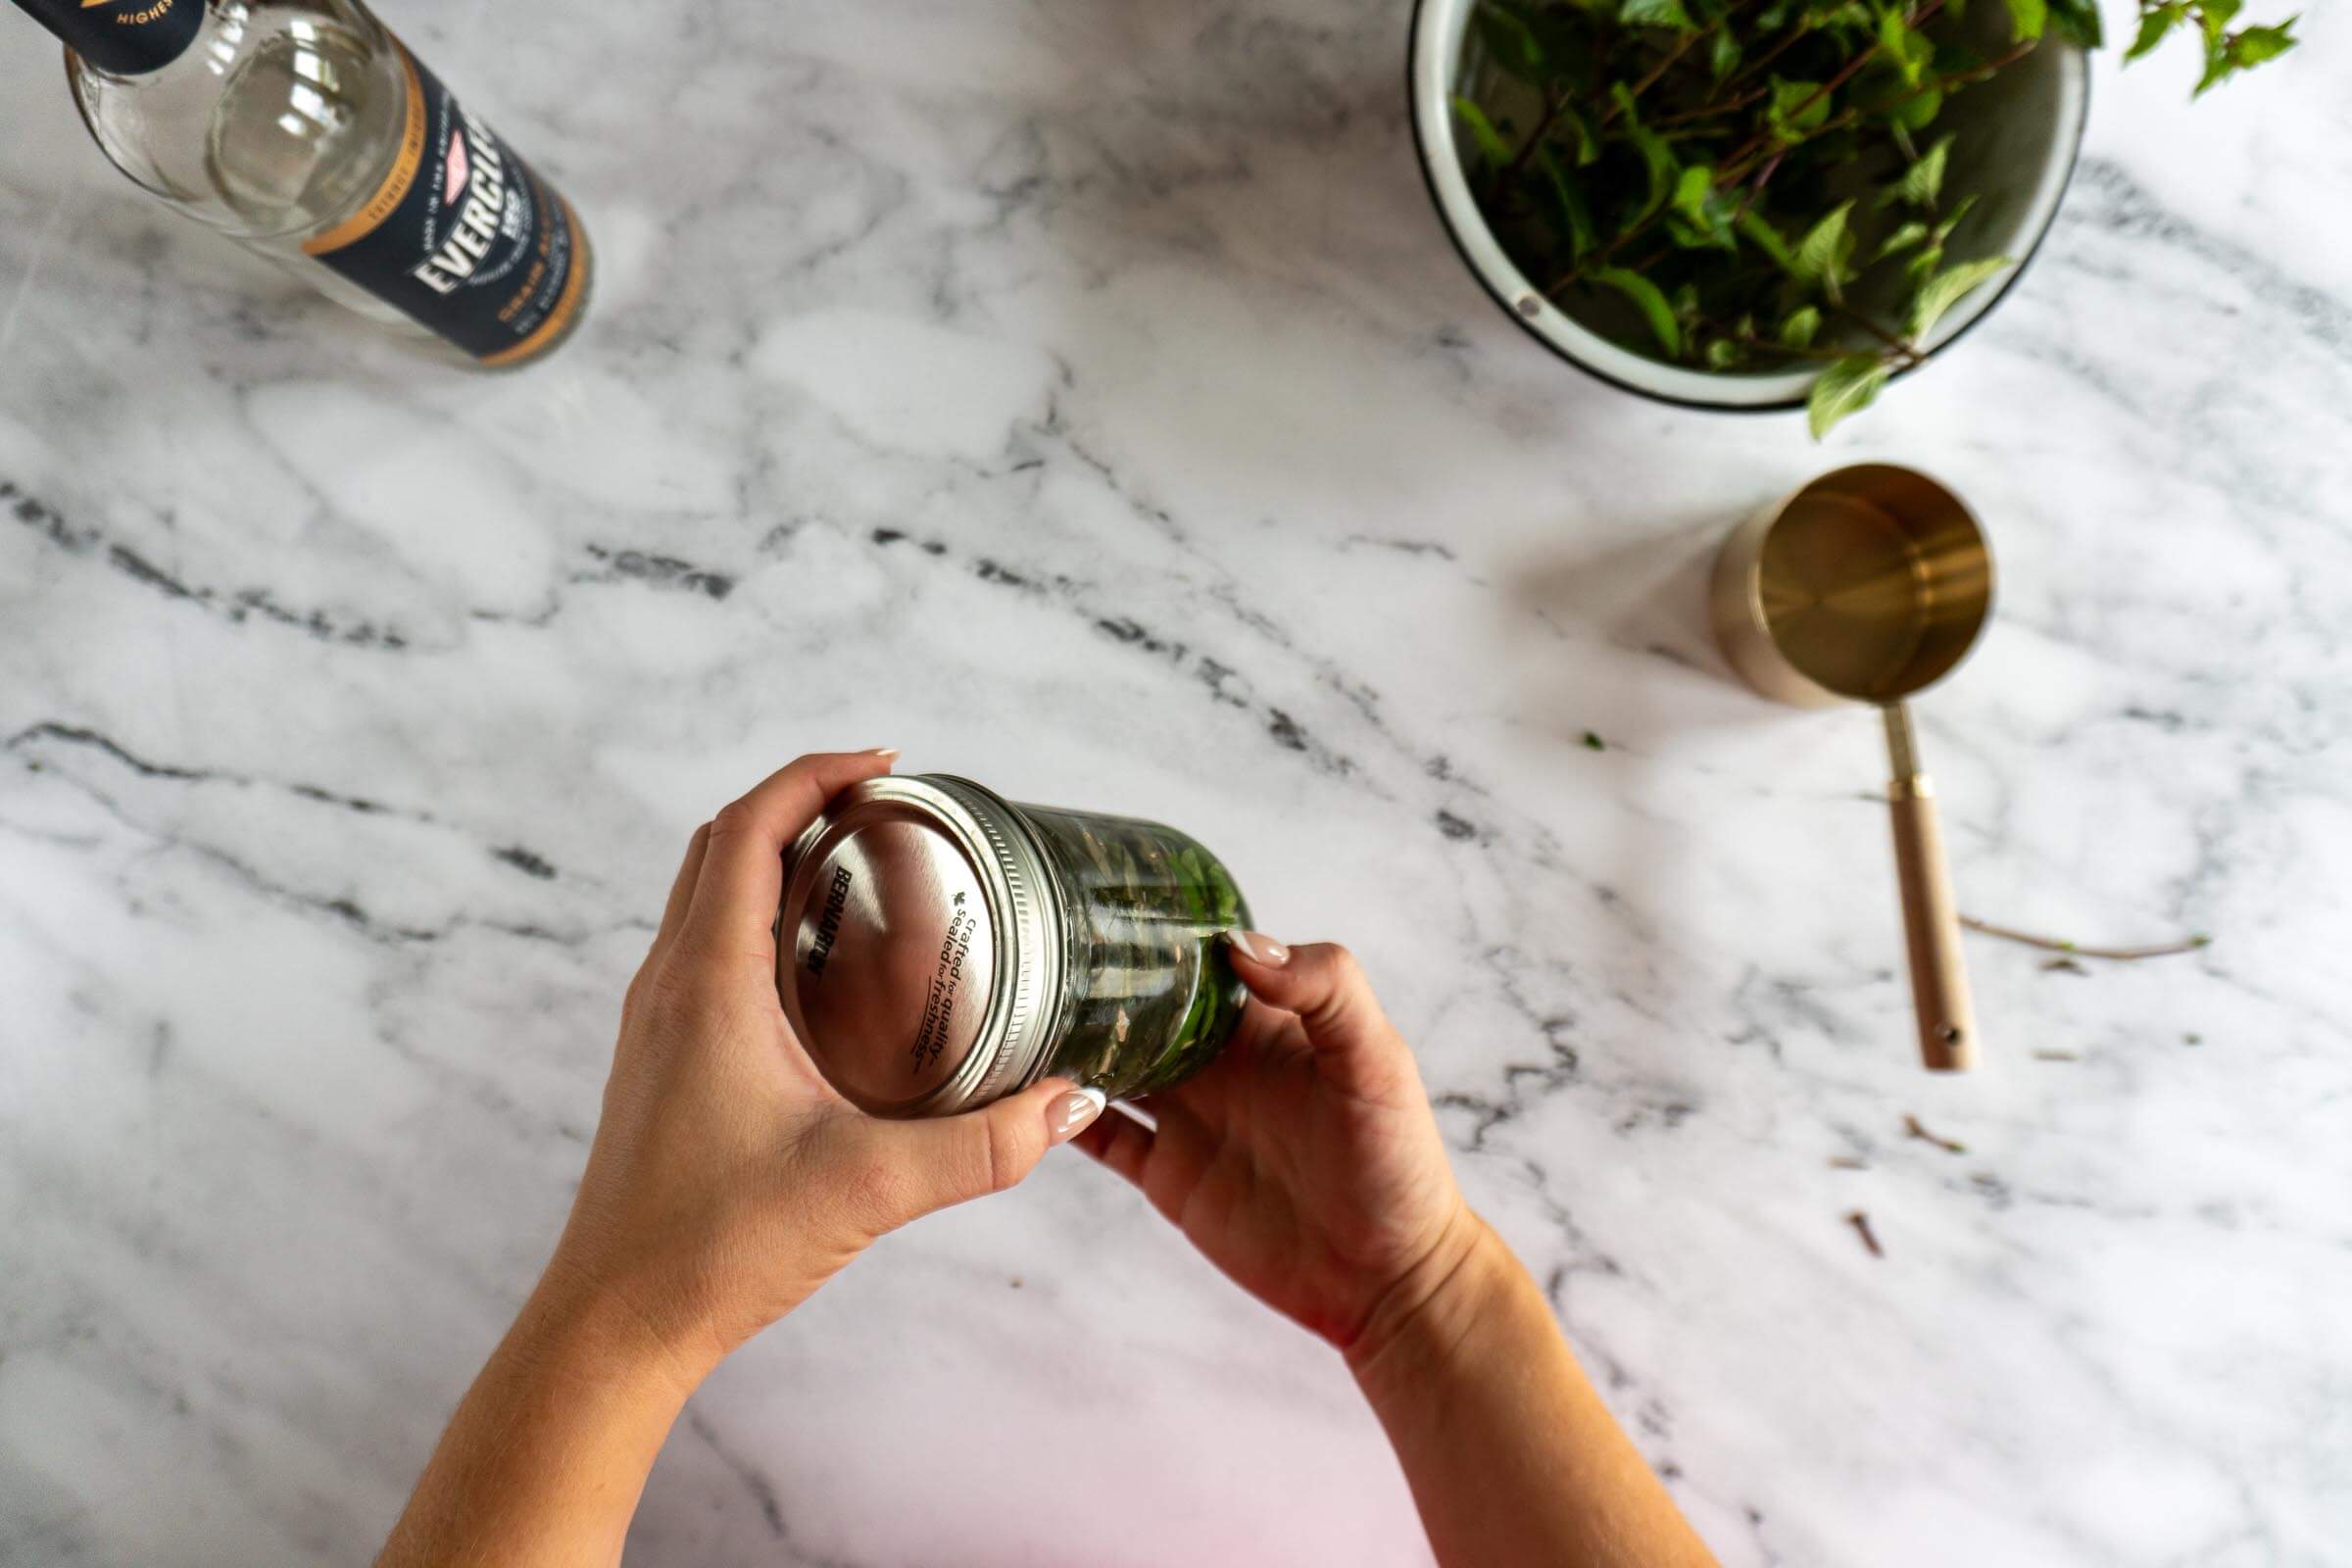
- Step 12: Cover the jar with the lid, give it a swirl a couple of times a day for the next 2-3 days before repeating the strain and replace process at least once more.
Strain And Store:
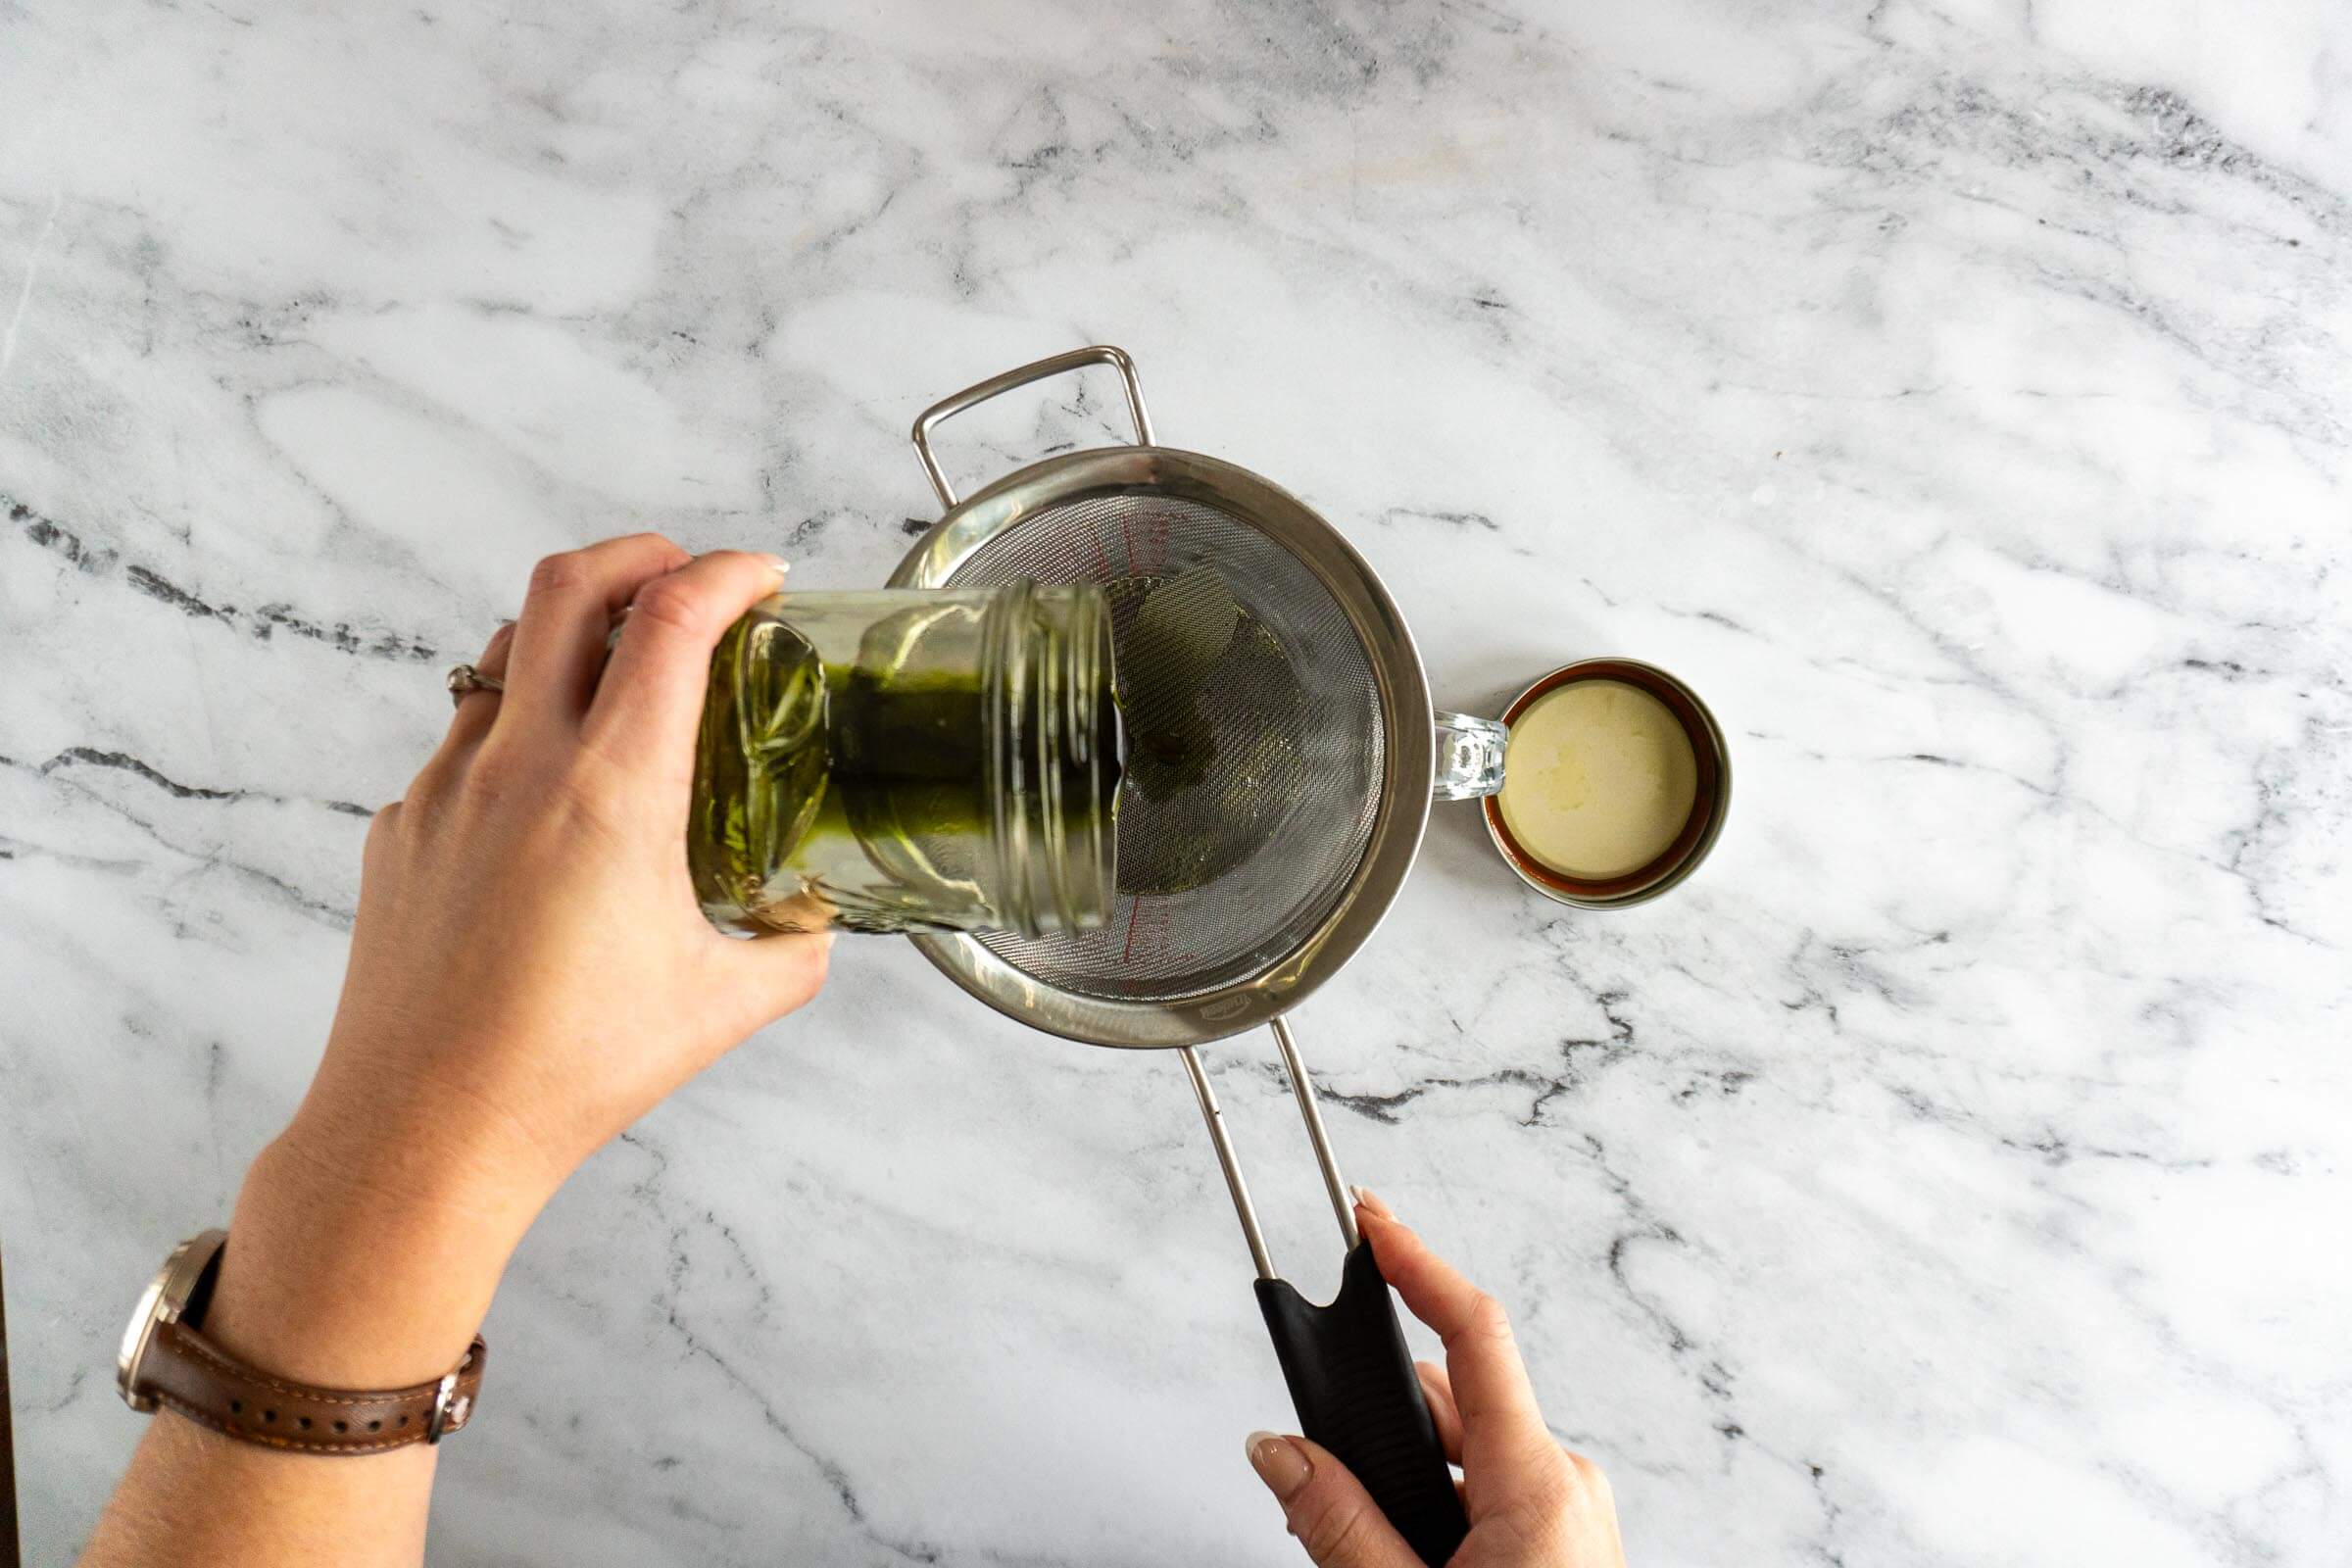
- Step 13: After 2 more days, strain extract to remove the mint leaves out of the alcohol using a cheesecloth or fine mesh sieve.
Meanwhile, wash your airtight storage container and lid. Dry well.
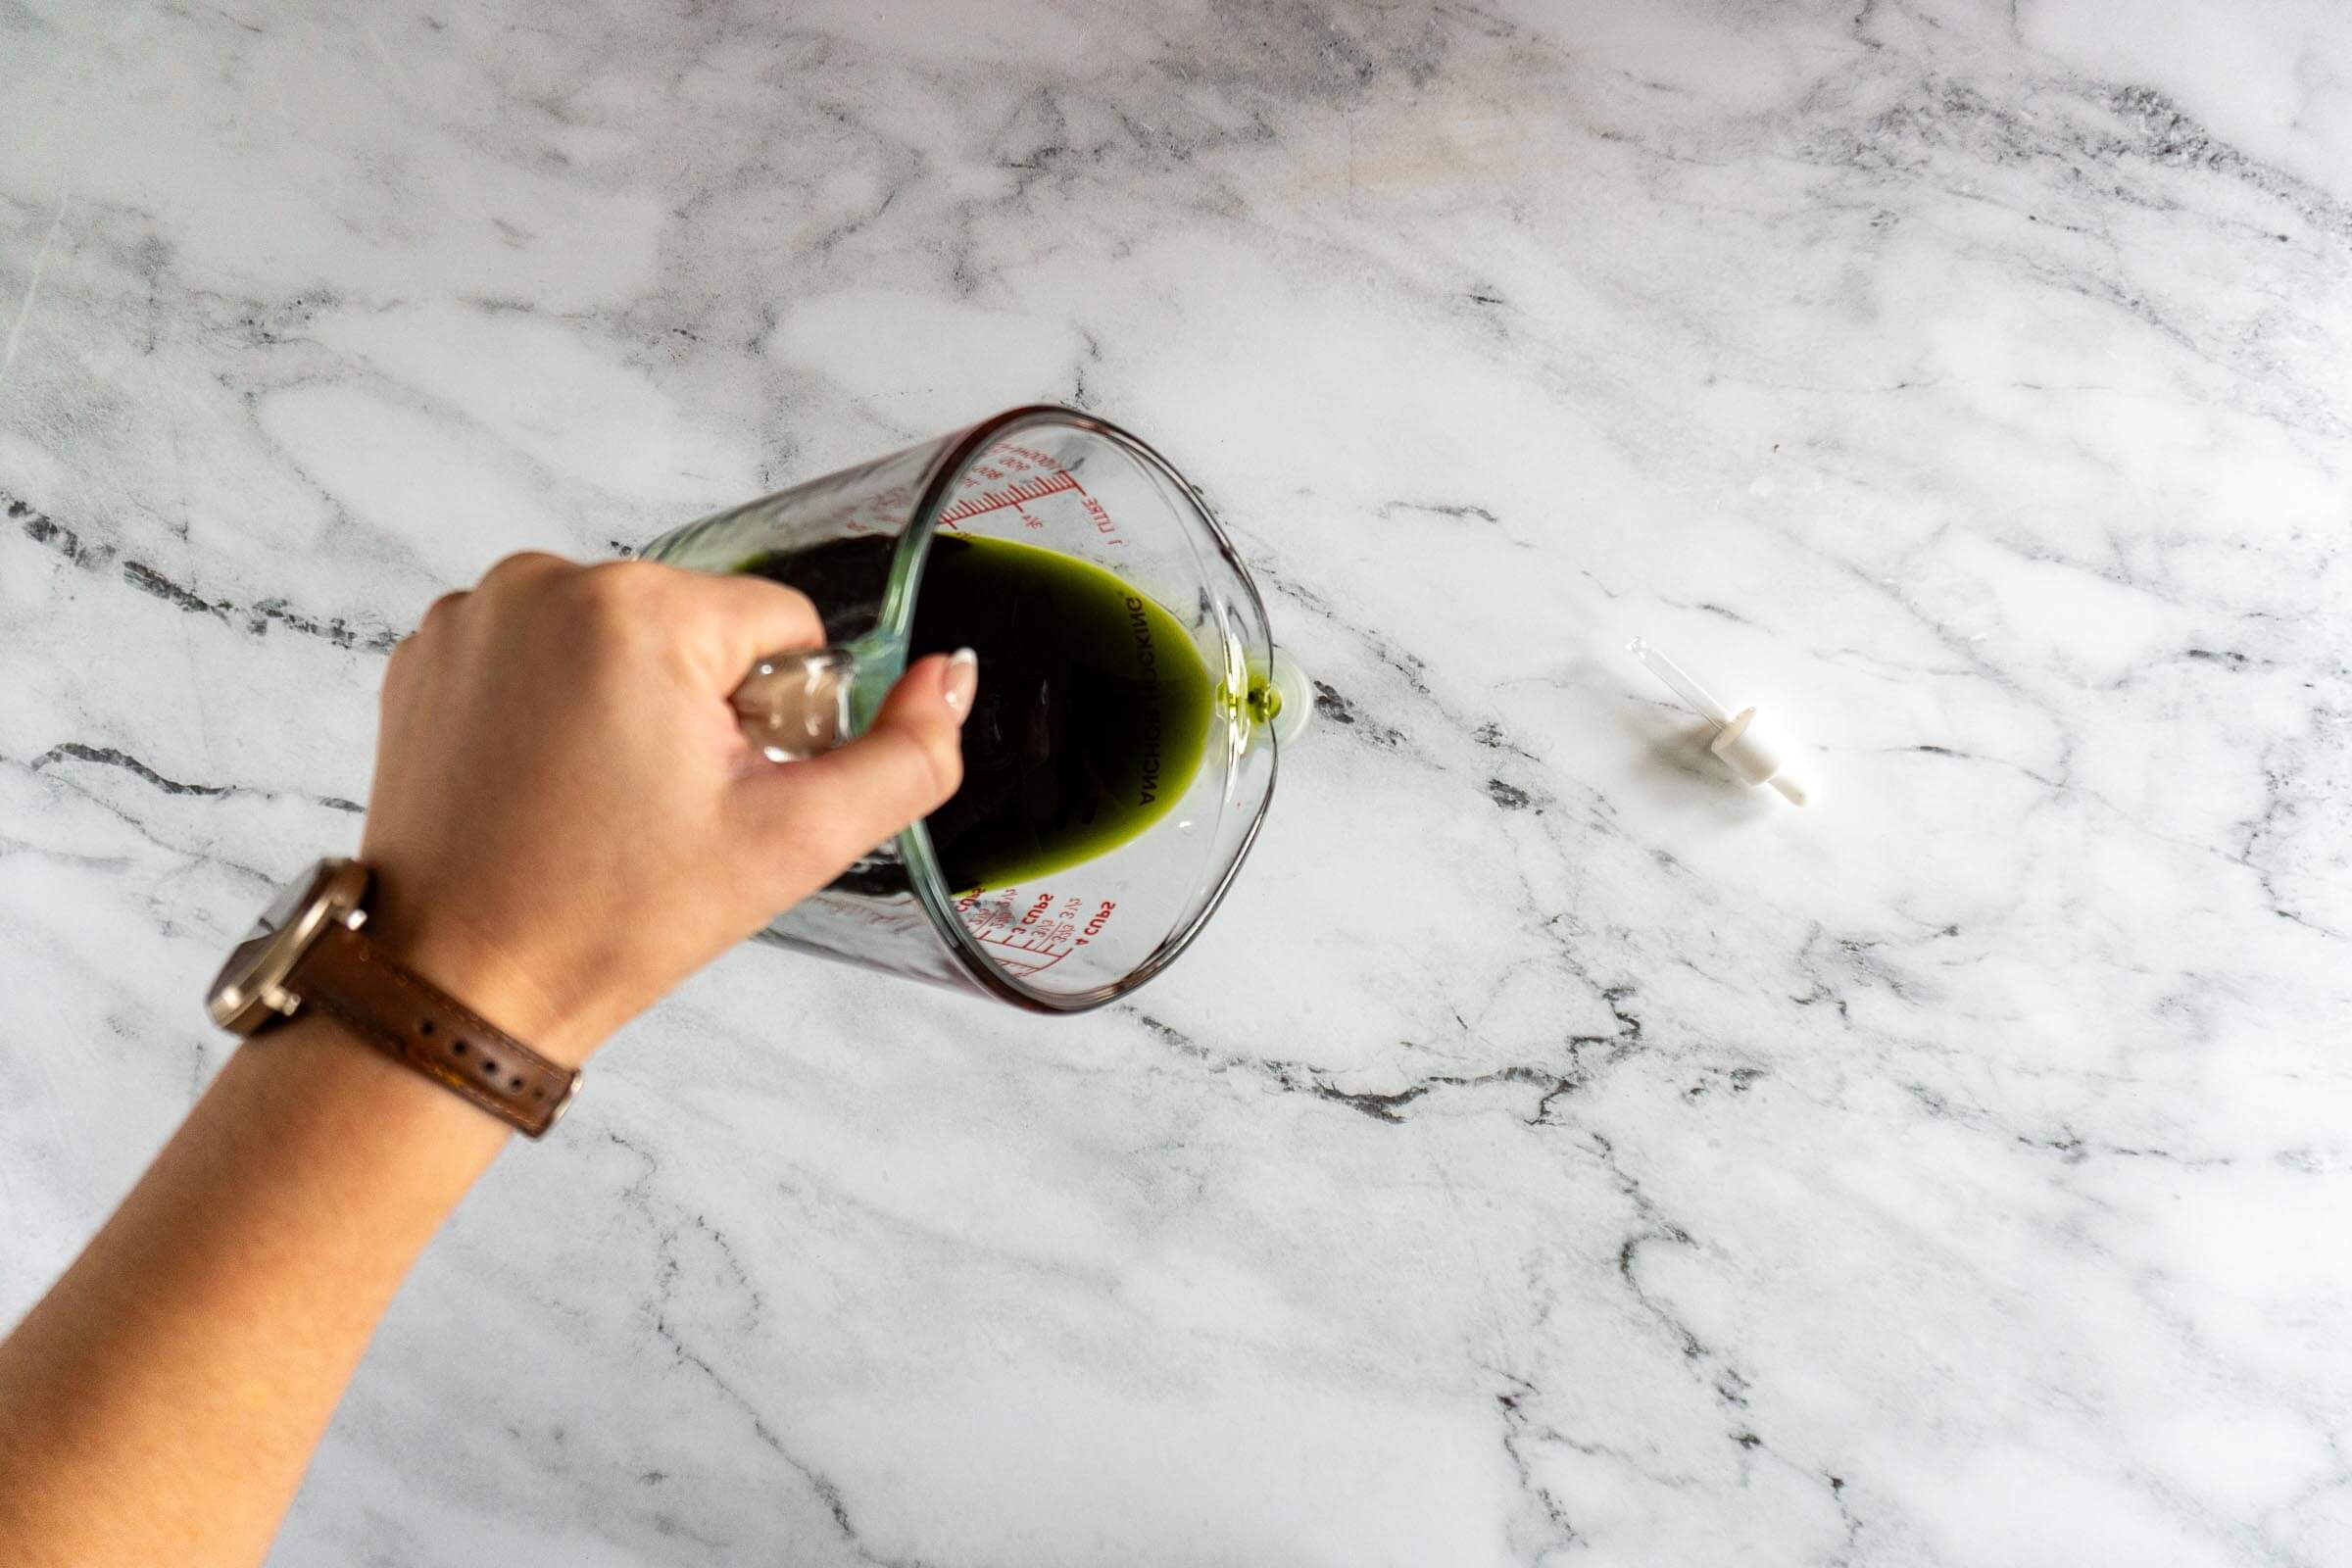
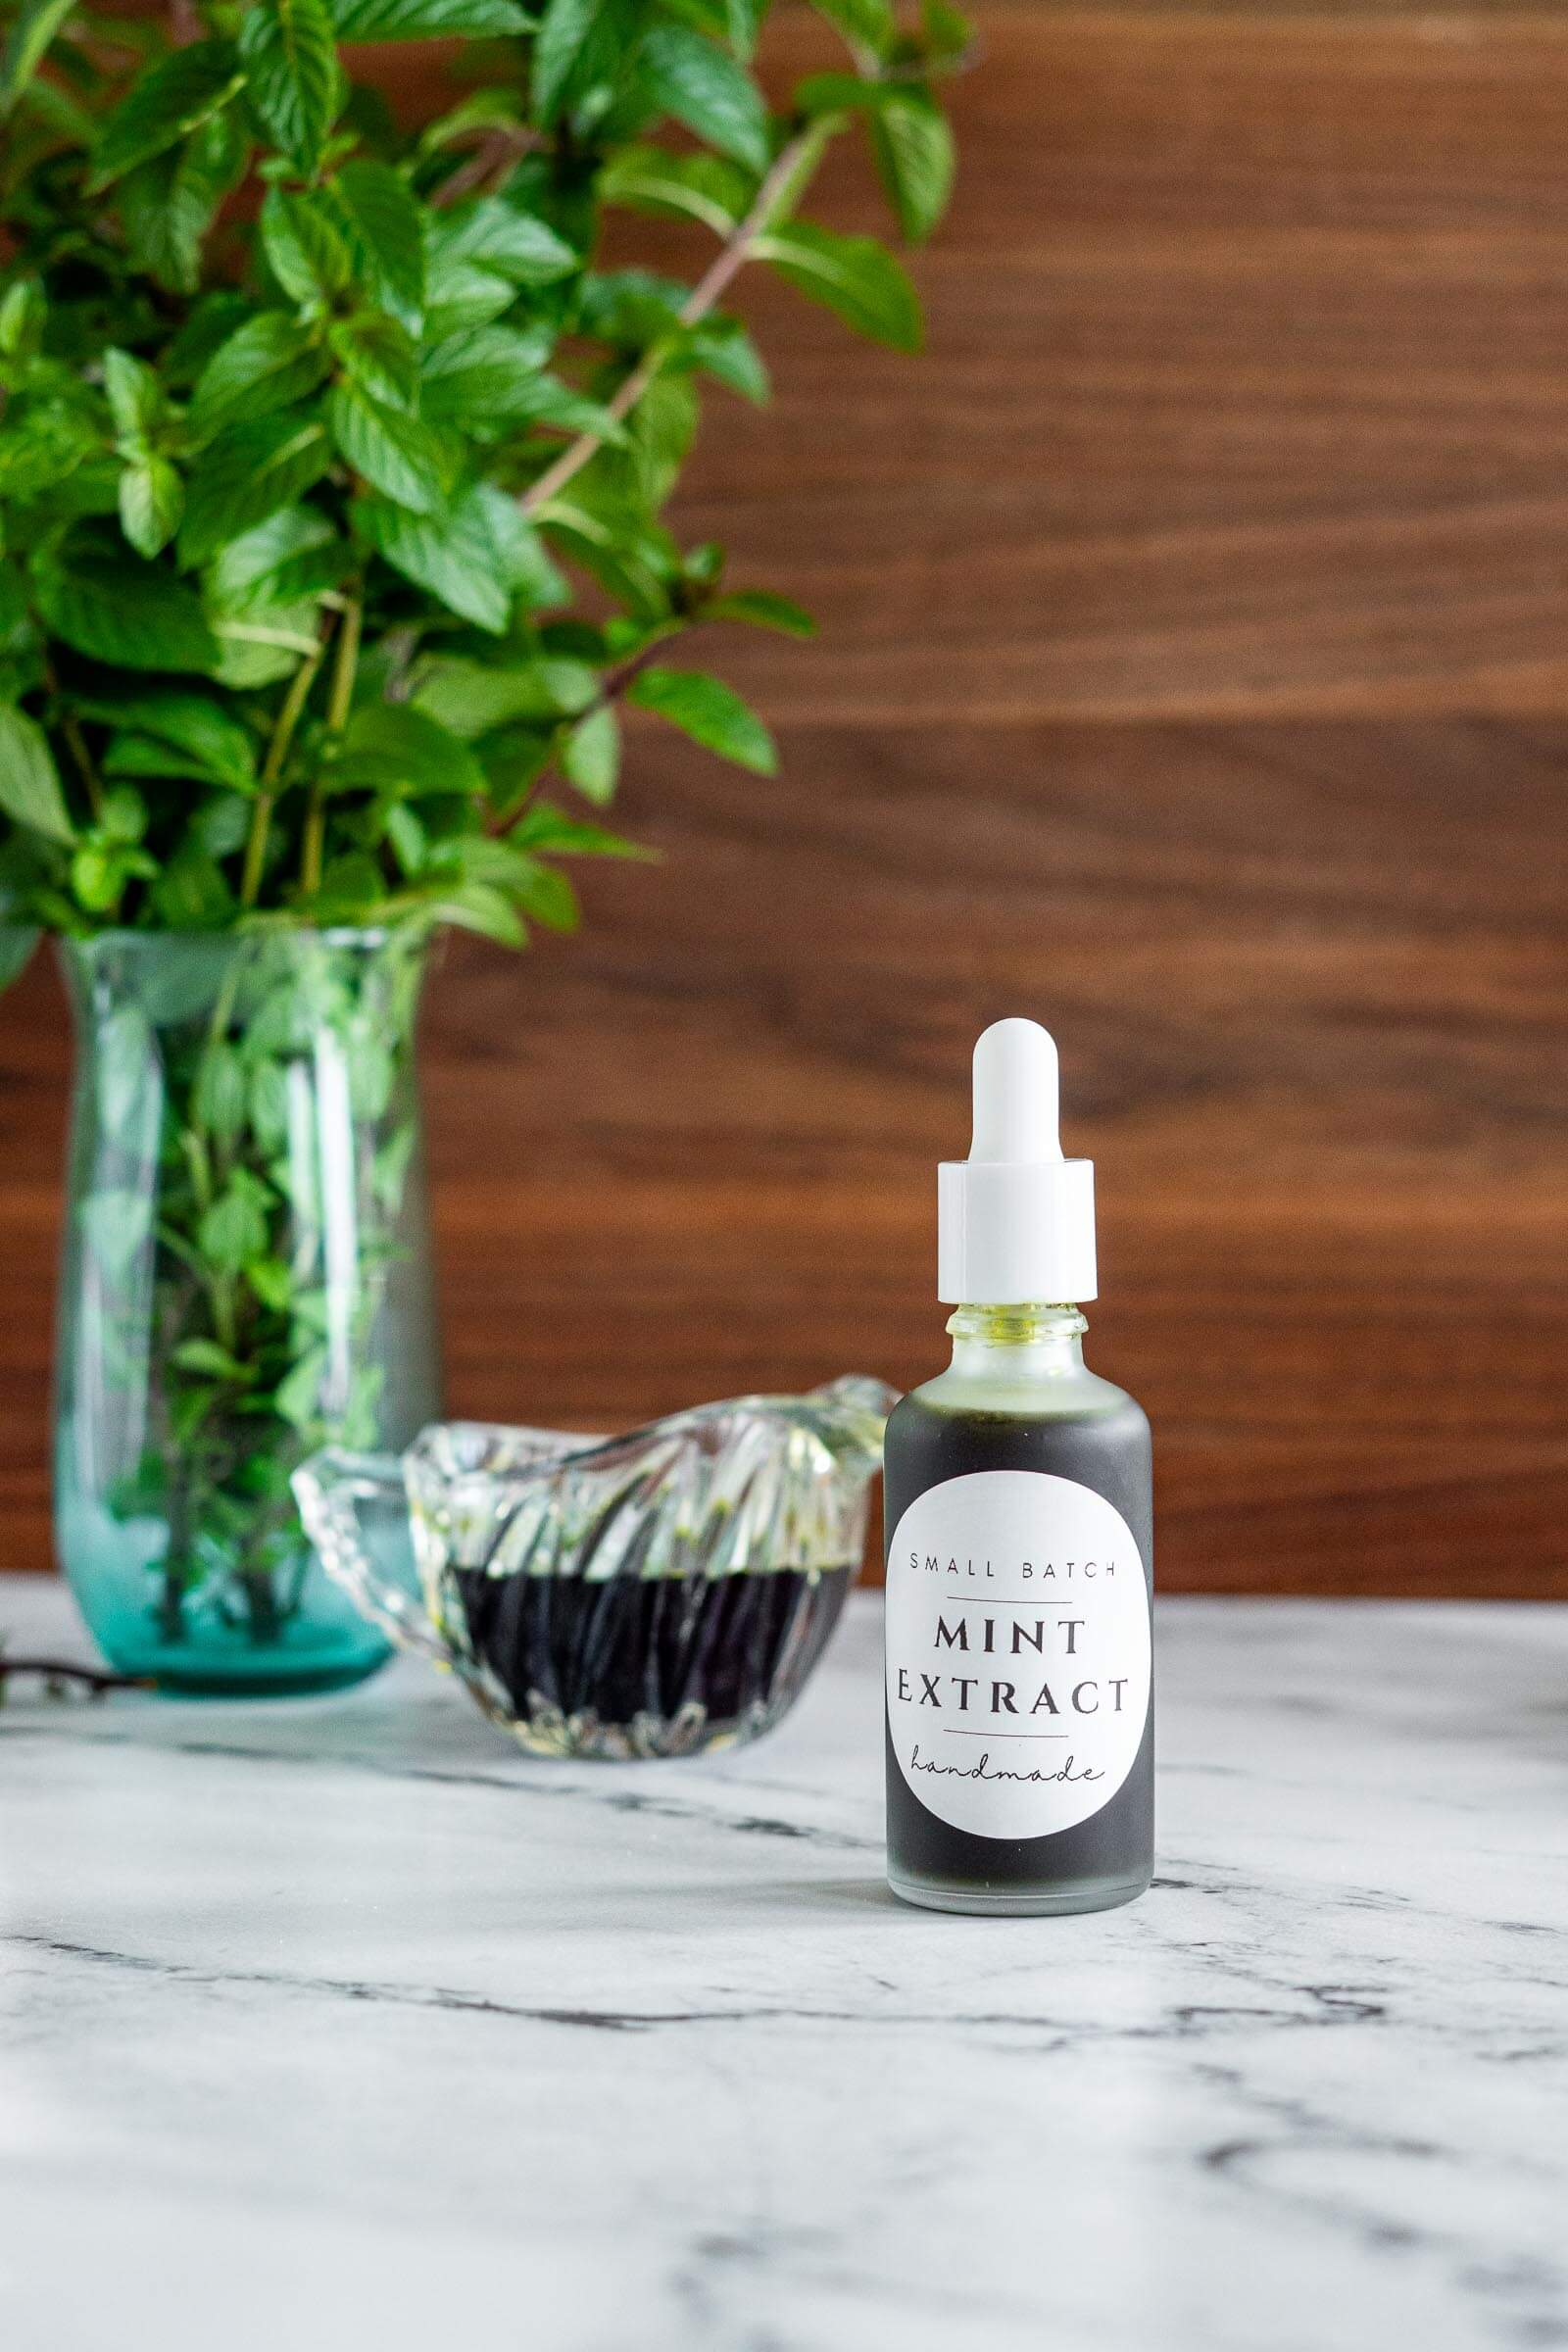
- Step 14: Transfer mint extract to cleaned storage container and store. I store my bulk mint extract in a pint sized mason jar at the back of the spice cupboard, and every day mint extract in a frosted glass dropper bottle.
Expert Tips
- This process extracts the menthol from the mint, but it also extracts the green! Be careful when working with your extract because it could stain clothes, tools, or countertops.
- Use a jar thats only as big as you need it. A larger jar with space to shake and jostle your ingredients has air space which can increase the oxidization of your mint leaves, which can contribute to off-tastes and colors.
- This process sees you infusing the alcohol with mint leaves for 2-3 days, then straining and replacing the mint leaves before repeating the process at least twice, 3-4 times is better. I find this to be the best solution to keeping the extract bright green and smelling minty. After more than 4-5 days, the mint leaves start to turn brown and your extract will too.
- I’ve included some harvesting guidelines, so if you’re growing your own mint you can maximize the quality!
- If you love making extracts, I have recipes for homemade vanilla extract and cinnamon extract!
Why This Recipe Works
Stops the brown! The standard long steep mint extract turns brown because the plant material slowly breaks down. Chlorophyll (green pigment in plants) oxidizes and degrades and the extract loses both its color and its fresh flavor. By introducing short steeping times and leaf swaps, we can reduce the oxidization.
Efficient extraction. High-proof alcohol, like Everclear, is a more efficient solvent for mint’s volatile oils, like menthol, menthone, and the other compounds responsible for that clean, bright flavor. It extracts them quickly, before the plant material has time to break down and muddy the result.
Homemade Mint Extract FAQs
This happens when mint leaves sit too long in low-proof alcohol. The chlorophyll breaks down and oxidizes, causing a dark color and unpleasant smell. Using high-proof alcohol and shorter infusion times prevents this.
When stored in a sealed glass jar in a cool, dark place, homemade mint extract lasts 6-12 months. High-proof alcohol helps preserve it longer.
Yes, but the flavor will be different. Dried mint produces a more muted, earthy extract compared to the bright, fresh flavor of fresh leaves. Reduce the quantity by about half when substituting.
Homemade extract made with this method is often more concentrated. Start with ½ teaspoon homemade for every 1 teaspoon store-bought, then adjust to taste.
Like all extracts, your homemade mint extract should be stored in a cool, dark place. Aim to keep it in the smallest glass jar possible to reduce oxidization. I keep mine in small bottles in my spice cupboard. This helps to prevent oxidization and keep your extract fresher longer.
Harvesting Fresh Mint
If you’re like me and have 4-5 different kinds of mint scattered around your garden, you’re in luck, this is a super easy process.
Aim to harvest your mint before it flowers, if possible. I have found my spearmint and peppermint always flower earlier than my chocolate mint, so I usually end up making chocolate mint extracts in the fall. Harvesting can be done after flowering, but I just find that once the plant starts putting a ton of energy into the flowers, it stops putting as much energy into the leaves and the flavor can suffer.
The best time of day to harvest is in the morning, usually after the dew has dried off the leaves but before the sun’s intense heat starts to evaporate off the volatile oils in the leaves, sapping their flavor. Either pinch off a few leaves from multiple growing stems if you’ve got bunches, or using sharp garden snips, nip the growing stem off about 1/3 of the way down, directly above a leaf node.
Types Of Mint
If you’re buying at a farmers market or the grocery store, you’ll likely be limited to spearmint or peppermint, but if you’re growing mint the world is your oyster!
Each variety of mint has it’s own quirks and flavor characteristics and may compliment different recipes differently. This is one benefit that homemade has over store bought extract.
Peppermint
Peppermint is the classic mint flavor you’re thinking of. It’s got more menthol, gives a cooling sensation, and can have a bit of a spicy quality to it. Peppermint can be differentiated from spearmint by using your senses; it has a spicier flavor, stronger mint scent, and the leaves are generally darker and less pointed.
Peppermint is most commonly used in sweet dishes and paired with chocolate. You cannot go wrong with peppermint!
Spearmint
Spearmint has less menthol than peppermint, by a large margin – 0.5% versus up to 40%. The leaves of a spearmint plant can be almost sweet tasting. Spearmint can be differentiated from peppermint by using your senses; it has a milder sweetish flavor, different scent – more like Wrigley’s gum, and the leaves are generally lighter green and quite pointed at the end.
Reach for spearmint when you’re making savory dishes. While it is delicious, it can be off-putting to eat mint brownies that remind you of toothpaste!
Chocolate Mint
Chocolate mint is a newer cultivar in the mint world, I have one variety called “chocolate mint” and another called “After Eight mint”. These mint plants are easily distinguished in the garden by their reddish-brown stems.
While there is no actual chocolate in the mint, the aroma is reminiscent of mint chocolates. Think Andes or After Eights. I LOVE my chocolate mint extract in chocolate recipes, like my sous vide chocolate ice cream!
Using Homemade Mint Extract
The uses for your mint extract are only limited by your imagination! Here are some suggestions:
Baking: Add a smidge of extract to amp up the flavor in your crushed candy cane cookies, mint sourdough brownies, or even a dash to a chocolate cake to add an interesting flavor – or better yet, add it to frosting!
Desserts: Consider adding a dash to your chocolate ice cream base or sub it for vanilla in your favorite vanilla ice cream recipe.
Drinks: Make a peppermint latte by adding a dash to your morning brew, or add some to yummy homemade hot chocolate for a minty treat.

Printable Labels
Handmade extracts are such a lovely Christmas gift for the foodie on your list, but if you’re making these for yourself, don’t let that stop you from labeling your jars!
I used my Munbyn thermal printer with 2″ round labels to make the labels as seen in these photos, but you could very easily use Avery labels and their templates to print on a regular printer.
Simply input your name in the boxes below and I’ll send the file right to your inbox so they are ready when you are!
See What Else I’m Making!


If you tried this Homemade Mint Extract recipe or any other recipe on my blog, please leave a 🌟 star rating and let me know how it went in the comments below. Thanks for visiting!
📖 Printable Recipe
Homemade Mint Extract Recipe
Ingredients
- 3 cups mint leaves, packed, divided
- 1 – 2 cups high proof grain alcohol, Everclear
Instructions
Prepare Mint:
- Rinse mint stems under cool running water, then transfer to a salad spinner and spin dry. Remove mint from the salad spinner and place on a clean kitchen towel to dry while you prepare your jars.
- Wash your infusion jars, lids, and weights (if using) in hot soapy water, rinse well and dry.
Muddle And Fill Jars:
- Pick all the leaves from the stems, then crinkle or smash 1 packed cup of mint leaves before adding them to your prepared jar.
- Pour Everclear or other high proof grain alcohol over the mint leaves, ensuring they are covered. I like to toss a Pickle Pebble over my leaves to make sure they stay covered.
- Cover the jar with the lid and set somewhere that you'll see at least daily and give it a swirl a couple of times a day for the next 2 days.
Strain And Replace:
- After 2 days, strain the mint leaves out of the alcohol using a cheesecloth or fine mesh sieve. Refill the jar with fresh mint leaves, add your weight, and add back the alcohol.
- Cover the jar with the lid, give it a swirl a couple of times a day for the next 2-3 days before repeating the strain and replace process at least once more.
Strain And Store:
- After 2 days, strain the mint leaves out of the alcohol using a cheesecloth or fine mesh sieve.
- Meanwhile, wash your airtight storage container and lid. Dry well.
- Transfer mint extract to cleaned storage container and store.
Notes
Expert Tips
- This process extracts the menthol from the mint, but it also extracts the green! Be careful when working with your extract because it could stain clothes, tools, or countertops.
- Use a jar thats only as big as you need it. A larger jar with space to shake and jostle your ingredients has air space which can increase the oxidization of your mint leaves, which can contribute to off-tastes and colors.
- This process sees you infusing the alcohol with mint leaves for 2-3 days, then straining and replacing the mint leaves before repeating the process at least twice, 3-4 times is better. I find this to be the best solution to keeping the extract bright green and smelling minty. After more than 4-5 days, the mint leaves start to turn brown and your extract will too.
- I've included some harvesting guidelines, so if you're growing your own mint you can maximize the quality!
- If you love making extracts, I have recipes for homemade vanilla extract and cinnamon extract!


The mint in my food forest is rampant… LOL – this is a great way to harvest, preserve, and use some of it. We’ve been adding some to homemade ice cream and its so good, plus the added alcohol helps to prevent the ice cream from freezing SUPER hard in the freezer